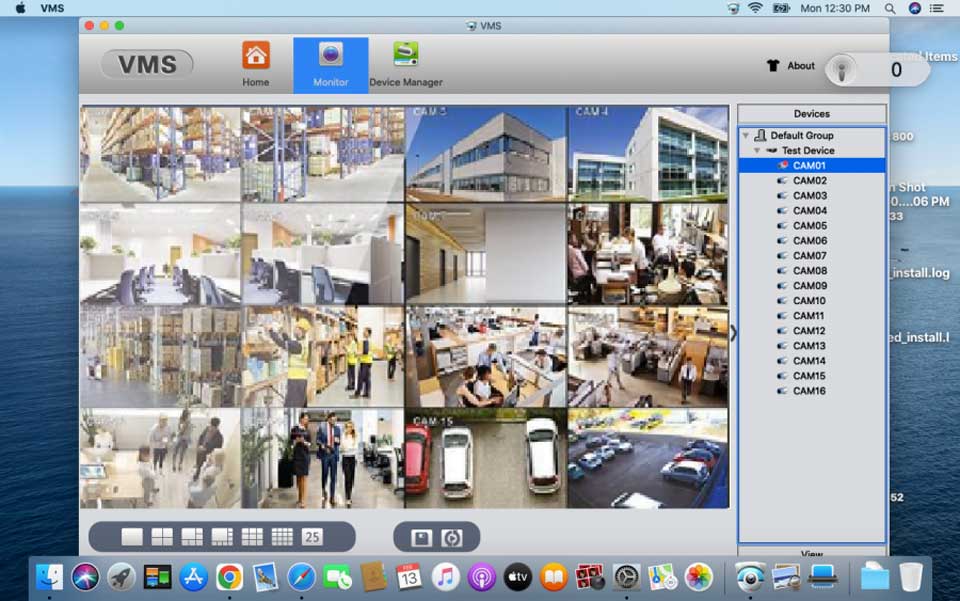
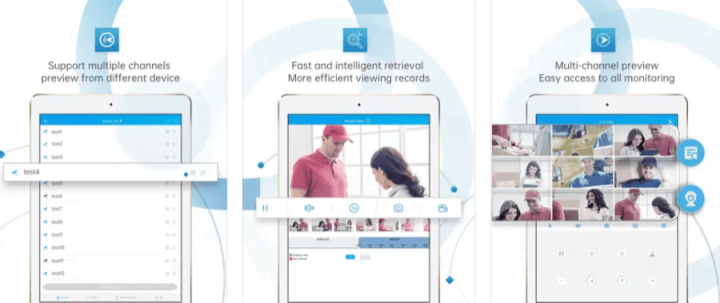
XMEYE For Mac is a CCTV surveillance software. With its help, you can access devices installed at different locations and watch them from your place.
XMEYE for Mac is regarded as a trusted CMS application. The app gives users the freedom to use it on Apple devices. You can access the devices from remote locations. There is no time lag in playing the cameras. You get the live video in real-time.
XMEYE For MAC Download Free
This article will help you in getting the ‘XMEYE For Mac’ application. The download button is also given. Click the button to get this app. The features and functions of this app are also elaborated deeply.
If you want to operate the device in the desired way, you can easily do it. The latest features give you access to operate the CCTV camera and check the playback from a remote location.
What Is A CMS Application For Mac?
A CMS application is used to play on a Macintosh device for monitoring CCTV cameras. These days life is fast-moving. We have different natures of work. Monitoring from a single place hampers our progress to expand. The app allows us to monitor our people and places from far-flung locations.
We can check everything in the live mode and pass instructions. This kind of remote monitoring gives users authority and control over their enterprises and home monitoring. It is useful in modern times.
Know More About XMEYE For Mac OS
It is a free utility software used for monitoring CCTV cameras from anywhere. The app is developed by XMEye Incorporation. You can watch your devices on the computer screen. This application is developed to work in compatibility with cloud technology.
There are many features and characteristics given to make this application more user-friendly. It is a trusted app that gives users the command to communicate with the people on the device end.
It has smart sensors which sense any threat and suspicious activity. Any motion or sound is detectable. It sends alert notifications to its users discerning any threat.
It is extremely useful and easy-to-operate software.
Features & Functions Of XMEYE For Mac OS
Knowing the features and functions of any device or product is important. When you know them, you can play these functions. When you are not sure about all the features and functions of the app, you can’t use the product to its full capacity.

Download The XMEye For Mac Files
The download button is given below. you have to press the button and begin the application loading process.
The files are given in a zipped file format. You have to unzip them before the installation.
The step-by-step installation process is given in the next section. It is given with diagrams to make it easier for comprehension.
Press the download button to get the application file.
Download XMYE For MAC
Install The App, Log In & Add The Device For monitoring On Mac OS
The installation process, logging in, and device addition are given here in different steps. Follow the procedure to do it yourself. We will demonstrate here three important steps.
The first step is for the installation of XMEye on Mac OS and the second step is the login part. The third step is for configuring it to any recorder app for monitoring.
Step-1 Install XMEye On Mac OS
The first step is to get the application file from the download button. It is given in a zipped file folder. Unzip the file and then click it to download it on your Mac OS system.
It will show you here on your computer system.

As you are seeing here, it is a 20.3 MB file. When it is properly downloaded, you can find it on the download drive. It is done in a DMG file.
Right-click the file folder. The next function will appear. The Video Monitoring system and file folder are given. Drag the VMS cam to the file folder and it will show up on the launch pad screen.

Now go to the launch pad option and look for the VMS app. You will find it here.

Double-click on this XMEye VMS icon. a new window will surface. This page has different windows open to it.
You can see it is stating, VMS can not be opened because the developer can’t be verified.
If you are an Apple device user, you know better that it doesn’t allow you to download any thithird-partyp instantly. You have to permit it every time. You have to convince the system that this file is free from malware.
For that, you have to go to the option of System preferences. Click the system preferences icon and then go to the security and privacy option. Click it and a new page will open.

When you press the cancel button a new window pops up with a new message.

The moment you press the cancel button, this message appears. It says that “VMS was blocked from use because it is not from an identified developer.”
You have to simply press the “Open Anyway” option. It means you are trusting the app and allowing the system to open it.
This way you can download and install the file and go to open the file.
Step-2 Log In to The File
When you try to open the XMEye for Mac application, you can’t open it unless you log in to the file. You get the following page when you go to open it.

By default, the Id and password are respectively “admin” and “admin.” Enter them and the following page surfaces.

This page is the home page of the application. This page always follows the login part. It confirms that we are properly logged in to the system.
Now, we move towards the third step of the process. It is the configuration of the app and adding to the device for monitoring.
Step-3 Configuration, Device Addition & Monitoring
Click the device manager option from the home page and this page will appear on the screen.

It is for searching the IP and adding to the camera.
We click on the ‘Add’ option when we have to search and add the IP automatically. It is a very simple process. When you press the Add button option, the page shows that the following device has been added.
In the status column, you will see the online/ offline status. If it is offline, then you have to give the device password to connect to the cam.

Here, put in the device password and it will be connected to the application. The cam will appear on the screen.
If you have to manually add the camera then click the Manual add button.

When you manually add the camera, you have to manually mention the IP address, Port No. and device name.
After that go to the homepage and open the monitor option.
This window opens.

Select the cameras you have added to the device and they will surface on the screen.

This way the XMEye app for Mac will be connected to the device. You will see the cameras on the screen.
Conclusion
We have illustrated here the installation part of the ‘XMEye For Mac OS. It is given in three detailed steps. The installation, login, and configuration steps. The characteristics of the application are mentioned here in detail. The download button is mentioned to load it on Macintosh PC.
Please share your viewpoint and queries. We will respond to your every issue.
Thank you.


