You can search and play recorded videos on devices registered in Wisenet Viewer by date or event type. If you add the part you are interested in as a bookmark, you can quickly search the video. You can also save videos of specific sections or channels in the desired file format on your PC.
You can switch to Playback mode while monitoring real-time videos to search for or play saved recorded videos on a device.
Select the Playback button on the timeline or select the timeline of the channel to switch to Playback mode.
![]()
![]()
NOTE
from the current layout screen will be displayed. Select if you want to display the entire timeline of
the channel.
142 | Wisenet Viewer User Manual
If you switch to Playback mode, you can play recorded videos on that channel. You can control playback via the timeline while playing a video. You can also use the Shortcut menu.
If you select a tile, the section mark bar is displayed on the timeline. The section mark bar is displayed only on the section with a recorded video. Timeline’s standard display range is 1 day (24 hours), and you can zoom in or out the time display ratio with a mouse wheel. If you click the desired time, the recorded video of that time will play.
![]()
Managing Recorded Videos
|
No. |
Screen Configuration |
Detailed Description on Functions |
|||||||
|
1 |
|
|
|
Show or hide the thumbnail of the video that is currently playing. Divide the range of the timeline marks equally and display the thumbnail that is the first frame of each separate section on the timeline. |
|||||
|
2 |
— |
Switch to multi timeline or single timeline. Ifyou select multi timeline, the timelines of all channels in the current layout are displayed. For multi timeline, a timeline of 1 day is displayed. |
|||||||
|
3 |
|
If the Record type filter window is displayed, select the record type to search. For more detail, please refer to Searching by Record Type (page 150). |
|||||||
|
4 |
|
pi] |
|
If the Calendar window is displayed, select a date to search for a video. For more detail, please refer to Searching by Date (page 149). |
|||||
|
5 |
|
|
|
|
Displays the date and time of the video that is currently playing. If you click the date, you can select a date to search on the calendar window. If you click the time, you can enter the search time manually. |
||||
|
|
1/16/2023 15:11:07 |
|
|||||||
|
|
|
|
|
||||||
|
6 |
|
|
|
|
Controls the playback and play speed of a video. For more detail, please refer to Using the Playback Function (page 146). |
||||
|
|
1« |
« |
|
II |
►► |
►►I |
|
||
|
|
|
|
xl |
▼ |
|||||
|
|
|
|
|
||||||
|
7 |
|
|
|
|
Displays the name of the currently selected channel. |
||||
|
|
CH04 |
|
|||||||
|
|
|
|
|
||||||
|
8 |
|
You can synchronize several videos with the same time to play or you can disable playback sync. |
|||||||
Managing Recorded Videos | 143
|
No. Screen Configuration |
Detailed Description on Functions |
|
9 |
Switch between Live mode and Playback mode. When playback is synced, all channels in the layout switch between Live or Playback mode. |
|
0 |
If there is a recorded video, a section mark bar will be displayed. Ifyou select a specific point on the timeline with a mouse, the video will play from the selected point and the keyframe will be displayed. If you drag the keyframe, you can change the playback location. |
NOTE
Regular recorded videos are displayed in yellow-green while event recorded videos are displayed in red.
144 | Wisenet Viewer User Manual
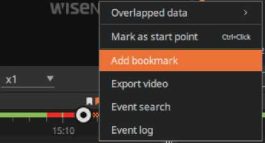
After right-clicking the top of the timeline while playing a video, you can use the Shortcut
menu.
Managing Recorded Videos
NOTE
Ifyou select a section, the menu related to the section will be added and displayed on the Shortcut menu. For more information on the Shortcut menu that can be used after selecting a section, refer to Selecting Sections (page 148).
Managing Recorded Videos | 145
You can control the speed or zoom in and out of the timeline while playing the video of a selected channel.
|
Overlapped data |
If you change the time or time slot of a device, the video recorded at the same time will be overlapped and saved. If there is an overlapping video, it is displayed as a mosaic on the timeline and you can select and play it from the Overlap list. |
|
Mark as start point / Mark as end point |
Select the start and end points of the desired section from the timeline. If you click the desired point while pressing the Ctrl key, you can set the start and end points of the section. For more information on setting sections, refer to Selecting Sections (page 148). |
|
Clear |
You can remove the selected section box. |
|
Zoom |
You can zoom in on the selected section. |
|
Add bookmark |
You can select the desired section from the timeline and add a bookmark. For more information on using the Bookmark, refer to Adding Bookmarks (page 165). |
|
Export video |
You can select the desired section from the timeline and save it as a video file on your PC. For more information on exporting videos, refer to Exporting Recorded Videos (page 152). |
|
Event search |
You can search events in a channel. For more information on searching for events, refer to Searching Event Recorded Videos (page 131). |
|
Event log |
You can search the event log of the selected channel. For more information on event log searches, refer to Checking Event Logs (page 178). |
• You can also click the timeline and switch to Playback mode.

146 | Wisenet Viewer User Manual
You can move to a different timeline after clicking on and dragging the timeline with your
mouse or dragging the scroll bar on the bottom. You can also move the time zone by selecting
the / button on both endpoints of the timeline.
You can change the time display ratio by scrolling your mouse wheel on the timeline. If you
double-click the area that displays the time slot of the timeline, that section will be zoomed in
on.
If you select while playing a video, you can synchronize the playback of several videos with
the same time.
If you select again, video sync is disabled and the video plays by each channel.
channels of the layout equally.
Managing Recorded Videos
Managing Recorded Videos | 147
You can select specific sections of the timeline as the start and end points to set a bookmark or save it as a file on your PC.
The Section box will appear.
![]()
• You can directly select the start and end points of a section with the mouse while pressing the Ctrl key.
|
1^ |
Previous event |
You can move to the previous event. |
|
◄◄ |
Reverse speed playback |
You can quickly play the video in reverse. |
|
►/II |
Play/pause |
You can play or pause a video. |
|
►► |
Forward speed playback |
You can quickly play the video in the forward direction. |
|
►►1 |
Next event |
You can move to the next event. |
|
^^^^^^^9 |
Play speed control slider |
You can select the video playback speed. •Speed when playing in the forward direction: x1/8, x1/4, x1/2, x0, x1, x2, x4, x8, x16, x32, x64, x128, x256
•Speed when playing in reverse direction: -x1/8, -x1/4, -x1/2, x0, -x1, -x2, -x4, -x8, -x16, -x32, -x64, -x128, -x256
|
[□ Layout
El * 7th FL
El Gate#i
El Lobby
^ gi Sequence
WISeNGT
wiseNeT
WISGNi
H ~ V Q 1/16/2023 1^11/38 I« « II ►► ►►! • jd ‘
1/… । 1/16/2023 1430 । 1/16/202314:45 । 1/16/202315:00
^^^^^^^^^^^^^^^^^^^^^^^^^^^^^^^^^^^^^^^“ • o •
1430 14:35 14:40 1 4:45 14:50 14:55 15:00 15:05 15:10
Overlapped data
Mark as start point odkm
Clear
Zoom
Add bookmark
Export video
Event search
Event log
1:44:47 PM
Live f Playback/
15:25
• Overlapped data: If there is any duplicated data while you change the time or time zone, the list will be displayed.
• Mark as start point / Mark as end point: You can select the start/end point of the section.
• Clear: You can remove the selected section box.
• Zoom: You can zoom in on the selected section.
• Add bookmark: You can add the selected section to the bookmarks.
• Export video: You can save the selected section as a file to your PC.
• Event search: In the Event search window, you can search events within the selected channel/section.
• Event log: You can search event logs within the selected section of the Event log window.
148 | Wisenet Viewer User Manual
Searching Recorded Videos
You can search and play the recorded videos on a device registered in Wisenet Viewer by date or record type.
You can select the date and search recorded videos on the selected channel’s timeline.
Managing Recorded Videos
![]()
X
2023 ▼ J ▼ Today
Sun Mon Tue Wed Thu Frl Sat
25 26 27 28 29 30 31
1 2 3 4 5 6 7
12 13 14
15 16 17
The current date is indicated with an orange dot below it.
Managing Recorded Videos | 149
You can select a record type in the timeline of the selected channel to search recorded videos.
![]()
Filter
□ All
| 0 Continuous recording
| @ Manual recording
@ ‘& Motion detection
@ ® Video analytics
@ Face detection
Q S’: Tampering detection
Q O Auto tracking
@ % Defocus detection
] & Fog detection
] ‘o’ Audio detection
Q ^V Audio analytics
Play filtered section (^OfF)
150 | Wisenet Viewer User Manual
4. Select a video from the timeline to play it.
Managing Recorded Videos
Managing Recorded Videos | 151
You can save the recorded video of the device registered on Wisenet Viewer as a file on your PC.
Select the desired section from the timeline or several channels to save them. You can also set the password for the file to save it.
B ” Y 0 1/16/2023 15:11:24 |44 44 II ►► ►►! * xi T CAM04 ^ ( Uve ( Playback )
1/16/202313:50 । 1/16/202314:00 । 1/16/202314:15 । 1/16/2023 14:30 । 1/16/202314:45 । 1/16/202315:00 R । 1/16/2023 15:15 । 1/16/2023 15:30
13:55 14:00 14:05 14:10 14:15 14:20 14:25 1430 14:35 14:40 14:45 14:50 14:55 15:00 15:05 15:10 15:15 1520 15:25 1530 15:35 15:40
• You can select a specific section and export the video. For more information on selecting sections, refer to Selecting Sections (page 148).
2. Select Export video in the Shortcut menu.

ID : admin
Password
| | Don’t ask again
![]()
Cancel
The prompt will not appear unless the Wisenet Viewer is restarted.
152 | Wisenet Viewer User Manual
4. When the Export video window is displayed, select the video information to save.
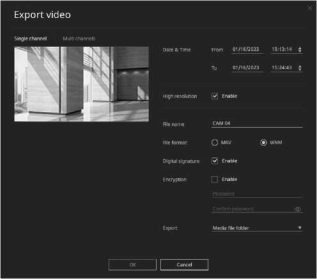
Managing Recorded Videos
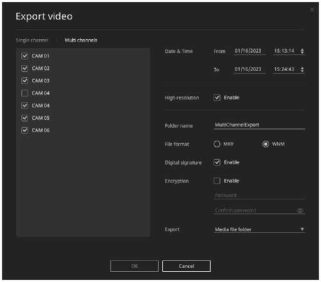
Managing Recorded Videos | 153
Once saving is complete, select the Close button on the Progress window.
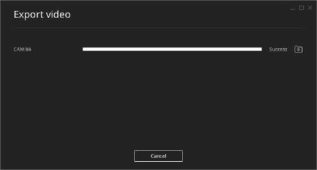
NOTE
Wisenet Player is saved in the folder where videos are saved. Wisenet Player is a program that allows WNM, SEC files, and other common media files to be played without installing Wisenet Viewer.
154 | Wisenet Viewer User Manual
Applying Video Masking to Recorded Videos
You can set video masking (privacy masking) areas on a recorded video to protect privacy or to hide areas that you don’t want to display. The privacy-masked section of the video can also be exported.
![]()
NOTE
To use video masking, activate a video masking license. In case of activation, the Video masking button
appears.
Managing Recorded Videos
Activating the Video Masking License
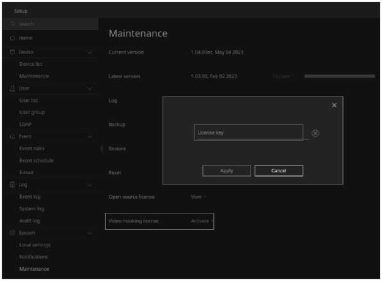
Managing Recorded Videos | 155
Checking a Video Masking Window
In Wisenet Viewer, click to open a Video masking window. Here are the components.
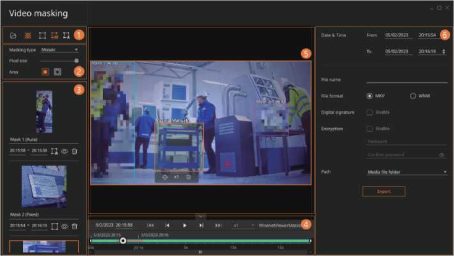
156 | Wisenet Viewer User Manual
Managing Recorded Videos
Managing Recorded Videos | 157
158 | Wisenet Viewer User Manual
Three masking types are supported: fixed, manual, and auto masking. You can use multiple masking types on one video file.
With fixed masking, you can apply a static privacy masking to the area that you define.
Managing Recorded Videos
|
Screen No. Configuration |
Detailed Description on Functions |
|
1 Icon Buttons |
•Open media file : Open a video file where you will apply masking to.
Both .wnm and .sec extensions are supported. You can also select one of the files under Resource in Wisenet Viewer and drag the file to the video window of the Video masking window. •Preview : Enable the Preview button (displayed in orange) to view the
masked areas with mosaic or color applied on the video. Disable Preview (displayed in white) to view the masked areas without any mosaic or color applied on the video (Only an orange frame will be shown). •Fixed masking : Apply a permanent masking to your defined area. To apply
fixed masking, see Setting Video Masking Areas (page 159) > Applying Fixed Masking (page 159). •Manual masking : Manually track and mask the moving object that you select. To apply manual masking, see Setting Video Masking Areas (page 159) > Manually Tracking and Masking Objects (page 160).
•Auto masking : Automatically track and mask the moving object that you select. To apply auto masking, see Setting Video Masking Areas (page 159) > Automatically Tracking and Masking Objects (page 163).
|
|
No. |
Screen Configuration |
Detailed Description on Functions |
|
2 |
Masking Options |
•Masking type : Select Mosaic or Fill.
•Pixel size : When selecting Mosaic, you can adjust the pixel size by dragging the bar to the right to increase pixels by 3 pixels each. (The default is 20 pixels.)
•Color : When selecting Fill, you can select which color to use to cover the defined area. Your selected color will be applied to masking areas.
•Area : Select Include or Exclude to define what parts of the video where objects should be masked.
–: Apply masking only to the defined area.
–: Apply masking to areas excluding the defined area.
|
|
3 |
Masked-Areas List |
Displays the masked areas with thumbnails. If you select a thumbnail from the list, the masked area will be shown in the video. •Name : Displays an auto-created name under the thumbnail. The default is “Mask {number} {masked type}.” You can change the name.
•Time : Displays the time of tracking and masking moving objects. You can also manually set the time.
If the set time is longer than the original time, an orange frame for fixed masking will appear at the original start and end points of tracking objects, and fixed masking will be applied during the manually added time. For example, if the tracking and masking time was from 1:01:20 to 1:01:40, and you changed the start time to 1:01:10 and the end time to 1:01:50, fixed masking will be automatically applied from 1:01:10 to 1:01:20 and from 1:01:40 to 1:01:50. Ifyou set the start time later than the original start time and the end time ahead of the original end time, e.g., from 1:01:25 to 1:01:35, your selected masking will be applied only during the changed time (i.e., only for 10 sec.). •Information
– , , : Displays your masking type. –, : Hide and show the masked area in the video.
–: Delete the masked area.
|
|
4 |
Timeline |
Displays the duration of tracking and masking objects on the video. Select a thumbnail from the list, and the duration will be shown as an orange horizontal bar in the timeline bar. |
|
5 |
Video Window |
Displays a video where masking is being applied. You can check whether masking is properly applied to the video in real time. |
|
No. |
Screen Configuration |
Detailed Description on Functions |
|
6 |
Export |
Set up the settings for exporting privacy-masked videos. •Date & Time : Set the start time and end time of the section that you want to export in the privacy-masked video file. You can also drag the controller in the timeline bar in the video window to set the start and end time.
•File name : Type the name of the file.
•File format : Select the file format between MKV and WNM. MKV or Matroska is an open video container format. You can open and play an .mkv file in almost any media player including Wisenet Viewer.
WNM is a Wisenet media format. Yon can open and play a .wnm file only in Wisenet Player or Wisenet Viewer. •Digital signature : If you select WNM under File format, you can select whether to use digital signature. Check Enable to detect forgery or falsification of the file.
•Encryption : If you select WNM, you can encrypt the file. The password must be 8 to 32 characters long and must include at least 1 alphabet and at least 1 number. To open the encrypted file, you must input the password.
•Path : Specify a path to save the file.
If you select Media file folder and click Save, the file will be automatically saved in the folder that you already designated in Settings > System > Local settings > Media file folder. If you select Select later and click Save, you can specify where to save the file. •Export : When you click Export, the file starts being exported with the progress bar appearing. If you click the Cancel button, the file will stop being exported, and the partially exported file will also be saved. When the (partially or completely) exported file is saved, appears. Click it to open the exported file.
|
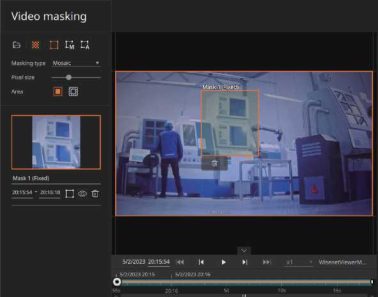
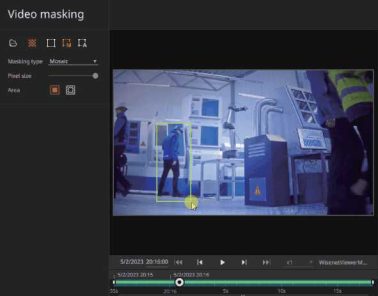
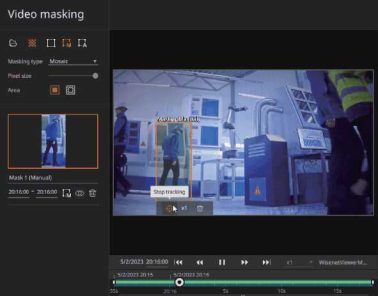
object for masking.
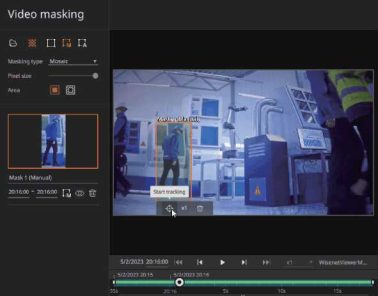
160 | Wisenet Viewer User Manual
® Drag the inside of the frame to track the object and put it in the frame. To track the object easily, you can play the video at 1/2 speed.
@ To resize the frame, point to the edges of the frame and drag the arrow to any direction; to shift the position, drag and drop the inside of the frame to your desired position.
Managing Recorded Videos
Managing Recorded Videos | 161
![]()
NOTE
In case the manually tracked object gets out of the frame, follow the steps:
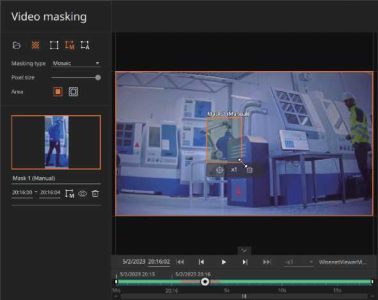
162 | Wisenet Viewer User Manual
■ Automatically Tracking and Masking Objects
Once you apply auto masking to the object you select, the selected object will be automatically masked.
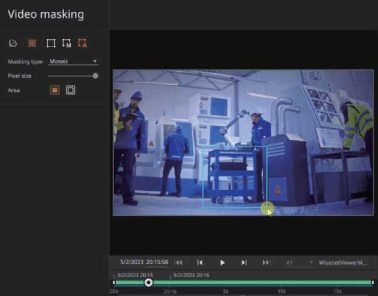
Managing Recorded Videos
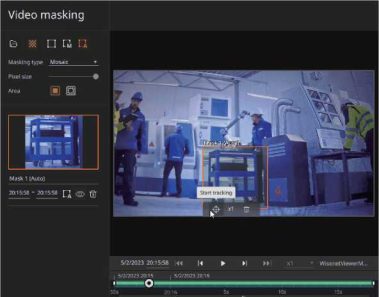
Managing Recorded Videos | 163
NOTE
In case the automatically tracked object gets out of the frame, follow the steps:
164 | Wisenet Viewer User Manual
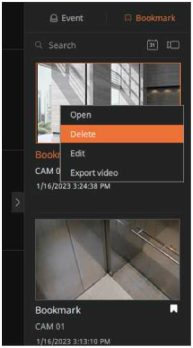
You can add a bookmark to a video section of the interest in Playback mode. You can check and play the added bookmark video via the Bookmark tab. You can also edit or delete bookmark information.
You can add a bookmark to a section of interest in a saved video.
The Section box will appear.
Managing Recorded Videos
S ~ V 0 1/16/2023 IWM |M « || ►► ►►! * xi T CAM04 ^ ( Uve ( Playback )
। 1/16/2023 14:15 । 1/16/202314:30 । 1/16/202314:45 । 1/16/202315:00 R । 1/16/202315:15 । 1/16/2023 15:30 । 1/16/202315:45 । 1/16/20231…
^^^^^^^^^^^^^” ^^^^^^^^^^^^^^^^^^^^^^^^^^^^^^^^^^^^^^^^^^^^^^^^^^^^■’.■.’.’.■.■.■.■.’.’.■.■.■.■.’.’.■.■.■.■.’.’.■.^^^^^n I ^”^) MI ^^^^^^^^^^^^^^^^^^^^^^^^^^^^^^^^^^^^^^^^^^”
14:15 14:20 14:25 14:30 1435 14:40 14:45 14:50 14:55 15:00 15:05 15:10 15:15 1530 15:25 15:30 15:35 15:40 15:45 15:50 15:55 16:00 16:05
• You can directly select the start and end points of a section with the mouse while pressing the Ctrl key.

Managing Recorded Videos | 165
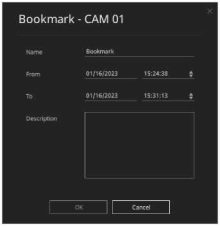
Managing Recorded Videos
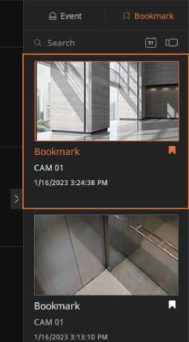
Managing Recorded Videos | 167
■ Editing Bookmarks
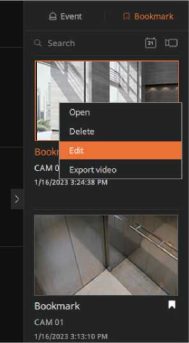
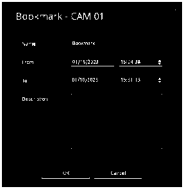
168 | Wisenet Viewer User Manual
■ Deleting Bookmarks
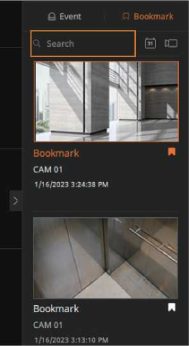
• Only bookmarks corresponding to the entered content are displayed in the list.
170 | Wisenet Viewer User Manual
■
Searching Bookmarks by Date
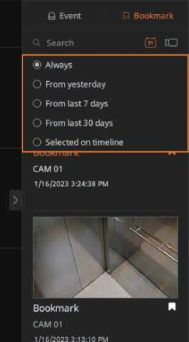
Managing Recorded Videos
Managing Recorded Videos | 171
■ Searching Bookmarks by Device
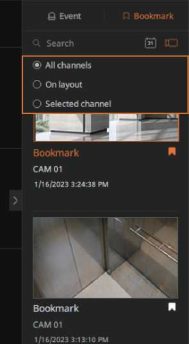
Managing Recorded Videos
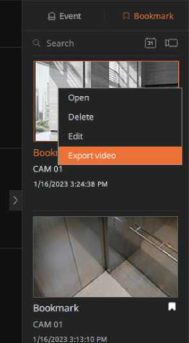
4. Enter your password and click OK if you are prompted to.
ID: admin
Password
I I Don’taskagain
![]()
Cancel
Managing Recorded Videos | 173
5. When the Export video window is displayed, select the video information to save.
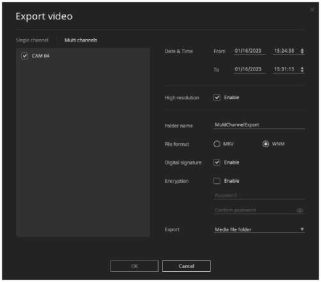
Once saving is complete, select the Close button on the Progress window.
![]()
NOTE
For more information on exporting video, refer to Exporting Recorded Videos (page 152).
174 | Wisenet Viewer User Manual
Setting up the Local Save File
When saving the video in real time with the local save function of Wisenet Viewer, you can set up maximum record time, file format, and file path.
Setting up the Local Save File Location
When using the local save function of Wisenet Viewer, you can set up a folder to save the file.
![]()
Managing Recorded Videos
NOTE
It will be used as a common folder where the file displayed on the Resource tree > Media file item is
stored.
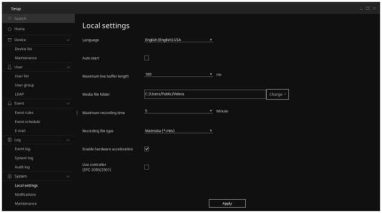
• If a save folder is selected, the path will be displayed.
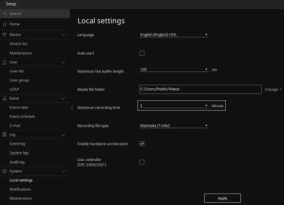
• You can set a maximum recording time of 5-120 minutes.
Managing Recorded Videos
5 Device
Device list
Maintenance
£ User
User list
User group
Q Event
Event rules
Event schedule
Enable hardware acceleration
Use controller (SPC-2000/2001)
Event log
System log
Audit log
Local settings
Notifications
Maintenance
Apply
Managing Recorded Videos | 177
You can check the system, audit log, and event that occurs on devices connected to Wisenet Viewer.
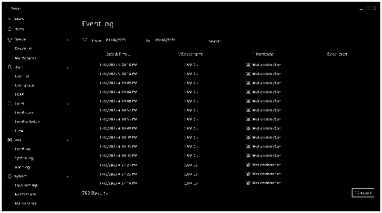
You can search event log for events that occurred on a device or save log information. You can check changes detected on a video and device, log content of preset events registered by users, and the occurrence date/time.
Device list
Maintenance
& User
User list
User group
â Event
Event rules
Event schedule
£1 Log
Event log
System log
Audit log
0 System
Local settings
Notifications
Maintenance
Event log
Y Event type
;^ Motion detection
SJ’ Motion detection ^ Motion detection ^2 Motion detection &2 Motion detection SJ’ Motion detection ^ Motion detection ^2 Motion detection &2 Motion detection
1/16/2023 4:57:27 PM CAM 03
1 /16/2023 4:57:23 PM CAM 03
1/16/2023 4:57:16 PM CAM 03
1/16/2023 4:57:12 PM CAM 03
1 /16/2023 4:57:08 PM CAM 03
790 Results
^2 Motion detection
^ Motion detection
J£ Motion detection
SE Motion detection
‘ Description
178 | Wisenet Viewer User Manual
4. Select the Search button.
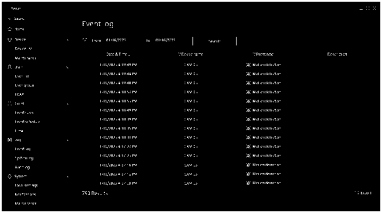
Checking Logs
When the column item of a search result is selected, it will be automatically arranged in ascending/descending order.
Checking Logs | 179
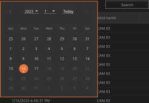
You can search system logs that occurred in the device or save log information. You can check log content related to the system such as system device, power and record error as well as the date and time it was run.
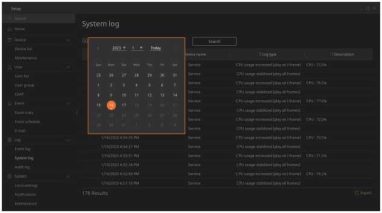
• You can directly enter dates via a keyboard.
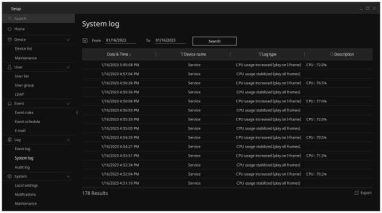
When the column item of a search result is selected, it will be automatically arranged in ascending/descending order.
180 | Wisenet Viewer User Manual
You can search audit logs for a device or save log information. Audit logs are records of all activities during Wisenet Viewer operation. You can check the date and time of occurrence and all log content, such as login per user, system settings, and checking real-time video.
Checking Logs
![]()
Audit log

733 Results
Description
User played video from 1/16/2023 3:27:53 PM to 1/16/2023 3:27:53
User played video from 1/16/2023 2:05:57 PM to 1/16/2023 3:10:56
User played video from 1/16/2023 2:24:26 PM to 1/16/2023 3:10:49
User played video from 1/16/2023 2:41:48 PM to 1/16/2023 3:10:47
User played video from 1/16/2023 3:06:31 PM to 1/16/2023 3:10:51
User played video from 1/16/2023 3:08:14 PM to 1/16/2023 3:10:46
User played video from 1/16/2023 3:10:43 PM to 1/16/2023 3:14:28
User played video from 1/16/2023 3:09:07 PM to 1/16/2023 3:10:43
User played video from 1/16/2023 3:11:21 PM to 1/16/2023 3:13:54
Exported from 1/16/2023 3:13:14 PM to 1/16/2023 3:14:29 PM.
Exported from 1/16/2023 3:13:14 PM to 1/16/2023 3:24:24 PM.
User played video from 1/16/2023 3:13:10 PM to 1/16/2023 3:13:12
User played video from 1/16/2023 3:11:54 PM to 1/16/2023 3:12:06
User played video from 1/16/2023 3:13:30 PM to 1/16/2023 3:13:35
• You can directly enter dates via a keyboard.
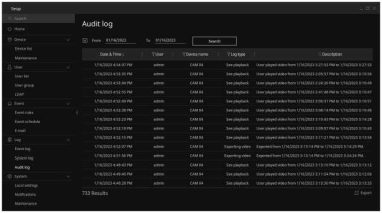
When the column item of a search result is selected, it will be automatically arranged in ascending/descending order.
Checking Logs | 181
You can save log information that occurred on a device via your PC.
182 | Wisenet Viewer User Manual
Setting up the System
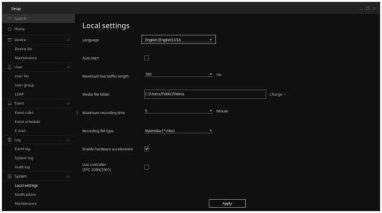
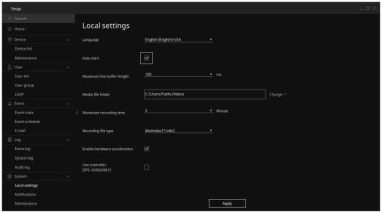
You can set the language, auto start, and enable hardware acceleration for Wisenet Viewer. You can also backup/restore or initialize the settings information.
Setting up the System
You can select a language to enable in Wisenet Viewer.
184 | Wisenet Viewer User Manual
Setting up Hardware Acceleration
If an Intel graphics card that supports Intel Quick Sync or a graphics card that supports NVIDIA CUVID on PC is being used, the hardware acceleration function can be used.
If you set the hardware acceleration function, you can play more videos using the GPU.
![]()
Setting up the System
NOTE
The Enable hardware acceleration item is displayed only when an Intel Quick Sync or NVIDIA graphics card
is installed on the PC.
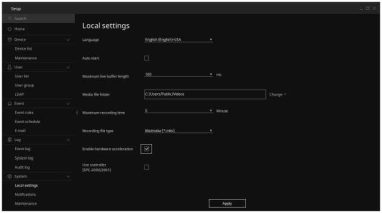
• It is automatically set if Intel Quick Sync or a graphics card that supports NVIDA CUVID is installed on the PC.
Setting up the System | 185
You can select a controller to use in Wisenet Viewer.
![]()
NOTE
– SPC-2000/ SPC-2001
Q Search
O Home
5 Device
Device list
Maintenance
£ User
User list
User group
Q Event
Event rules
Event schedule
® Log
Event log
System log
Audit log
0 System
Apply
Local settings
Notifications
Maintenance
![]()
NOTE
For detailed information about how to use the system controller, refer to Using the System Controller (page
201).
186 | Wisenet Viewer User Manual
You can set whether to notify you of events when they are detected by recorders or connected cameras. If you enable the notification for a specific event, both the event and details will be indicated in the Event tab as soon as the event occurs during real-time monitoring.
Setting up the System
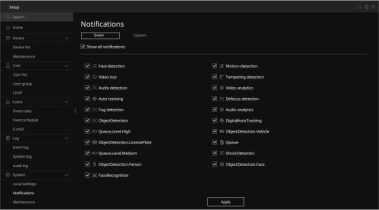
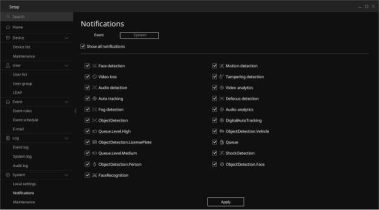
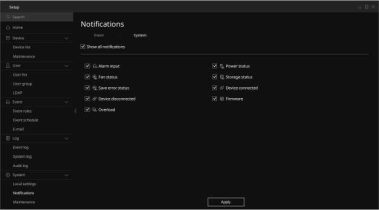
188 | Wisenet Viewer User Manual
You can update Wisenet Viewer, back up the configurations, or roll back using existing backup files.
You can also initialize the program or check the log files.
You can enable automatic updates of Wisenet Viewer software.
Setting up the System
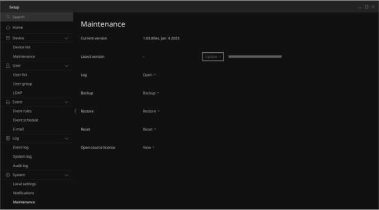
Setting up the System | 189
You can check the system folder where the Wisenet Viewer logs and administration files are retained.
If you have any system failures or errors with Wisenet Viewer, you will be asked to send this log folder to our customer contact center.
(C:) > Users > Public > Documents > WisenetViewer >
190 I Wisenet Viewer User Manual
5. Open the log_settings.conf file in Notepad.

Setting up the System
|
Name |
Date modi… |
Type |
Size |
|
logs |
2022-08-1… |
File folder |
|
|
J coreservice_settings.conf |
2022-08-1… |
CONF Ale |
|
|
3 dashboard.sqlite |
2022-08-1… |
SQLITE File |
|
|
J dashboard.sqlite-shm |
2022-08-1… |
SQLITE-SHM Ale |
|
|
J dashboard.sqlite-wal |
2022-08-1… |
SQLITE-WAL Ale |
|
|
j log.sql’rte |
2022-08-1… |
SQLITE File |
|
3 *log_settings.conf – Notepad — □
File Edit Format View Help
# pattern example : %T.%e | %5t | %6I | %!%v
it = = > 18:49:03.421 | 52712 | info | Stop QCoreServiceManager instance
It level : trace < debug < info < warning < error << critical, remark! trace level works on debug build. It size : log file max size (MB)
It files : log file count
It fileline : true or false to print source file information for debugging
it ConsoleO output enable, enable outputdebugstring for windows console_enable = false
It normal log file configuration normal]
□attern =2%D%T.%e | %5t | %6l | %!%v” evel =| “debug””] size = 50 files = 2 ileline = false
It statistics log file configuration stat]
aattern = W%T.%e | %5t | %6I | %!%v” evel ^ “debug”~| size = 50 files = 2 ileline = false
• To report an issue, please provide the following information:
• For clarity on the issue, please provide footage or screenshots that can help us understand the issue in question.
Setting up the System | 191
You can save the saved devices, user info, layouts, and event rules in Wisenet Viewer as backup files. Kindly note that log information is not included in backup files.
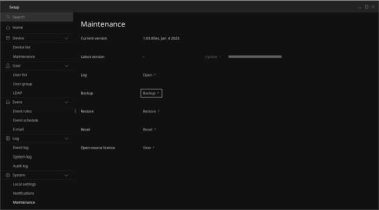
• The backup file is saved in .wdb format.
Setting up the System
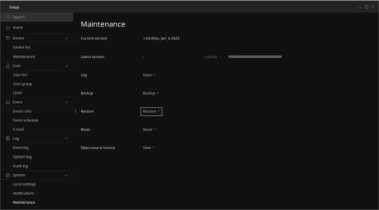
• You can only apply the .wdb format for the backup file.
NOTE
When you restart the Wisenet Viewer program after restoring the system, the following items will be initialized. Then, set it up again.
– Language
– Maximum live buffer length
– Media file folder
– Maximum recording time
– Recording file type
Setting up the System | 193
You can initialize to the initial setup of Wisenet Viewer.
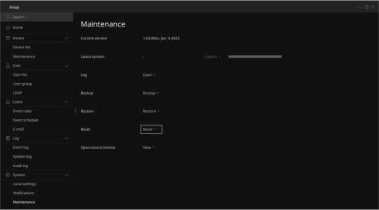
• If restoration is complete, the program will restart automatically.
Every setting information besides log will be initialized, so set up necessary items for enabling the program, such as setting administrator password or device registration.
194 | Wisenet Viewer User Manual
Troubleshooting
Troubleshooting
Troubleshooting | 195
196 | Wisenet Viewer User Manual
|
Problem Symptoms |
Items to check and measures |
|
The device is not connected. |
Enter the IP and Port information that was entered during device registration in Wisenet Viewer into the web browser and check if the web browser opens normally. To strengthen security, the Wisenet Viewer first connects with https if the device information is set in https. •Some of the former recorder firmware may have passed the wrong https port number, disabling the connection to the device.
•Some of the former recorder firmware may not be connected with https, disabling the connection to the device.
|
|
It does not appear on the list when searching for a device. |
Check whether the device list is displayed normally in the device manager. • If the device list appears normally in the device manager but does not on Wisenet Viewer, check whether the execution permission is set No when first running the Wisnet Viewer program. Check whether Wisenet Viewer is registered in the Windows firewall and is being blocked. |
|
Wisenet Viewer’s detailed log history is required. |
If a problem persists while using Wisenet Viewer and you need to contact the customer service center, collect and deliver the system log. When the system log delivers the collected folder in a compressed file format to the customer service center, we can diagnose the problem precisely and help you solve the problem. • For more information on system log collection, refer to Configuring system log collection (page 190). |
|
What information is displayed when you press the button on the function button panel? |
It will show the currently received frame rate. The frame rate displays the number of frames buffering for the video equivalence. |
|
I want to play the recorded video by double clicking the event as soon as the event occurs on the event panel, but the video is not displayed. |
It may vary depending on the platform of the recorder, but usually a recorder saves videos on an HDD when 2 Mbyte or 4 Mbyte capacity of data is accumulated. For videos with smaller amounts of data, the videos are saved on an HDD for up to 15 seconds. The video can be played on the client when the data is saved on an HDD. |
|
Are previous DVR models supported? |
Wisenet Viewer is compatible with DVR and NVR products that support SUNAPI version 2.3.1 or above. The previous DVR does not support the SUNAPI protocol, hence they are not compatible with Wisenet Viewer. However, if the previous DVR can support SUNAP 2.3.1 or above through firmware upgrades, then it is compatible with Wisenet Viewer. |
|
Problem Symptoms |
Items to check and measures |
|
What information is being processed in Backup and Restore on the Settings Menu? |
Bookmarks, channels, devices, event schedules, the device group, layout, user, user group, web-page information, event rules, and e-mails are backed up and restored. |
|
What is the product ID on the screen of the manual registration device? |
If you select DDNS/P2P when registering a device, you need to enter the device ID. It is the product ID registered on the DDNS site to establish a remote connection and is used when registering a device with DDNS. |
|
I want to fix a slider control while playing the recorded video. |
You can use the playback speed slider on a timeline when using fast forward. If you want to fix the playback rate, select the speed option of your choice from the combo box next to the playback speed slider. |
