Vivotek CamCloud Setup Guide, Vivotek is a Taiwanese company specializing in IP surveillance solutions. Founded in 2000, Vivotek is known for its range of products that include network cameras, video servers, network video recorders (NVRs), and video management software. Their main focus is on providing high-quality, reliable video surveillance products and services to various industries such as transportation, retail, healthcare, and smart city infrastructures.
There are a couple of ways to setup your Vivotek camera:
.Auto Setup – completely automated setup procedure (highly recommended)
.Manual Setup – add the settings to your camera individually
Auto Setup
Note: Before starting, make sure that you’ve port-forwarded your camera. If you’re unsure how to start the port-forwarding process, take a look at our guide
Vivotek CamCloud Setup Guide
Step #1. Start the “Add Camera” Wizard
.
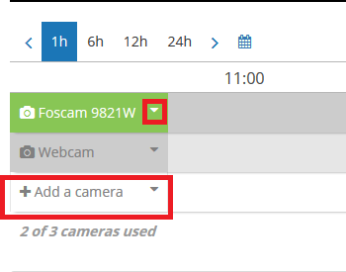
First Login to Camcloud.com ⏴http: /www.camcloud.com/> . Click on the “TIMELINE” tab. This is where you’ll have a list of any cameras you’ve already setup.
.
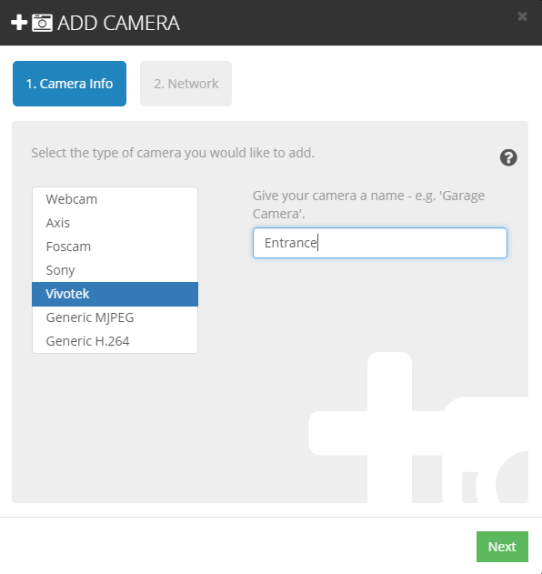
Click on “Add Camera”, select “Vivotek”, and pick your model. Name your camera whatever you’d like.
.
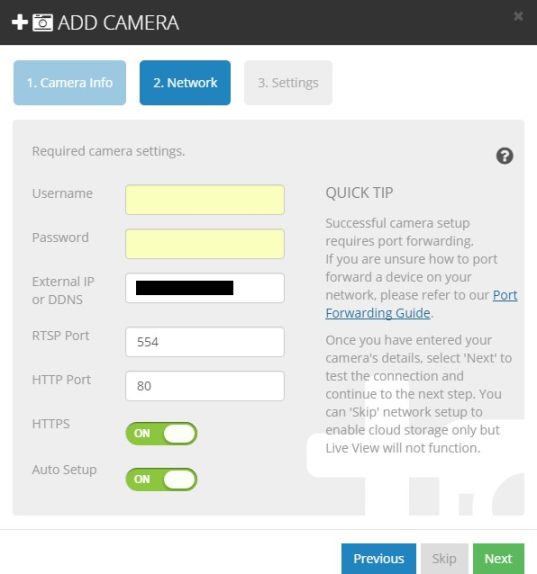
Once you click on next, you’ll have to add in your camera’s username, password, IP address, RTSP port, and HTTP port. This means your RTSP & HTTP ports need to be forwarded on your
router. Make sure to use an “admin” user as other levels have no access to use the APIs.
Click on Next. (**See Below for troubleshooting step if you encounter RTSP Failure)
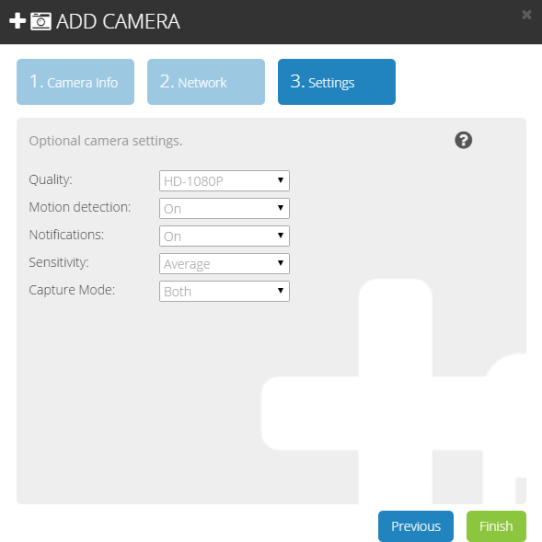
This is where you can also change whether or not you’d like notifications, and the sensitivity of your camera’s motion detection. Once you’re done, click on “Finish”.
Now the setup wizard is gonna run through its process and confirm that it completed the configuration successfully.
**RTSP Failure Troubleshooting Step
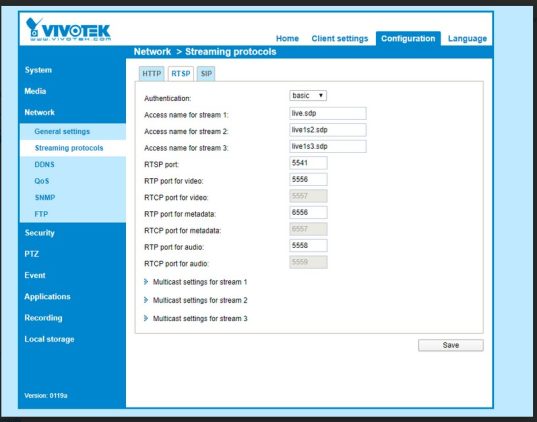
If you encounter RTSP failure, you should double check the following setting on the camera (some vivotek firmware’s encounter this differential):
Access name for Stream 1 should be live.sdp
Change live1s1.sdp to live.sdp in the Configuration > Network > Streaming Protocols > RTSP > Access name for stream 1
Manual Setup
The manual setup can be a bit tricky. This article will walk you through the main steps.
Note: Once your VIVOTEK is on your network, follow the Automatic Setup for Vivotek documentation to add your camera, then return to this article which explains how to configure motion detection on your VIVOTEK.
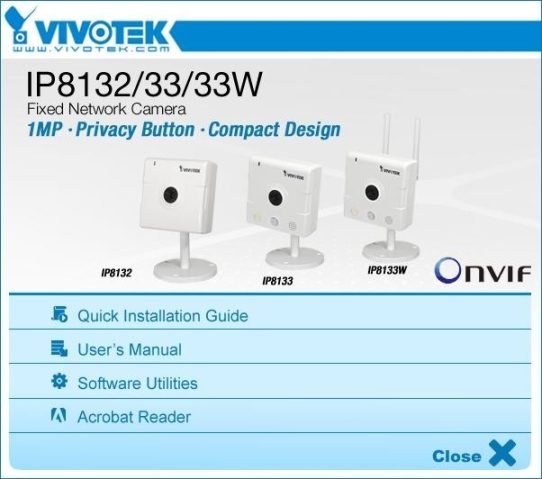
The quickest way to get the camera on your network is through their Software utilities and click on Installation Wizard 2 (twice). This should install a program on your computer.
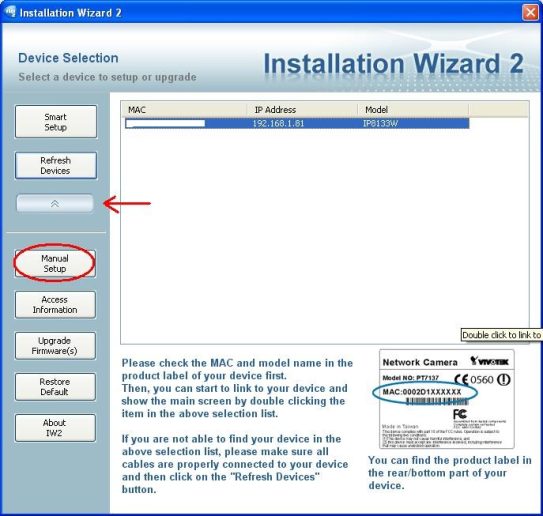
Now open up Installation Wizard 2 which should be installed on your computer and it will look like:
The next two tabs for ports and DDNS can be skipped for now (very useful DNS and DDNS setup
You will receive a popup about Mobile access setup, you can select No for now.
Here is where it will find your device. Now select that device and select the two arrow button to open further options. Now you can select “Manual setup”.
You can try the “Smart Setup” button which is easier but I’ve never gotten this to work. Okay, moving on, it will then ask you to setup a password for root. A dialog will ask you to setup PPoE, select No.
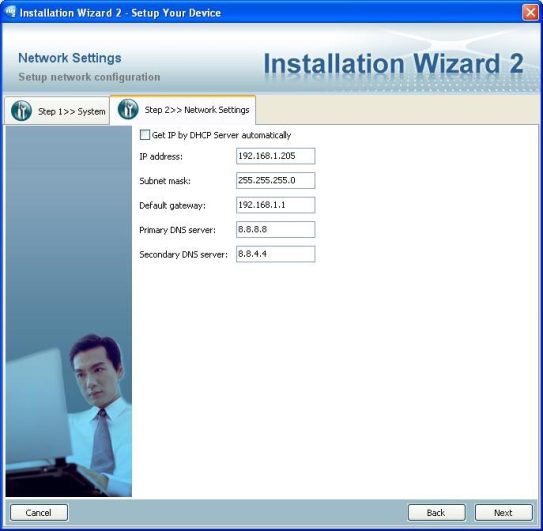
Setup the IP, I recommend creating a static IP for this camera and more importantly adding DNS servers. Select an IP value, it doesn’t really matter what value you use and make sure to use the appropriate value of your router. This varies depending on the router type, for example:
.
For DNS use 8.8.8.8 and 8.8.4.4.
.
.
.
Then it asks you to setup wireless. Simply enter your wireless details and you’re ready to go. Be careful with these settings make sure you know what types of options you have for your wireless.
Finally “Apply” the changes.
.
Wait until all processing is done and then you can unplug the LAN cable, You should be on wireless now.
.
A new window should open like the one below with a link to your camera’s admin page. If not, just enter in the camera IP you created earlier into the browser. In my case it was 192.168.1.205.
.
.
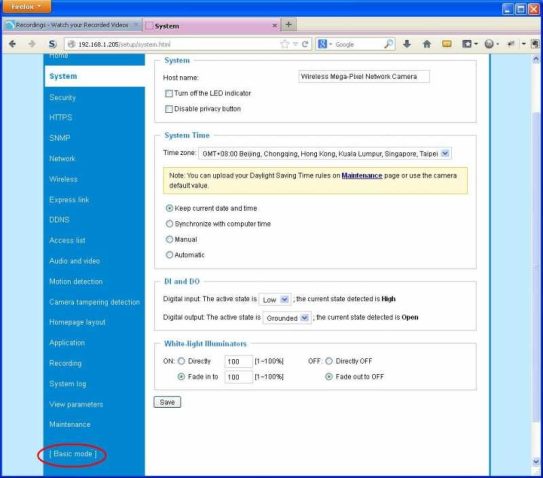
You should see a view of the camera and at the very bottom on the left should be a “Configuration” link. Click that to go into the camera configuration. Also at the bottom with be another link called “Advanced mode”. Select that and new menus will appear.
.
Setup your camera on Camcloud by following the Generic MJPEG
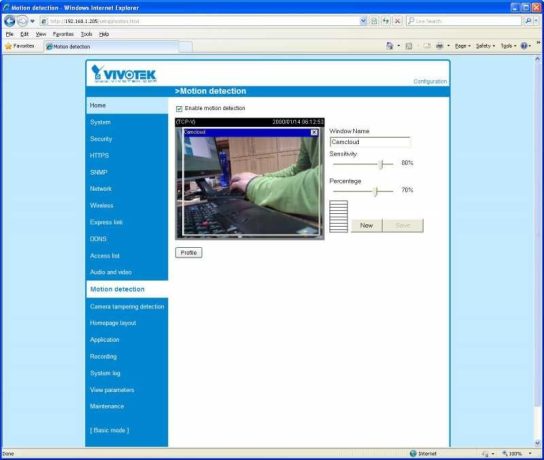
Now we can go back to the Vivotek interface and setup up motion detection (again remember IE is your best bet). Going to the Motion Detection tab you need select “Enable motion detection” and click the New button. This will create a new motion window area to detect motion. Enter a name for the window. Motion will be detected within the area that you select, and will be ignored
outside it. I normally select the entire window. Increase sensitivity and percentage. The percentage meaning the variation between sequential images (think of this like the size of the object); play around with these settings for optimal motion detection but a good starting point I found was 90% for sensitivity and 20% for percentage). Hit Save.
Now go to the Application tab and click the Add button for an Event Setting.
When your done it should look something like this:
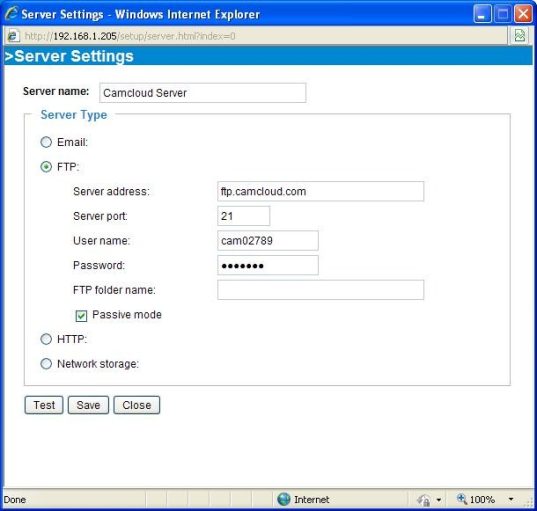
Before you hit Save, you need to “Add Server” at the bottom. Remember the credentials you have for your FTP camera, enter
them here. Note: Select the “Test” button which will verify you have entered the credentials correctly.
Now hit Save for your Server Settings (It doesn’t actually close the window, so you need to do that).
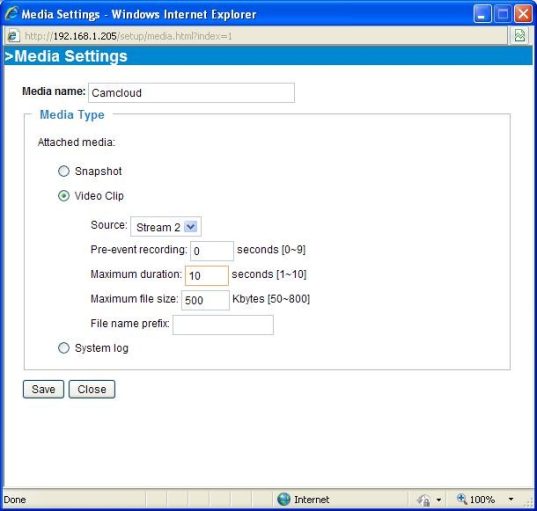
Next we need to add media with the “Add Media” button (which was next to “Add Server” button). Here I changed it to Video Clip, changed to Stream 2 and changed Maximum duration to 10. I would also add pre-event recording to 1 or 2 seconds and change the Max file size to 800 to give you the longest possible video. Save and Close.
Now you will have to go back into your Event settings and at the bottom select both the Server and Media options you created. This is quite confusing and I found that I had to start it over again. Once you do sort that out hit Save for your Event Settings. This is what it should look like:
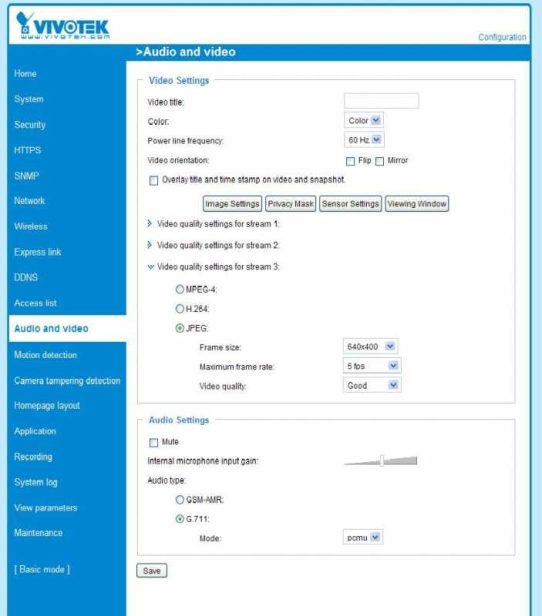
One more thing to do. You need to configure the Vivotek MJPEG stream to be used for the Camcloud Live View. We need to change stream profile 3 to handle that. Go to the “Audio and video” tab.
Select “Video quality settings for stream 3:” and select JPEG as the
stream and hit Save.
You are all setup for motion detection with Camcloud. Wave in front of your camera and then go to the Camcloud Timeline page.
One extra special note of importance. You may find that your videos are quite small, in the range of 3-4 secs. Vivotek allows 10 sec videos but they bump up quality settings so it ends up being too big to send. You can go to the Audio and video tab and change Stream profile 2 settings. A quick example would be to set the
default 30 fps to 20 fps. Play around with these and you will find the right combination for your needs
