Use Micro SD card for the first time
Tenda camera supports recording storage in Micro SD card (self-prepared by users). After the camera successfully identifies the Micro SD card, it will automatically start recording according to the recording mode.
![]()
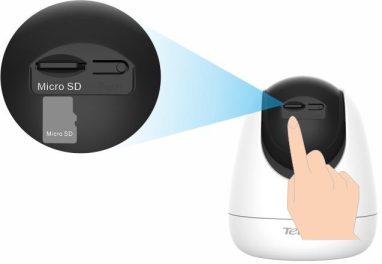
Step 1 Insert the Micro SD card in the slot of the camera (turn the lens upward, then you can see it).
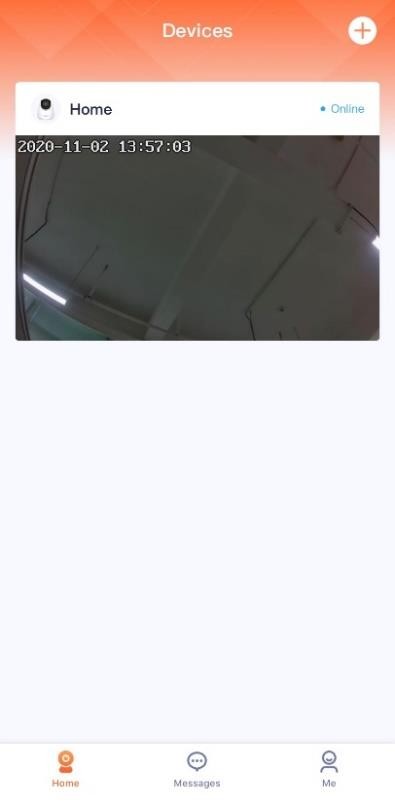
Step 2 Log in to TDSEE App to check whether the Micro SD card can be identified normally.
Log in to TDSEE App. Tap the camera on the home page. If a window pops up that Micro SD Card Error. It indicates that the current format of the Micro SD card does not meet the requirements. Please format it according to the instructions.
![]()
![]()


If the formatting of the Micro SD card fails, please try the following solutions:
Step 3 Set the recording mode of Micro SD card. Please refer to Micro SD card recording settings for detailed steps.
—-End
Micro SD card recording settings
Tenda camera supports recording storage in Micro SD card (self-prepared by users). You can set recording type of Micro SD card here.
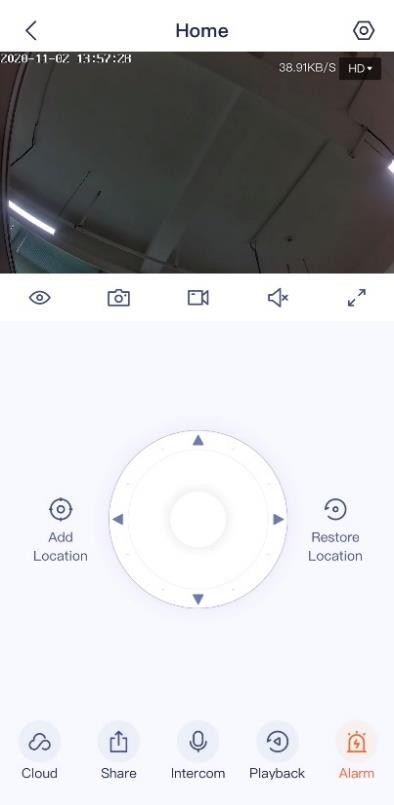
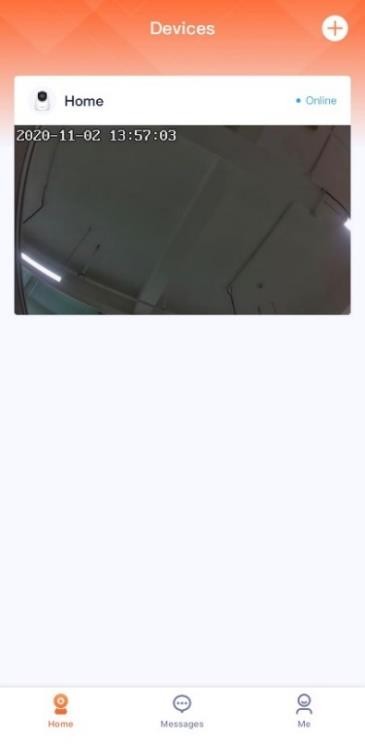
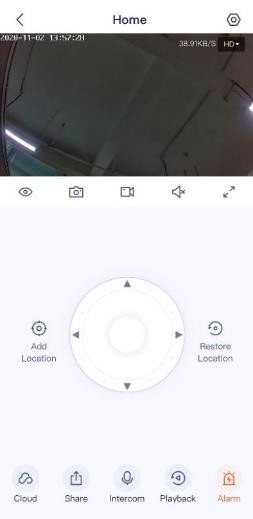
Step 1 Log in to TDSEE App. Tap the specific device on the home page, which is the camera Home in this example. Tap ![]() in the upper right corner.
in the upper right corner.
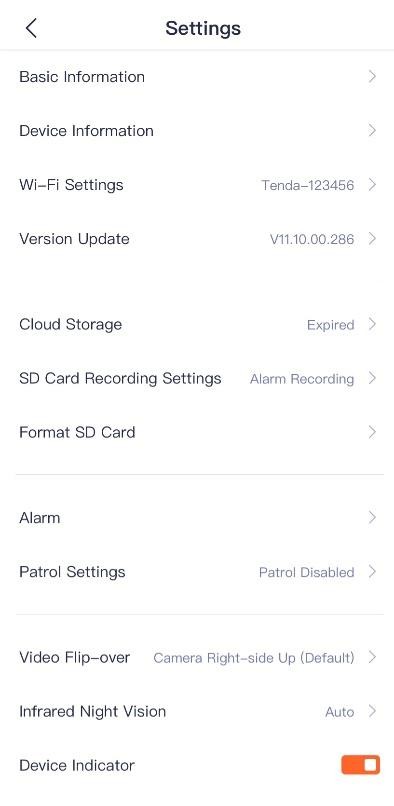
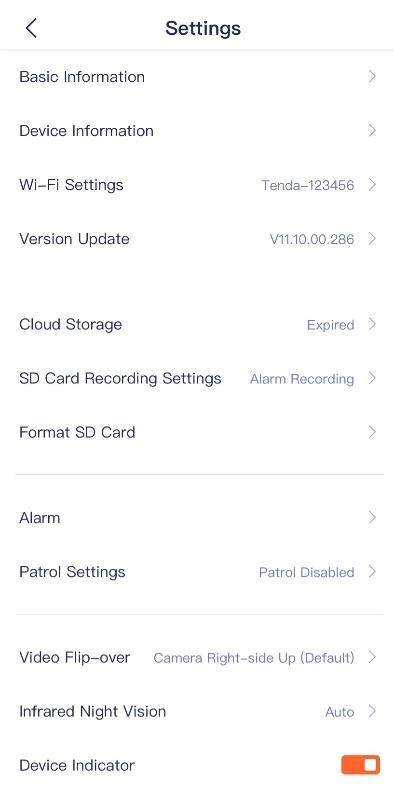
Step 2 Tap SD Card Recording Settings, and select the recording mode according to the actual conditions.
![]()
![]()


![]()

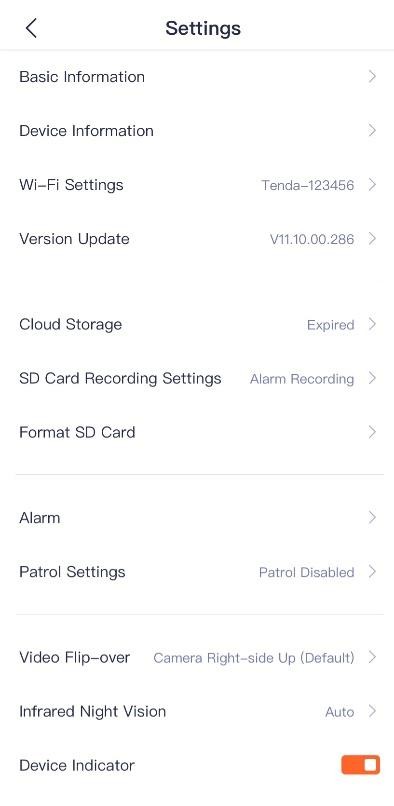

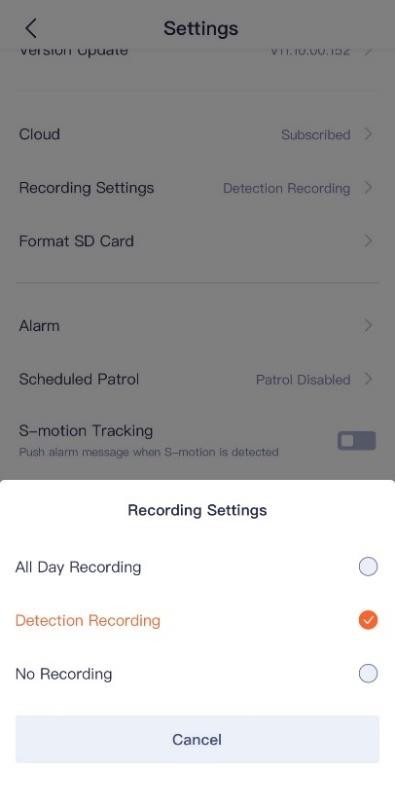
—-End
Format Micro SD card
If the camera cannot identify the Micro SD card, or you want to clear the recording video of the Micro SD, you can format the Micro SD card.
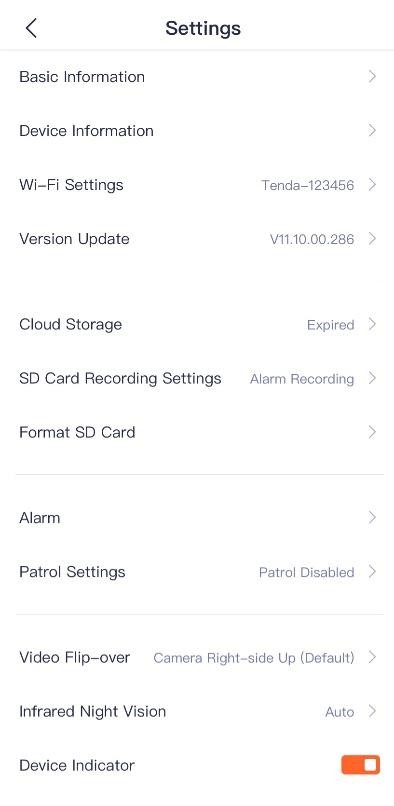
Step 1 Log in to TDSEE App. Tap the specific device on the home page, which is the camera Home in this example. Tap ![]() in the upper right corner settings.
in the upper right corner settings.
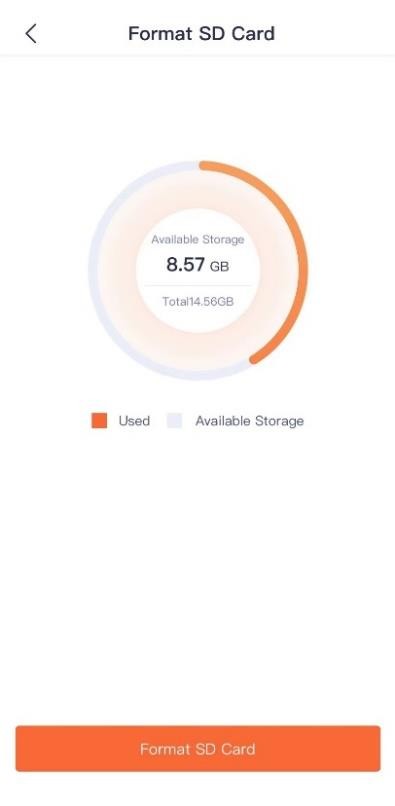
Step 2 Tap Format SD Card, then tap Format SD Card . Tap Format in the pops up window. Settings completed, the camera will format the Micro SD card.
![]()
![]()

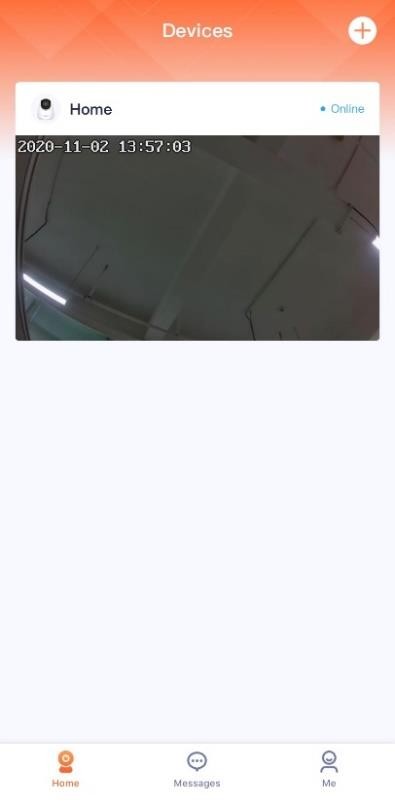

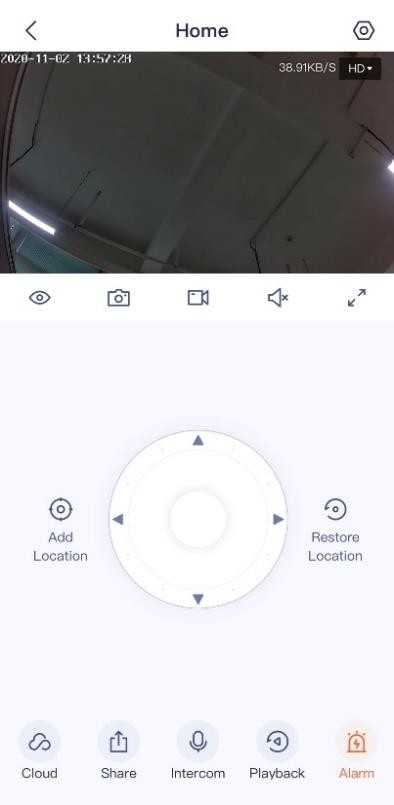
![]()


—-End
Check or edit the Micro SD card video
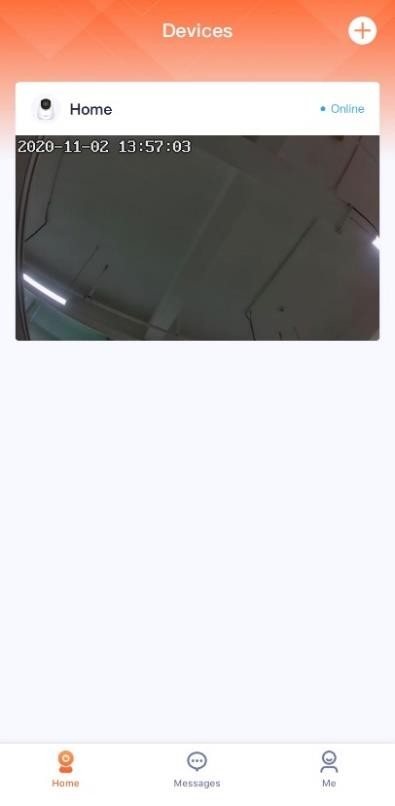
Step 1 Log in to TDSEE App. Tap the specific device on the home page, which is the camera Home in this example. Then tap Playback ![]() in the lower right corner.
in the lower right corner.
![]()


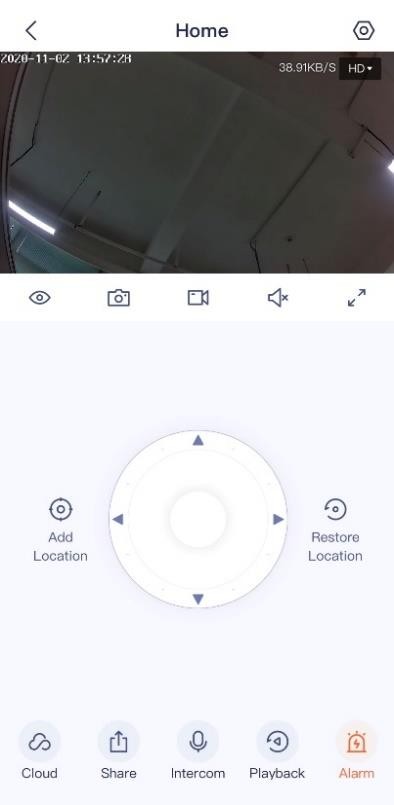
Step 2 You can check and edit the video according to the actual conditions.
Parameter description
Parameter Description
Screenshots.


![]() Tap it to save the screenshot of the current monitoring image to TDSEE Album.
Tap it to save the screenshot of the current monitoring image to TDSEE Album.
Recordings.
![]() Tap it to start recording, and tap it again to stop recording. Successfully recordings are automatically
Tap it to start recording, and tap it again to stop recording. Successfully recordings are automatically
save to TDSEE Album.
—-End
![]()
![]()
![]()
![]()
![]()
Recording video timeline
Tap it to delete the specific cloud storage video. Deleted videos cannot be restored.
Tap it to pause the video. Tap it to play the video.
Tap it to enable or disable the camera audio. Tap it to view in full screen.
Orange means detection recording. Blue means
continuous recording. Gray means no recording.
![]()
You can choose a specific time on the timeline.
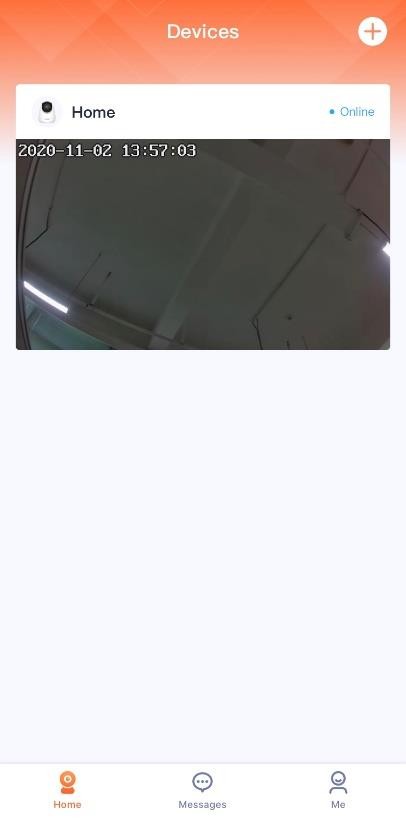
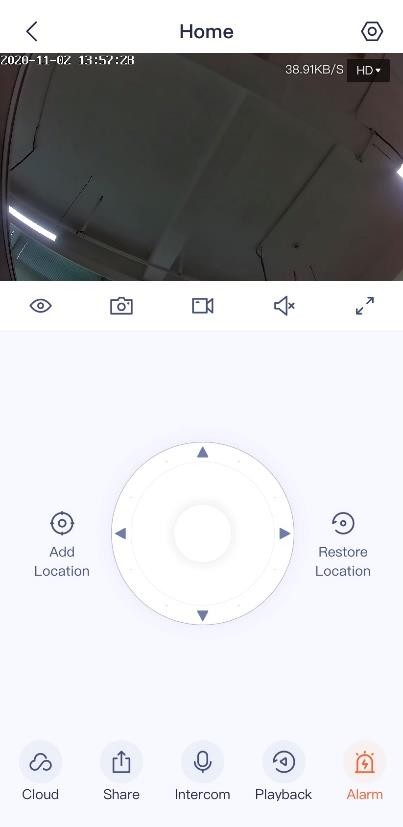
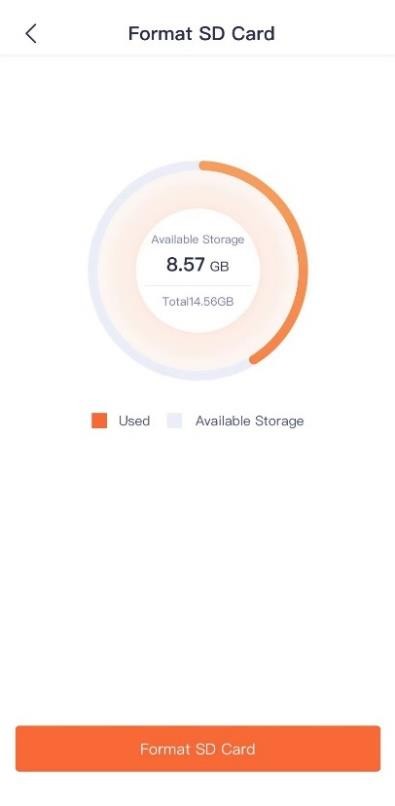
Check micro SD card avaliable storage
Step 1 Log in to TDSEE App. Tap the specific device on the home page, which is the camera Home in this example. Then tap ![]() in the upper right corner.
in the upper right corner.
Step 2 Tap Format SD Card to check Available Storage of Micro SD card.
![]()
![]()
![]()




—-End
Set up alarm
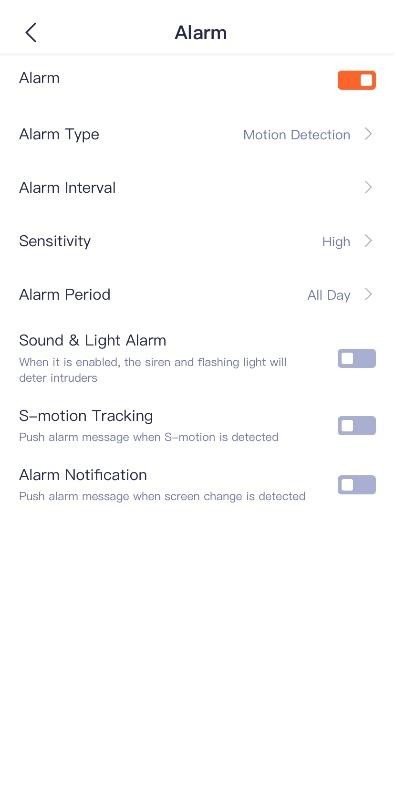
After the alarm function is enabled, the camera can send alarm messages and monitoring image to TDSEE according to alarm type. You can check specific messages in message page.
Method 1 (Recommended)
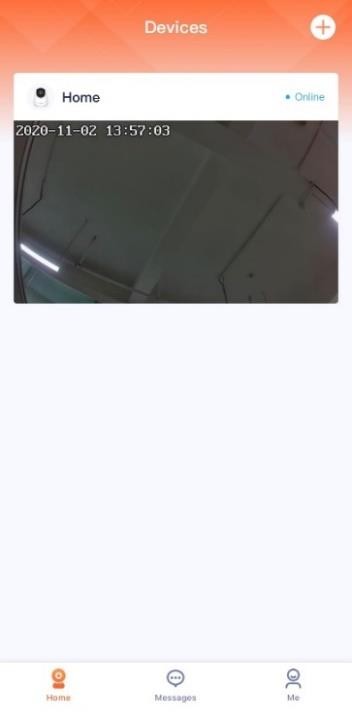
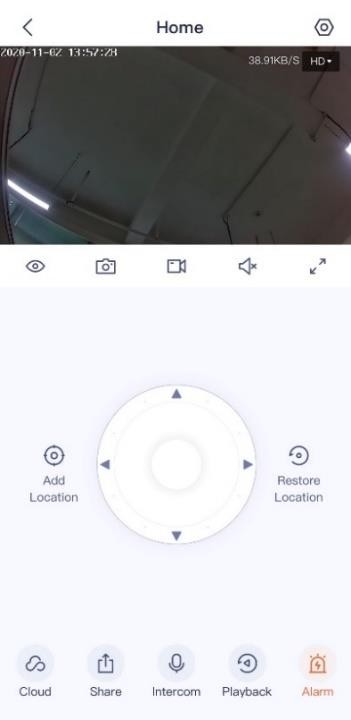
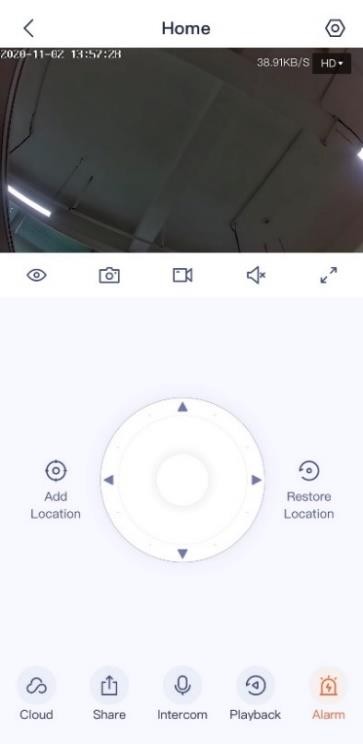
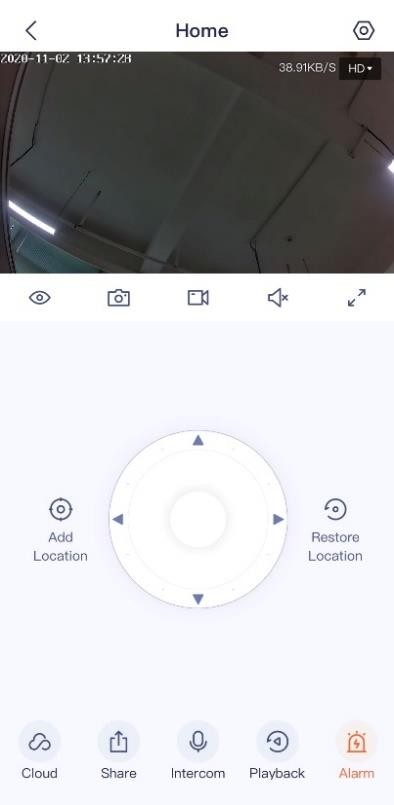
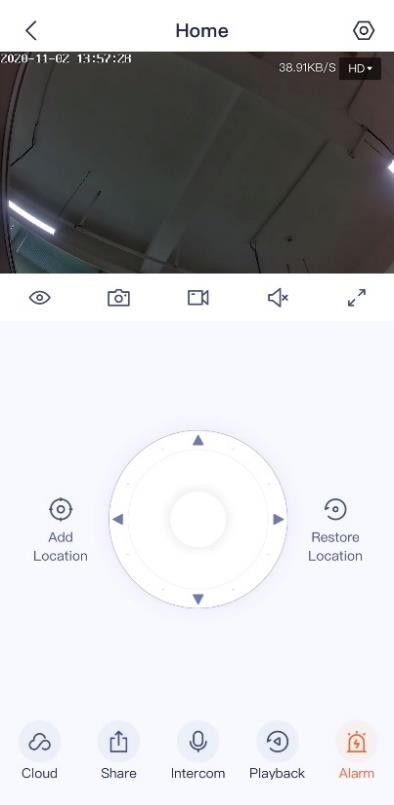
Step 1 Log in to TDSEE App. Tap the specific device on the home page, which is the camera Home in this example. Then tap Alarm ![]() in the lower right corner.
in the lower right corner.
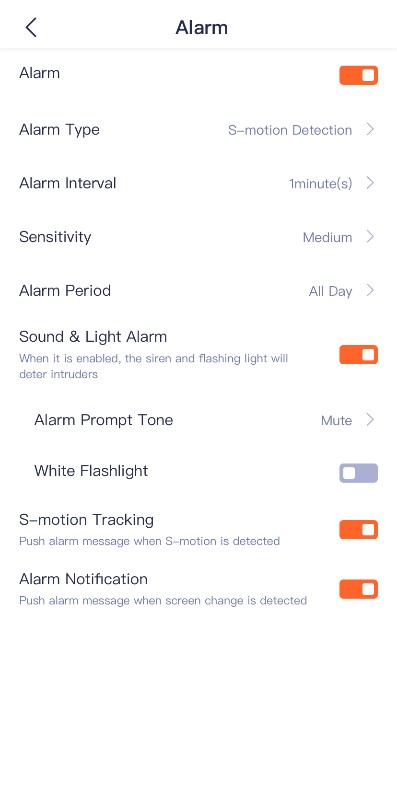
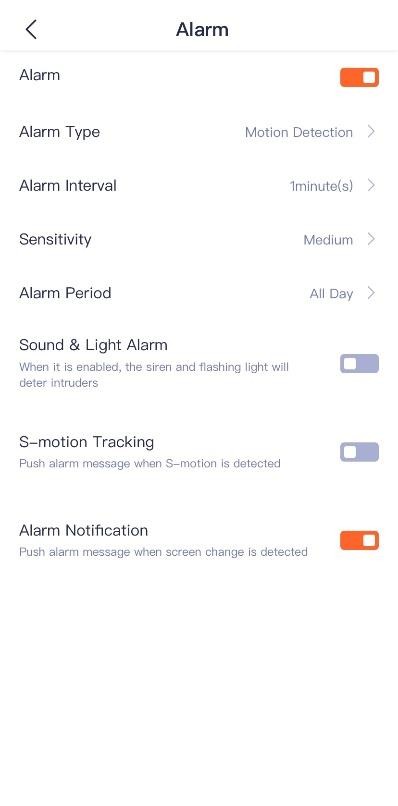
Step 2 You can modify the relevant parameters according to the actual conditions.
![]()


![]()

—-End
Parameter description
Parameter Description
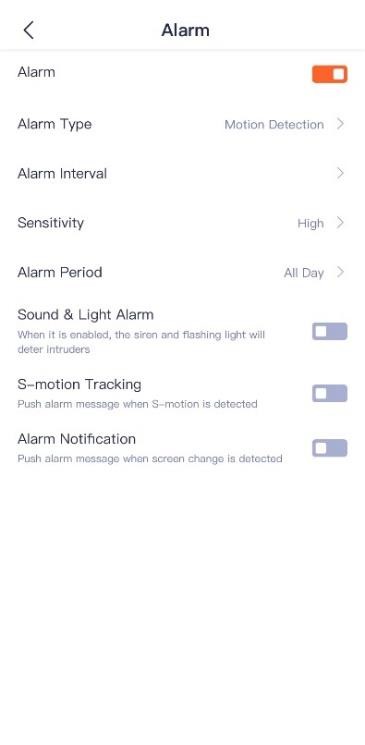
Alarm It specifies whether or not to enable the alarm function.
It specifies alarm type of the camera.
Alarm Interval It specifies the time interval at which the camera sends alarm messages. You can select it according to the actual condition.
Sensitivity
It specifies the detection sensitivity of the camera.
By default, the detection sensitivity is Medium, you can select High or Low
according to the actual condition.
Alarm Period
It specifies the period in which the camera generates alarms.
You can select the period preset by the system, or customize it as required.
Sound & Light Alarm
After the function is enabled, the camera flashes white, and produces audio alert when the alarm is detected.
It specifies alarm prompt tone of the camera.
You can select the prompt tone preset by the system, or record it by yourself when the sound and light alarm function is enabled.
White Flashlight When the sound and light alarm function is enabled, if the camera detects an alarm image, the camera will flash white light.
Parameter Description
S-motion Detection
Alarm Notifications
After the function is enabled, when S-motion activity is detected, the TDSEE tracks and follows the subject.
After the function is enabled, when image change is detected, the camera will send notifications and monitoring image to the TDSEE App according to the Alarm Period.
Method 2
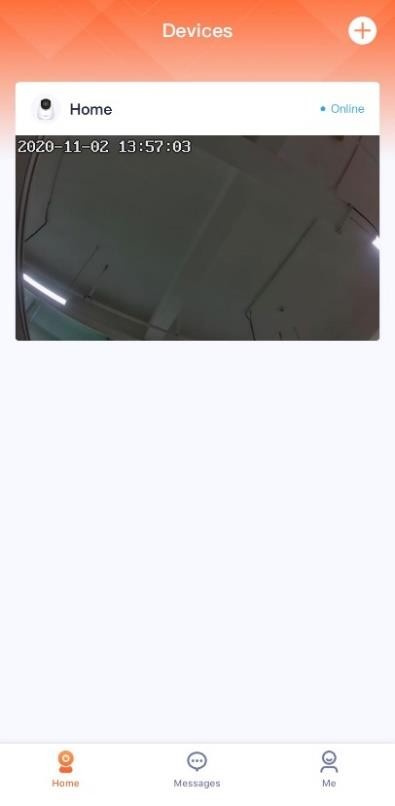
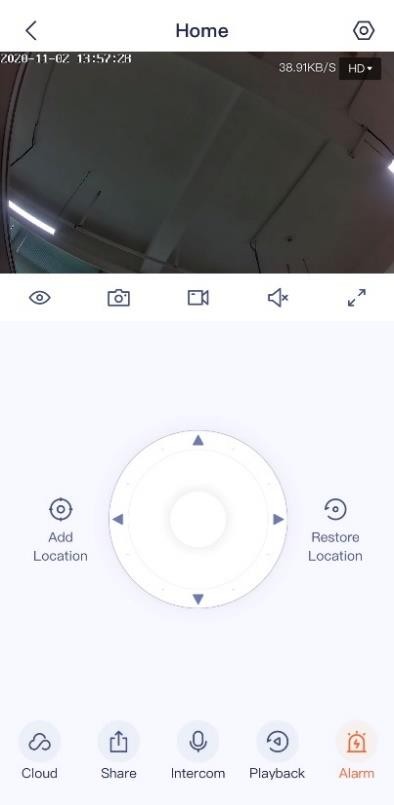
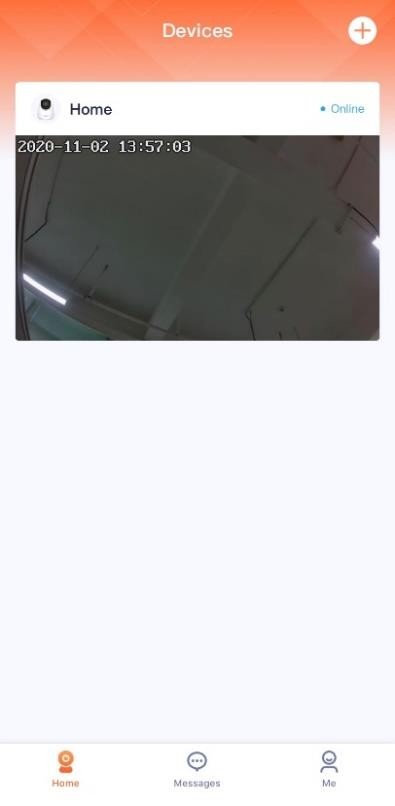
Step 1 Log in to TDSEE App. Tap the specific device on the home page, which is the camera Home in this example. Tap ![]() in the upper right corner.
in the upper right corner.
Step 2 Tap Alarm, then you can modify the relevant parameters according to the actual conditions.
![]()
![]()


![]()


—-End
Enable S-motion Tracking
After the S-motion tracking function is enabled, when the camera detects figure movement, the TDSEE tracks and follows the subject.
Method 1 (Recommended)
Step 1 Log in to TDSEE App. Tap the specific device on the home page, which is the camera Home in this example. Then tap Alarm ![]() in the lower right corner.
in the lower right corner.
![]() Step 2 Find S-motion Tracking, and set the S-motion Tracking from to
Step 2 Find S-motion Tracking, and set the S-motion Tracking from to ![]() .
.
![]()
![]()



—-End
Method 2
Step 1 Log in to TDSEE App. Tap the specific device on the home page, which is the camera Home in this example. Tap ![]() in the upper right corner.
in the upper right corner.
![]() Step 2 Tap Alarm, find S-motion Tracking, and set the S-motion Tracking from to
Step 2 Tap Alarm, find S-motion Tracking, and set the S-motion Tracking from to ![]() .
.
![]()
![]()
![]()




—-End
Set up scheduled patrol
You can set up scheduled patrol of the camera, including panoramic patrol and location patrol.
− Panoramic patrol: The camera performs 360° patrol of its surroundings.
− Location patrol: The camera patrols the location you specified. You need to add the location in Basic settings in advance.
![]()
After 2 hours’ patrol, the patrol function will be automatically disabled.
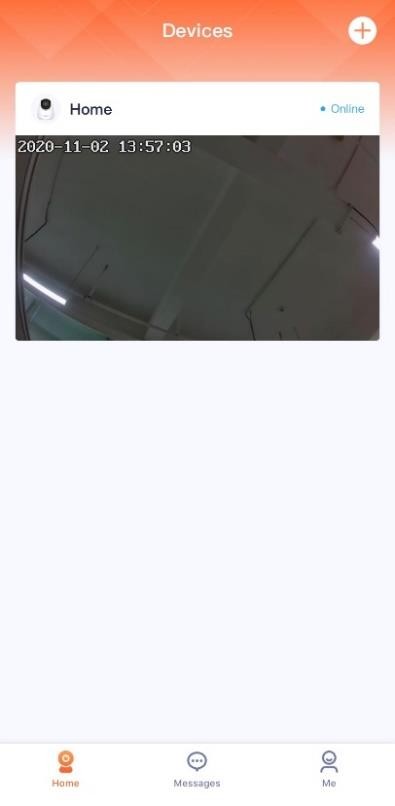
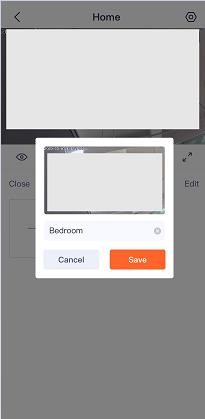
Assume that you want to use the camera to monitor the bedroom, balcony, kitchen area.
Step 1 Add the camera patrol location.
![]()
![]()
![]()




Step 2 Set Scheduled Patrol to Custom Patrol.
![]()
![]()




—-End
Set up video flip-over
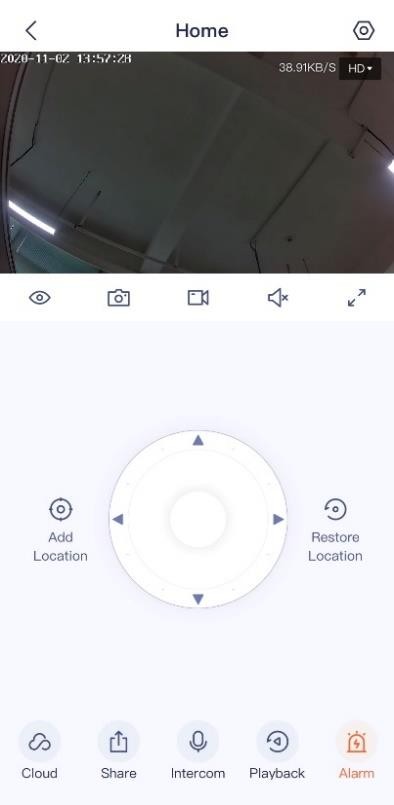
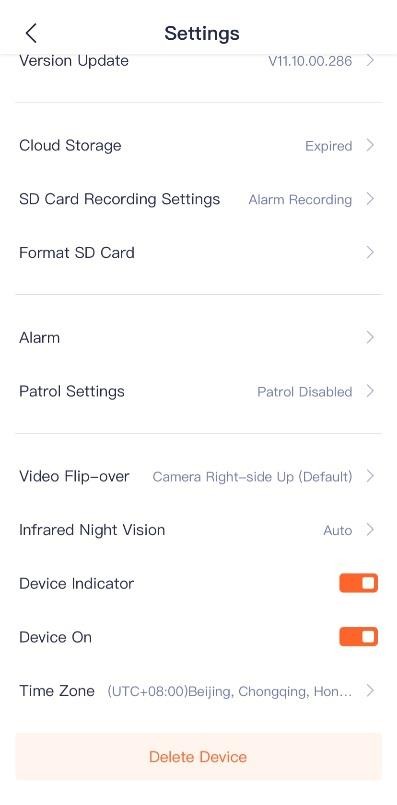
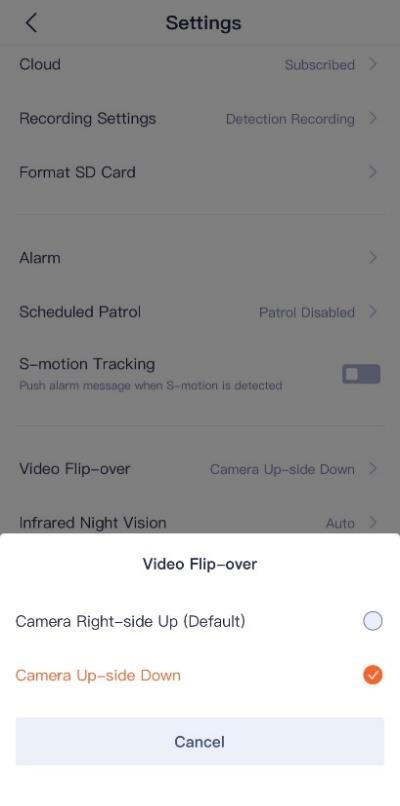
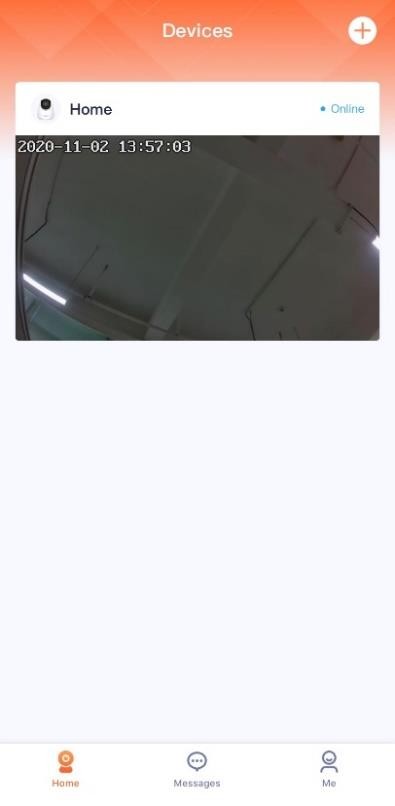
If the camera installation method is ceiling installation, in order to facilitate monitoring, you need to set the direction to Camera Up-side Down.
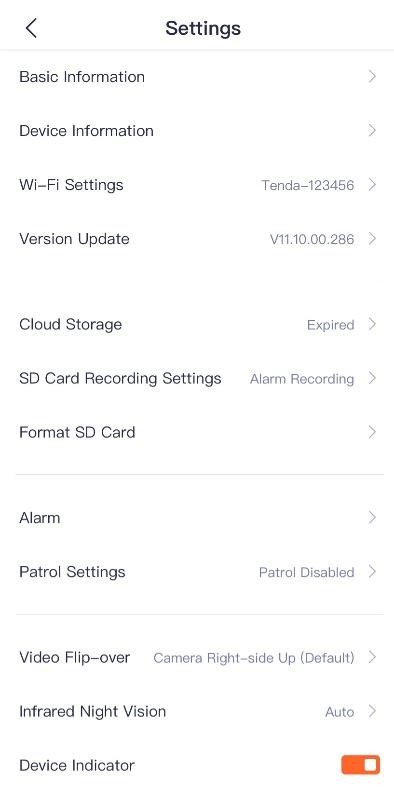
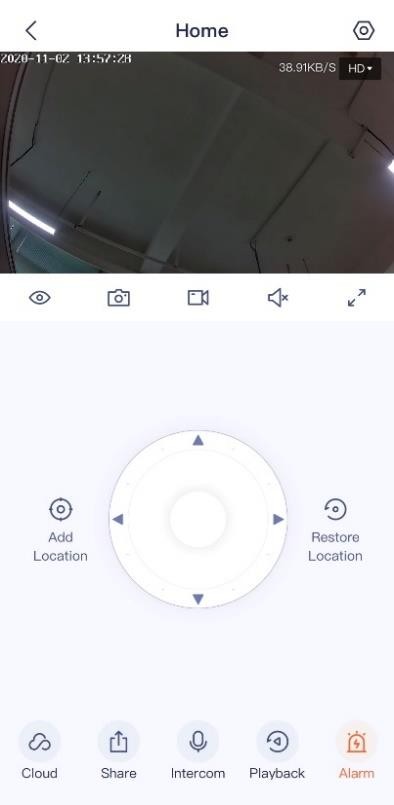
Step 1 Log in to TDSEE App. Tap the specific device on the home page, which is the camera Home in this example. Tap ![]() in the upper right corner.
in the upper right corner.
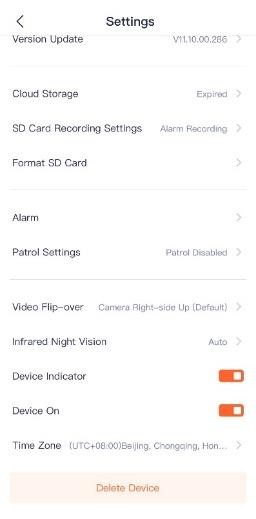
Step 2 Scroll down to the bottom of the page, tap Video Flip-over, and select Camera Up-side Down.
![]()
![]()

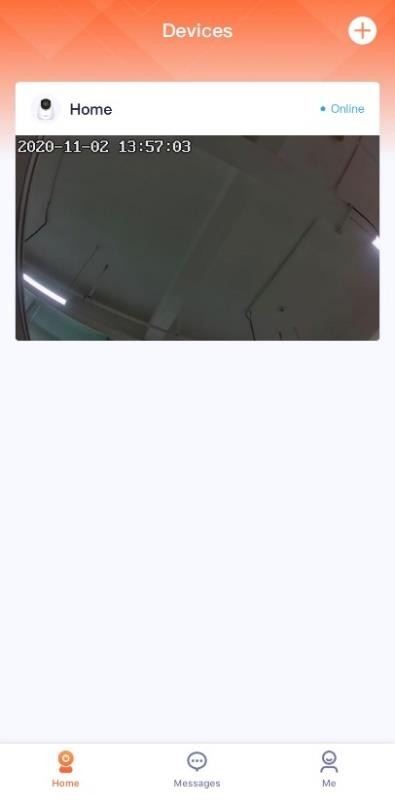

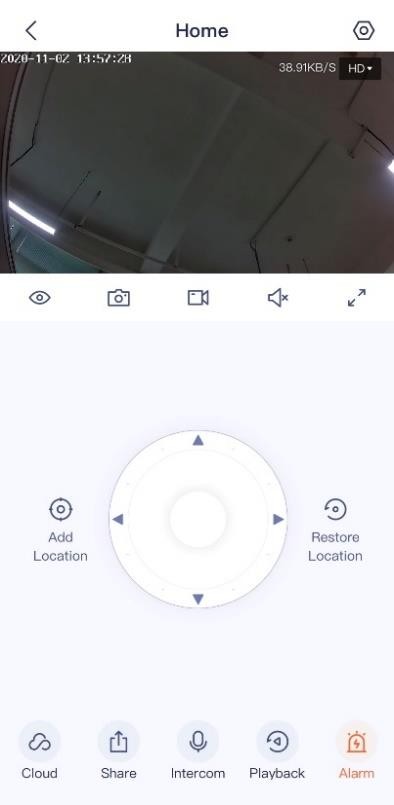
![]()


—-End
Set up infrared night vision
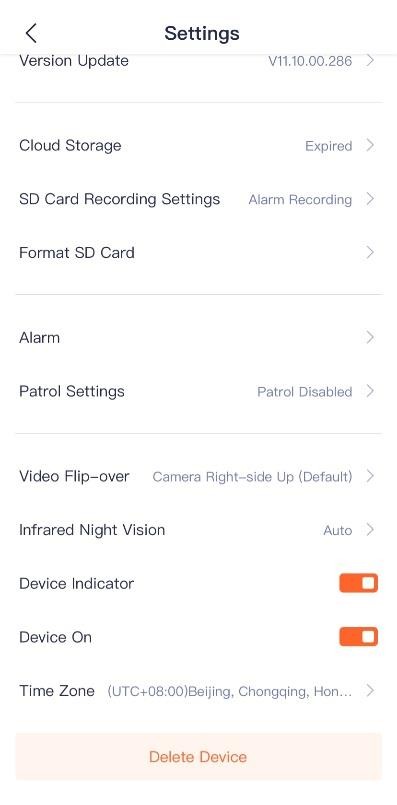
Infrared night vision indicates that in the dark environment without visible light or weak light, the camera turns on the infrared light. Even in the dark environment, the camera can monitor normally, and the image is black and white.
Set up infrared night vision
Step 1 Log in to TDSEE App. Tap the specific device on the home page, which is the camera Home in this example. Tap ![]() in the upper right corner.
in the upper right corner.
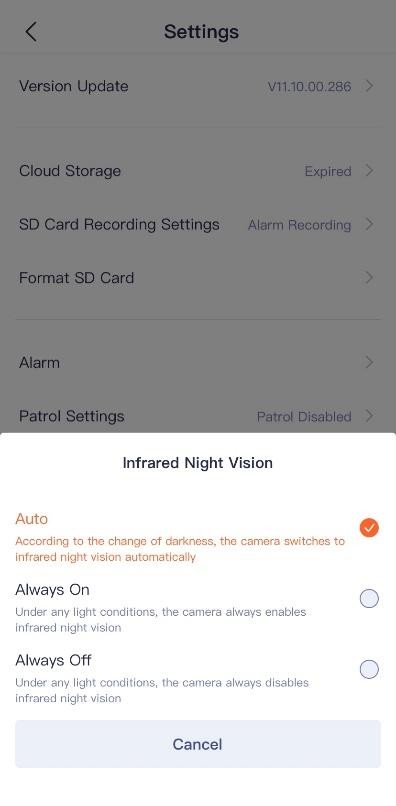
Step 2 Scroll down to the bottom of the page, and tap Infrared Night Vision. Select the mode according to the actual conditions.
![]()
![]()


![]()


—-End
Parameter description
Infrared night vision The camera infrared light Monitoring image
Auto
According to the change of darkness, the camera turns on or off the infrared night vision automatically.
Always on Under any light conditions, the camera always enables
infrared night vision.
Under any light conditions, the camera always disables
The monitoring image is black and white.
If the light is strong, the monitoring image is colorful.
Always off
infrared night vision.
If no light or weak light, the camera cannot monitor normally.
Turn off device indicator
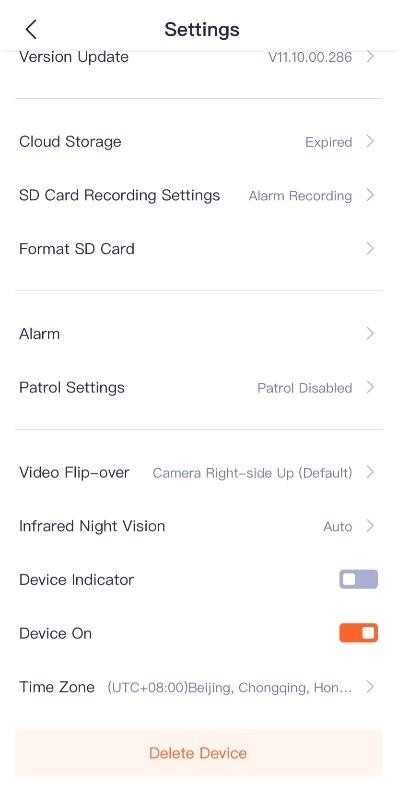
You can turn on or off the device indicator on the Settings page. By default, the device indicator is turn on.
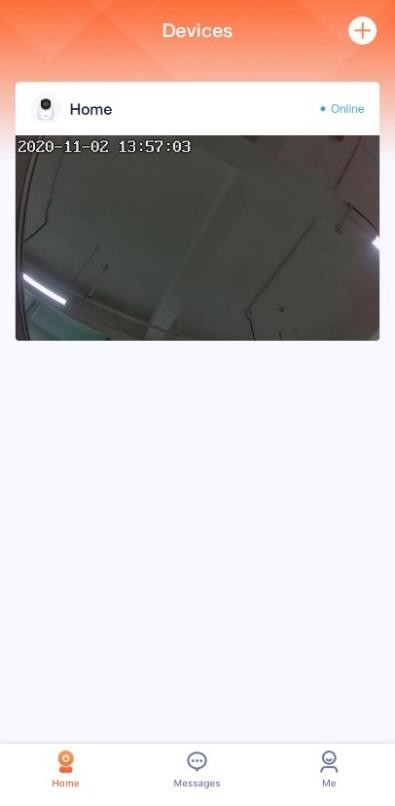
Step 1 Log in to TDSEE App. Tap the specific device on the home page, which is the camera Home in this example. Tap ![]() in the upper right corner.
in the upper right corner.
Step 2 Scroll down to the bottom of the page, find Device Indicator, and set the Device Indicator from ![]() to
to ![]() .
.
![]()
![]()



—-End
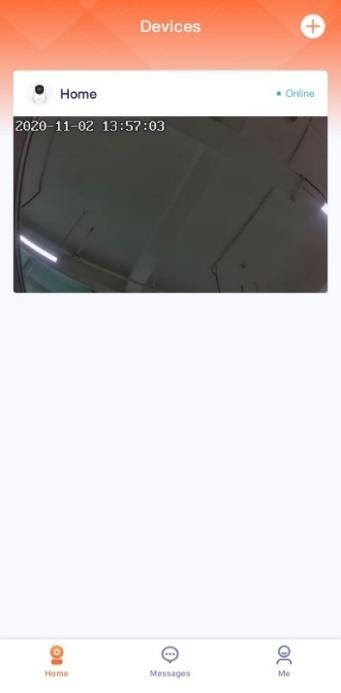
Turn off device
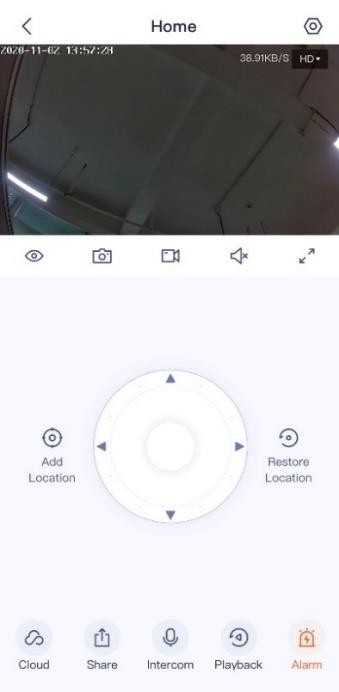
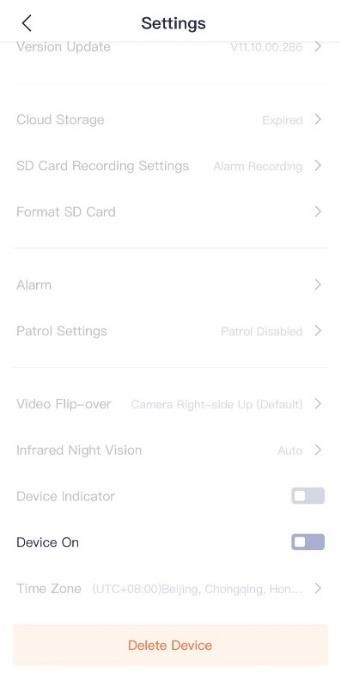
You can turn on or off the device. After the device is turn off, the device stands by, and stops monitoring.
Step 1 Log in to TDSEE App. Tap the specific device on the home page, which is the camera Home in this example. Tap ![]() in the upper right corner.
in the upper right corner.
Step 2 Scroll down to the bottom of the page, find Device On, and set the Device On from ![]() to
to ![]() .
.
![]()
![]()
![]() After the device is turn off, if you want to turn on it again, you can turn on it on the monitoring live page of the device.
After the device is turn off, if you want to turn on it again, you can turn on it on the monitoring live page of the device.



—-End
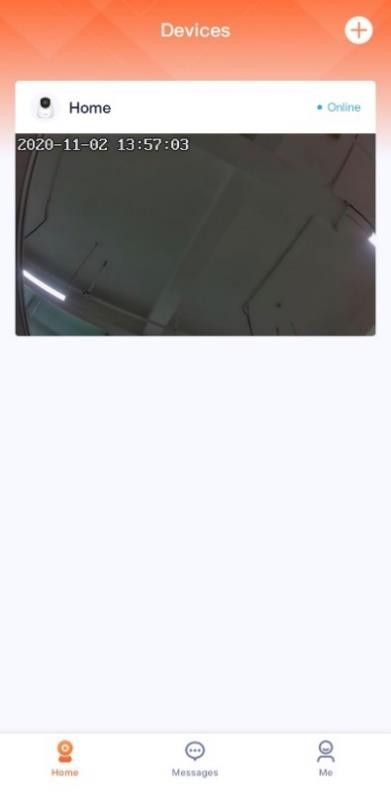
Modify the time zone
You can modify the time zone here.
For time-based functions to take effect correctly, please ensure that the time zone of your device is correct.
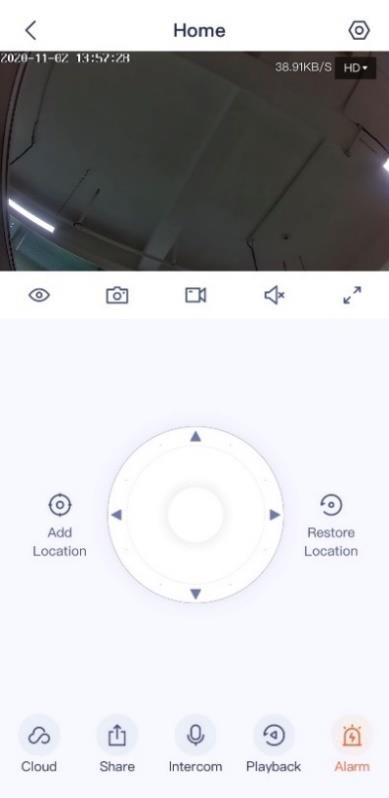
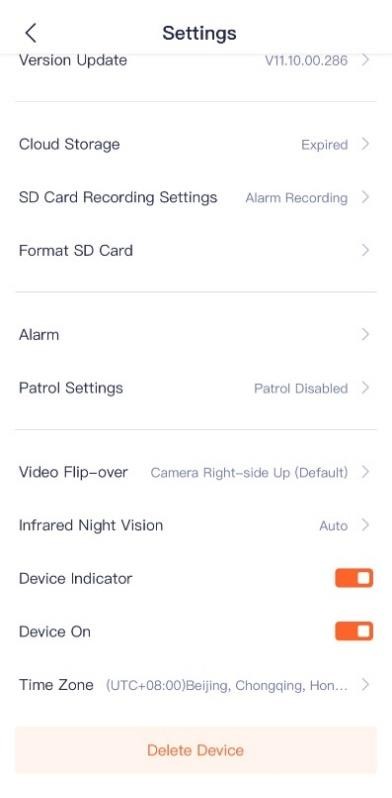
Step 1 Log in to TDSEE App. Tap the specific device on the home page, which is the camera Home in this example. Tap ![]() in the upper right corner.
in the upper right corner.
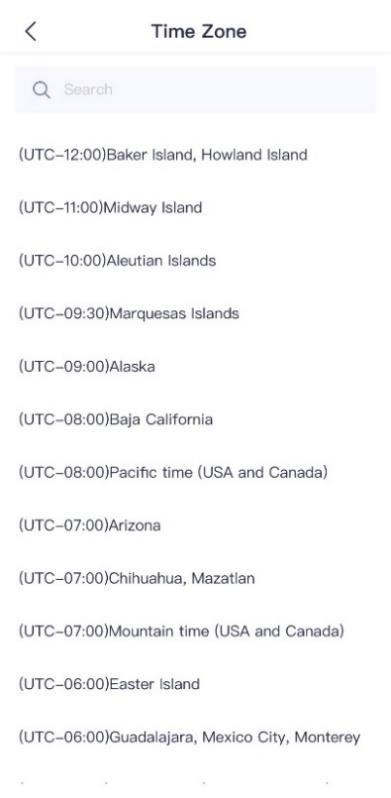
Step 2 Scroll down to the bottom of the page, find Time Zone, and select a time zone according to the actual conditions.
![]()
![]()
![]()




—-End
Delete the device
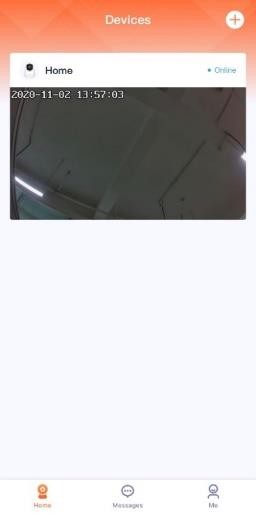
A device can only be added by one account. If any of the following situations occurs, please delete the device on the TDSEE App first.
− Another account needs to add the device.
− The device is abnormal and needs to be repaired or returned.
![]()
Delete device will clear the binding relationship between the device and the account, including Wi-Fi configuration information, add location information, and custom alarm prompt tone.
Step 1 Log in to TDSEE App. Tap the specific device on the home page, which is the camera Home in this example. Tap ![]() in the upper right corner.
in the upper right corner.
Step 2 Scroll down to the bottom of the page, and tap Delete Device.
![]()
![]()



End
Check messages
