![]()
![]()
![]()




![]()
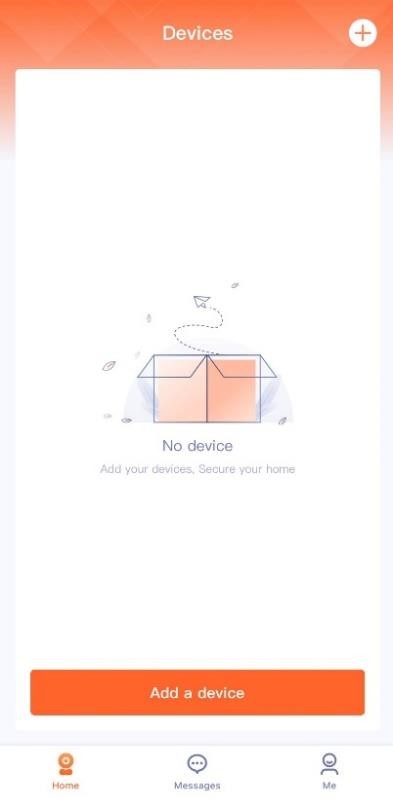
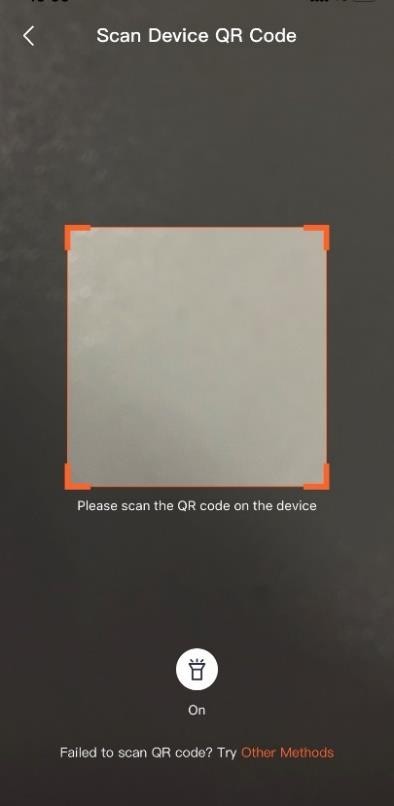
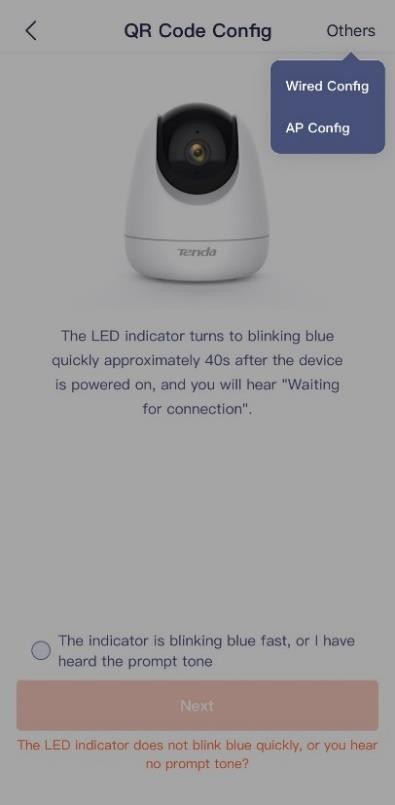
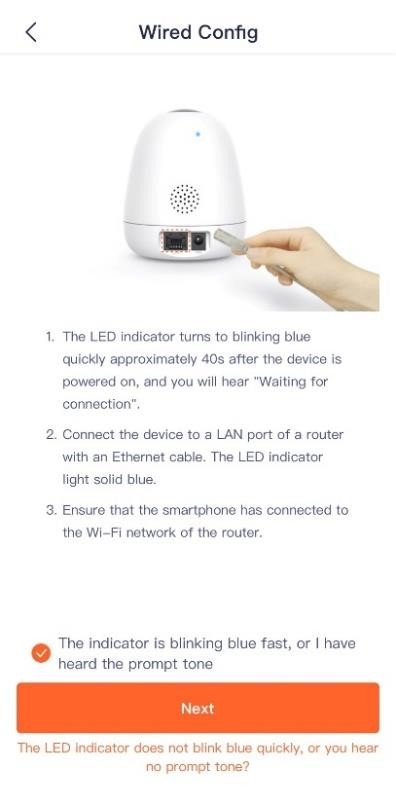
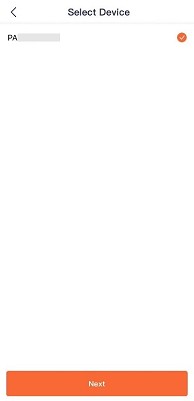
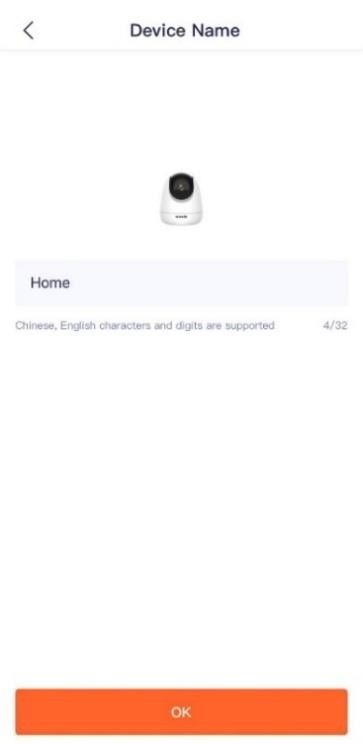
The default name of the device is PA+UUID, and the UUID can be found on the bottom of the device.

![]()

![]()

![]()

—-End
![]()
After added the camera successfully via Wired Config, do not disconnect the Ethernet cable between the camera and the router, but you can connect the camera via the Ethernet cable to the LAN port of other routers that are connected the internet successfully.
Home page
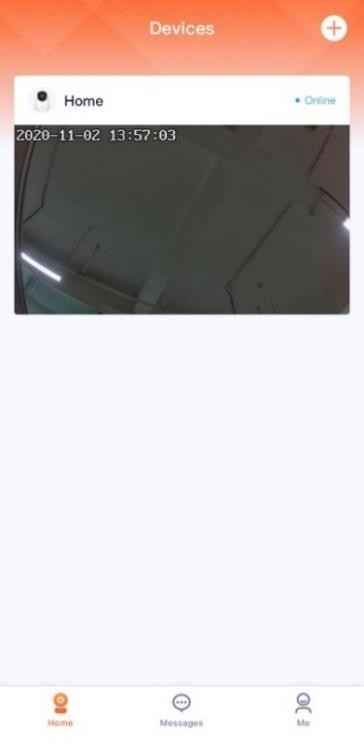
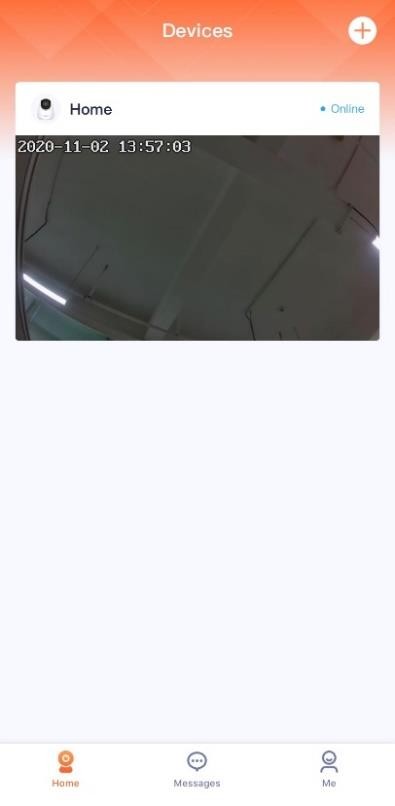
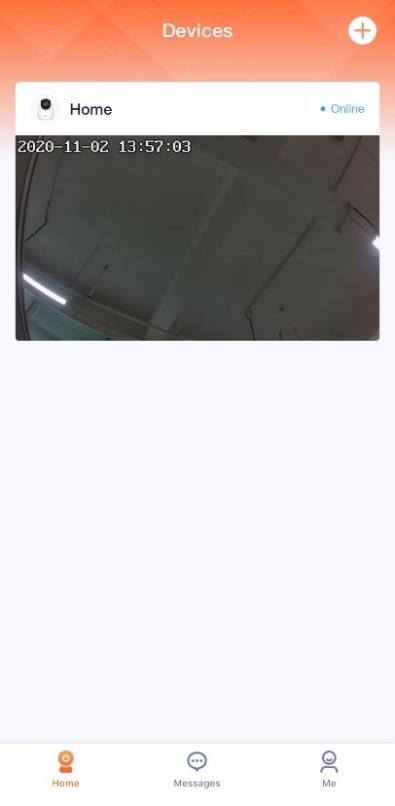
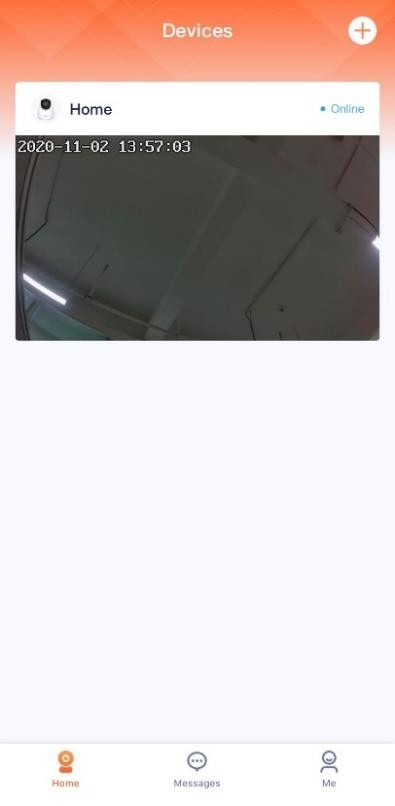
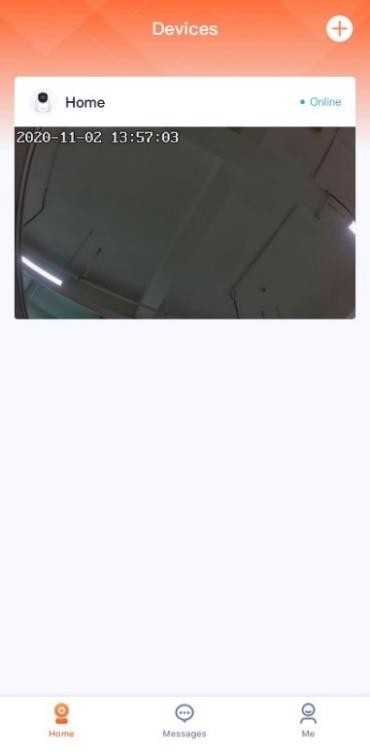
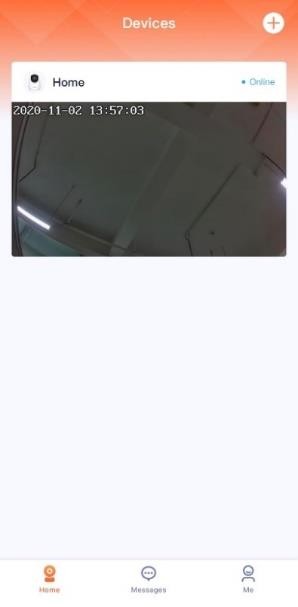
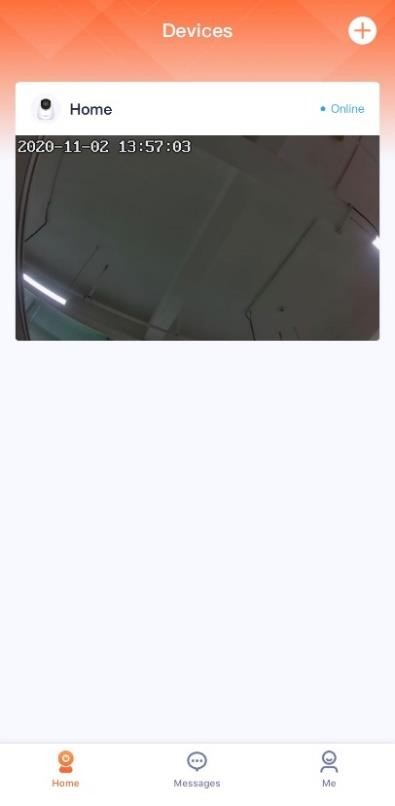
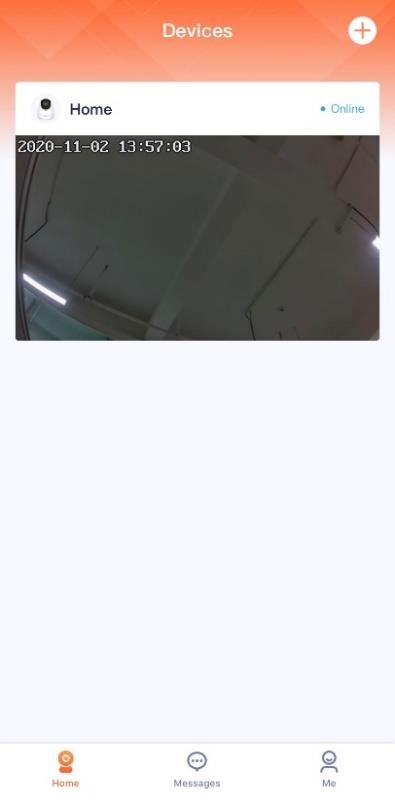
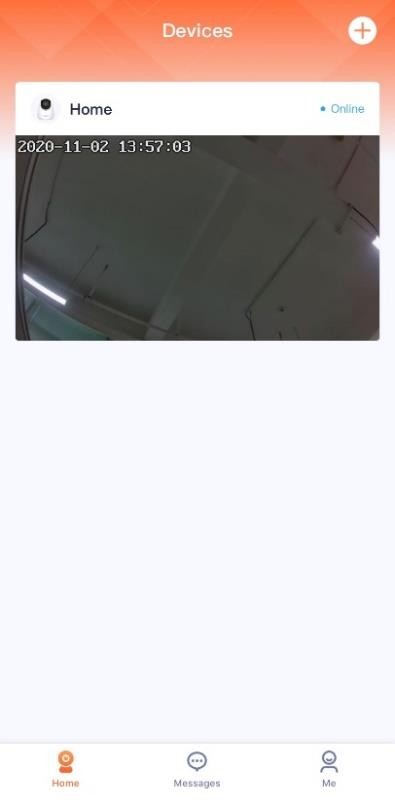
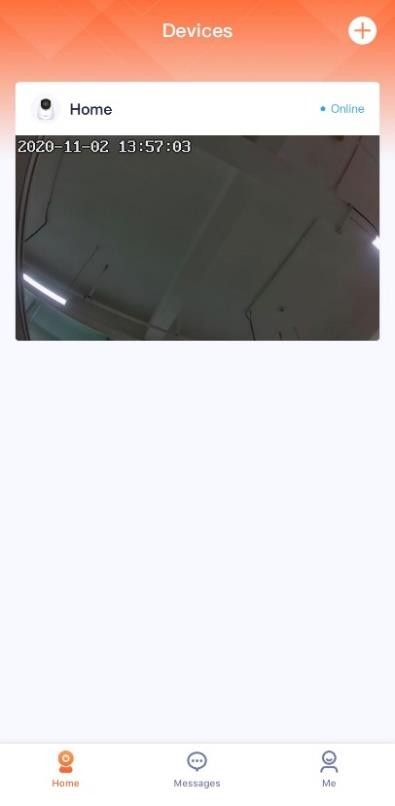
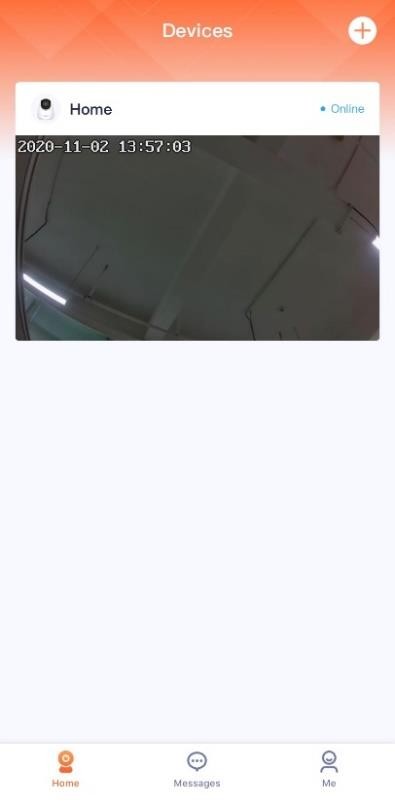
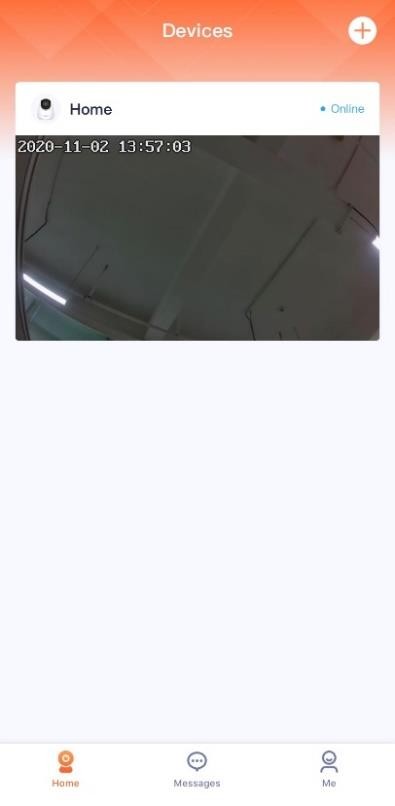
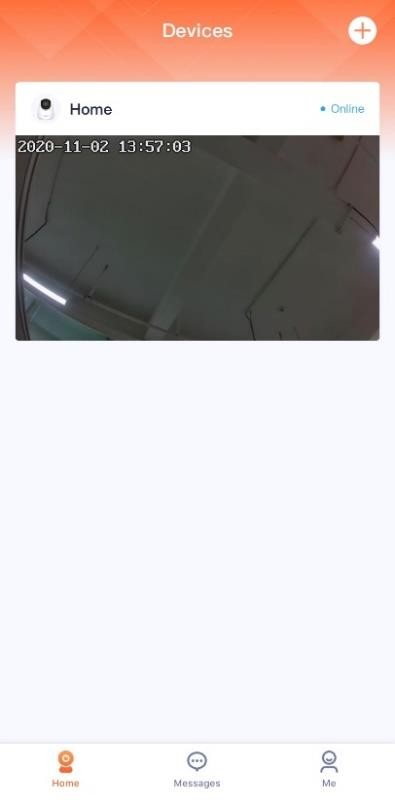
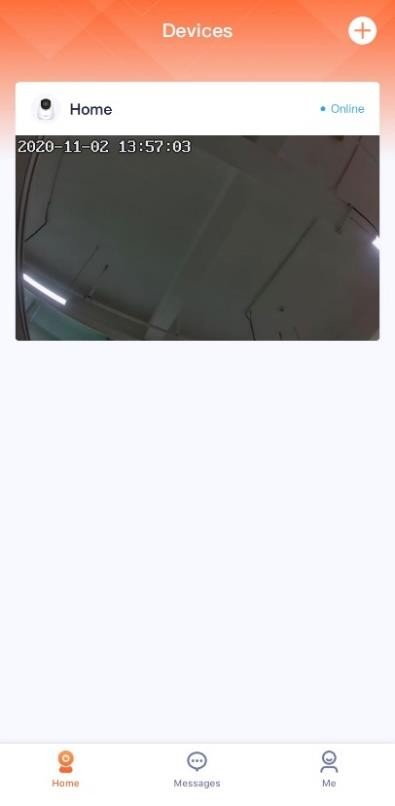
After logging in to TDSEE App, the default page is Home page. You can preview all devices under this account, or add a device, etc.
Check the name of your device Tap it to add a device Check device status

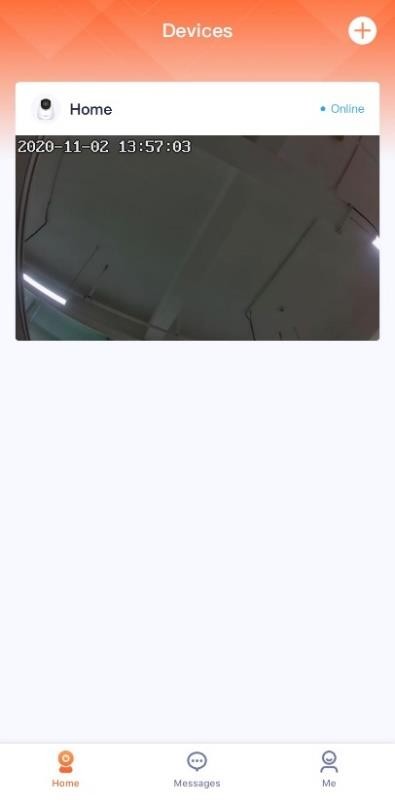
Monitoring video of the camera. Tap it to perform detailed settings for the camera
Tap it to check more settings
Tap it to check system messages and notification messages of each device
Basic settings
Monitoring operation
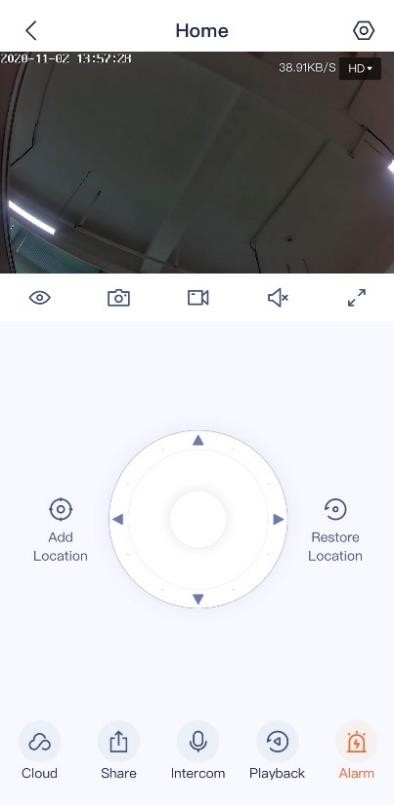
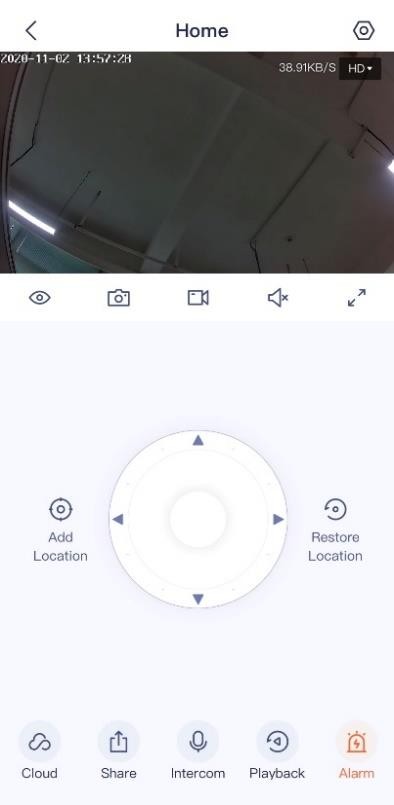
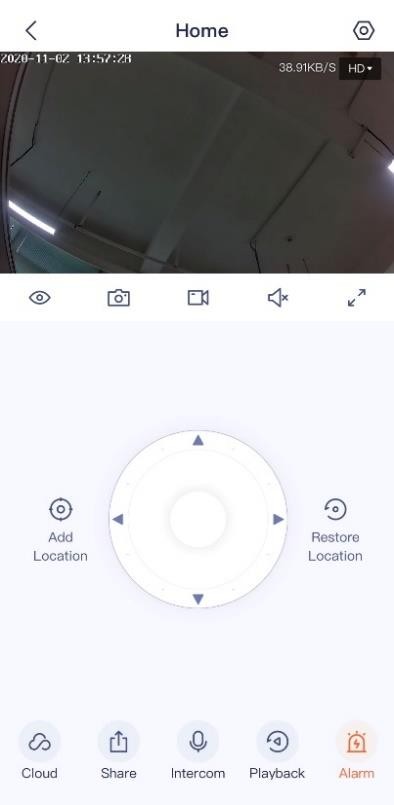
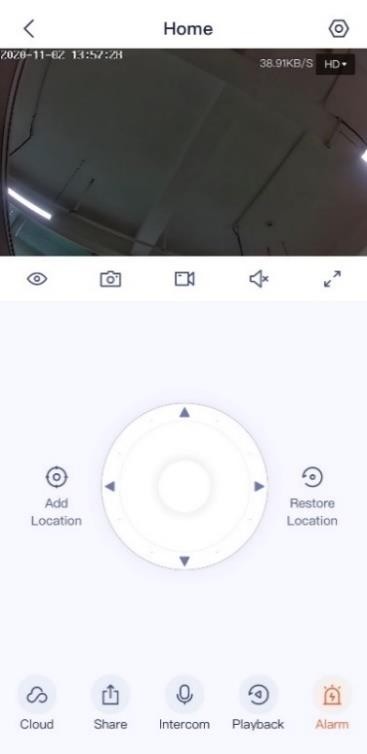
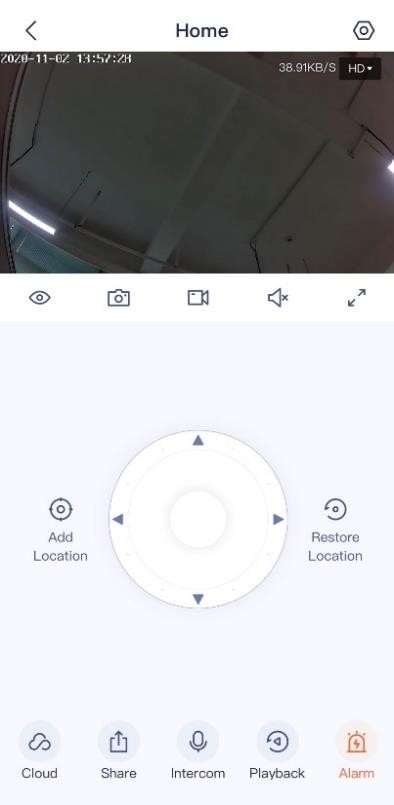
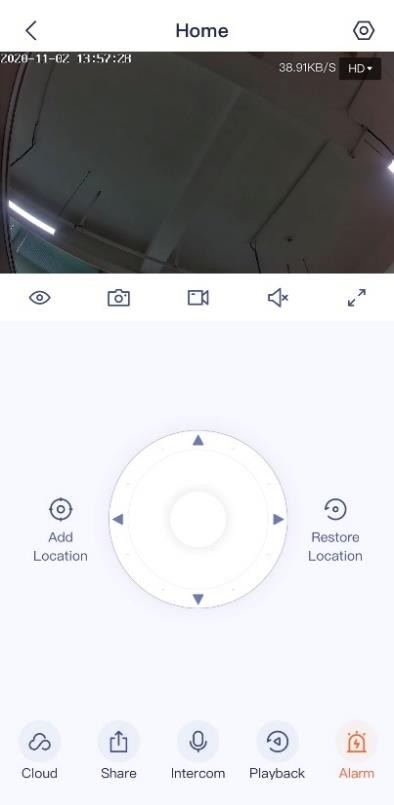
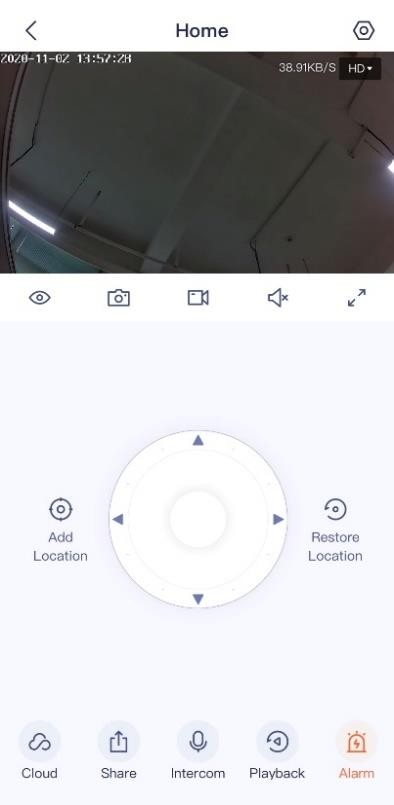
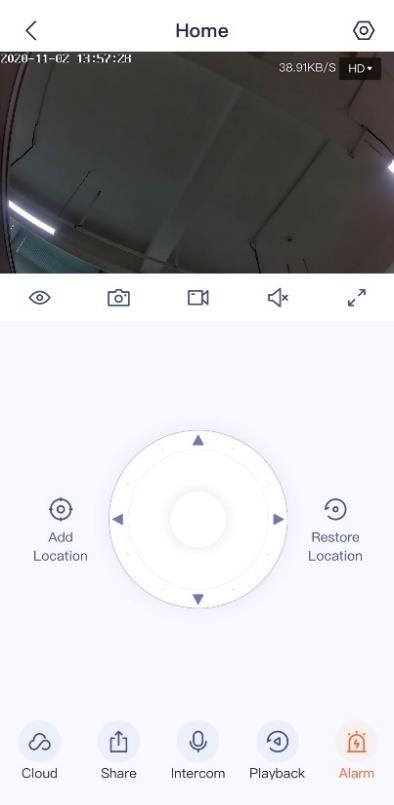
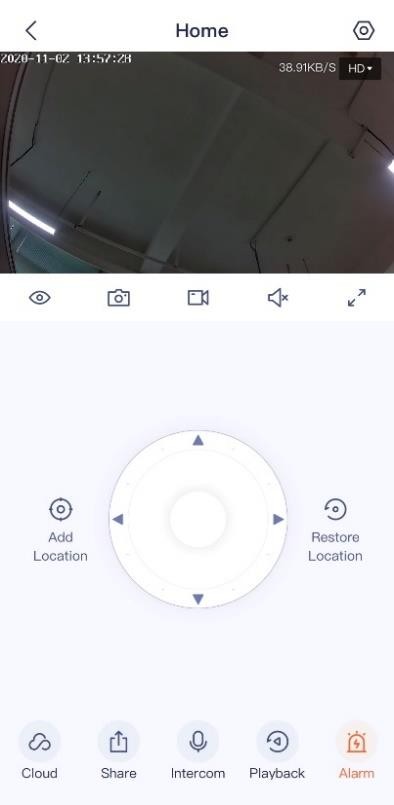
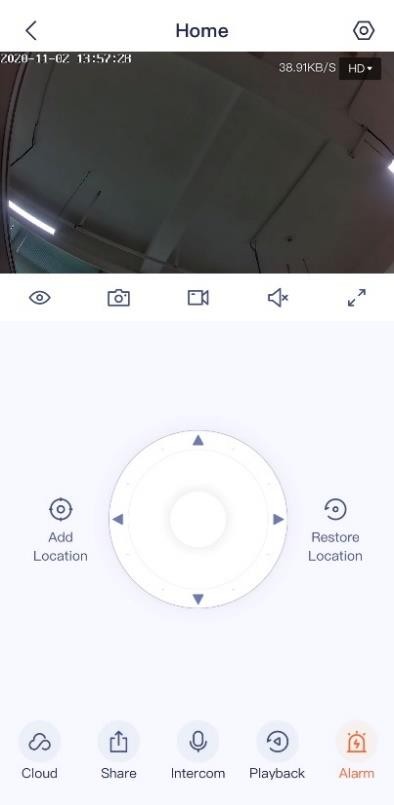
![]() Log in to TDSEE App. Tap the specific device on the home page, which is the camera Home in this example, then you can perform basic settings. If you want to scale up any part of the video, you can double-tap the video and slide, or use the pinch-to-zoom gesture to see the details.
Log in to TDSEE App. Tap the specific device on the home page, which is the camera Home in this example, then you can perform basic settings. If you want to scale up any part of the video, you can double-tap the video and slide, or use the pinch-to-zoom gesture to see the details.


Parameter description
Parameter Description
Tap it to shutter or unshutter the camera lens. By default, the camera lens is unshuttered.
![]() After the camera lens is shuttered, the video image is disabled. At the same time the camera lens automatically rotates downward to hide itself, and no longer monitors.
After the camera lens is shuttered, the video image is disabled. At the same time the camera lens automatically rotates downward to hide itself, and no longer monitors.
Screenshots.
![]() Tap it to save the screenshot of the current monitoring image to TDSEE Album.
Tap it to save the screenshot of the current monitoring image to TDSEE Album.
Recording.
![]() Tap it to start recording, and tap it again to stop recording. Successful recordings are automatically saved to TDSEE Album.
Tap it to start recording, and tap it again to stop recording. Successful recordings are automatically saved to TDSEE Album.
![]() Tap it to enable or disable the camera audio. By default, the audio is disabled.
Tap it to enable or disable the camera audio. By default, the audio is disabled.
![]() Tap it to view in full screen.
Tap it to view in full screen.
![]() Tap it to add a specified monitoring location for the camera.
Tap it to add a specified monitoring location for the camera.
Location selection panel.
![]() Tap it to adjust the monitoring position of the camera.
Tap it to adjust the monitoring position of the camera.
Parameter Description
Restore location.
Tap it to restore the lens of the camera to the default location.
![]()
![]() If the monitoring position changes owing to external forces, such as manual rotation, in order to ensure that the location recorded by the TDSEE App matches the actual location of the camera, it is recommended to perform the Restore Location operation before selecting the monitoring location of the camera via the TDSEE App.
If the monitoring position changes owing to external forces, such as manual rotation, in order to ensure that the location recorded by the TDSEE App matches the actual location of the camera, it is recommended to perform the Restore Location operation before selecting the monitoring location of the camera via the TDSEE App.
Cloud storage service.
![]() After subscribed the cloud storage service, the device uploads monitoring videos to the cloud, you can watch and edit cloud storage video as required.
After subscribed the cloud storage service, the device uploads monitoring videos to the cloud, you can watch and edit cloud storage video as required.
Share device or add friends.
![]() Tap it to share the device with others for management. Only members with registered account could be shared.
Tap it to share the device with others for management. Only members with registered account could be shared.
![]() Tap it to realize real-time call between TDSEE App and the device (such as camera).
Tap it to realize real-time call between TDSEE App and the device (such as camera).
![]() Tap it to check the video stored in Micro SD card.
Tap it to check the video stored in Micro SD card.
Alarm.
![]() Tap it to set up alarm-related parameters of the camera.
Tap it to set up alarm-related parameters of the camera.
Name your device
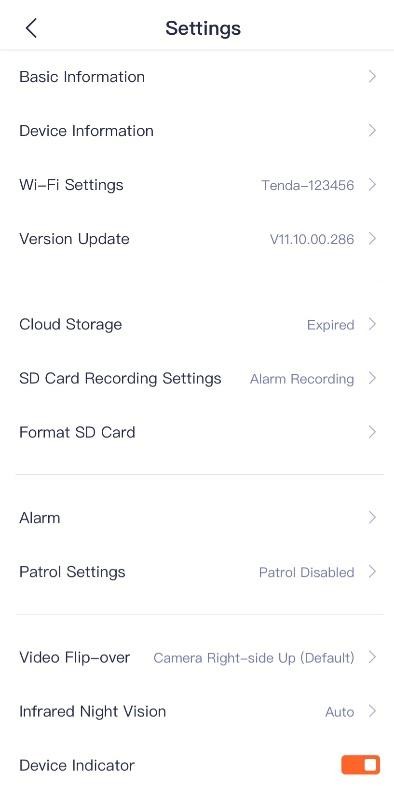
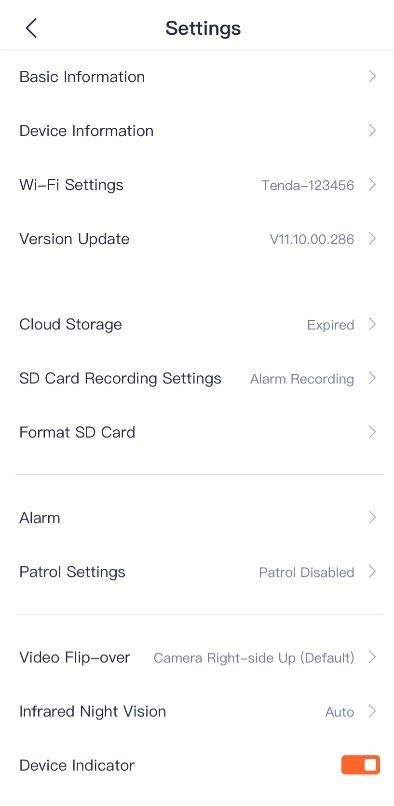
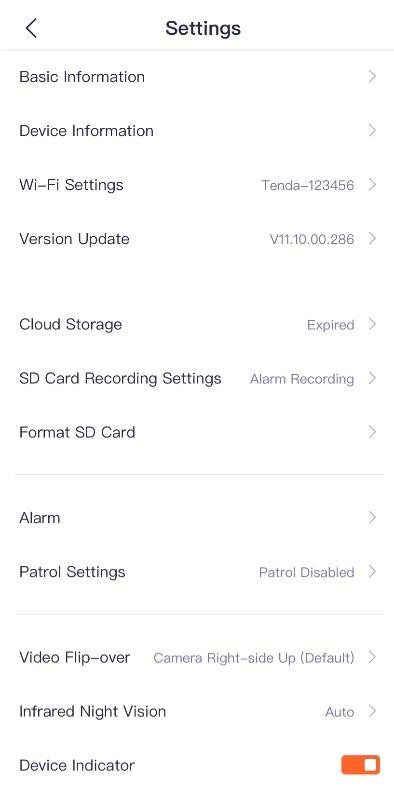
You can name your camera on Settings page.
Step 1 Log in to TDSEE App. Tap the specific device on the home page, which is the camera Home in this example. Tap ![]() in the upper right corner.
in the upper right corner.
Step 2 Tap Basic Information, and name your camera as required, then tap Save.
![]()
![]()


![]()



—-End
Check the basic information of your device
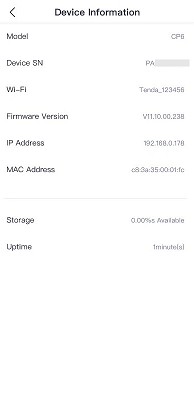
You can check the basic information of the camera, such as the model, device serial number, Wi-Fi name, IP address, MAC address, storage, and uptime.
Step 1 Log in to TDSEE App. Tap the specific device on the home page, which is the camera Home in this example. Tap ![]() in the upper right corner.
in the upper right corner.
Step 2 Tap Device Information, then you can check the relevant parameters of your device.
![]()
![]()


![]()


—-End
Modify the Wi-Fi settings
You can modify information of the Wi-Fi which the device is connected to on the Settings page.
![]()
Before modifying or configuring the Wi-Fi settings of your camera, please ensure that the camera status is online.
Scenario: The current monitoring videos of the camera is not smooth, so you want to change a Wi-Fi network to which the camera is connected.
Requirement: Ensure that the camera can monitor normally and the monitoring video is smooth.
Solution: You need to connect to another 2.4 GHz Wi-Fi network. Assume that the Wi-Fi name is Tom, and the Wi-Fi password is Tom12345. The Wi-Fi Settings
function can meet this requirement.
Step 1 Log in to TDSEE App. Tap the specific device on the home page, which is the camera Home in this example. Tap ![]() in the upper right corner.
in the upper right corner.
Step 2 Tap Wi-Fi Settings, then select a new Wi-Fi network, which is Tom in this example.
![]()
![]()
![]()



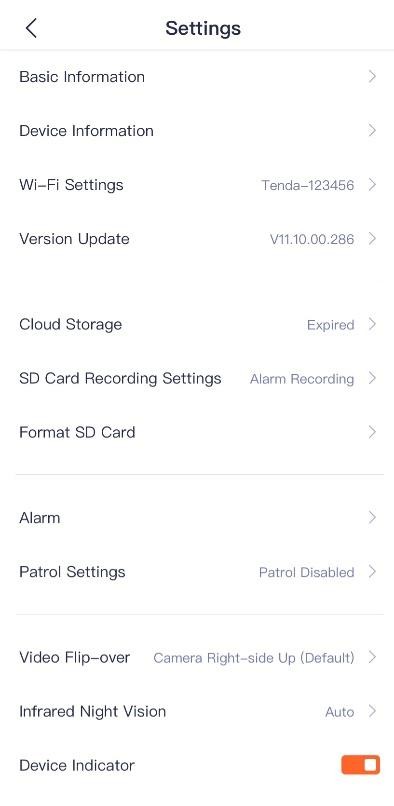


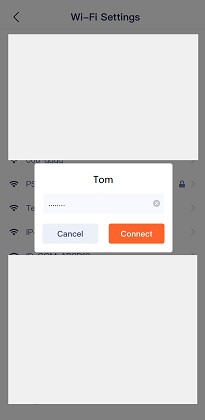
Step 3 Enter the Wi-Fi password of the Wi-Fi network, which is Tom12345 in this example, and tap Connect . Wait for 1 to 2 minutes till it can monitor normally after the camera successfully establish the connection again.

—-End
Upgrade device software
Tenda is devoted to constantly improving and innovating products to provide users with a smoother online experience. The device can achieve new functions or more stable performance through software upgrades.
Please upgrade the software if a new App version is detected.
![]()
During upgrade, do not cut off the power or disconnect the device from the internet, otherwise the upgrading may fail and damage the device.
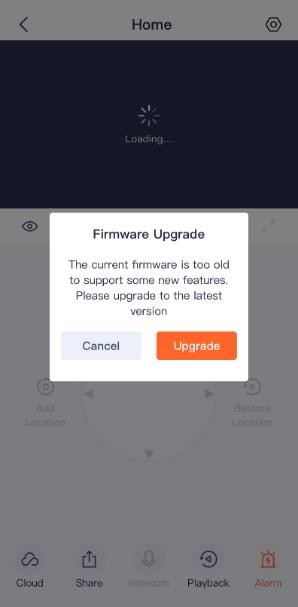
Step 1 Log in to TDSEE App. Tap the specific device on the home page, which is the camera Home in this example. The software upgrade windows will pops up if the new App version is detected. Tap Upgrade .
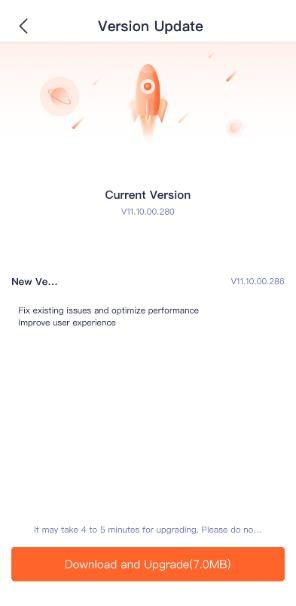
Step 2 Tap Download and Upgrade , the TDSEE App will download the firmware and upgrade automatically.
![]()
![]()



—-End
Cloud
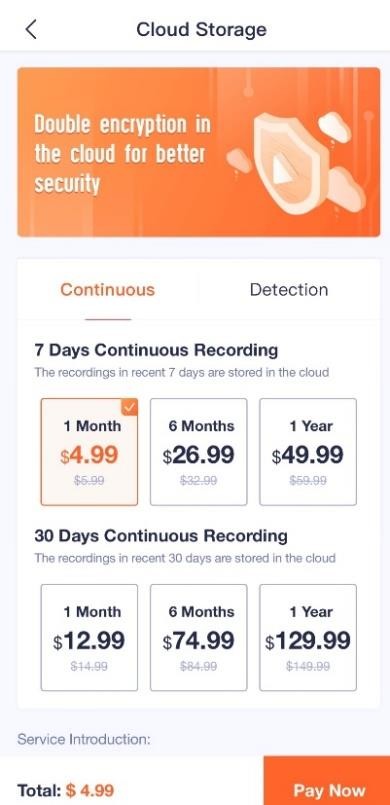
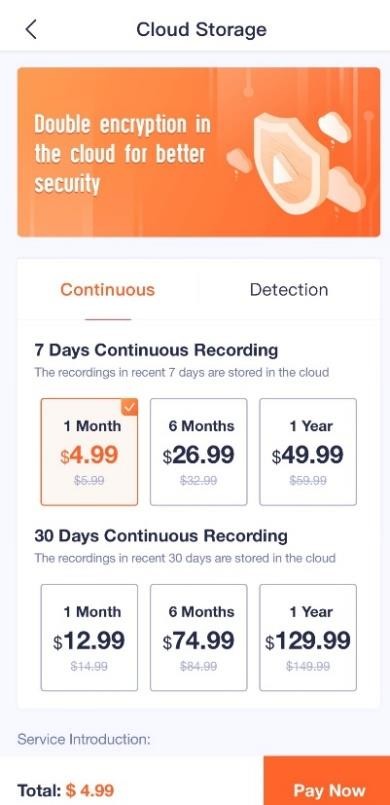
After you subscribe to the cloud storage service, the monitoring video of the device will be stored on the cloud. You can check the video at any time. Cloud storage service description:
− Cloud storage service is only applicable for Tenda device.
− Network bandwidth shall not be lower than 4 M.
− The current subscribed cloud storage service is only applicable for the current device.
− The cloud storage service types of the camera include continuous recording and detection recording.
− You can enjoy free cloud storage service (7-days loop detection recording) for 3 months upon the first activation.
Subscribe to the cloud storage service
Method 1 (Recommended)
Step 1 Log in to TDSEE App. Tap the specific device on the home page, which is the camera Home in this example. Tap ![]() in the lower left corner.
in the lower left corner.
Step 2 Follow the on-screen instructions to subscribe to the cloud storage service package. After subscribed successfully, the service is activated immediately.
![]()
![]()



—-End
Method 2
Step 1 Log in to TDSEE App. Tap the specific device on the home page, which is the camera Home in this example. Tap ![]() in the upper right corner.
in the upper right corner.
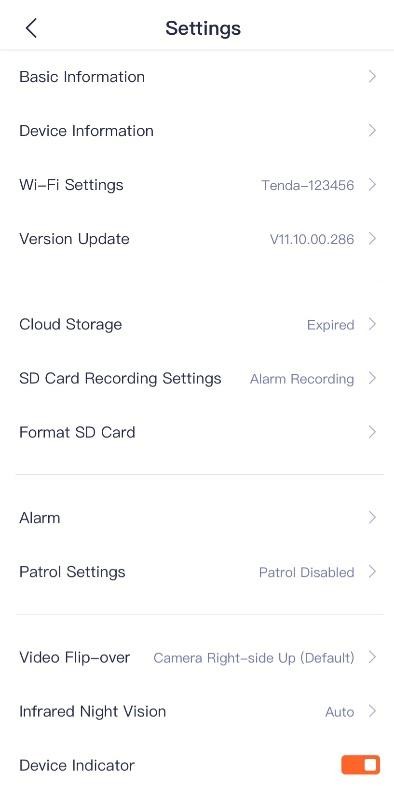
Step 2 Tap Cloud Storage, and follow the on-screen instructions to subscribe to the cloud storage service package. After subscribed successfully, the service is activated immediately.
![]()
![]()


![]()


—-End
Check and edit cloud storage video
Method 1 (Recommended)
Step 1 Log in to TDSEE App. Tap the specific device on the home page, which is the camera Home in this example. Tap ![]() in the lower left corner.
in the lower left corner.
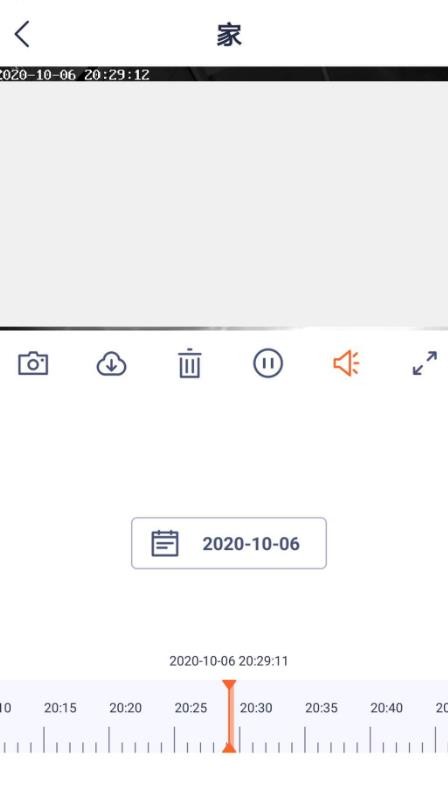
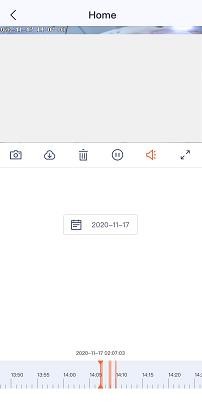
Step 2 You can check and edit the video according to the actual conditions.
![]()
![]()



—-End
Cloud video parameter description
Parameter Description
Screenshots.
![]() Tap it to save the screenshot of the current monitoring image to TDSEE Album.
Tap it to save the screenshot of the current monitoring image to TDSEE Album.
Download.
![]() Tap it to download the specific video to TDSEE Album.
Tap it to download the specific video to TDSEE Album.
![]()
![]()
![]()
![]()
![]()
Recording video timeline
Tap it to delete the specific cloud storage video. Deleted videos cannot be restored.
Tap it to pause the video. Tap it to play the video.
Tap it to enable or disable the camera audio. Tap it to view in full screen.
Orange means detection recording. Blue means continuous recording. Gray
means no recording.
![]()
You can choose a specific time on the timeline.
Method 2
Step 1 Log in to TDSEE App. Tap the specific device on the home page, which is the camera Home in this example. Tap ![]() in the upper right corner.
in the upper right corner.
Step 2 Tap Cloud Storage > My Cloud Storage, then you can check and edit the video according to the actual conditions. The relevant parameters refer to Cloud video parameter description.
![]()
![]()

![]()
![]()




—-End
Method 3
![]()
If your device is shared by your friends, this method is not applicable.
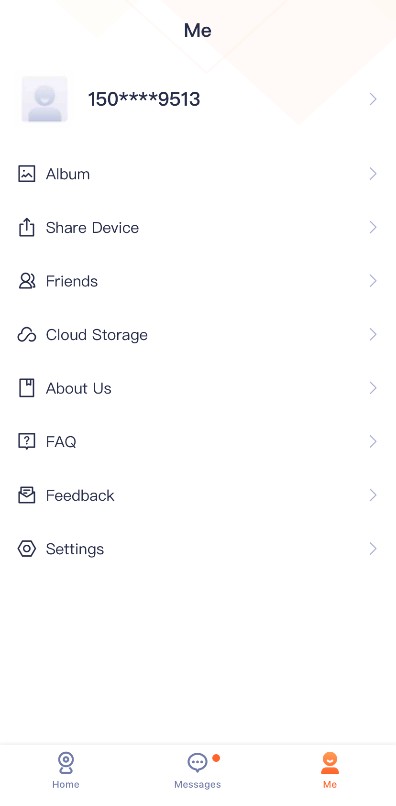
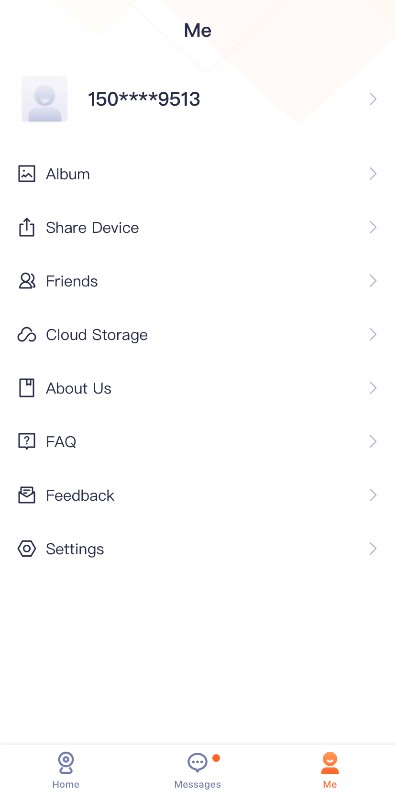
Step 1 Log in to TDSEE App. Tap Me > Cloud Storage.
Step 2 Select a device of which you want to check the cloud storage video, which is Home in this example. Then you can check and edit the video according to the actual conditions. The relevant parameters refer to Cloud video parameter description.
![]()
![]()
![]()




—-End
Disable the cloud storage service
After the cloud storage service function is disabled, the device will not upload videos to the cloud. Please operate carefully.
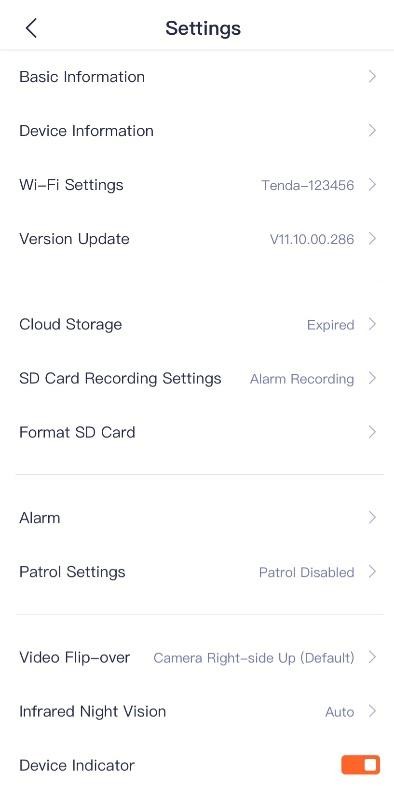
Step 1 Log in to TDSEE App. Tap the specific device on the home page, which is the camera Home in this example. Tap ![]() in the upper right corner.
in the upper right corner.
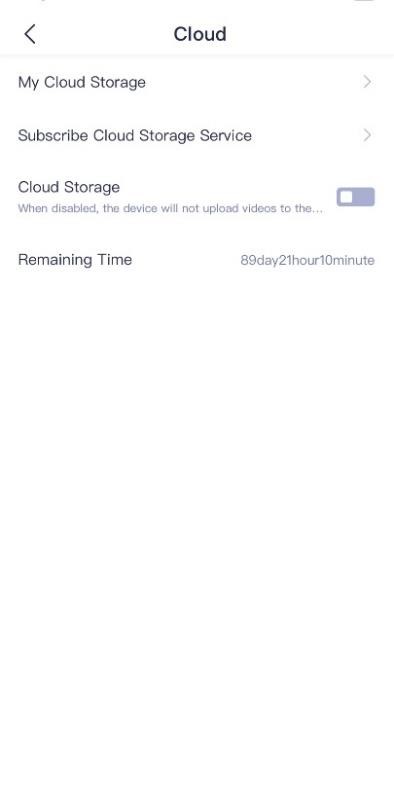
![]() Step 2 Tap Cloud Storage, disable this function, then set the Cloud Storage from to
Step 2 Tap Cloud Storage, disable this function, then set the Cloud Storage from to ![]() .
.
![]()
![]()


![]()


—-End
Check remaining time of cloud storage
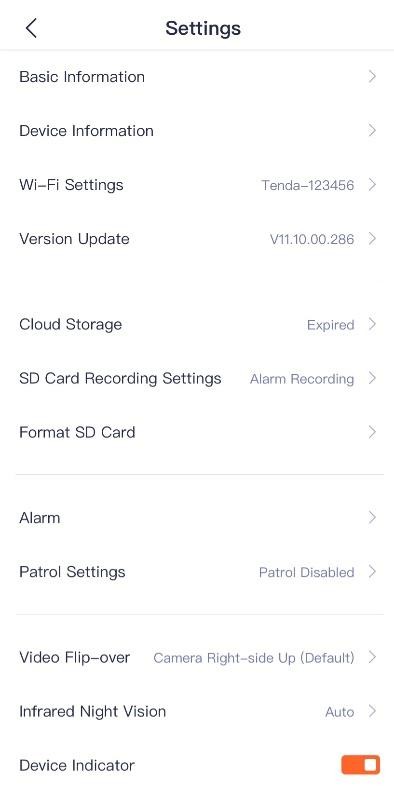
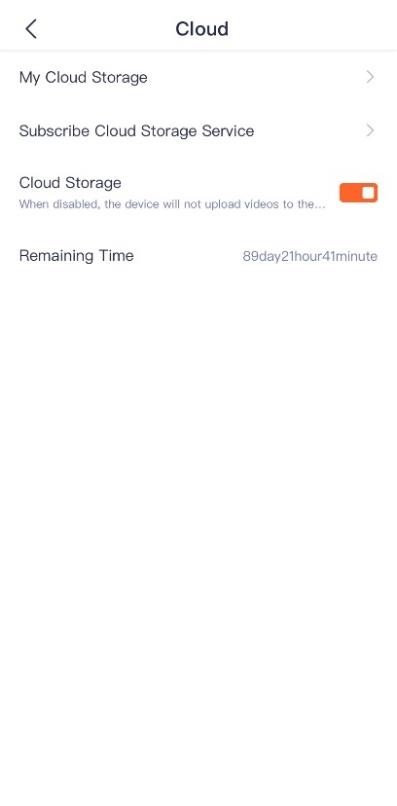
Step 1 Log in to TDSEE App. Tap the specific device on the home page, which is the camera Home in this example. Tap ![]() in the upper right corner.
in the upper right corner.
Step 2 Tap Cloud Storage to check remaining time of cloud storage service.
![]()
![]()


![]()


—-End
Check my order
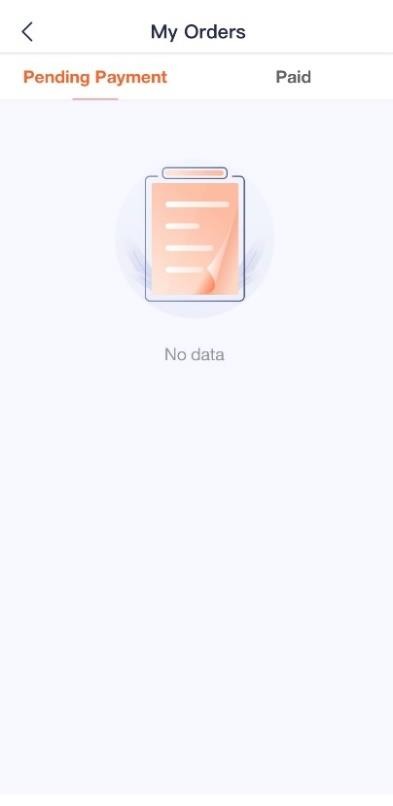
You can check the order status of cloud storage service, including orders pending payment and paid orders.
Step 1 Log in to TDSEE App. Tap Me > Cloud Storage.
Step 2 Tap My Order in the upper right corner to check the order status of cloud storage service.
![]()
![]()

![]()
![]()



—-End
