Swann Security VMS Download Guide,This CMS software provides as well as enables the user to access the surveillance camera along with different functions as well as to operate and control the devices through a PC or smartphone. The application is available for free to download on Windows, Mac, Android, and iOS operating systems.
Swann Security VMS access for V8 units
NOTE 1: This guide is for the following recorders with a similar interface: DVRx-4480V, 4580V, 4680, 4780V, 4ch 4980V, 8 and 16ch 4980, 5580, 5680 and NVRx-8580 and 8780. It is NOT suitable for standalone cloud storage cameras.
NOTE 2: Support for Swann Security VMS is limited to installation and P2P connection setup only. Advanced network setup and port forwarding are not supported.
Minimum System Requirements:
- Windows 10 or later
- Intel 9th Gen or AMD Ryzen Quad Core or greater at 3Ghz or higher
- 16GB RAM (32GB or greater recommended)
- Dedicated Graphics Card
- 500GB storage (for software and clips, larger storage may be needed for local recording to PC)
- 4Gbps upload (8Gbps or greater upload recommended)
Read Next :
Installing the software:
Download Swann Security VMS from the links below based on your operating system (OS) and install as per usual. Click here to check the file version history.
- Windows – download the VMS version 2.7.84 software HERE then proceed below
- Mac – download the VMS version 2.7.85 software HERE then once installed, click HERE
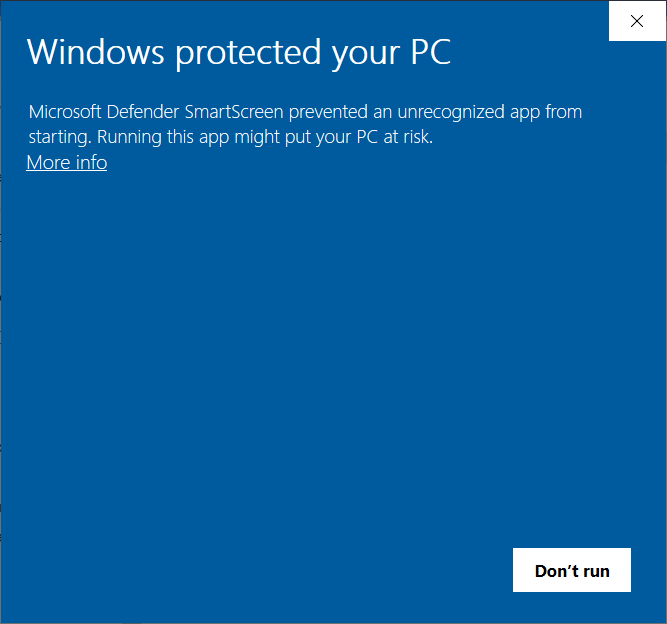
If this prompt appears, click More Info then Run Anyway then continue with the installation.

Once installed, open the Swann Security program and follow the steps below:
- Set a password – to protect you from anyone who wants to view your unit on your computer.

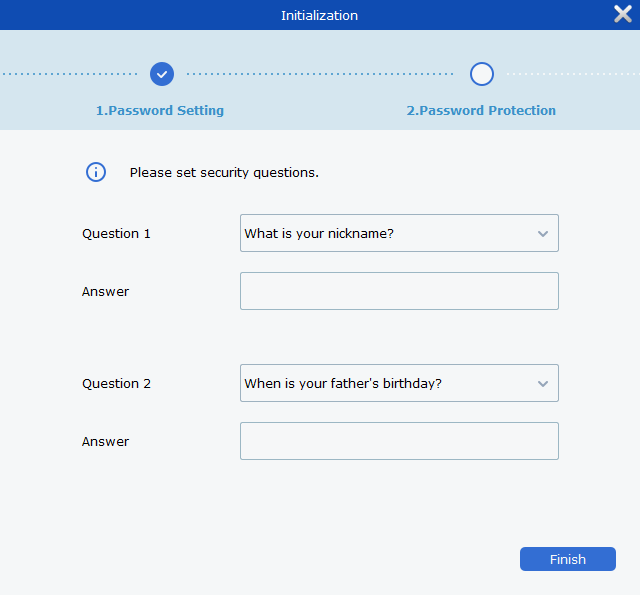
- Set a security question – will be used when you forgot the password your set.
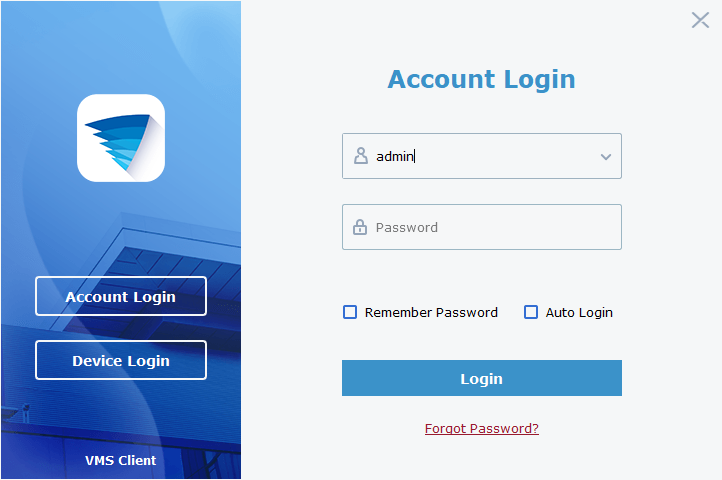
- Login – just type in the password you’ve set earlier. Username is admin.
- Add device
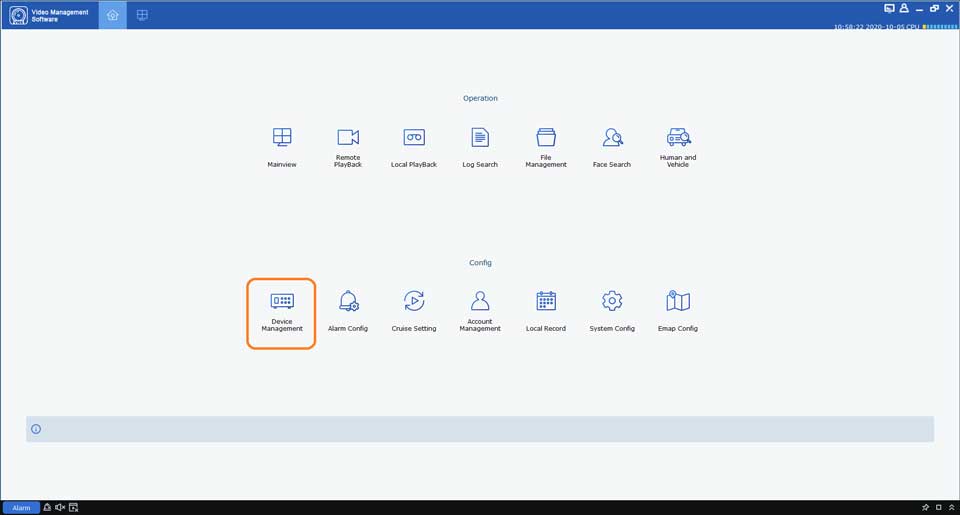
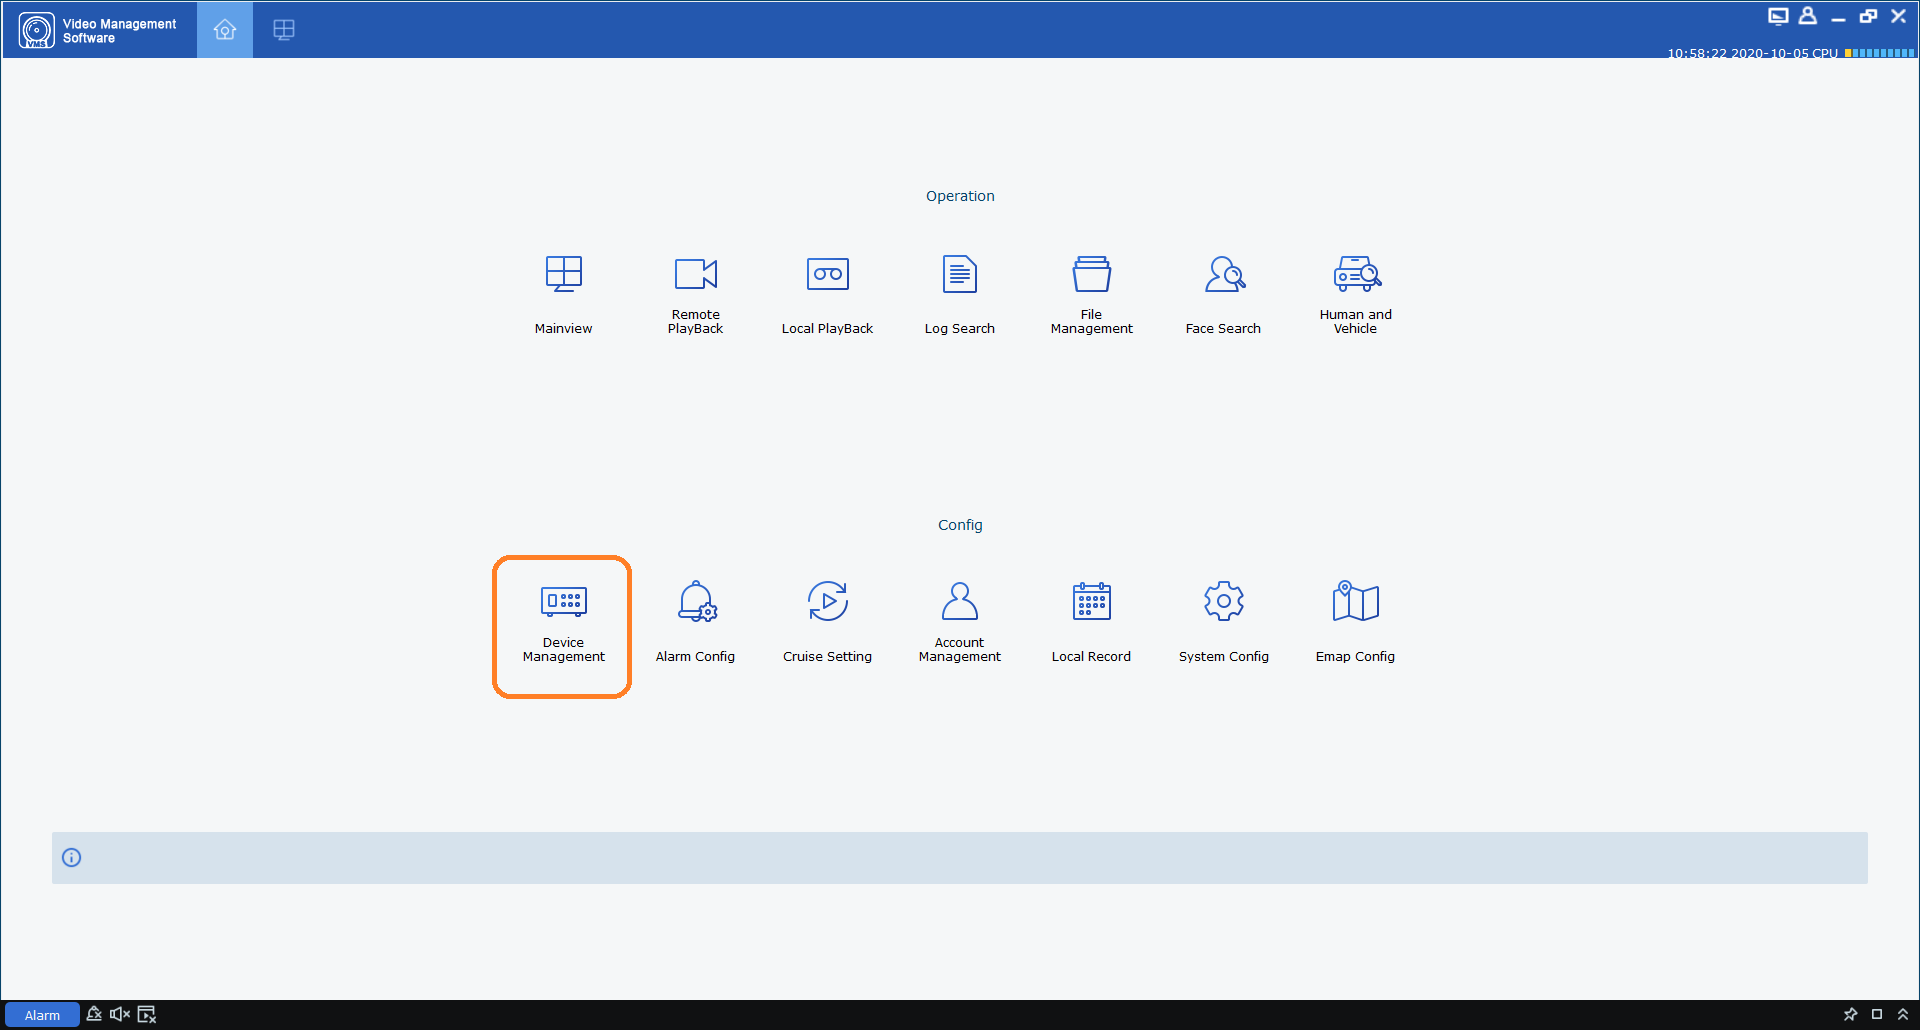
- Click the Home icon (top-left) then choose Device Management
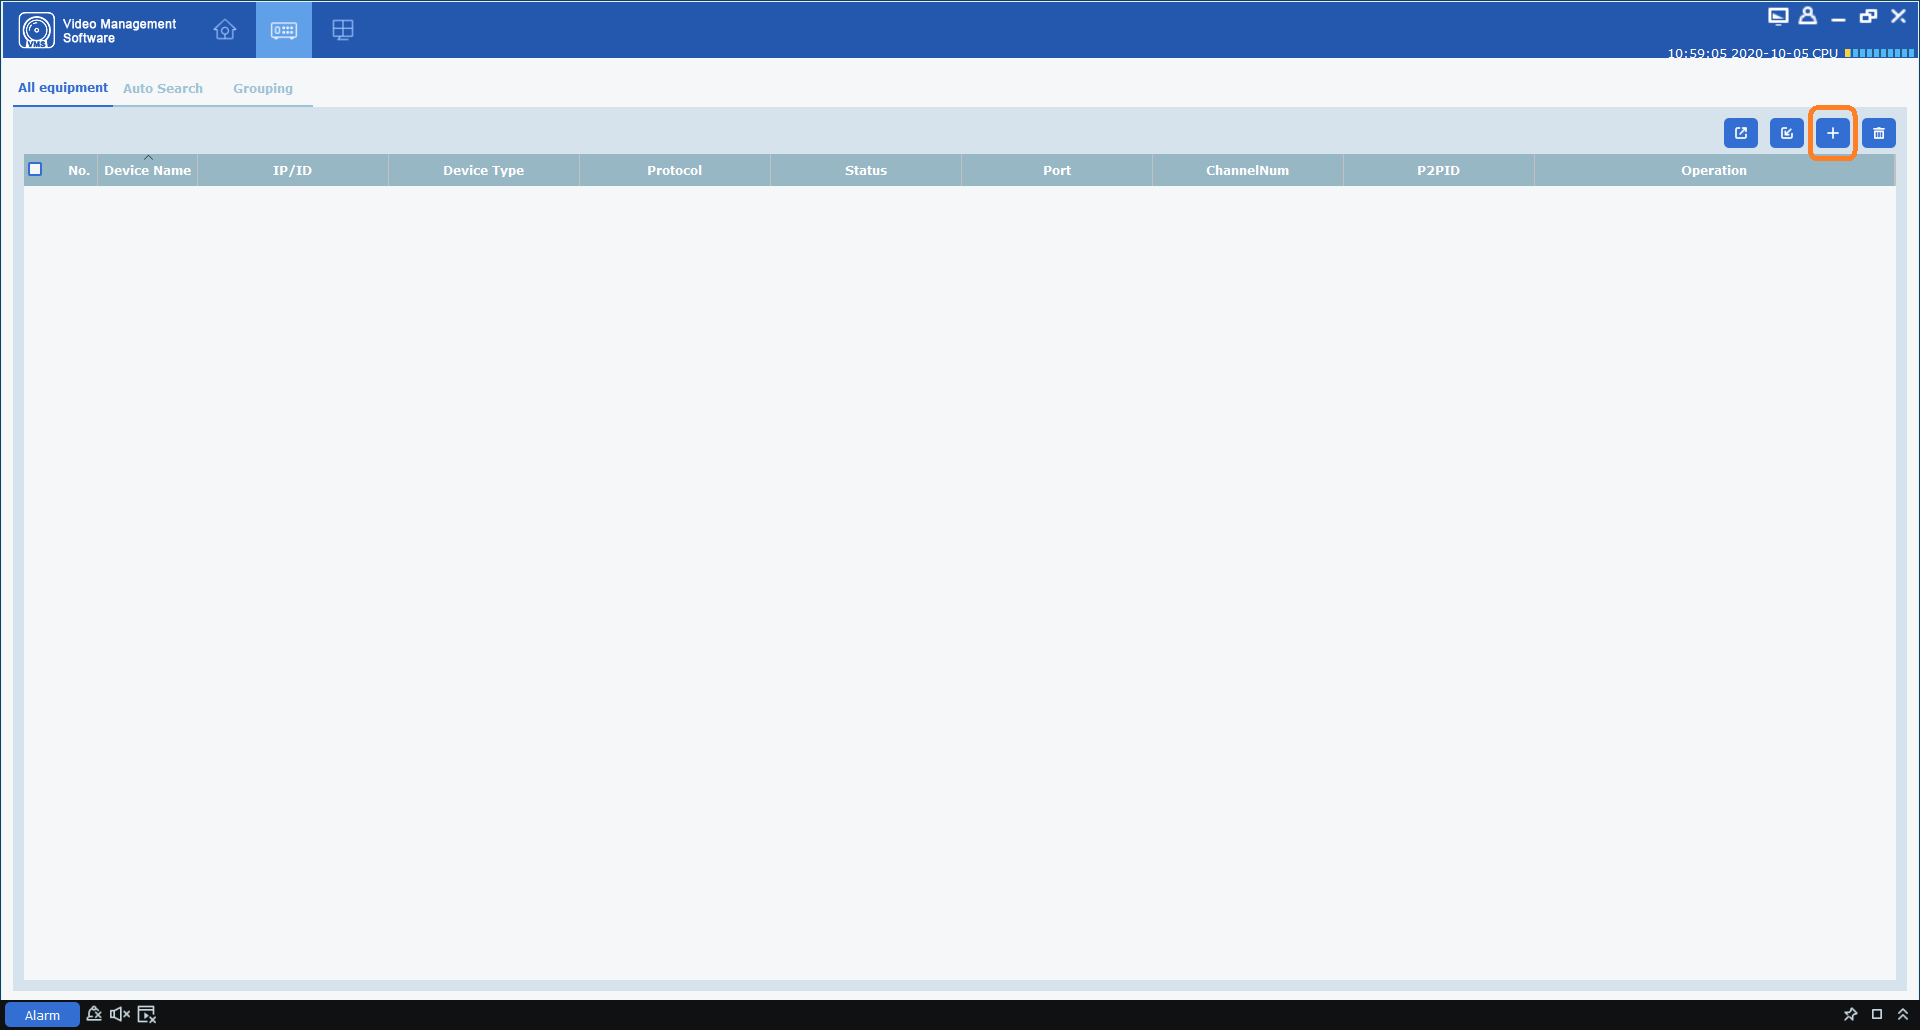
- Click the plus (+) icon (top-right)
- Enter your recorder’s details:
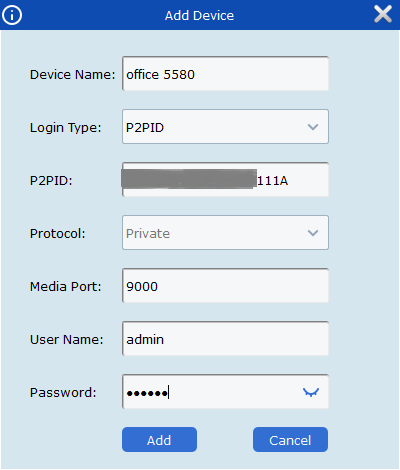
- Device Name: <name anything you like>
- Login Type: P2PID
- P2PID: <20-character alphanumeric code; found at the top of your recorder>
- Protocol: Private
- Media Port: 9000
- User Name: <recorder’s admin username; default is admin>
- Password: <recorder’s password>
- Click Add
- Click the Home icon (top-left) then choose Device Management
- Status – Online – under Status column, a green box will appear to indicate that the recorder is online. If not, double check the connection to your internet or the username and password you entered.

- Stream – click the Mainview icon (monitor with 4-boxes) at the top or when you click the Home icon.
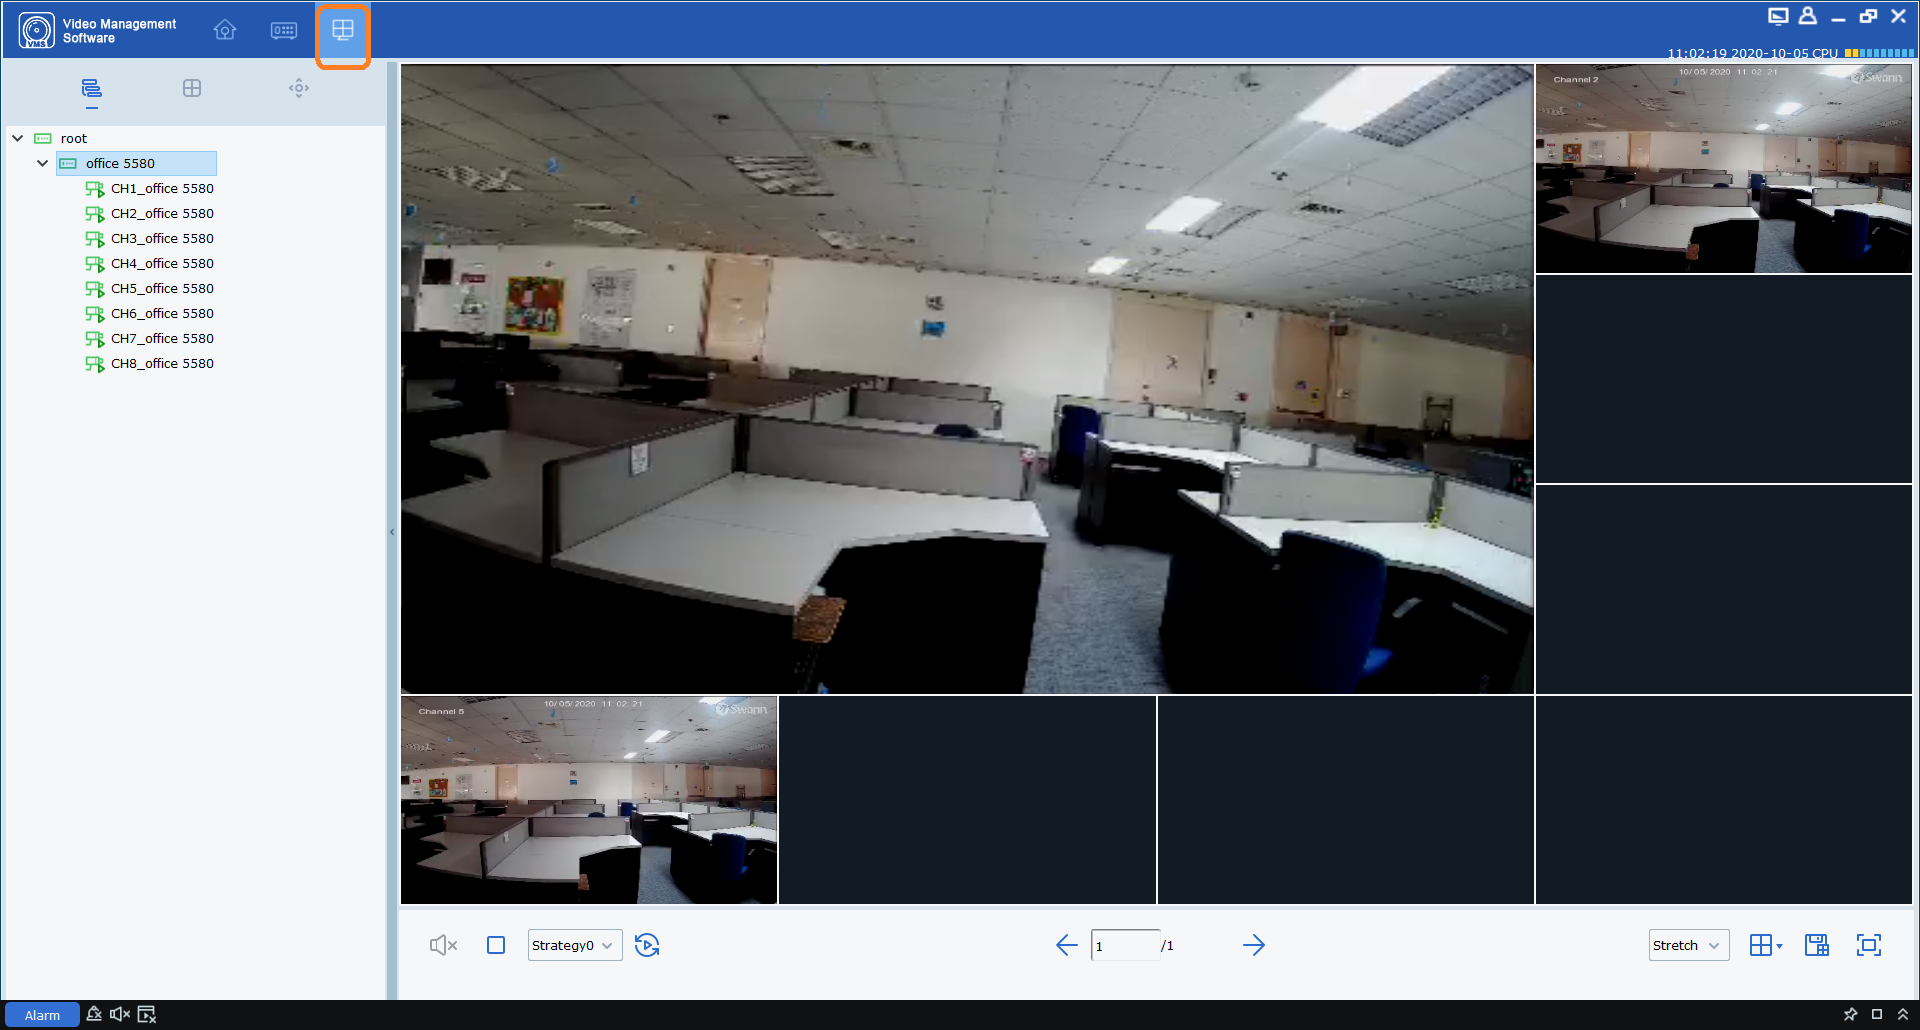
- Click the arrow beside ‘root’ to expand
- Once you see your device, either click and drag the device name to any boxes at the right OR click and drag a specific camera to load.
Swann Security VMX access (Windows only)
NOTE 1: This guide is for the following recorders with a similar interface: DVRx-4680, 4680XN, 5680X, 5680XN. It is NOT suitable for standalone cloud storage cameras.
NOTE 2: Support for Swann Security VMX is limited to installation and P2P connection setup only. Advanced network setup and port forwarding are not supported.
Minimum System Requirements:
- Windows 10 or later
- Intel 9th Gen or AMD Ryzen Quad Core or greater at 3Ghz or higher
- 16GB RAM (32GB or greater recommended)
- Dedicated Graphics Card
- 500GB storage (for software and clips, larger storage may be needed for local recording to PC)
- 4Gbps upload (8Gbps or greater upload recommended)
Installing the software:
Download the Swann Security VMX software for Windows here and install the app as per usual and then follow the steps below to configure and add your device or watch this clip for a complete guide. Click here to check the file version history.
Once installed, open the Swann Security VMX program and follow the steps below:
- Login – default username and password is admin & admin then click Sign in
- Add device
- For remote access setup (viewing your cameras when you are not at the location), click HERE
- For local access setup (viewing your cameras when your computer is at the same network as the recorder), it can be added automatically or choose Add devices manually then click OK. The next prompt will appear, click Yes then continue to the next step


- For remote access setup (viewing your cameras when you are not at the location), click HERE
- Once logged in, the software interface will open.

- Add device
- Click the Device Manager icon (1). Your Swann device can be added automatically using the IPV4/IPV6 Search option if the PC running the VMX software is on the same network. Note: To manually add your Swann device, proceed to step 4 below.

- Select the discovered device and click Add and then Save.

- The device will added to the application but will remain disconnected. Select the newly added device again (6) and click on the Edit (7) option to update the settings. Give friendly to your Swann device (8) and input the correct credentials (8). Click OK.

- Click Manual Add (9) and enter your recorder’s details:

- Device Name: <friendly name of you device>
- Login Type: IP
- IP: IP address of you device (can be found on your router or network switch management interface)
- Media Port: 9000
- User Name: <recorder’s admin username; default is admin>
- Password: <recorder’s password>
- Click Save And Continue
- Click the Device Manager icon (1). Your Swann device can be added automatically using the IPV4/IPV6 Search option if the PC running the VMX software is on the same network. Note: To manually add your Swann device, proceed to step 4 below.
- Confirm Status – under the Connect column, a Connected status will appear to indicate that the recorder is online. If not, double check the connection to your internet or the username and password you entered.

- Stream – click the Home icon at the top and then select Live View.

- Select the desired View (14) based on the number of cameras you have or your preferred layout.

- To view a specific camera on the list (15) to a window on the live view area, click and drag the channel name and drop into the desired area (A, B, C, D, E, or F).
- Or select the desired window on the live view area and then double click the channel name (15) to load the camera.
—————–
Remote access setup
- Your recorder must be paired to a Swann Security account first
- If it isn’t yet, you may read this article first the continue below once done: Pair your Recorder on Swann Security app
- In the Home screen, click the Device Manager icon

- Click the Manual Add button at the bottom
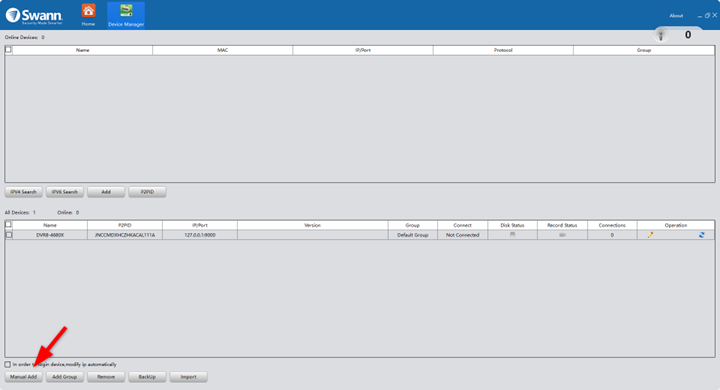
- In the Add Device screen, read the following:
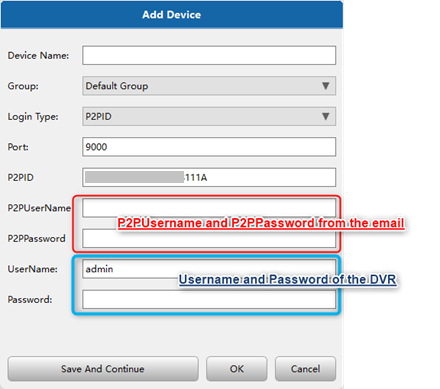
- Device Name: Enter a name the device
- Login Type: set it to P2PID
- Port: 9000
- P2PID: Enter the UID of the DVR
- Check your email and enter the credentials in the P2PUserName and P2PPassword fields
- UserName: Enter the DVR’s username
- Password: Enter the DVR’s password
Click the OK button.
If you don’t have the P2PUserName and P2PPassword, contact our Technical Support and make sure to provide your recorder’s UID or MAC address.
HomeSafe View for Windows
NOTE: This guide is for the following recorders : DVR-1590, 1600, 4575/4580/4590, 4780, 4980, NVR-7450
The new HomeSafe View software is used for our new range of hybrid HD-over-Coax recorders.
Use the Wizard in the Help menu for a walkthrough of adding a recorder.
Link to the software user guide
NB: The password requested when you run the software the second and subsequent times is <Blank>, unless you change this in the software. The first login screen below is for the software, not the recorder. This is, therefore, not the username/password combination you use to access the recorder itself.
Password Reset using Swann Security VMS software for Windows
NOTE: This guide is for the following recorders : DVR-4480G, 4480RN, 4480V, 4580G, 4580RN, 4580V, 4680, 4680RN, 4680A, 4685, 4685RN, 4780V, 4980, 5580, 5580A, 5580G, 5580G2, 5580RN, 5580RU, 5680, 5680A, 5680RN, NVR-8580, 8580RN, 8780, 8780RN, NVW-650, 800
NOTE2: If you are trying to reset the password for your Swann Security account, please proceed to this article instead: Password Reset for Swann Security Account
NOTE3: If you still have access to your Swann recorder via the Swann Security app, please click on this article instead: Recover your Swann Security DVR, NVR, or NVW “Admin” password using the Swann Security app
This guide is intended for customers to reset their Swann recorder when they have forgotten their password using the Swann Security VMS PC software.
Acquiring the reset code via Swann Security VMS software
The reset code on new recorders is acquired primarily by using the relevant client software on a computer. Other methods exist, but they usually require a level of networking knowledge over what we expect customers need to operate their system.
The reset code itself is a unique 12 character string that is generated by the unique hardware identifier of the network interface of the device, known as the MAC address.
Excerpt from the Hardware Quick Set Up Guide
NOTE: NVW units doesn’t need to be hardwired to obtain the MAC Address
To find your recorder’s reset code, connect the recorder to your router (if you have not yet done so) and install and run the software on your computer connected to the same router.
Installing the software
Download the software
Download the Swann Security VMS software on your Windows computer and install it.
If this prompt appears, click More Info then Run Anyway then continue with the installation.

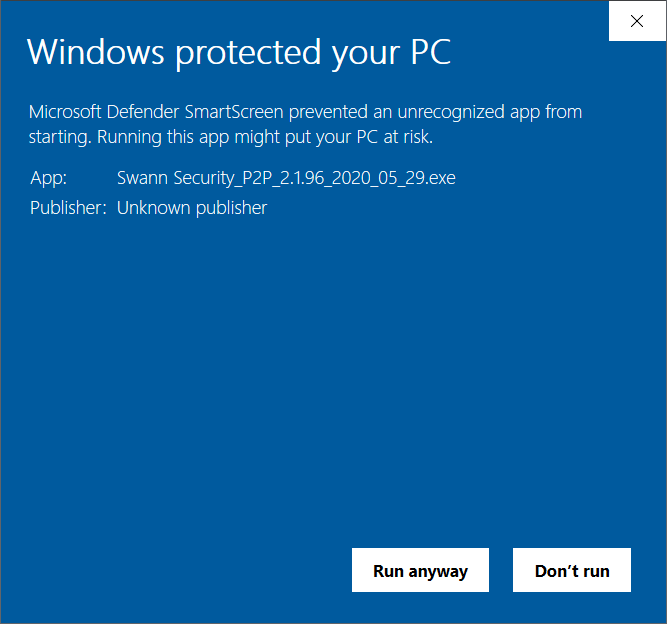
Once installed, open the Swann Security program and follow the steps below:
- Set a password – to protect you from anyone who wants to view your unit on your computer.
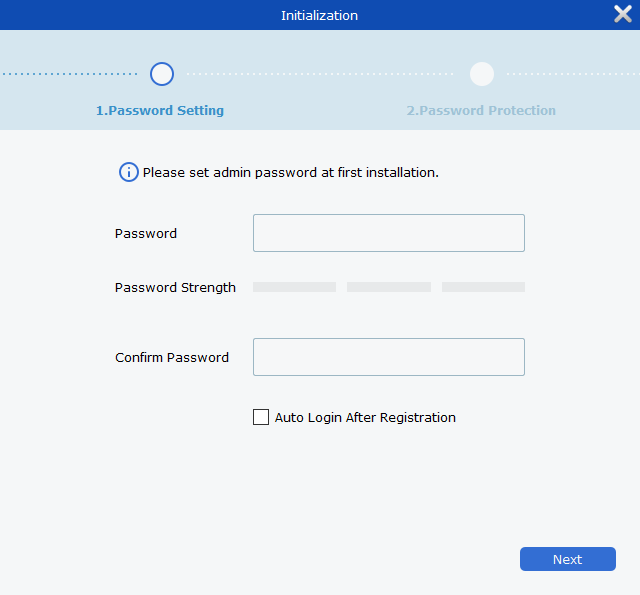
- Set a security question – will be used when you forgot the password your set.
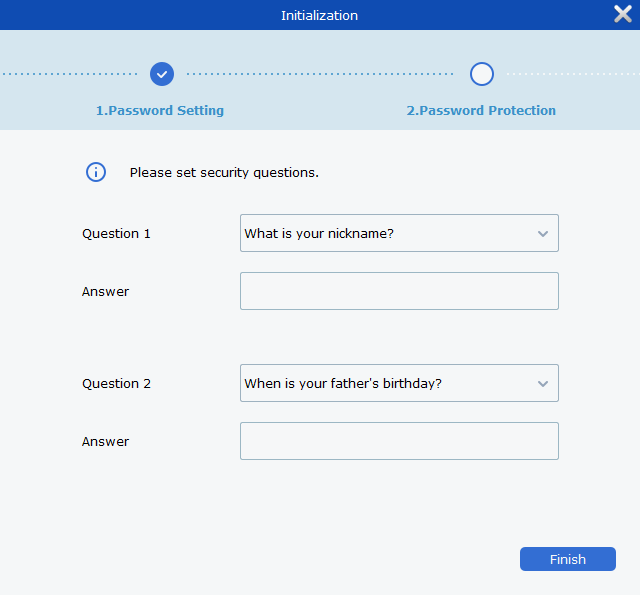
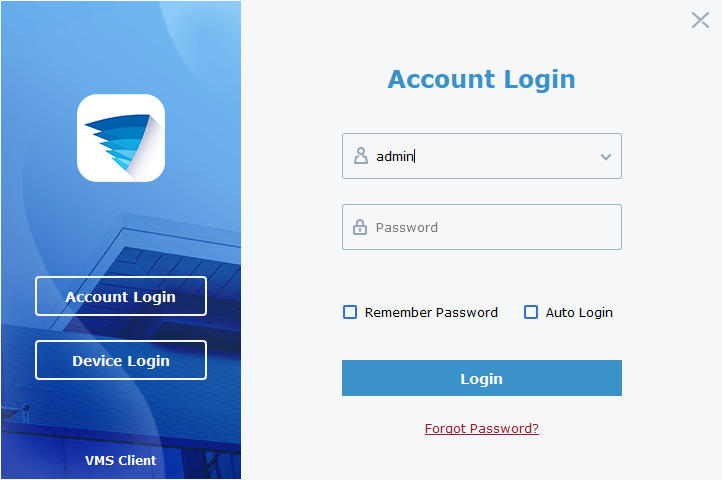
- Login – just type in the password you’ve set earlier. Username is admin.
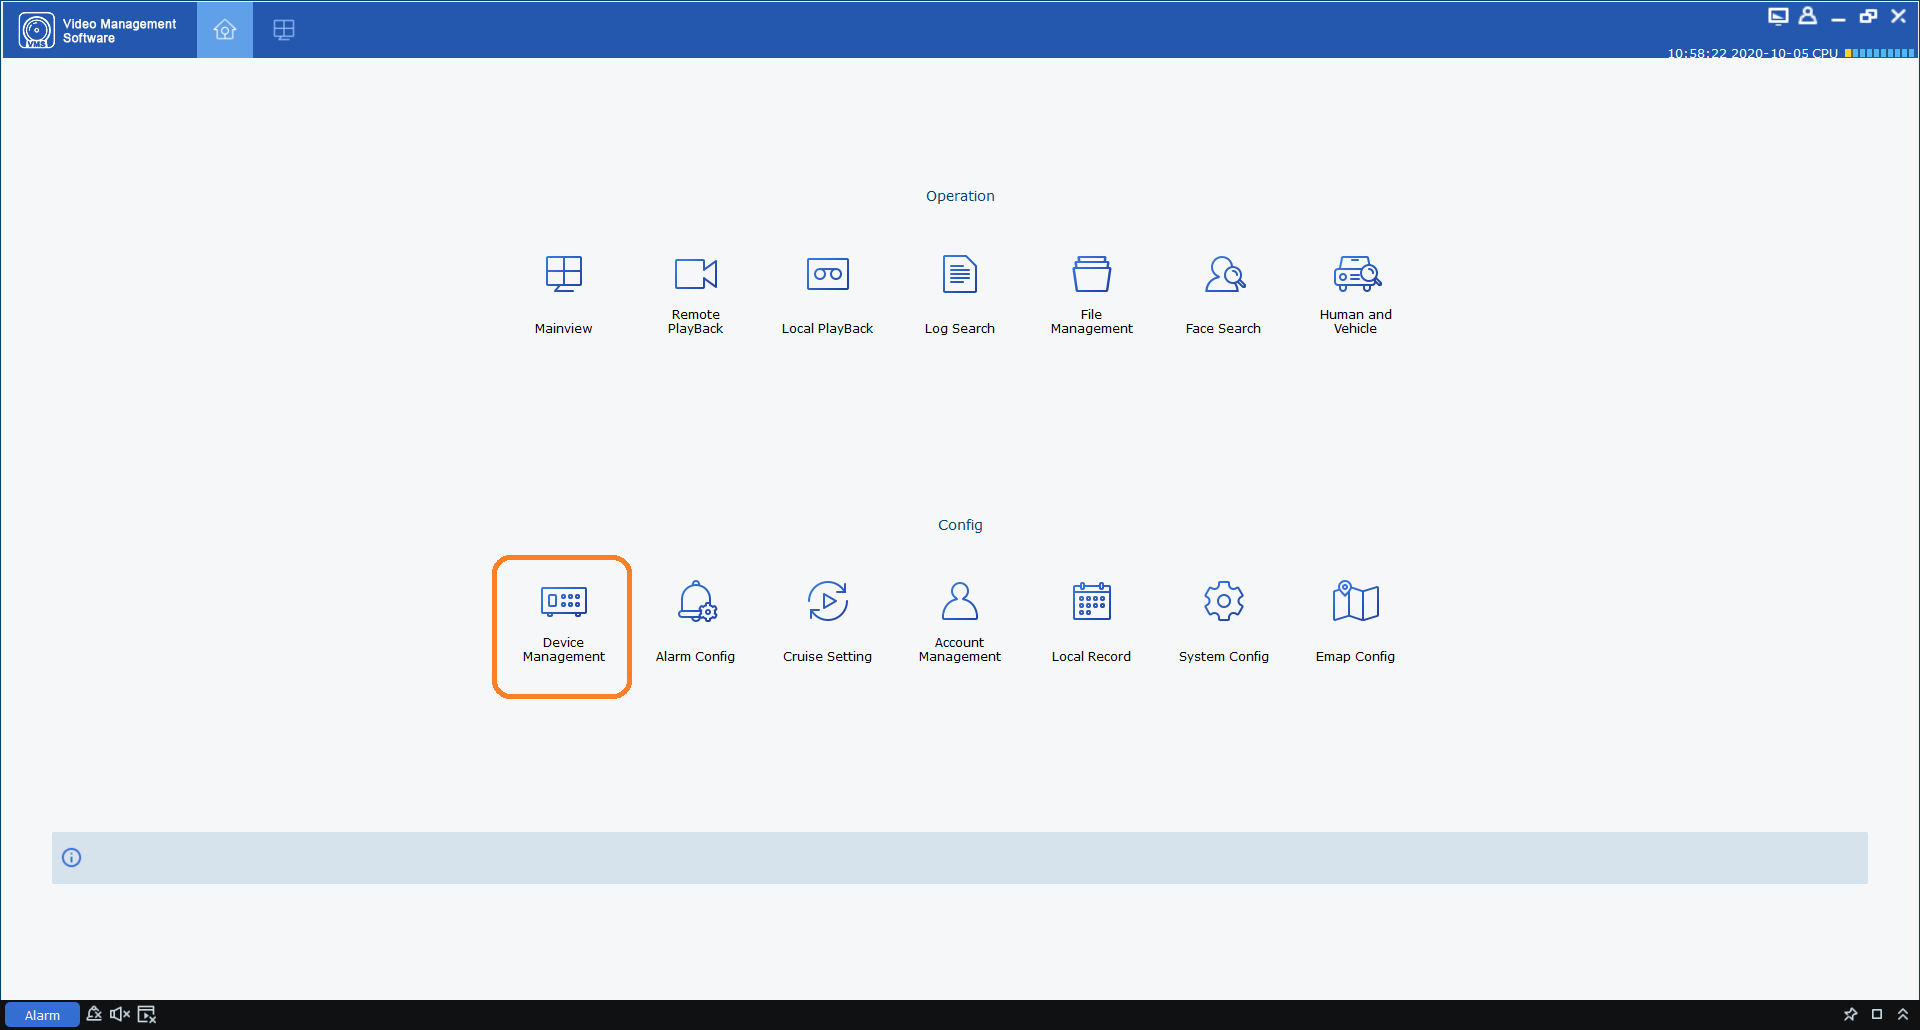
- Search for device
- Click the Home icon (top-left) then choose Device Management
- Click the Auto Search (top) to get the MAC address of your recorder. Copy down any MAC address starting with the characters ’00-23-63′ or ‘BC-51-FE’ first, then any others. Replace the dashes (-) with colons (:).
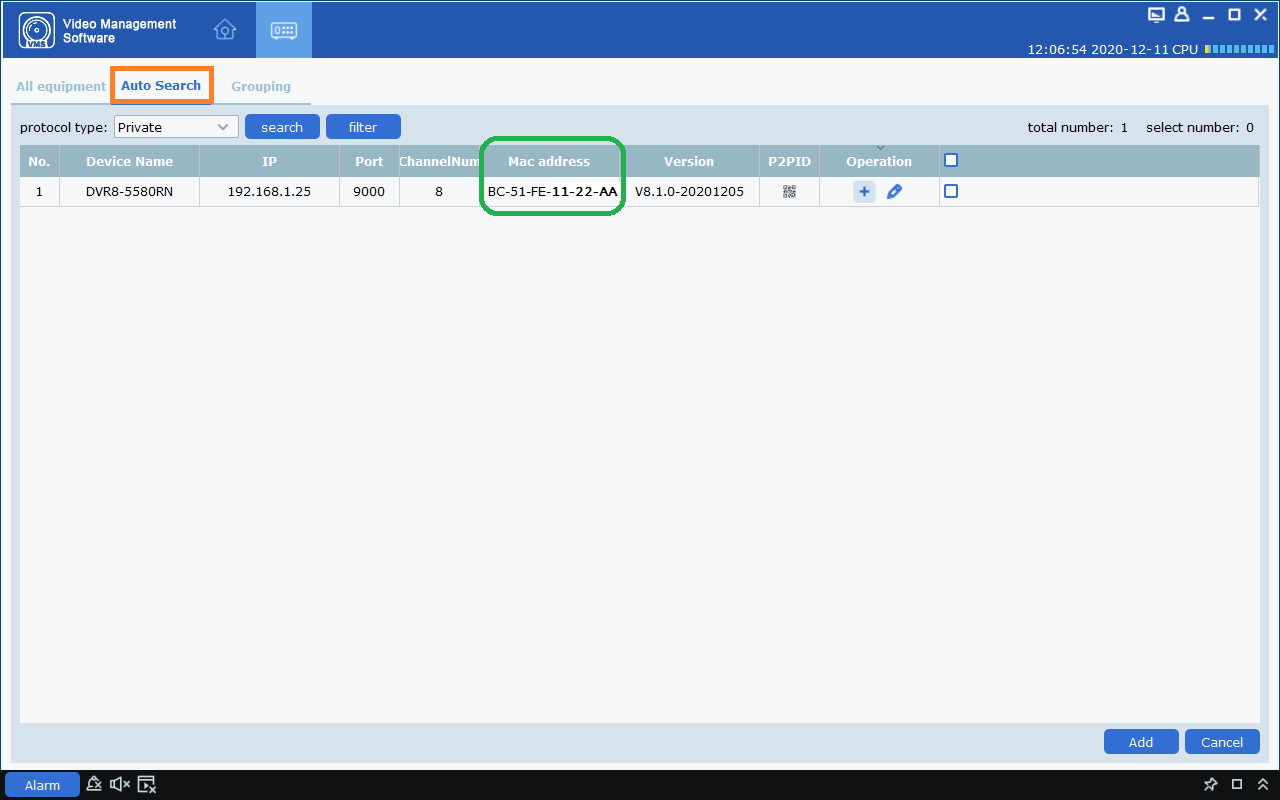
- Click the Home icon (top-left) then choose Device Management
Entering the reset code
You now use what you wrote down in the previous step to initiate a password reset on the recorder. On the Login interface, click Forgot Password.
On the recorder:
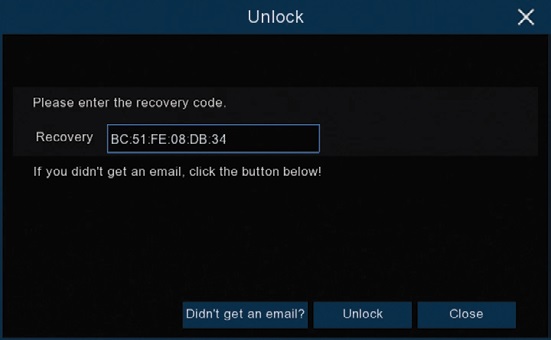
The reset code needs to be entered after clicking Forgot Password. Enter it in the Recovery field. Letters are in UPPERCASE with the colons (e.g BC:51:FE:11:22:33).
Click Unlock once done. A message will appear on-screen stating that your password has been reset. Click OK to continue.
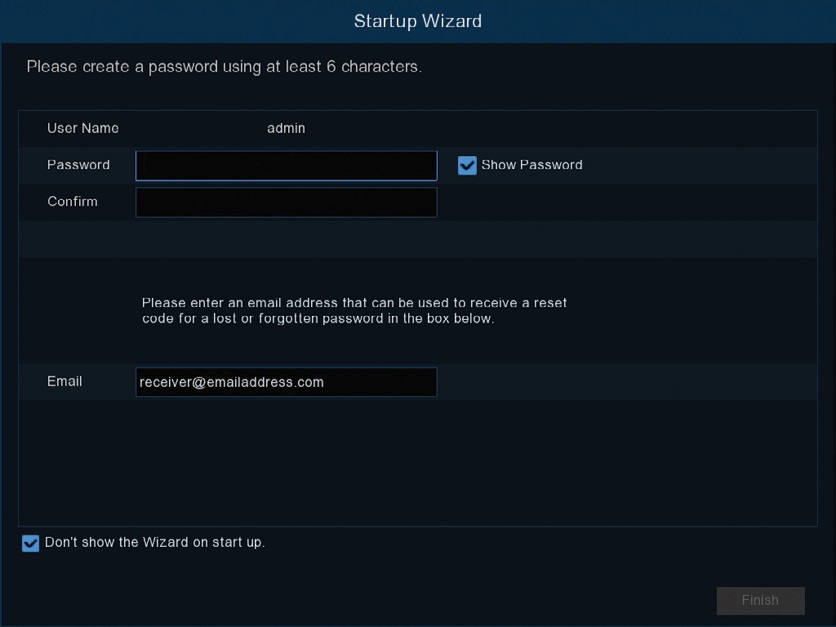
Once this window appears, enter your preferred password (minimum of 6 characters).
You must enter an email address below so the next time you need to reset your password, the MAC address will be sent to your email; otherwise, you can write down your MAC address somewhere safe.
Click FINISH once done.
Notes
You will need to re-enter a new password every time you reset the password. The reset code CANNOT be used to login to the recorder nor can it be used for remote access.
