Why is my camera offline?
Occasionally you might get a notification that your camera is offline. When your camera can’t be reached by the Swann Security server, you’ll get a notification that it is offline. This could mean your internet is down, the internet connection between your camera and our server is unstable, or your camera has been moved out of range from your Wi-Fi router. Normally, your camera should come back online by itself once your internet access is available again.
If your camera stays offline for an extended period of time, try turning the power to the camera off for 10 seconds before turning it back on. You might also want to make sure that your internet connection is working properly. You can try rebooting your Wi-Fi router to resolve any network connectivity issue.
Why am I getting false motion alerts?
Moving cars, passersby, direct sunlight or reflection may cause unwanted motion detection. To minimize false motion detections, adjust the camera angle slightly downward and ensure the field of view is focused only on the immediate area of concern and excludes as much background activity as possible. If placed outdoors, avoid
locations where your camera will be directly exposed to sunlight during the day. Also, take note of shiny surfaces in the vicinity, such as house or car windows, which can reflect sunlight and trigger your camera’s motion sensor. You can also try lowering the motion detection sensitivity in the camera’s Detection Settings to suit the environment.
Does my camera still record events if the internet/Wi-Fi connection is down?
Your camera will continue to detect and record events to its internal memory or local microSD card even if your home Wi-Fi network or internet connection is experiencing issues, as long as your camera remains powered. Once your camera comes back online, it will attempt to upload any event clips recorded during the downtime to your cloud storage which you can later view in the Playback tab.
If I set my camera’s live view quality to Low, will it also affect the video quality of event recordings?
No, event recordings will always be captured in the highest camera resolution available.
(Continued on the next page)
(For Battery-powered cameras) What can I do to maximize the battery performance on my camera?
Here are some simple and practical tips to get more battery life out of your camera:
How far back can I access my camera’s cloud recordings?
Note: Please check the product specifications to find out if the cloud storage feature is available for your camera. For Wi-Fi cameras with cloud storage, event recordings displayed on the Playback tab will be available for the length of time determined by the cloud subscription plan associated with the camera. To find out more about the cloud storage subscription plans available for your cameras, go to App Menu > Secure+ Plans.
Can I disable the siren so it doesn’t sound when my camera is triggered?
Yes, you can easily set your camera not to activate its built-in siren when an motion is detected. Go to Devices tab > Select the camera > Detection Settings, and under the Siren setting, select OFF.
How long is a camera event clip?
Event clips can be as short as 10 seconds and up to 1 minute in length, depending on how long the sound or motion activity lasts. The camera will begin recording an event when sound or motion is first detected, and continue to record until there is completely no sound or motion. If the camera continues to detect sound or motion for longer than a minute, a new recording will be created as a separate event in the camera’s event history.
How long does it take for camera recordings to appear on the Playback tab?
This can be highly variable depending on the video size (the longer the recording, the larger the size) and the signal strength of your Wi-Fi network. In normal circumstances, the clip of an event should be displayed on the Playback tab a few minutes after it has been recorded. Try tapping in the Playback tab screen to refresh the video history.
Why doesn’t the camera event clip have sound?
Make sure that the camera’s microphone volume setting is not turned OFF or the volume level set too low—the camera will not be able to pick up any sound in the background when it is recording the event.
(For devices with local microSD card storage feature) Can my camera record events without a microSD card installed?
No. The camera requires a microSD card to be installed. If the camera doesn’t have a microSD card installed, it can still detect events but it will not be able to record video. The camera will also not be able to download and perform firmware updates without a microSD card.
(For devices with local microSD card storage feature) Why has my camera stopped recording events?
If you’ve recently removed your microSD card from the camera (for example, to copy files to your computer) and then re-inserted the card, the camera might not have recognized and mounted the microSD card properly. Try restarting your camera. From the app, go the Devices tab > Select the camera > System Settings, and tap Reboot. If you have inserted a new microSD card, make sure to format the card first (System Settings > Format)
(For devices with local microSD card storage feature) What is the maximum microSD card size that can be used?
The maximum microSD card size supported is generally 128GB (class 10 or higher recommended). Check your camera
packaging for exact specifications.
If you’re having trouble pairing your device with the Swann Security app, here are some tips that can help you fix the issue.
Note: Screenshots are for reference only and may vary depending on device.
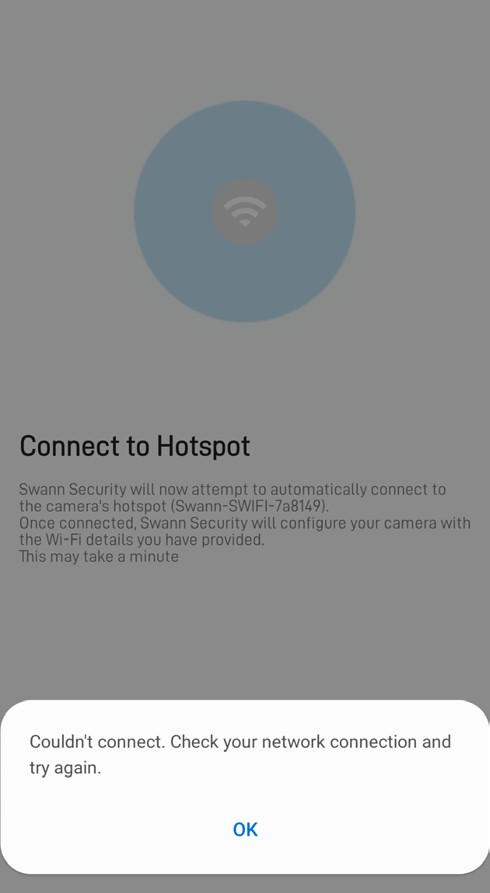
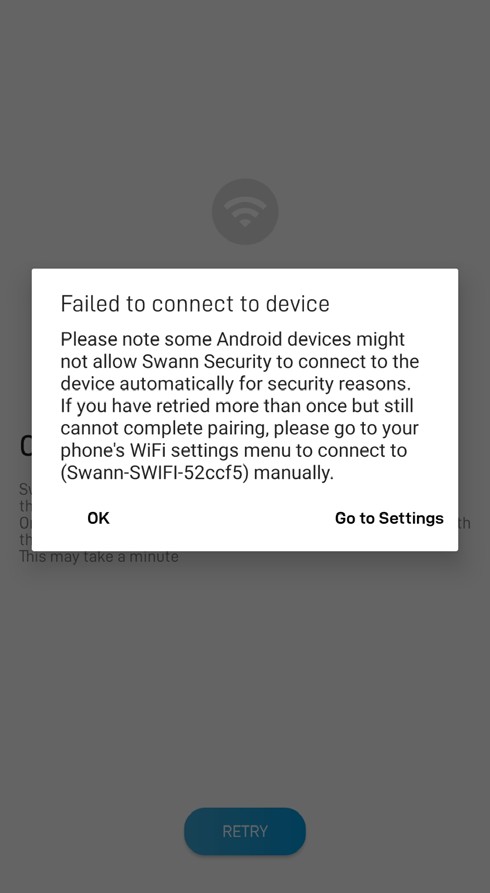
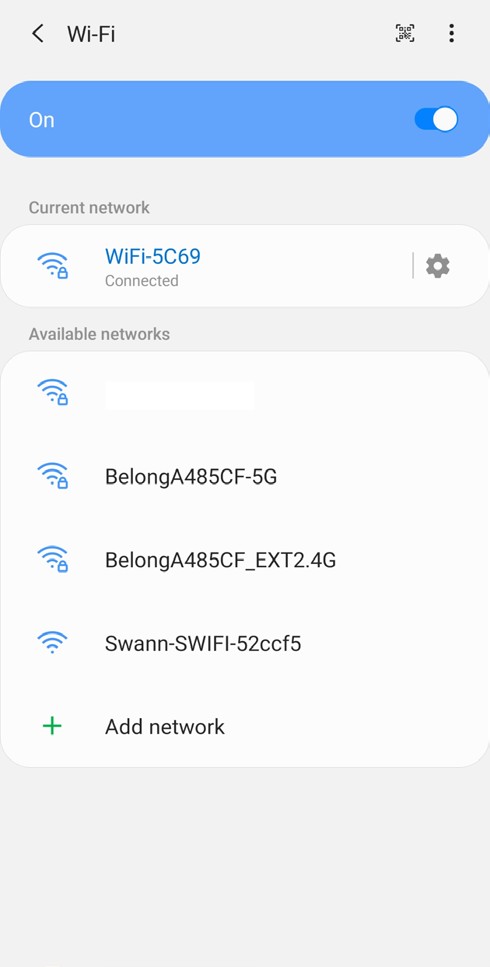
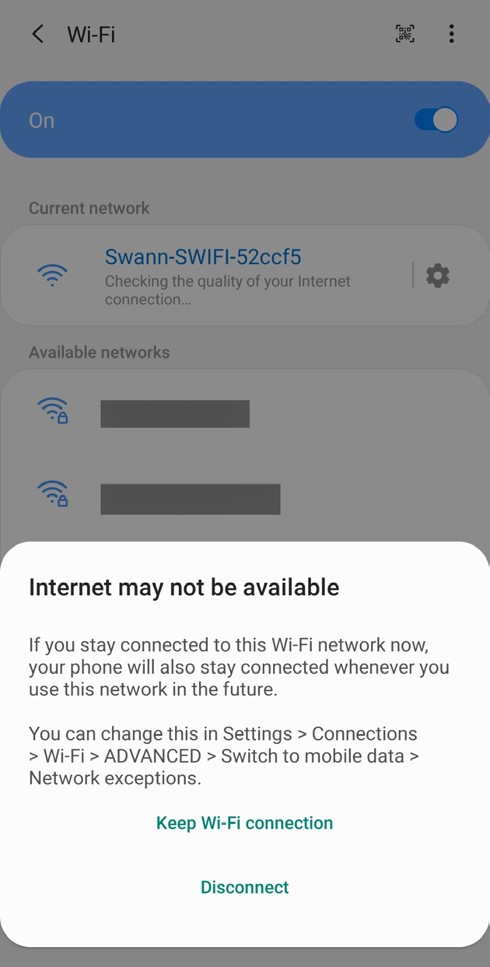
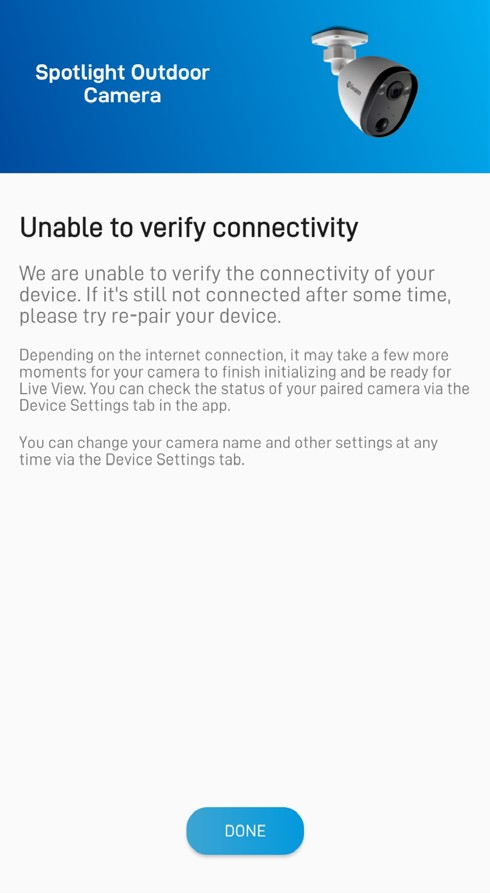
To fix this issue, tap “Go to Settings“ and manually connect to the camera’s Wi-Fi hotspot from your phone’s Wi-Fi Settings screen. The name of the hotspot will be something like “Swann-SWIFI-XXXXXX“. Once connected, wait for a notification to appear stating “Internet may not be available“. Tap “Keep Wi-Fi Connection“ to ensure that your phone remains connected to the camera’s hotspot. Then return to the Swann Security app and tap the Retry button to resume the pairing process.
ADDITIONAL SUPPORT

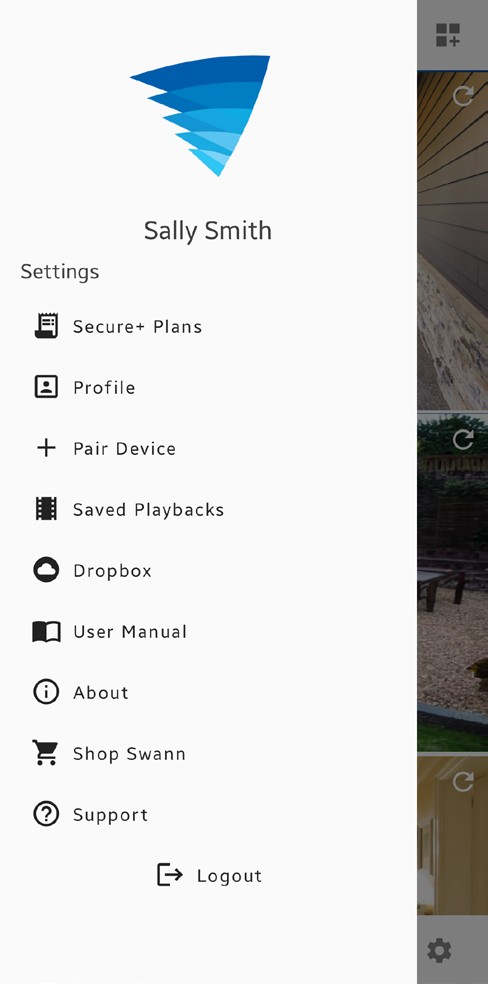
If you need further assistance, you can get in touch with us through the app’s built-in contact feature.
A
B
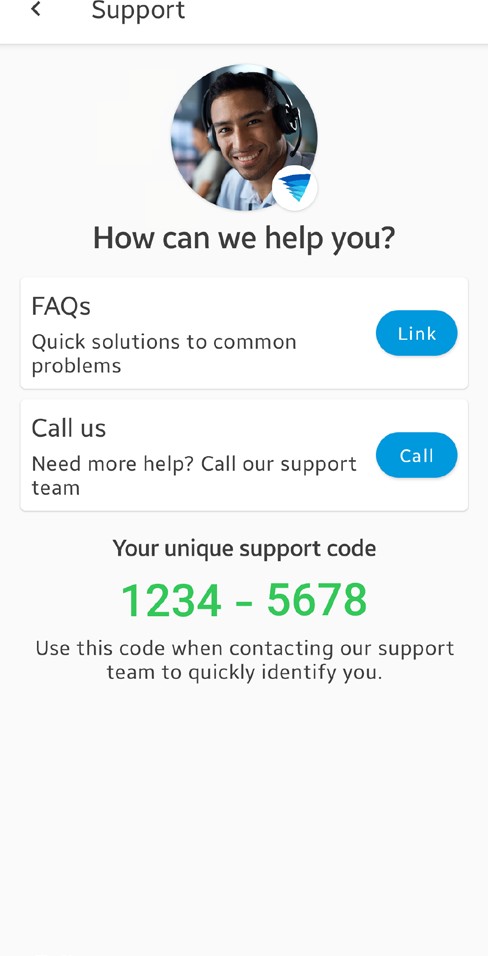
Open the link to the Swann Help Center website where you can find product FAQs, video tutorials, pairing guides, and more. Call Swann Tech Support. Please have your unique 8-digit support code displayed on the screen ready. This will enable our support agent to quickly identify your Swann Security account and help you troubleshoot your device.
A• B•
Note that, the Swann Security app will ask for call permission, ensure you select Allow.

