14
Camera Settings
The settings available vary depending on the device and will only appear if the feature is supported.


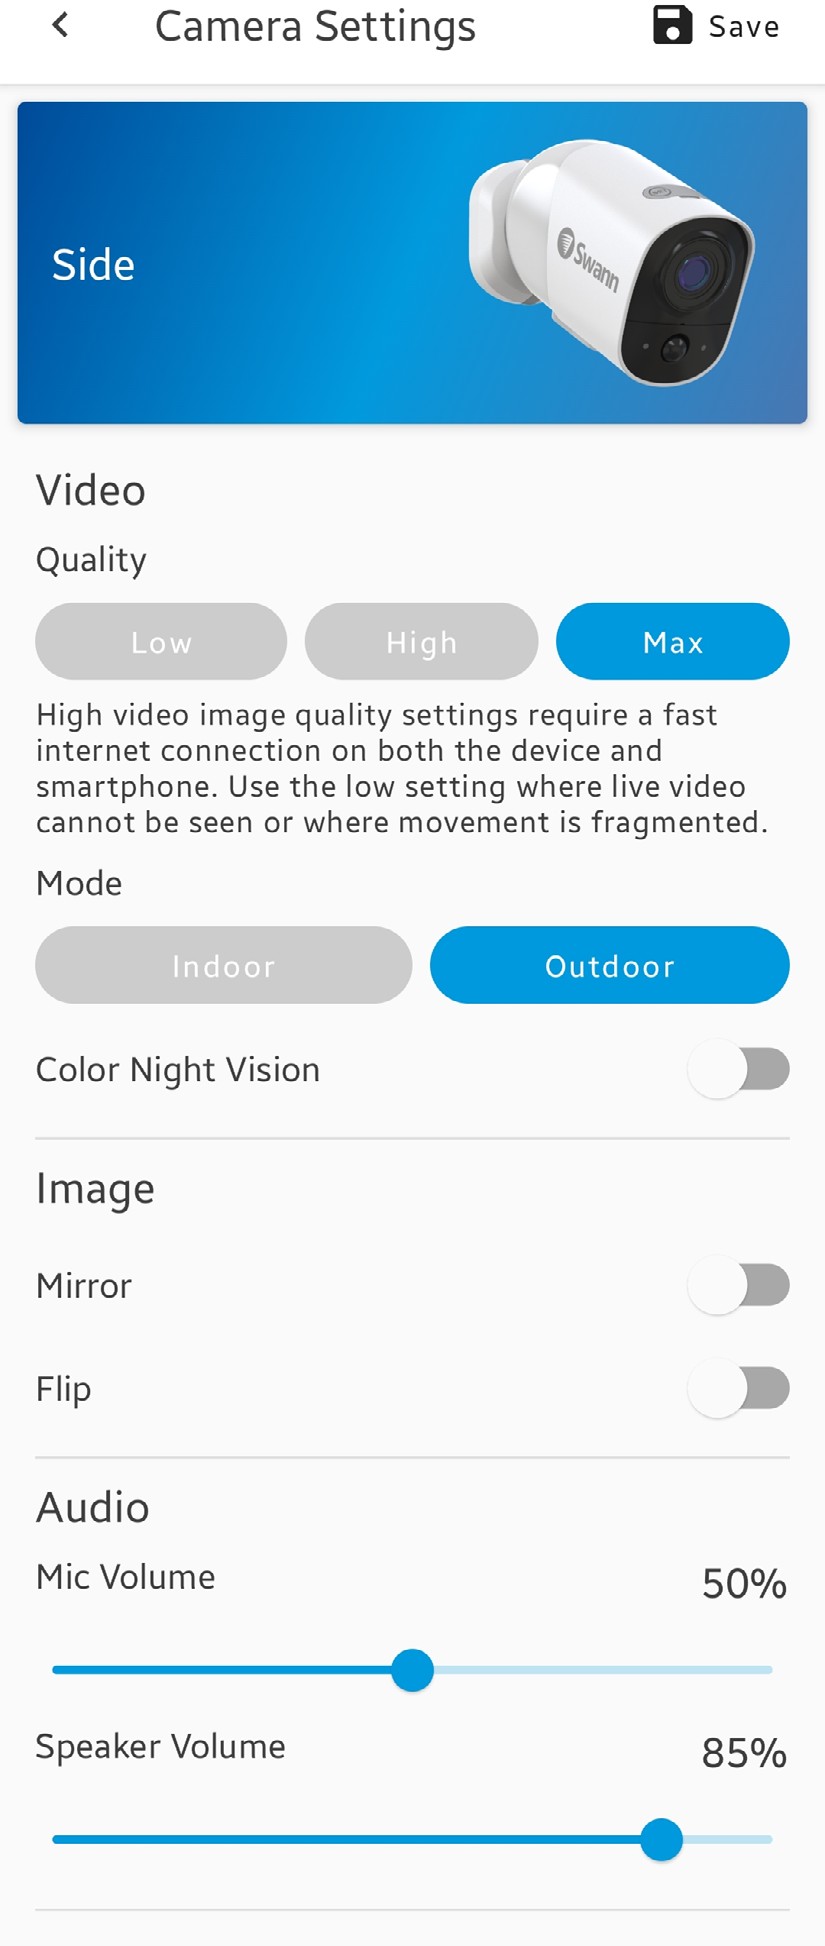
Select the live view quality. If you find that it’s taking a while for the camera live view to stream, it is usually due to slow internet speed on your phone, caused by poor Wi-Fi or cellular coverage, or limited home internet bandwidth. Additionally, concurrent video streaming activities on your Wi-Fi network can cause congestion, which can affect your internet upload and download speeds. To improve loading times and ensure smoother video streaming, try using the Low setting.
1
Note: This setting does not affect the video quality of camera events which are always recorded in HD.
Select the mode according to where the camera is physically located. If the camera is used in Indoor mode, you must set the camera’s environment to match with your country’s electrical frequency. This can help prevent video flicker caused by fluorescent lights.
2
You can enable Color Night Vision, which disables the camera’s infrared LEDs, allowing the camera image to appear in color at night when there is sufficient ambient lighting.
3
You can enable Mirror to horizontally reverse the orientation of the camera’s video display.
4
You can enable Flip to turn the camera’s video display upside down. This is useful if the camera has been mounted upside down.
5
Adjust the camera’s microphone volume. The higher the microphone volume, the more background noise the camera will pick up. You can also mute the camera’s microphone by sliding the level all the way left to 0%.
6
Adjust the camera’s speaker volume. You can also mute the camera’s speaker by sliding the level all the way left to 0%.
7
Select the camera’s default live view layout —
8
Dual (both Pano and Zoom views), Pano, or Zoom, as shown below:
Dual live view layout example
10
1
2
3
4
5
6
7
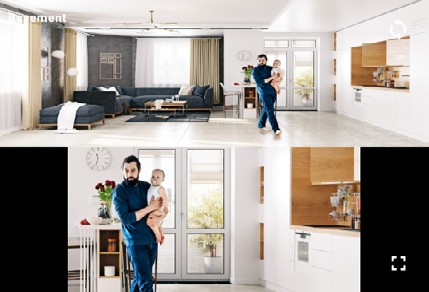
Top – 180° Panoramic wide-angle view Bottom – Zoom view (tracks movement
8 of detected person)
9
Lets you select the volume of the chime speaker linked to your SwannBuddy Video Doorbell. You can completely turn the volume off by selecting the Mute option.
Save any changes made to the camera settings.
9
10
Detection Settings
7
1
2
3
4
5
The settings available vary depending on the device and will only appear if the feature is supported.
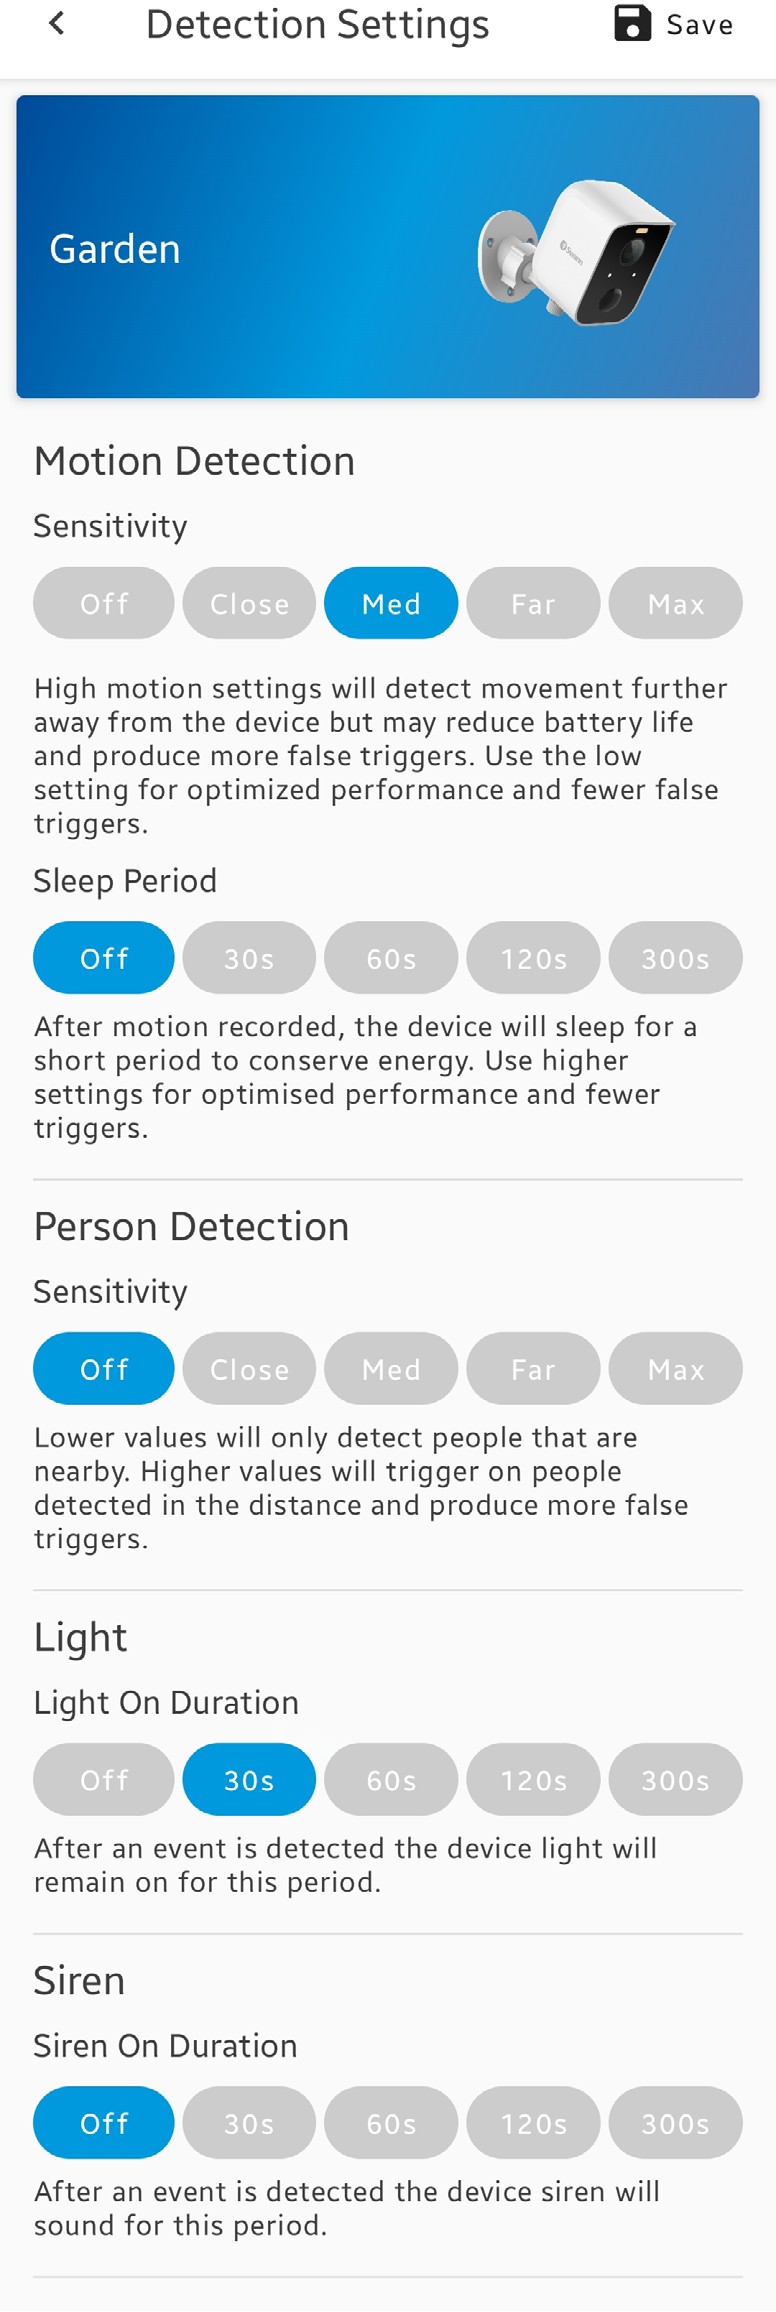
MOTION DETECTION – Adjust the motion detection sensitivity level of the camera for the current mode. To adjust the motion detection sensitivity for other modes, go to the Modes tab screen instead.
1
SLEEP PERIOD – Select the time that must elapse before the camera can be triggered again by another motion activity.
2
Note: If you know that there’s continuous activity happening around the camera, such as someone mowing the grass in the backyard or people walking in and out, it is recommended that you temporarily set a longer sleep period. This will prevent unnecessary recordings and conserve battery life.
PERSON DETECTION – Receive person detection alerts when the camera detects the presence of a person during the motion event. The higher the person detection sensitivity, the more sensitive the camera is in distinguishing between human shapes and other motion objects further away. Selecting Off turns off person detection alerts.
3
Note: To receive person detection alerts, the Motion Detection
sensitivity setting (above) must not be set to Off.
LIGHT – Select how long the camera’s spotlight/floodlight will stay
4
on when motion or sound is detected during night time.
Note: The camera’s built-in night detection sensor, which reads the ambient light levels, will automatically keep the spotlight/ floodlight off during daytime to conserve electricity and extend their lifespan. You can manually turn the spotlight/floodlight on or off via the camera’s single live view screen during the daytime by tapping the bulb icon.
SIREN – Select how long the camera’s built-in siren will sound when motion or sound is detected.
5
Note: Please exercise discretion and good judgment when deciding to activate the siren. Make sure to comply with all local noise regulations.
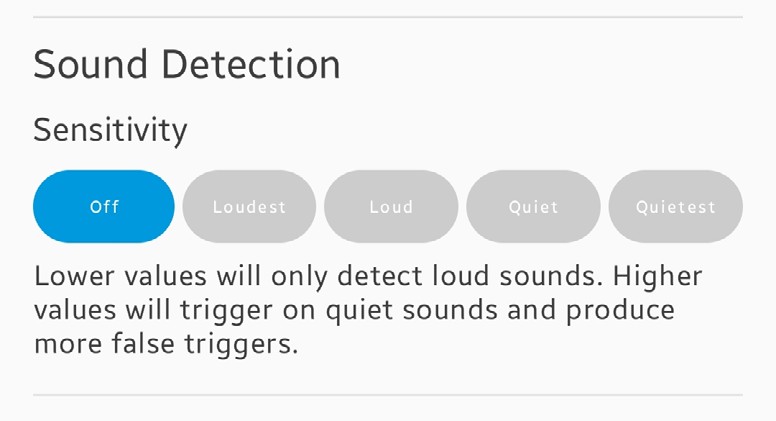
SOUND DETECTION – Adjust the sound detection sensitivity level of the camera for the current mode. To adjust the sound detection sensitivity for other modes, go to the Modes tab screen instead.
6
6
7
Save any changes made to the detection settings.
Motion Detection Mask
NOTE: THE MOTION DETECTION MASK FEATURE MAY NOT BE AVAILABLE ON ALL WI-FI CAMERA MODELS.
IMPORTANT: Please note that if the camera’s motion detection sensitivity level is currently set to MAX, the Motion Detection Mask set here will not take effect. To apply the Motion Detection Mask, ensure the camera’s motion detection sensitivity level is any level below MAX, such as CLOSE, MED or FAR. You can adjust the camera’s motion detection sensitivity by going to the Devices tab > [your camera] > Detection Settings or the Modes tab > Edit.
1
2
3
4
5
6
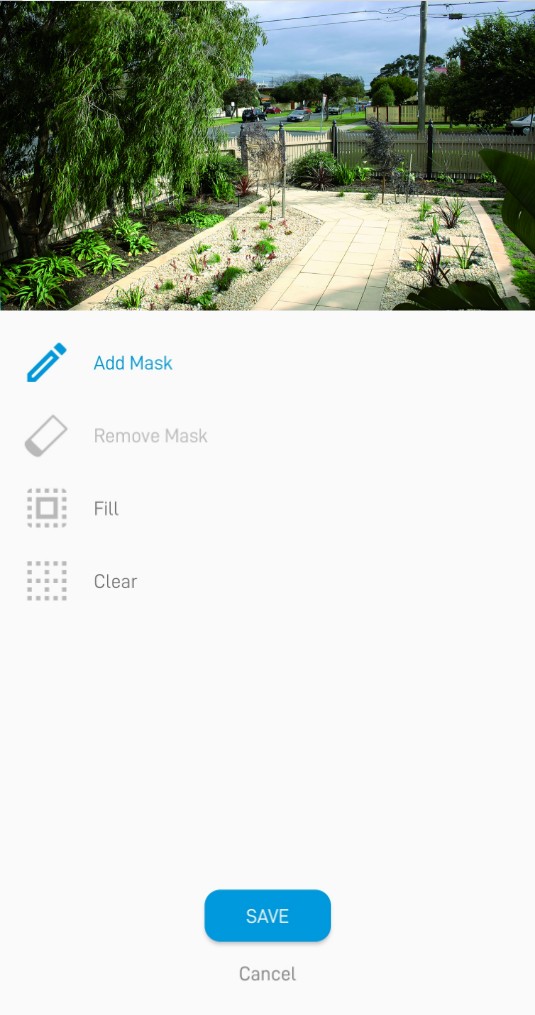
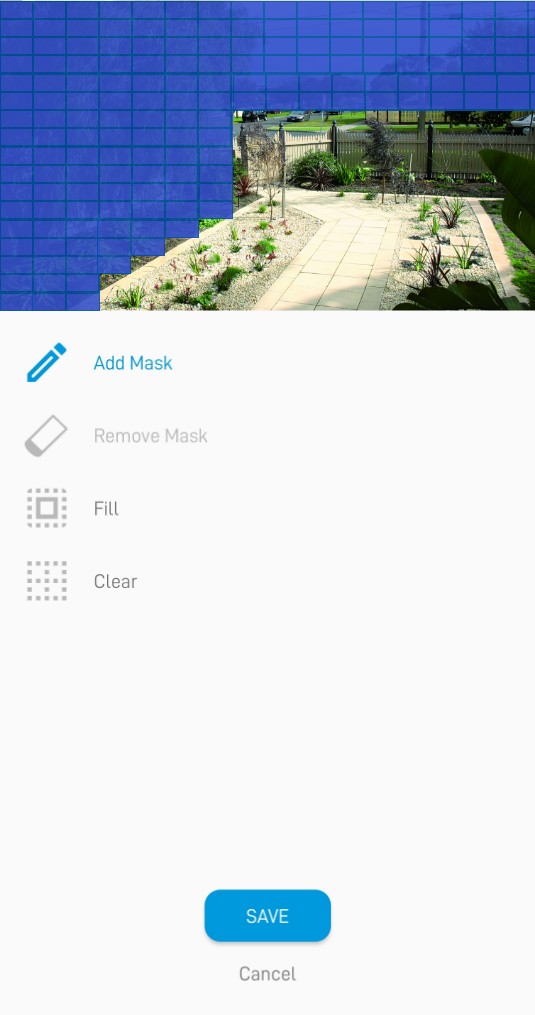
The Motion Detection Mask reduces unwanted motion triggers by excluding specific areas from detection. For example, you can exclude nearby bushes or trees swaying in the wind, frequently traveled roads, or high traffic areas. To create a mask, tap Add Mask, then use your finger to highlight the areas in the camera view that you want to exclude from motion detection. Any areas highlighted in blue will be exempt from motion detection, and the camera won’t trigger or record video if movement is detected in those areas.
1
Tap Remove Mask then use your finger to erase currently highlighted areas of the camera view. Tap Fill to highlight the entire camera view. This will exclude all areas from motion detection. Tap Clear to completely remove all highlighted areas from the camera view.
2
3
4
5
Tap to save the Motion Detection Mask setting.
Tap to discard any changes and return to the previous screen.
6
Face Recognition
NOTE: THE FACE RECOGNITION FEATURE IS ONLY AVAILABLE ON THE SWIFI-CAM WIRE-FREE SECURITY CAMERA.
2
3
1
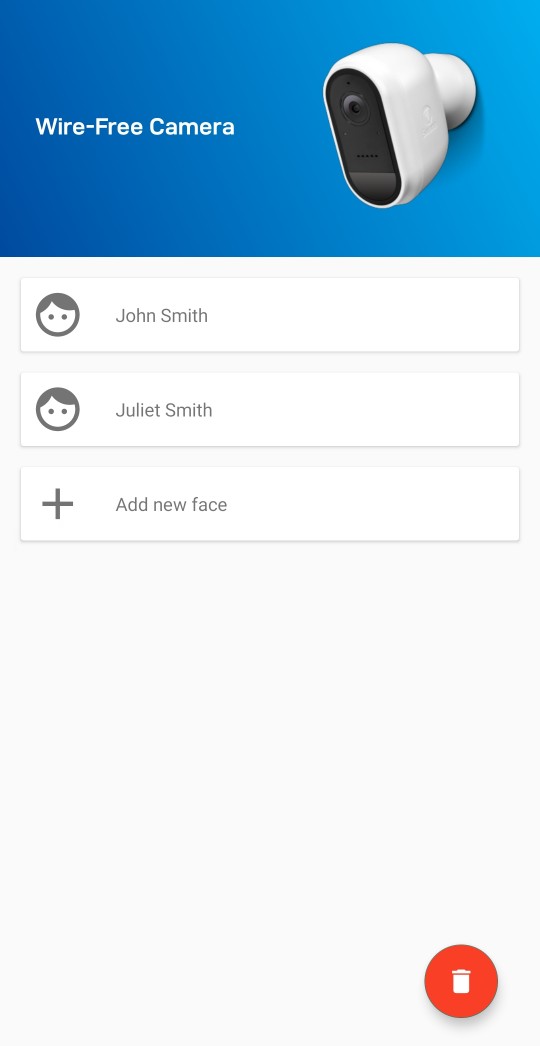
The list of registered face recognition profiles is displayed here.
1
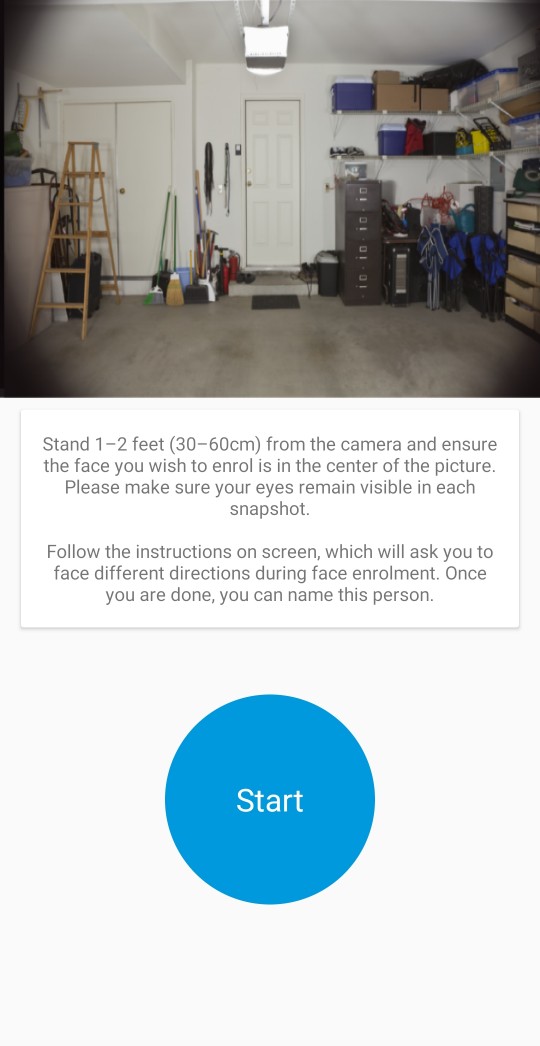
The Face Recognition video analytics feature uses profiles to represent individuals, such as family members. Each profile will require enrollment of multiple face images (five different face views) of an individual that you want the camera to recognize. When the camera detects and identifies an individual matching a profile, you’ll receive a Face Recognition alert notification from the app.
2
To register a new Face Recognition profile, tap on the “+ Add new face“ button and follow the on-screen instructions (as shown on the right figure) to capture the face images of the individual that you want to associate with the profile. You can enter a name for the profile once all of the required face images have been taken.
NOTE:
the lens.
registration process again.
screen) must not be turned Off.
3
Remove all face recognition profiles from the camera.
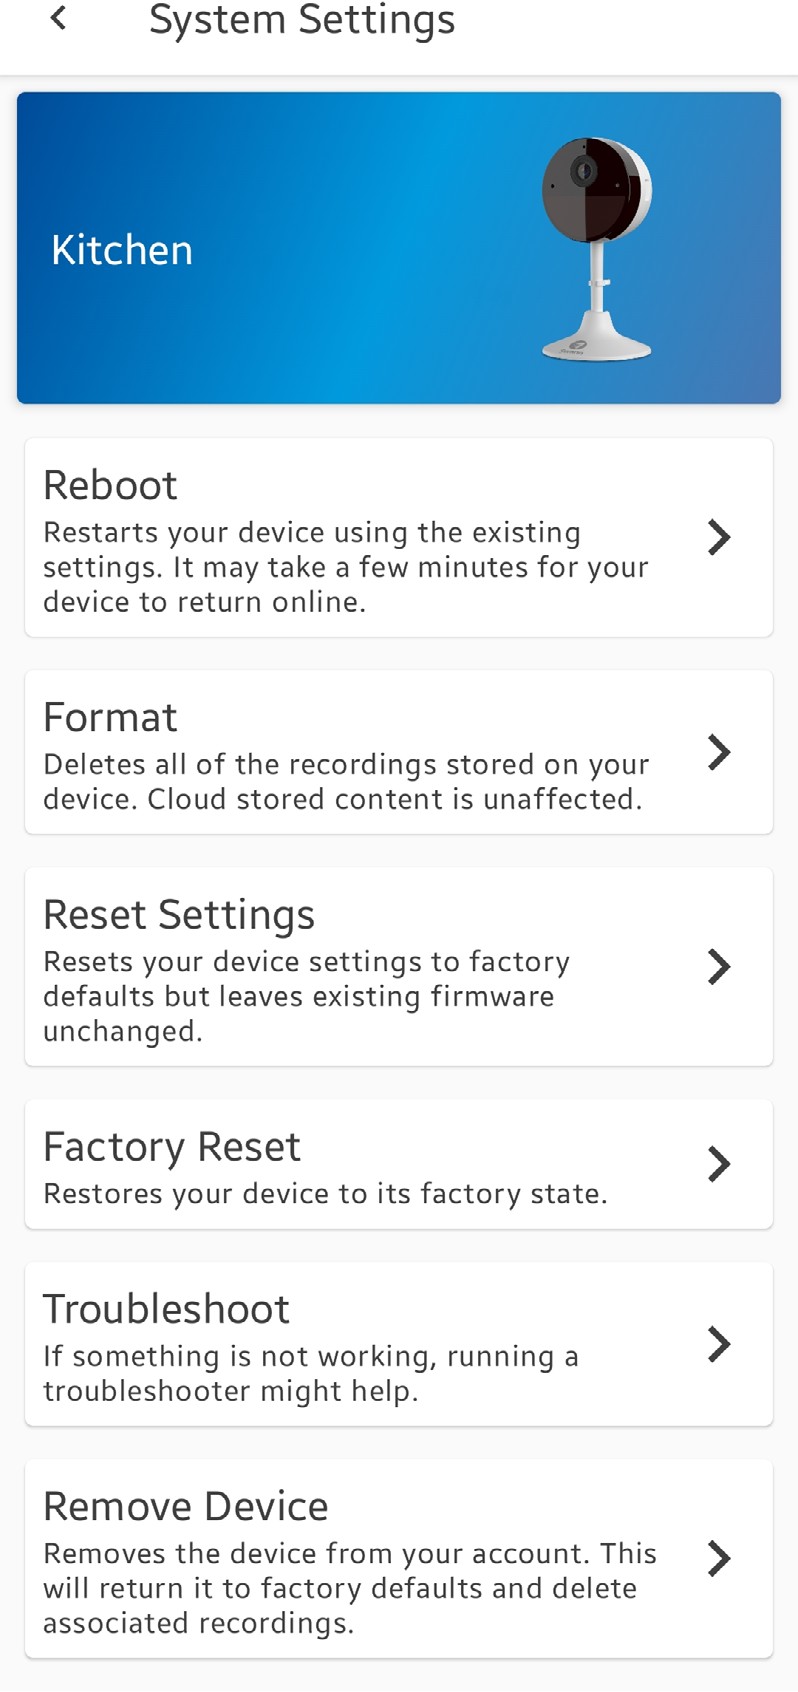
The settings available vary depending on the device and will only appear if the function is supported.
1
2
3
4
5
6
Tap to reboot your camera. If you are having difficulties with your camera, try rebooting it. A simple reboot can often fix connectivity issues quickly.
1
Tap to format the microSD memory card installed on the camera, which will permanently erase all recordings stored on it.
2
Tap to reset camera settings such as the name, timezone, audio, video, and detection settings to default values.
3
Tap to reset the camera to factory defaults. This is usually only necessary for troubleshooting. It isn’t something to do lightly as it will format the internal memory/microSD card, wipe the current Wi-Fi information, and return all of the camera settings (name, timezone, etc) to factory defaults. If your camera is already offline, you can factory reset the camera using the physical Reset button located on the device. See “Factory Resetting the Camera” on page 38.
4
Tap to run the troubleshooting tool to check and troubleshoot problems with the device.
5
Tap to remove (unpair) the device from your Swann Security account.
6
Note: For Wi-Fi cameras, this action will also result in the
deletion of all video clips stored in the cloud and on the installed microSD memory card (if available).
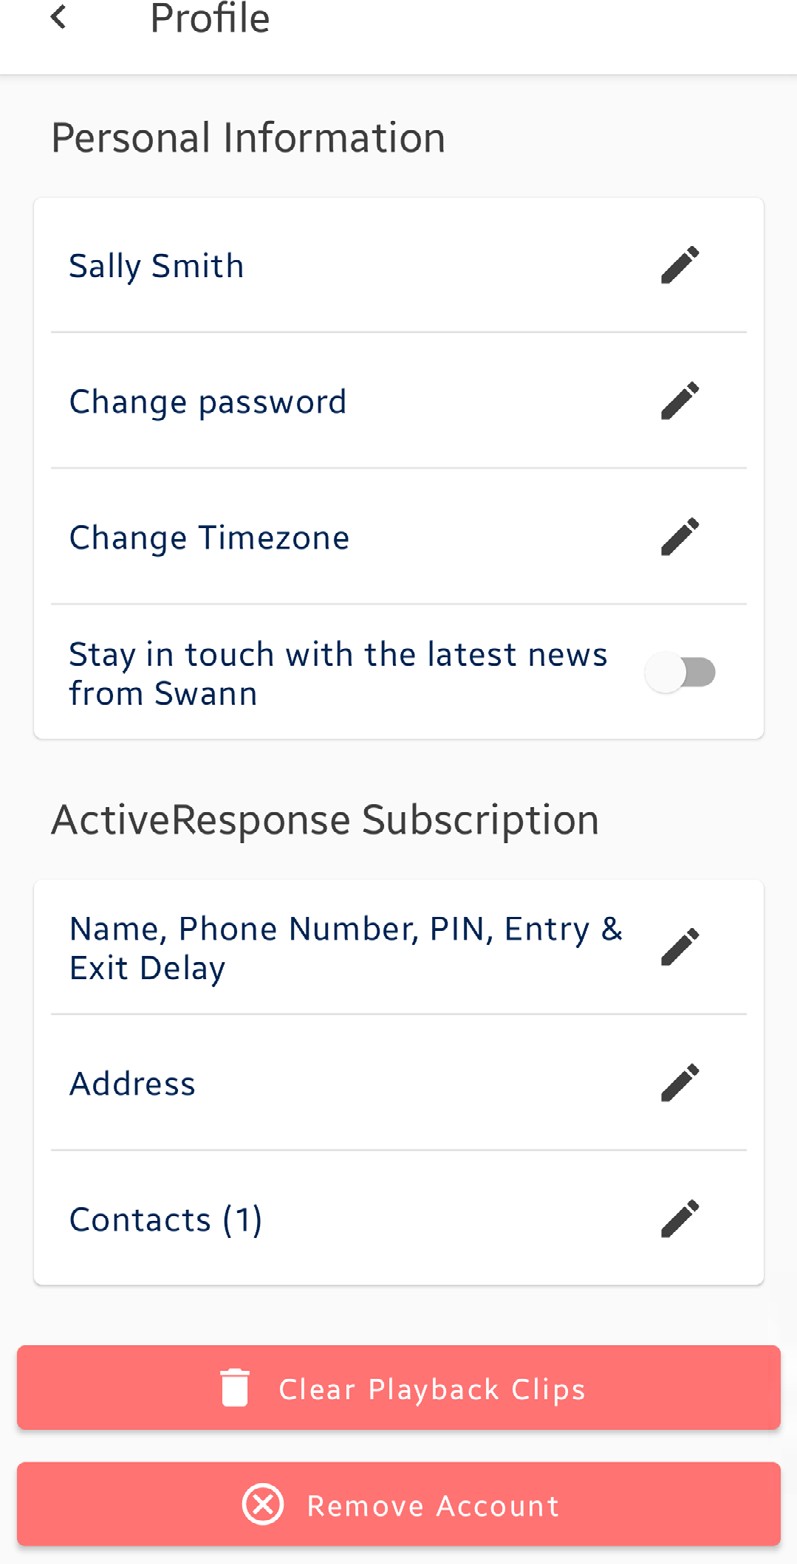
You can update your Swann Security account profile information at any time. Tap App Menu > Profile.
5
8
9
7
6
4
3
2
1
Tap to update the name associated with your Swann Security account. Tap to change your Swann Security account login password.
2
3
1
Tap to change your timezone.
Enable this option if you would like to receive the latest information about product and offers from Swann.
4
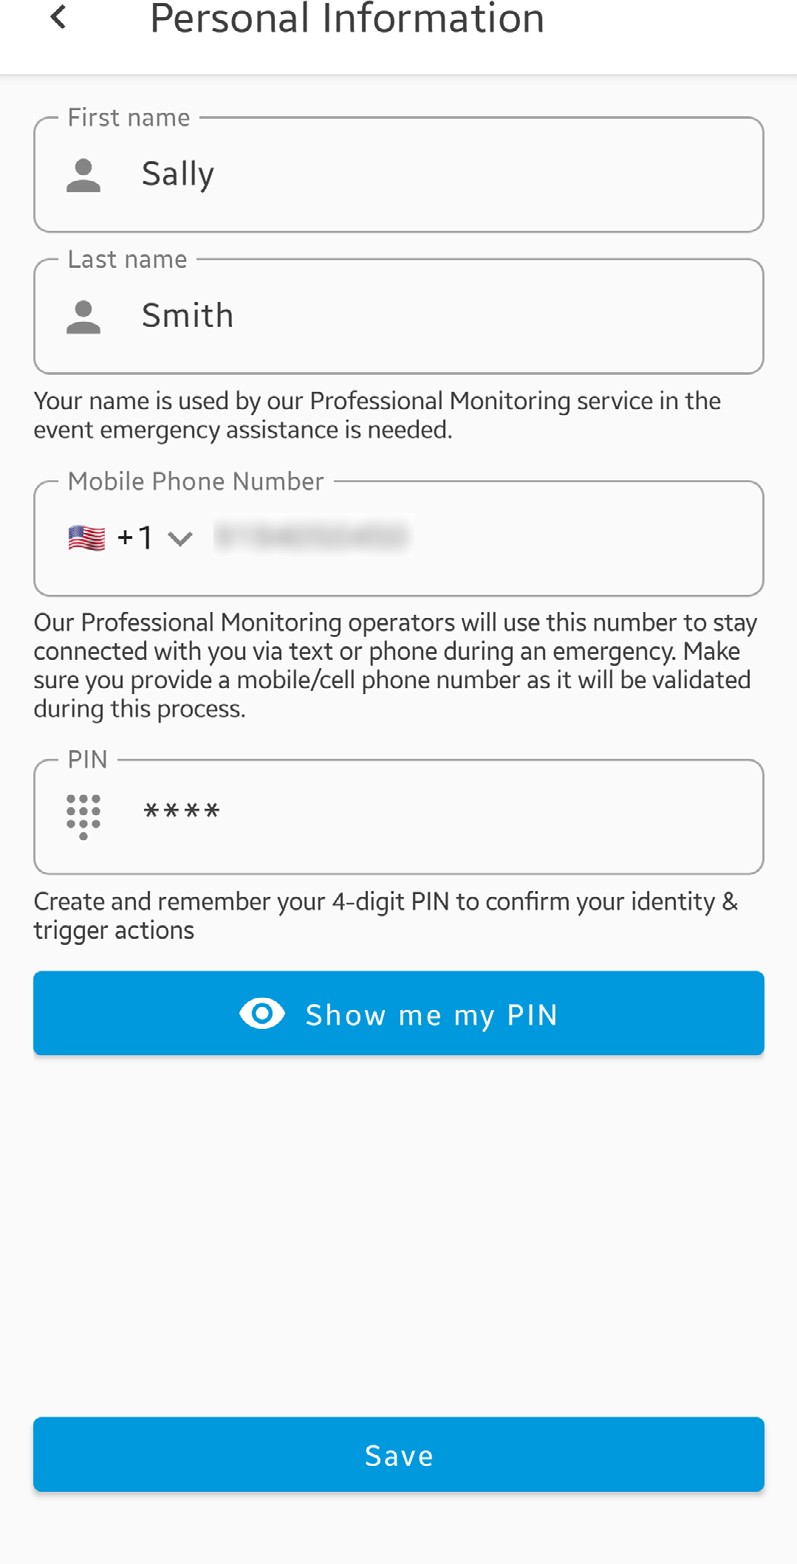
(Only available to ActiveResponse plan subscribers) Tap to manage and update your personal information, such as your mobile number and personal 4-digit pin code. These information will be used by the professional monitoring center to contact and verify your identify in the event of an emergency.
5
6
Tap to update your address.
Tap to update the details of your emergency contacts, including their 4-digit pin code (this option is only available to ActiveResponse plan subscribers). Make sure to tap the Save button after making any changes.
7
Tap to delete all cloud recordings stored in your Swann Security account. Before deleting, make sure you have saved a copy of any cloud recording you want to keep via the Playback tab, as deleted cloud recordings cannot be recovered.
8
Tap to delete your Swann Security account. A confirmation link will be sent to your registered email address. Open the link to confirm that you want to permanently delete your Swann Security account.
9
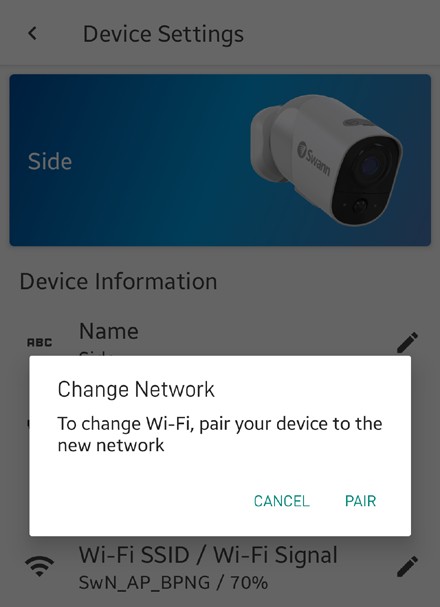
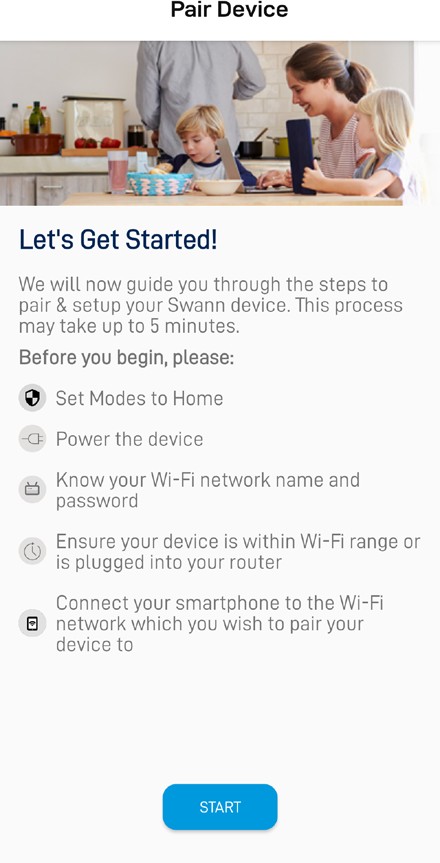
You can easily change the Wi-Fi network that your camera is using, if your home has multiple Wi-Fi access points or if you have installed a new router.
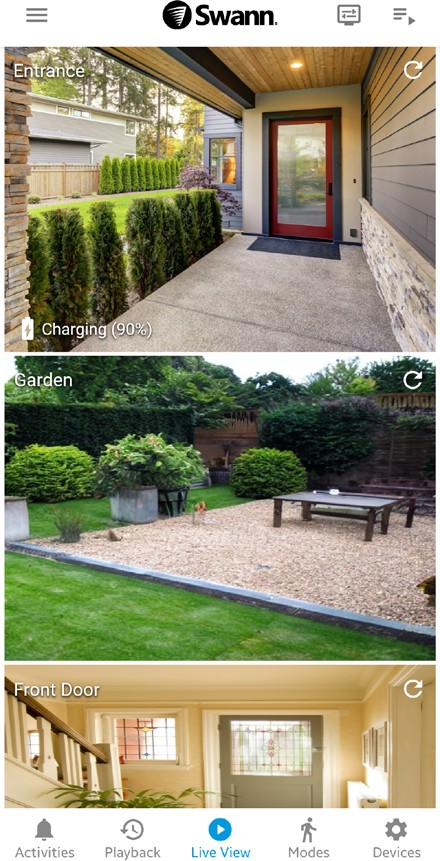
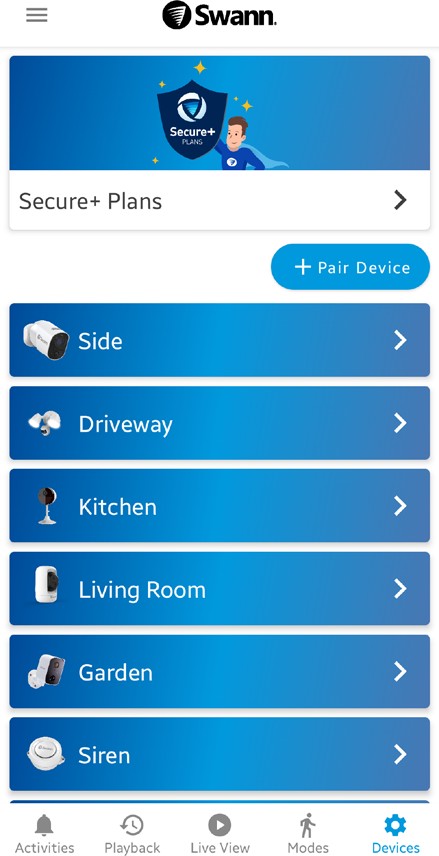

If your previous Wi-Fi network has been disconnected and the camera is no longer online, simply go to App Menu > Pair Device and follow the on-screen instructions to pair the camera to the new Wi-Fi network.
Factory resetting your camera is usually only necessary for troubleshooting. It isn’t something to do lightly as it will format the internal memory/microSD card (i.e., erase all locally stored clips), wipe the current Wi-Fi pairing information, and return all of the camera settings to the original factory defaults.
Note: Factory resetting your camera does not remove (unpair) it from your Swann Security account. If you’re giving your camera to somebody else, you can remove the device from your account via the Advanced Settings screen. Depending on whether your camera status is online or offline, you can perform a factory reset via the Factory Reset
button in the app or the physical Reset/Pair button located on the camera.
METHOD A – VIA SYSTEM SETTINGS (IF CAMERA STATUS IS ONLINE)
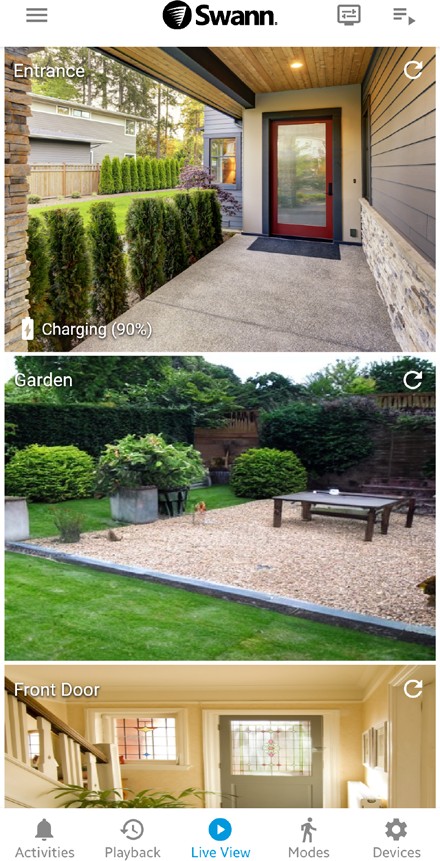
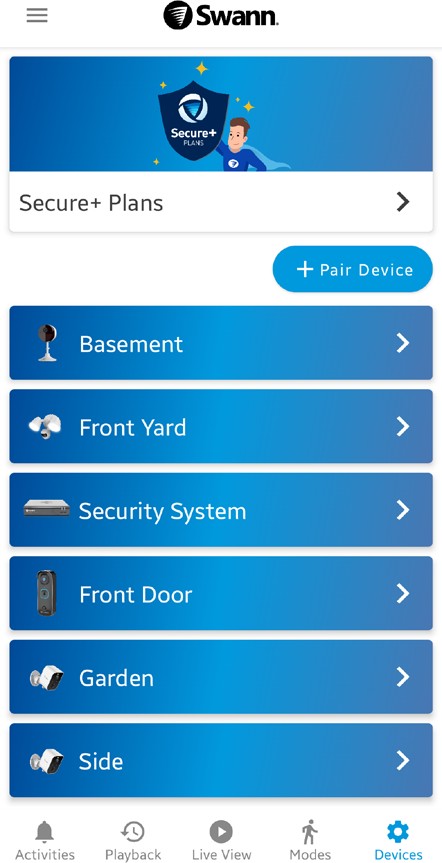

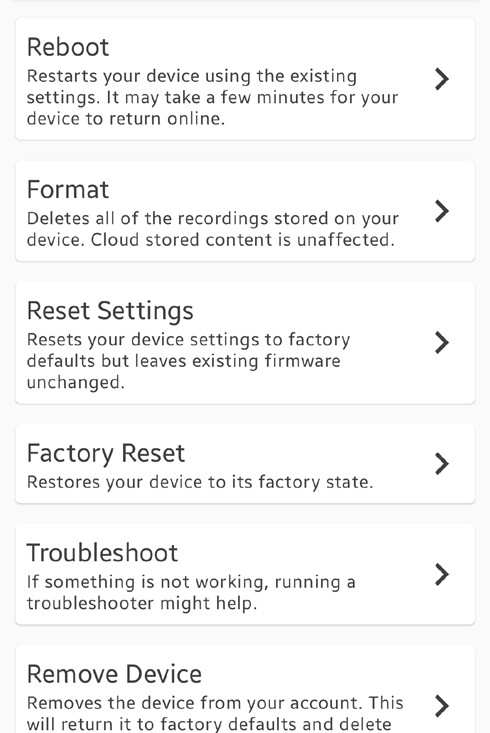
The camera will reset to factory defaults and restart automatically. When factory reset is complete, the LED indicator/ring on the camera will blink blue slowly to indicate that the camera is in pairing mode (on certain models, you will also hear the device say “Ready for pairing”).
IMPORTANT: After factory resetting your device, you’ll have to pair it with your Wi-Fi network again. See “Pairing
—> SEE NEXT PAGE FOR METHOD B – VIA PHYSICAL RESET BUTTON
METHOD B – VIA PHYSICAL RESET BUTTON (IF CAMERA STATUS IS OFFLINE)

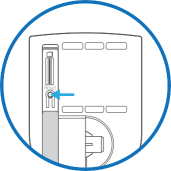
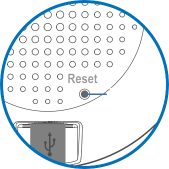 power supply or USB charger.


|
SWIFI-XTRCAM
SET Button
RST (pinhole) Button |
SWIFI-BUDDY
SET Button RST (pinhole) Button |
SWIFI-CORECAM/COREPRO
Reset Button |
|
SWIFI-2KOCAM/SPOTCAM
Reset Button |
SWIFI-FLOCAM
Reset Button |
SWIFI-4KFLOCAM
Reset Button |
|
SWIFI-CAM
Reset Button Pair Button |
SWIFI-FOURTIFY4
|
SWIFI-TRACKCAM
Reset Button |
|
SWIFI-2KICAM
Reset Button |
SWIFI-PTCAM2
Reset Button |
SWIFI-ALERTCAM
Reset Button |

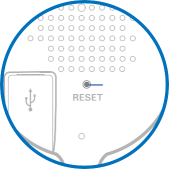 —> CONTINUED NEXT PAGE
2a. For (SWIFI-2KICAM/2KOCAM/ALERTCAM/SPOTCAM/4KFLOCAM/FLOCAM/TRACKCAM/PTCAM2 models)
Press and hold the Reset button for 20 seconds until the blue LED indicator on the camera turns off. Release the Reset
button. The camera will start the factory reset process which can take up to 2 minutes.
2b. For (SWIFI-XTRCAM) / (SWIFI-BUDDY)
Press and hold the SET and RST buttons simultaneously, then release the RST button and continue holding the SET button until the LED starts blinking red. Release the SET button. The camera will start the factory reset process which can take up to 2 minutes.
2c. For (SWIFI-CORECAM/COREPRO)
Make sure the Power switch is in the ON position. Press and hold the Reset button (for about 10 seconds) until the LED indicator on the camera turns off. Release the Reset button. The camera will start the factory reset process which can take up to 2 minutes.
2d. For (SWIFI-FOURTIFY4)
Press and hold the Reset button for 10 seconds. Release the Reset button. You’ll hear the camera say “Restore factory settings and format SD card”. The camera will start the factory reset process which can take up to 2 minutes.
2e. For (SWIFI-CAM)
Press and hold the Reset and Pair buttons simultaneously, then release the Reset button and continue to hold only the Pair button for another 35 seconds. Release the Pair button. The camera will start the factory reset process which can take up to 2 minutes.
IMPORTANT: After you factory reset your device, you’ll have to pair it with your Wi-Fi network again. See “Pairing the
Device” on page 6.
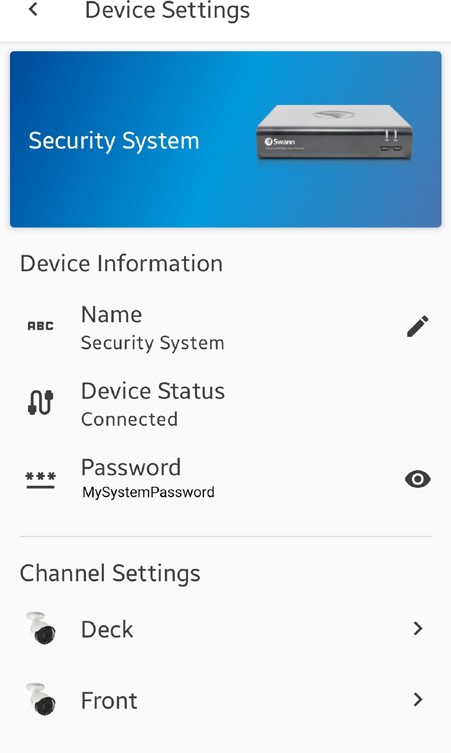
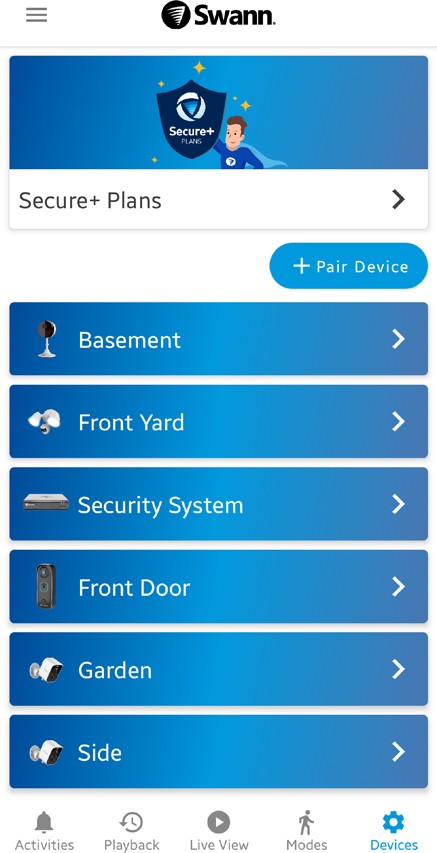
You can easily find the password for any DVR/NVR associated with your Swann Security account. This can be
particularly helpful when you need to log into your DVR/NVR locally but have forgotten the password.
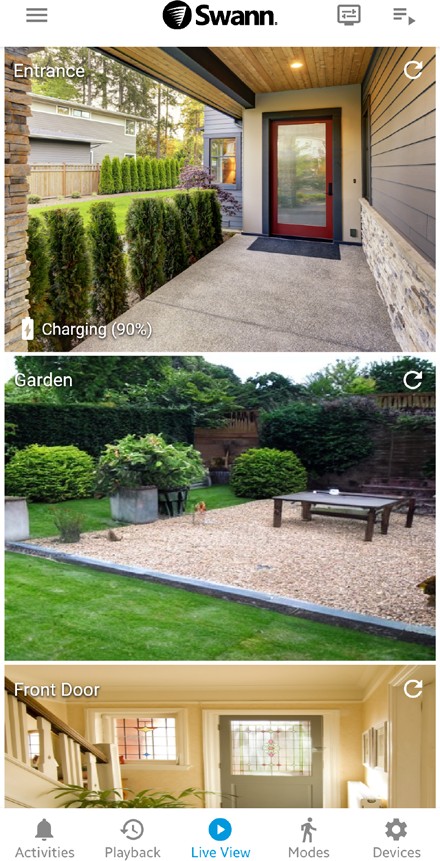
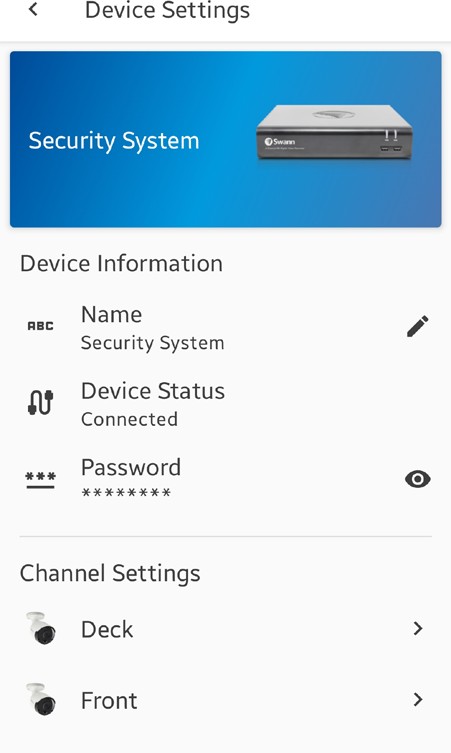
Note: If your phone does not have a screen lock set up, you’ll be prompted to enter your Swann Security account password instead.
