3
4
4
5
2
1
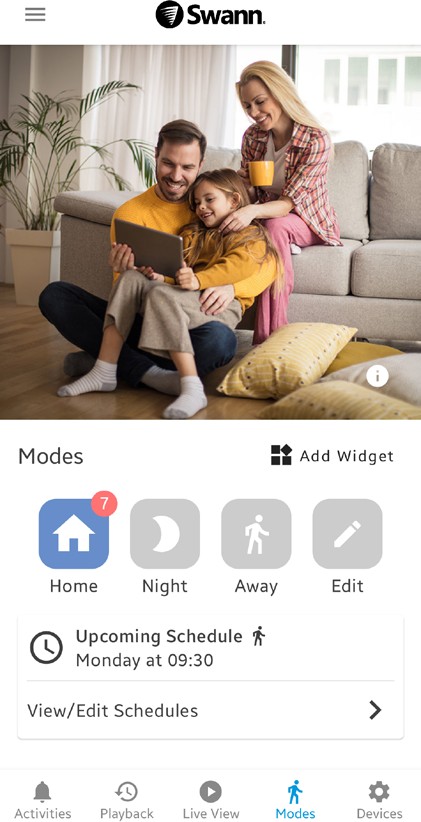
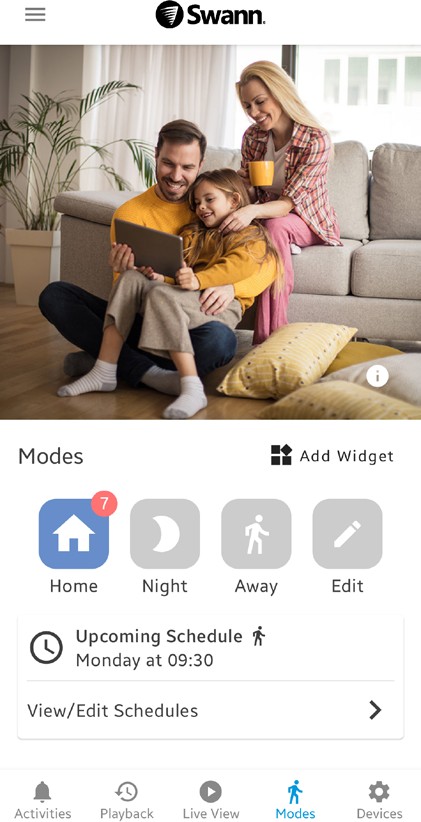
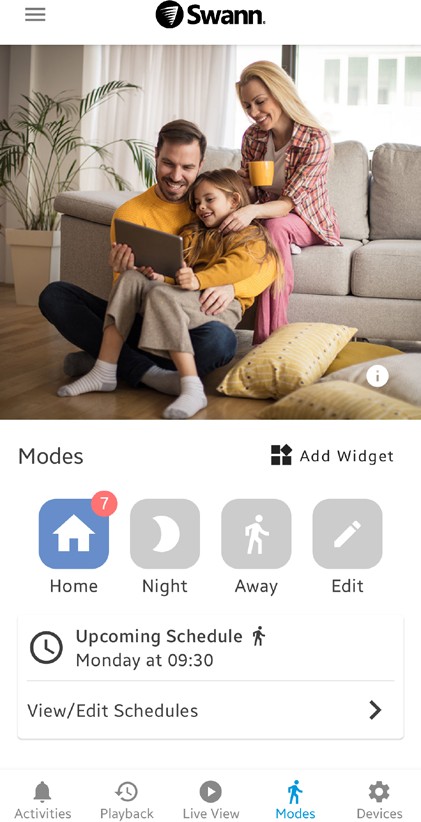
![]() Tap to display a popup window providing a general description of the mode that is currently active which is the highlighted icon.
Tap to display a popup window providing a general description of the mode that is currently active which is the highlighted icon.
1
2
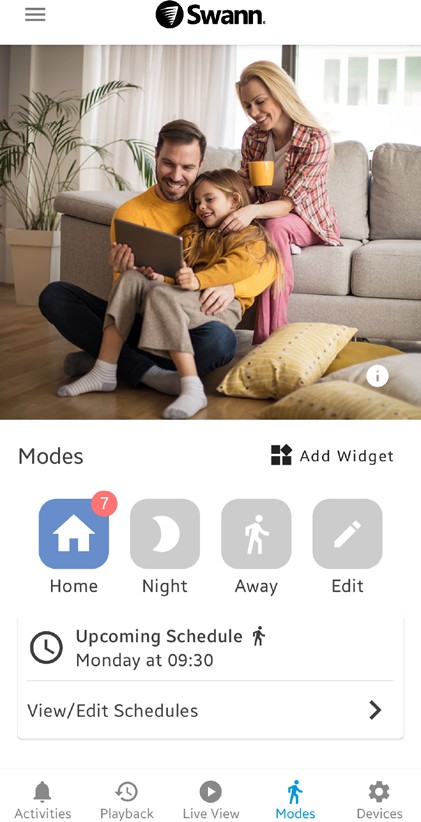
Tap to add the Modes widget to your phone’s home screen. With the Modes widget, you will be able to check and change modes without having to open the app.
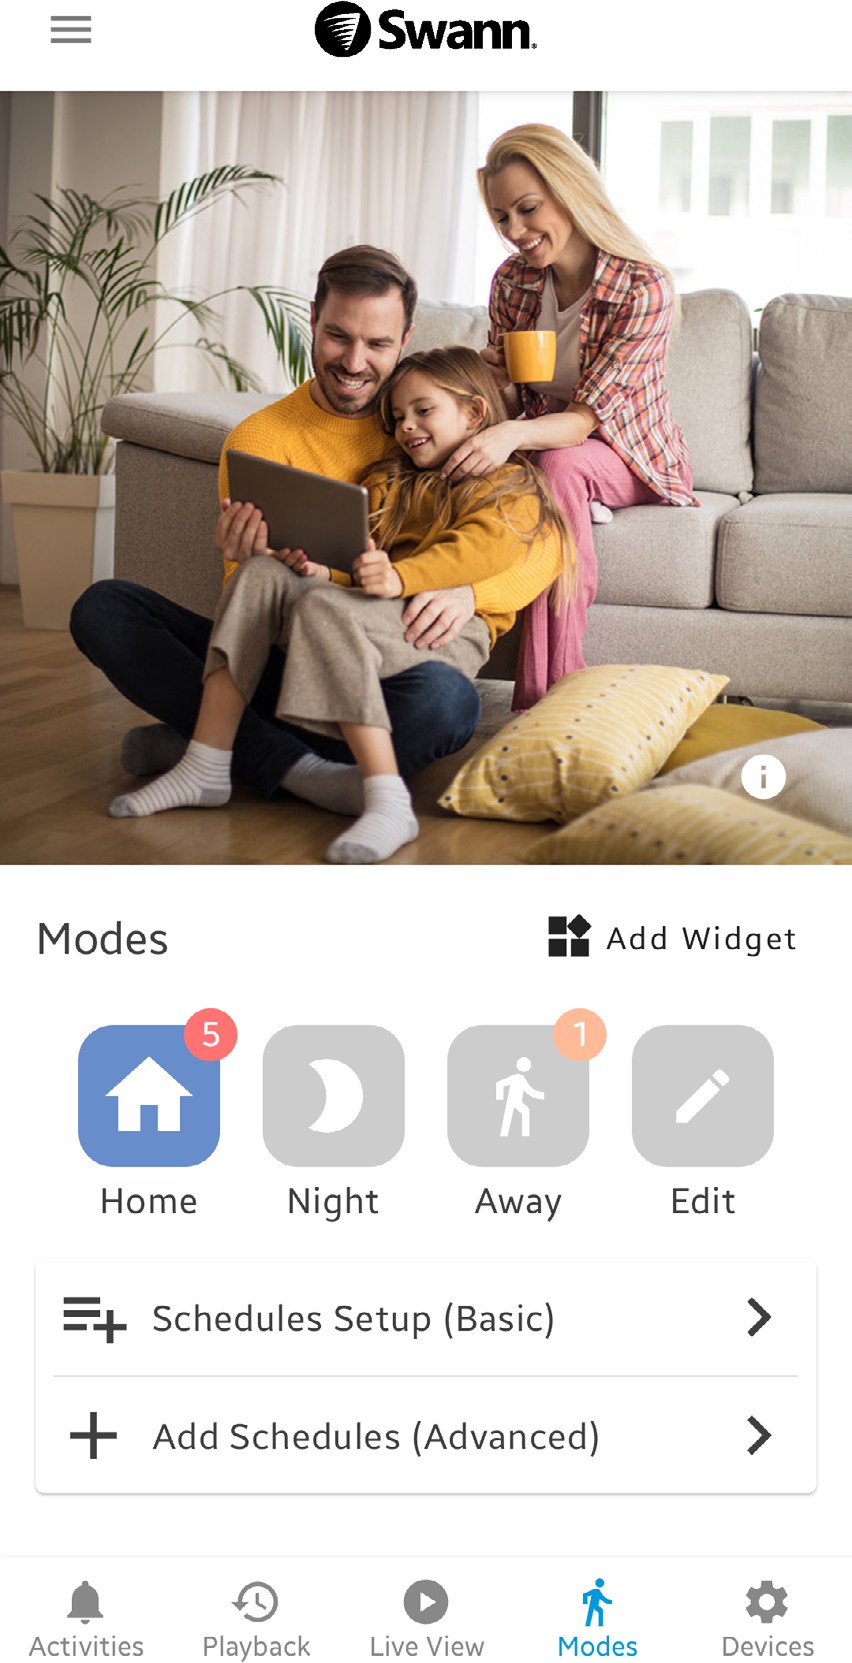
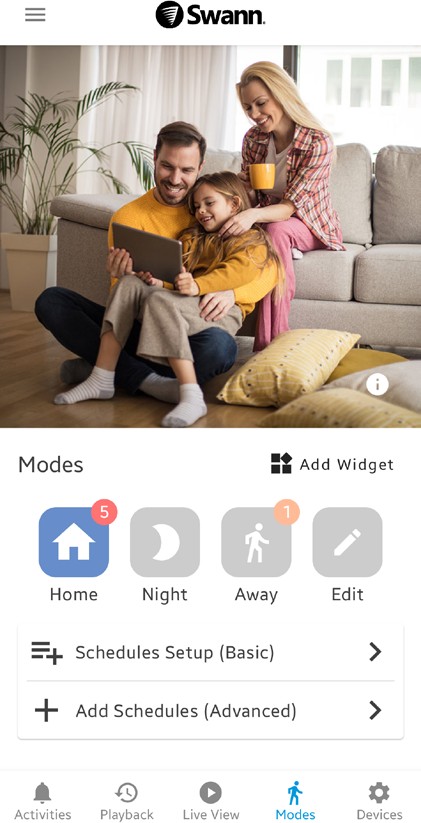
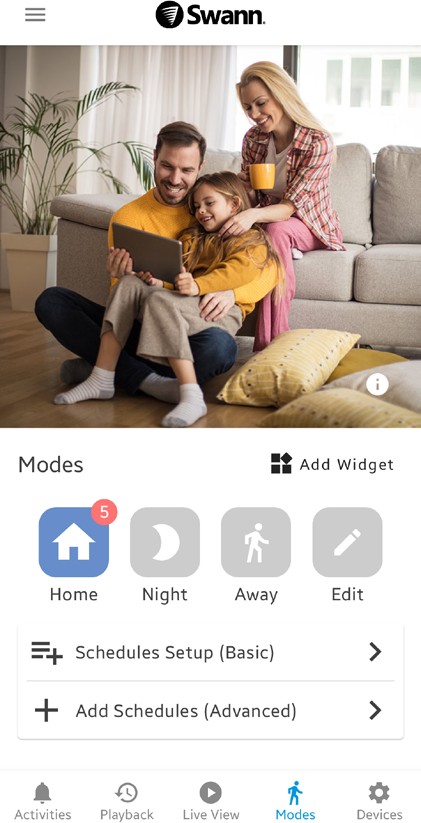
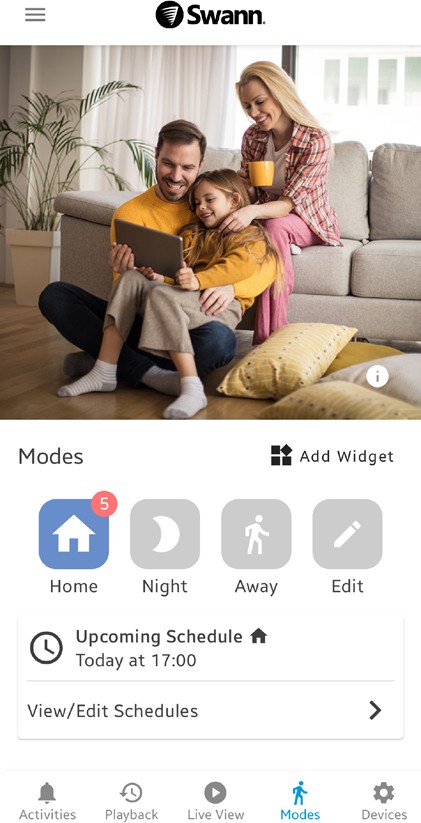
The Modes panel displays the currently active mode, which is highlighted. You can change the mode by tapping on the icon of the mode you would like to switch to. Changing the mode will alter how your devices respond to motion or sound detection events based on the settings configured for the selected mode. For your convenience, each mode comes pre-configured with default “typical use” settings, but they can be fully customized to fit your household’s security needs. Please see below for more information about the icons displayed in the Modes panel.
3
Home mode
The highlighted icon with red bubble indicates current active mode and the number of devices
Night mode Away mode
4
While transitioning between modes, the orange bubble indicates the number of remaining devices moving from the previous mode to the activated mode.
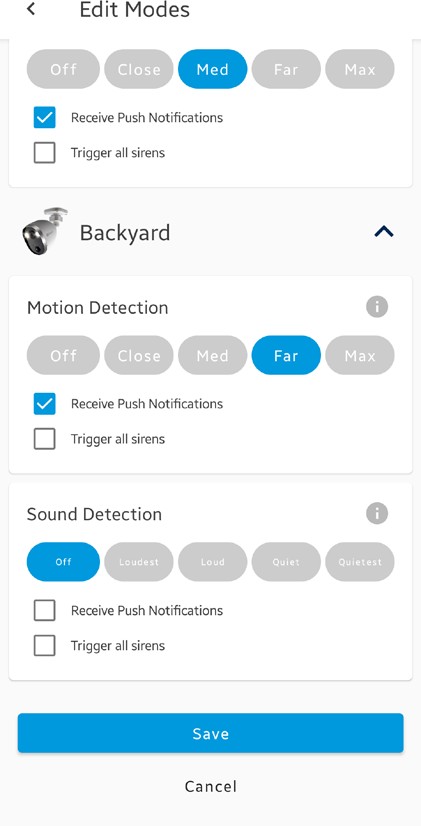
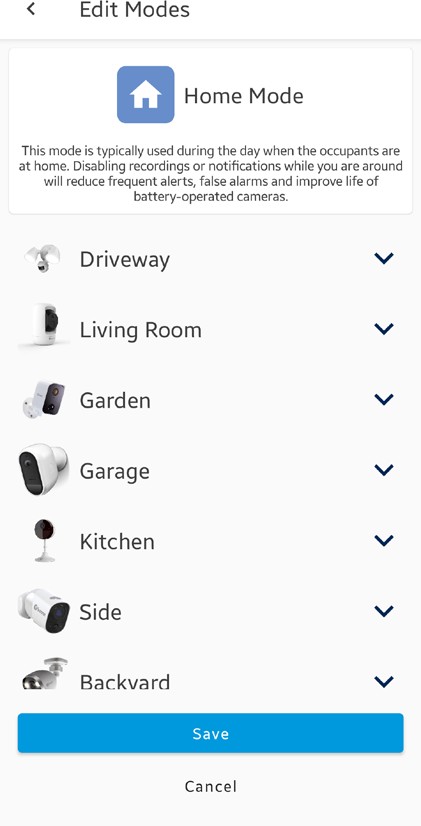
Tap to configure mode settings. For each mode (Home, Night, Away), you can customize settings such as a camera’s motion/sound detection sensitivity, siren trigger (if a siren is available), and push notification preferences. For more information,
see “Modes Tab” on page 18.
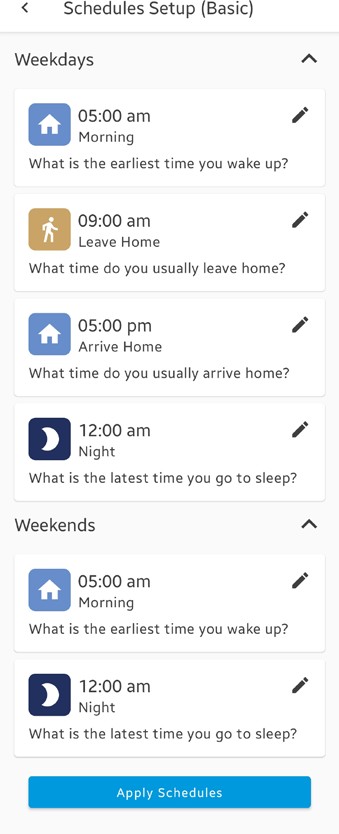
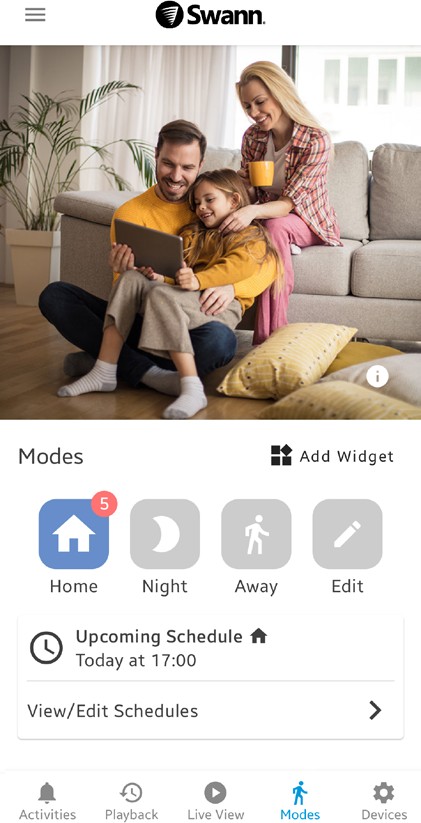
Tap to create a set of mode schedules based on your typical weekday and weekend routines. To learn more, see
“Modes Tab” on page 19.
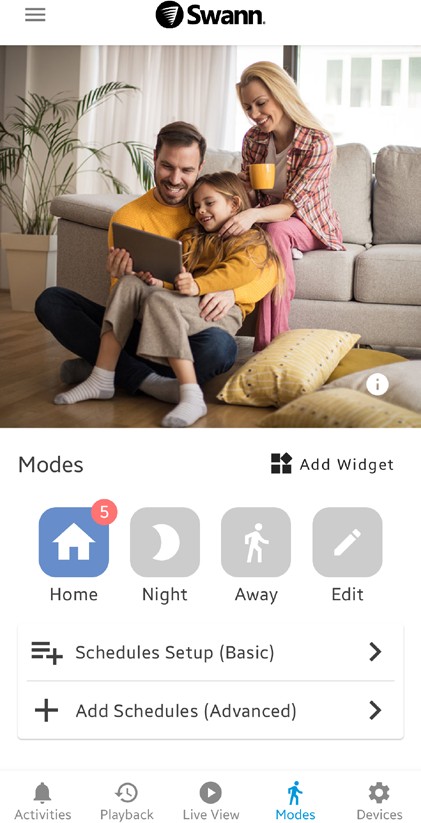
Tap to create the initial custom mode schedule.To learn more, see “Modes Tab” on page 19.
5
Configuring Modes
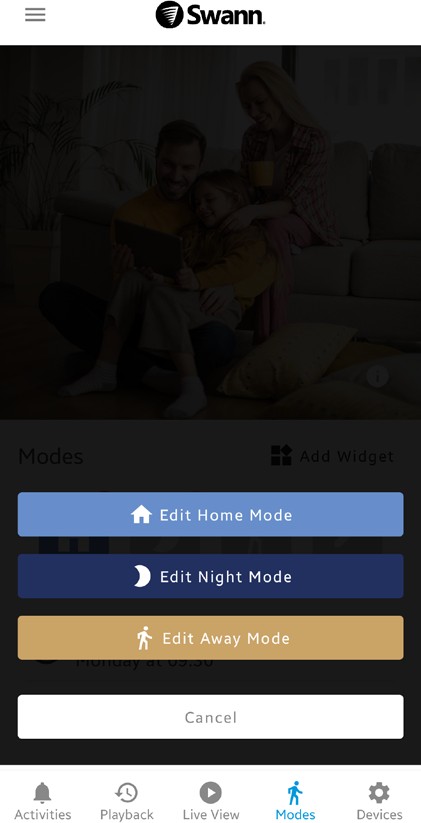
1. From the Modes tab, tap the Edit button.
3. Tap the arrow icon on the left of the device name to display the available settings.
2. Select the mode that you want to edit by tapping on the button.
Schedules
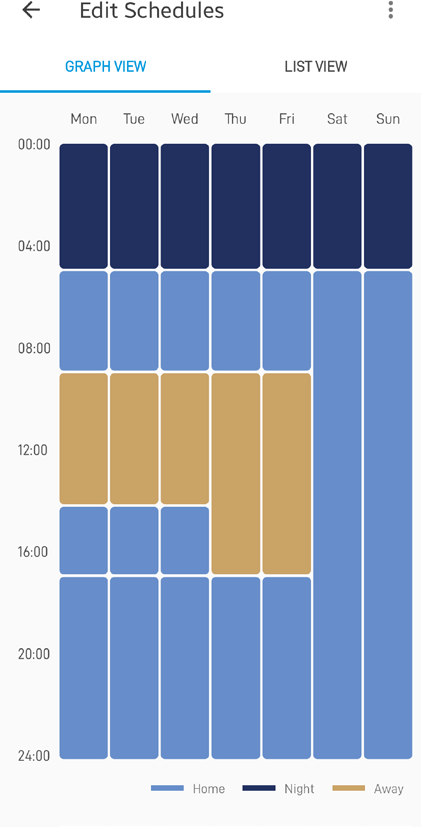
Your Swann Security devices can change modes automatically at various times of the day or days of the week using Schedules. For example, you can use schedules to set your devices in Night mode every day around bedtime, Away mode on the weekdays just before everyone leaves for work or school, or Home mode when you are back at home relaxing after work and during the weekends. Simply create a schedule whenever you want a mode change to occur—it’s a convenient and flexible way to control your Swann Security devices.
Creating Schedules
There are two ways to begin creating schedules in the app. You can quickly create a set of schedules based on your typical weekday and weekend routines via Schedules Setup (Basic), or you can choose Add Schedules (Advanced) to create the initial custom schedule.
Home mode
Away mode
Home mode
Away mode
Home mode
Night mode
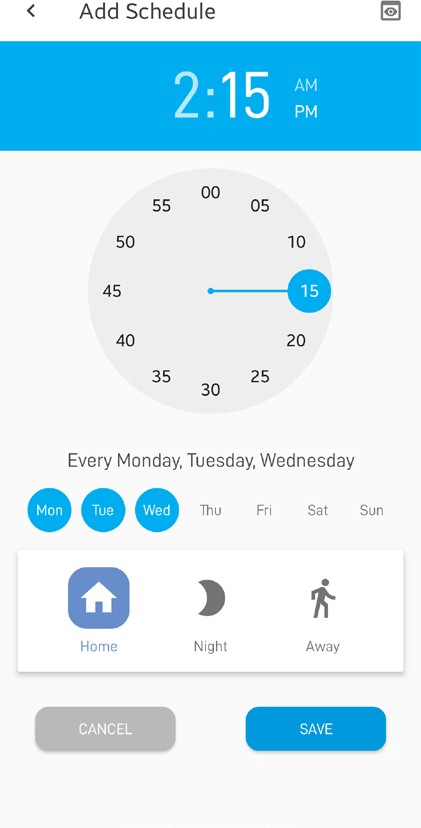
Tap to set the start time for the schedule
1. From the Modes tab, tap Add Schedules (Advanced). 2. Set the mode, the start time, and the day(s) for the
schedule you are creating, as shown below.
To set the start time for the schedule, tap either the ‘Hour’ or ‘Minute’ field and then adjust the clock hand
accordingly.
Select the desired mode for the schedule
Preview the schedule Select ‘AM’ or ‘PM’
Select the day(s) of the week on which you would like to run the schedule. The schedule will recur weekly, meaning that it will repeat every week
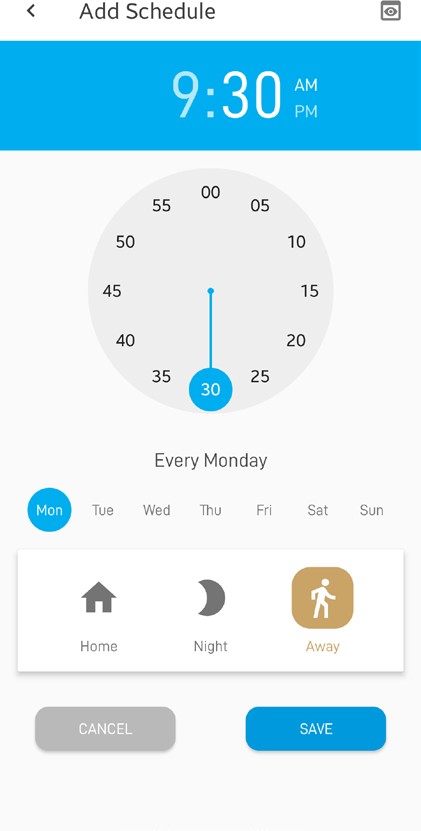
on the same day(s) that you select, as long as the schedule is enabled. For example, if you select Monday, the schedule will repeat every Monday
Creating Additional Schedules

Preview the schedule
To set the start time for the schedule, tap either the ‘Hour’ or ‘Minute’ field and then adjust the clock hand
accordingly.
Select the desired mode for the schedule
Select ‘AM’ or ‘PM’
Select the day(s) of the week on which you would like to run the schedule. The schedule will recur weekly, meaning that it will repeat every week

on the same day(s) that you select, as long as the schedule is enabled. For example, if you select Monday, Tuesday, and Wednesday, the schedule will repeat every Monday, Tuesday, and Wednesday
Editing Schedules
Delete the schedule
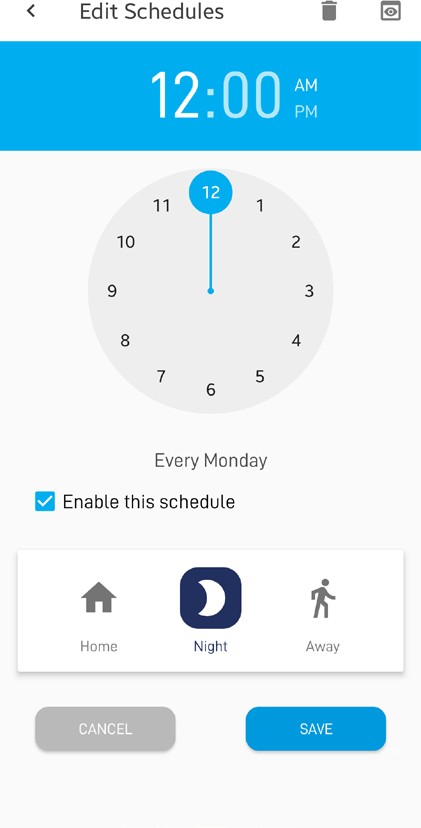
To adjust the start time for the schedule, tap either the ‘Hour’ or ‘Minute’ field and then adjust the clock hand
accordingly. Note: If the updated start time of this schedule conflicts with another schedule, this one will automatically take precedence and override the conflicting schedule, deleting
it in the process
If necessary, you can change the mode that will be applied to the schedule
Preview the updated schedule
Select ‘AM’ or ‘PM’
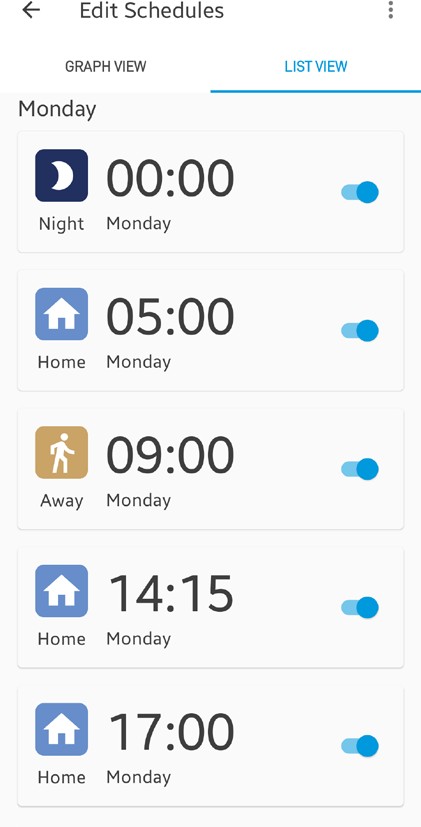
Occasionally, you may want to temporarily turn the schedule off by unchecking the box. The schedule
will be removed from the weekly view and won’t run until it is re-enabled
Note: You can delete all the mode schedules by tappingat the top right corner, then tap Delete All.
Discard changes and return to the previous screen
Save changes and return to the previous screen
You can manually override the mode after the schedule has started using the Modes panel. This is useful in situations where the mode set by the schedule is no longer appropriate.
The Activities screen provides a consolidated view of all the detection alerts generated today and the past week by your Swann Security devices.

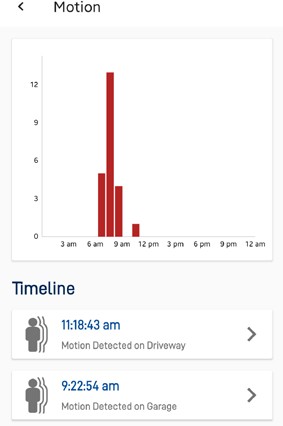
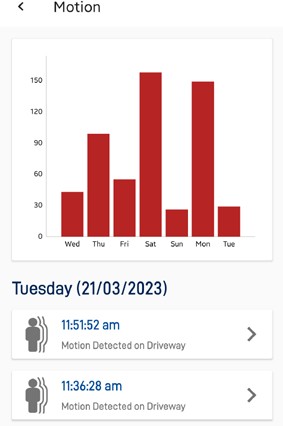
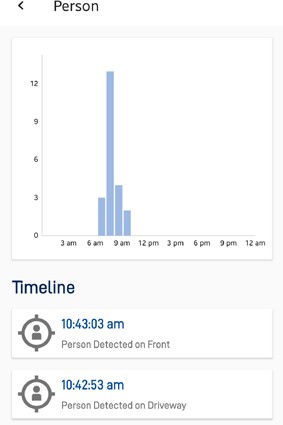
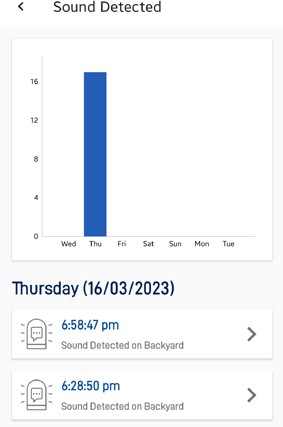
If you enable Do Not Disturb, your phone will not receive any notifications from the Swann Security app, regardless of the push notification settings you’ve configured for individual devices in Modes.
view details or configure settings.
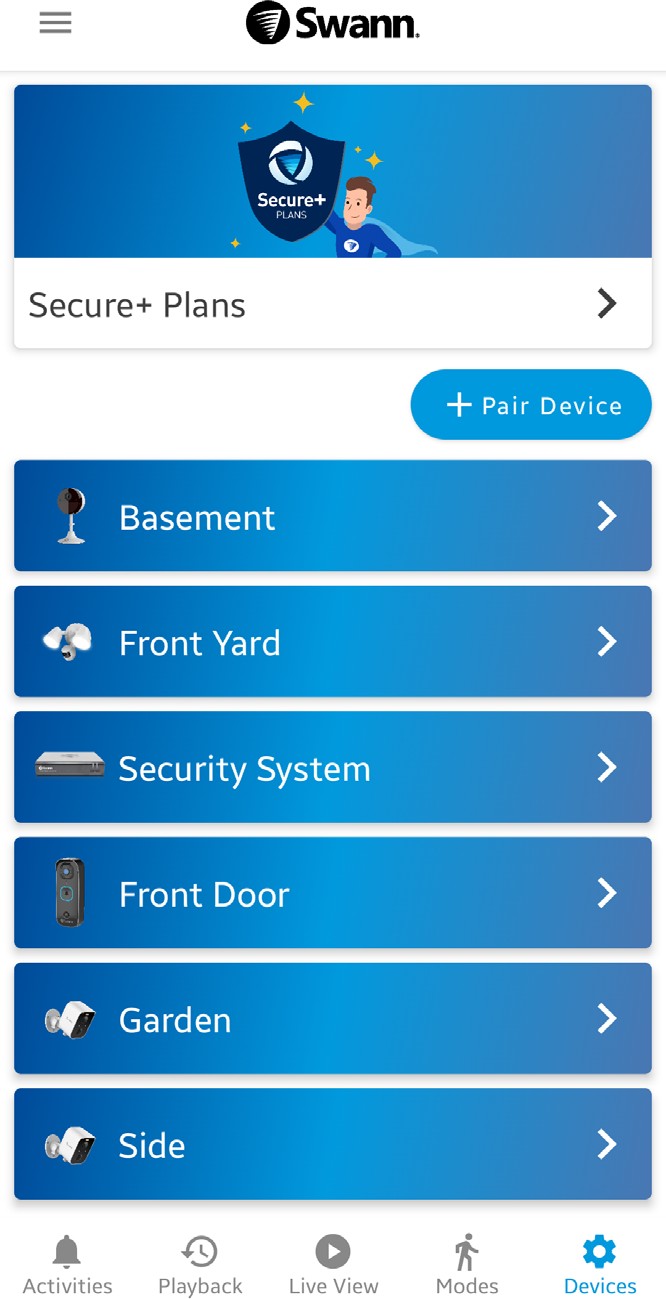
The name of the DVR/NVR system. You can tap to change it.
1

1
2
3
4
5
6
Shows the connection status of the DVR/NVR:
2
Note: If the device is “Disconnected“, check your internet connection and make sure the Ethernet and power cables are properly connected on both ends. You can try re-establishing the connection by tapping .
In case you’ve forgotten the password to access the DVR/ NVR system locally, tap the icon to reveal the password. For more information, see “Finding your DVR/NVR Password” on page 41.
3
You can change the name of the camera channels on the DVR/ NVR by tapping . If you rename the camera channel through the app, it will also be automatically updated on your DVR/NVR.
4
You have the option to remove (unpair) the DVR/NVR from your Swann Security account. In some cases, you may need to unpair your DVR/NVR. For example, if you plan to use your DVR/NVR with a different Swann Security account or give it away to a family member, you will need to unpair it first. See “System Settings” on page 34.
5
You can view technical information about your DVR/NVR such as the model code, software (firmware) version, device ID, MAC address, and network IP address.
6
The settings available vary depending on the device and will only appear if the feature is supported.
1
2
3
4
5
6
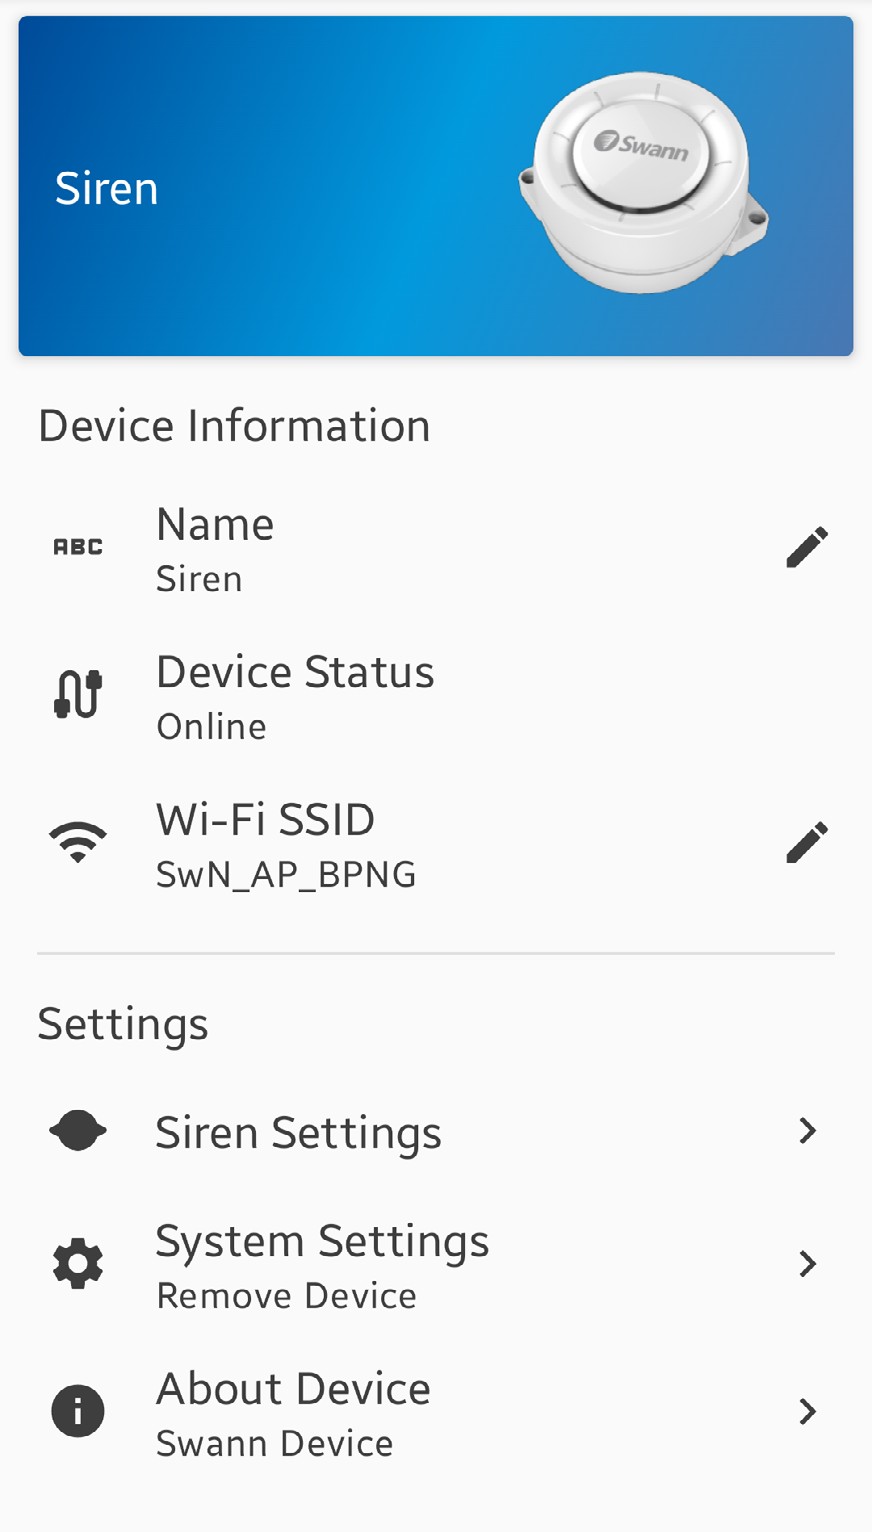
The name of the device. You can tap to change it. Shows the connection status of the device:
2
1
Note: If the device is “Offline“, check your Wi-Fi/internet connection and the device’s battery level. The device will automatically reconnect to Wi-Fi once the network is restored.
Shows the name (SSID) of the Wi-Fi network the device is currently connected to. If you have multiple Wi-Fi networks in your home, you can tap to change the Wi-Fi connection.
3
You can change the settings for the siren such as the volume, duration, and sound effect. See below for more information.
4
You have the option to remove (unpair) the device from your Swann Security account. See “System Settings” on page 34.
5
You can view technical information about the device such as the
6
model code, firmware version, installation date, and IP address.
SIREN SETTINGS
4
1
2
3
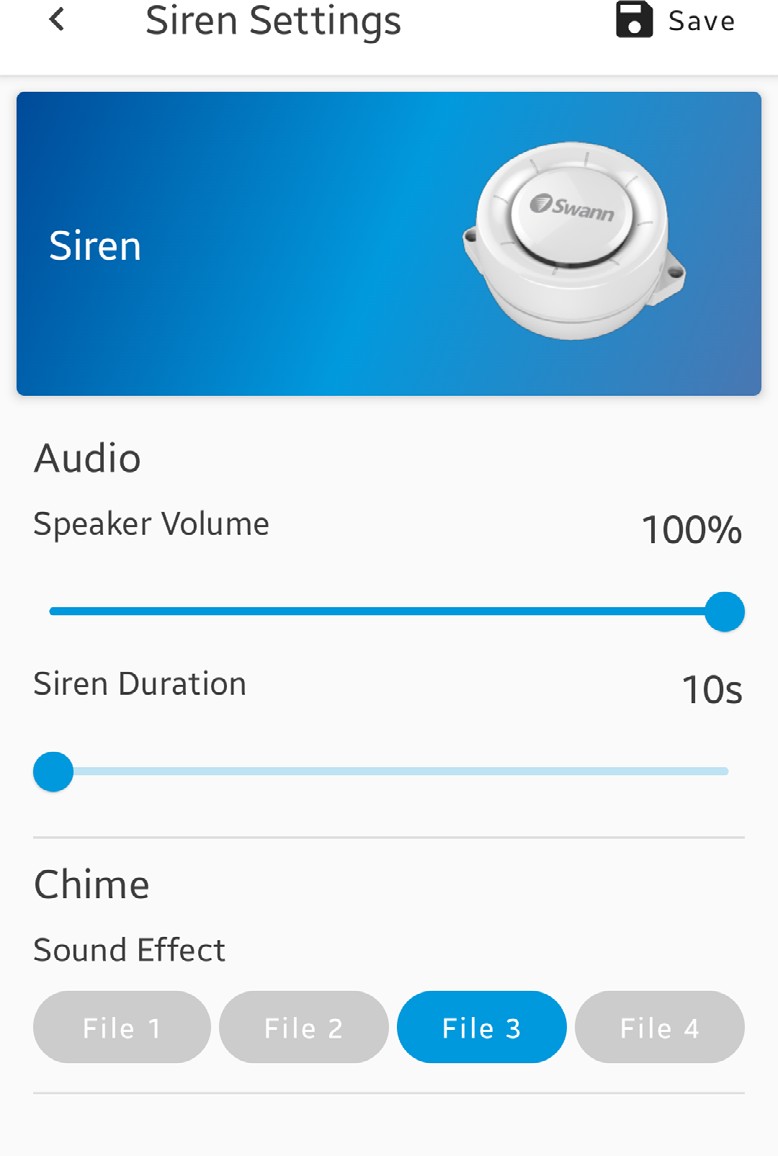
You can adjust the siren volume by sliding to the level desired. To mute the siren, slide the level all the way left to 0%. Note that even when muted, the red and blue LED light ring will continue flashing.
1
You can set how long the siren will sound when the associated device detects an event.
2
You can select the sound that the siren will play when it is triggered. Save any changes made to the siren settings.
3
4
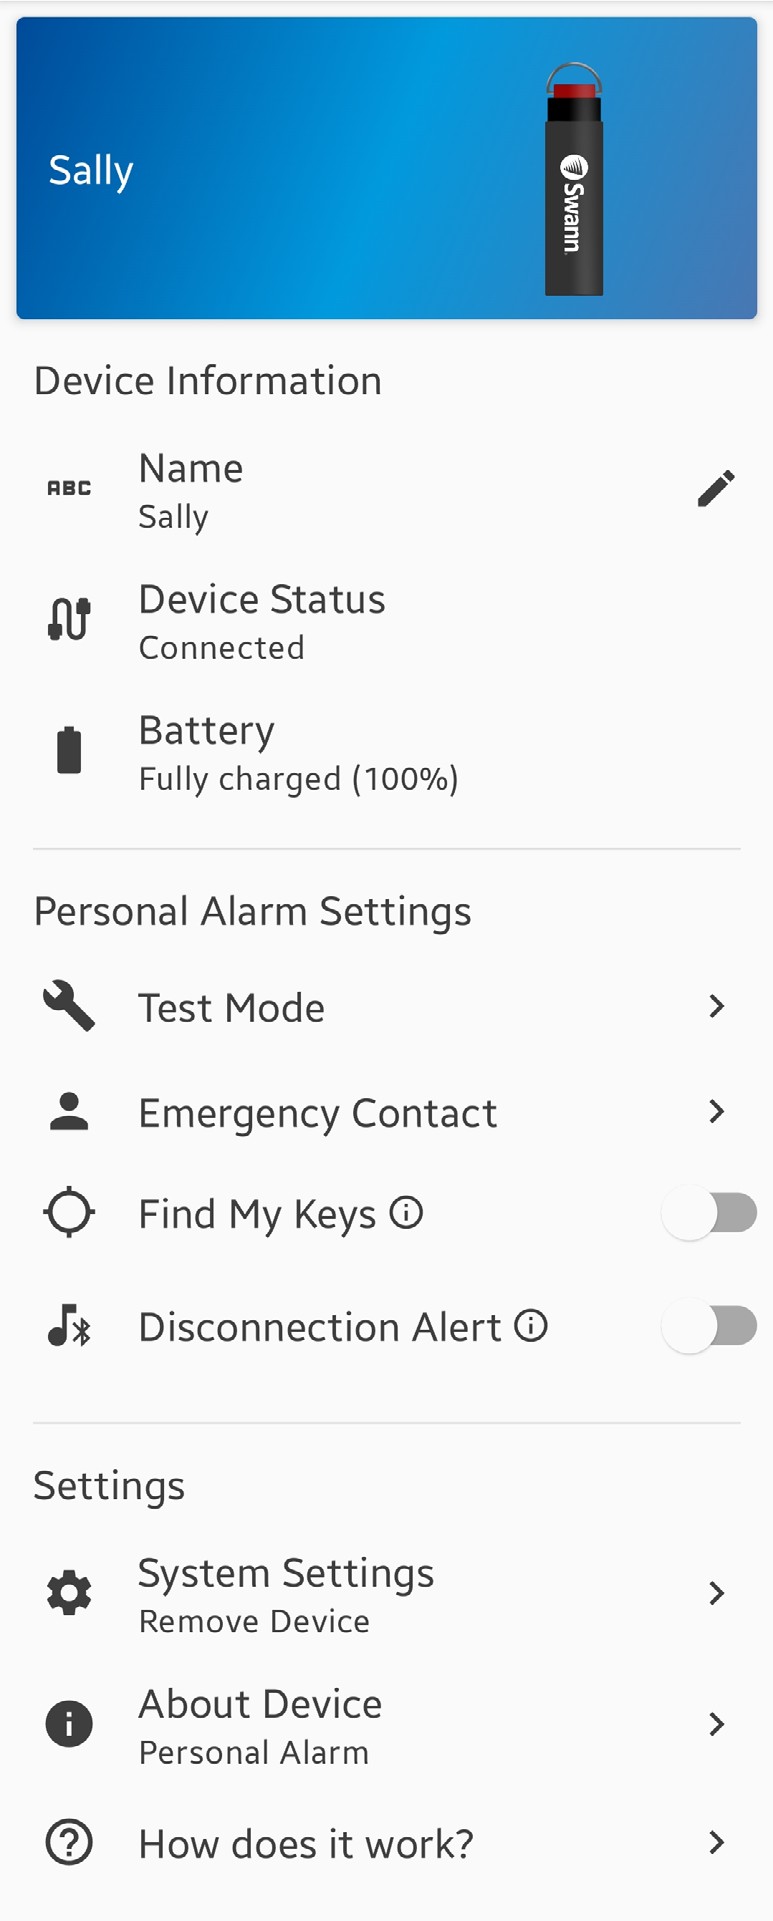
The name of the Personal Alarm. You can tap to change it. Shows the device status:
2
1
1
2
3
4
5
6
7
8
9
10
Note: If the device is “Disconnected“, check your phone settings to ensure that Bluetooth is turned on.
Shows the current battery level (%).
3
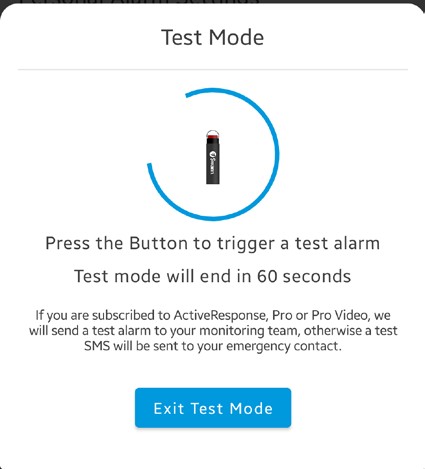
You can enter Test Mode at any time to familiarize yourself with how your Personal Alarm works without risking false alarms. Triggering the Personal Alarm during the test mode will result in either:
4
contact, or
Swann Security Account Profile” on page 36.)
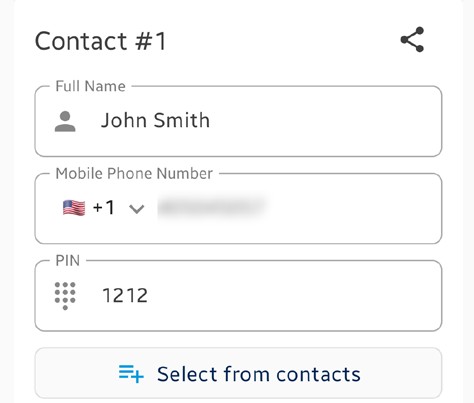
You can manage the details of your emergency contacts, including their 4-digit pin code (this option is only available to ActiveResponse plan subscribers).
5
Note: Be sure to inform your designated contacts about their 4-digit pin code, which will be used to verify their identity when the monitoring center calls — simply tap Share .
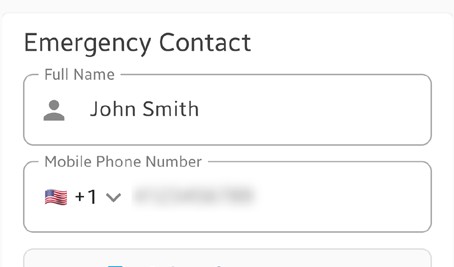
(Free plan)
(ActiveResponse subscribers)
In addition to professional monitoring, the ActiveResponse plan allows you to locate misplaced keys and designate up to five emergency contacts. To learn more about the benefits and to subscribe, navigate to the App Menu > Secure+ Plans.
(Only available to ActiveResponse plan subscribers) If your keys are attached to the Personal Alarm, you can easily locate them if they have been misplaced. For example, If you have your phone, but don’t know where your keys are, you can toggle ‘Find My Keys‘ on to make the Personal Alarm emit the siren.
6
You can toggle ‘Disconnection Alert‘ on or off. When this is enabled, your Personal Alarm will emit a 20-second beep when it’s out of Bluetooth range of your phone. This feature is useful if you want to ensure that your Personal Alarm always stays with you when you leave the house.
7
You can unpair the Personal Alarm from your Swann Security account. For example, if you plan to give it away to a family member, you will need to unpair it first.
8
You can view technical information about the Personal Alarm
9
such as the firmware version and installation date.
You can display the help overlay explaining how to use the Personal Alarm and what the ‘Disconnection Alert‘ feature does.
10
The settings available vary depending on the device and will only appear if the feature is supported.
1
1
1
1
2
3
4
5
6
7
8
9
0
1
2
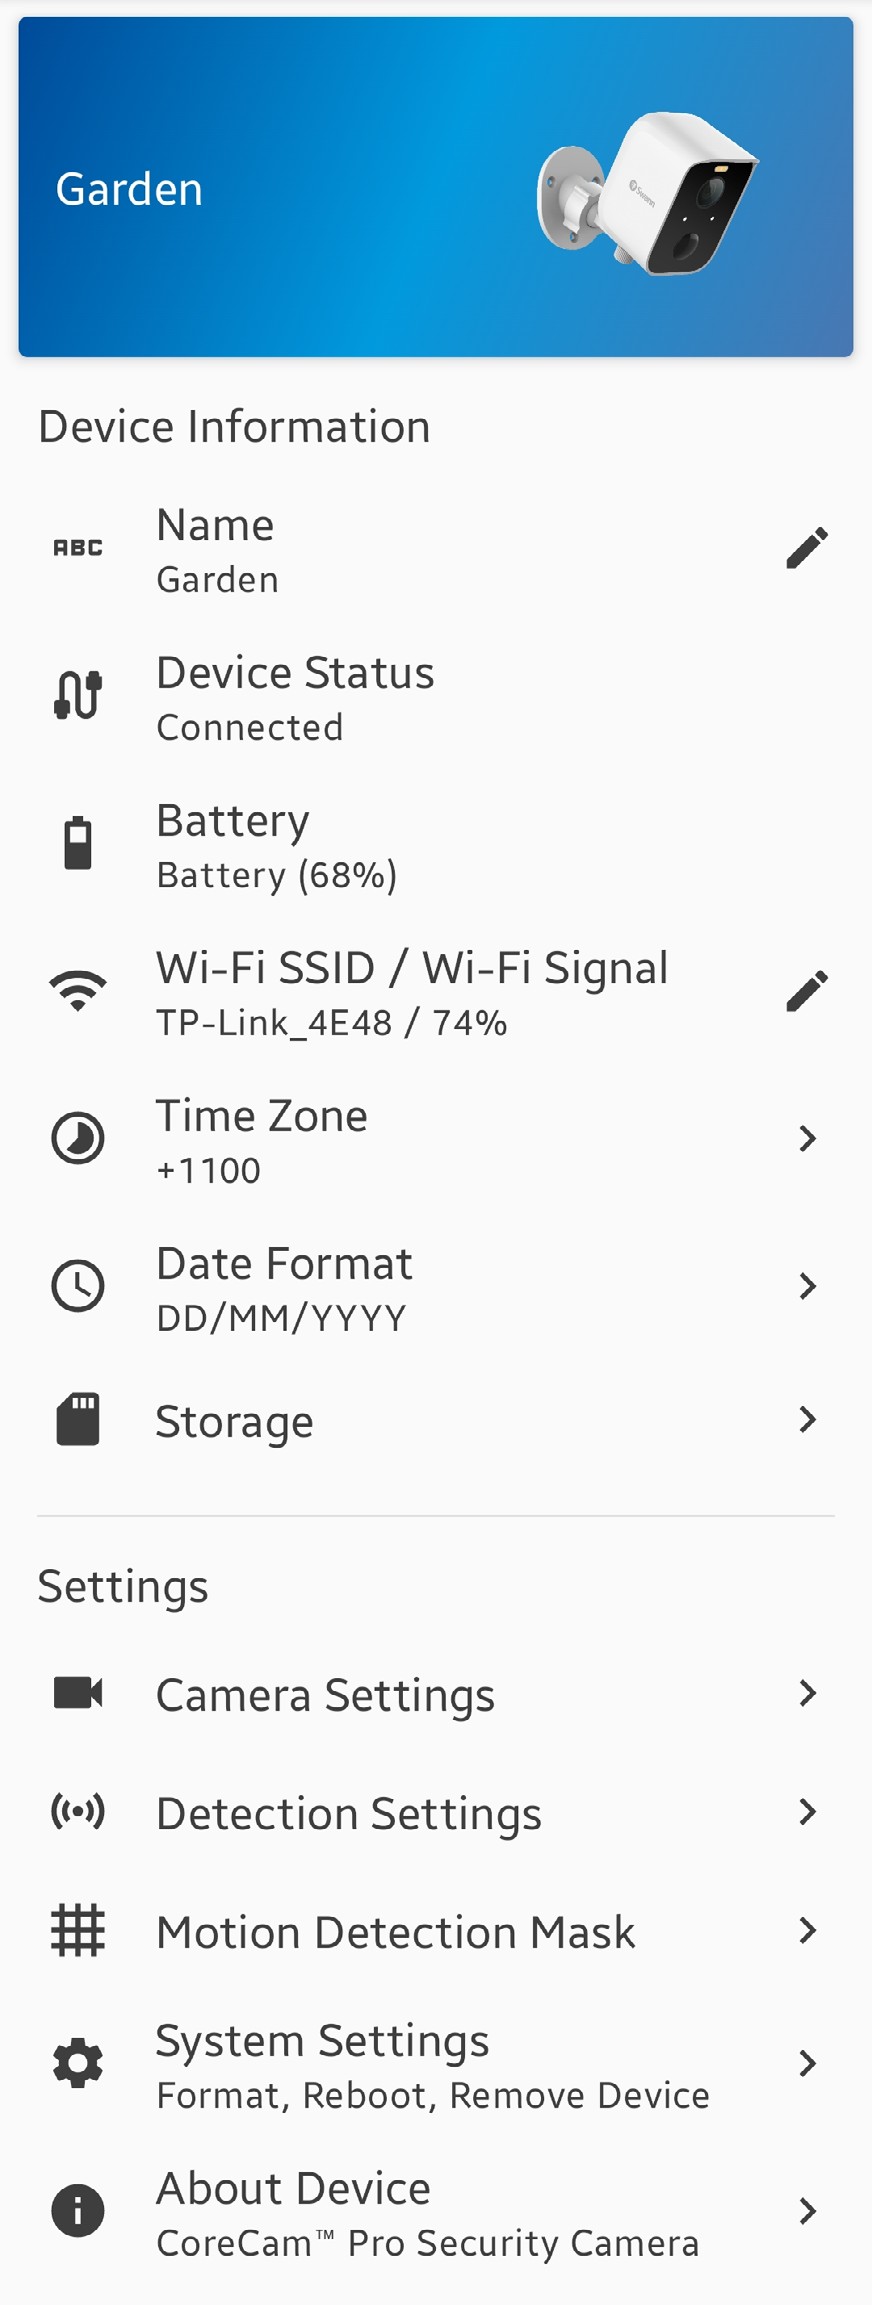
The name of the camera. You can tap to change it. Shows the connection status of the camera:
2
1
Note: If the device is “Disconnected“, check your Wi-Fi/internet connection and the device’s battery level/power connection. You can try re-establishing the connection by tapping .
Shows the current battery level (%) and the charging status when the camera is connected to the USB power charger or Swann solar panel.
3
Shows the name (SSID) and signal strength of the Wi-Fi network the camera is currently connected to. The signal strength is represented as a percentage, and the closer the camera is to your Wi-Fi router or access point, the higher the percentage and the more reliable and faster the wireless connection between devices. A camera located far from the router or access point, without a strong wireless connection, may drop off the network from time to time, resulting in problems with video streaming.
4
If you have multiple Wi-Fi networks in your home, you can tap to change the Wi-Fi connection. For more information, see “Changing the Camera’s Wi-Fi Network” on page 37. Note that for the best video streaming performance, you should always connect your camera to the Wi-Fi access point or extender nearest to it.
Shows the timezone of the camera. The date and time stamp of camera recordings will be based on the timezone you’ve selected. You can tap
5
to change the timezone. Timezone is based on Universal Coordinated Time (UTC), and options range from UTC -12:00 to UTC +14:00.
Shows the current date format displayed in the camera recordings. You can tap to change the date format. Options available: MM/DD/YYYY, YYYY/ MM/DD, DD/MM/YYYY
6
You can access recordings stored on the camera’s local microSD card.
7
You can adjust the camera’s audio and video settings such as the video stream quality, video orientation, microphone volume, and speaker volume. See “Camera Settings” on page 30.
8
You can adjust the camera’s detection settings such as the motion and person detection sensitivity, sleep period, and siren duration. See “Detection Settings” on page 31.
9
You can set up a motion detection mask for the camera to reduce false motion triggers. This feature allows you to specify certain areas within the camera’s field of view where motion should be ignored. By configuring the motion detection mask, you can ensure that the camera only detects motion in the desired areas, thus minimizing false alarms and improving overall detection accuracy. See “Motion Detection Mask” on page 32.
10
You can perform general maintenance such as rebooting the camera, resetting camera settings, formatting internal storage, and factory reset. There is also the option to remove the camera from your Swann Security account. See “System Settings” on page 34.
11

1
3
You can view technical information about the camera such as the model code, firmware version, installation date, MAC address, and Wi-Fi IP address.
12

14
You can set up and manage face recognition profiles on the camera. See
13
“Face Recognition” on page 33.
This setting is enabled by default to optimize power consumption, which helps prolong the camera’s battery life. Disabling this setting may result in faster performance but will also lead to higher battery drain.
