3
4
If the camera has completely lost connection to the app (due to connection timeout, device
sleeping, Wi-Fi/Network issues, etc), the camera tile will prompt you to reconnect, as shown on the right. Tap the tile to reconnect to the camera.
Note: If you encounter issues reconnecting to the camera, try turning the power to the camera off for 10 seconds. Then turn it back on and restart the app. Additionally, ensure that your internet connection is working properly. You can also try rebooting your Wi-Fi router to resolve any network connectivity issues.
Tap the tile to display live view of the selected camera in single view mode and access additional camera options (device-dependent) such as quick snapshots/clips, 2-way talk, pan and tilt controls, spotlight, siren, and more. For more information, see “Single View Mode” on page 12.
5
6
Displays the current battery level (%) of the camera when charging via a solar panel or a USB charger.
(Personal Alarm only) Tap the tile to display the device settings screen. For more information, see
7
“Personal Alarm Settings” on page 28.
(Indoor Siren only) You can manually activate the siren. Tap the tile > tap > set the Siren toggle to the ON position, then tap the SET button, as shown on the right.
8
Single View Mode
3
1
2
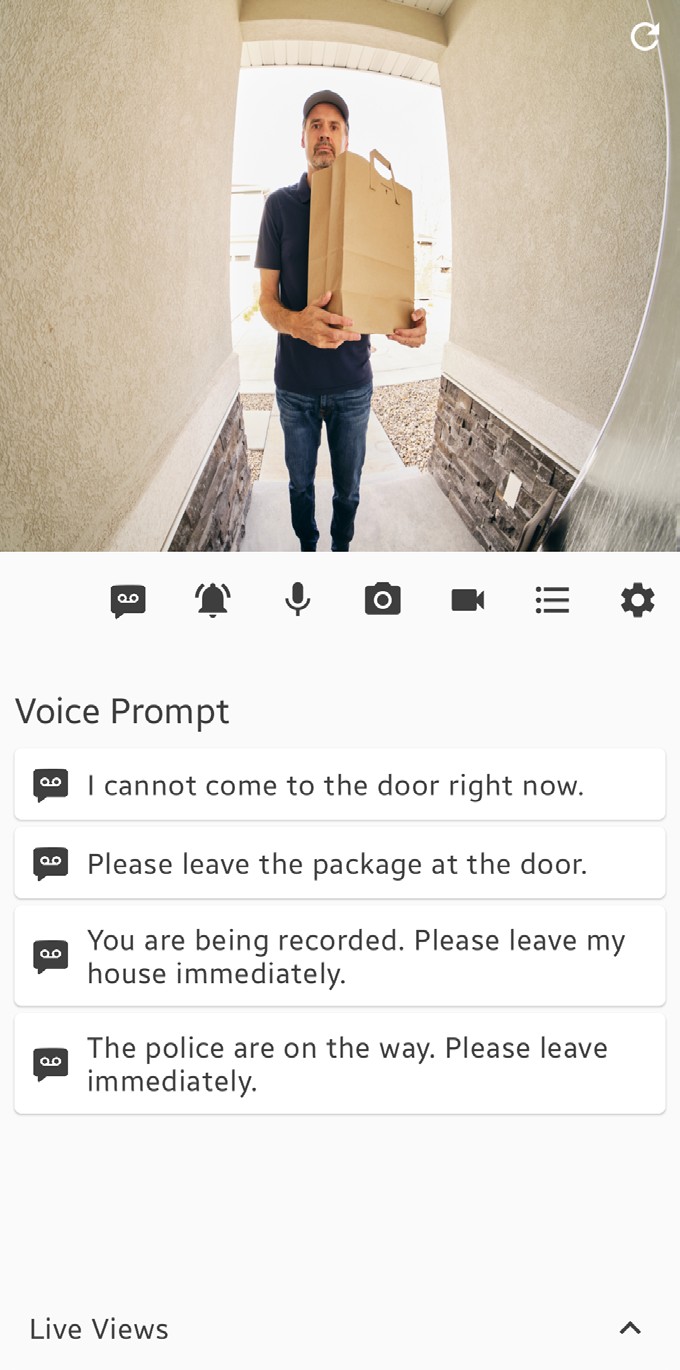
The SwannBuddy Video Doorbell has a smart “Pre- recorded Messages” feature available. Tap this icon to display the list of pre-recorded messages which you can quickly choose to play as a response to visitors when you can’t answer the door.
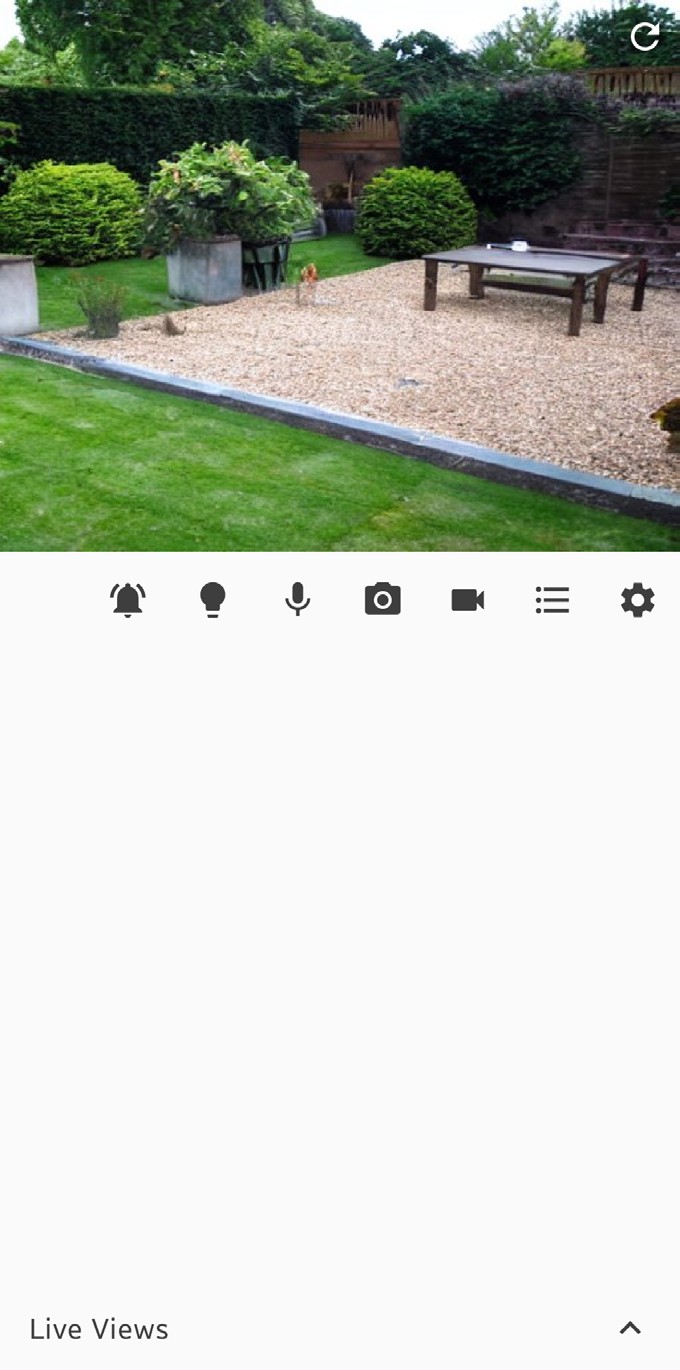
The camera’s live video window.
1
4
back to zoom out.
12
If the live video feed has stopped streaming, tap this icon to refresh it.
The displayed icons vary depending on the device and will only appear if the feature is supported. The following table describes the icons that may appear on the screen.
13
|
Icon |
Description |
Icon |
Description |
|
|
Tap to display the pan and tilt/tracker panel on the screen to control the view of the camera. For more details, see “Single View Mode: Pan and Tilt / Tracker Panel” on page 13 . |
|
Tap to display the > Live Recordings. See “Viewing Saved Recordings” on |
|
|
Tap to display the off the camera’s built-in floodlight/spotlight. |
||
|
|
Tap to display the |
|
Tap to display the list of recent activities detected by the camera. |
|
|
Activate or deactivate the camera’s 2-way talk mode When activated, press and hold the PTT (Push to Talk) button to talk. Release the PTT button to listen. |
|
Tap to go directly to the camera’s Settings screen. |
|
SD |
For DVR/NVR systems, you can toggle between different video quality settings. The HD quality setting will display the clearest and sharpest video possible, but the bandwidth required to stream video will be much higher and you’ll need high-speed internet on both ends of the connection. A lower quality setting can help to load the video clip faster and ensure smoother playback. This can be useful if you have a slower internet connection or if you want to conserve bandwidth. |
||
|
|
Tap to take a snapshot of the live video. The snapshot will be saved to your phone, and you can view it by opening your phone’s Gallery/Photo app. |
||
|
|
|||
Tap to open the panel displaying the live view tiles of your other cameras. Scroll left or right to see the available cameras. Tap on the tile of the camera to view it in the live video window above.
41
Single View Mode: Pan and Tilt / Tracker Panel
2
3
1
5
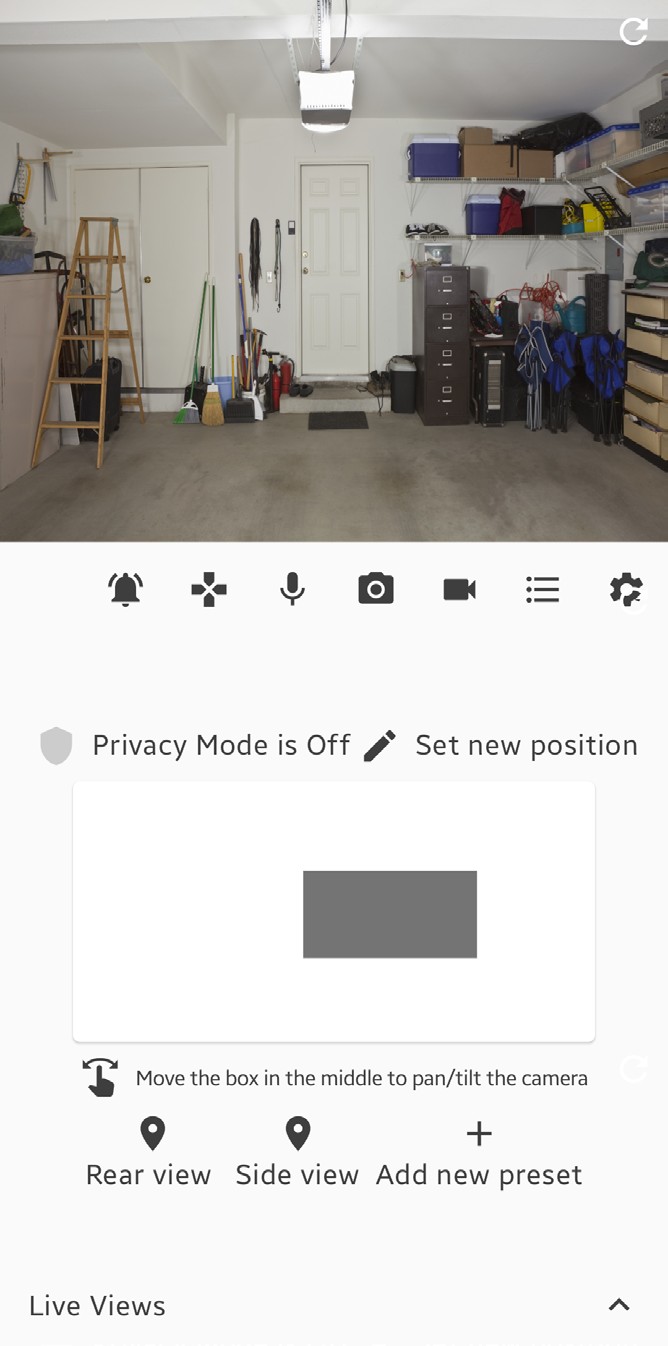
Drag the grey box in the desired direction within the control area to pan and tilt the camera.
1
Note: For cameras, such as the Tracker Camera, with motion tracking function and dual video layout display, you can manually focus the zoom view on a particular zone by dragging the control box in the desired direction.
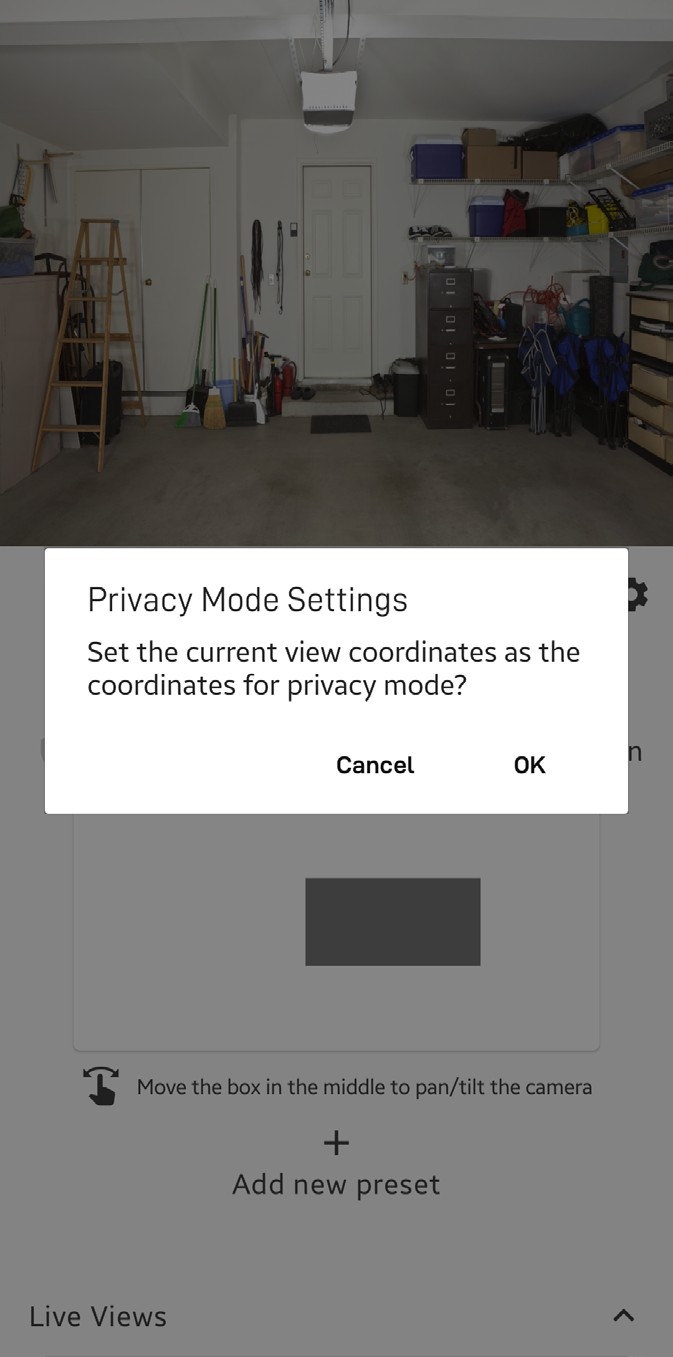
Tap to enable/disable Privacy mode. When Privacy mode is enabled, the camera will rotate to its privacy mode
3
2
position (see ) and also disable the motion sensor, preventing any recordings from being captured to ensure
privacy. The Privacy mode icon will be highlighted when enabled.
Move the camera to the desired viewing angle using the
3
grey box, then tap
to set this view as the
Privacy mode position. “Privacy Mode set successfully“ is displayed on the screen.
1
4
Tap to auto-rotate the camera and scan the scene once.
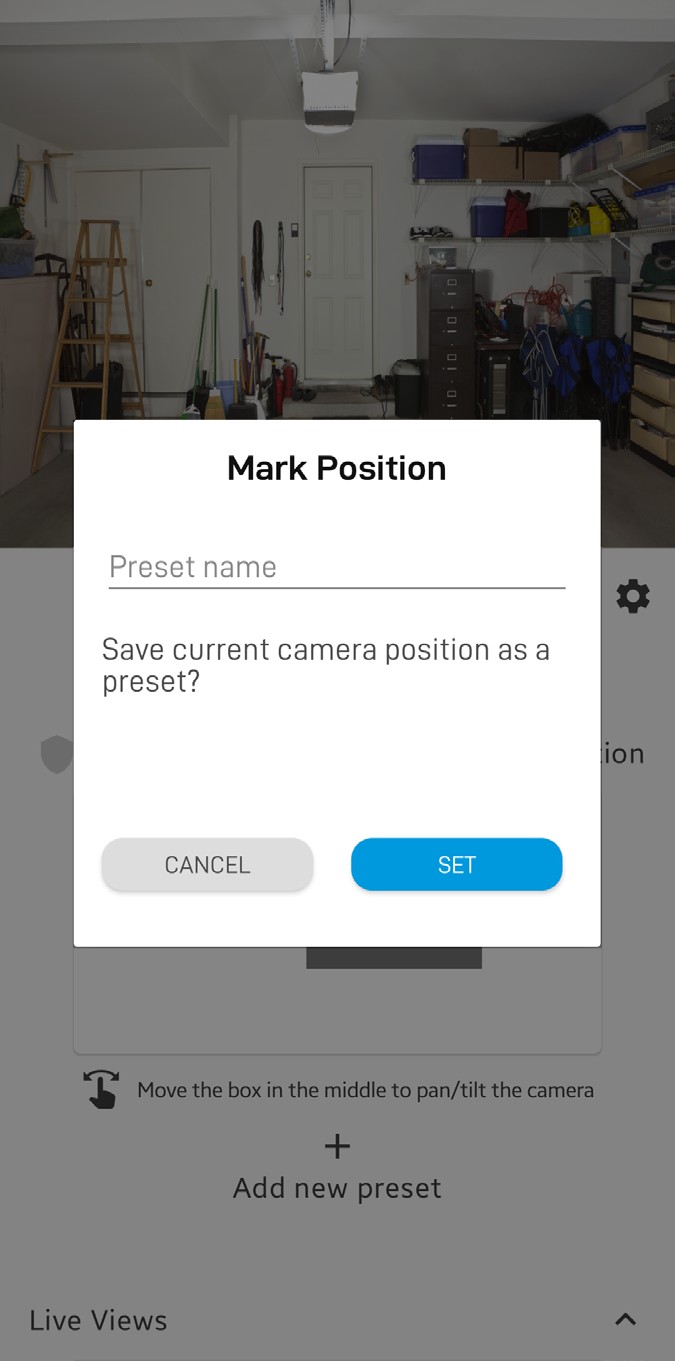
Camera presets let you easily move the camera to pre-defined viewpoints. To create a preset, use the grey box to adjust the camera to your desired viewing angle, and then tap the ‘Create Preset‘ button. A box will appear where you can name the preset, as shown above.
5
1
. A box will appear where you can name the preset, as shown above.
Live View Tab Settings
Position 1
7
1
2
6
Position 2
3
4
5
Position 3
Position 4
You can hide camera tiles from being displayed on the Live View tab. For example, if you don’t want live video from a
1
specific camera to be visible, you can hide that camera’s tile.
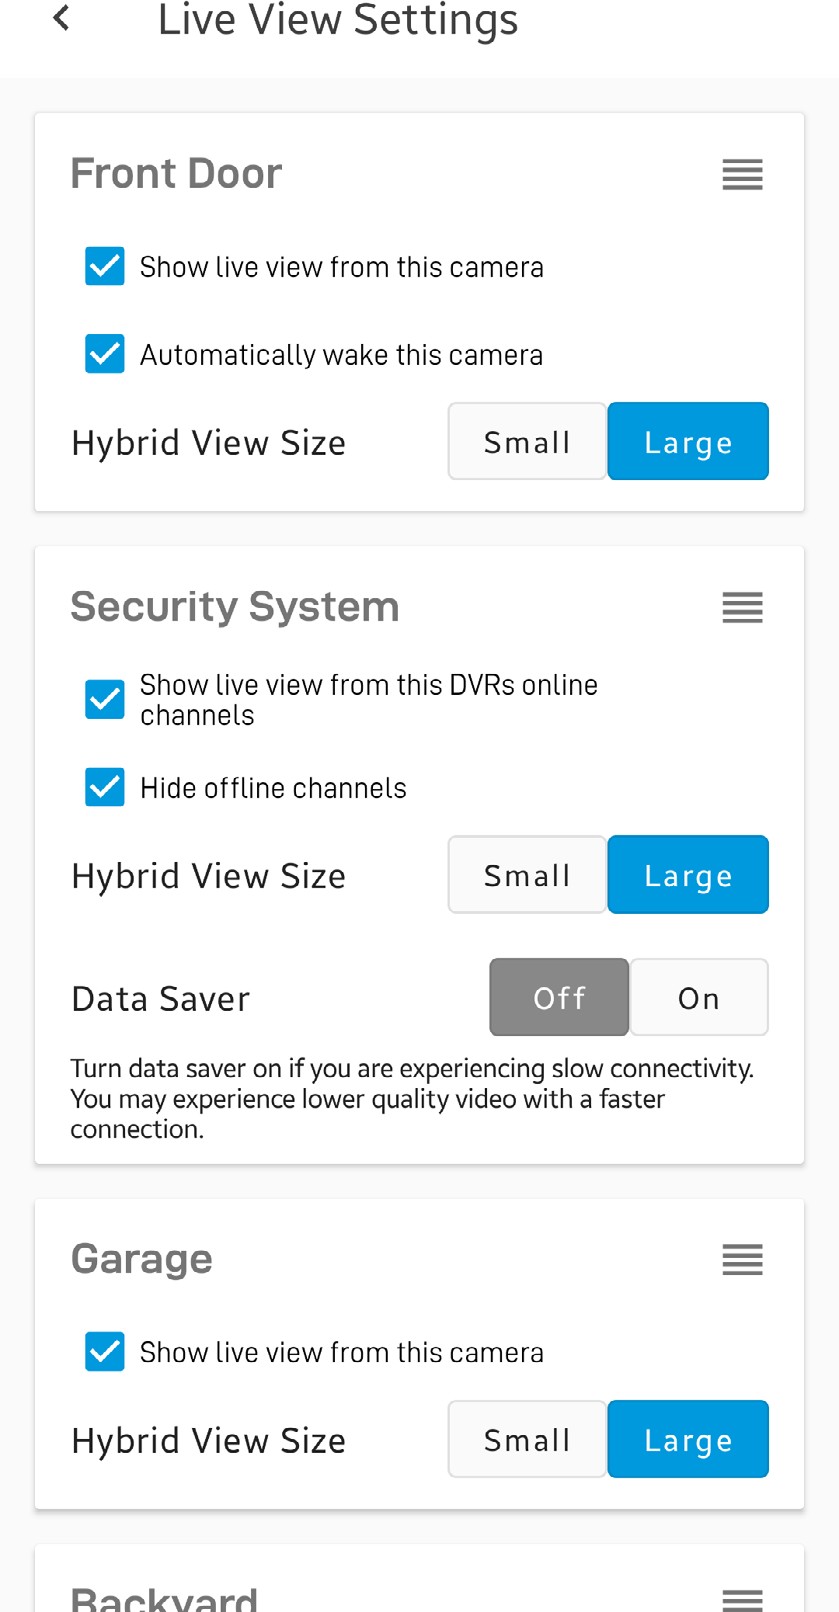
 To hide a camera tile, uncheck the “Show live view from this camera” box. To unhide a camera tile, check the “Show live view from this camera” box.
(Battery-powered camera only) By default when the app is launched, the camera will automatically wake up from sleep and stream live video. If you want to conserve battery life between charges, you can uncheck the “Automatically wake this camera” box. You will need to tap on the camera tile to manually wake the camera and start the live video stream, as shown on the right.
2
(DVR/NVR only) Uncheck the “Show live view from DVR“ box to hide all DVR/NVR channel tiles on the Live View tab. To unhide all DVR/NVR channel tiles, check the “Show live view from DVR“ box.
3
(DVR/NVR only) You can hide offline (unused) DVR/NVR channel tiles from being displayed. Check the “Hide offline
4
channels“ box. To unhide offline DVR/NVR channel tiles, uncheck the “Hide offline channels“ box.
5
(NVR only) You can turn the Data Saver feature on or off. If your internet connection is slow, we recommend turning this feature on to improve the live streaming performance of your NVR cameras–the app will use “Mobilestream“ as the default live video quality setting. For more details, refer to the instruction manual of your NVR system.
You have the option of customizing the size of the device tile between Small and Large for Hybrid View layout.
6
Grid View List View
7
You can rearrange the position of camera tiles on the Live View tab – simply press and hold the icon of the camera you want to move, then drag it to the desired position. The camera that was previously in that position will move back one place. The positions of camera tiles in grid and list views on the Live View tab are arranged in a specific order as shown on the right.
|
Position 1 |
Position 2 |
Position 1 |
|
Position 3 |
Position 4 |
Position 2 |
|
Position 5 |
Position 6 |
Position 3 |
|
Position 7 |
Position 8 |
Position 4 |
Note: The order of DVR/NVR channels cannot be rearranged and is always sequential based on their channel number (e.g., 1, 2, 3, 4, etc.).
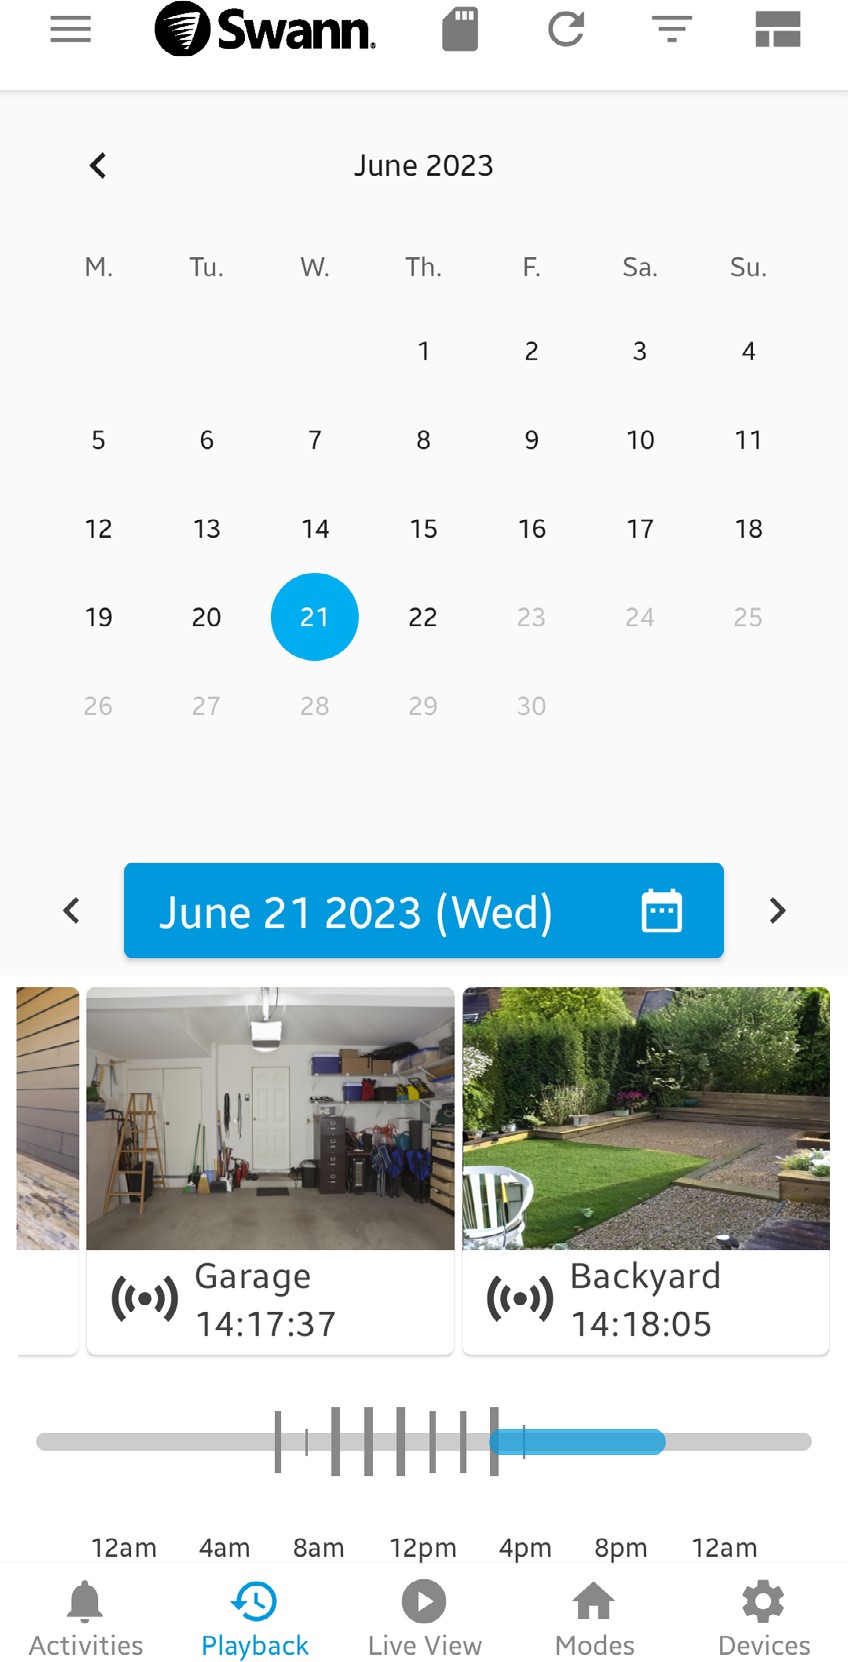
List View Display Timeline Slider View Display
2
3
4 5
6
1
7
1
8
Tap to playback recording. See next page for details.
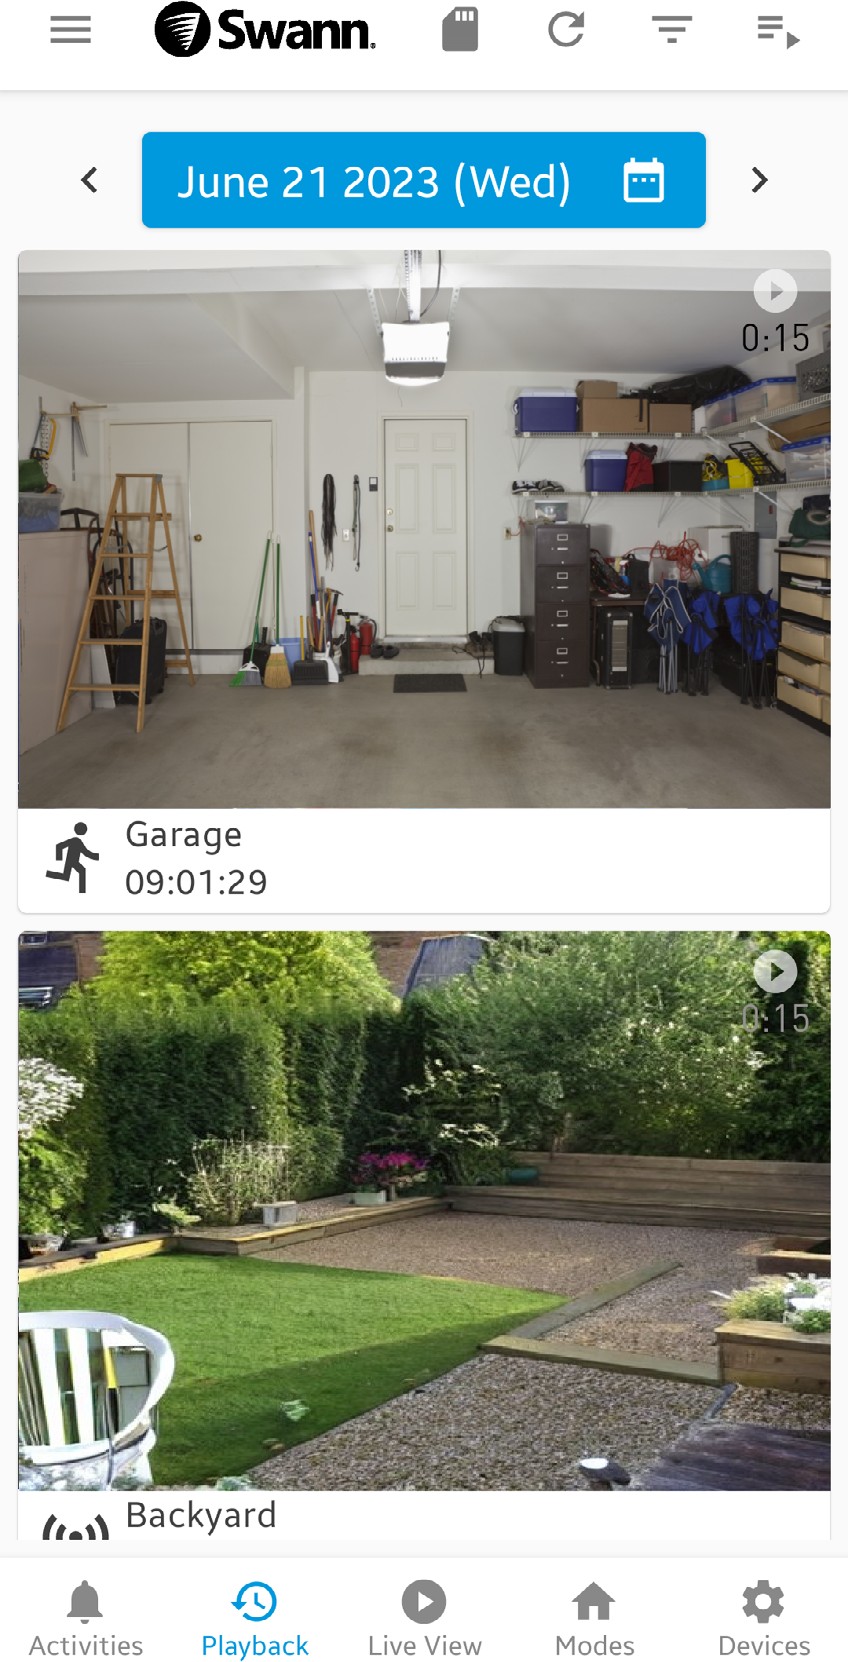
By default, the list of today’s camera recordings is displayed. Depending on the type of devices paired, this may include recordings stored in the cloud, live recordings, as well as those located on the DVR/NVR. For SWIFI camera models that only have microSD card storage, such as the TrackCam, please refer to 2 below. You can also view camera recordings from a different date, simply tap here and select the desired date using the calendar or tap the left or right arrow to view the previous or next day’s recordings.
1
Note:
Cloud recordings will be displayed on the Playback tab for the length of time determined by the Secure+ cloud plan associated with the camera. You can find out more about the Secure+ cloud plans available for your cameras and as well as subscribe to a plan at any time, simply tap Menu > Secure+ Plans.
2
Tap to access and view recordings stored on the camera’s local microSD memory card, if available. Tap to refresh the video history and check for new recordings.
3
4
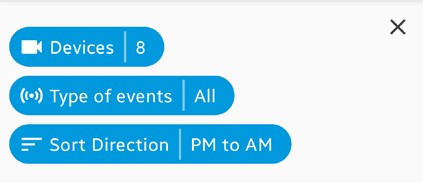
Tap to access the playback filter options, as shown on the right. You can sort recordings in chronological (AM-PM) or reverse chronological (PM-AM) order, and filter recordings by device type and event type.
5
Tap to switch the display from List View to Timeline Slider View (see above right screenshot). Tap to switch the display from Timeline Slider View to List View (see above left screenshot). The calendar allows you to select any date to view that day’s camera recordings.
6
7
8
Drag the timeline slider left or right to quickly find recordings at specific times of the day. The timeline displays the video thumbnail of the camera recording along with a unique symbol indicating the type of event, and the time of recording.
Video Playback Window
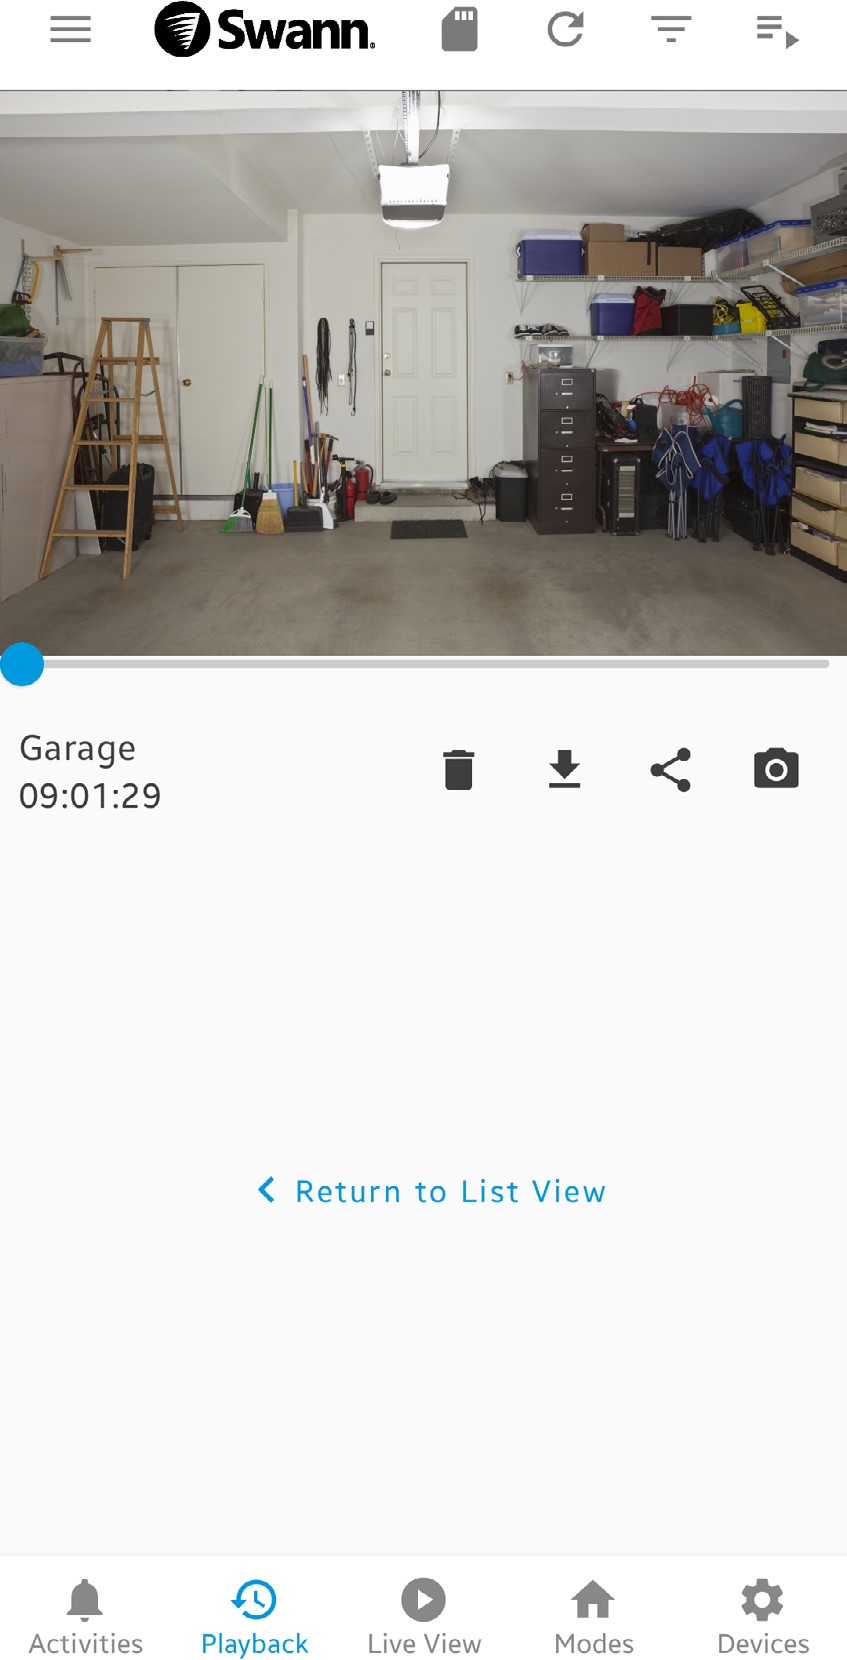
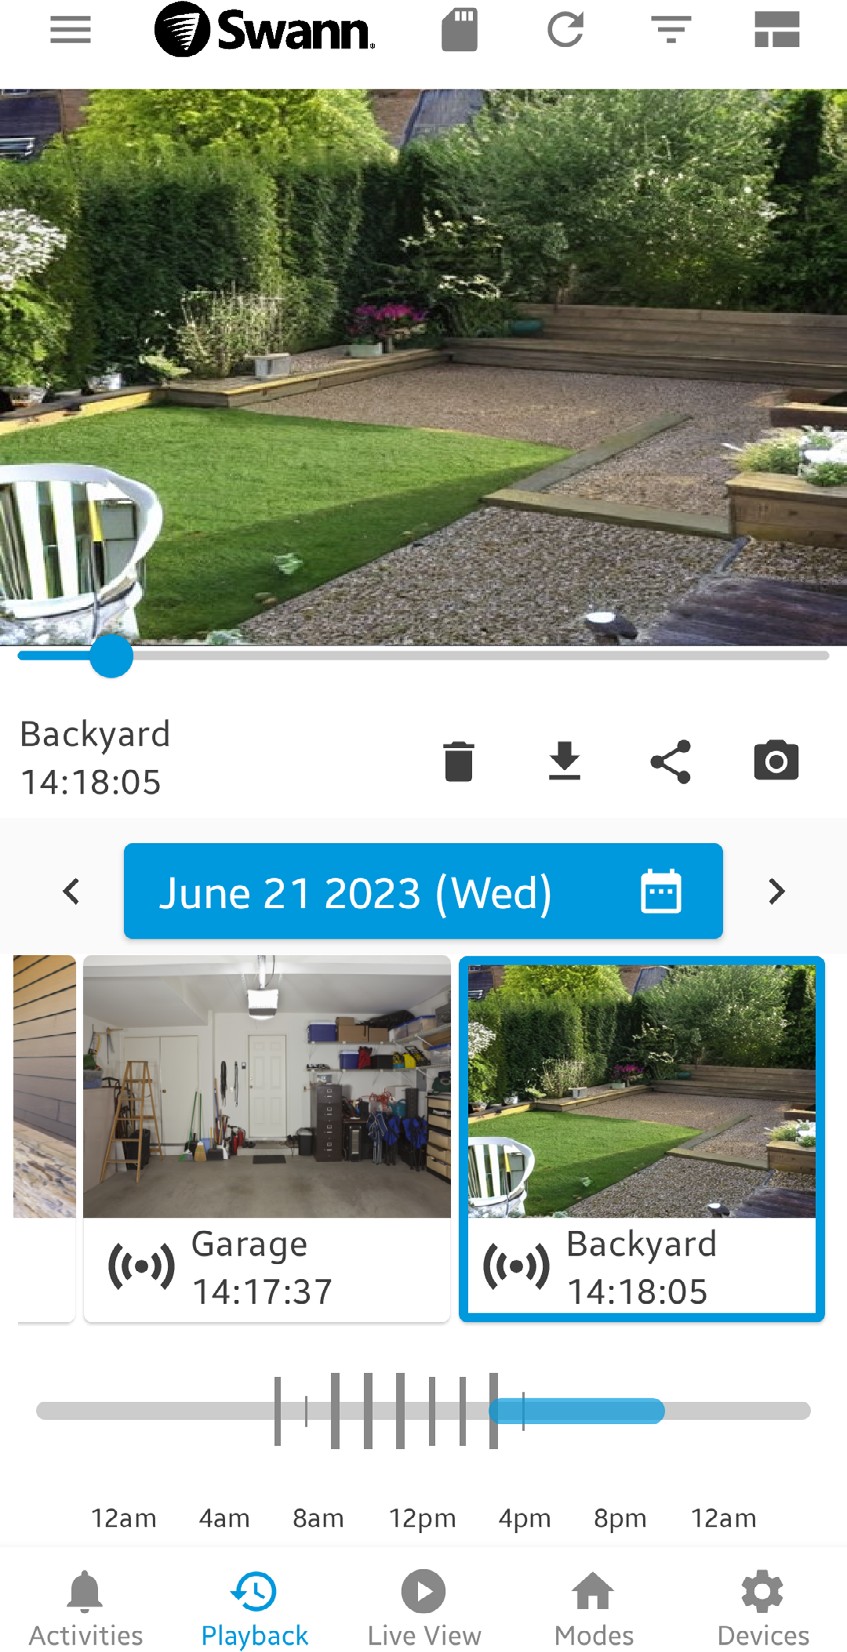
From List View Display From Timeline Slider View Display
1
2
3
4
The video playback window: tap to reveal video playback controls. You can pause/play, fast-forward/rewind (using the seekbar), adjust the playback speed (0.25x – 16.0x), and watch the video in full screen mode ().
1
You can Delete the recording (which will remove the recording from the video history and cloud storage so make sure to download it first if you want to keep it), Download
the recording, Share
the recording (via popular email/ messaging apps installed on your phone), or take a Snapshot
during playback.
2
Note:
Tap to close the video playback window and return to the List View display. Tap to close the video playback window and display the calendar.
