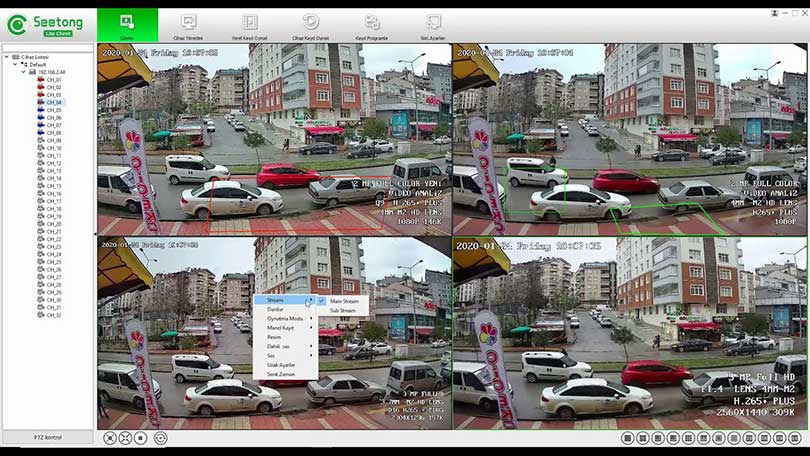
Seetong APP User Manual, Seetong is the remote monitoring client for all Seetong cloud devices.
The main functions of the APP include: user registration, fast adding cloud equipment, real-time image preview, intercom, video, screenshot, screen segmentation, wheel patrol, cross screen or vertical screen display, alarm push, remote video playback, local album and video playback management.
Android Seetong User Manual
1 Preface
Thanks for choosing our products ,we are dedicated to provide provide the best excellent and trustworthy service, please contact us if you have any questions
The user manual is applicable to Seetong mobile phone video surveillance client of Android version, which is only for reference . The user manual also introduces software’s all functions in detail and hope it help.
There will exist difference with reality as we need update and optimize software and add new functions frequently, the software shall prevail. The user manual will update continuously without notice , please download the newest version software on our website if it is necessary for you.
The user manual may include technology’s inaccuracy and print’s mistake, welcome you to put forward valuable suggestions, we will improve continuously and thanks for your great support
2 Function Brief
Seetong surveillance client software is specially designed for mobile users, which is very convenient for them to achieve real time monitoring ,talkback ,snapshot ,recording and even PTZ control operation. The user manual introduces usage of Seetong mobile client in detail, you can achieve real time monitor from own device when mobile phone is connected to internet and after opening our client software , no matter the camera is installed at home ,office or outdoor.
Below introduce Seetong function briefly
Support to register user through cloud management server and add own device .
Input user name and password to login ,then add device whose information will store after user cancel, when login again ,user can get former added device list .
Support add and delete device , modify user name ,password ,media parameter ,image overturn, motion detection and alarm set.
Time zone is man-made system for saving energy, it adopt daylight saving time and can adjust based on different time zone
Check if it is the newest version and upgrade to perfect function and stabilize device
Add device to video play window and check real time video , user can choose 1 or 4 split screen ways. User can monitor ,talkback and record during video playback.
When our device own audio function and connect audio input and output device ,user can begin to monitor and talkback only need click relative voice and talkback button
User may achieve snapshot and record when preview video .The snapshot and record files are saved in mobile phone for user preview
User can control PTZ ( up ,down ,left ,right) through real time monitoring and adjust the best position.
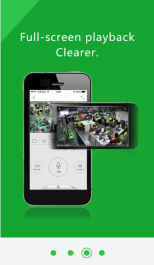
Usercan choose landscape or vertical mode to play video based on private preference .
Through scan device QR code , we can get device ID ,user name and password from Seetong client software . When information is right ,it will add correct device information automatically for simpler information
Support alarm information switch and setting , user can configure parameter based on request
Support local photo album and recording file playback
User can playback and search video stream through remote recording which have been saved in front storage device
User can learn the newest information about Seetong device
The software will introduce newly increased functions in brief via guide so that user can learn software advantage
3 Procedure Installation and Unload
3.1 Operation Environment
Seetong*.*.*.apk support running on Android mobile phone and Ipad with
Android 2.2
Seetong APP User Manual
Read More : EseeCloud Mobile PC App Full Guide
3.2 Installation Method
User can search and download the file installation of Seetong*.*.*.apk through Google Play shop ,360 application market ,Xiaomi application shop ,Huatu application market ,Baidu application market ,Pea Pod and so on

3.3 Unload method
User find Seetong via mobile phone program management, click ‘unload’ button to unload software
4 Register and Login
The software register and login can help user learn our procedure and user method
4.1 User Register
Click’ register ‘button and enter information interface, we will introduce register function as follow
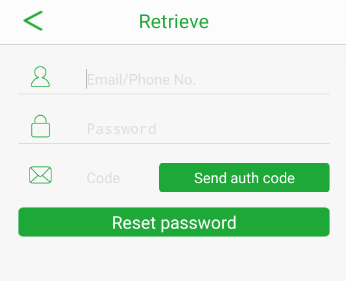
Relative attributes as follow :
Cellphone/ Mailbox: Receive verification code
Login password: 6 to 32 bits character;
Verification code: will send to user cellphone or mailbox
After finishing register, it will back to login interface automatically and paste user name and password in textbox.
4.2 User Login
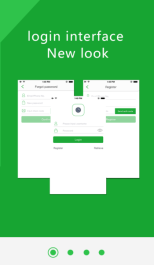
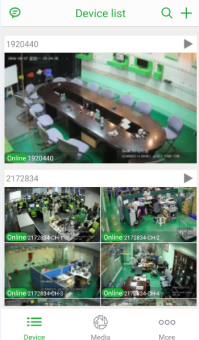
After finishing register , it will skip into “ user login’ interface,then input correct user name and password to login . The device list is empty if it is the first time for user to login , it will show follow list after including user list
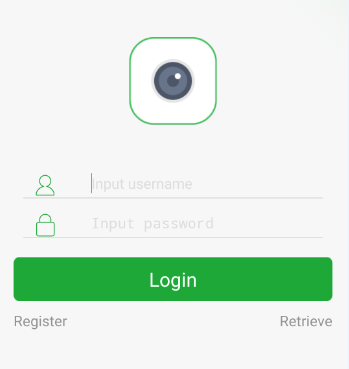
Relative attributes as follow:
User Name: input correct cellphone and mailbox (the default is null )
Password: input correct password (the default is null );
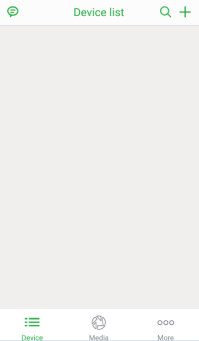
The picture below showed two device list information , the left device list is null ,the right is full
5 Video Preview
5.1 Video preview
Click device on software main interface and enter video preview interface ,preview and playback video as the picture below:
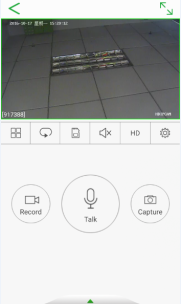
On playback window ,click“”button and choose one screen to playback“
” choose four screens to playback as the picture below:
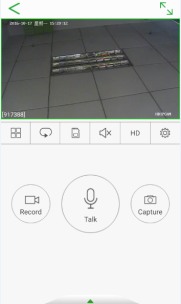
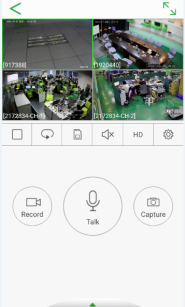
【1 screen playback】 【4 screen playback】
Or choose standard SD and HD in code stream type and switch like below picture :
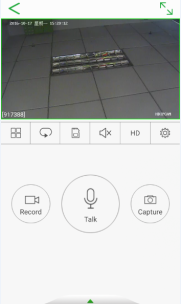
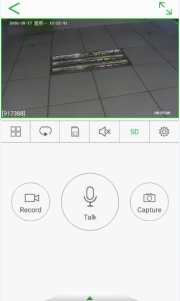
【HD Playback】 【SD Playback】
Or click“”button and only playback current device,click“
”button to loop playback device list as the picture below:
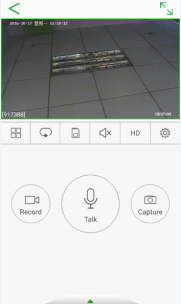
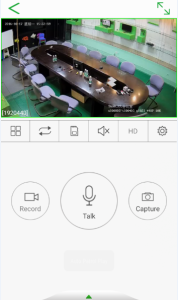
【Current image playback】 【Loop Playback】
5.2 Voice and Talkback
Attention: The device must support voice and talkback function and set the audio decode way to G.711.
5.2.1 Voice
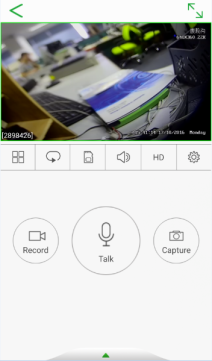
click button“”,will change into “
”during real time preview playback,open video function ,mobile phone can hear front-end voice
【As follow picture】:
5.2.2 Talkback
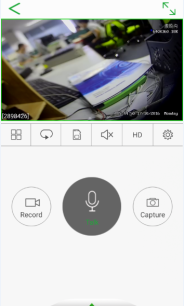
On real time preview playback interface ,click “”,button then change to “
”,then start talkback function ,mobile phone can hear front-end voice, the front-end device also can hear mobile phone voice
5.3 Capture and Recording
5.3.1 Capture
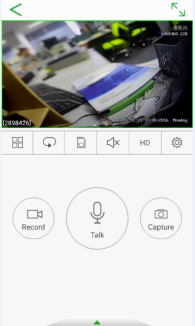
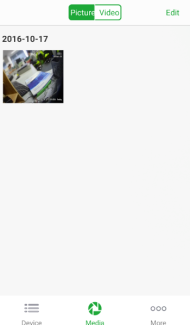
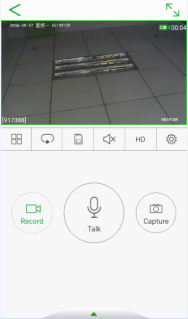
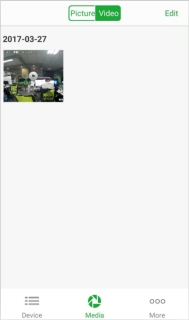
On real time preview playback interface ,click“”to capture image as the picture below, then enter into 【multi-media】–【picture】 as the picture below :
5.3.2 Record
When playback vidoe ,click record button“” and begin to playback video ,the button will become green“
”,the preview interface show red and recording time, start recording and click record button again until finish. The recording file will be saved in 【multi-media】–【video】 as the picture below:
5.4 PTZ Control
Attention : It need our device to support PTZ function firstly and PTZ basic configuration parameter should be correct ,then user can begin PTZ control . If device doesn’t support PTZ , click PTZ button will show nothing.
User can touch screen to start up ,down ,left ,right ,zoom in and out operation when playback video , turn PTZ with different direction in order to achieve device image zoom in ,zoom out and restore functions
6 Device List
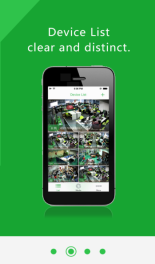
The green means “online ‘playback video stream on device list after normal connection , the orange means device“ offline ”and can’t playback video stream . User can add ,delete and search list and modify name on device list as the picture below
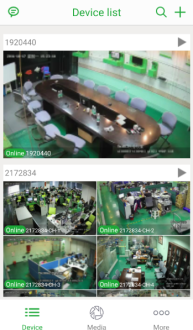
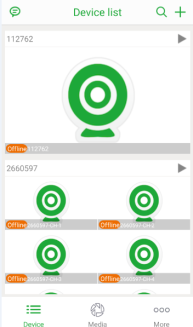
Attention : system will give hint if device is offline
6.1 Add Device
6.1.1 Add device by user name and password
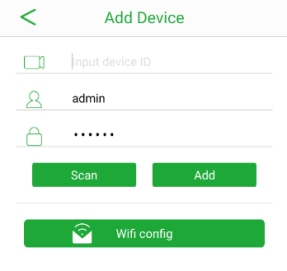
Click upper right corner button then enter into device add interface, input device cloud ID number ,account and password . After finishing ,click “add’ button, only information is correct, it can add normally. User also can scan R code to add device .The added device will be added automatically. The user name : admin ,default password is 123456 as the picture below:
6.1.2 Scan to add device
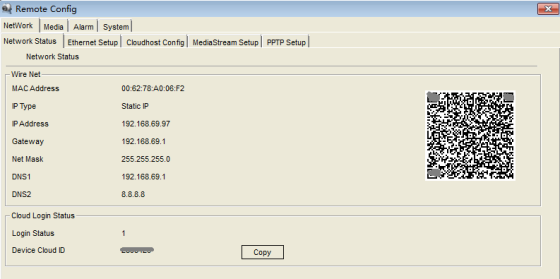
In order to simplify operation, our software added the function through scan QR code to add device function. Firstly user need visit device local LAN IP address, then enter into device webpage, there is a QR code in network state of network configuration as the picture below. Open client Seetong ,click scan QR code to add device automatically
6.1.3 Set camera WiFi
Firstly it need confirm that mobile phone have connected WIFI network .Then open Seetong mobile phone client , click “set camera Wi-Fi” on add device interface, enter into “ wireless configuration interface as the picture below
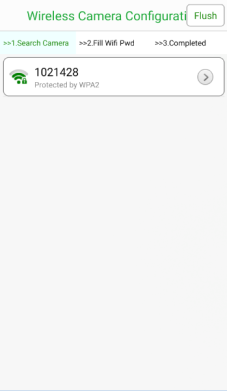
Search the device ID you need change ,click . For example : 526806 is device WIFI ID, connect network of 526806 and enter into WIFI password interface ,input Wi-Fi password ,click next step, it will remind you that WIFI configuration is successful
Attention: please confirm that mobile phone record and connect a normal Internet WIFI.
6.2 Delete Device
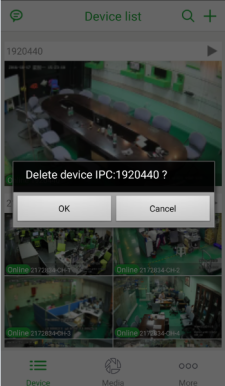
When add wrong device ID, the ID will be added in device list , user need delete needless device .Choose the needless device ,then pop up prompt dialog box ,click confirm button and delete as the picture below
Attention: If user want to delete NVR device , he only can delete NVR device , but not delete channel quantity
6.3 Search Device
Search dialog box as the picture below . User need input keyword and system will search automatically when there are many devices, the eligible content will show in search dialog box
6.4 Modify IPC/NVR and channel name
Because our system have stored device cloud ID automatically, it is not easy for memory ,user can be permitted to modify IPC/NVR and channel name .Choose necessary device and will popup relative dialog box, input new channel name and confirm as the picture below:


6.5 Modify camera wifi
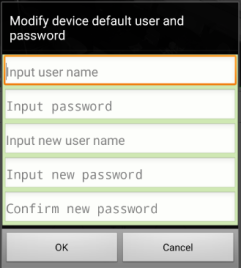
User need modify camera user name and password by considering the security. Firstly input former password, set new password and verification code ,click confirm button then take effect as the picture below:
6.6 Modify media parameter
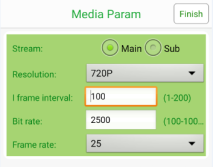
Modify media parameter refers to resolution, bit rate and frame rate of playback video main and sub code stream. It can set different parameter configuration and watch video result as the picture below:
6.7 Image Rollover
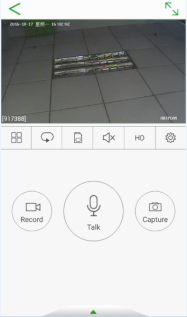
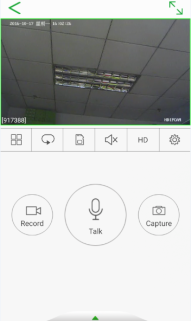
Image Rollover is divided into vertical and horizontal mode and will show different results as the picture below :
【Default】 【Rollover Vertical】
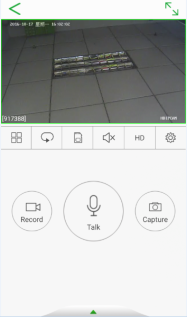
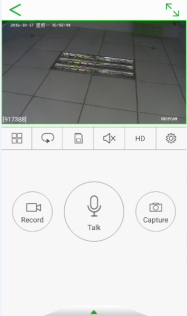
【Default】 【Rollover Horizontal 】
6.8 Motion detection
After start motion detection button , it can detect interference from outside world and choose “start alarm ”, user can check motion detection information on “start alarm ”interface as the picture below :
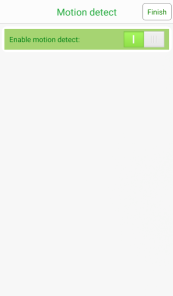
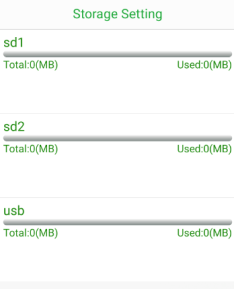
6.9 Storage Setting
The storage setting mainly targets recording file in storage device, which introduce device usage condition and support to format and unload as the picture below:
6.10 Time Zone Setting
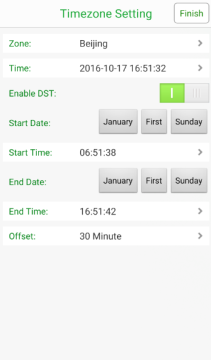
Time zone is man-made system for saving energy, it adopt daylight saving time and can adjust based on different time zone
When device support time zone setting, user only need start daylight saving time setting button ,he can set out –of line time ,start and finish time and date. After configuration success, click store “store ”button , user can enter device to preview time as the picture below :
6.11 Front-end Recording
Front-end recording aim at these installed storage devices, recording file will be stored in device . The file will record in remote control. User can check video through remote control and search stored recording to playback , The time scale in recording may adjust as the picture below:
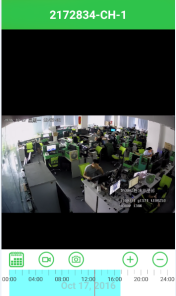
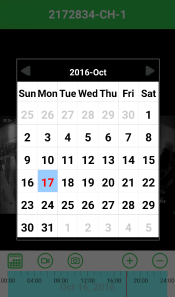
Attention: When device can’t support front-end recording playback, it will give hint.
6.12 Restore Factory Setting
When user need restore device parameter before factory, it can click restore factory setting button as the picture below :
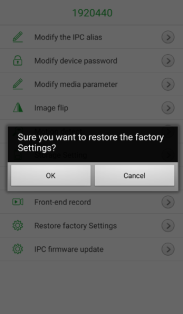
6.13 Firmware Update
When device detect new update firmware ,there is a red point on firmware update interface, click red point and update software to the newest version as the picture below:
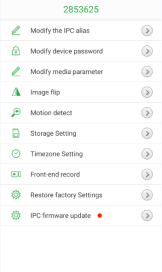
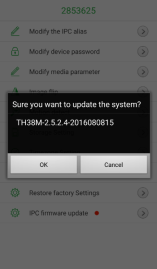
7 Local Recording
Click “multi-media” on software interface and enter recording management interface, local recording file uses recording button to record file .After entering local recording interface ,user will see all files according to time sequence, which playback ,derive and delete file as the picture below
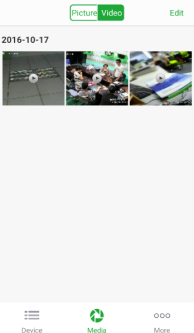
7.1 Recording Playback
User can playback recording file on local recording interface. When playback recording, choose the file to playback then will pop up mobile player , then will start playback. User can click on fast and slow forward
7.2 Recording Delete
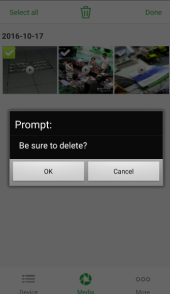
Click“ edit“ button on top right corner, choose the recording file to delete ,click “” button and will pop up prompt dialog box“ be sure to delete ”,click “ OK “ as the picture below :
8 Local Album
Click“image”on“multi-media”interface and enter into local album management interface .user can check captured picture ,it support mouse to zoom in and out as the picture below:

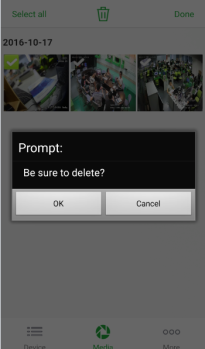
User also can delete captured picture , it only need click “edit” button on top right corner ,choose the file to delete ,click “”button, will pop up window, then click “OK” as the picture below:
9 Seetong Information
When Seetong issue new information ,there is a red point on interface ,click it to check the newest information as the picture below:
10 Alarm Information
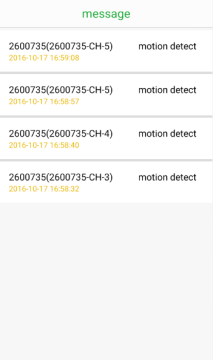
When start motion detection , system will send alarm and its record will be recorded in alarm information. User can click edit button on topper right corner and delete alarm information if it is necessary as the picture below :
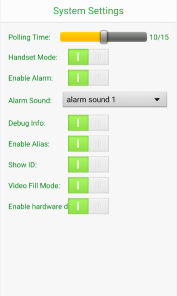
11 System Setting
Click“more”button on software interface, click “system setting” to management software as the picture below:
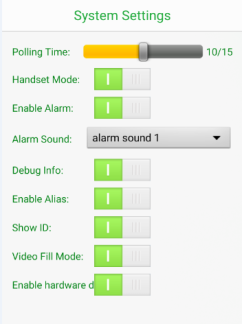
Configuration properties as follow:
Patrol time: when video preview mode is loop playback, the time interval is second
Telephone receiver mode : start telephone receiver mode means that it uses telephone receiver to monitoring and playback recording with small voice . When user close telephone receiver mode to monitoring and playback ,the voice is big .
Enable alarm :After starting alarm button ,it will show alarm option, when user click alarm , the device will send alarm voice during preview
Alarm voice:choose disable and alarm voice, when user start the device, it will send alarm voice
Debugging information: choose disable and enabled debugging information, user can check relative network type ,p2p state, playback state information
Display name : choose disable or enabled alias , user can see device alias in device list and video preview interface.
Display device ID: choose disable and enabled device cloud ID, user can check ID number after starting
12 Playback setting
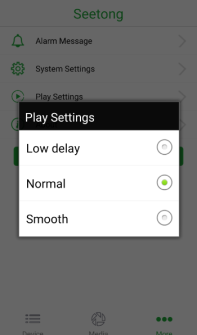
Choose “low delay”, which show real time image, but the fluency is not so good. If user choose “fluency ”,which show very fluent image ,but the real time is not so good . If user choose“normal”,the video playback will be ok between low delay and fluency as the picture below :
13 About us
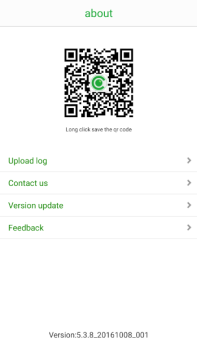
Click “more” on software interface ,enter “about us” ,it will show software version and contact information as the picture below:
13.1 Press and Save WeChat QR Code
Press seetong QR code and storage picture into mobile phone album. User can scan QR code and add Seetong WeChat number
13.2 Upload log
When user can’t use some functions normally ,he can click upload log, our developer will locate and check
13.3 About us
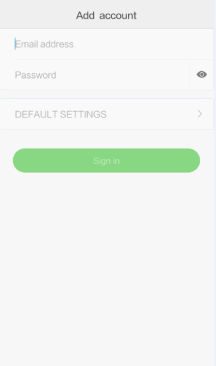
Click” contact us “ , if user meet any questions , he can send email to our company , we will resolve as soon as quickly as the picture below:
13.4 Version Update
User can check if the version is the newest and remind him to update
13.5 Suggestion Feedback
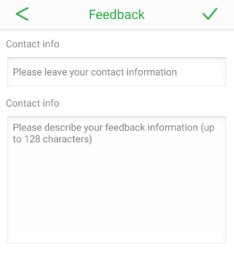
User can provide feedbacks to our company , we will try our best to meet customer requirement as the picture below:
14 FAQ
1、 Why can’t mobile phone watch the video?
A. When user login , please confirm added device ‘s user name and password if they are right.
B. Check mobile phone if it connect network
C. Device version is too low and doesn’t include P2P function
2、It happens time delay and disconnection during watching video
A、 Network condition is poor , wireless network is weak.
B、The setting about video frames and resolution is too high , user can reduce them to improve video fluency and stability.
C、The communication result between device and server is not good ,P2P penetrate and transmit ability are not stable
D、 There are many users to watch a video and buffer area is full.
3、After entering main interface ,why can’t it operate PTZ ?
A、 Check channel if it includes PTZ
B、 PTZ reaction delay sometimes , user need wait for a while.
Please read our user manual carefully before you look for technology support, if it still can’t help you resolve questions , please contact with our technology support and send email to help@seetong.com
IOS Seetong User Manual
Thanks for choosing our products ,we are dedicated to provide provide the best excellent and trustworthy service, please contact us if you have any questions
The user manual is applicable to Seetong mobile phone video surveillance client of Android version, which is only for reference . The user manual also introduces software’s all functions in detail and hope it help.
There will exist difference with reality as we need update and optimize software and add new functions frequently, the software shall prevail. The user manual will update continuously without notice , please download the newest version software on our website if it is necessary for you.
The user manual may include technology’s inaccuracy and print’s mistake, welcome you to put forward valuable suggestions, we will improve continuously and thanks for your great support
Seetong surveillance client software is specially designed for mobile users, which is very convenient for them to achieve real time monitoring ,talkback ,snapshot ,recording and even PTZ control operation. The user manual introduces usage of Seetong mobile client in detail, you can achieve real time monitor from own device when mobile phone is connected to internet and after opening our client software , no matter the camera is installed at home ,office or outdoor.
Below introduce Seetong function briefly
Support to register user through cloud management server and add own device .
Input user name and password to login ,then add device whose information will store after user cancel, when login again ,user can get former added device list .
Support add and delete device , modify user name ,password ,media parameter ,image overturn, motion detection and alarm set.
Time zone is man-made system for saving energy, it adopt daylight saving time and can adjust based on different time zone
Check if it is the newest version and upgrade to perfect function and stabilize device
Add device to video play window and check real time video , user can choose 1 or 4 split screen ways. User can monitor ,talkback and record during video playback.
When our device own audio function and connect audio input and output device ,user can begin to monitor and talkback only need click relative voice and talkback button
User may achieve snapshot and record when preview video .The snapshot and record files are saved in mobile phone for user preview
User can control PTZ ( up ,down ,left ,right) through real time monitoring and adjust the best position.
Usercan choose landscape or vertical mode to play video based on private preference .
Through scan device QR code , we can get device ID ,user name and password from Seetong client software . When information is right ,it will add correct device information automatically for simpler information
Support alarm information switch and setting , user can configure parameter based on request
Support local photo album and recording file playback
User can playback and search video stream through remote recording which have been saved in front storage device
User can learn the newest information about Seetong device
The software will introduce newly increased functions in brief via guide so that user can learn software advantage
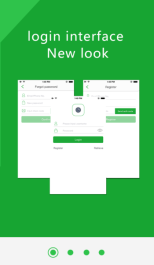
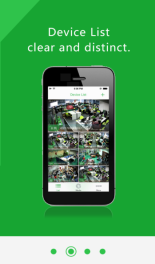
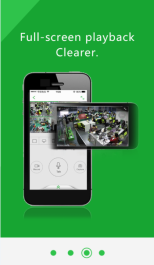
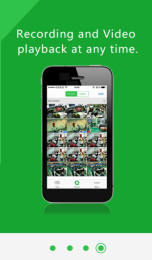
3 Procedure Installation and Unload
3.1 Operation Environment
Seetong*.*.*.ipa support operation environment on Iphone and Ipad’s IOS 5.0 version
3.2 Installation Method
User can search the file : Seetong*.*.*.ipa through App Store or iTunes into mobile phone , then install as the picture below
3.3 Unload Method
User find via mobile phone program management, click ‘unload’ button to unload software
The software register and login can help user learn our procedure and user method
4.1 User Register
Click’ register ‘button and enter information interface, we will introduce register function as follow
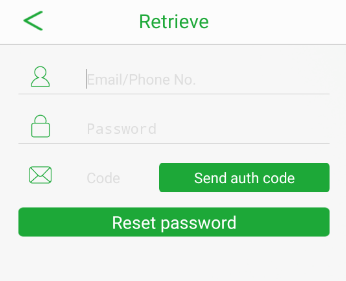
Relative attributes as follow :
Cellphone/ Mailbox: Receive verification code
Login password: 6 to 32 bits character;
Verification code: will send to user cellphone or mailbox
After finishing register, it will back to login interface automatically and paste user name and password in textbox.
4.2 User Login
After finishing register , it will skip into “ user login’ interface,then input correct user name and password to login . The device list is empty if it is the first time for user to login , it will show follow list after including user list
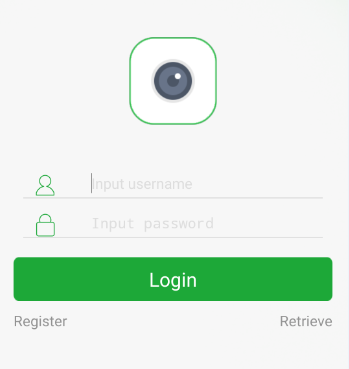
Relative attributes as follow:
User Name: input correct cellphone and mailbox (the default is null )
Password: input correct password (the default is null );
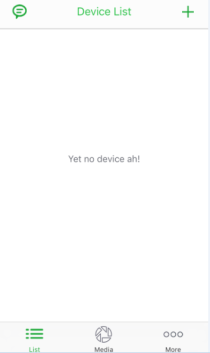
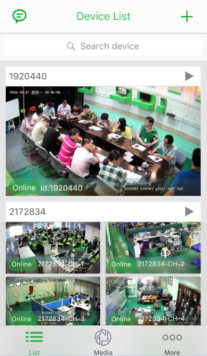
The picture below showed two device list information , the left device list is null ,the right is full
5.1 Video preview
Click device on software main interface and enter video preview interface ,preview and playback video as the picture below:
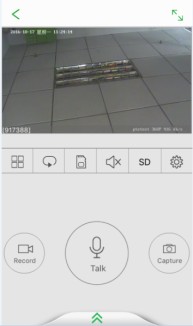
On playback window ,click“”button and choose one screen to playback“
” choose four screens to playback as the picture below:
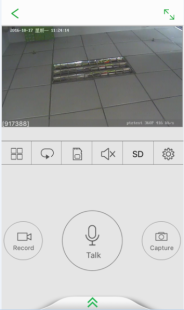
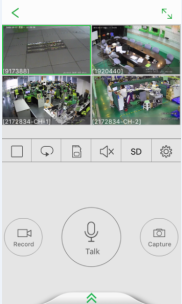
【1 screen playback】 【4 screen playback】
Or choose standard SD and HD in code stream type and switch like below picture :
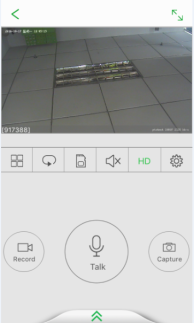
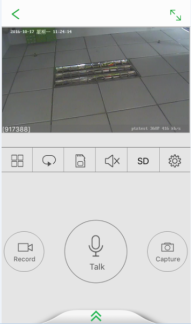
【HD Playback】 【SD Playback】
Or click“”button and only playback current device,click“
”button to loop playback device list as the picture below:

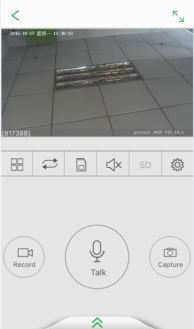
【Current image playback】 【Loop Playback】
5.2 Voice and Talkback
Attention: The device must support voice and talkback function and set the audio decode way to G.711.
5.2.1 Voice
click button“”,will change into “
”during real time preview playback,open video function ,mobile phone can hear front-end voice
【As follow picture】:
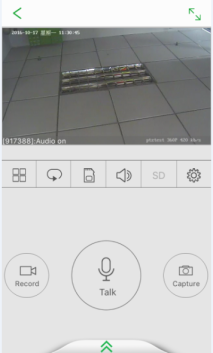
5.2.2 Talkback
On real time preview playback interface ,click “”,button then change to “
”,then start talkback function ,mobile phone can hear front-end voice, the front-end device also can hear mobile phone voice
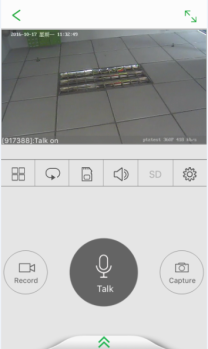
5.3 Capture and Recording
5.3.1 Capture
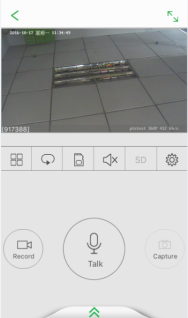
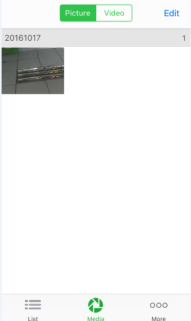
On real time preview playback interface ,click“”to capture image as the picture below, then enter into 【multi-media】–【picture】 as the picture below :
5.3.2 Record
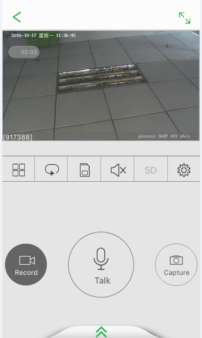
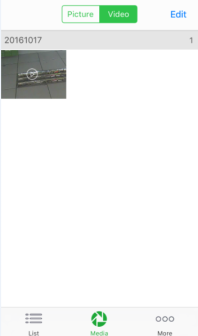
When playback vidoe ,click record button“” and begin to playback video ,the button will become green“
”,the preview interface show red and recording time, start recording and click record button again until finish. The recording file will be saved in 【multi-media】–【video】 as the picture below:
5.4 PTZ Cotrol
Attention:It need our device to support PTZ function firstly and PTZ basic configuration parameter should be correct ,then user can begin PTZ control . If device doesn’t support PTZ , click PTZ button will show nothing.
User can touch screen to start up ,down ,left ,right ,zoom in and out operation when playback video , turn PTZ with different direction in order to achieve device image zoom in ,zoom out and restore functions.
The green means “online ‘playback video stream on device list after normal connection , the orange means device“ offline ”and can’t playback video stream . User can add ,delete and search list and modify name on device list as the picture below
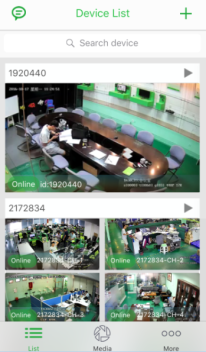
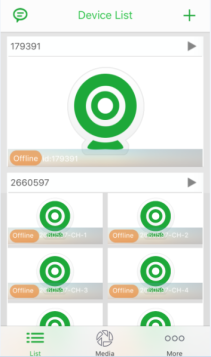
Attention : system will give hint if device is offline
6.1 Add List
6.1.1 Add device by user name and password
Click upper right corner button then enter into device add interface, input device cloud ID number ,account and password . After finishing ,click “add’ button, only information is correct, it can add normally. User also can scan R code to add device .The added device will be added automatically. The user name : admin ,default password is 123456 as the picture below:
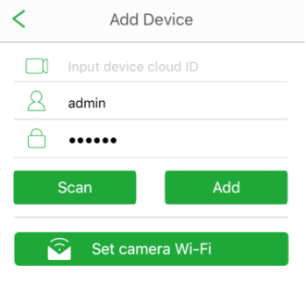
6.1.2 Scan to add device
In order to simplify operation, our software added the function through scan QR code to add device function. Firstly user need visit device local LAN IP address, and then enter into device webpage; there is a QR code in network state of network configuration as the picture below. Open client Seetong, click scan QR code to add deviceautomatically
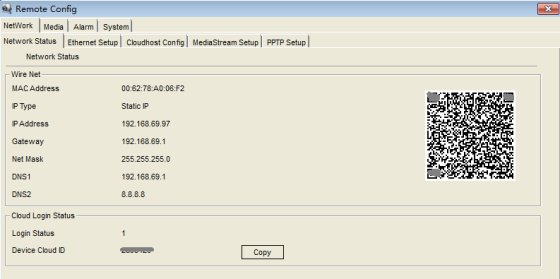
6.1.3 Set camera WiFi
Firstly it need confirm that mobile phone have connected WIFI network .Then open Seetong mobile phone client , click “set camera Wi-Fi” on add device interface, enter into “ wireless configuration interface as the picture below
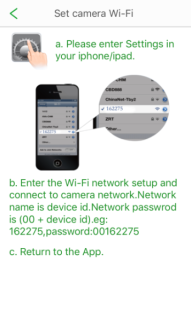
Search the device ID you need change ,click . For example : 526806 is device WIFI ID, connect network of 526806 and enter into WIFI password interface ,input Wi-Fi password ,click next step, it will remind you that WIFI configuration is successful
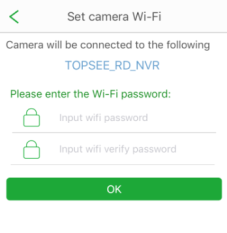
Attention: please confirm that mobile phone record and connect a normal Internet WIFI.
6.2 Delete Device
When add wrong device ID, the ID will be added in device list , user need delete needless device .Choose the needless device ,then pop up prompt dialog box ,click“ ”button and delete as the picture below
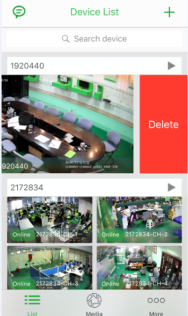
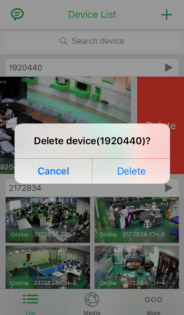
Note: delete the NVR devices, the devices list can be deleted, the channel number is not allowed to delete.
6.3 Search Device
Search dialog box as the picture below . User need input keyword and system will search automatically when there are many devices, the eligible content will show in search dialog box
6.4 Modify IPC/NVR and channel name
Because our system have stored device cloud ID automatically, it is not easy for memory ,user can be permitted to modify IPC/NVR and channel name .Choose necessary device and will popup relative dialog box, input new channel name and confirm as the picture below:

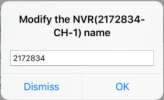
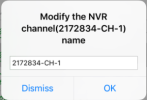
6.5 Modify media parameter
Modify media parameter refers to resolution, bit rate and frame rate of playback video main and sub code stream. It can set different parameter configuration and watch video result as the picture below:
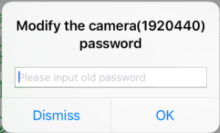
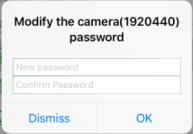
6.6 Image Rollover
Image Rollover is divided into vertical and horizontal mode and will show different results as the picture below :
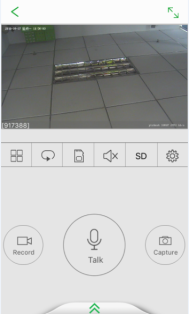
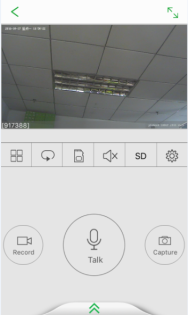
【Default】 【Rollover Vertical】
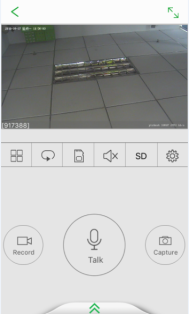
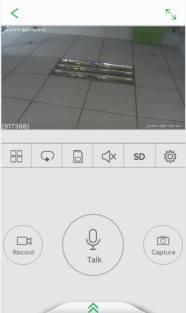
【default】 【Horizontal flip】
6.7 Alarm Setting
Enable motion detection and alarm information switch, user can check alarm signal, when detect alarm information ,there is a read point then send alarm voice, mobile phone will receive information as the picture below:
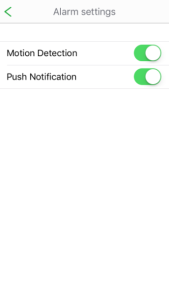
6.8 Time Zone Setting
Time zone is man-made system for saving energy, it adopt daylight saving time and can adjust based on different time zone
When device support time zone setting, user only need start daylight saving time setting button ,he can set out –of line time ,start and finish time and date. After configuration success, click store “store ”button , user can enter device to preview time as the picture below :
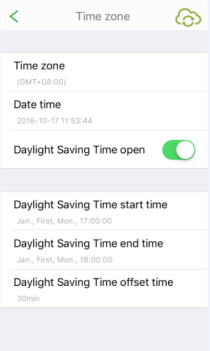
6.9 Restore Factory Setting
When user need restore device parameter before factory, it can click restore factory setting button as the picture below :
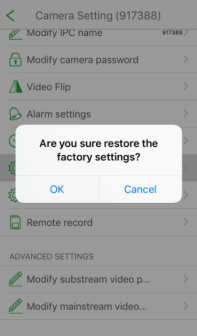
6.10 Firmware Update
When device detect new update firmware ,there is a red point on firmware update interface, click red point and update software to the newest version as the picture below:
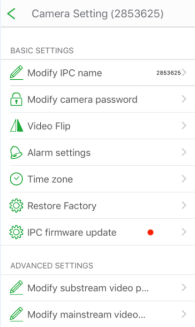
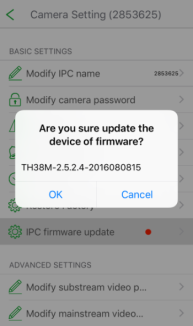
6.11 Modify Code Stream Parameter
User can modify resolution ,frame and bit rate to main and sub stream parameter, then watch different result as the picture below:
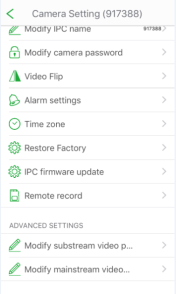
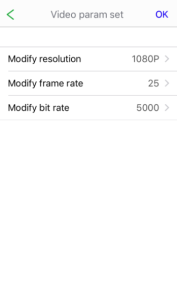
6.12 Front-end Recording
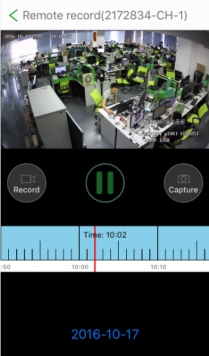
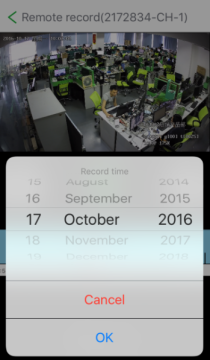
Front-end recording aim at these installed storage devices, recording file will be stored in device . The file will record in remote control. User can check video through remote control and search stored recording to playback , The time scale in recording may adjust as the picture below:
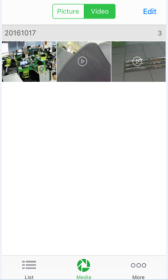
Click “multi-media” on software interface and enter recording management interface, local recording file uses recording button to record file .After entering local recording interface ,user will see all files according to time sequence, which playback ,derive and delete file as the picture below
7.1 Recording Playback
User can playback recording file on local recording interface. When playback recording, choose the file to playback then will pop up mobile player , then will start playback. User can click on fast and slow forward
7.2 Recording Delete
Click“ edit“ button on top right corner, choose the recording file to delete ,click “” button and will pop up prompt dialog box“ be sure to delete ”,click “ OK “ as the picture below :
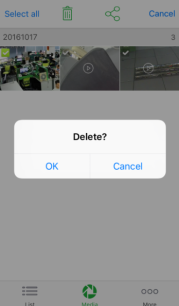
7.3 Recording Export
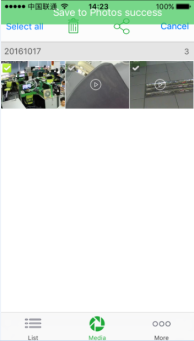
User can export recording into mobile for watching any time ,click “” button,the interface will give hint“succeed share and save in album ”, then recording will export into mobile phone album and check any time
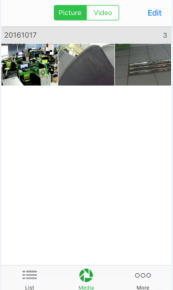
Click “image” on“ multi-media ”interface and enter into local album management interface .user can check captured picture ,it support mouse to zoom in and out as the picture below:
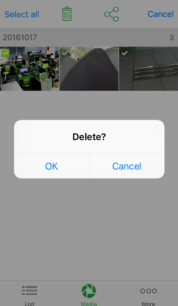
User also can delete captured picture , it only need click “edit” button on top right corner ,choose the file to delete ,click “”button, will pop up window, then click “OK” as the picture below:
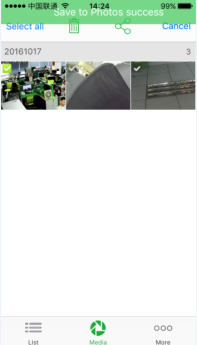
User can import album into mobile phone so that he check any time
When Seetong issue new information ,there is a red point on interface ,click it to check the newest information as the picture below:
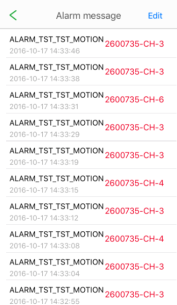
When start motion detection , system will send alarm and its record will be recorded in alarm information. User can click edit button on topper right corner and delete alarm information if it is necessary as the picture below :
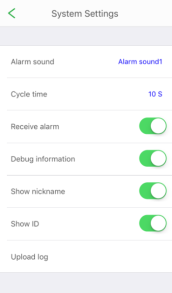
Click“ more” button on software interface, click “system setting” to management software as the picture below:
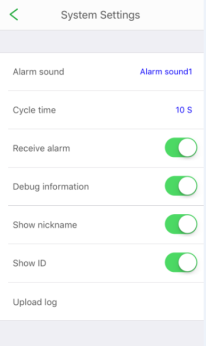
Configuration properties as follow:
Patrol time: when video preview mode is loop playback, the time interval is second
Telephone receiver mode : start telephone receiver mode means that it uses telephone receiver to monitoring and playback recording with small voice . When user close telephone receiver mode to monitoring and playback ,the voice is big .
Enable alarm :After starting alarm button ,it will show alarm option, when user click alarm , the device will send alarm voice during preview
Alarm voice: choose disable and alarm voice, when user start the device, it will send alarm voice
Debugging information: choose disable and enabled debugging information, user can check relative network type ,p2p state, playback state information
Display name : choose disable or enabled alias , user can see device alias in device list and video preview interface.
Display device ID: choose disable and enabled device cloud ID, user can check ID number after starting
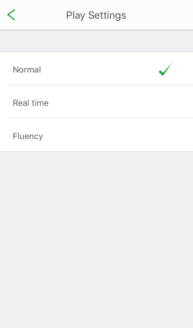
Choose “low delay”, which show real time image, but the fluency is not so good. If user choose “fluency ”,which show very fluent image ,but the real time is not so good . If user choose“normal”,the video playback will be ok between low delay and fluency as the picture below :
Click “more” on software interface ,enter “about us” ,it will show software version and contact information as the picture below:
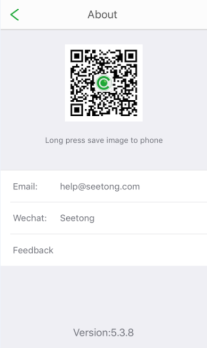
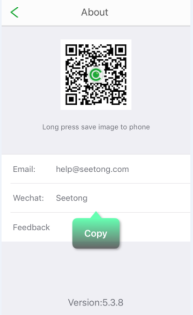
13.1 Press and Save Image In Mobile Phone
Add Seetong QR code image, it support keep image in mobile phone album. User can scan QR code and add Seetong WeChat
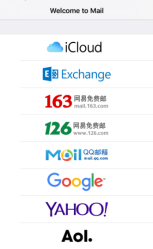
13.2 Contact Email
Click contact email and user can send suggestion us ,we will resolve user problem as soon as quickly as the picture below :
13.3 WeChat
User can add our WeChat and learn product new information as the picture below:
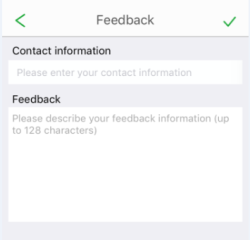
13.4 Suggestion Feedback
User can provide feedbacks to our company , we will try our best to meet customer requirement as the picture below:
1、 Why can’t mobile phone watch the video?
A. When user login , please confirm added device ‘s user name and password if they are right.
B. Check mobile phone if it connect network
C. Device version is too low and doesn’t include P2P function
2、It happens time delay and disconnection during watching video
A、 Network condition is poor , wireless network is weak.
B、The setting about video frames and resolution is too high , user can reduce them to improve video fluency and stability.
C、The communication result between device and server is not good ,P2P penetrate and transmit ability are not stable
D、 There are many users to watch a video and buffer area is full.
3、After entering main interface ,why can’t it operate PTZ ?
A、 Check channel if it includes PTZ
B、 PTZ reaction delay sometimes , user need wait for a while.
Please read our user manual carefully before you look for technology support, if it still can’t help you resolve questions , please contact with our technology support and send email to help@seetong.com
