How to set up Chime Alerts for your Chime or Chime Pro
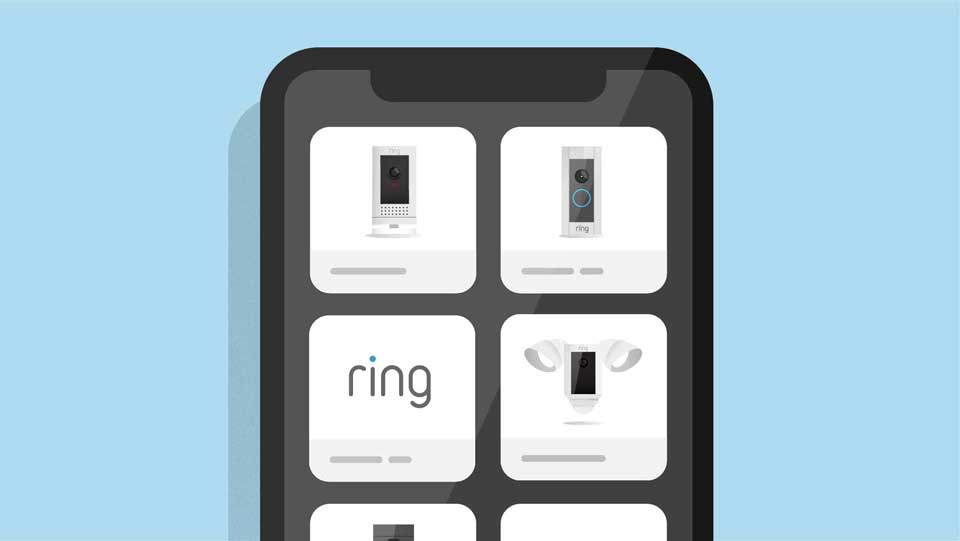
Chime and Chime Pro can play audio alerts when motion is detected on your Ring device, or when someone presses your Ring doorbell. It’s up to you which devices and types of events you want your Chime to alert you.
Learn how to link Chime or Chime Pro to your Ring device
How to choose Chime Tones for your Chime or Chime Pro
Your Chime or Chime Pro can play different sounds for Motion and Ring events. Follow these steps in the Ring app to set up your favorite Chime Tones.
Get audio alerts from Alexa
Select Echo devices can play Announcements for Motion and Ring Alerts detected on your Ring devices.
How to Set Up Map View in the Ring App
Jump to:
What You Need to Know to Use Map View
Changing Locations Using Map View

What is Map View?
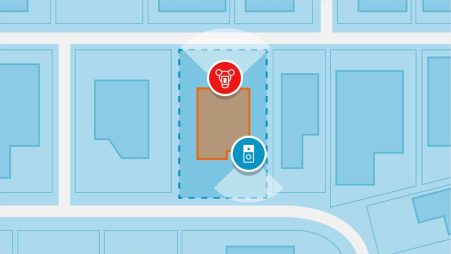
Map View allows you to pin your video doorbells and security cameras on a map, and see them at a glance from an overhead view in the Ring app.
Map View can be used for all Ring video doorbells and security cameras.
This feature is currently available in the US for account owners. Shared Users cannot activate Map View.
What You Need to Know to Use Map View
To use Map View you’ll need to:
How to Set Up Map View in the Ring App
1. Tap the three lines (≡) on the top left of your dashboard.
2. Tap Settings.
3. Tap Map View.
4. From the Map View screen, you can follow the in-app prompts to:
Changing Locations and Using Map View
If you’re going to move your location, turn off Map View in the Ring app, then re-enroll so that you can set new building and property outlines and position your devices.
Using Bird’s Eye Zones
Bird’s Eye Zones allows you to create customized aerial-based motion zones, using radar technology, that can work with your camera‘s motion zones for more precise alerts – so you can get notified about activity in your front garden, not the pavement.
A motion event is only triggered if your radar-enabled device detects motion in both a Bird’s Eye Zone and in one of your Camera Motion Zones. If a motion isn’t detected by both views, the motion will be ignored to ensure you only get notified about specific areas of interest.
Bird’s Eye Zones is available on Video Doorbell Pro 2, Floodlight Cam Wired Pro, Spotlight Cam Pro and Stick Up Cam Pro.
To use Bird’s Eye Zones and get the best results:
Note: With Use Bird’s Eye Zones toggled on, Bird’s Eye View will be automatically enabled so you can see the path of visitors on an aerial map view in Live View and on your Event History Timeline.
How to set up Bird’s Eye Zones in the Ring app
Note: The radar technology that powers Bird’s Eye Zones may be affected by weather changes, obstacles, reflections, wifi connectivity and other factors.
How to edit Bird’s Eye Zones in the Ring app
Make sure you select the mounting height for Security Cameras.
The mounting height affects the precision of the motion detection. The back of the camera should be tilted at a 45 to 60° angle.
When viewed through the camera, the horizon should be level.
If you choose Skip for now default zones will be used, covering an area up to 30 ft from your device.
How to turn Bird’s Eye Zones off in the Ring app
For Video Doorbells:
With Use Bird’s Eye Zones toggled off, radar detection will remain on. You will receive motion notifications when the radar and camera detect motion within your Camera Motion Zones, up to 30 ft from your device.
For Security Cameras:
With Use Bird’s Eye Zones toggled off, radar detection will also be turned off. You will receive motion notifications when the camera detects motion within your Camera Motion Zones, which may reach beyond 30 ft from your device.
Rebooting your Video Doorbell or Security Camera
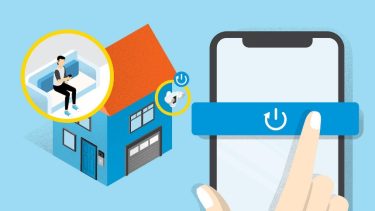
Rebooting your Ring device is an easy way to solve distorted audio and discolored video issues like black video, pink video or night vision during daytime hours.

How to reboot your device in the Ring app
Note: To reboot your Ring device in the Ring app, it must be connected to wifi.
Other ways to reboot your device
If your Ring device is not connected to wifi:
1. Reconnect your device to wifi, and reboot in the app.
If your Ring device is offline, you’ll see a red offline icon over your device in the Ring app. Tap the icon and follow the instructions and tips to help you get your device back online. Then, follow the steps above to reboot your device in the Ring app.
2. Take the battery out for a few seconds.
Some Ring devices have a Quick Release Battery Pack that you can slide out to temporarily disconnect power to the device. The device will reboot when the battery is reinserted. For Ring devices with an internal battery, briefly press and hold the setup button (you may have to unscrew the device from the wall to access the setup button).
3. Temporarily shut off the power at the breaker.
For wired Ring devices, you can turn off the power at the circuit breaker, wait a few seconds, then turn it back on. The device will reboot automatically when power is restored.
Important: Do you not attempt this with Ring Alarm or Ring Alarm Pro.
Verifying Your Identity to Recover Access to Your Ring Account (US & Canada)
Learn how to recover access to your Ring account (without calling Customer Support) if you’ve lost access to verification codes.
The process involves five simple steps to securely verify your identity and generate a new verification code. All you need is your mobile device or web browser, your government-issued ID documentation, and a quick photo of yourself. Review these steps or tap the Verify with ID button below to begin.
How it works
When you log in to your Ring account, we require Two-Step Verification to help protect and secure your account. However, there are situations where you can’t get your verification code. For example, if you change your phone number and can no longer receive the verification code sent by text to your previous phone number.
Ring uses third-party vendor Persona to help seamlessly verify your identity so that you can log into your Ring account without needing to contact Customer Support.
Five steps to verify your identity
Once you’re on the Verify your account screen, you’ll be prompted to enter your verification code. Click “Try another way” at the bottom.
Verify your identity

Remember, this option requires a valid government-issued ID.
Once you’ve successfully signed in, please update your Account Verification settings under Control Center to your preferred method.
Tips for successful verification
To capture high-quality images of your ID document:
To capture high-quality images of yourself:
Frequently asked questions
Why do we need to verify your identity?
Your personal data privacy and security is a top priority. To help protect you from unauthorized logins into your Ring account, we require Two-Step Verification. Every time you log in to Ring (Ring App, Ring.com or Ring Community), after entering your username and password, you receive a six-digit verification code via text that you need to enter in order to successfully log in. In situations where you can’t get your verification code (for example, if you changed your phone number or you don’t have access to your phone), you have the option of ID Verification as the alternate method to verify your identity before providing you a new verification code.
How do I find the “Try another way” link?
Go to the screen where we require you to enter your verification code.
What do I need to be verified via the “Try Another Way” link?
You have to be at least 18 years old and you will have to provide a government-issued ID with a photo on it and a picture of yourself. The name on your ID should match your Ring account (slight name variations may work).
How does ID verification work?
After you consent to proceed with the ID verification in the Ring app, we will automatically direct you to Persona, a third-party ID verification vendor. Then, Persona guides you step by step through the procedure:
What data are you collecting from me and how will it be used for?
This process verifies your identity by taking biometric data, including measurements of your face (“facial data”) from captured images, and comparing them to facial data from the photo on your government-issued ID. Third-party service providers (including Persona) will collect pictures of your ID document and a picture of yourself (a photo of yourself) that you provide. They will process your biometric information and facial data to verify your identity and investigate potential identify fraud by performing the following checks:
Persona will automatically destroy biometric and facial data within one hour of completing the verification process, unless otherwise required by law. They will delete all photos of submitted ID documents and pictures after 14 days, however Ring may store these photos for longer, as allowed under applicable law, to investigate potential fraud. Facial data will be treated in accordance with Ring’s Privacy Notice for the foregoing purposes. Read more about about Ring’s Terms of Service.
What is Persona?
Persona is an established ID verification vendor. They are Ring’s third-party ID verification vendor to help Neighbors recover access to their accounts.
Can I provide an ID document issued by another country from other than where I currently live?
Yes, your ID document does not have to be issued by the country of your residence. It must be a government-issued ID with a picture on it. We currently support ID documents issued from US and Canada.
What types of IDs are supported?
Many government-issued IDs are supported, however you will not be able to use a military ID for this ID verification.
Using Dark Mode in the Ring App
Reduce eye strain, improve readability and extend the battery life of your mobile device by turning on Dark Mode in the Ring app.
Important:
Update to the latest version of Ring app and your mobile device’s operating system to start using Dark Mode.
How to set up Dark Mode in the Ring app
1. Tap the menu (☰).
2. Scroll down and tap Display.
3. Select one of the following options:
4. Select Standard or Extra Dark to save additional power.
How to set up Dark Mode in your mobile device settings
How to Get Package Alerts

Package Alerts are available on select Ring video doorbells and can alert you when there is a package in designated areas at your device. To start using Package Alerts, you will need a Ring Protect subscription and one of the following devices:
Find out which video doorbell you have in the Ring app.
Package Alerts work best with medium-to-large shipping boxes. Envelopes, tubes, small boxes, and food deliveries may not be detected. This feature also relies on Motion Detection, so make sure you have that feature turned on.
Motion detection for battery devices
Motion detection for hardwired devices
Turning on Package Alerts
Your settings have been changed for this device. To detect packages for your other devices, repeat steps 1-4 to enable this feature for those devices.

Customizing your Package Zone
A Package Zone lets you specify where you want your video doorbell to monitor for packages. For example, if your doorbell monitors your front yard and driveway for people and motion, you can set a zone specifically for packages.
If you decide to use the default Package Zone, you can customize your Package Zone later by going to Motion Settings > Smart Alerts, then selecting Customize under the Package section.
To customize your Package Zone:
Note: Deliveries must be left and set down within your Package Zone to be detected. Packages are detected most reliably when left within seven feet of your Ring device.
Review Package Events in your timeline
You can also review Package Events on your timeline, if you miss an alert or don’t have alerts enabled. To view your timeline, open your Ring app and select a device from your dashboard.
Note: Usually, when a package is detected, a Package Event is added to your timeline for you to review. However, if someone rings your doorbell or you start a Live View just after a delivery, you’ll see a Ring or Live View Event at that time instead.

