NETUS-Pro Quick Setup Guide, Version 3.6.002 January 2022 – Critical security update – all users are strongly recommended to install this. After upgrading, if you still have the default password of ‘00000’ you will be prompted to set a strong password. This is essential for security reasons, please ensure any mobile users update their app settings with the new password.
4 Channel – H6R404_COBRA002.bin
8 Channel – H6R408_COBRA002.bin
16 Channel – H6R416_COBRA002.bin
Emergency Firmware Upgrade
Cobra 5 – ZIP file
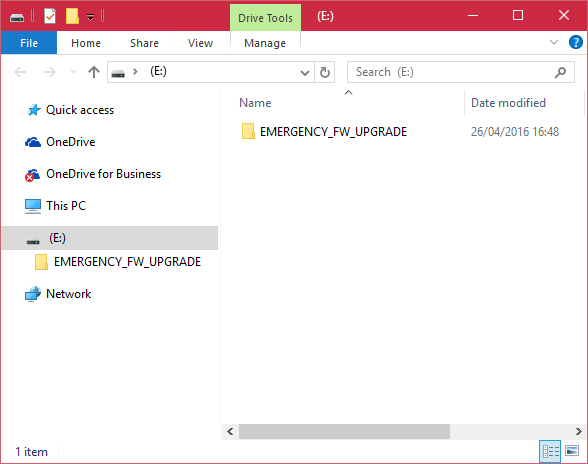
Use this when the unit isn’t starting up, or when instructed by a technician. To install, open the zip file, drag the ‘EMERGENCY_FW_UPGRADE’ folder across to your USB stick. Turn off the machine and insert the USB, then turn back on. The screen will advise what to do next. This will return the unit to factory default settings. The contents of your USB stick should look like this:
Software
Netus Pro
NETUS-Pro for Windows x64 (Recommended, version 1.0.0.67, updated 18/07/2022)
NETUS-Pro for Windows x86 (32-bit, version 1.0.0.52, updated 05/08/2021)
Default password to login to the program is ‘1111111‘. The application is now compatible with older Cobra DVR models, but those without a ‘DVR Web Service’ cannot be configured from within.

NETUS-Pro Quick Setup Guide
Read More : iVMS320 Installation and User Guide
VMS and RMS
Please note that the older Cobra software does not fully support the Cobra 5 and will not work properly.
Input ID / Password.
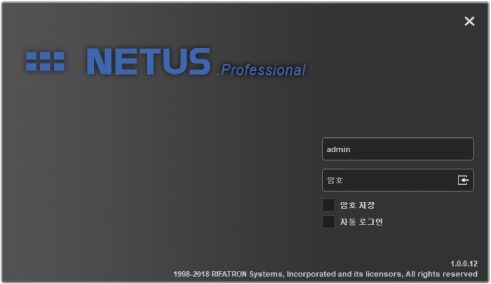
î\ Default ID/PW: admin/1111111
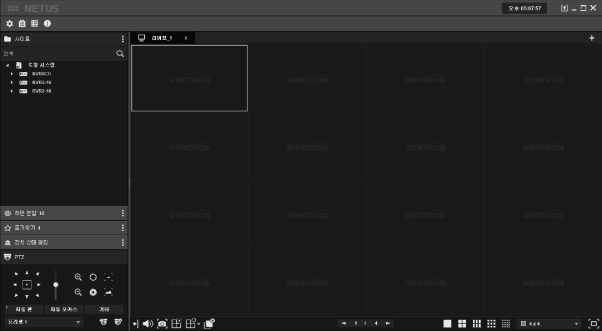
Run NETUS-Pro as below.
3
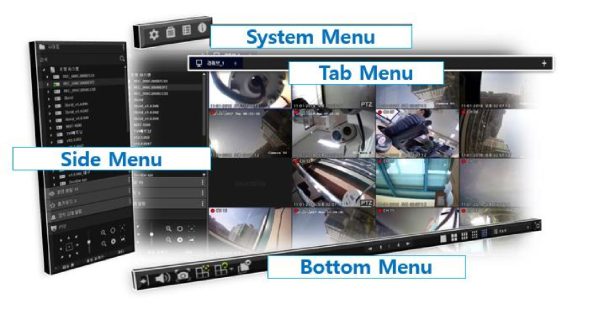
Menu commands of NETUS-Pro are as below.
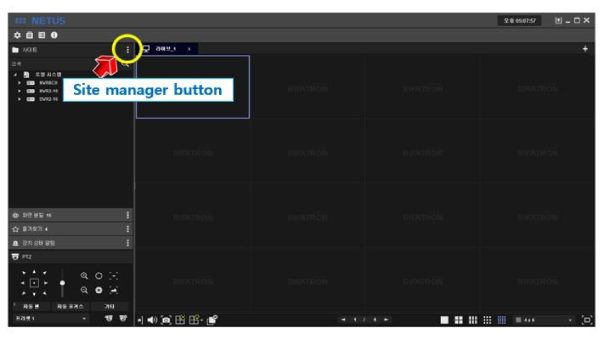
Click the yellow marked button to register device.
4
When [Site Manager] window pops up, RIFATRON DVR/NVR which is in the same band with PC is automatically searched and displayed in search list on the left.
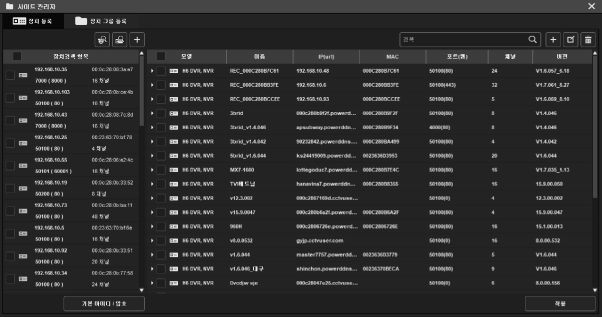
Select the device at
![]()
to register on NETUS-Pro and press
![]()
button, then it will be on the
list at right side tab.
50100(80)
MM «X 443) 50100(80) 50100(80) 4000(80) 50100(80)
50100(80)
50100(80)
50100(80) 50100(0)
50100(80)
MM 00(80) 50100(0) 50100(80) 50100(80)
50100(0)
£ & +
IP(ur1)
192 108 10.4«
192.16* 10.6
192.16*.10.93
000c 28069121 pow*»d. .
•psubway.powercMn…
•0232842 powvrcklna…. k «24419009.powcrdd.. lotteooducZpowcidd… hanavmal.powarddn… OO0c28O716MxctvvM…
000e2806726e.po«verd…
OyKMXtvuMi.com master7767.pow«rdd… ■hmchon.powcrddn«… OOOc28047e2SxctwM…
MAC
0WG28OC7C61
0O6C28OBB3FE
OWCZBODCCEE
0W£28OB9F2f
OOOC28Öß9F34
0O0C2W8A4M
0023153601953
0O0C28OB7E4C
0Ö0C 28008354
192 16*10.19 50209 (80)
192.16*. 10.73
50100 ( 80)
192.16*. 10.25
50100 ( 80)
192.16*10.43
7000 ( 8000 >
192.16C.10.72 5010*(80)
192 15*104
50100 ( 80)
19216*10.36
50100 1 80)
19216*10.103
50100 ( 80 )
192.16*10.92
50100 ( 80)
192.16*. 10.34 5*100 ( 80)
»iS
VI.6057 618
V1.7.061 *27
V1.6O59.8.10
V1.4 046
V 1.4.646
V1.4442
V 1.6444
V1.7435_1.13
15 9.00.050
12-3.00.002
15.9.00.047
15.1.00.013
84.00432
V 1.6.044
V1.6 046
5
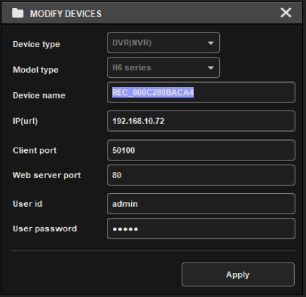
To change ID, password and settings of registered device, click ‘modify devices button’ on the upper right corner as below.
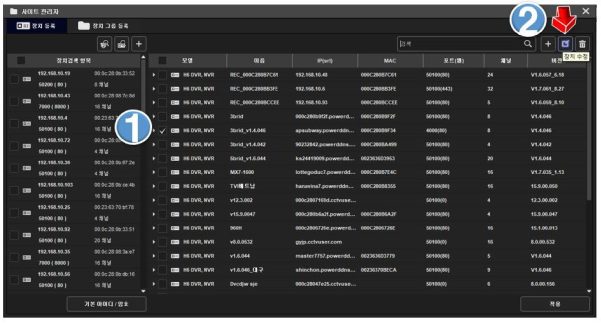
Then ‘MODIFY DEVICES’ tap pops up.
6
Device registration is done successfully.
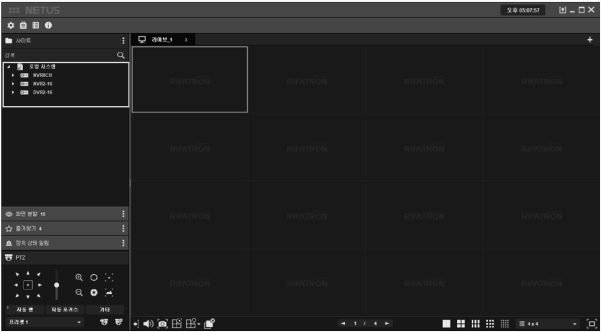
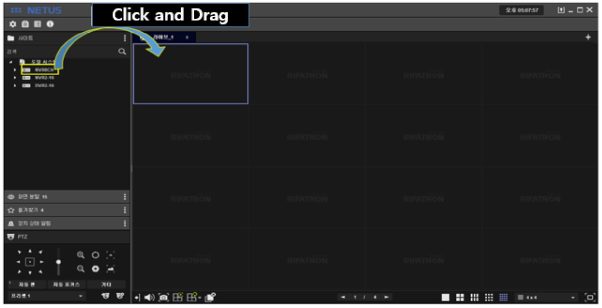
Drag and drop the mouse pointer to the display area to see all channels. Or, you can add one by one by dragging each camera.
7
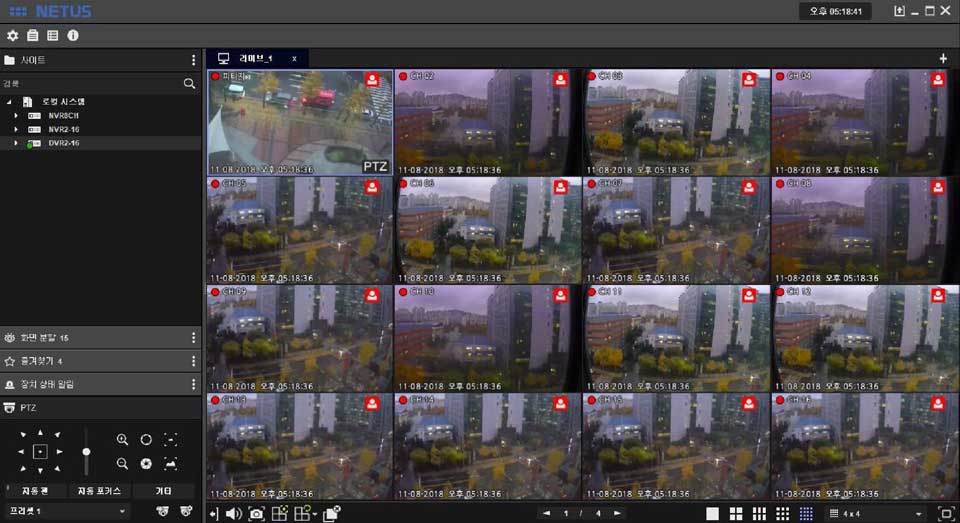
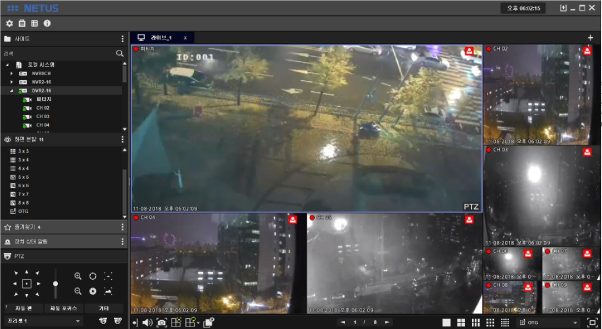
Live images are shown as below.
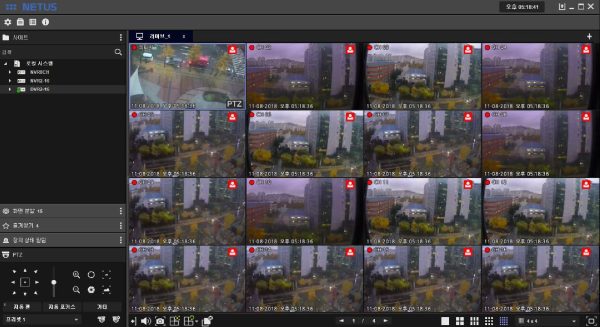
You can stop the display by pressing
button below.
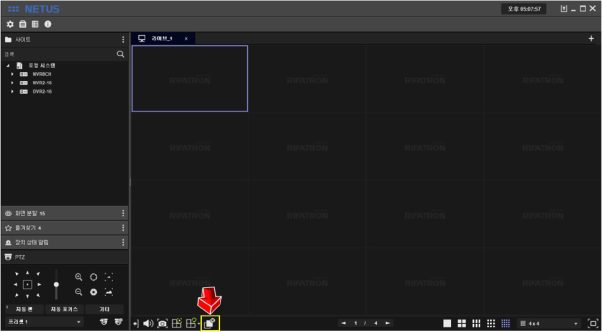
8
The image display tab can be added with ■ button below.
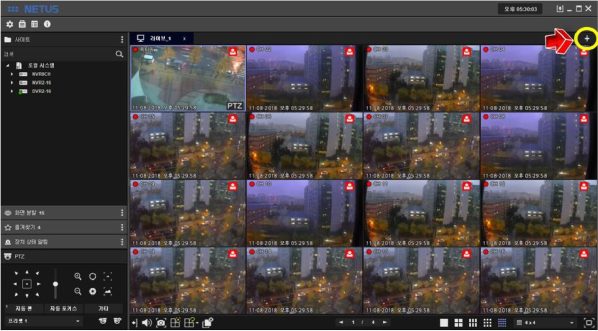
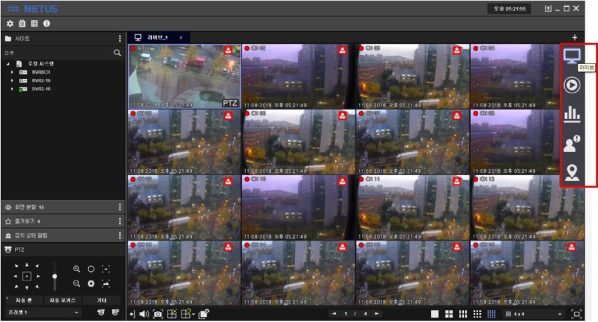
Menu bar comes out on the right side when you press D tab add button.
9
Each items on menu tab have functions as below.

Add live display tab
Run playback
Check status of NETUS
Control ‘event manager’
Set E-MAP
If you want to add live tab, click the live button
![]()
on D tab of the right side then live tab
comes out as below.
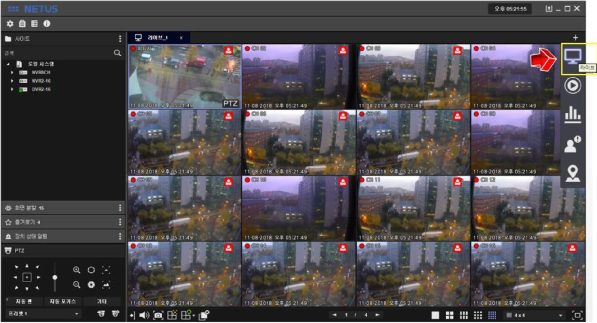
10
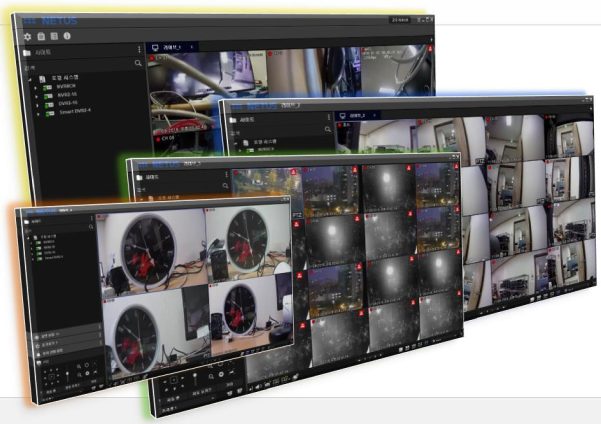
Drag another device to another tab if you want to add it. Live tab can be added maximum 4.
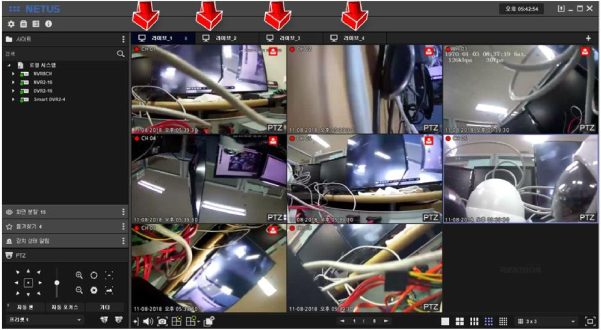
You can separate each display tab by dragging tab name.
11
Click B
button to split screen..
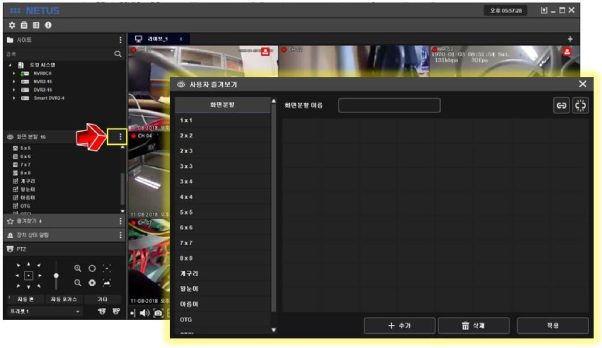
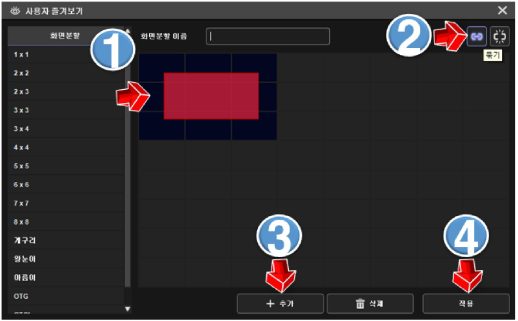
Setting window to split screen has 8×8 cell. Set the size of this cell as you want.
Bind them with button 2
![]()
and repeat this setting.
Click button 3
![]()
![]()
once your settings are done and apply setting with button 4
12
Then you can adjust size of each channel’s display as you want.
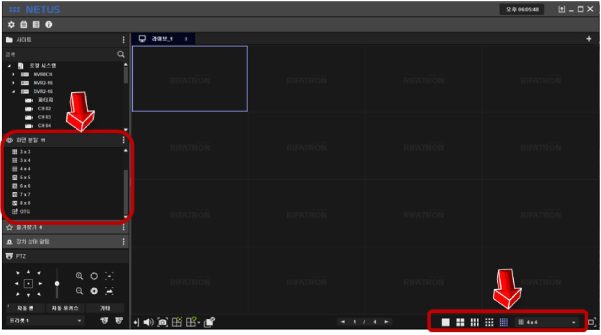
Select display mode to set ‘favorite’ at side menu or bottom menu.
13
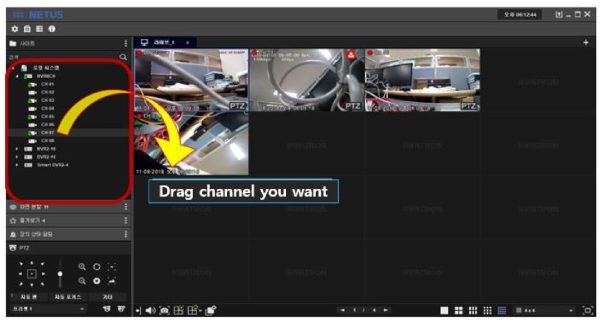
Drag channels you want to add favorite and put them to the display.
The picture below is to drag only odd number of channels.
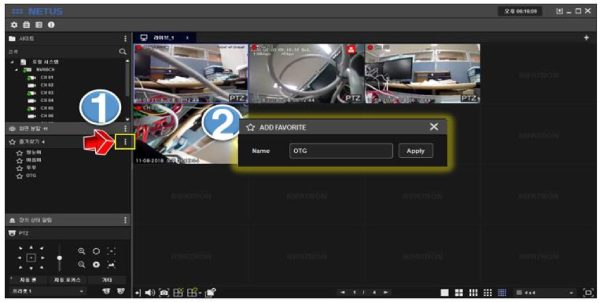
Click ‘ADD FAVORITE’ and put the name you want.
Settings are applied after click ‘Apply’.
14
![]()
Click Dbutton on the right side and click play button
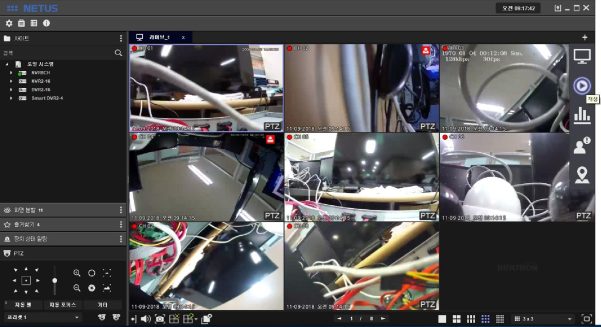
‘Playback’ tab comes out as below.

O »9 SW n
O P»7I 4
‘ fe:®’
2018.11 09
15

Drag devices to the right side (playback tab) in the same way as ‘Live display’ and click play button to play video.
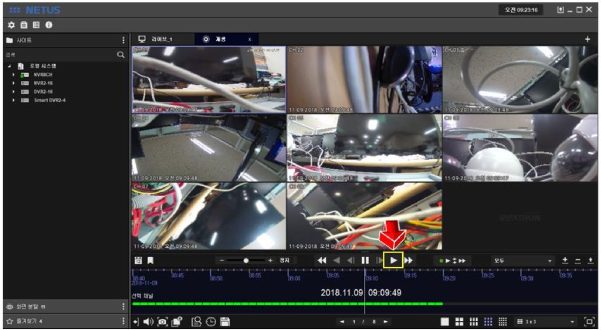
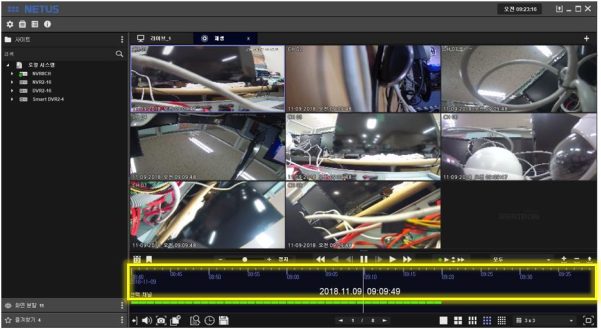
Click the mouse in the yellow area below and drag left & right, then the video can do playback.
16
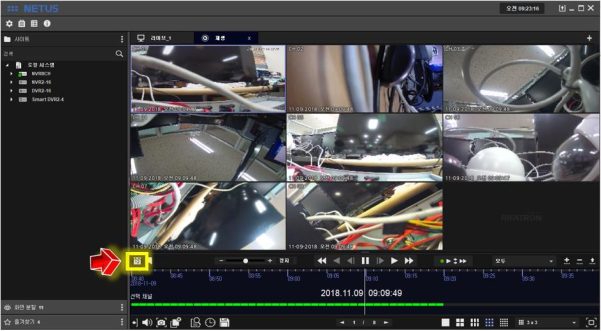
You can search the calendar with the yellow marked button below.
.
Calendar will be displayed once you click the calendar button
|
◄ |
July |
-*■ |
2018 |
▼ |
► |
|
|
Sun |
Mon |
Tue |
Wed |
Thu |
Frî |
Sat |
|
|
|
26 |
|
|
|
|
|
■1 |
2 |
3 |
4 |
5 |
6 |
7 |
|
8 |
9 |
10 |
11 |
12 |
13 |
14 |
|
15 |
16 |
17 |
18 |
19 |
20 |
21 |
|
22 |
23 |
24 |
25 |
26 |
27 |
28 |
|
29 |
30 |
31 |
|
|
|
|
j\ Green mark means there is recording data.
17
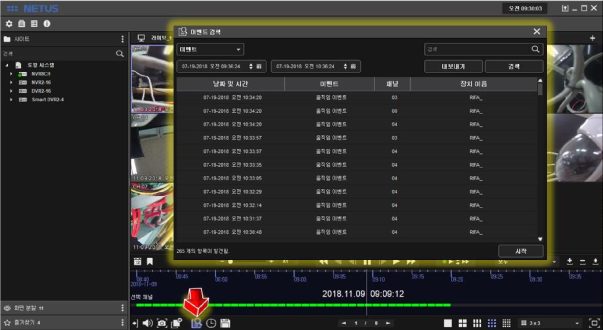
Event search window will be displayed once you click the event search button
![]()
. Select Event
you want to play and click ‘start button’
Start
. Then particular time you selected will be played.
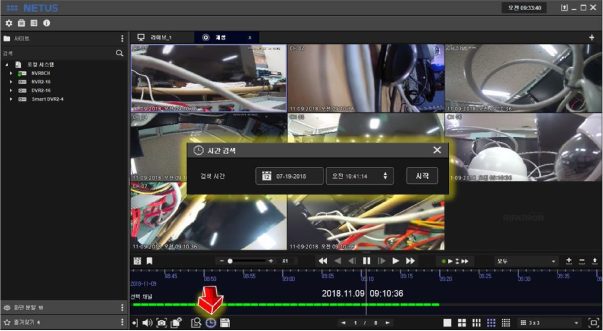
You can do playback by using ‘time search’ as well.
18
I*
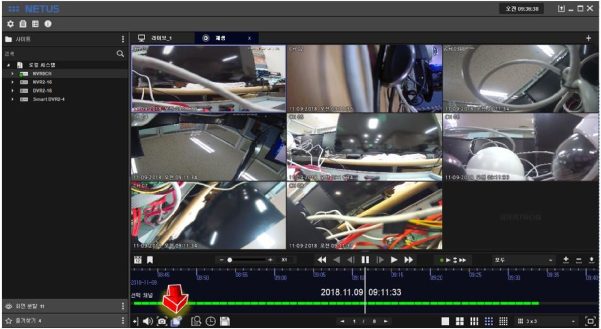
You can stop playback with ‘Display Off button
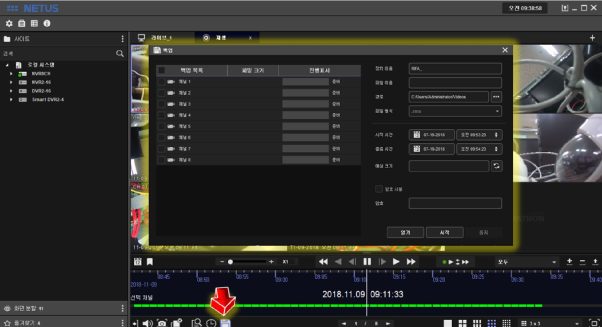
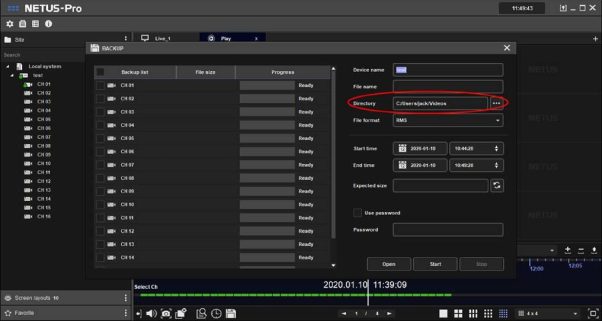
Backup window comes out once you click the backup button
![]()
at playback tap as below.
You can proceed backup with it.
19
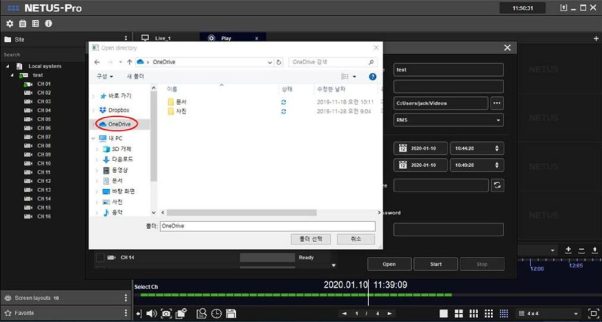
It’s also possible to back up the data to cloud server directly. (Google one-drive, drop-box, etc)
– Step 1. Click ‘Directory’ button to specify the location of server.
– Step 2. Specify the location of cloud server’s folder on your PC (ex. Google one-drive in picture).
20
Click status button
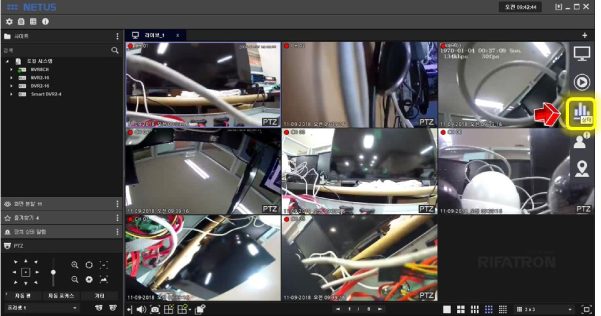
It shows the status of PC where the current NETUS-Pro is installed.
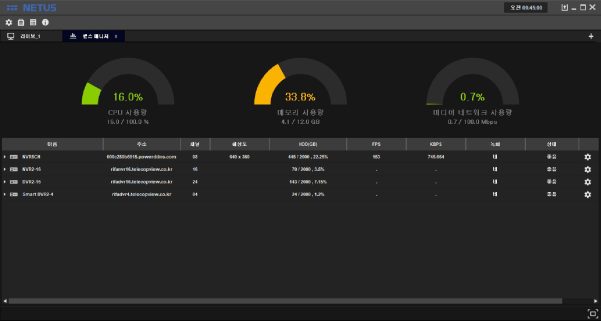
You can check the name, address, channels, resolution, HDD status, FPS, KBPS, recording, network status and detailed information of each registered device.
21
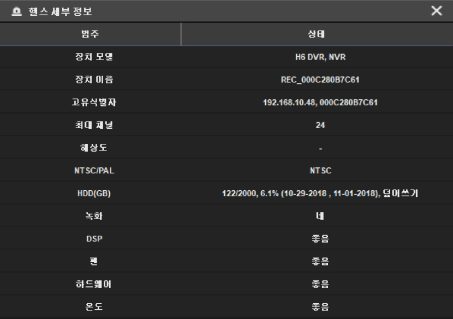
You can check the detailed information as below once you click the
*
button at the right side.
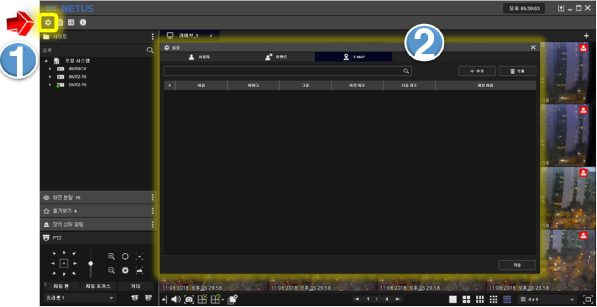
Add image for E-MAP. Click setting button
and set up the E-MAP tab.
22
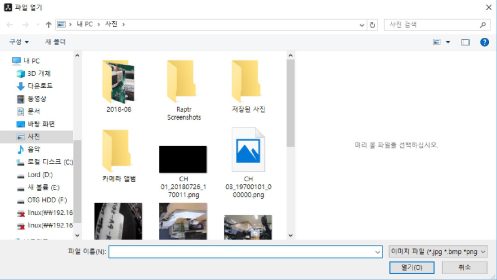
Click the ‘Add’ button
![]()
![]()
and then click ‘Open file’ button
for selecting image.

23
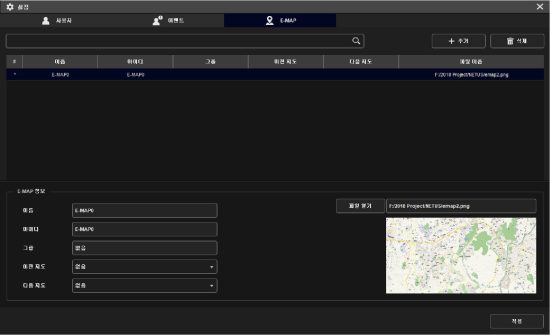
Click ‘Apply’ button at bottom. Now selecting the map for E-MAP has been completed.
Followings are the steps to compose E-MAP.
Click button.
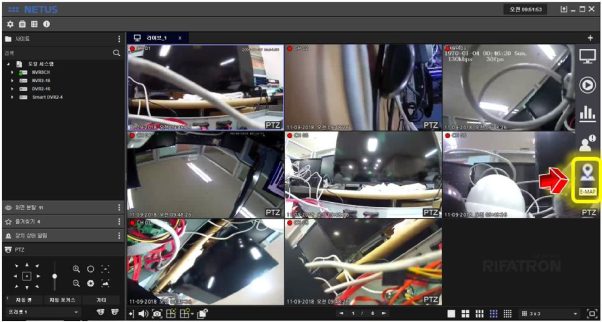
24
Then the window will be displayed as below.
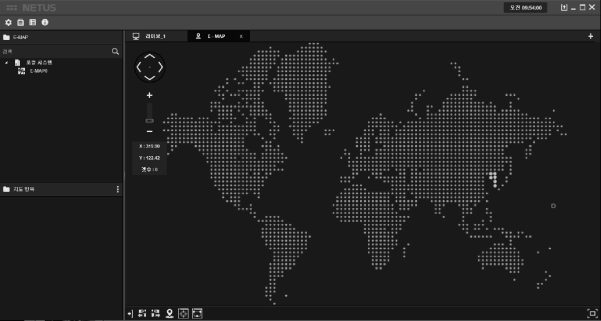
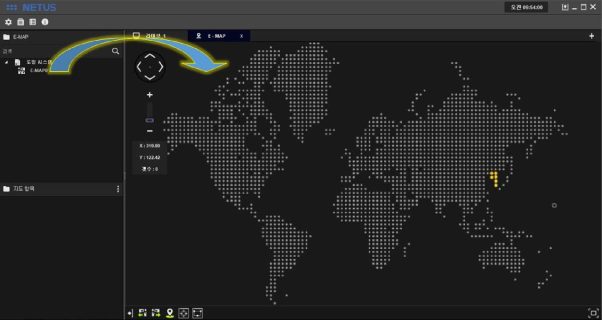
Drag the map image from the left side menu to E-MAP tap.
25
Adjust image as you want with zoom in/out the map.
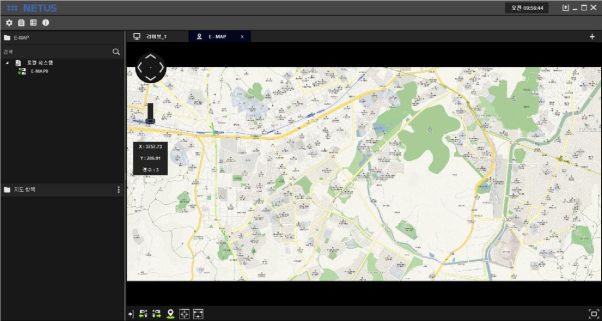
Click ‘Add E-MAP button’
![]()
then E-MAP item property window will come out.
Fill in the name and settings to be displayed in E-MAP. You can select the camera to be connected
![]()
to this name like number 2
once you click the selected camera
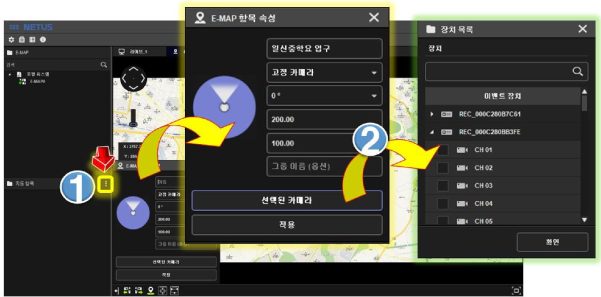
Select the camera and click OK button.
26
You can see the video once camera is added to left side tab.
You can set a number of cameras.

27
