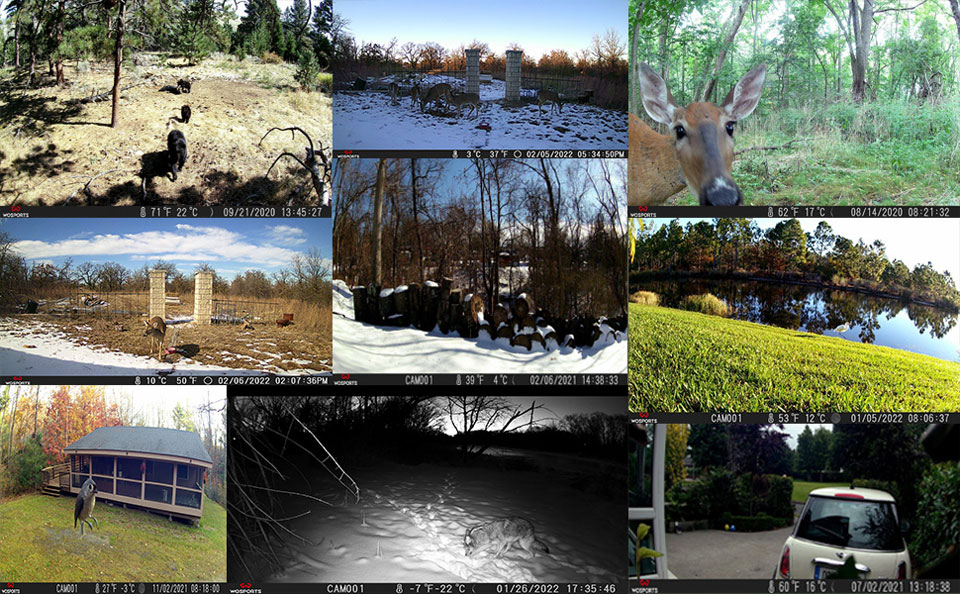
How to Use Hunting Trail Cameras, Trail cameras are wireless devices that allow you to photograph animals without alerting them or even personally being present. These cameras are ideal for hunting, farm security, wildlife monitoring, and home security, among other things. The benefits are numerous, and you will like using these trail cameras.
In recent years, trail cameras have become a crucial tool for wildlife enthusiasts, providing significant knowledge into the behaviors and activities of animal species in the wild. With technology progressing quickly, the trail camera market features many alternatives, including traditional game cameras to newer cellular devices.
This article highlights the various kinds of trail cameras and provides an in-depth review of the critical features that will serve as an overview for first-time purchasers. Continue reading to gather the necessary information to make an informed decision when purchasing a trail or game camera.
Credits: Pexels
What Is A Trail Camera?
Trail cameras are wireless devices that allow you to photograph animals without alerting them or even personally being present. These cameras are ideal for hunting, farm security, wildlife monitoring, and home security, among other things. The benefits are numerous, and you will like using these trail cameras.
Why are Trail Cameras Crucial for Wildlife Photography?
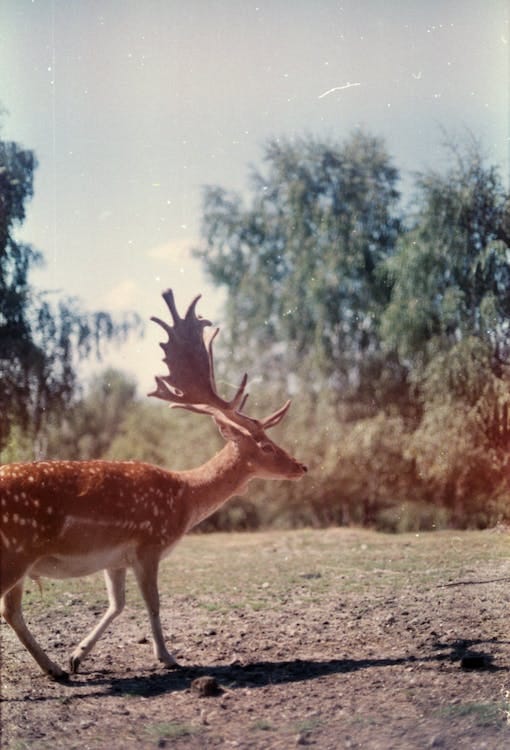
Trail cameras are handy for hunting and wildlife photography. These cameras offer a unique look into wild creatures, assisting hunters in better understanding their targets and planning their hunts appropriately.
Wildlife photographers can utilize trail cameras to capture spectacular photographs and video clips of wildlife in their natural environment.

Credits: Pexels
Types of Trail Cameras
Trail cameras have several types. However, here we will discuss three types of such cameras:
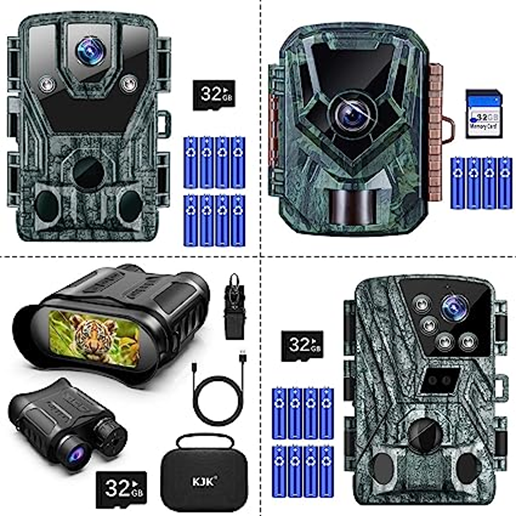
Cellular Trail Camera:
While maybe the most basic of trail cameras, this dramatic installation employs cutting-edge technology. The camera incorporates motion sensors that capture an object as soon as it moves. It is compact, which means it is small and lightweight.
The construction is tough, waterproof, and concealed. These characteristics make them ideal for hunting. Unlike previous generations of wireless trail cams that saved images on SD cards, the current models use cellular technology to broadcast pictures to your mobile device or email: you receive a real-time alert in the event of movements.
Most of these cameras feature 8 MP. However, a few crucial varieties have up to 16MP, resulting in more detailed photographs. Furthermore, some have infrared capabilities for usage at night, with flash settings including incandescent, white led, red glow, low glow infrared, and virtually invisible no-glow infrared.
View on Amazon
Wi-Fi Trail Camera:
A Wi-Fi trail camera can deliver pictures to a desktop or laptop over a wireless connection. It belongs to the broad category of wireless cameras. You can access the images and videos using a Wi-Fi connection if you are within range of the signal.
You must first build your signal or network point to use the camera. These networks have a short range, generally 100 feet or less, but powerful ones can reach up to 500 feet.
This camera’s most notable downside is its excessive power consumption. These cameras require power to stay connected to the network. Some modern cameras employ a wireless remote to enable or disable the camera.
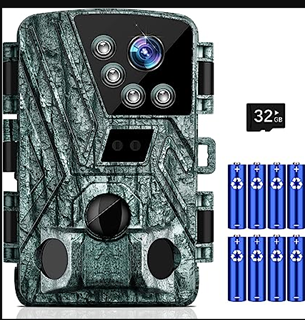
Wireless Trail Camera:
Wireless communication is improving. This technology-enabled camera allows users to access videos and pictures from a remote place.
The wireless trail camera relies on its signal or a signal provided by the user network to access video images.
Such cameras are incredibly convenient since you don’t have to walk to the camera to click the photographs. These cameras have a Wi-Fi signal. Such a camera can only communicate images via a link.
These cameras are more convenient and simpler to operate. When they detect movement, they send alerts to your laptop through a network.
These cameras are simple to operate. You can use them for security at home in addition to in-game surveillance. You will receive an immediate notification if there is any motion because they have motion sensors.
Wireless cameras’ drawback is that their batteries run out quickly, necessitating frequent recharges. Use them in areas with AC connections.
Key Features of Trail Cameras
Here are the key features of trail cameras:
View on Amazon
Trigger Speed and Recovery Time
A trail camera’s trigger speed is the duration to click a picture once the device detects motion. Recovery time is between taking a snapshot and being ready to take another one.
A camera with a quick trigger speed is ideal for photographing moving subjects. Similarly, a trail camera with fast recovery times is perfect for taking several pictures quickly. Again, this is ideal for animals that move quickly.
Cellular and Solar Cameras
Cellular cameras are a fantastic alternative if you want remote access to the trail camera’s photographs and settings without regularly dealing with your camera in the field. Similarly, adding a small solar panel to the trail camera will shorten deployment time. This is especially handy for deploying numerous cameras at once or monitoring inaccessible regions.
No-Glow or Low-Glow?
Trail cameras typically employ either no-glow or low-glow IR LEDs to capture photos in dim lighting. Animals probably don’t notice much of the visible light that no-glow LEDs emit. This is because of invisibility to the naked eye. However, it varies depending on the species.
Low-glow LEDs emit a very slight glow, making them somewhat visible and maybe attracting the attention of some animals. Low-glow cameras can illuminate across a wider area, which is one advantage.

Photo by Sourish Trivedy on Unsplash
Flash Range and Motion Detection Range
The range of a trail camera’s motion detection and flash are essential factors to consider if you intend to keep an eye on a broad region where you anticipate passing animals. A trail camera may detect an animal’s movement up to a certain distance from it when it detects motion.
The IR flash’s range is its maximum usable range. Low-light photographs of an animal may not clearly show the animal if the flash range is short and the animal is far away.
Resolution and Interpolation
The resolution of your photographs and videos significantly impacts their quality. However, remember that the megapixel numbers provided by manufacturers frequently underestimate the outcome of a process known as interpolation.
Many trail cameras allow you to change the resolution by interpolating or compressing it. Compression can help you save storage space by lowering the number of pixels. Interpolation adds pixels to a picture digitally, which consumes storage and causes delays in recovery while doing little to improve image quality.
Tips to Maintain and Troubleshoot Your Trail Cameras
· Keep your camera clean: Your camera’s lens may collect dust and dirt, which may reduce the clarity of the images. Use a soft towel to clean your camera often.
· Check Camera’s Battery: Check your batteries frequently and swap them out as necessary to keep your camera powered on.
· Troubleshooting problems: Consult the manufacturer’s troubleshooting manual if your camera isn’t operating or get help from customer service.
The Bottom Line
Every year, manufacturers appear to add new features to the list of trail camera functions. These features help photographers click high-end pictures. Begin by learning the function of the features, then decide whether you truly need them before paying for the ones you don’t. That is the simplest way to make the most of your future trail camera purchase.
How to Use Hunting Trail Cameras
Read More : Tuya Camera User Guide
Introduction
Thank you for choosing this camera. The camera is specially used to record activities of wild animals. For your easier use of it, the user manual contains full specifications of operation.
Please read carefully the manual before using, and keep it at a safe place for your future reference
The compilation of the user manual refers to the latest information. The manual quotes captured screen displays and graphics, with the aim to introduce the digital camera through detailed and direct methods. Due to the differences of technical R&D and production batch, those captured screen displays and graphics indicated in the manual may be different from that of actual digital camera.
Important Safeguards or Warnings
In case of a newly purchased memory card for the first time use, or data available in the memory card unrecognized for the camera or image captured by other cameras, please firstly format the memory card;
Before plugging in or out the memory card, please firstly disconnect power supply of the camera;
After using for many times, performance of the memory card will be lowered. In case of lowered performance, a new memory card is needed to purchase;
The memory card is a precise electronic device. Please don’t bend it and keep it away from falling or heavy load;
Don’t keep the memory card in the environment with strong electromagnetic or magnetic field, like the place near speaker or receiver of TV;
Don’t use or keep the memory card in environment with over high or low temperature;
Keep the memory card clean and away from contacting liquid. In case of contacting liquid, please dry it with soft cloth;
In case of keeping the memory card idle, place it into the card sleeve;
Please note that the memory card will get hot after long-term use, which is normal;
Don’t use the memory card having been used on other digital cameras. If still want to use this memory card, please format it with the camera.
Don’t use the memory card having been formatted on other camera or card reader;
In case of one of the followings with the memory card, the recorded data may be damaged:
Areas of application
. Camera trap for hunting
. Animal or incident observation
. Motion triggered security camera for domestic, office or public use
. Any internal and external surveillance, where evidence of an infringement has to be provided.
Camera Overview


3
. The LCD display screen only lights on in the SETUP mode, or when changing menu settings or viewing existing photos in ON mode.
. Using the operating buttons, menu settings can be changed in the test mode or existing
photos can be played back.
. A Micro SD memory card (not included) must have been inserted into the memory card slot in order to save photos and videos.
. To download photos and videos, connect the camera to a computer via the mini USB cable.
. There are 3 modes, which could be switched by the mode button.
. 8x LR6(AA) batteries (not included) are needed to power the camera.
. An external power supply can be provided via the DC connection (input 6V, at least 1.5A. Mains adapter is not included)
Steps to Use the Camera
Open and close the camera
1
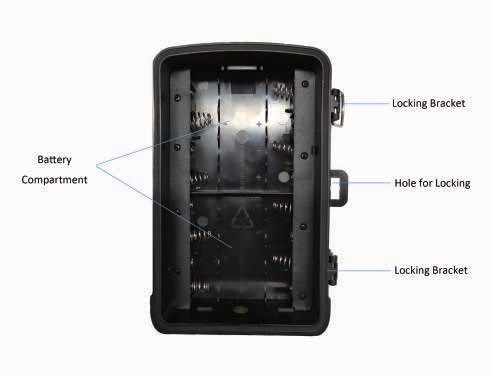
To open the camera, undo the two lateral locking brackets as shown in Fig. 1.
To lock the camera again, engage metal hoops of locking brackets into mount and press down plastic tab of bracket(Fig.2).
A fixing for a padlock is provided between the two locking brackets, allowing the camera to be
 securely locked.


Insert batteries
2
. Open the camera to inset the batteries. The battery compartment is housed in the right, rear part of the camera. Now open the protective cover of the battery compartment by pulling the clamping closure at the top slightly inwards before lifting off the cover.
4
. Insert 8 fully batteries as shown in the below figure. Ensure correct position as marked for each battery in the battery compartment when inserting batteries.

. Close the battery compartment again with the protective cover.
Note:
-Instead of type LR6(AA) batteries, rechargeable batteries with the same specification(with 2000mAh or higher) may be used. We recommend NiMh batteries with low self discharge(not included)
-There will be an alarm if the battery is low in power.
Insert memory card
3
In order to save photos and videos, you must insert a Micro SD memory card to the slot before
turning on the camera.
Note:
Micro SD memory card up to 32GB are supported.Insert the memory card as shown in the illustration.
Push the memory card into compartment until it clicks into place.
If the camera displays” Card protected”, remove the memory card and change the position of the memory protection
External Power Supply
4
The camera can be powered with an external power supply(not included). A 6V power supply (with a connector)≥ 1.5A, together with a 3.5mm external and 1.35mm internal diameter connector is required.
5
Note:
Rechargeable batteries cannot be recharged in the camera with an external power supply. Remove any existing batteries from the battery compartment when the camera powered with an external power supply.

 INSTALL THE CAMEAR WITH A STRAP
Use the included securing strap to attach the camera
to a tree or other object.
The illustrations below demonstrate how to fasten the
securing strap.
Position your camera desired and pull the loose end of the securing strap tight until the camera is firmly secured. To release the securing strap again, pull at the tab of the securing strap.
Using the camera
Prior to setting up the camera for surveillance, it must be set up for the respective purpose. For this purpose, there is a setup mode available. In addition to changing settings, photos and videos can be taken and existing photos can be viewed in this mode.
Mode switch
1
Open the camera, the mode switch is located at the bottom edge on the right inside. 3 modes
can be selected.
OFF: The camera is completely switched off in the OFF mode.
SETUP: Select SETUP mode to adjust settings and make or playback photos and videos.
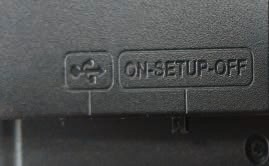
ON: The camera is activated to take photos automatically.
6
Operating buttons
2
Set the mode switch to SETUP and the camera and monitor are switched on,operating buttons can be activated and settings can be changed.
 Functions of operating buttons in recording mode:
3
When the camera is in recording mode as shown in the
picture.
By pressing button can do below operations:
. Mode: Photo, Video, Photo+Video
Select whether photos or videos should be taken when motion is detected. When in the “Photo+Video” mode, the camera first takes a set number of photos prior to recording a video.
. Photo resolution: 12MP, 8MP, 5MP, 3MP, 1MP
Select the desired resolution for photos. A higher resolution produces a somewhat better photo quality but results in larger files requiring more space on the memory card.
. Photo series: 1 photo, 2 photos, 3 photos
Select the number of photos to be taken in succession when the camera is triggered in the Photo mode. Please also observe the parameter interval!
. Video resolution: 1920x1080P, 1280x720P, 720x480P,640x480P,320x240P
Select the required video resolution. A higher resolution produces higher quality videos but results in larger files requiring more space on the memory card. Videos are recorded in AVI format which can be played back on most video equipment.
. Video length: The video length is optional between 1-60 seconds or 1-10 minutes.
The longer the recording time selected, the shorter the standby time is. The default video length is 5 seconds.
7
. Audio Recording: ON, OFF
Select ON, the video taken will have audio when played back.
. Shot lag: 30 seconds, optional from 5 seconds to 60 minutes
Select the shortest period for the camera to wait before it reacts to the successive triggering of the main sensor after an animal has first been detected. The camera does not record any images or videos during the selected interval. This prevents the memory card from being filled with unnecessary shots.
. Side motion sensor: ON, OFF
Select “On” to enable PIR motion function Select”Off” to disable PIR motion function
. Sensitivity motion sensors
The sensitivity of the main motion sensor is set here. For interior areas and environments with little interference, select “High”. Select “Medium” for exterior areas and environment with a normal amount of interference, and select “Low” for environment with a high level of interference.
. Target recording time
Press “MENU” to find “Target recording time”. Press “OK”, and then select “ON” to set the starting working and ending working time. After finishing setting, the camera only works during the set time every day. Beyond the period, the camera is in standby.
. Time lapse: On/off
When “On” has been selected, the camera automatically takes photos or videos in the selected time interval, irrespective of whether or not the PIR sensor has detected a motion or not. Select ”On” to set the time interval, and set the values of Hr, Min and Sec. For example, if the process of flowers blooming has to be recorded, time lapse can be used. The camera automatically take pictures in every set time intervals.
. Language: Select the desired menu language
The following languages are available: English, Deutsch, Dansk, Somi, Svenska, Espanol,
Francais, Italiano, Nederlands, Portugues, Japanese, Chinese.
8
. Time & Date
Set the time and date according to current time. Press Left/Right key to choose the number and change the value by pressing Up/Down key. Confirm the changes with OK key.
Time format: 12/24 hr
Date format: dd/mm/yyyy, yyyy/mm/dd, mm/dd/yyyy
. Photo Stamp:On/off (only available for photos, not for videos)
Select “ON” to print the date, time, temperature and moon phase on each photo. Otherwise select “off”.
. Password Protection
After selecting “On” enter a four digit password to protect your camera against unauthorized access. Press “OK” , and then select “ON” to set the password of the camera. The password is a 4-digit number selected between 0-9. If the password is lost, turn off the camera to OFF position, then press MENU and REPLAY key at the same time, and slide the operating mode selector switch from OFF to SETUP position. The camera is unlocked.
. Beep Sound: Turn beep sound on/off
Select “On”, it will sound beep when pressing the button. Select “Off”, it doesn’t sound beep when pressing the button.
. Format memory card:
All files are deleted by formatting the memory card. Press “OK” button and confirm formatting by selecting “Yes”.
We recommend formatting the memory card if it has already been used in other devices or if it is a new card.
Caution: Ensure that files still required have been backed up prior to formatting!
. Serial NO.:Off/On (can only be used for photos not for videos)
Select “On” to assign a serial number to the camera. As soon as “On” has been confirmed by pressing the OK button, the individual serial number can be inserted. The serial number
is 4-digit number selected between 0-9.
9
. Reset Settings:
All settings will be deleted if select “Yes”.
.Version: Check trail camera’s model name and firmware
By pressing button to start the replay mode, please refer to 4. Functions of operating buttons in replay mode for more operations.
By pressing button to change to manual recording mode for video recording, press
SHOT button to start and end video recording.
By pressing button to change to manual recording mode for taking photos, press
SHOT button to take picture.
OK,<> : No function in recording mode.
 Functions of operating buttons in replay mode
4
When the camera is in replay mode as shown in the picture . By pressing button can do below operations:
. Delete current file
You can use this function to delete individual recordings from the memory card. Press MENU key under the mode playback, move the select bar to “Delete current file” and press “OK” to delete the selected recording.
. Delete all files
You can use this function to delete all recordings from the memory card. Press MENU key under the mode of playback, move the selection bar to “Delete all files” and press OK to delete all recordings.
10
. Activate slide show
-This function can be used to playback the photos stored on the memory card automatically. Each photo is shown for about 2 seconds. To stop the slide show and keep the current image permanently on the screen, press the OK button.
. Write protect
-This function can be used to protect individual recordings of all saved recordings from accidental deletion.
-Select “Write-protect current file” to protect the currently selected recording from accidental deletion.
-Select “Write-protect all files” to protect all saved recordings from accidental deletion.
-Select “Unlock current file” to remove the write protection for the currently selected recording.
-Select” Unlock all files” to remove the write protection for all saved recordings.
By pressing button to return to the recording mode.
By pressing button
to view existing pictures and videos backwards, press “Ok” to play video.
By pressing button to view existing pictures and videos forwards, press “Ok” to play video.
By pressing button to zoom in photo in increments(up to 8 times) , press OK button to
zoom out photo, press MENU can return to original size.
The buttons / no function in replay mode.
Aligning the camera
5
In test mode you can work out the optimum exposure angle and range of the motion sensor. During alignment consider whether the use of the side motion sensor may be is useful for attaining the desired observation results.
11
Align the camera as follows:
Fasten the camera to a tree or similar object at a height of 1-2 meters and align the camera in
the desired direction. Then move slowly from one side of the target area to the other side. While doing this, monitor the motion display.
-If it lights up in red, you have been detected by the motion sensor. In this case, you can work
out the best alignment for the camera.
-The motion display only lights up when operating mode selector switch is in the SETUP position and one of the motion sensors has detected movement. During normal operation, there will be no LED display in this area.
-To ensure that the camera doesn’t make unwanted recordings of irrelevant movements, it should not be set up in a sunny location or close to branches. The detecting range of the sensors is 110°. And the recording angle of the camera is about 100 degree.
Normal working mode
6
Slide the operating mode selector from SETUP to ON position, after 5 seconds, the LED of motion display will go off ant it will go into standby mode.
In this mode, the camera only takes pictures or records video when an alarm is triggered by objects. As soon as any wild animals or similar object enter the detecting range of the side motion sensors, the camera will be activated and detect the motion. If the wild animals
keeps moving to the detecting range of the central sensor zone, the camera will start capturing photos and/or send videos(depending on the configuration).
-After the wild animal moves out of the detecting range of side motion sensors, the camera switches off and goes back into standby mode.
Night working mode
7
-During night exposures the infrared LEDs on the front of the camera provide the required light for taking pictures. The range of the LEDs makes the camera starting shooting, you have
been detected by one of the activated side motion pictures within 3m-20m. However, reflective objects can cause overexposure.
12
-Please note that pictures taken in night exposures are black and white. When recording video for a long time, the low voltage may have great influence on the stability of the camera. So in case of the low voltage, it is better not to record in the evening.
Note:
When using the camera at night, the electric current would increase because of the working of infrared lamps. If the camera is in low battery, it would not shoot photos or filming videos at night. Meanwhile once daylight is available, the camera works normally even in low battery.
Play the videos and pictures saved on memory card via TV and computer.
8
. TV connection:
The camera can transfer the video signal to an external monitor or the video input of a television set. Please also follow the instructions of the respective playback device.
-Turn on your TV, connect the TV with the camera through 3.5mm cable
-Turn on the camera, and slide the operating mode selector to “SETUP”
-After connecting, the camera enters the mode of playback and the LCD turns off, the camera recordings would be shown on the TV.
. Computer connection:
The Trail Camera can be connected to a computer using the supplied USB cable to view existing photos/videos.
Alternatively you can insert the memory card in a card reader on the computer. Note:
Mac computers shown as “Unknown” drive on the desktop. When clicking on the drive, the program “iPhoto” is automatically started.
13
