How To Install Synology Surveillance Station, In this How To… Guide we are going to take you through how to install Surveillance Station software to a Synology NAS and then show you how to add an IP camera to that software. This guide is aimed at people who have just setup a NAS or have pre-existing NAS that they want to start using for IP camera management and storage, if you are setting up your NAS for the first time this thread is not for you, either follow the instructions in the box, look at other threads in the Synology section of this forum, or ask us for help.
Once you have the NAS setup you can come back to this post and follow the steps below:
Step 1: Login to your Synology NAS via a browser

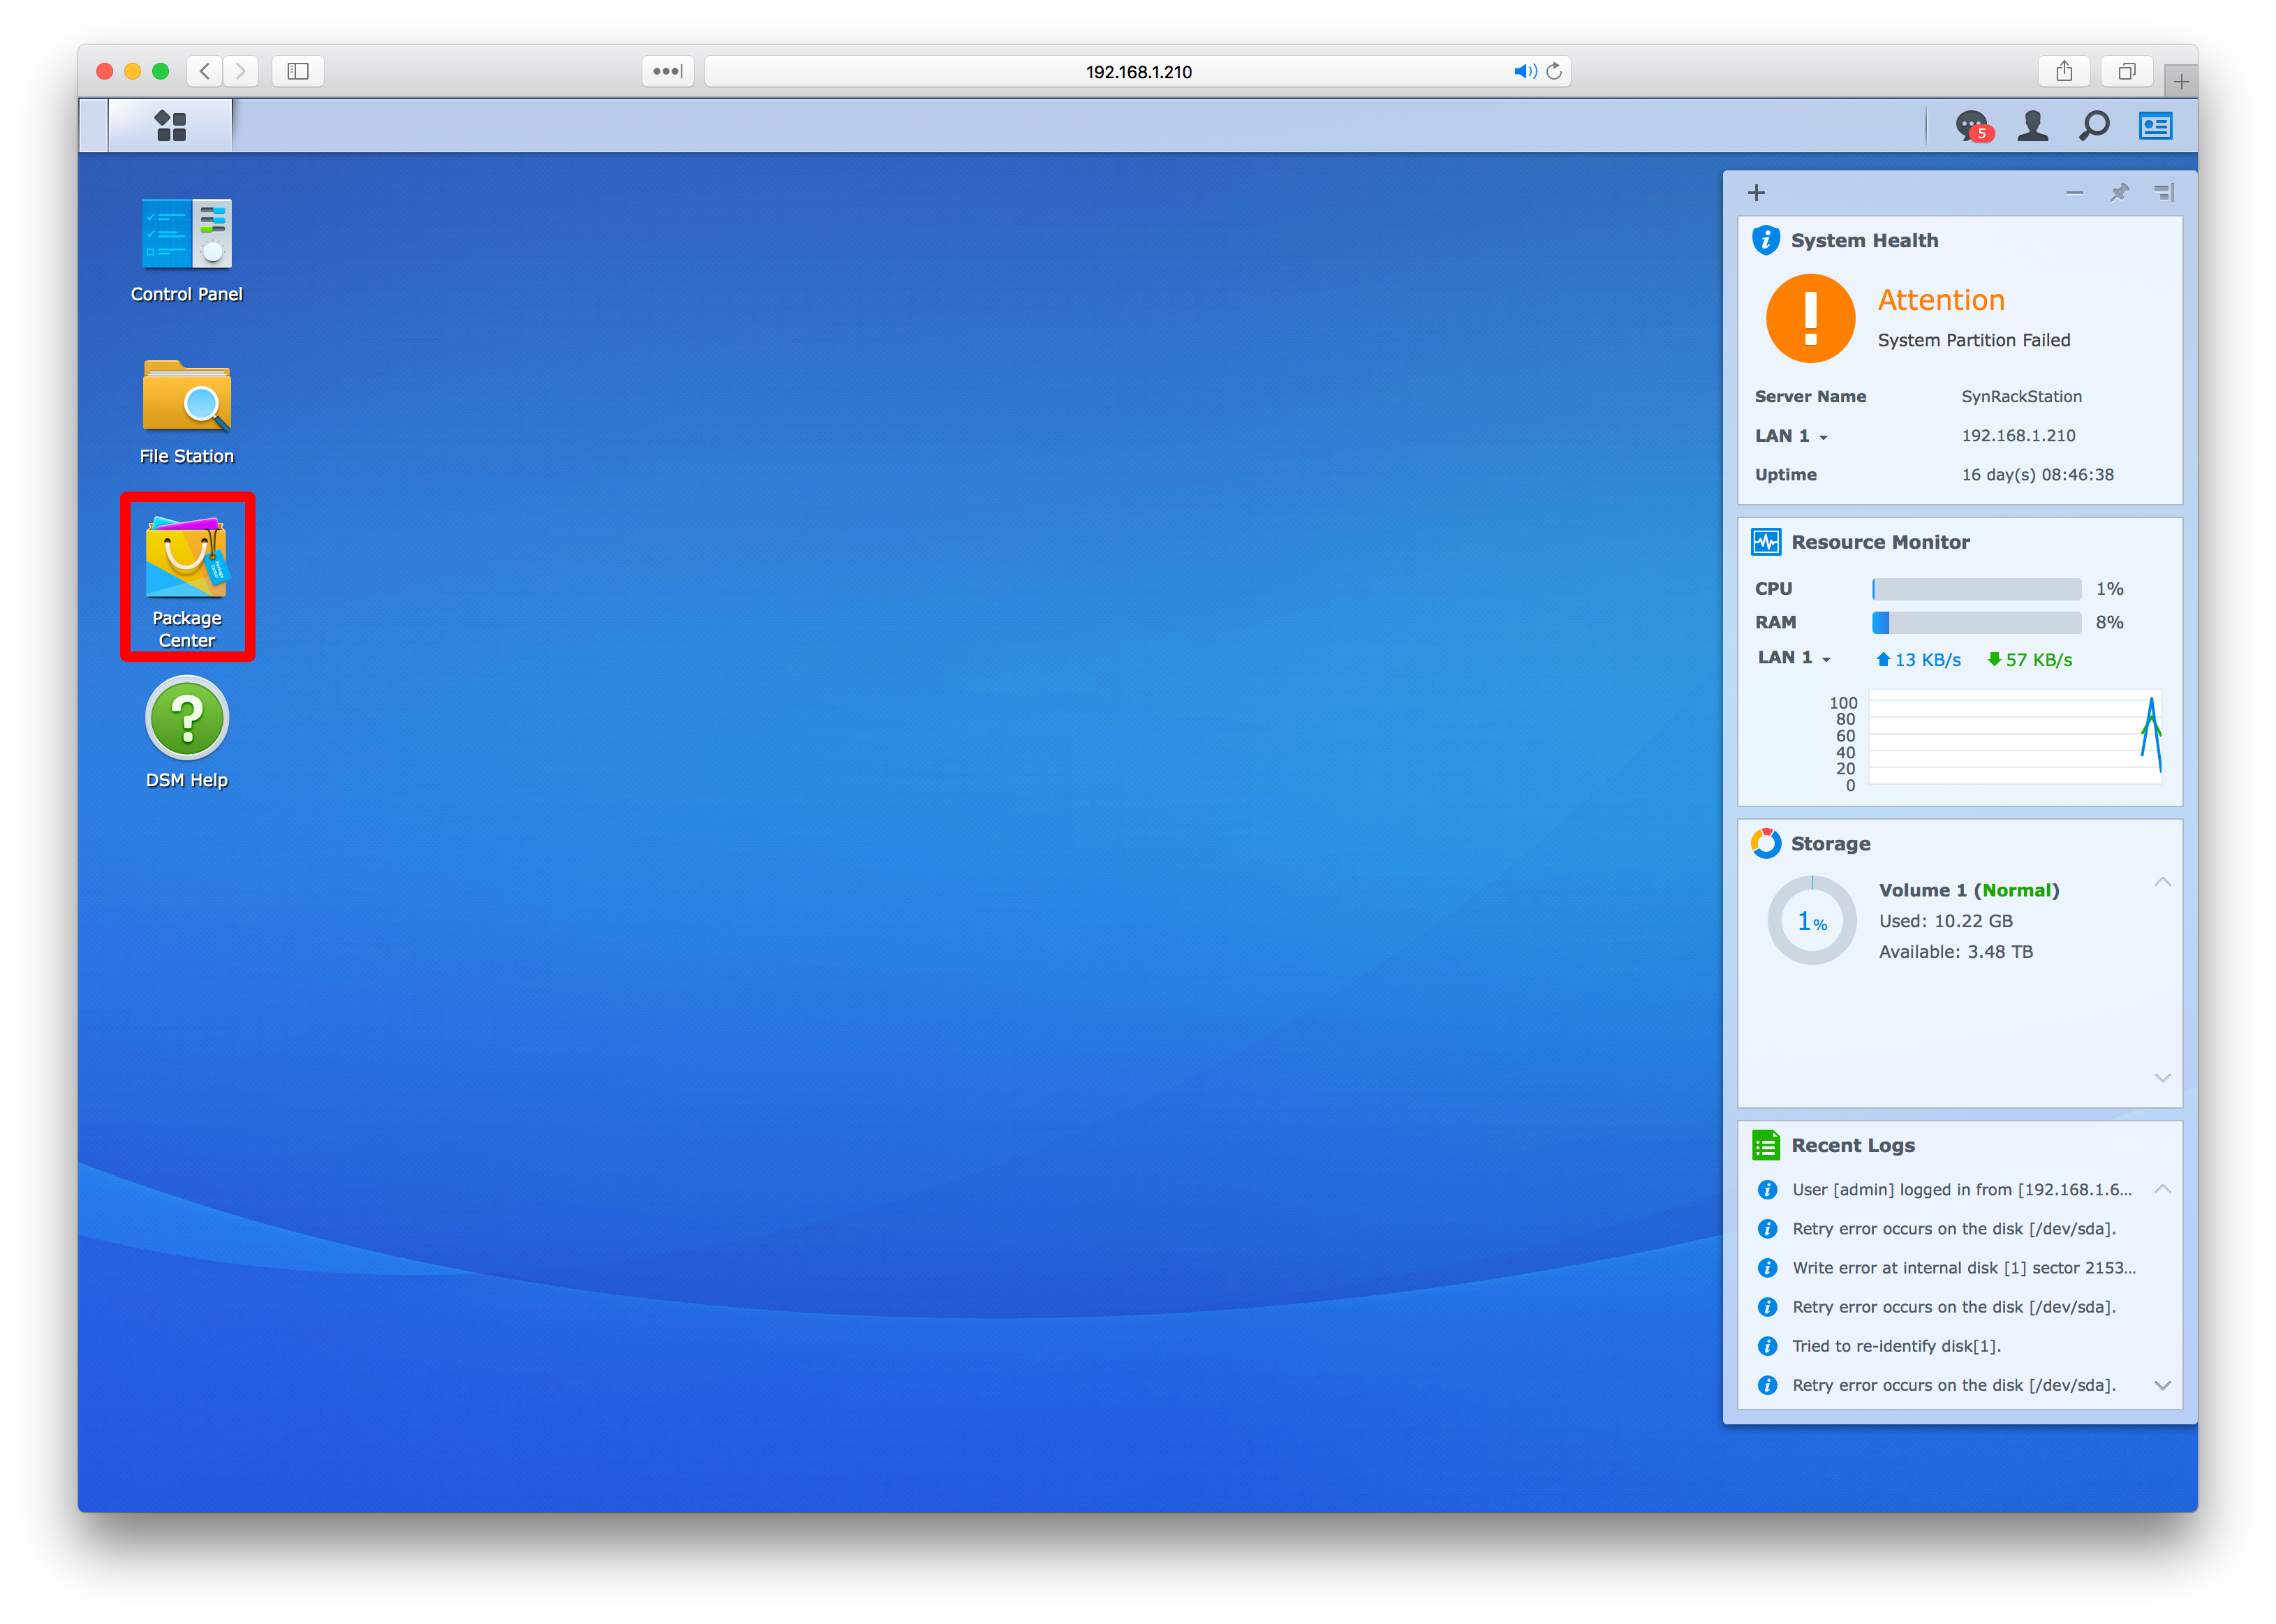
Step 2: Click the Package Center icon
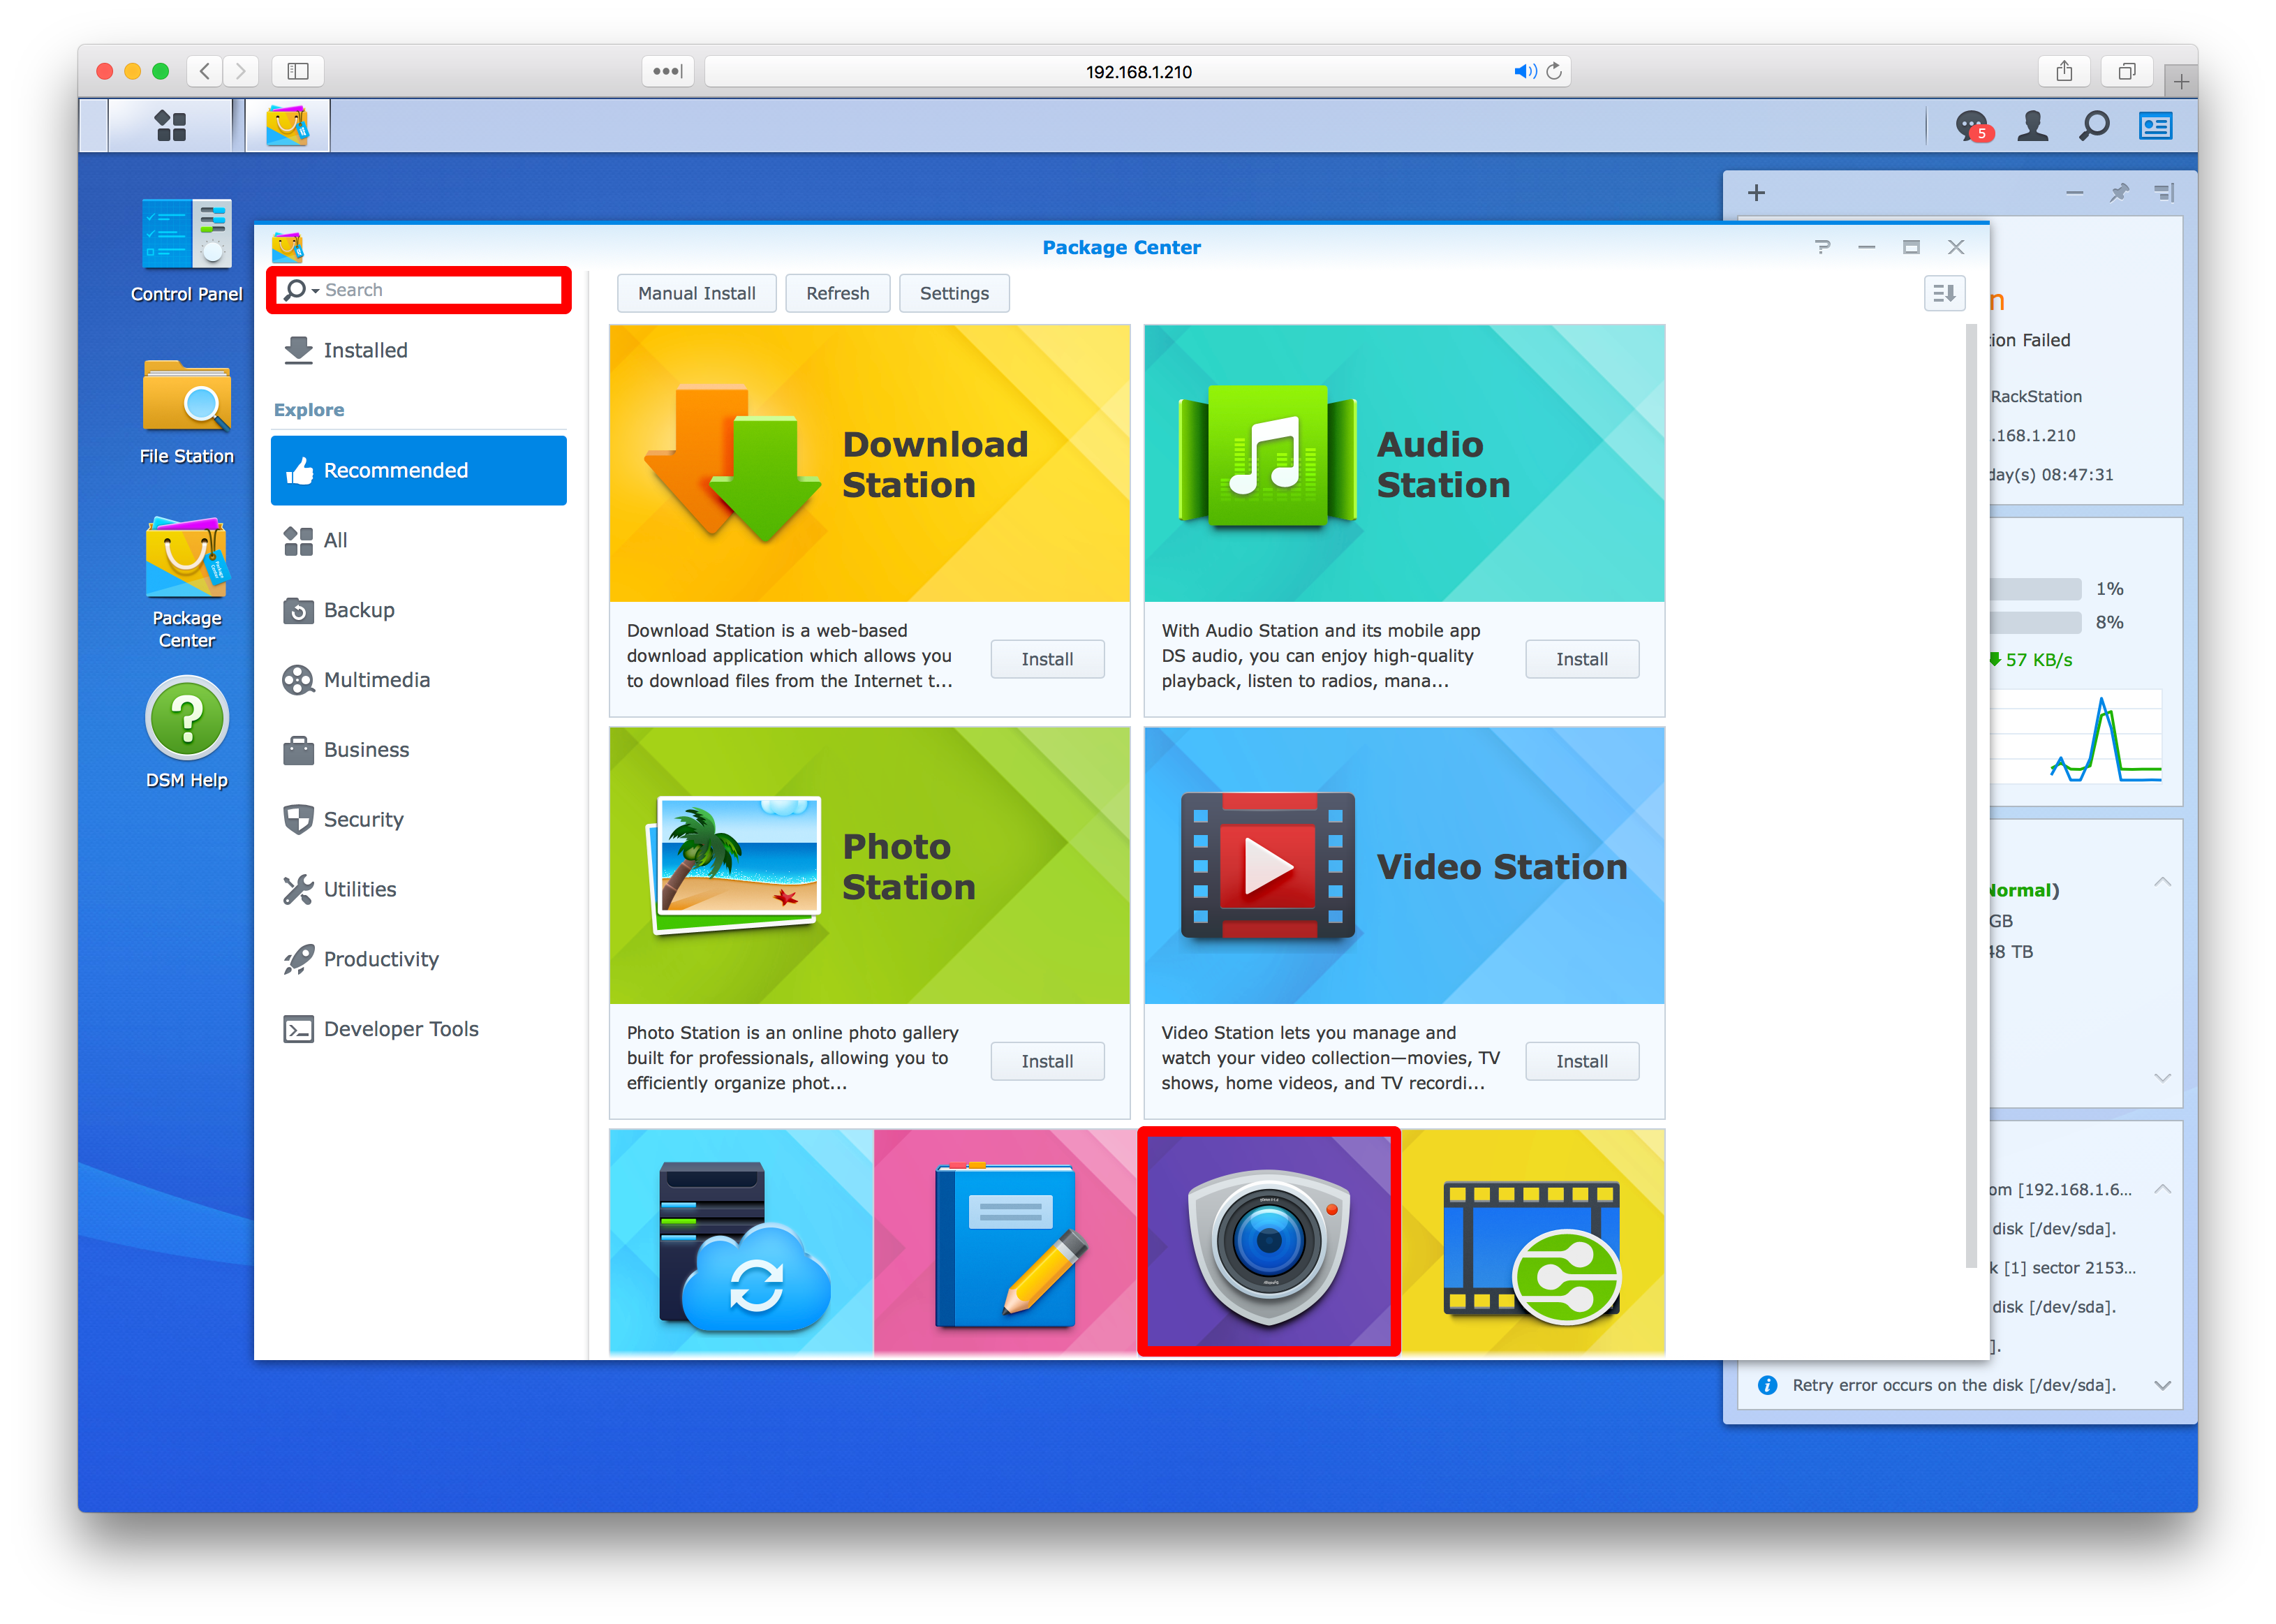
Step 3: Search for and install the Surveillance Station software (it should be on the home page of the package center, if not you can use the search bar to find it)
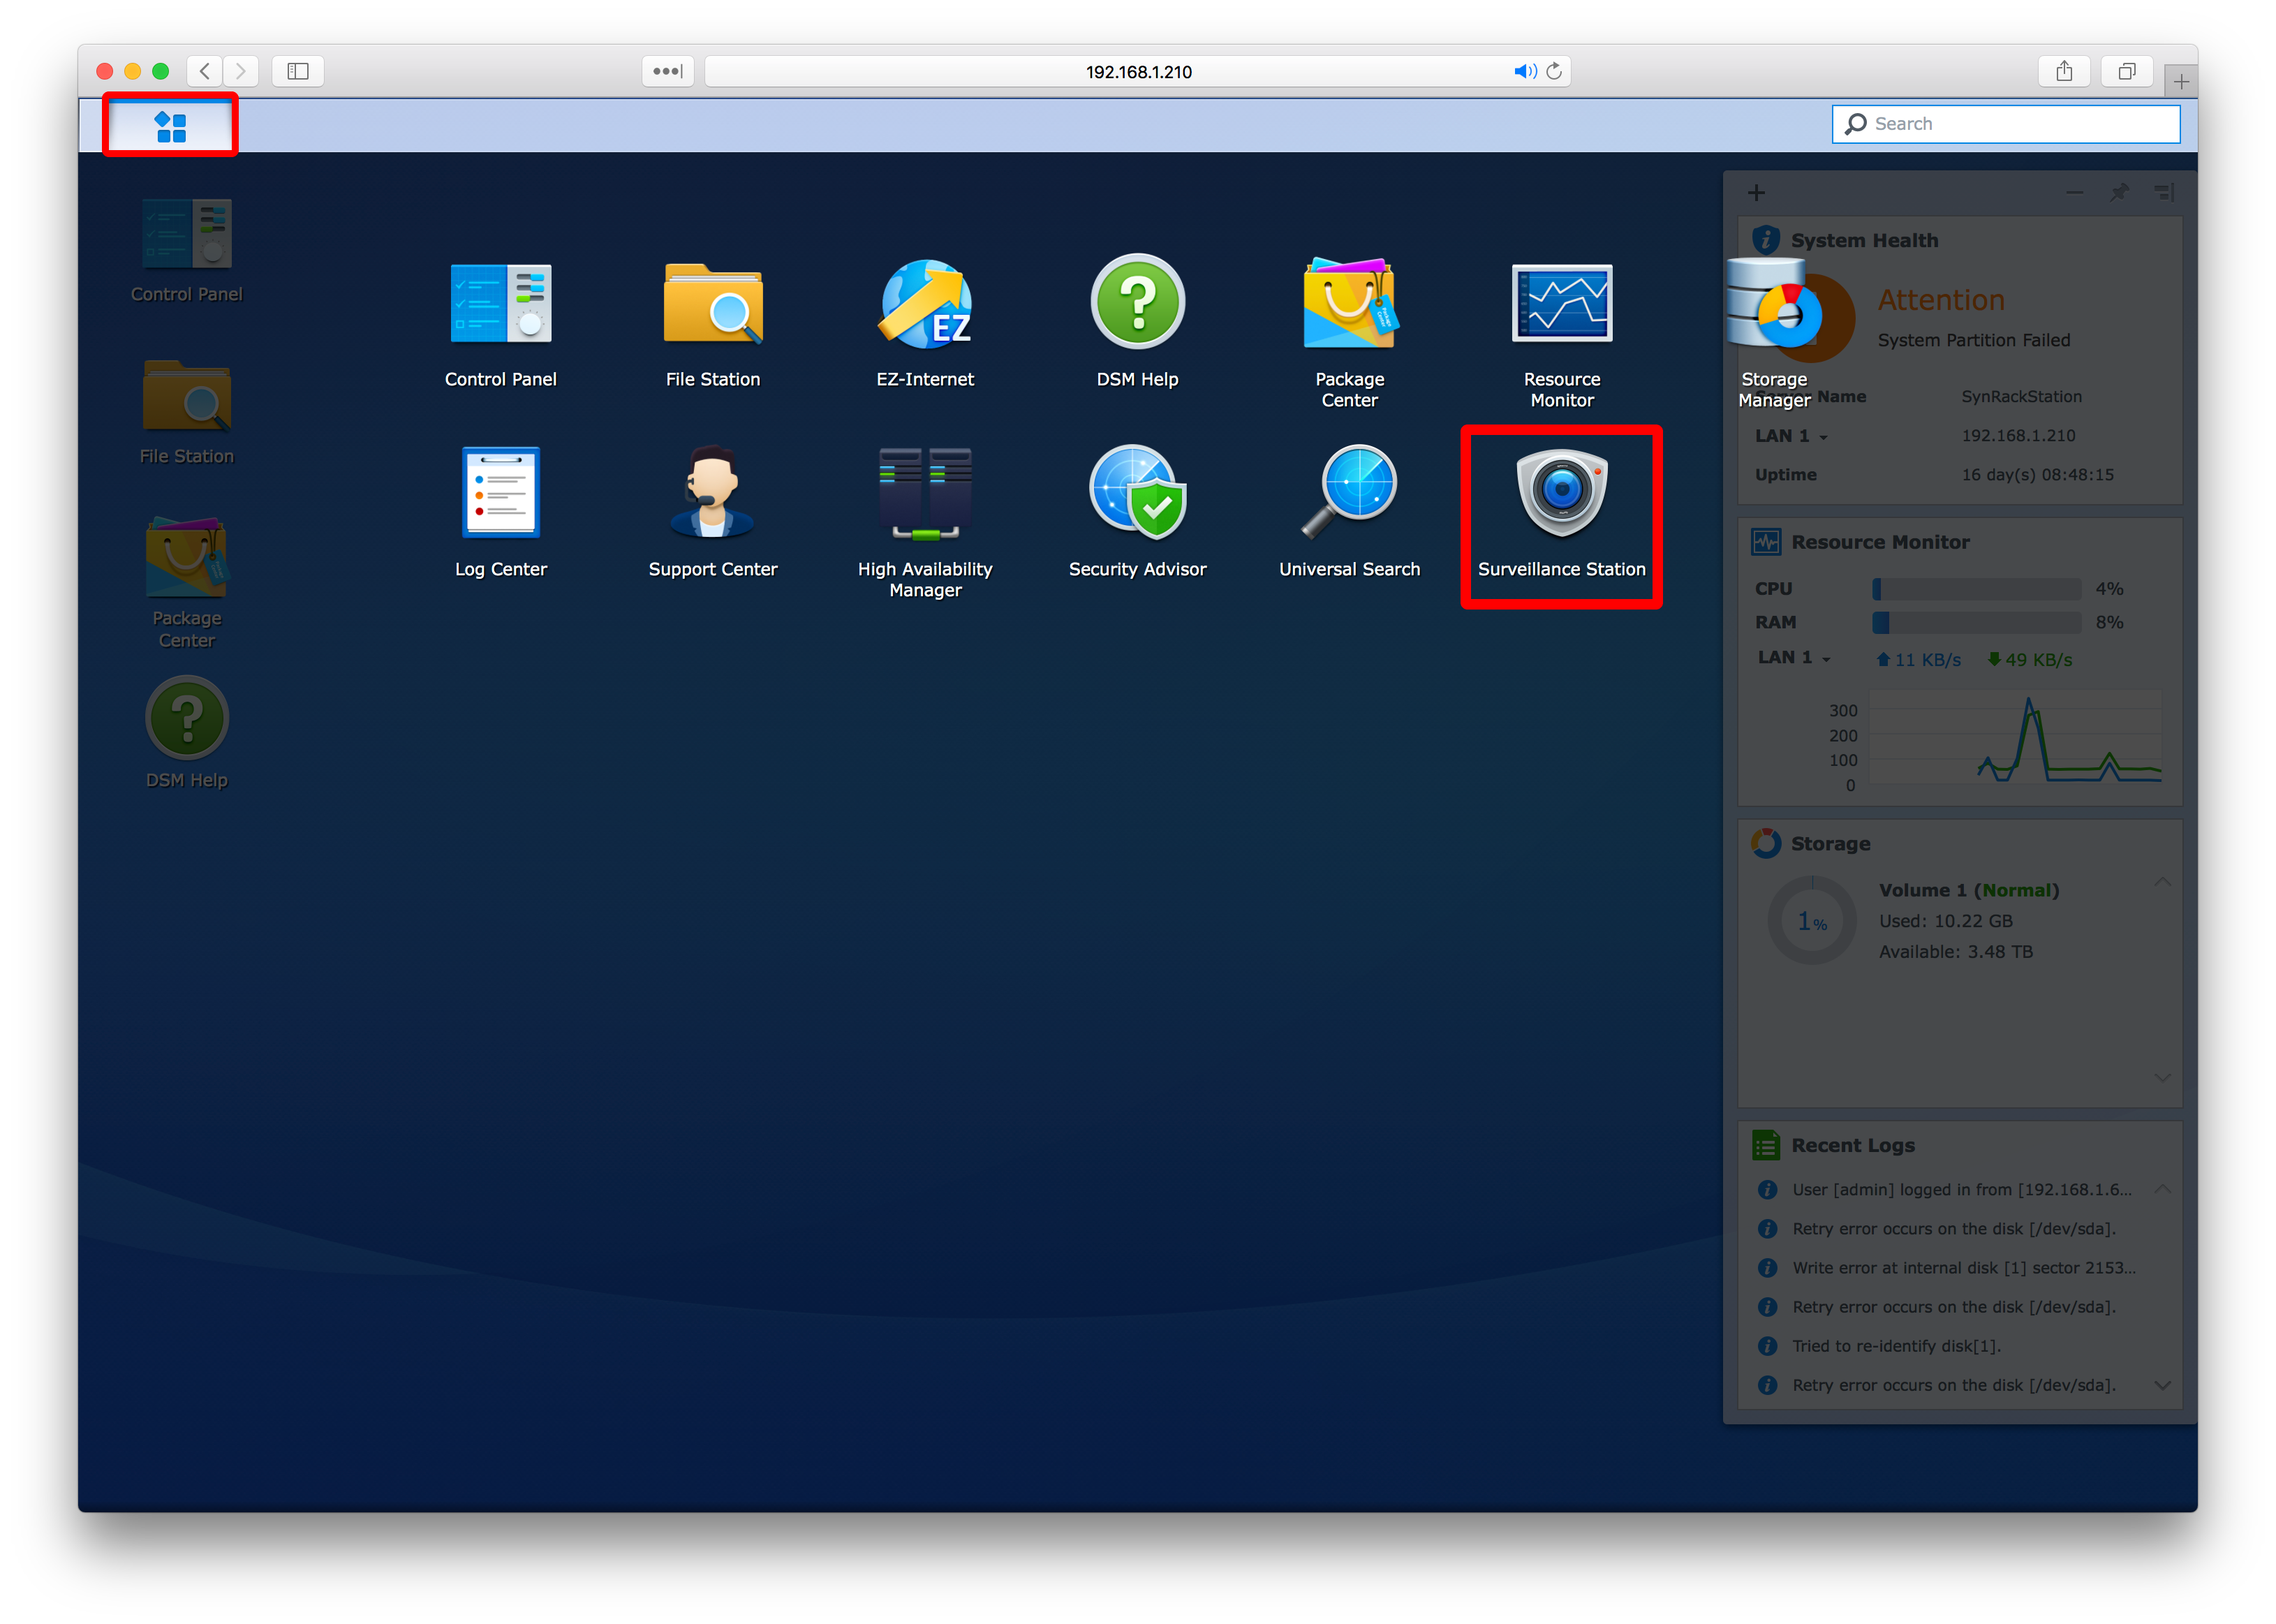
Step 4: Click the Synology main menu at the top left of your screen and open the newly installed Surveillance Station software
Step 5: Click the IP Camera icon
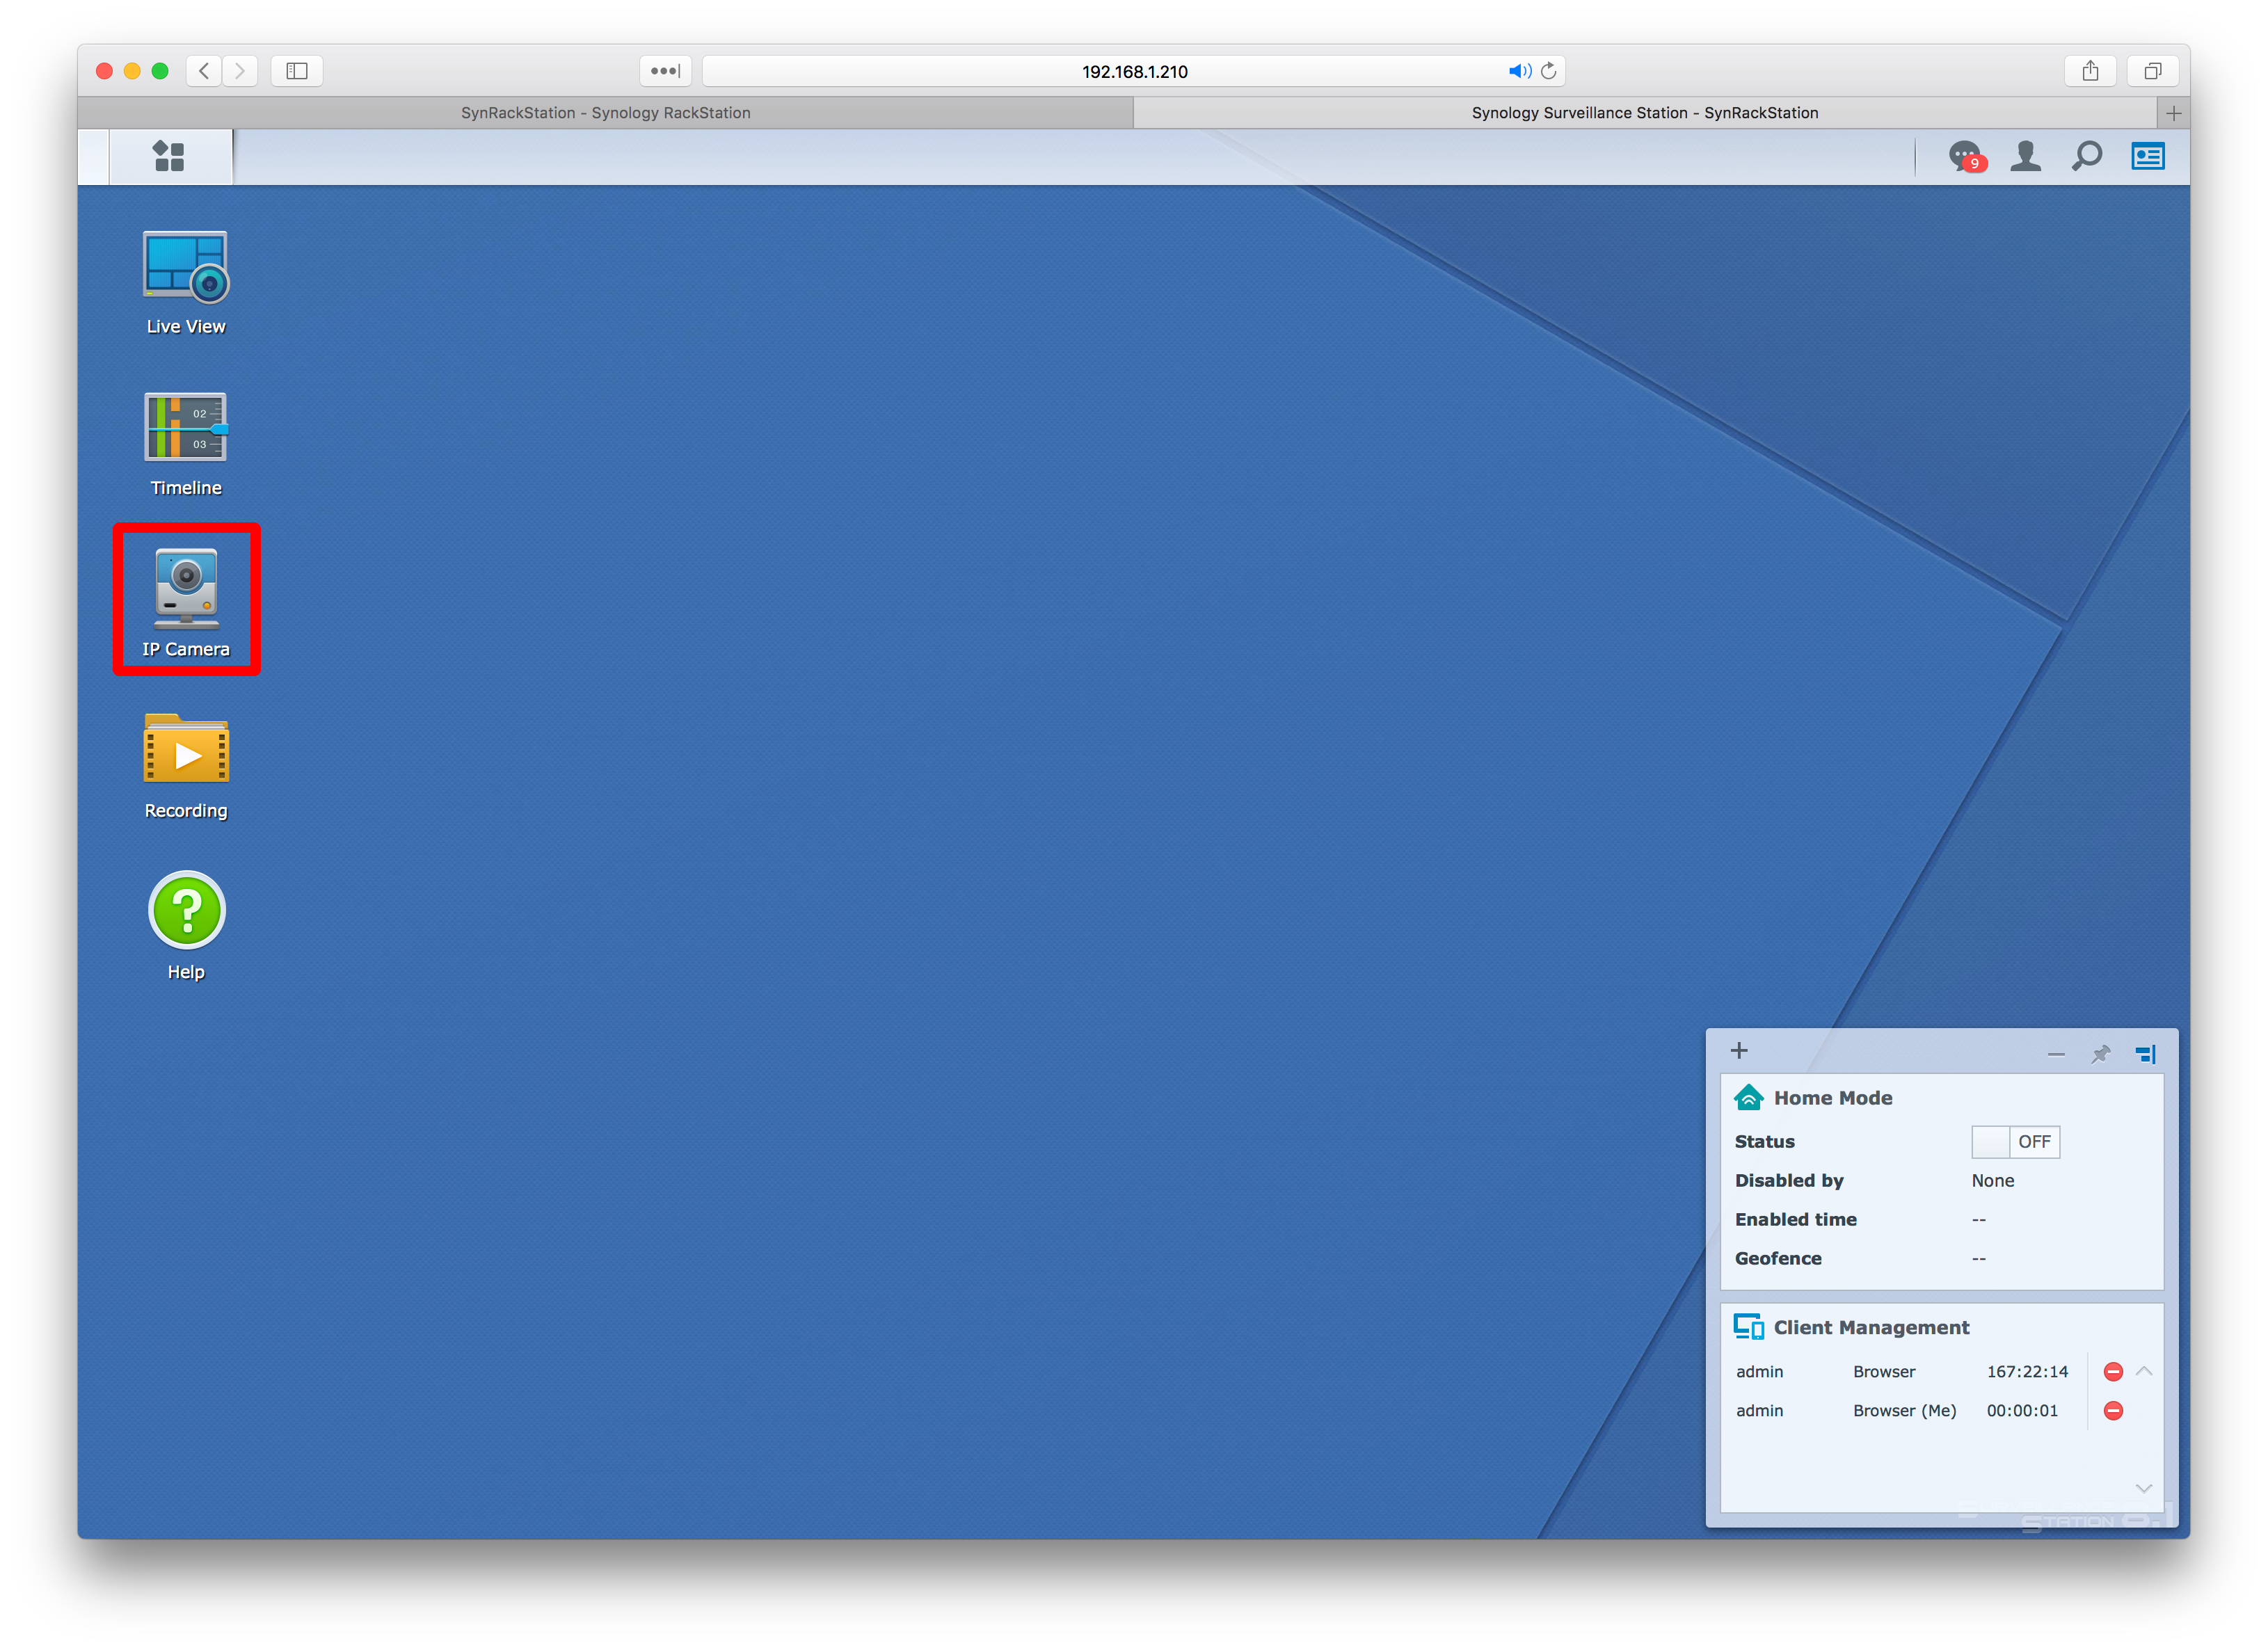
Step 6: Click the add button when the new window open and then click add camera from the drop-down
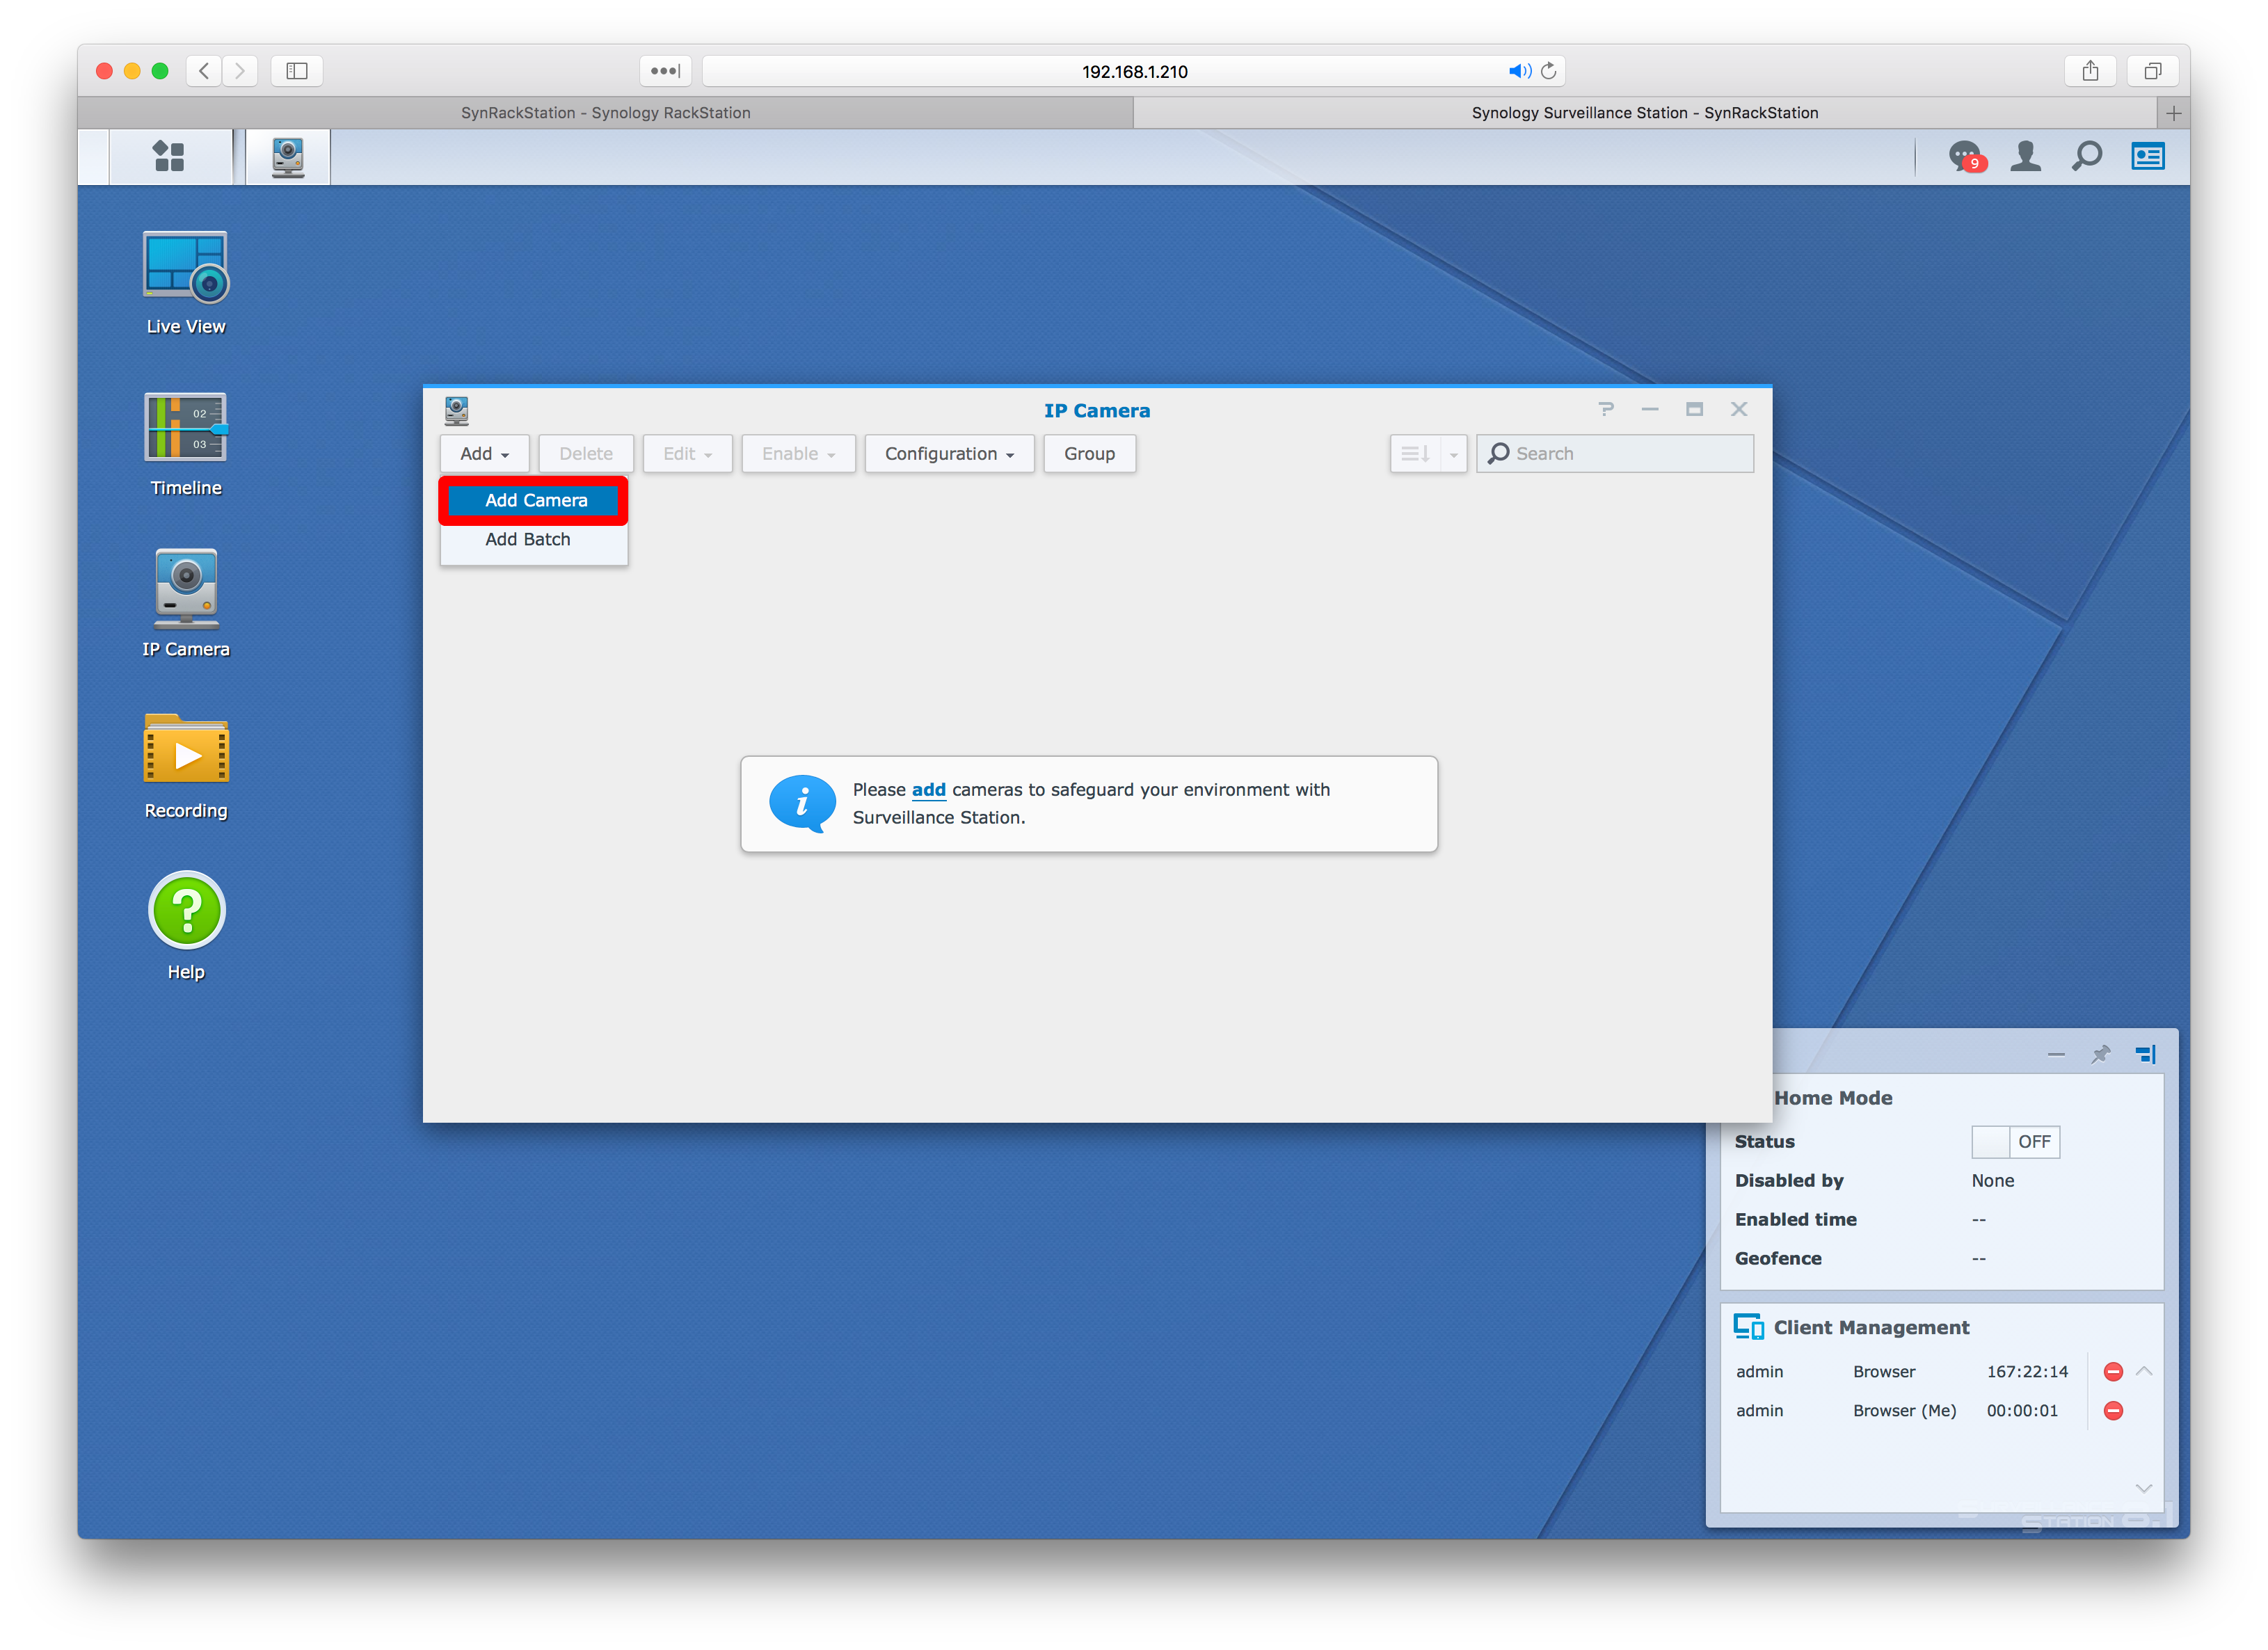
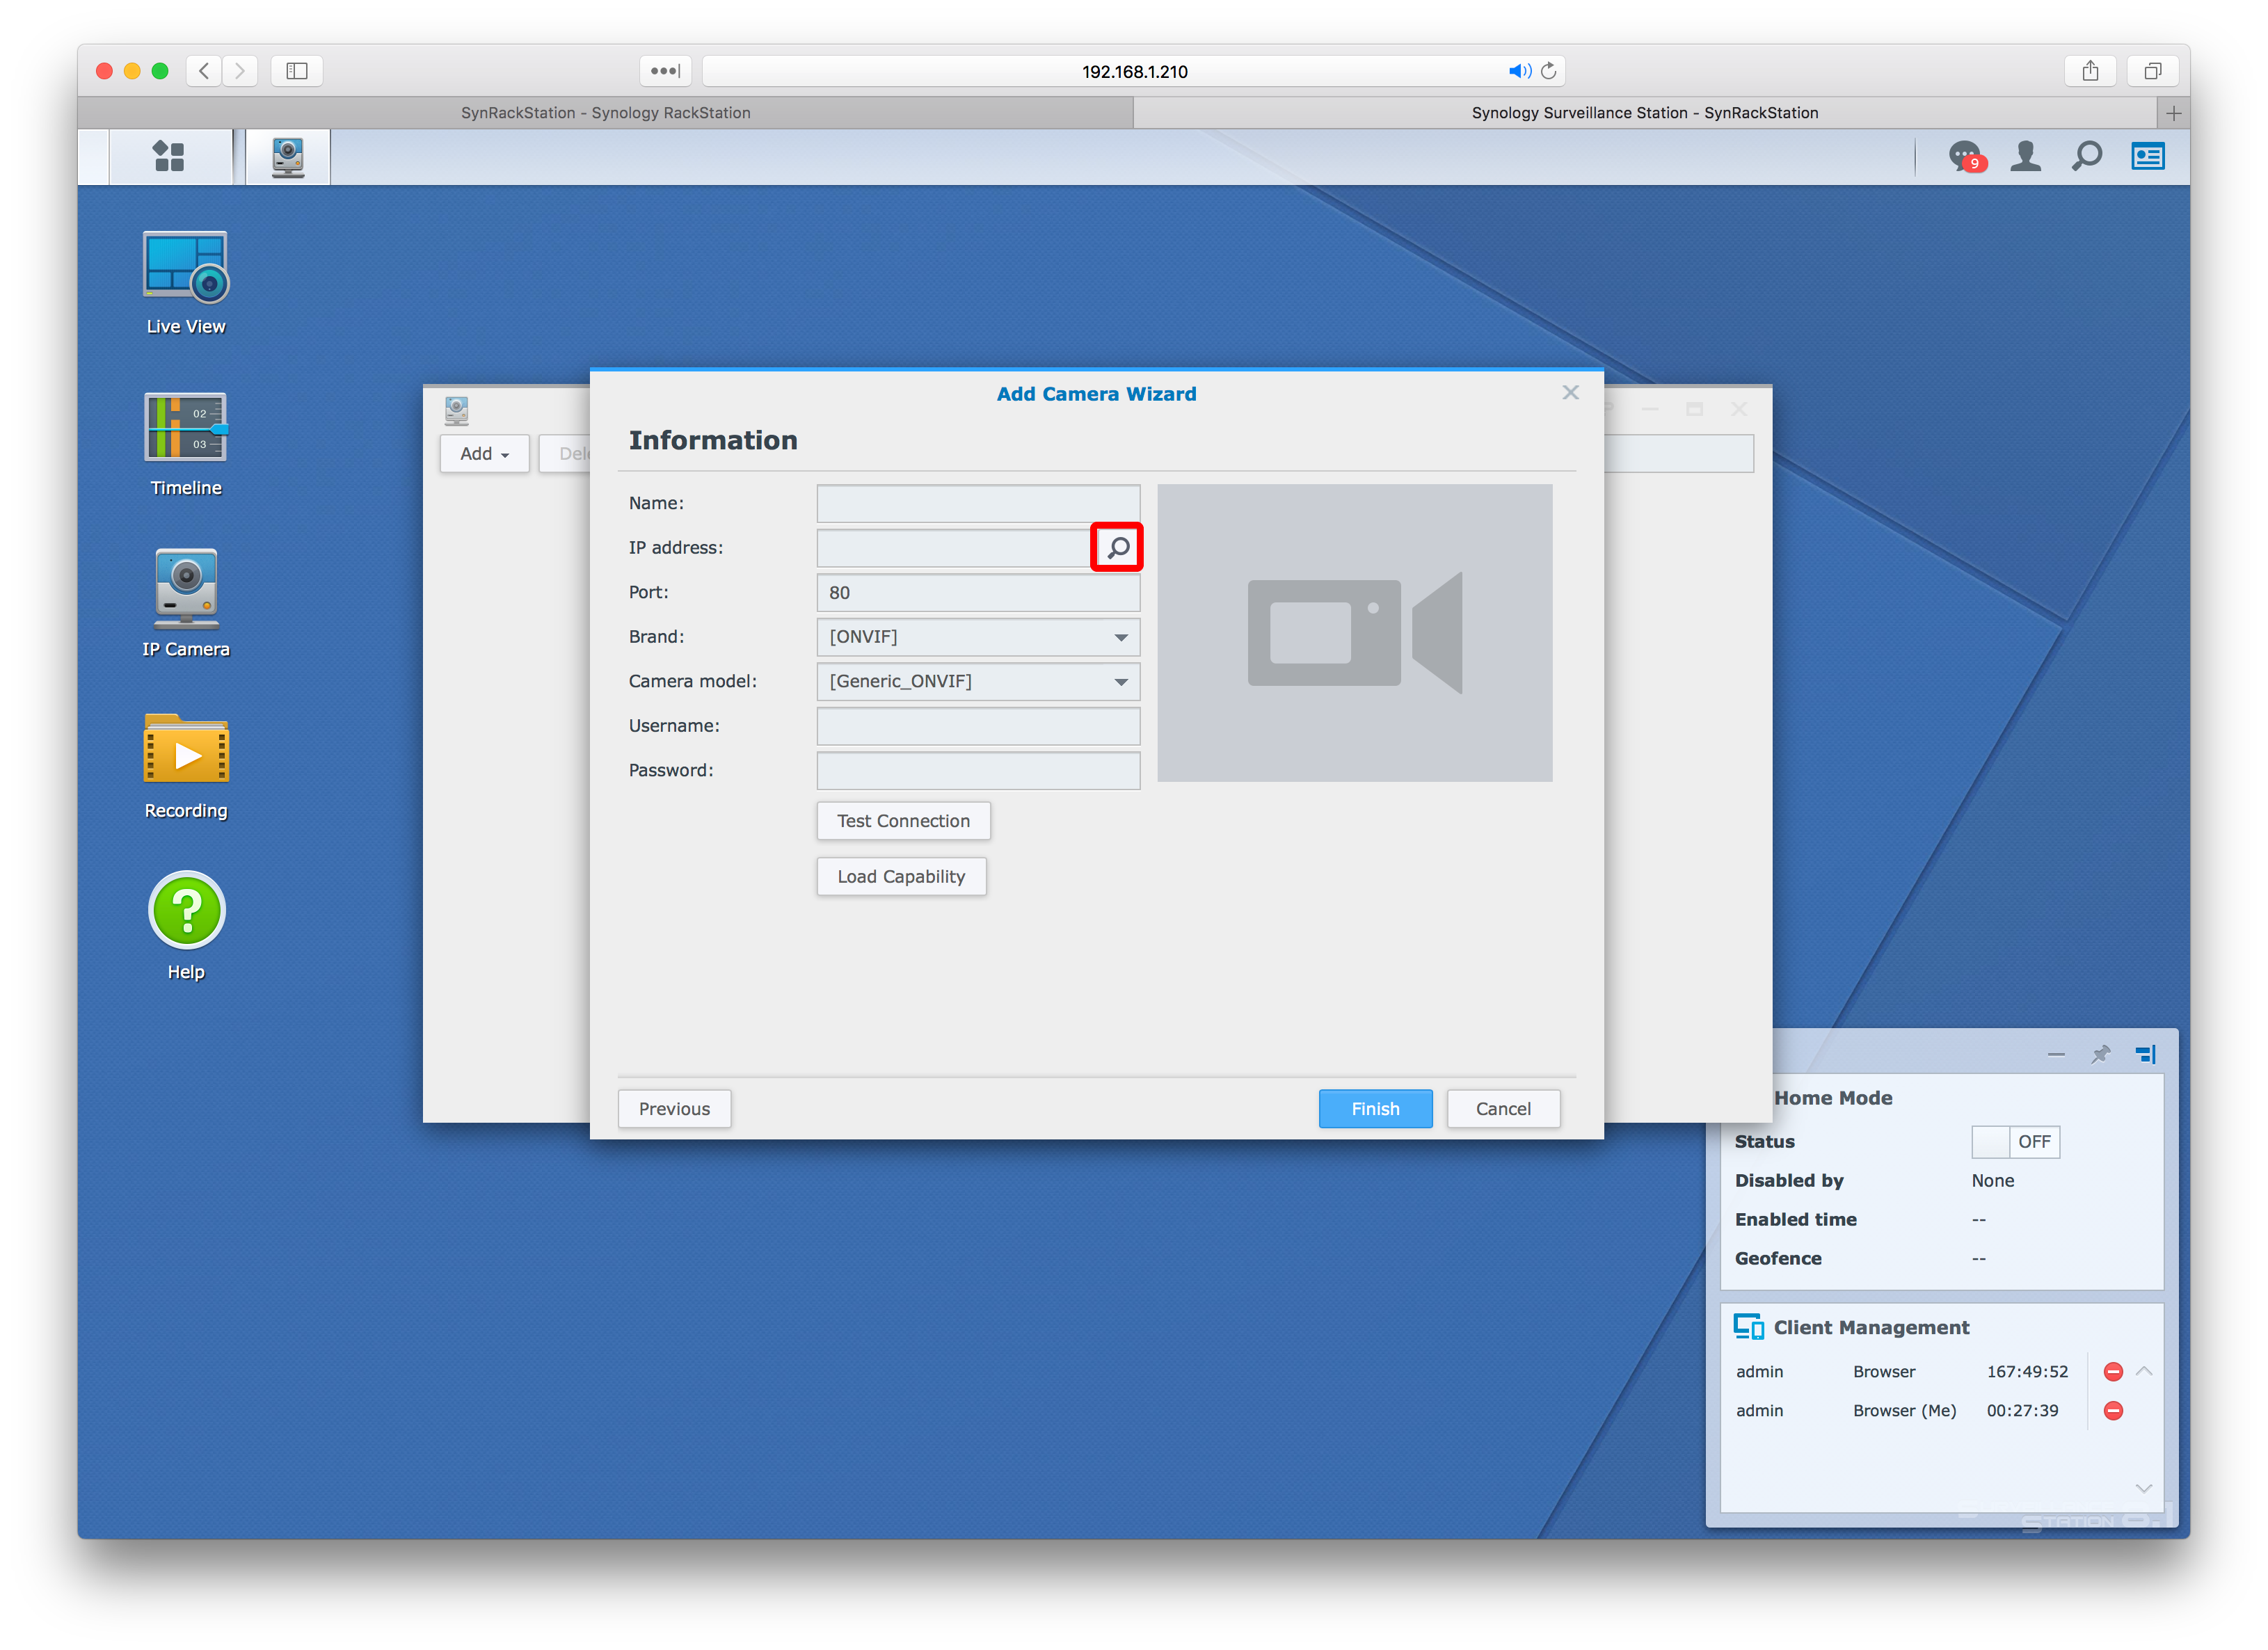
Step 7: Select Quick Setup and then click the next button
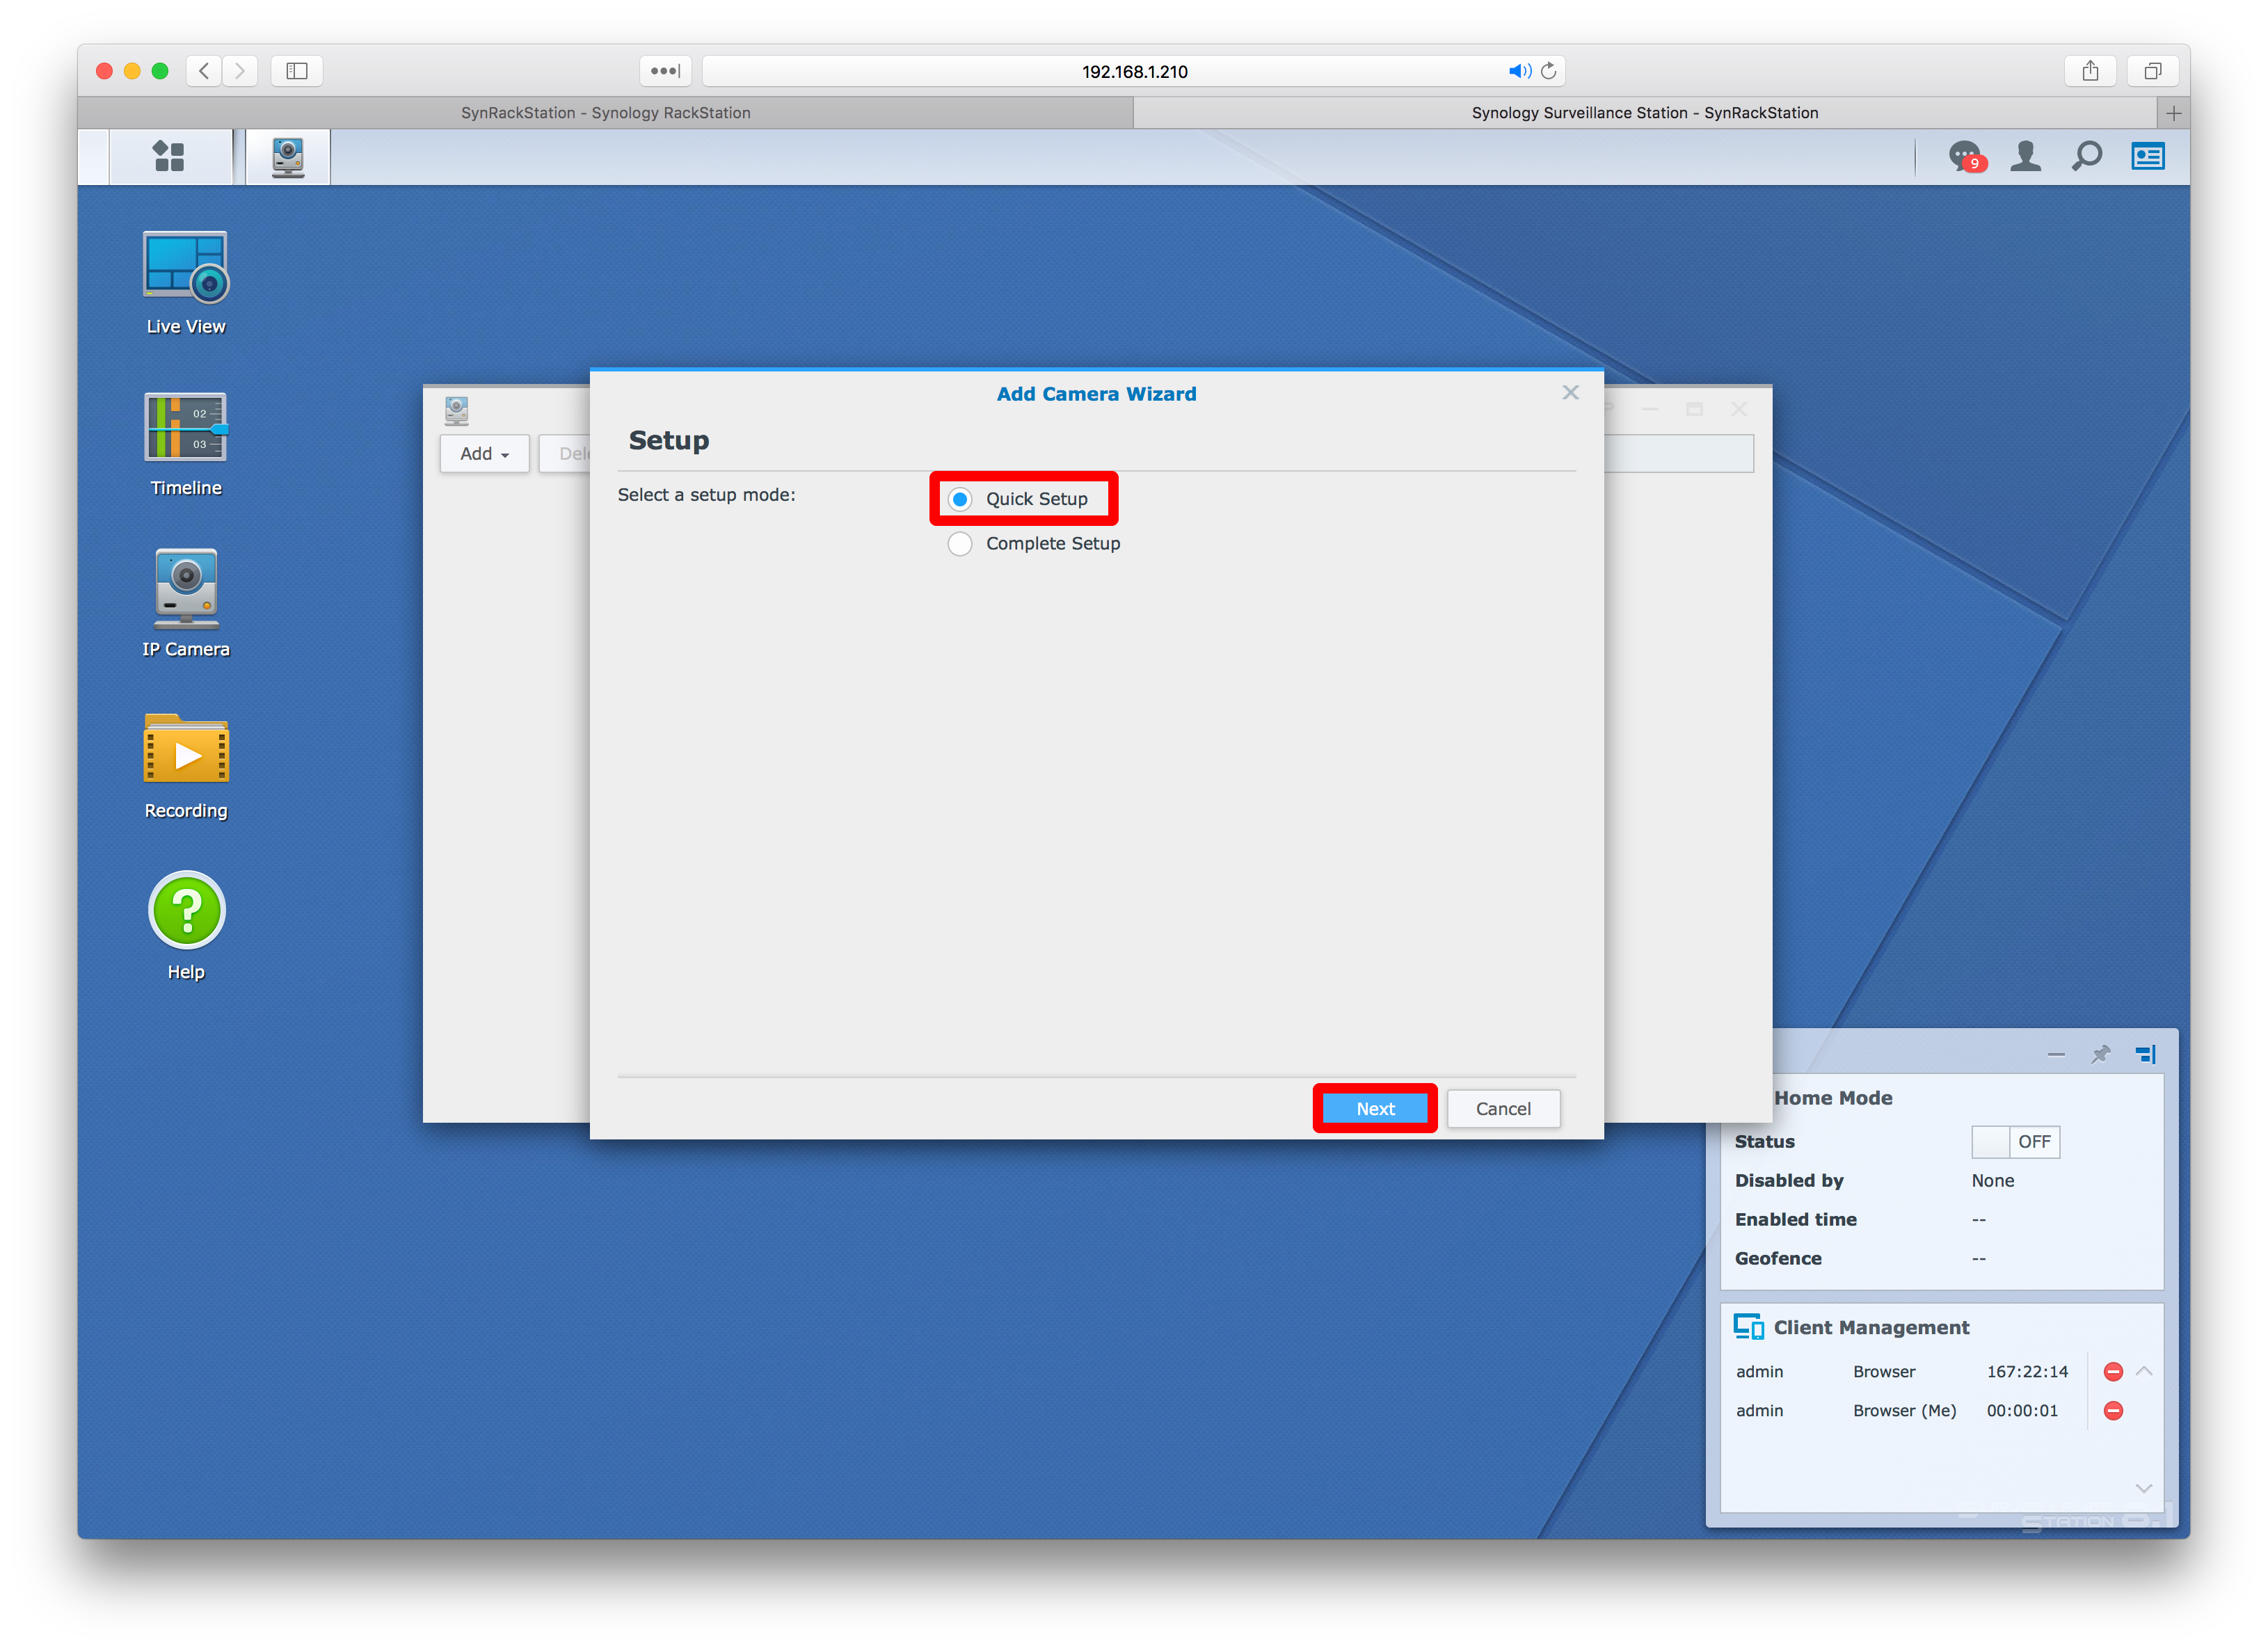
Step 8: Enter the camera details manually or click the Search icon next the IP Address box
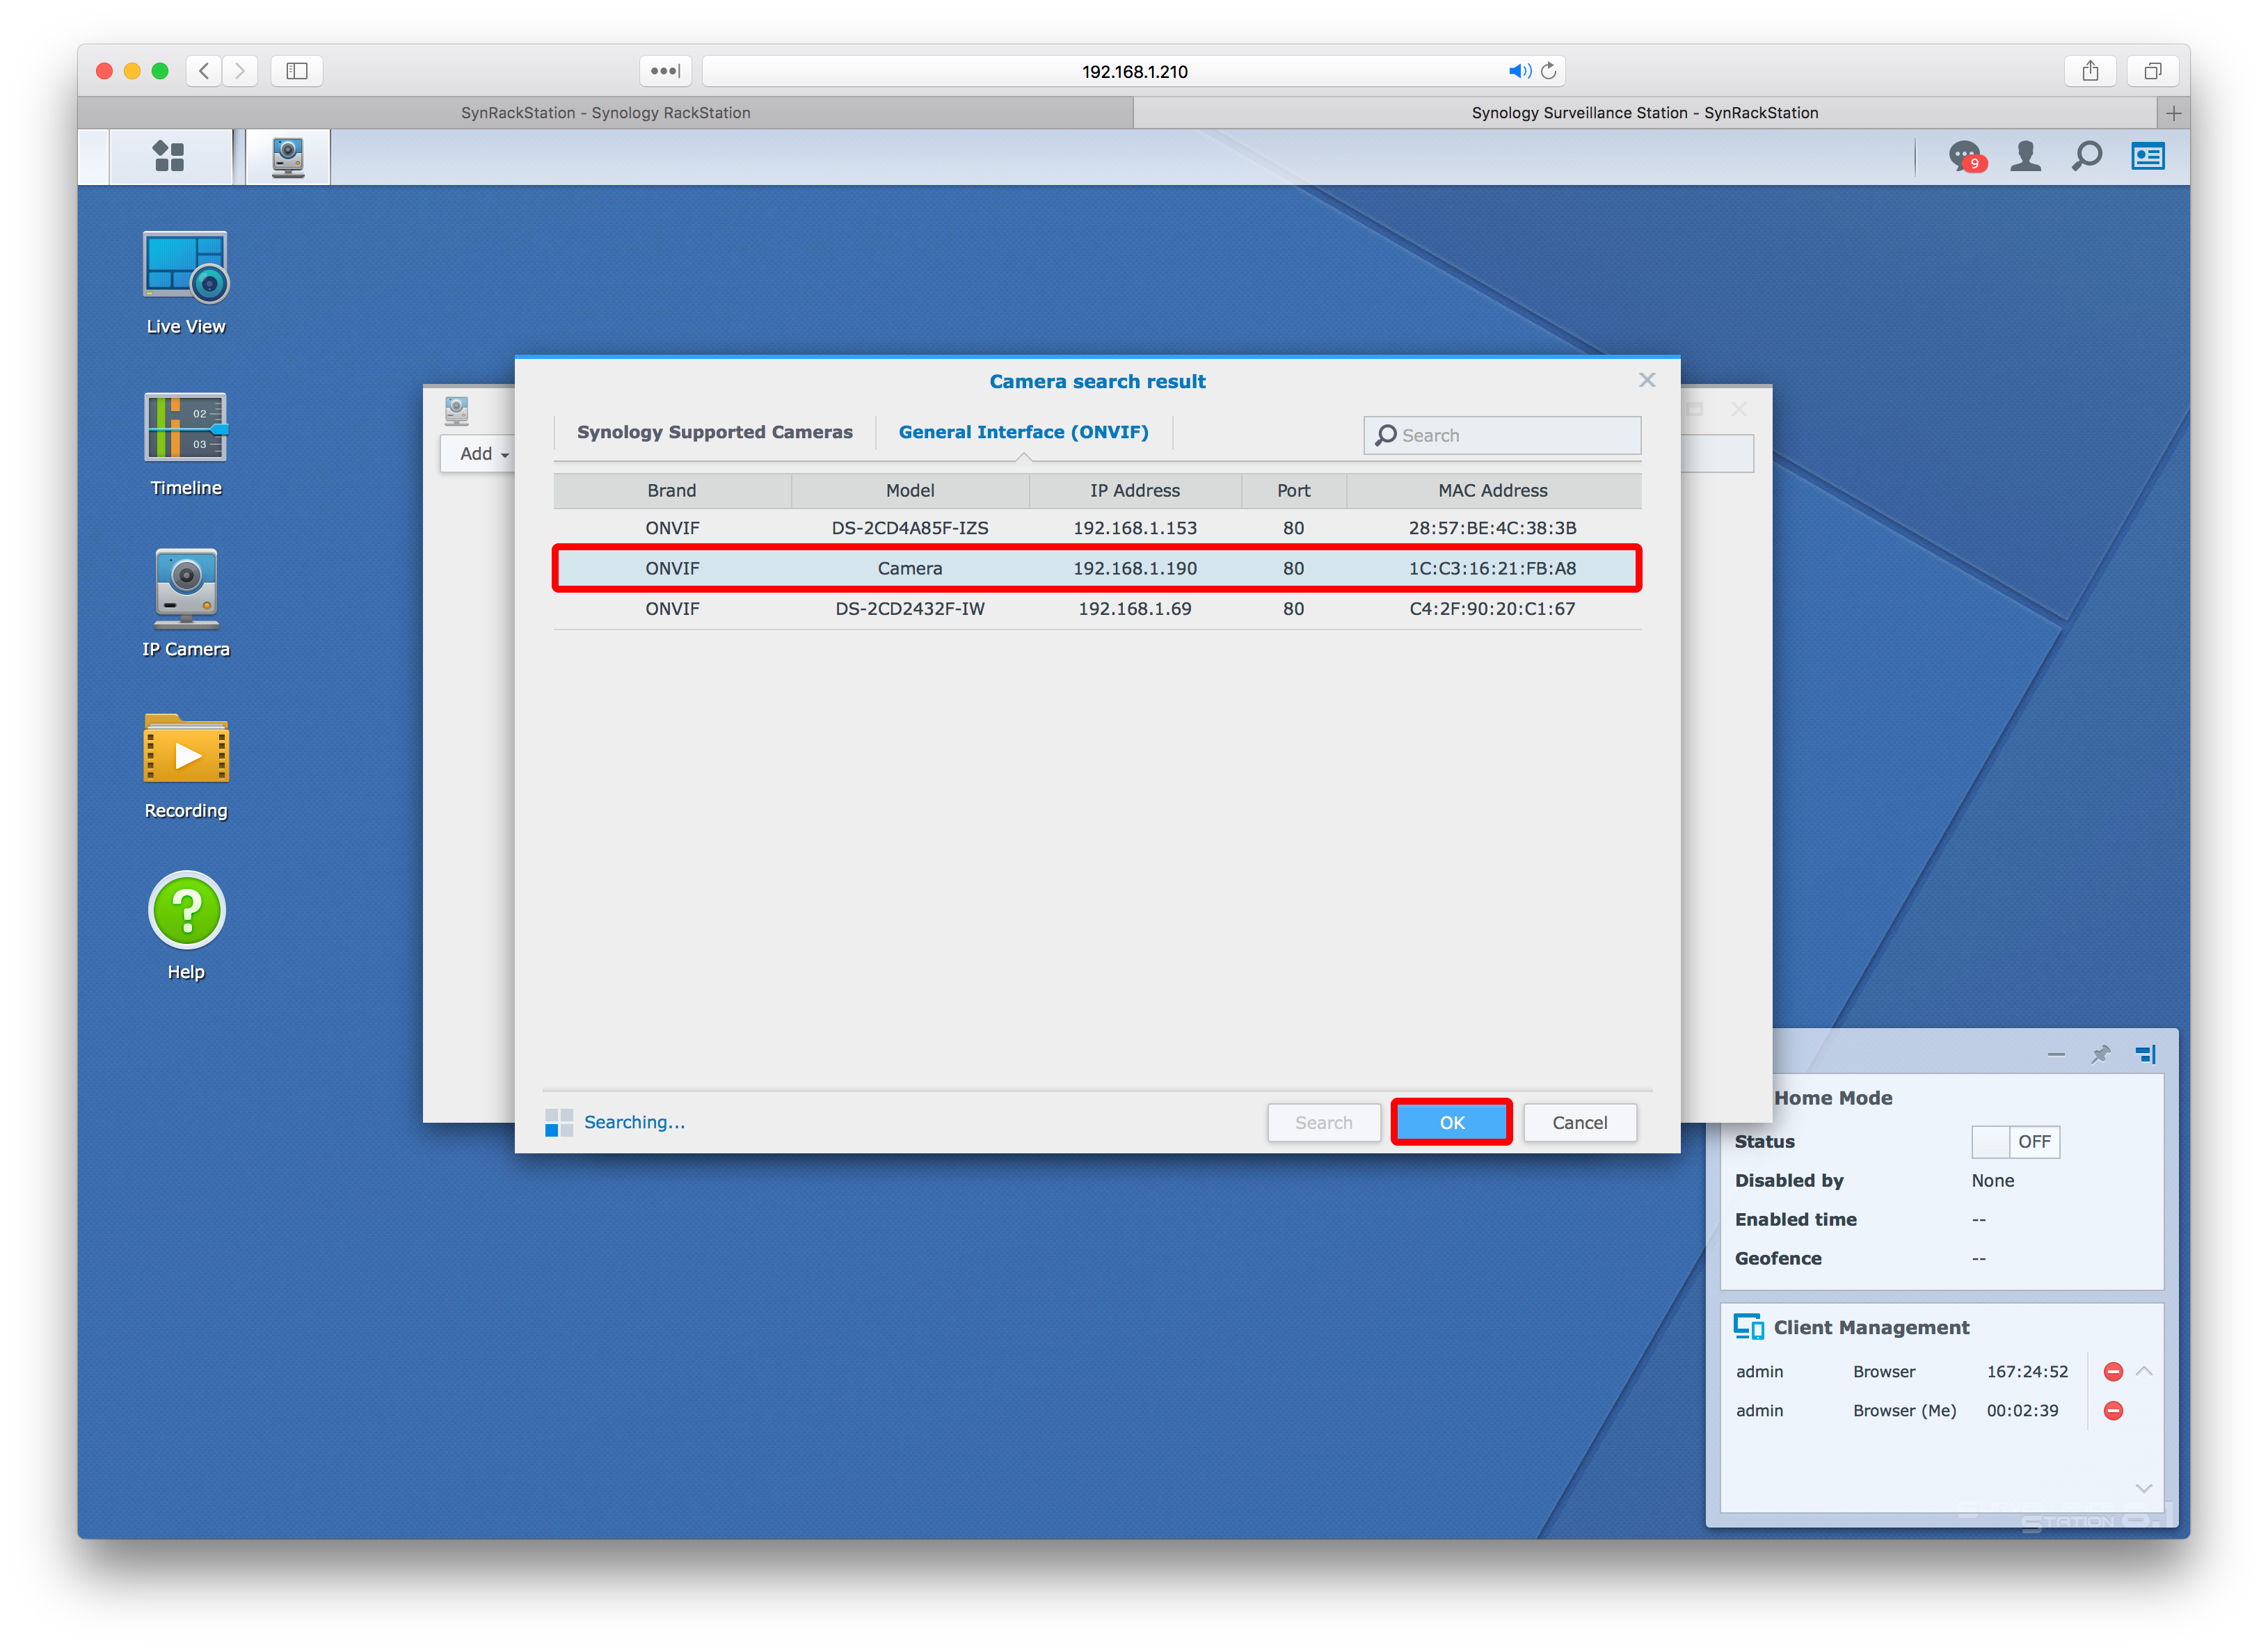
Step 9: Check both the Synology Supported Cameras and ONVIF lists (some camera models are not directly supported by Synology, but as long as the camera is ONVIF compliant you should be able to add it to the Surveillance Station software)
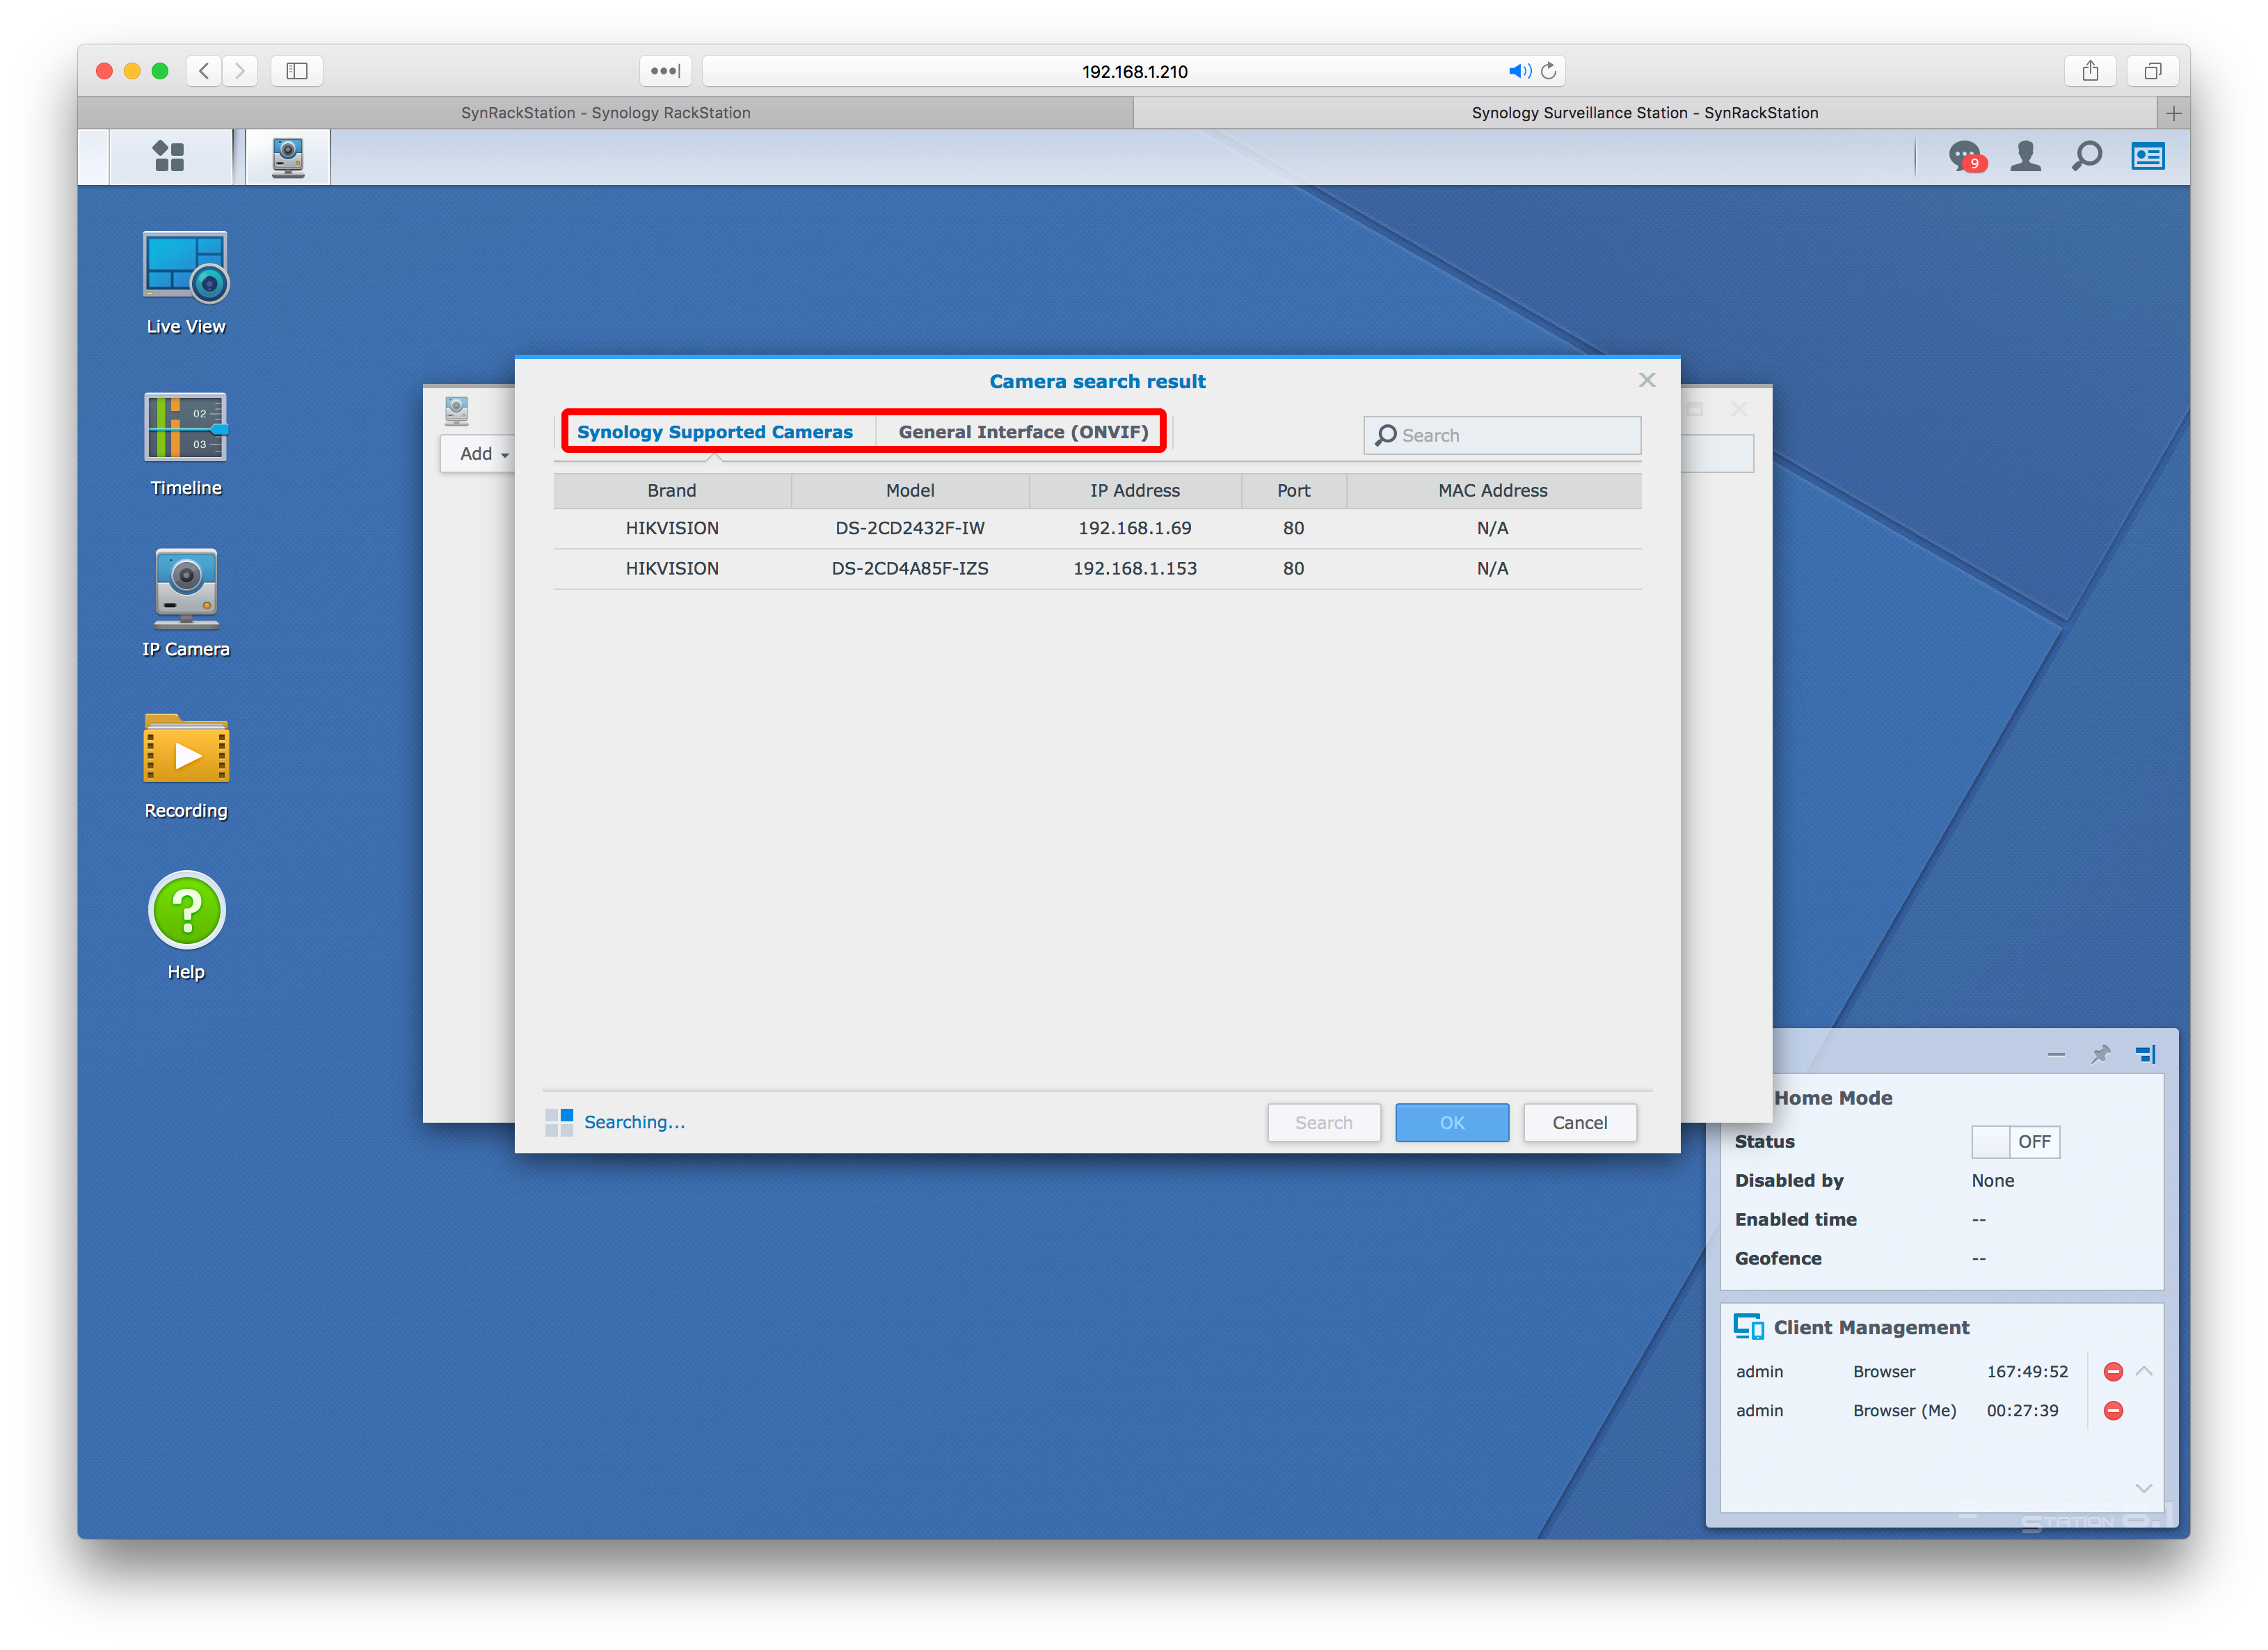
Step 10: Select the camera you want to add from one of the lists and click OK
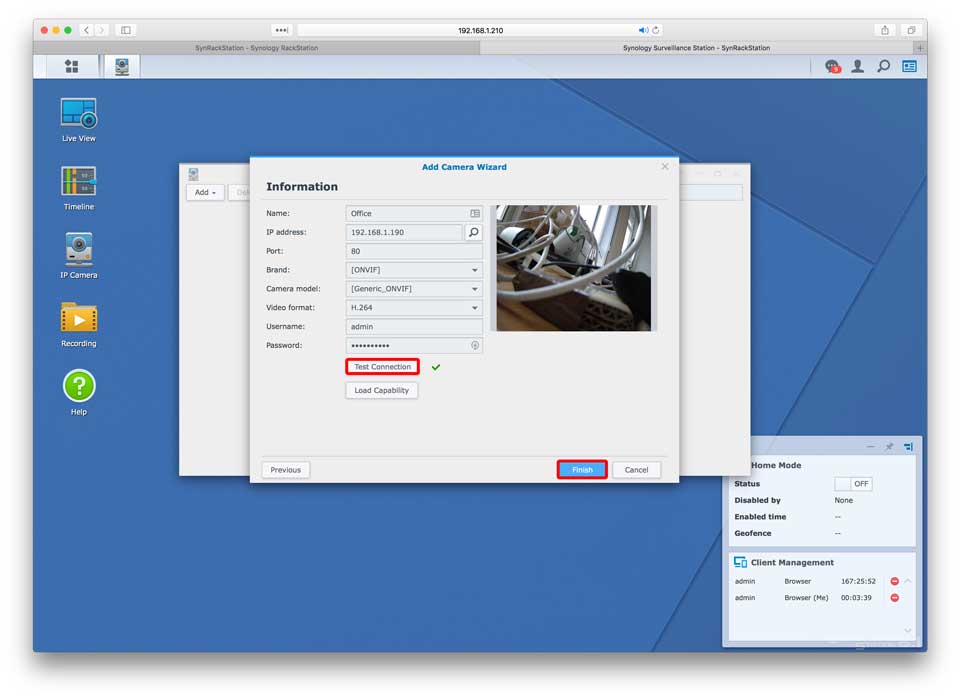
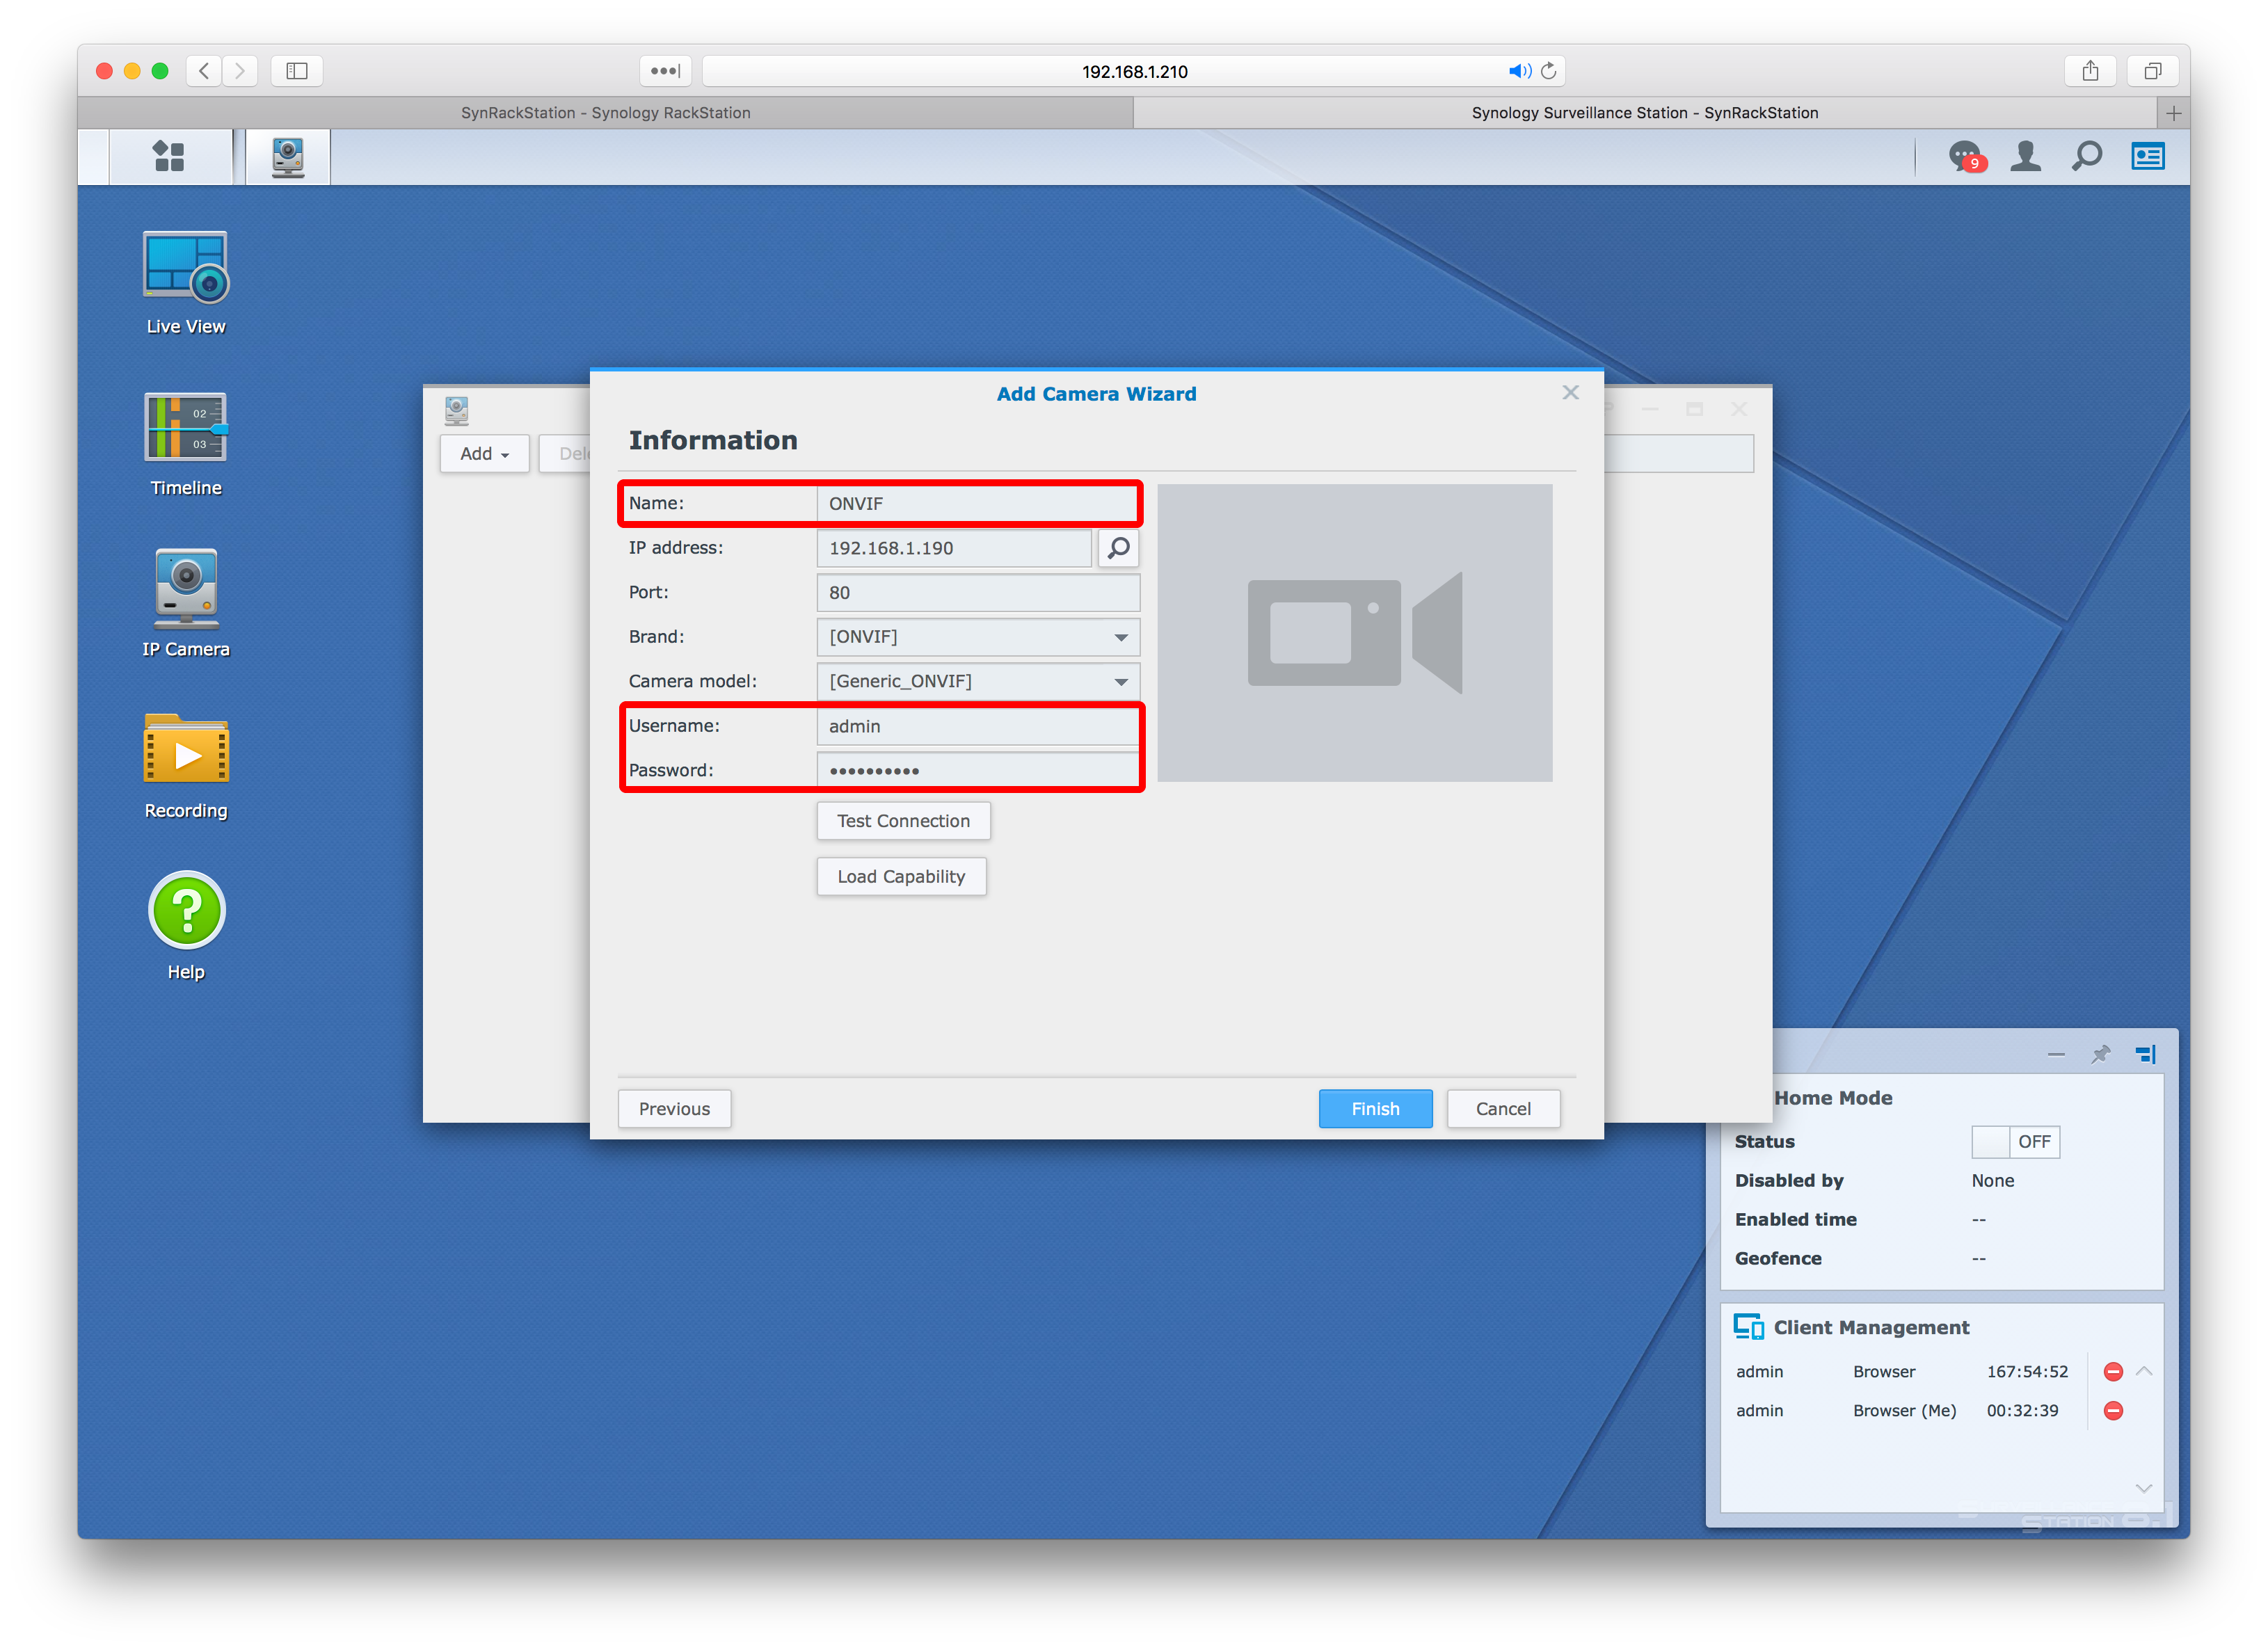
Step 11: Check that all the camera details are filled in, including the cameras username & password (also give the camera a unique name to help you identify it from other cameras)
Step 12: Click the Test Connection button and if the test is successful you’ll get a green tick and a live shot from the camera, you can then click Finish and the camera will be added to your Synology NAS
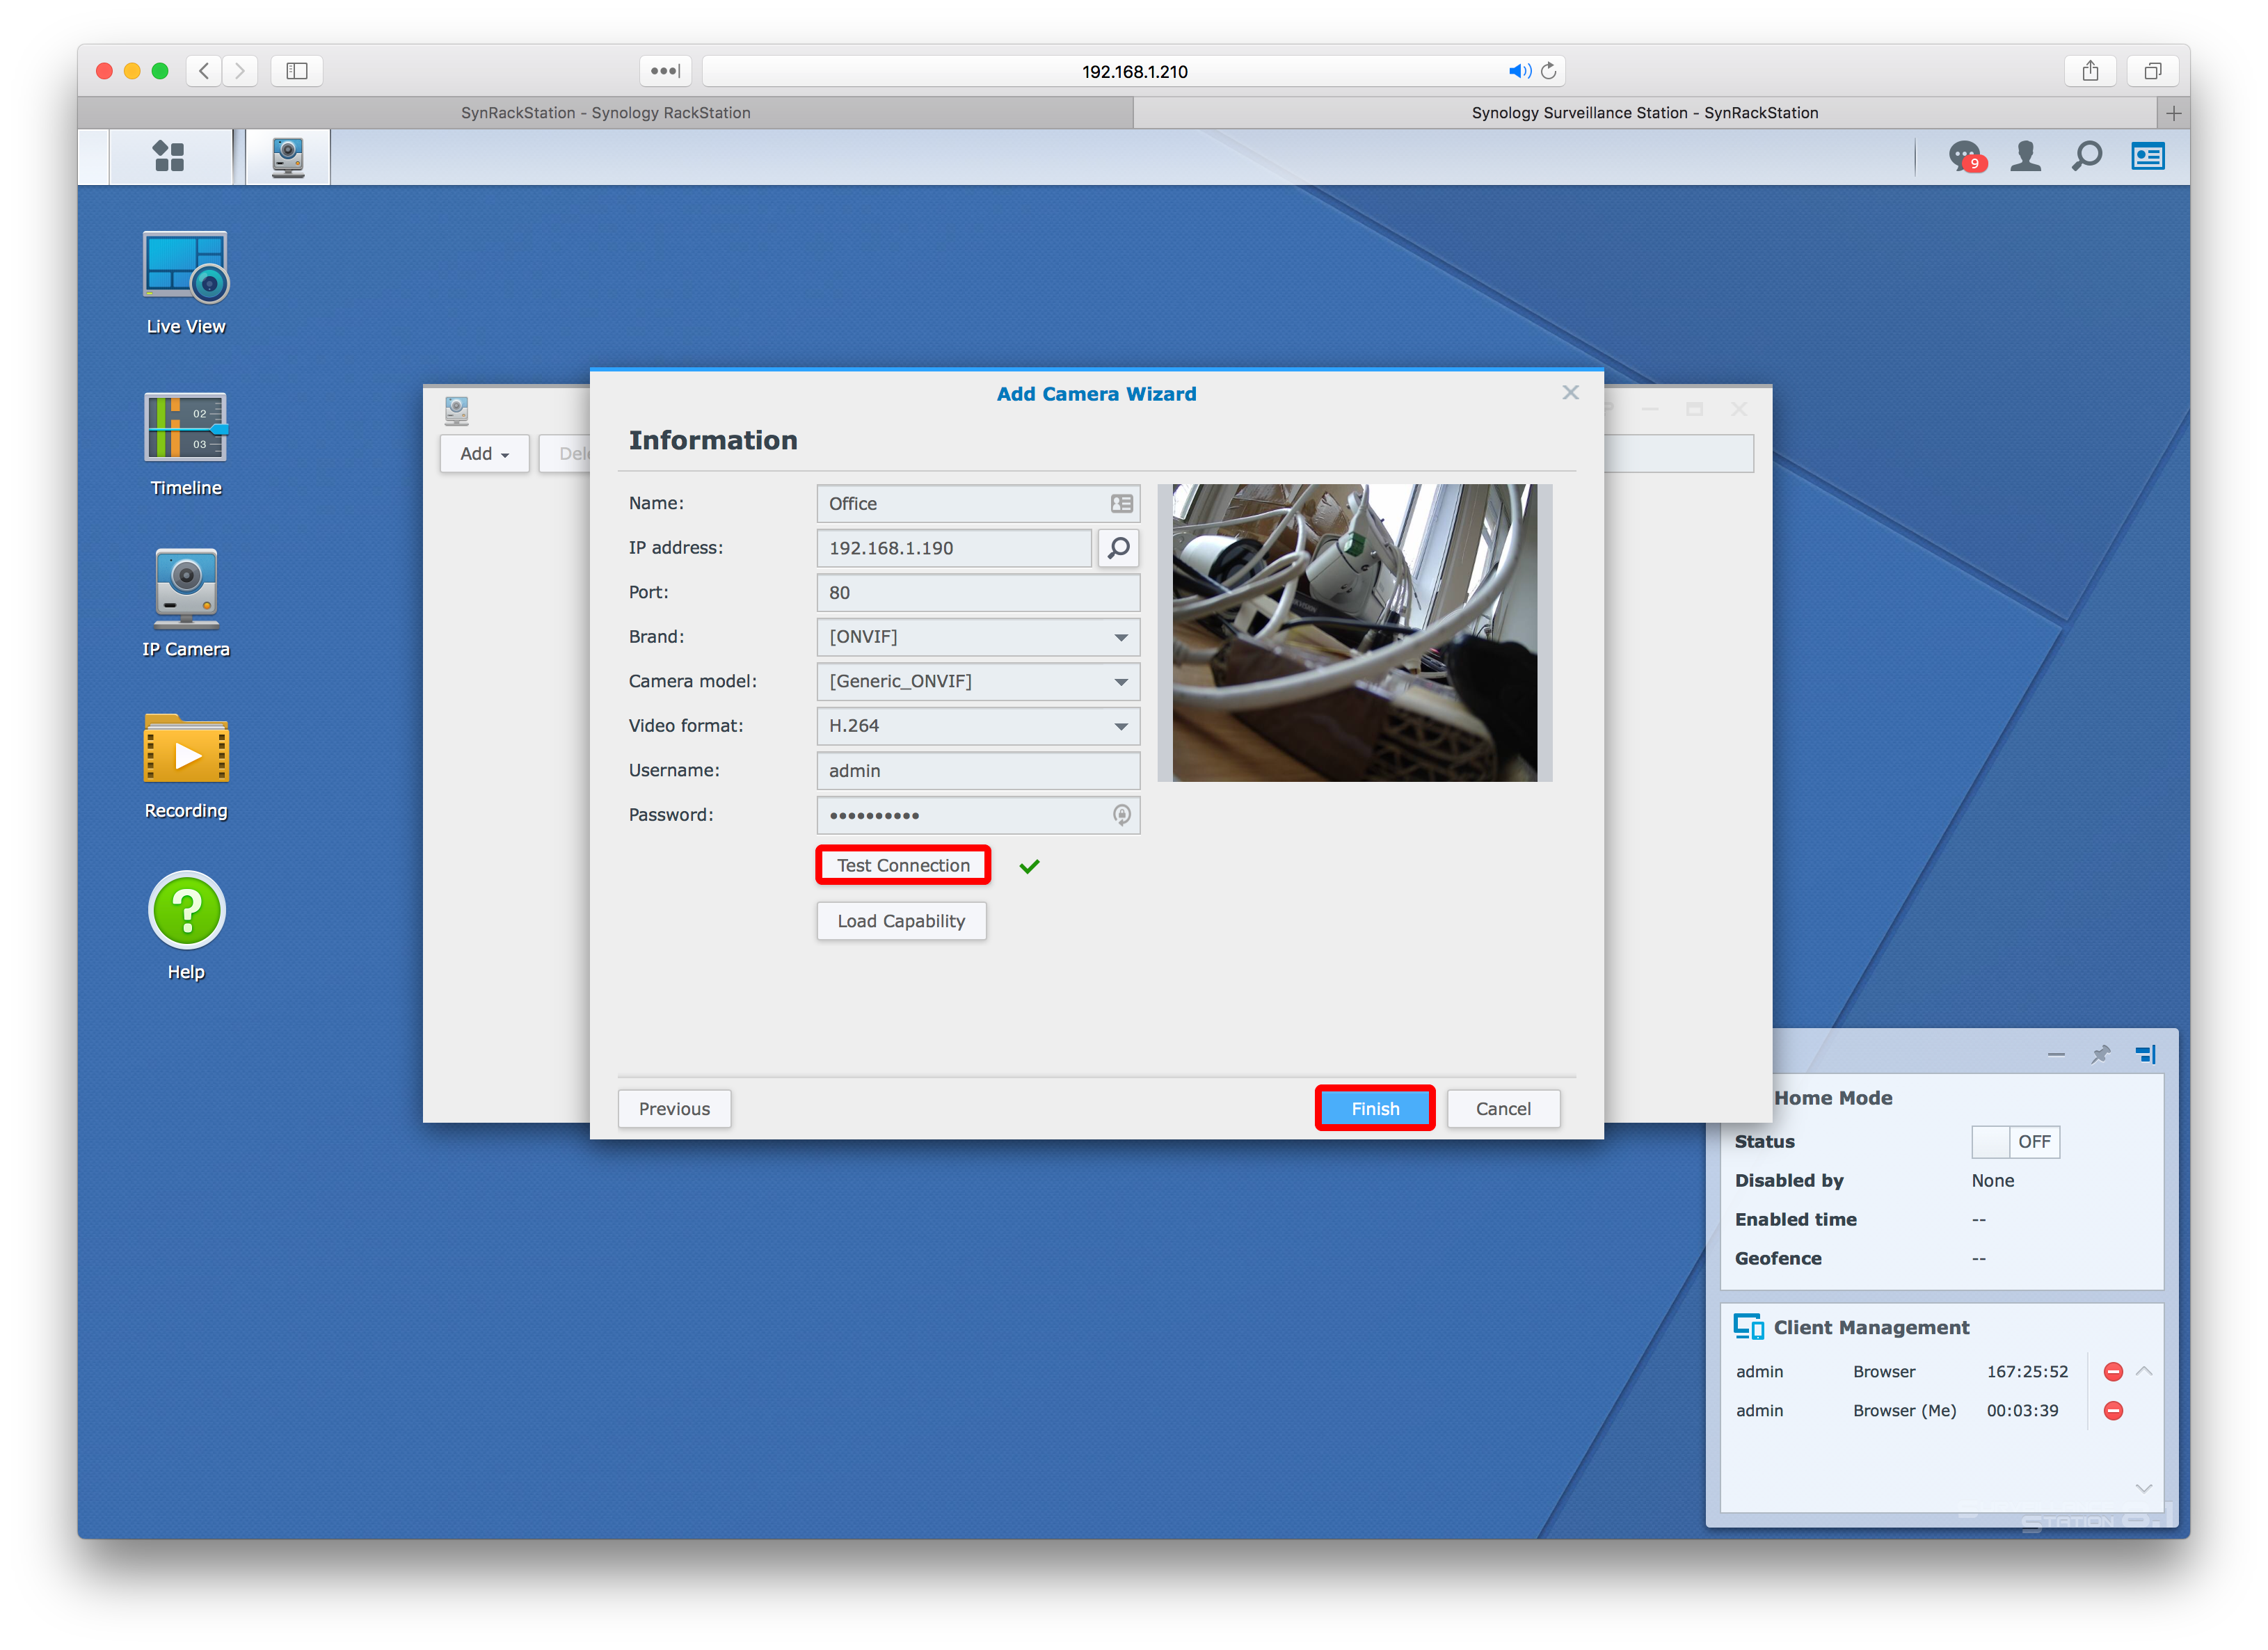
If the test is not successful you will have to go back and check the camera’s settings are correct, the most common problem is that the camera has an IP address that is not on your network, after you have followed our instructions from a previous video on how to change the IP address you should get a successful connection and be able to add the camera
If you need more help with installing Surveillance Station and adding an IP Camera to your Synology NAS you can watch this video:
How To Install Synology Surveillance Station
Read More : XMEYE For Mac Full User Guide
How To Create a Storage Volume on a Synology NAS for Recording IP Cameras
The key feature of Network Attached Storage (NAS) devices that sways people into using them over NVRs is that NAS devices can be used to record anything and not just IP cameras, this means that if you have enough storage you can use a section of your NAS to store videos, music, and general files and another section of the same NAS for storing your IP camera footage.
To store multiple types of file on one NAS you need to segment the available storage space, you do this by following the steps below to create a volume
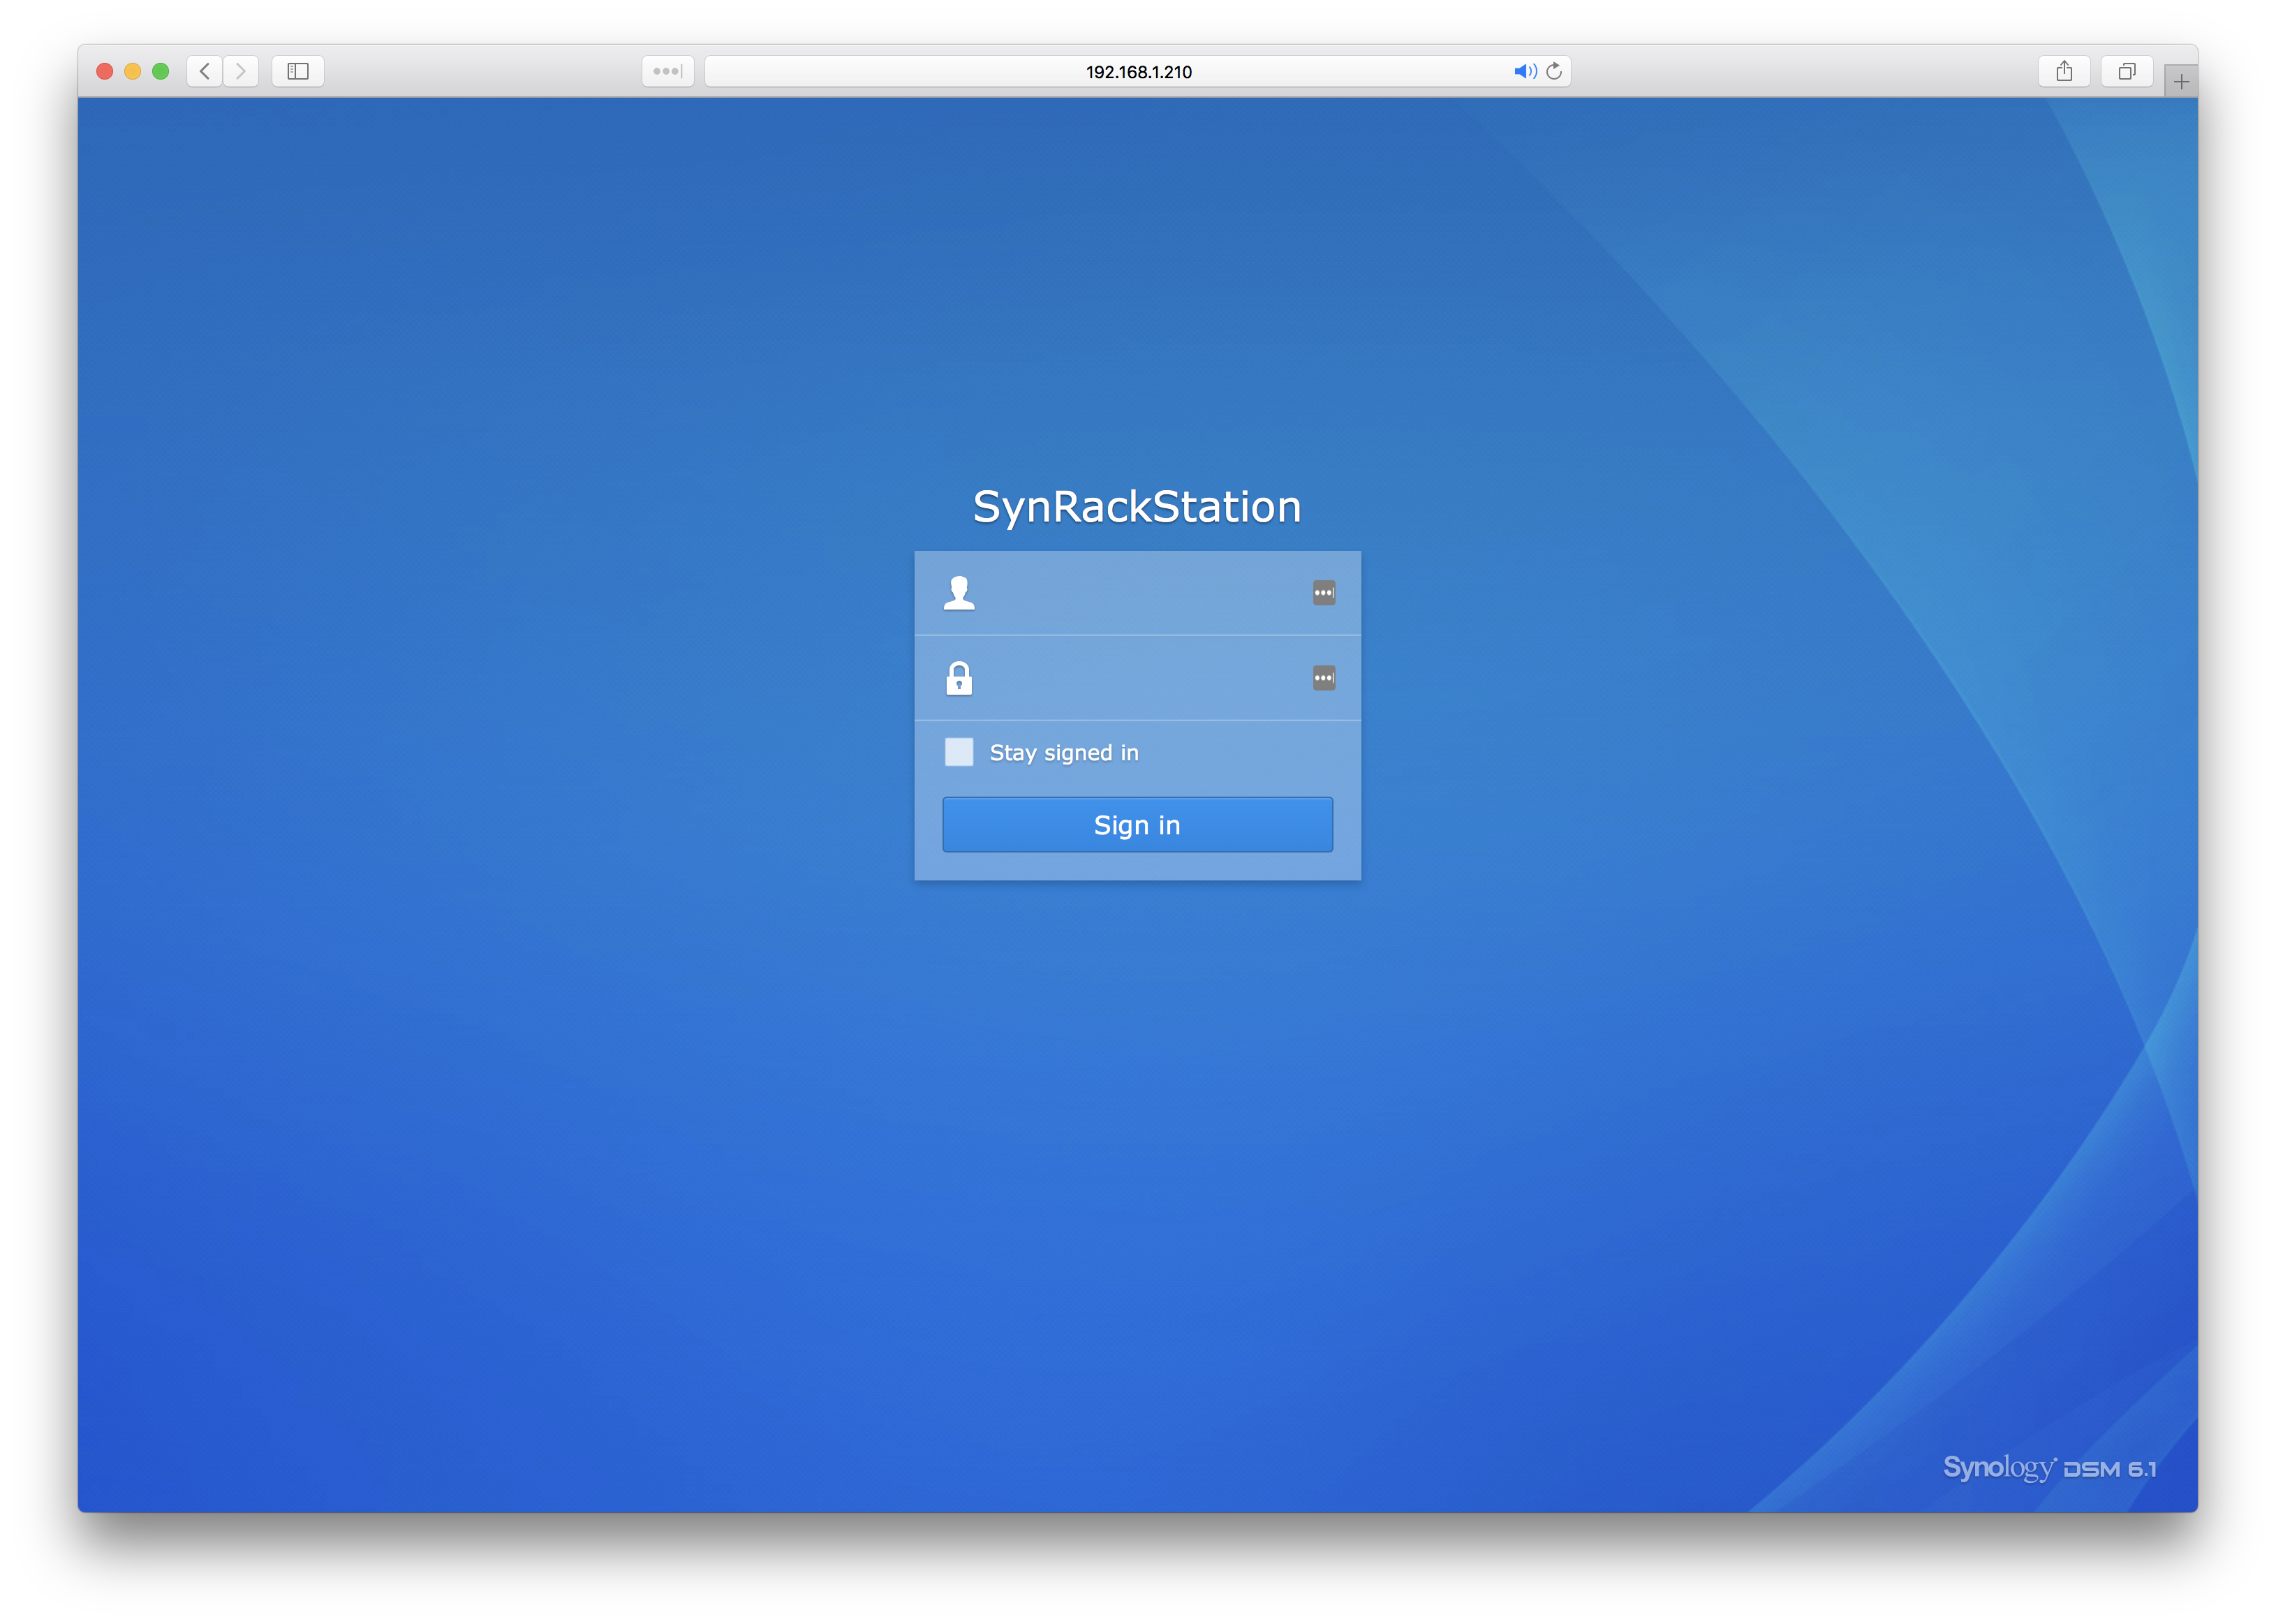
Step 1: Login to your Synology NAS
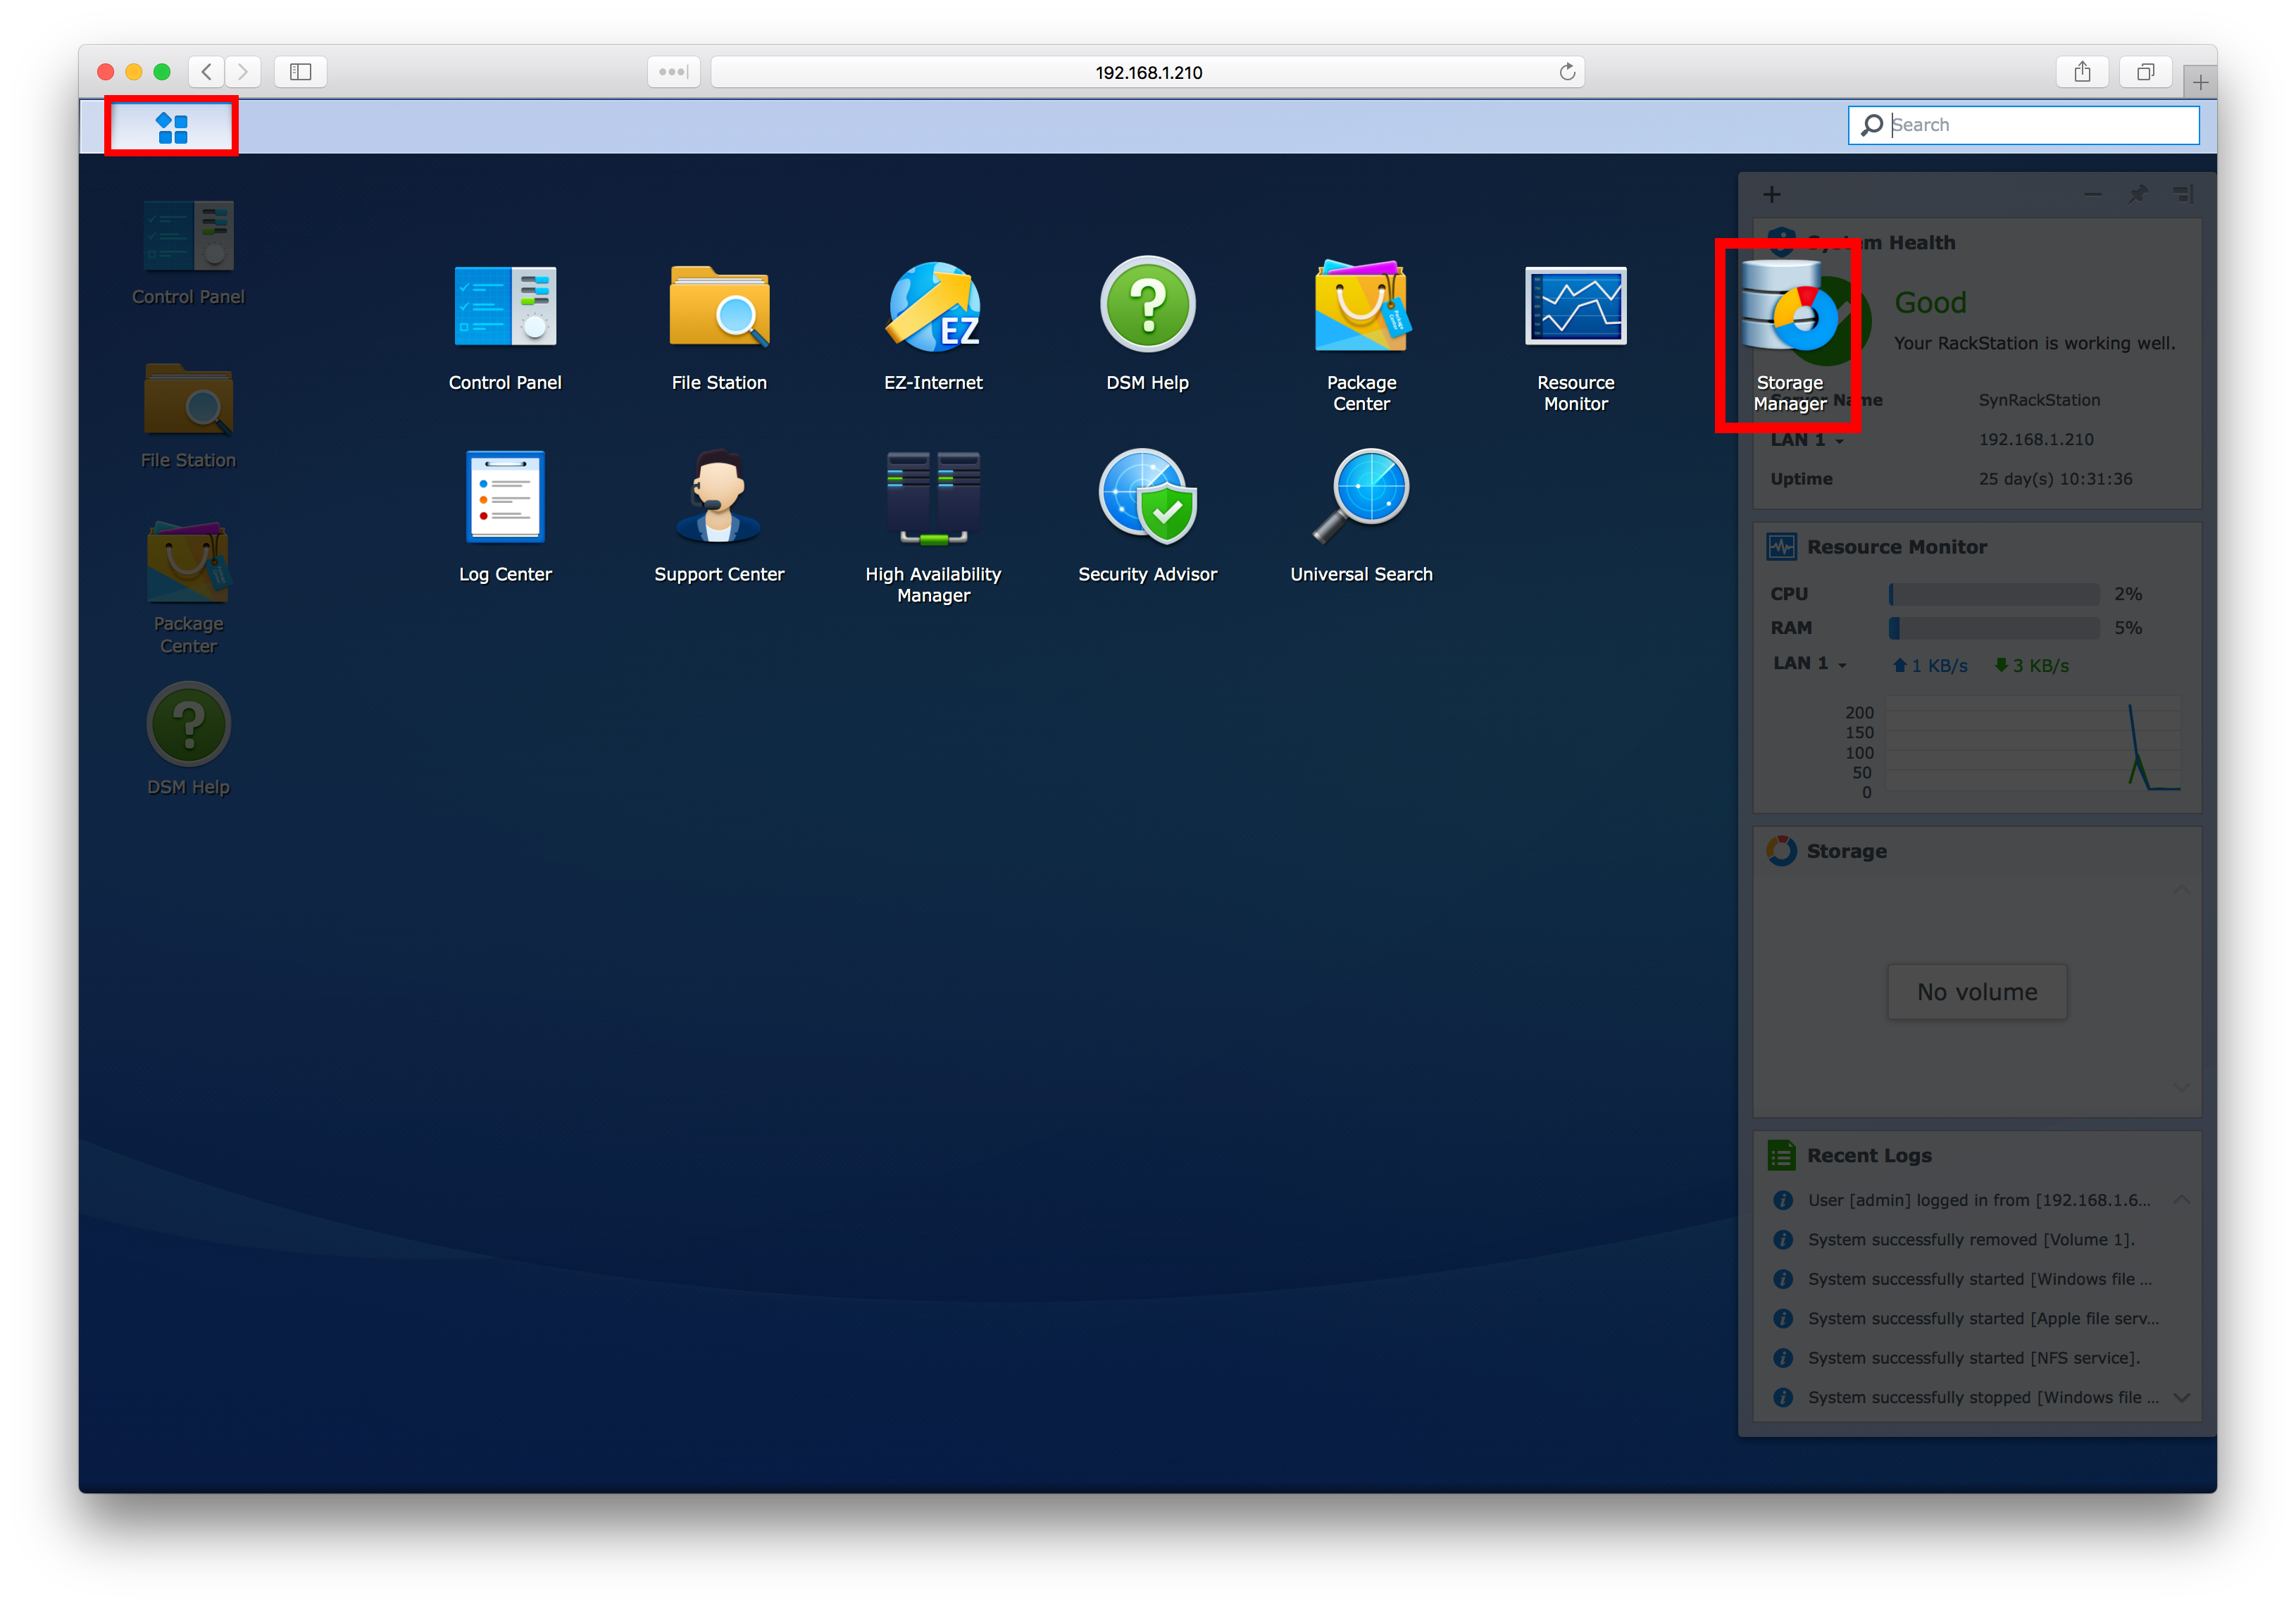
Step 2: Click the main menu and then open the Storage Manager window
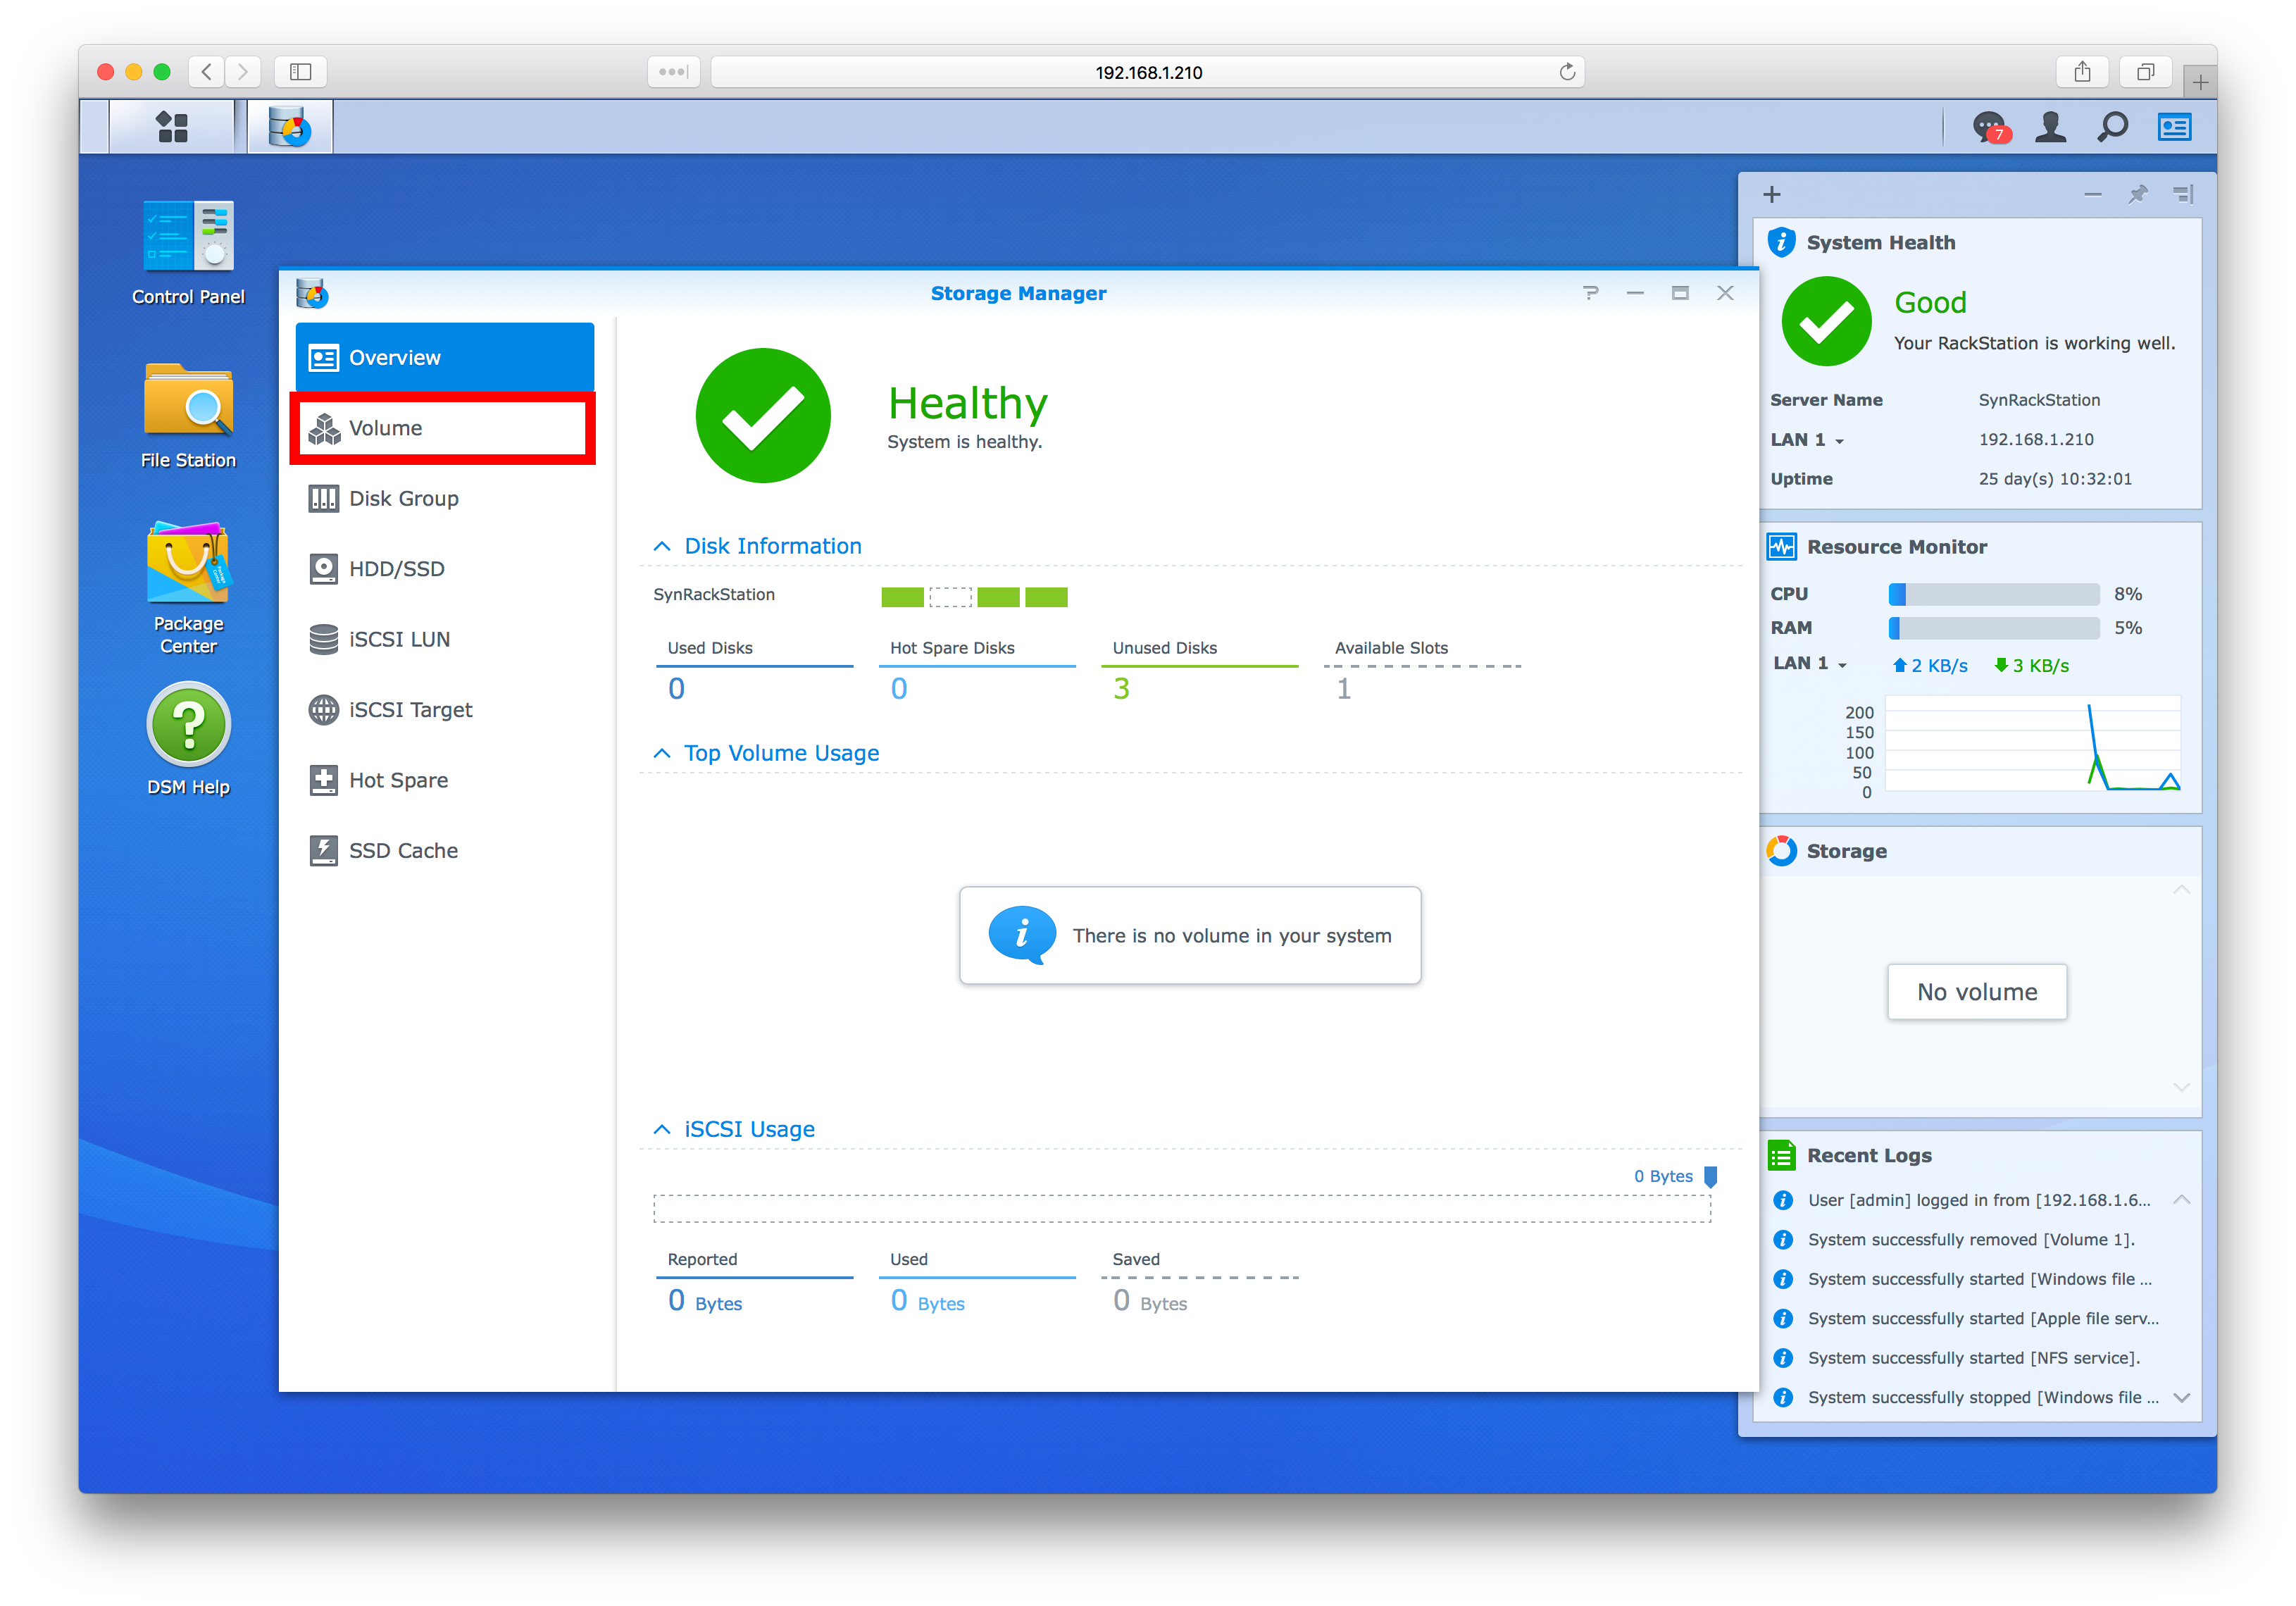
Step 3: Click the Volume tab from the menu on the left of the storage manager window
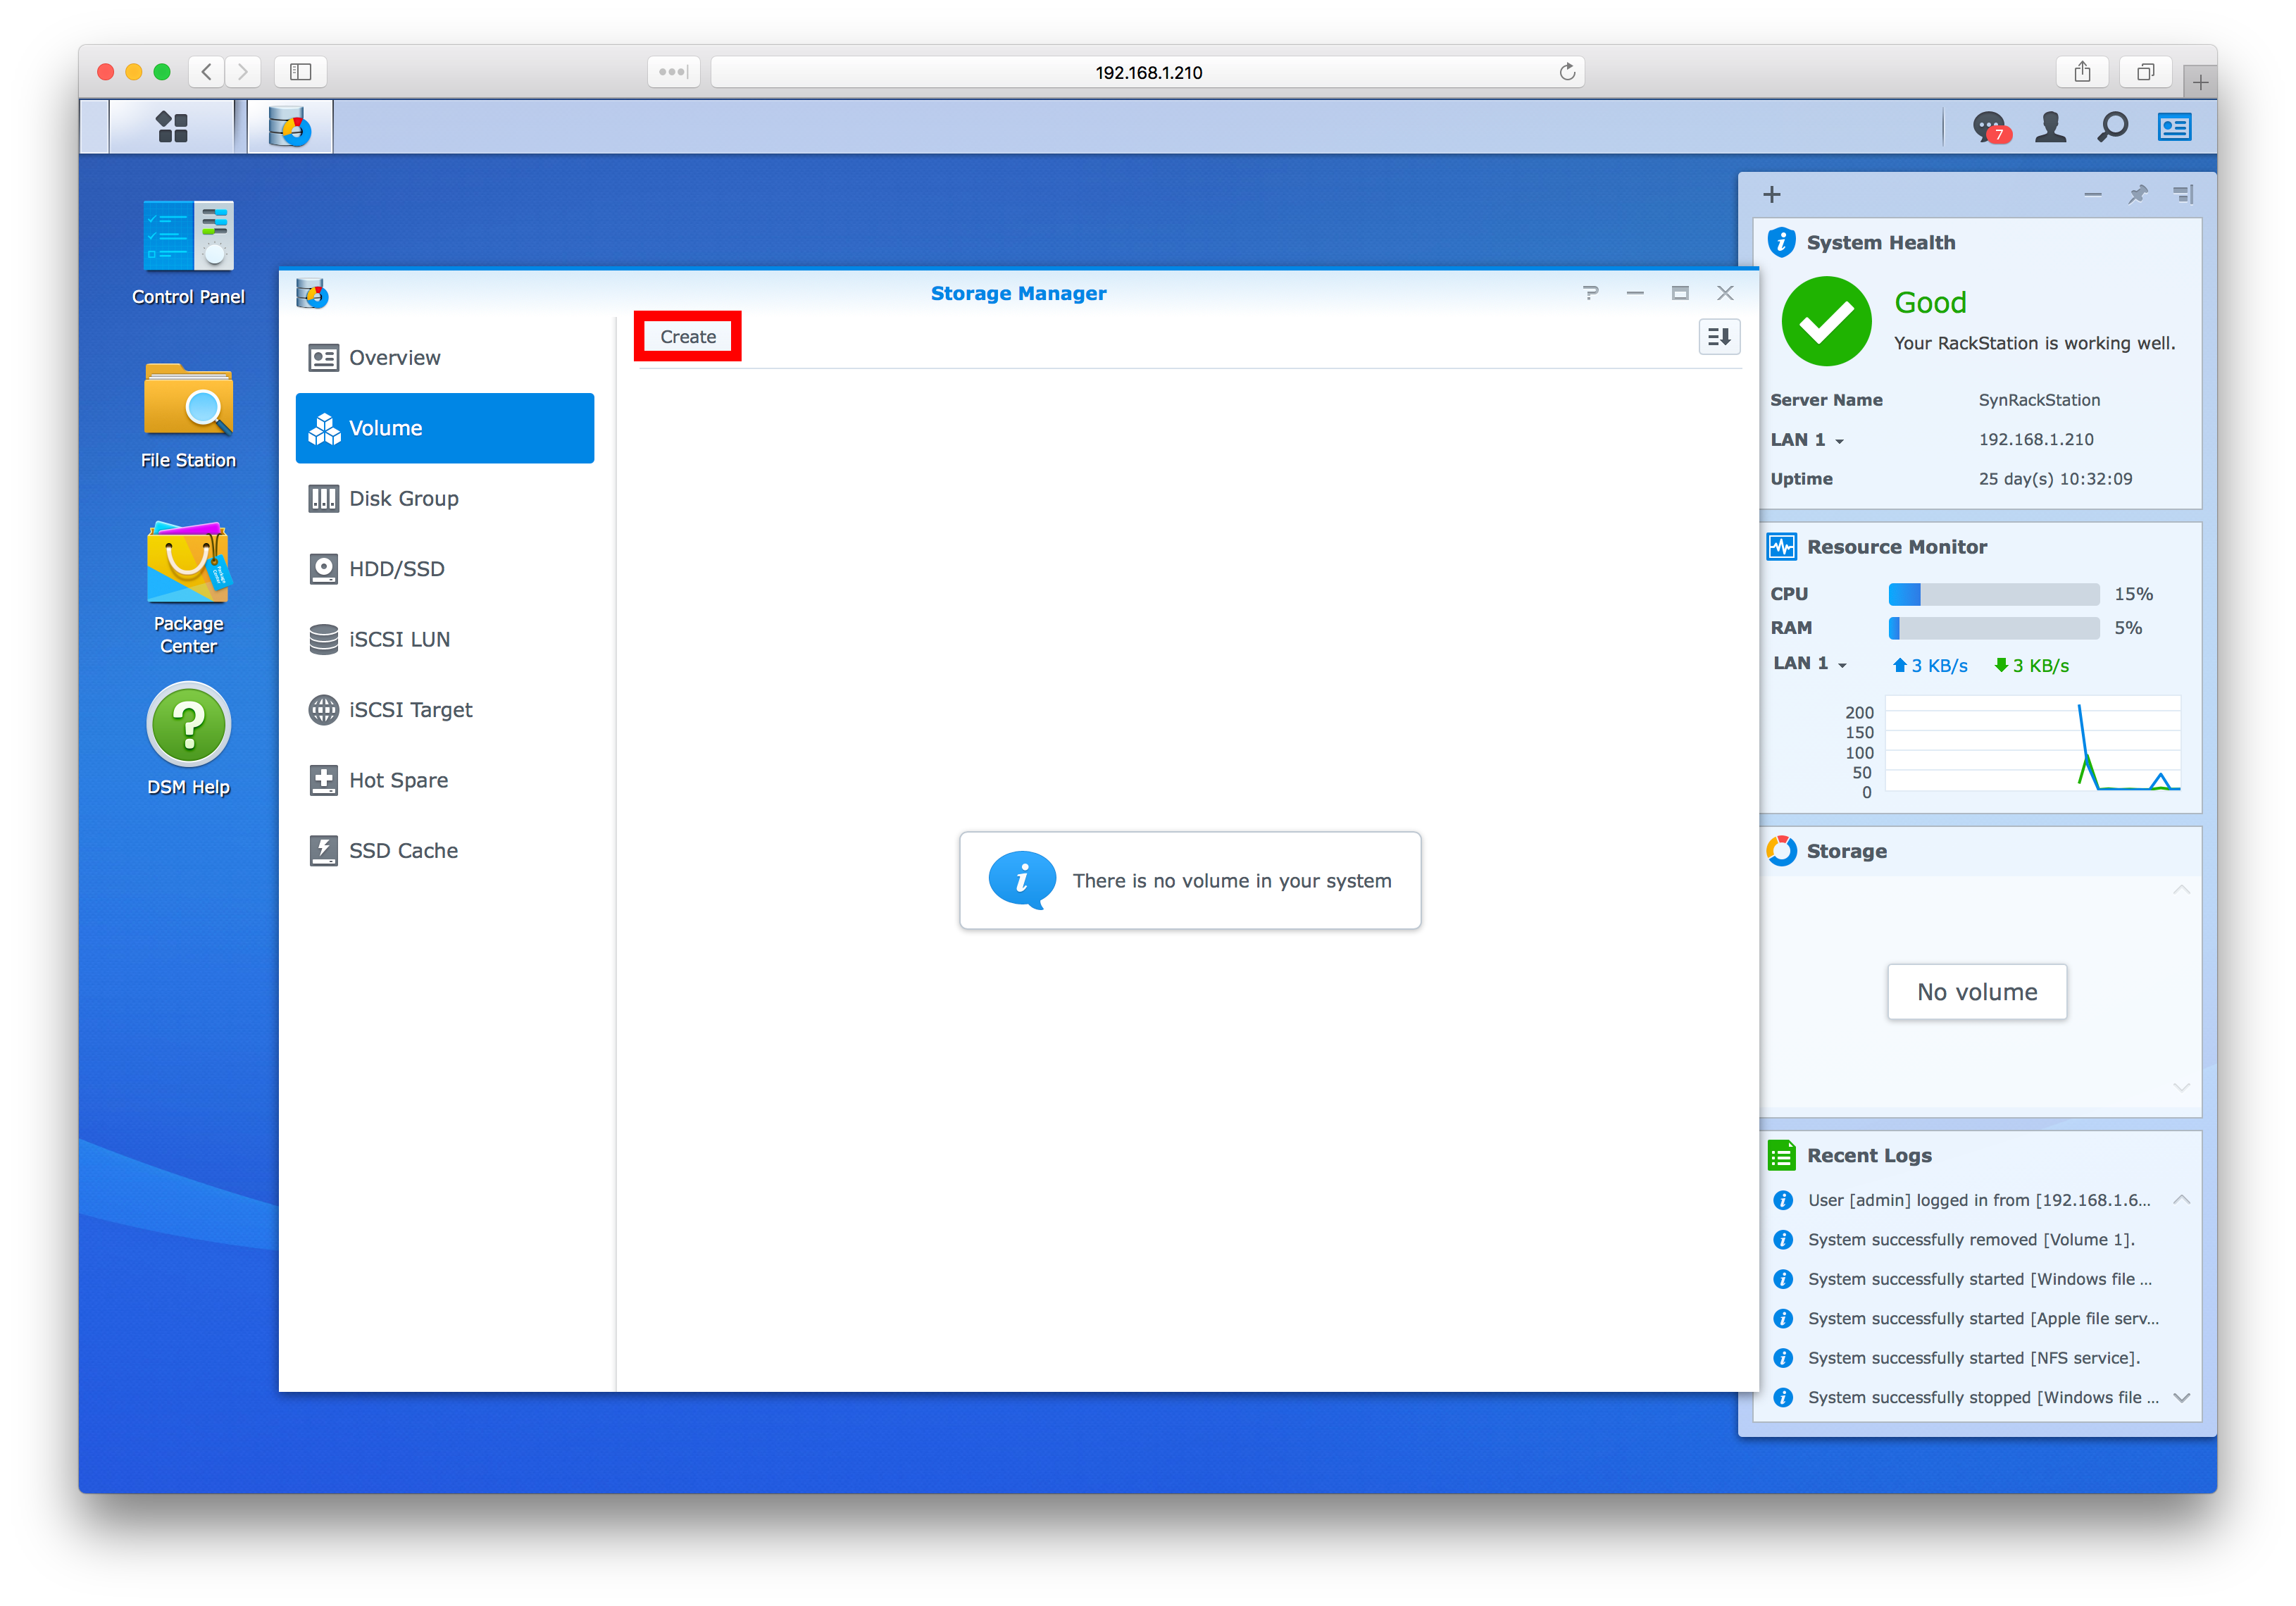
Step 4: Click the Create button at the top left of the volume window
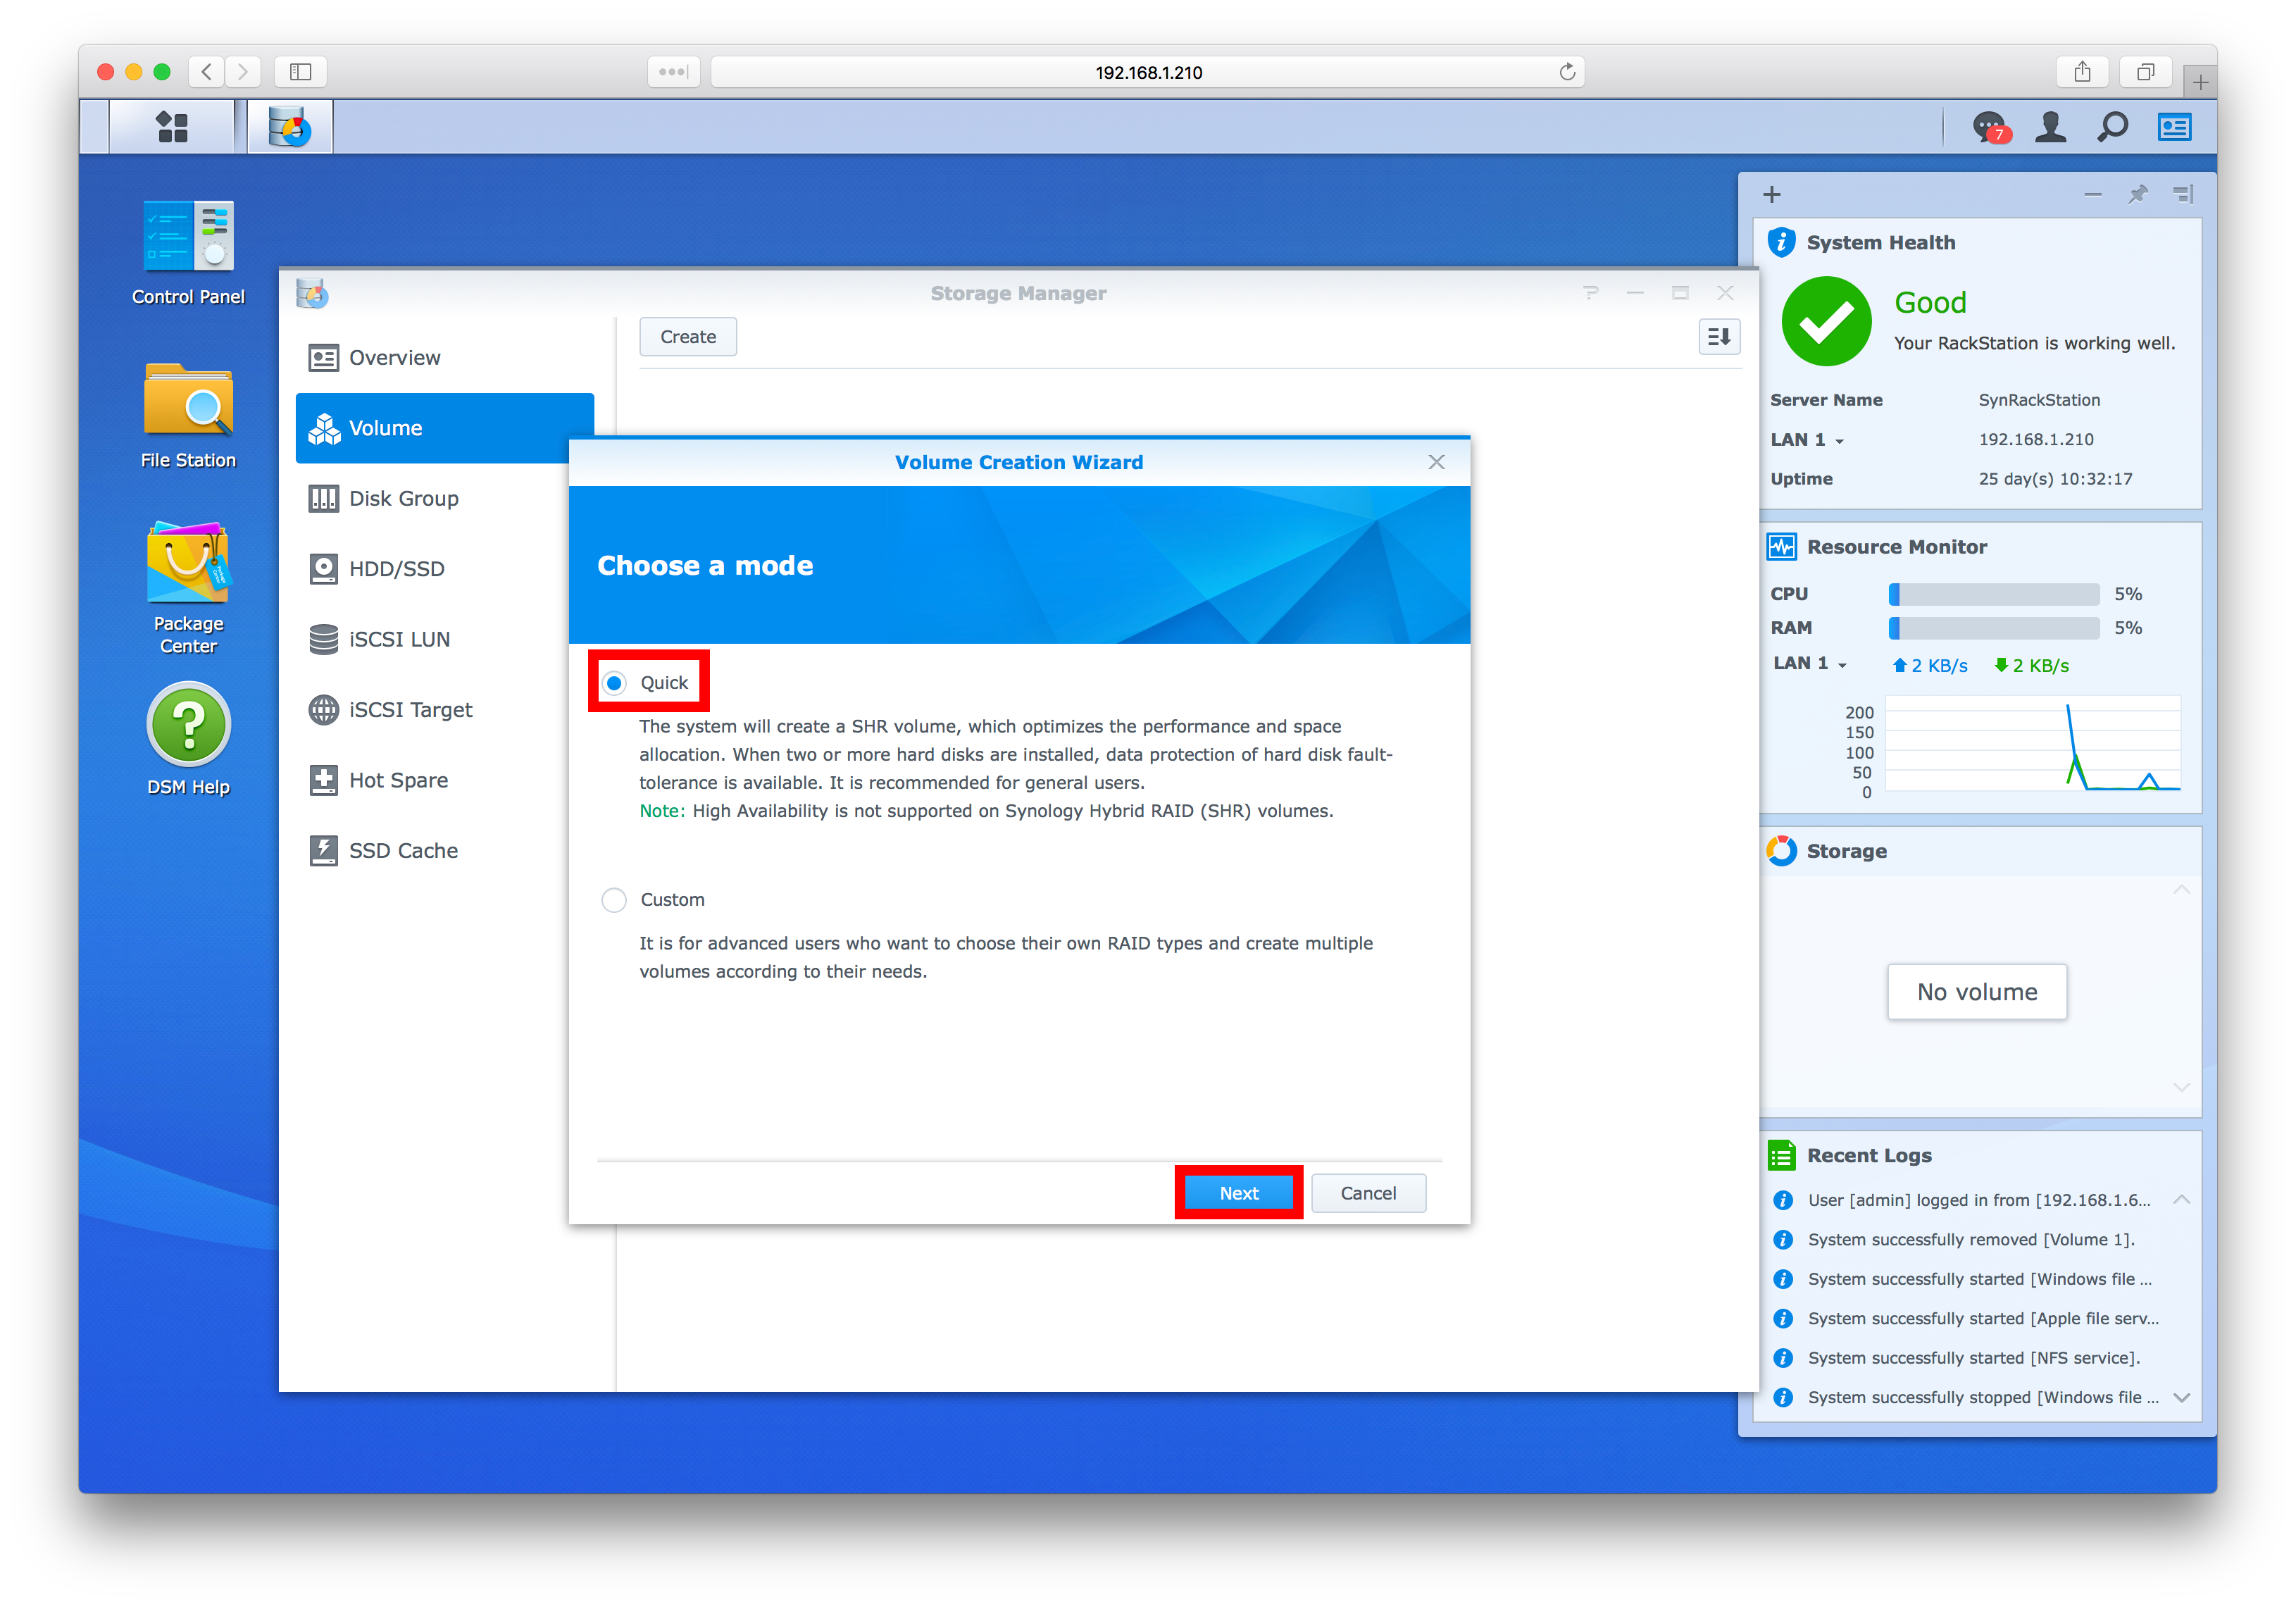
Step 5: When the Wizard opens select either Quick Setup or Custom Setup and then click next (If you’re new to this we would recommend just sticking with quick setup)
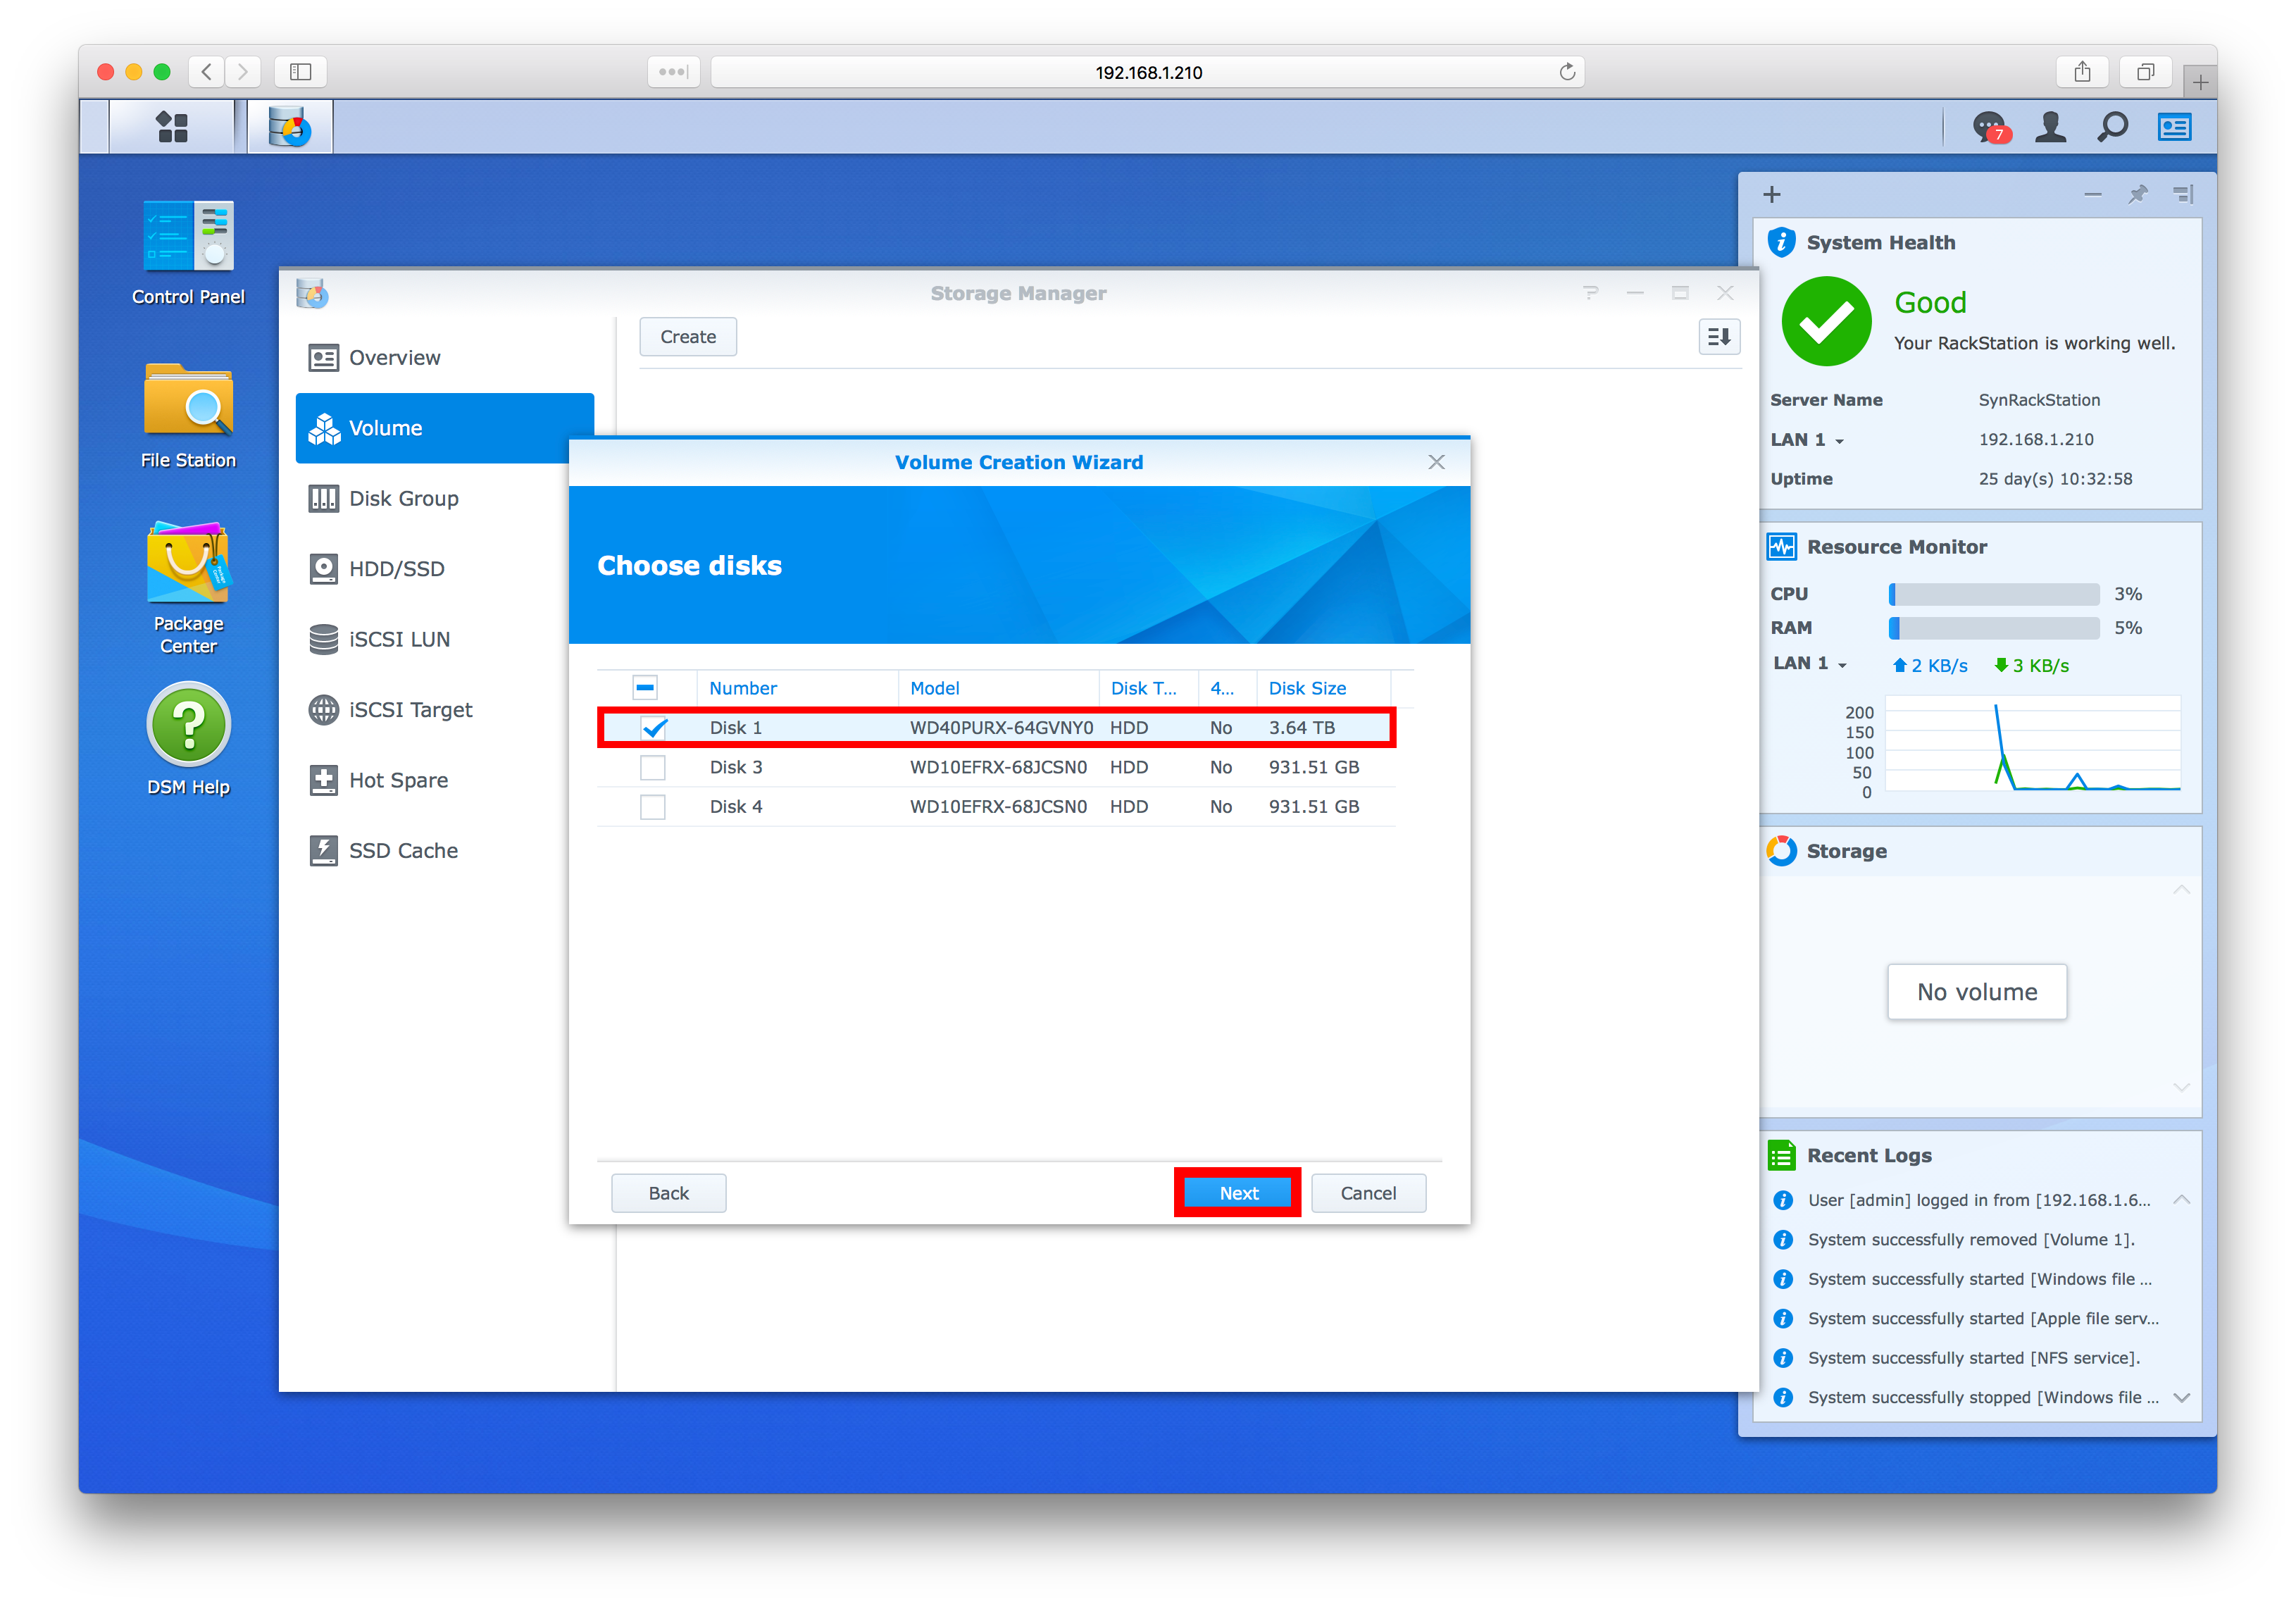
Step 6: Select the Hard Drive Disks that you want to include in this volume and then click next (we chose just 1, but if your NAS is larger or you are recording more cameras you can use as many as you like – but be aware that once created volumes can’t be changed without deleting them, so give yourself enough space)
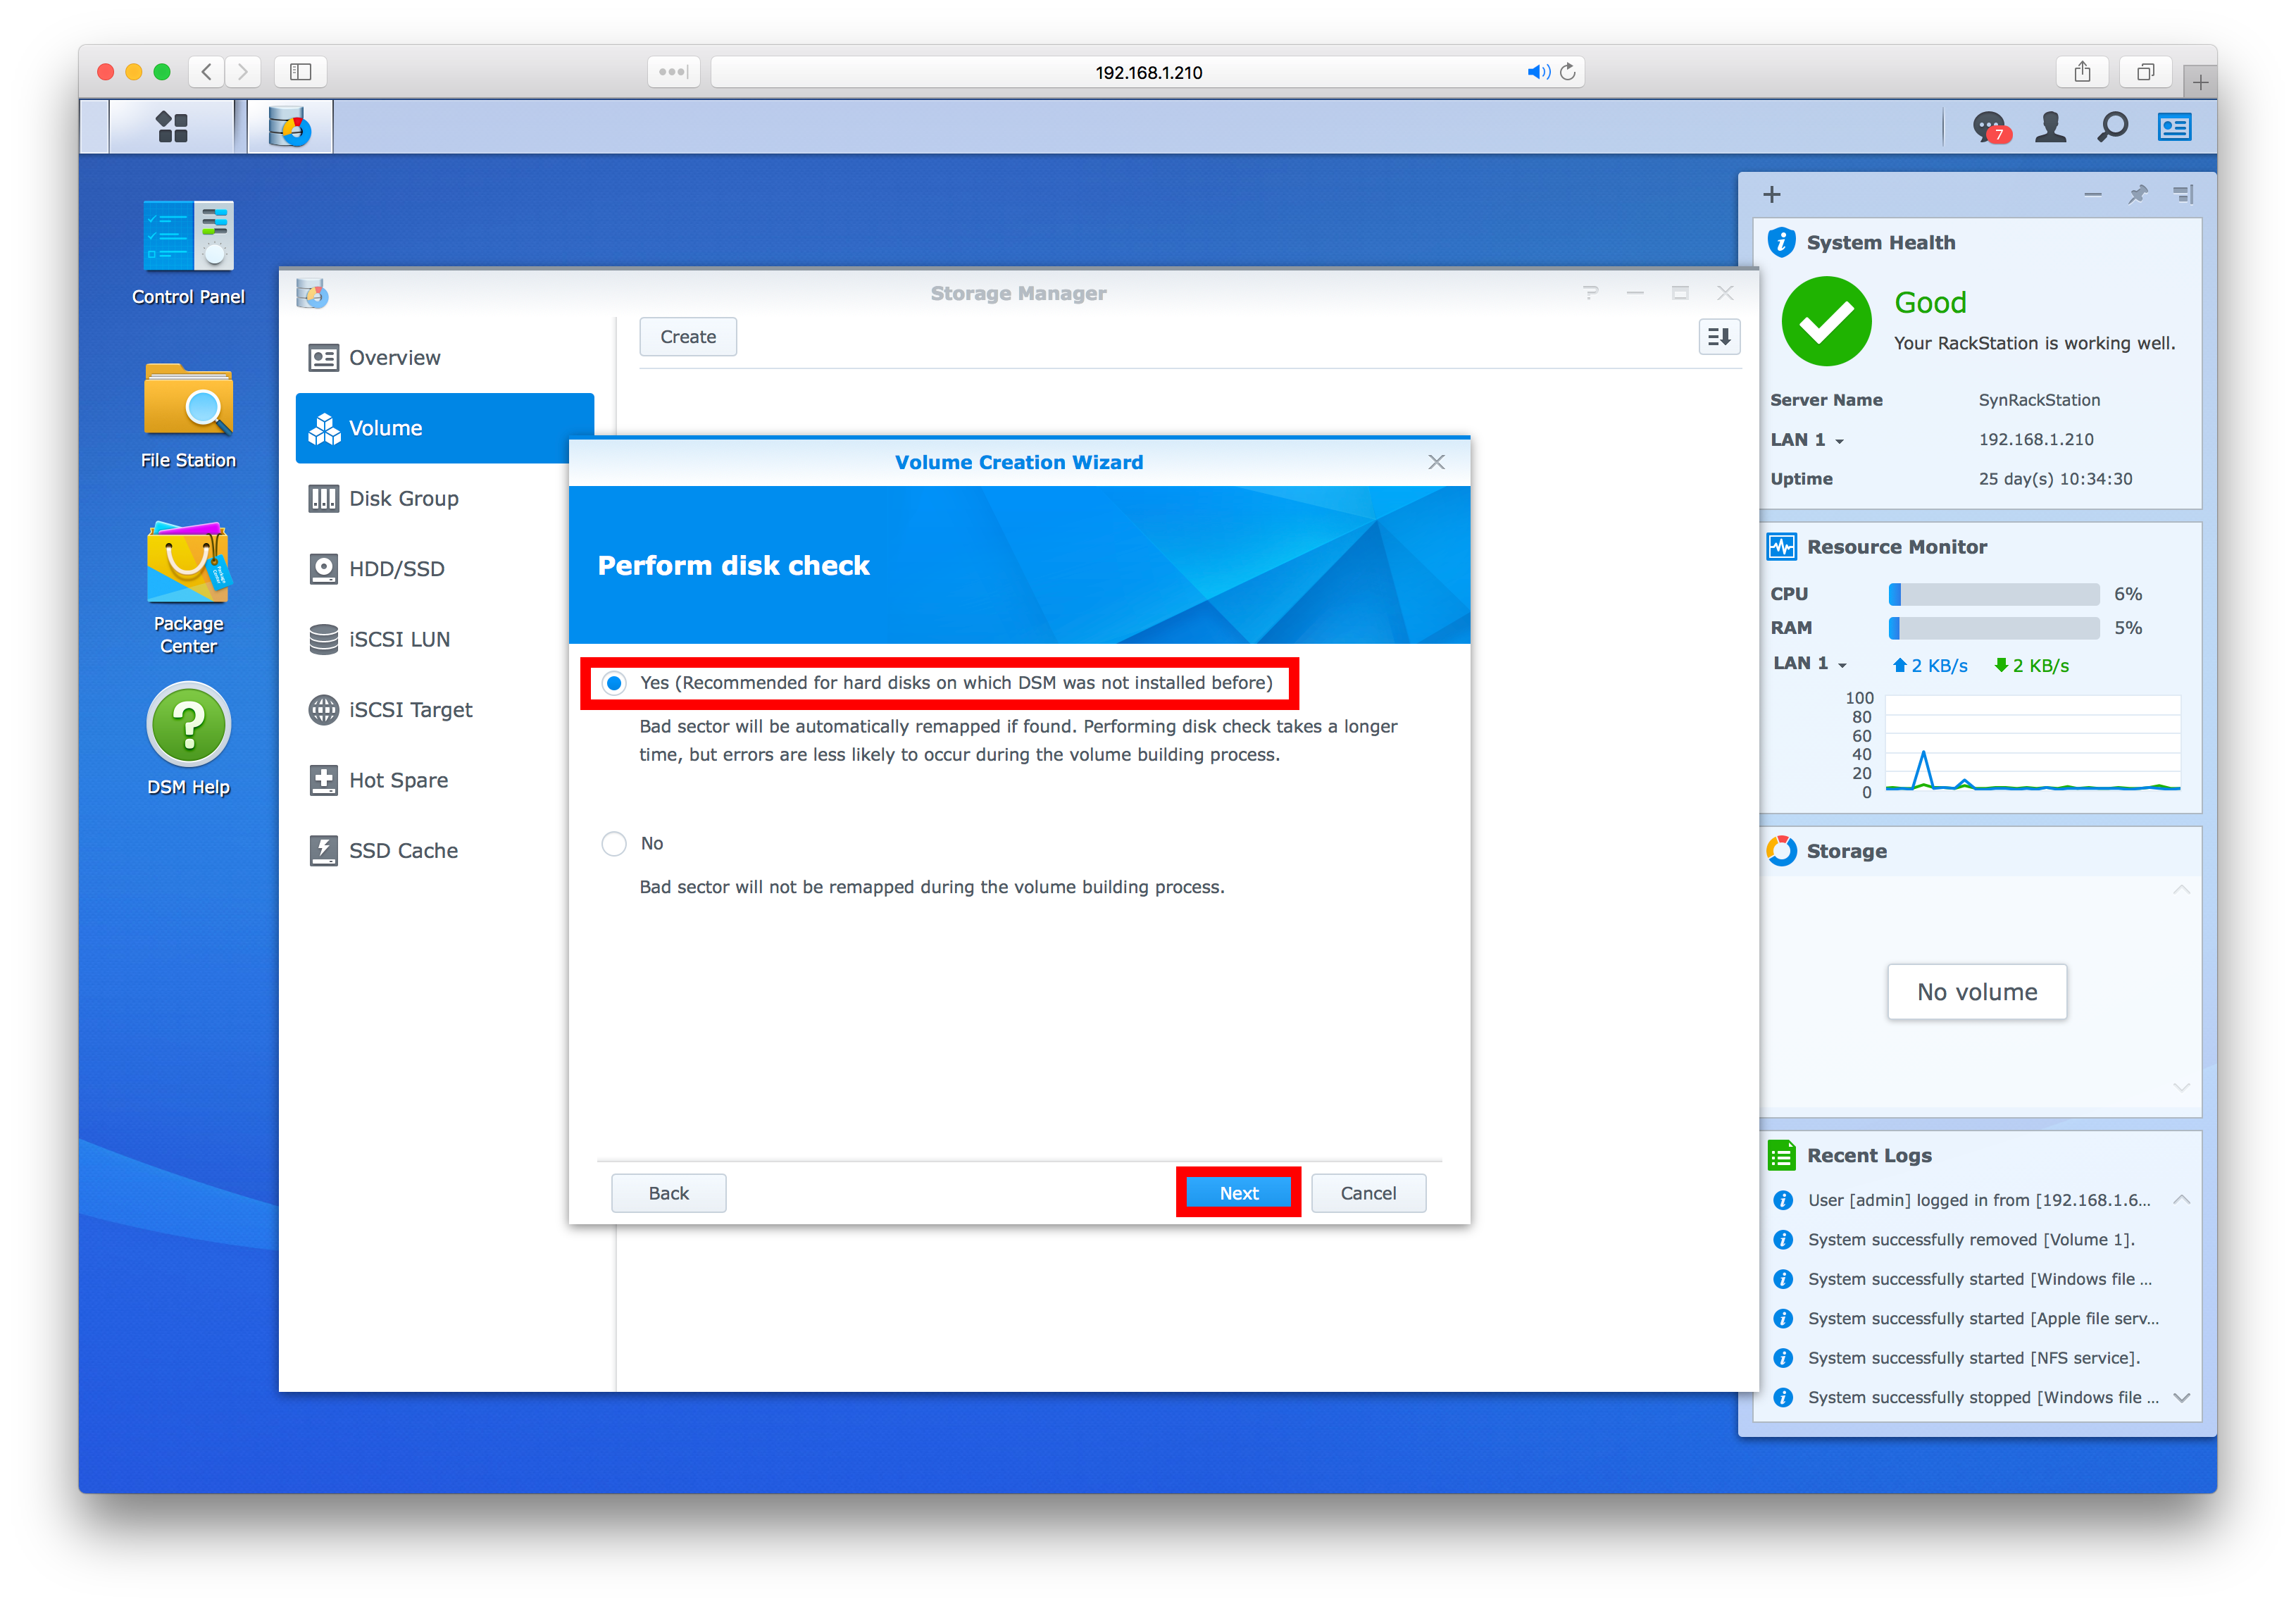
Step 7: Select Yes to do a disk check of the selected hard drives and then click next (we recommend doing this all the time, but especially if the HDD is new or has been repurposed from another storage device)
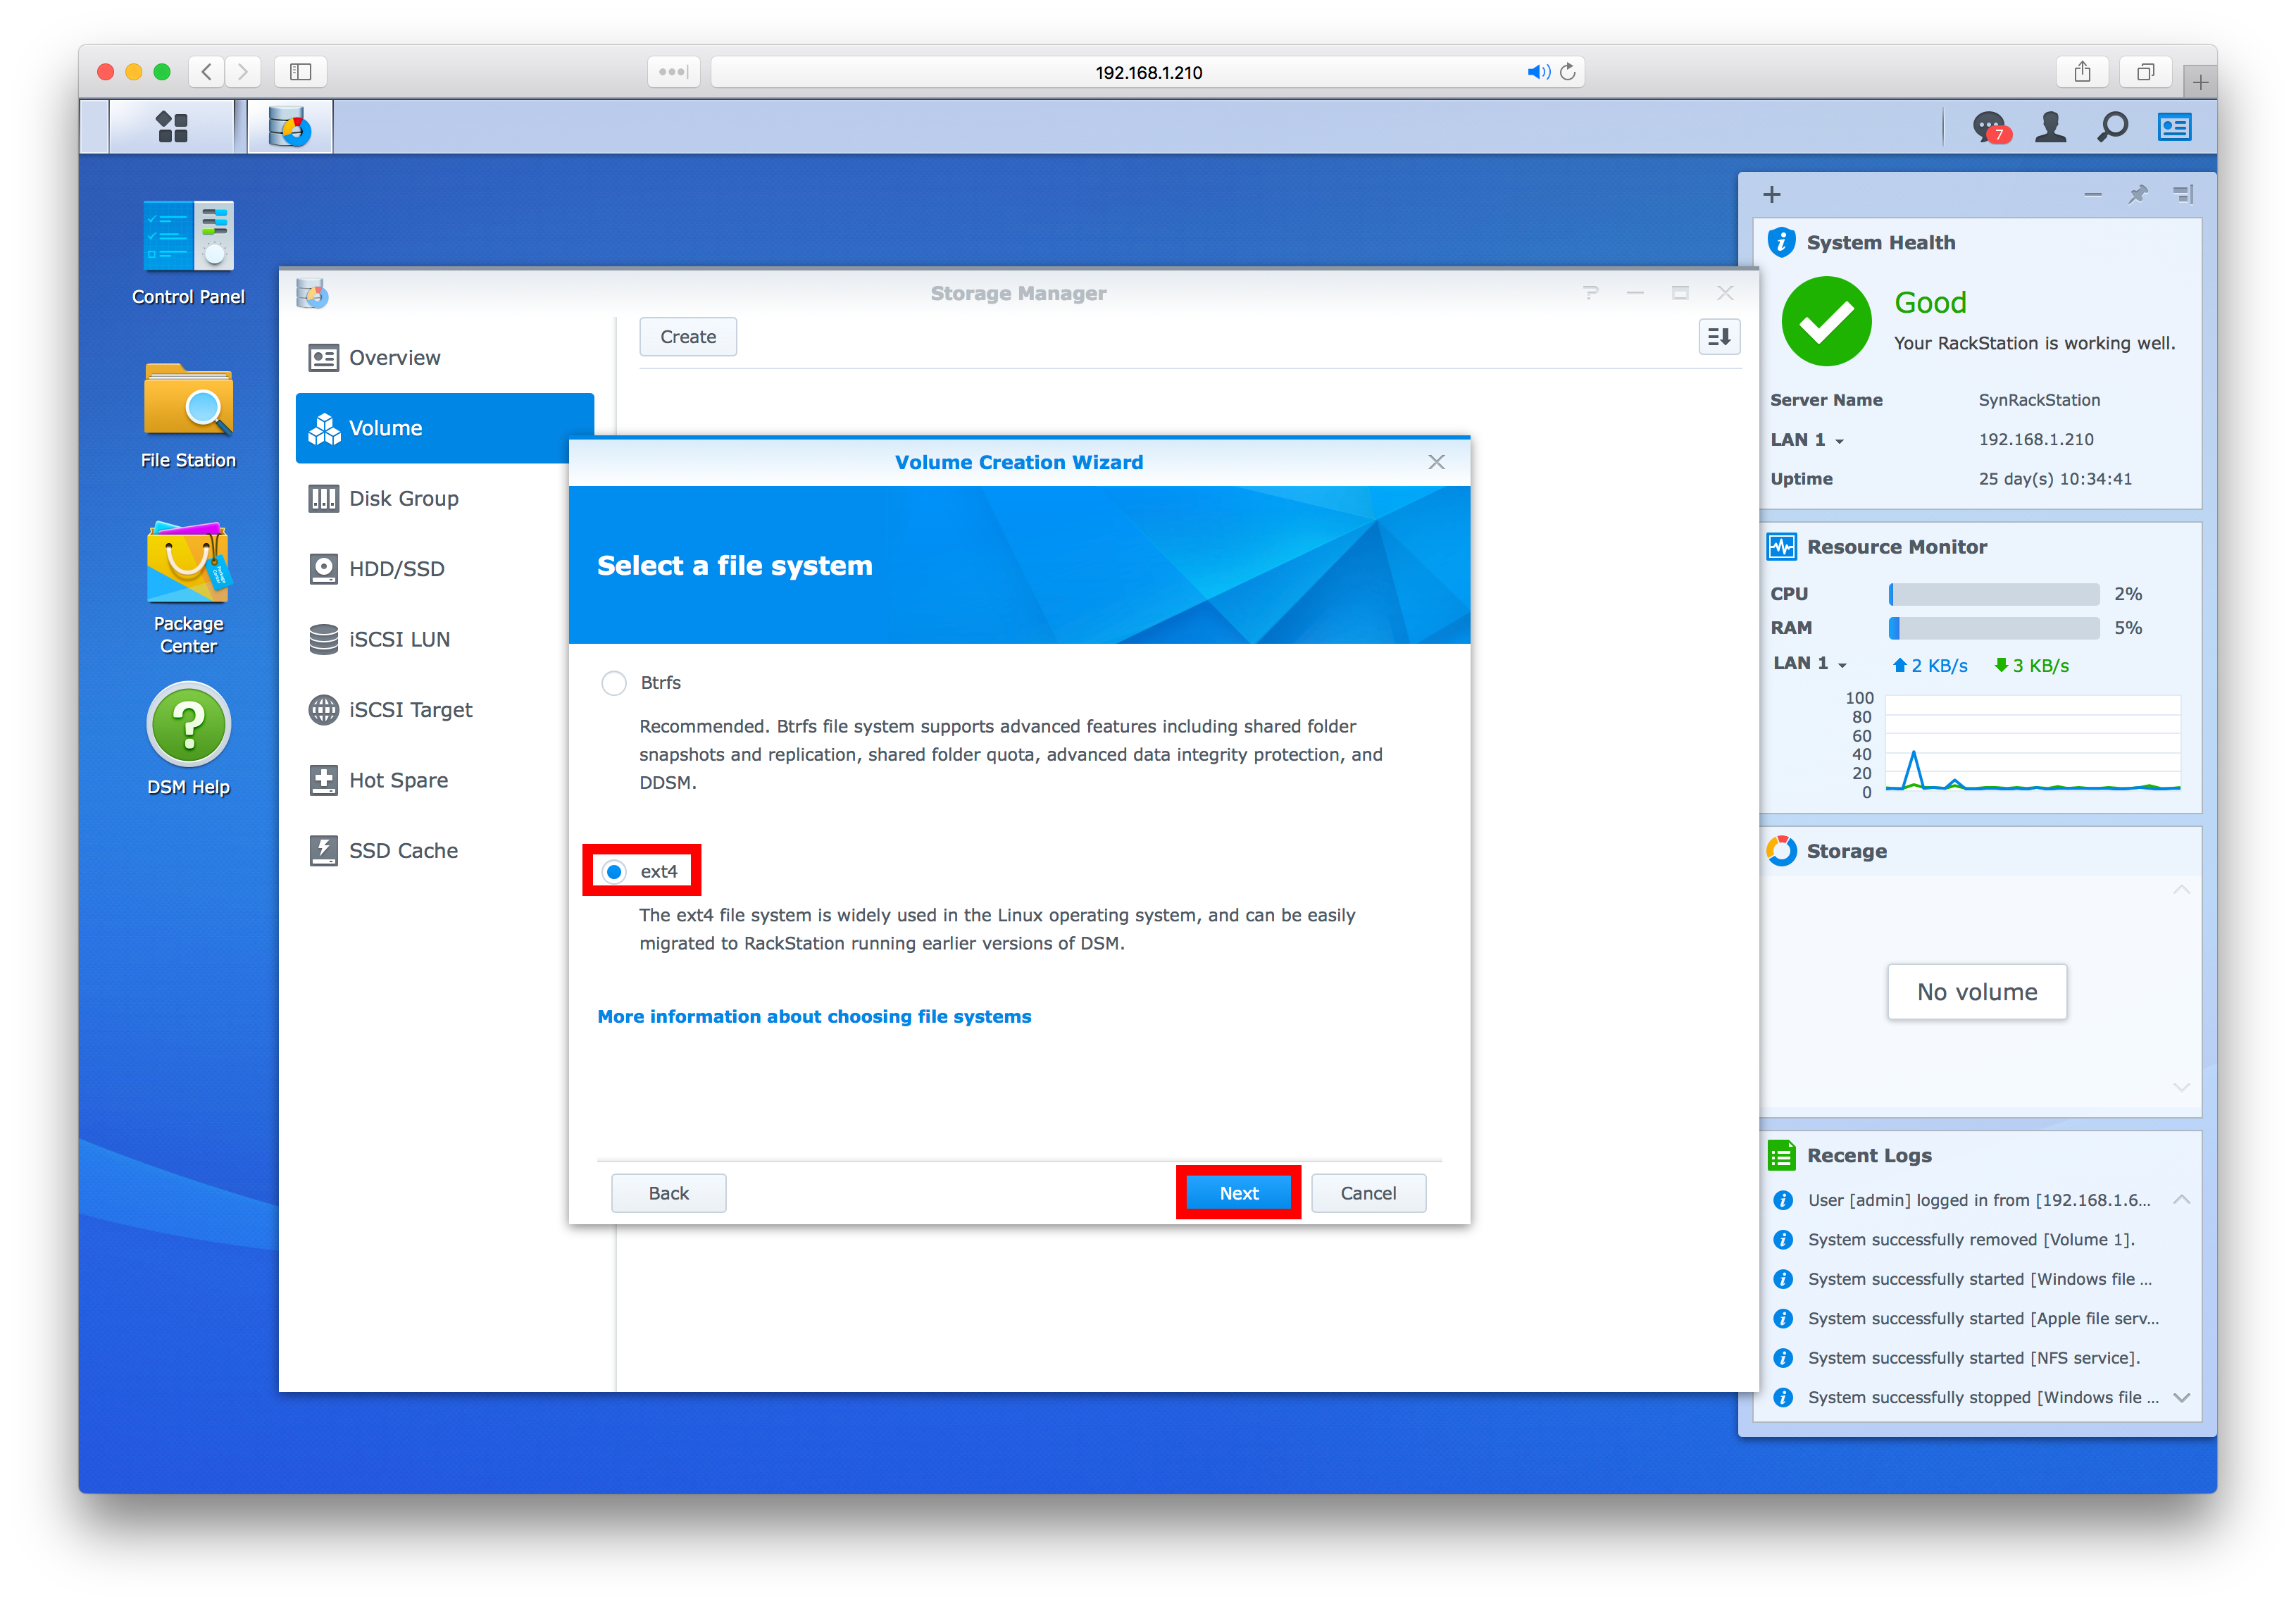
Step 8: Select the file system you want to save your files with, ext4 or Btrfs, and then click next (we recommend ext4 as it is the established standard)
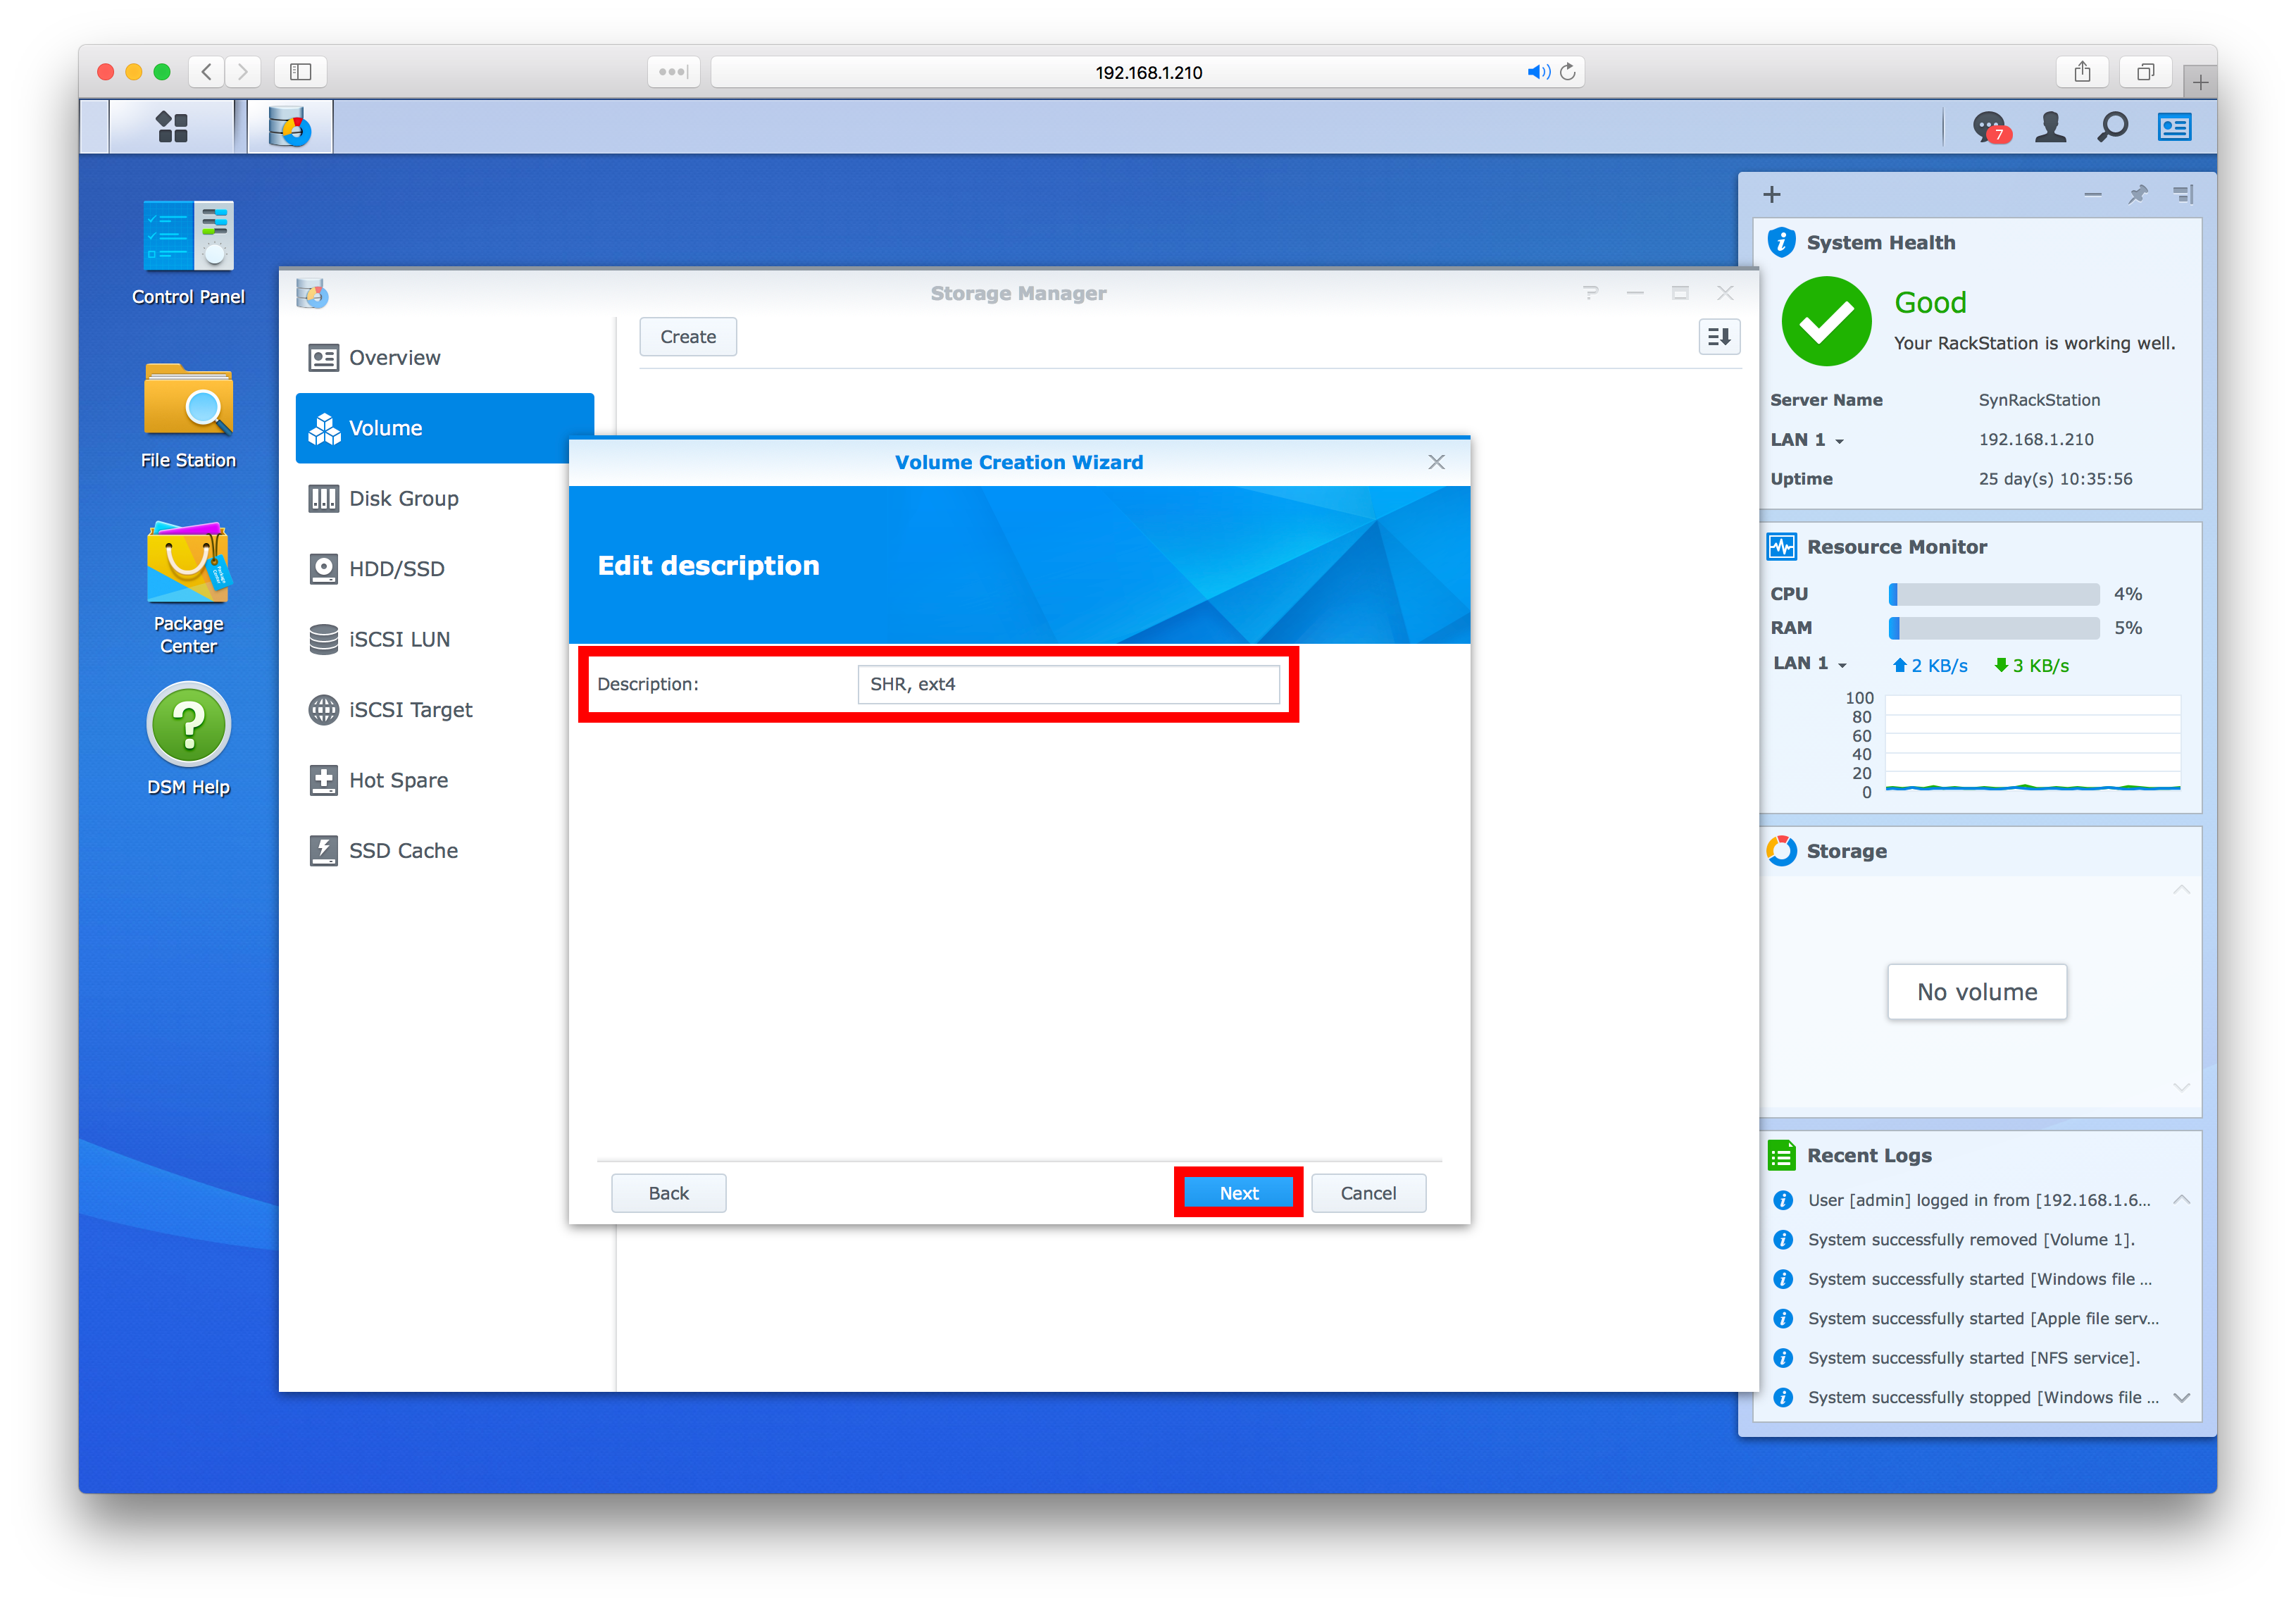
Step 9: Edit the description of the volume by giving it a name that relates to what you are going to use it for or just leave it as the default, then click next
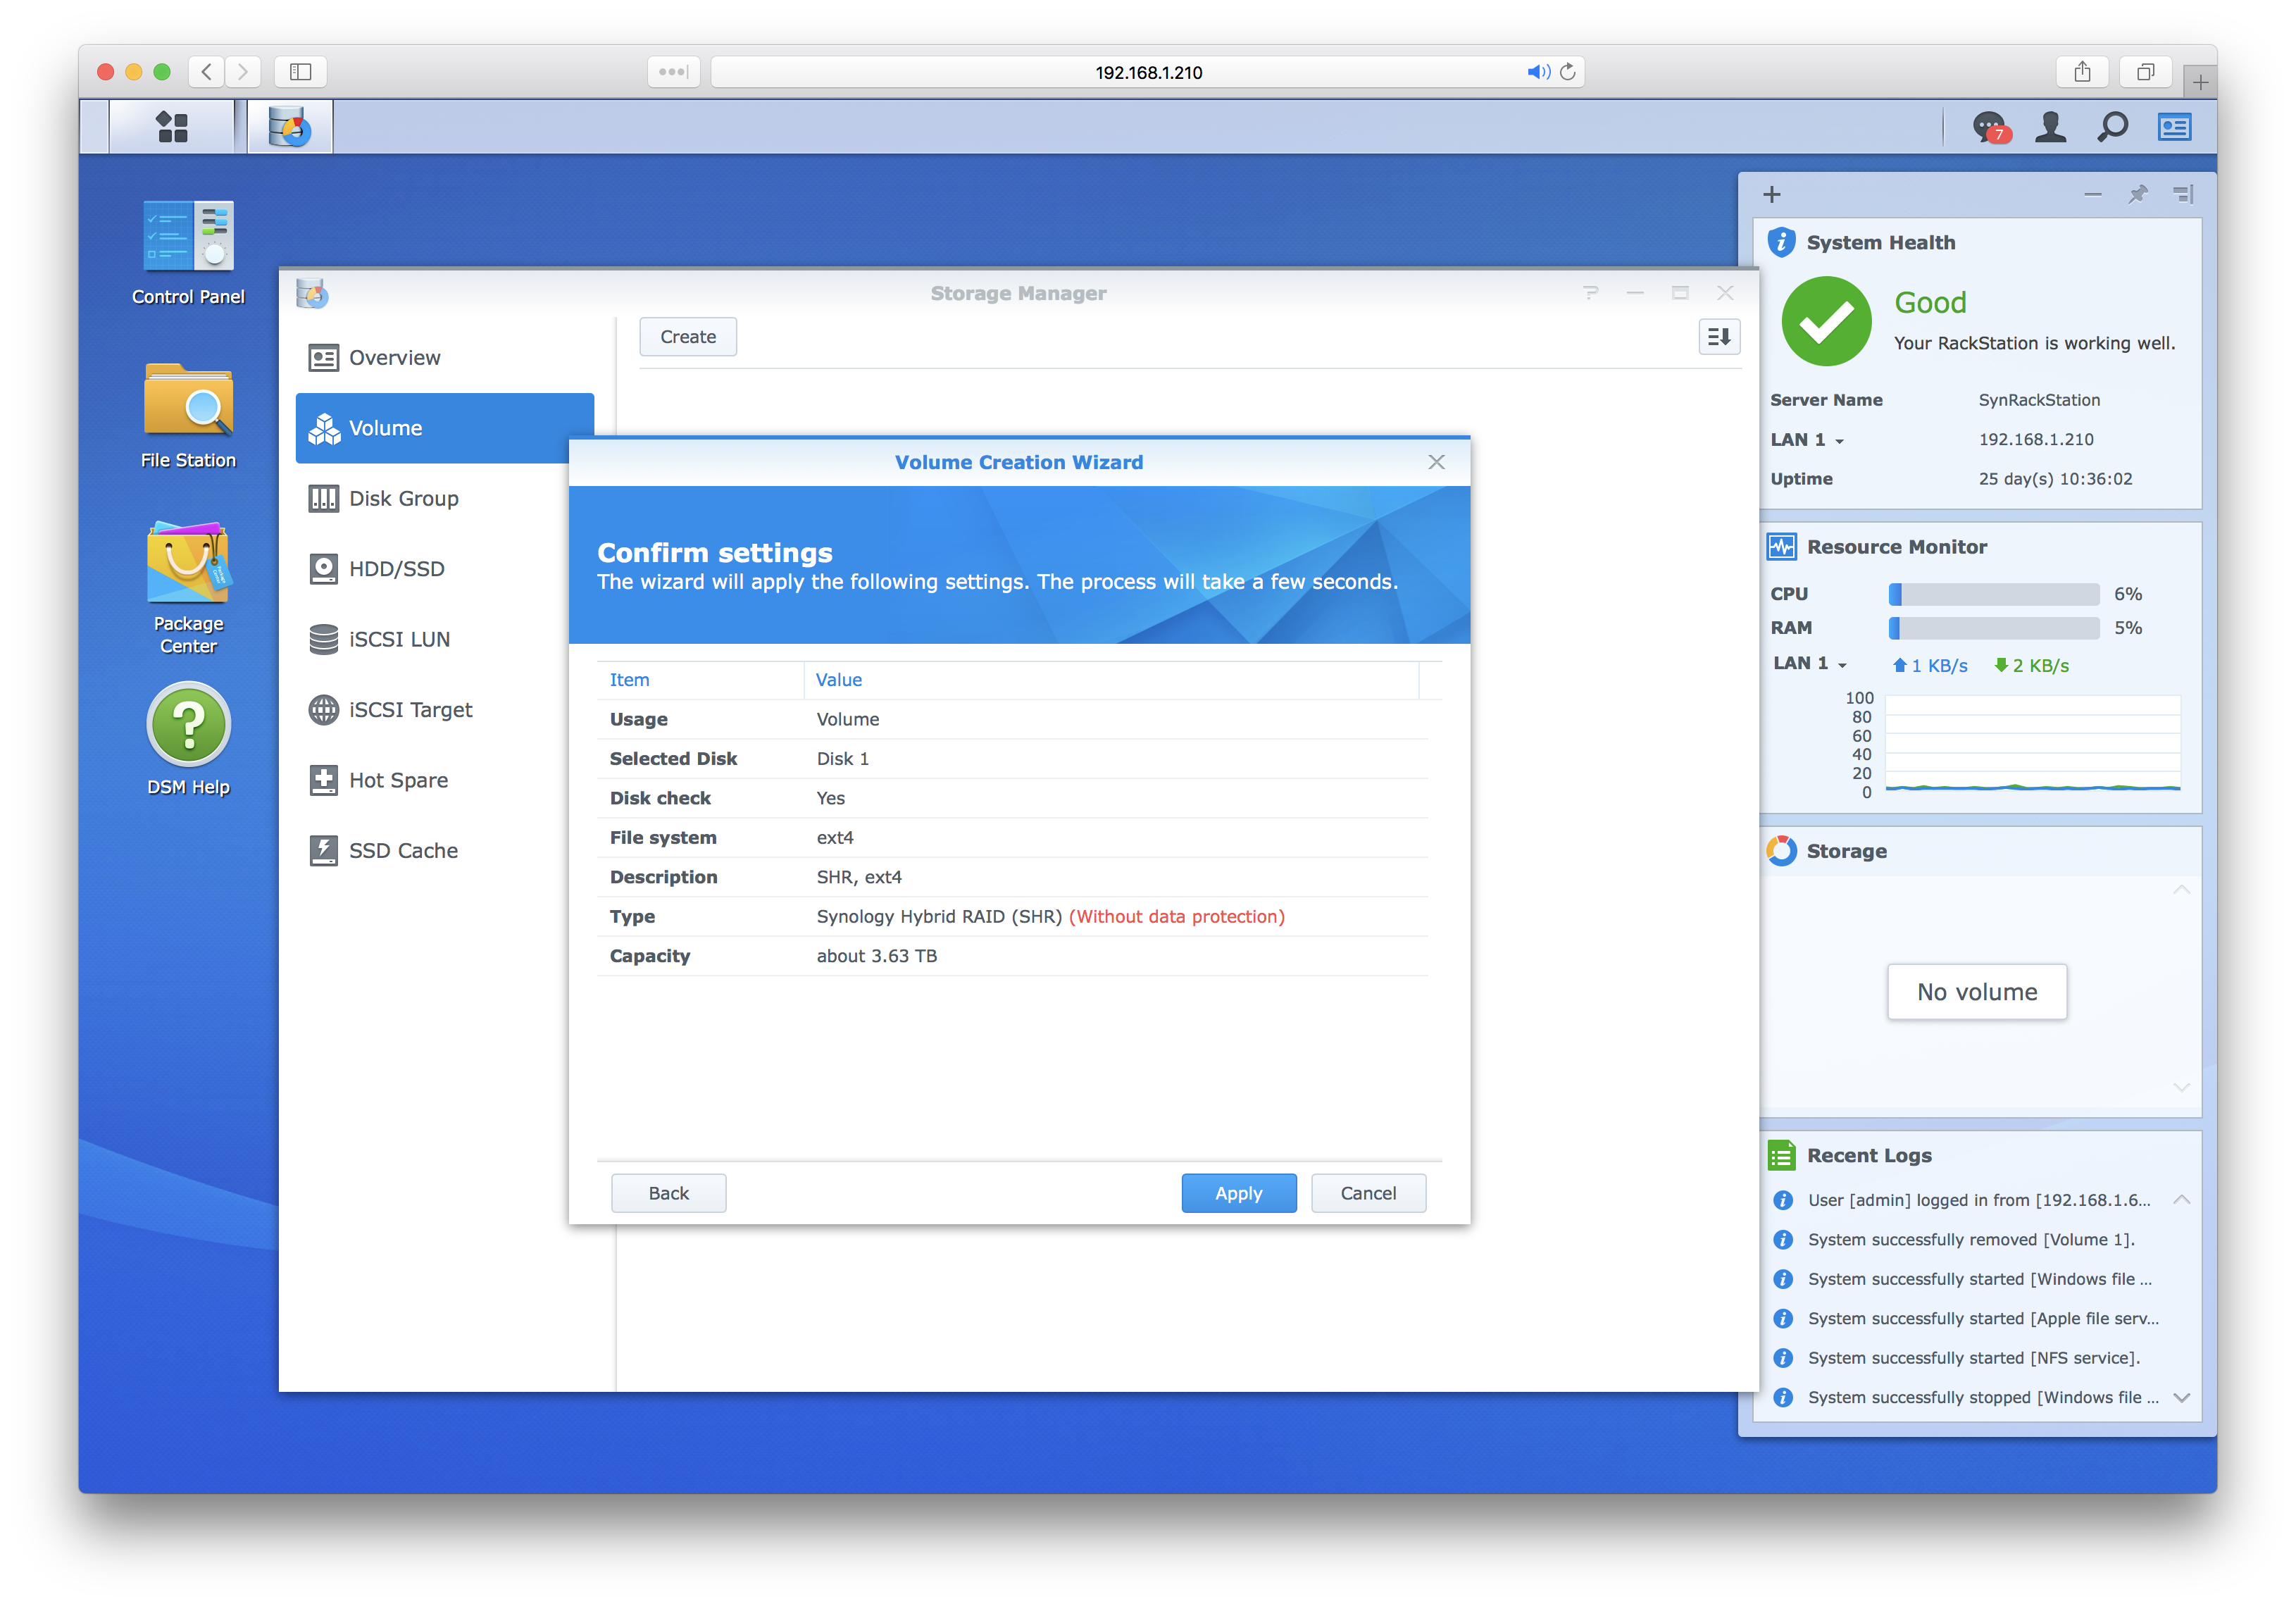
Step 10: Double check the settings you have chosen and then click apply
After a few seconds, you will be taken back to the volume page and the newly created volume be created and ready to be used for whatever storage you want
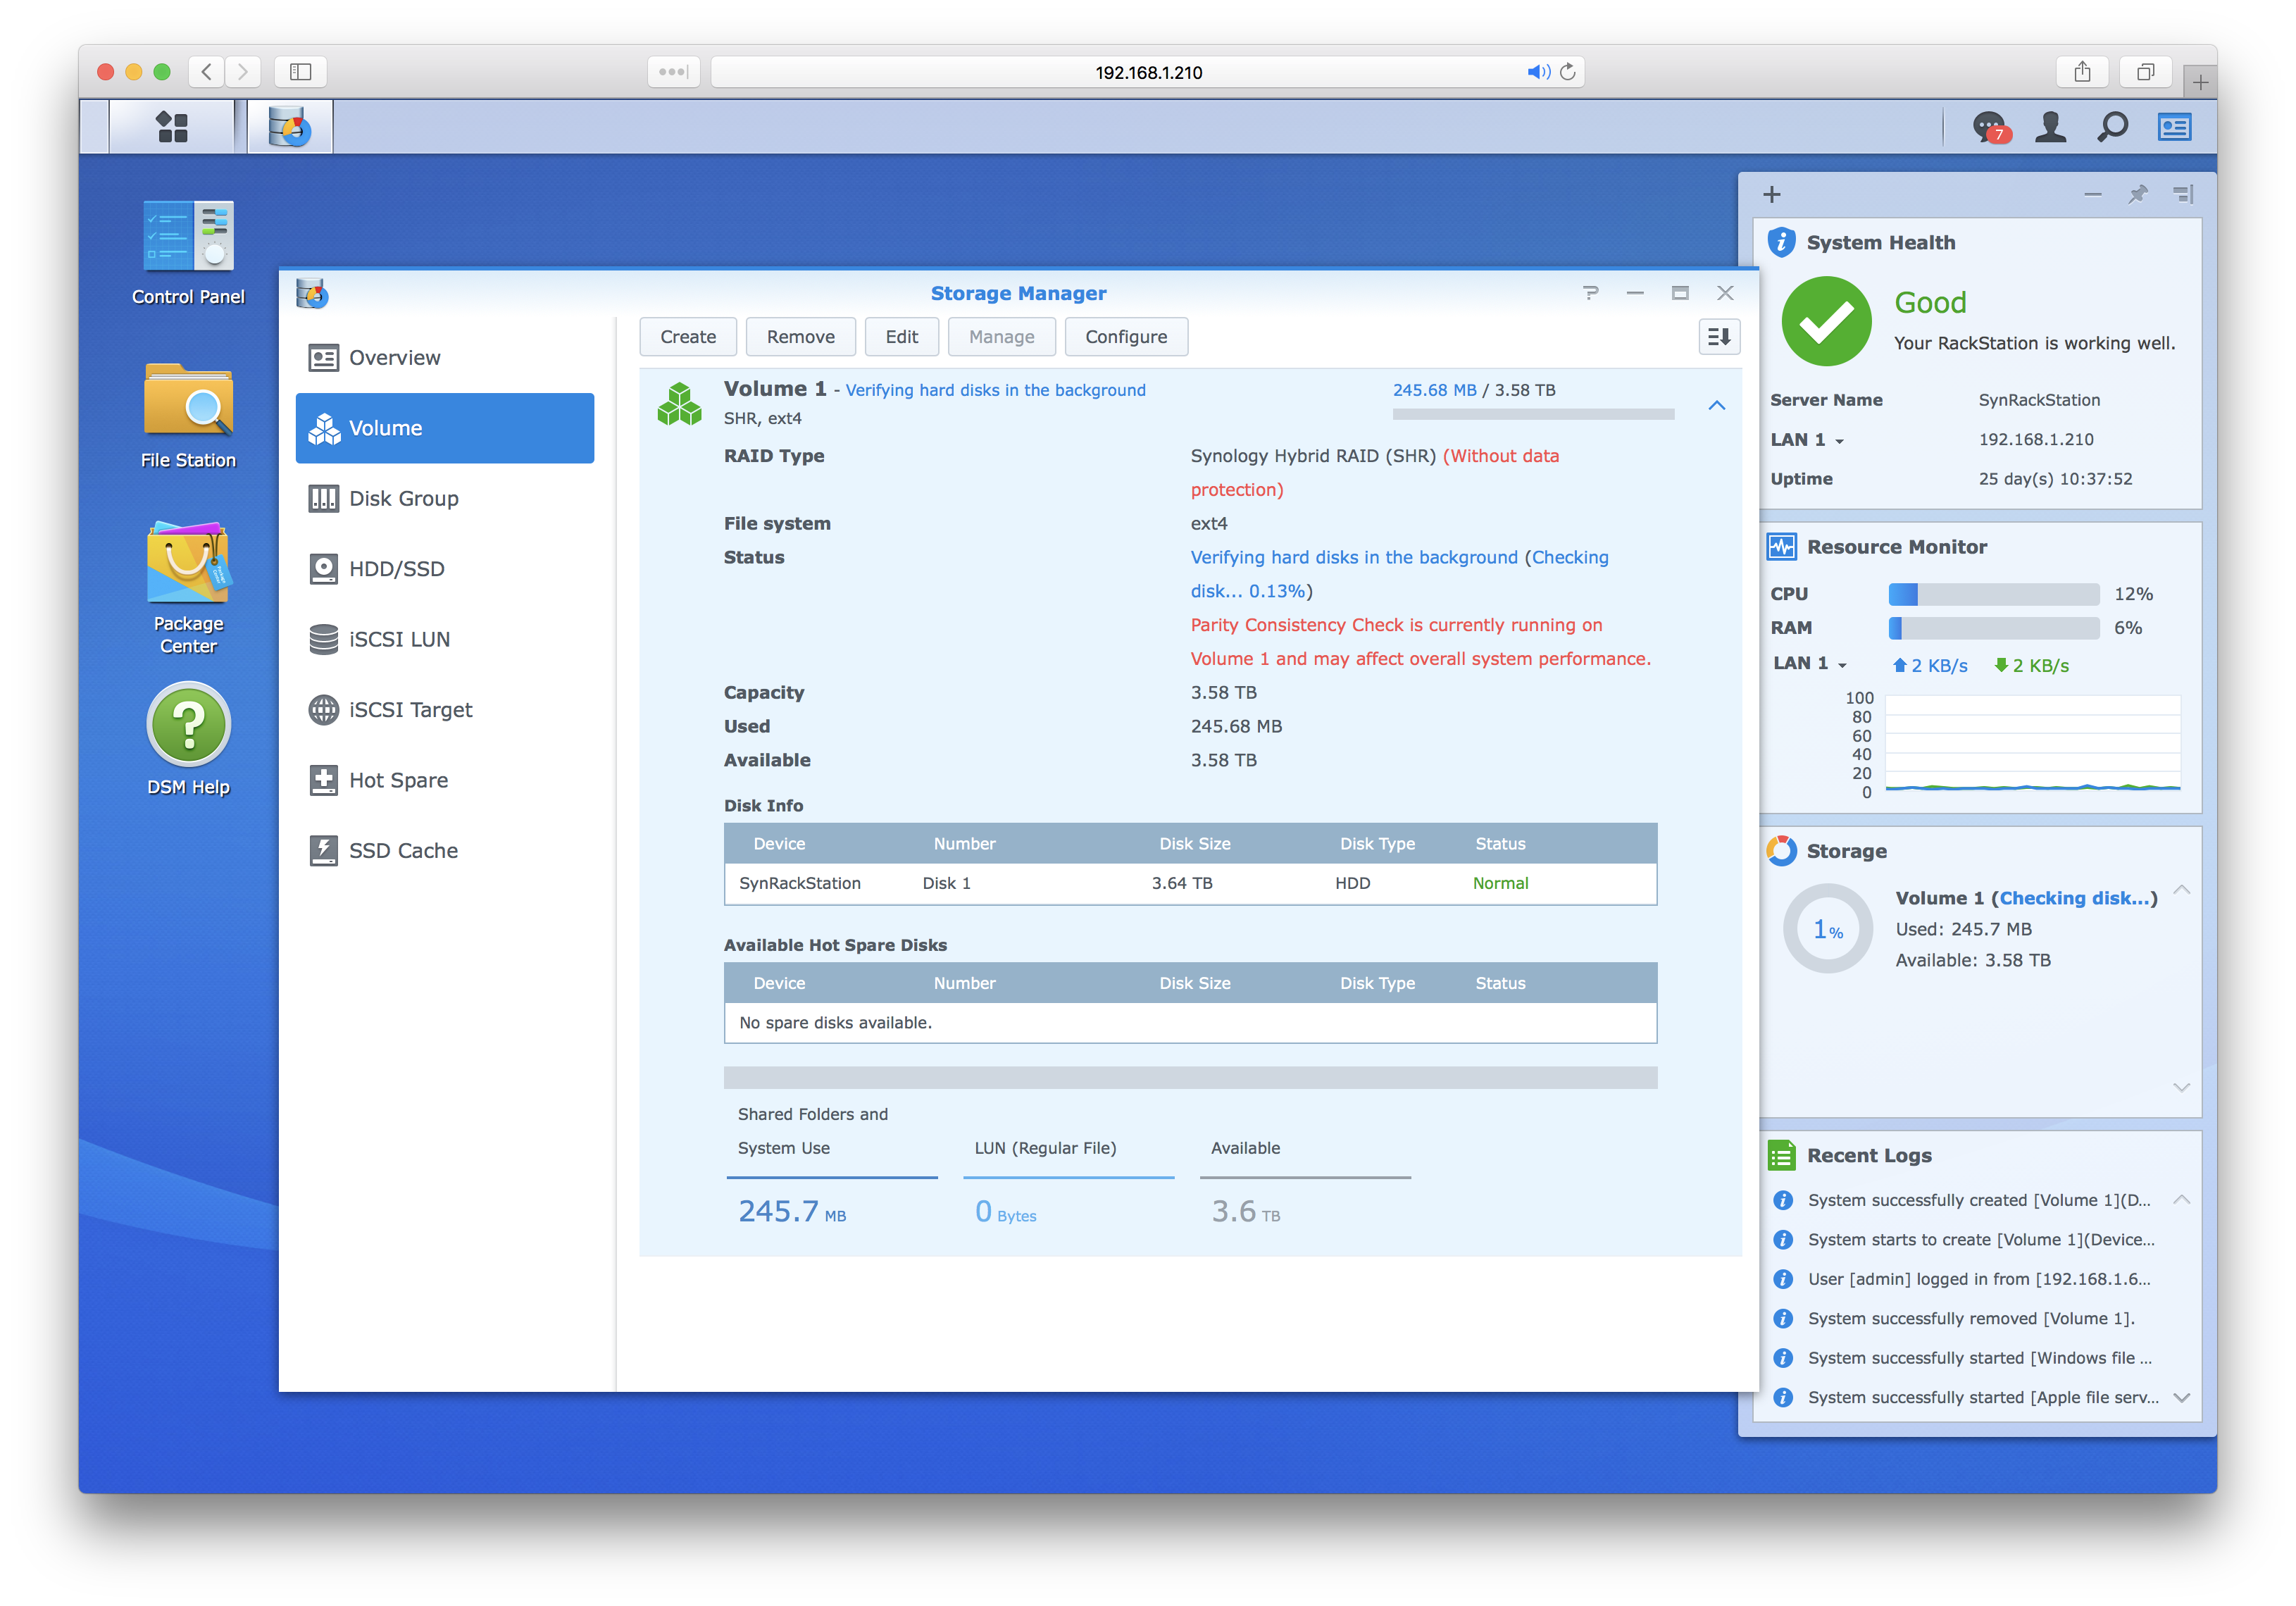
Be Aware that after creating a volume the NAS device will want to do a Parity Consistency Check which can take a while and can affect the devices overall performance while it completes the check
How To Change the Camera Settings and Record Settings of an IP Camera Connected to a Synology NAS
In this How To… Guide we are going to walk you through all the camera settings available to you when you add an IP camera to your Synology NAS, this also includes taking you through the record settings of the camera and how to playback any recordings you make, so lets start were we left off in our previous guide with the IP camera window open on your NAS and an IP camera added:
Step 1: Click the drop-down arrow at the right side of the IP camera window to see the default settings of the camera including where the camera is recording to
If the volume the camera is recording to is incorrect you can create a new one (follow our instructions HERE) or go into the camera settings and change the camera to record to an available volume
Step 2: Before changing any settings we advise clicking disable to stop the camera recording (this is not a necessity, you can edit settings while it still records but we would definitely advise disabling the camera if you are changing volumes just to stop the camera from continuing to record to the wrong volume)
Step 3: Select the camera from the list and click Edit and select Edit from the drop-down
A new window will then open displaying all of the camera’s settings, which we will take you through below:
Device Settings
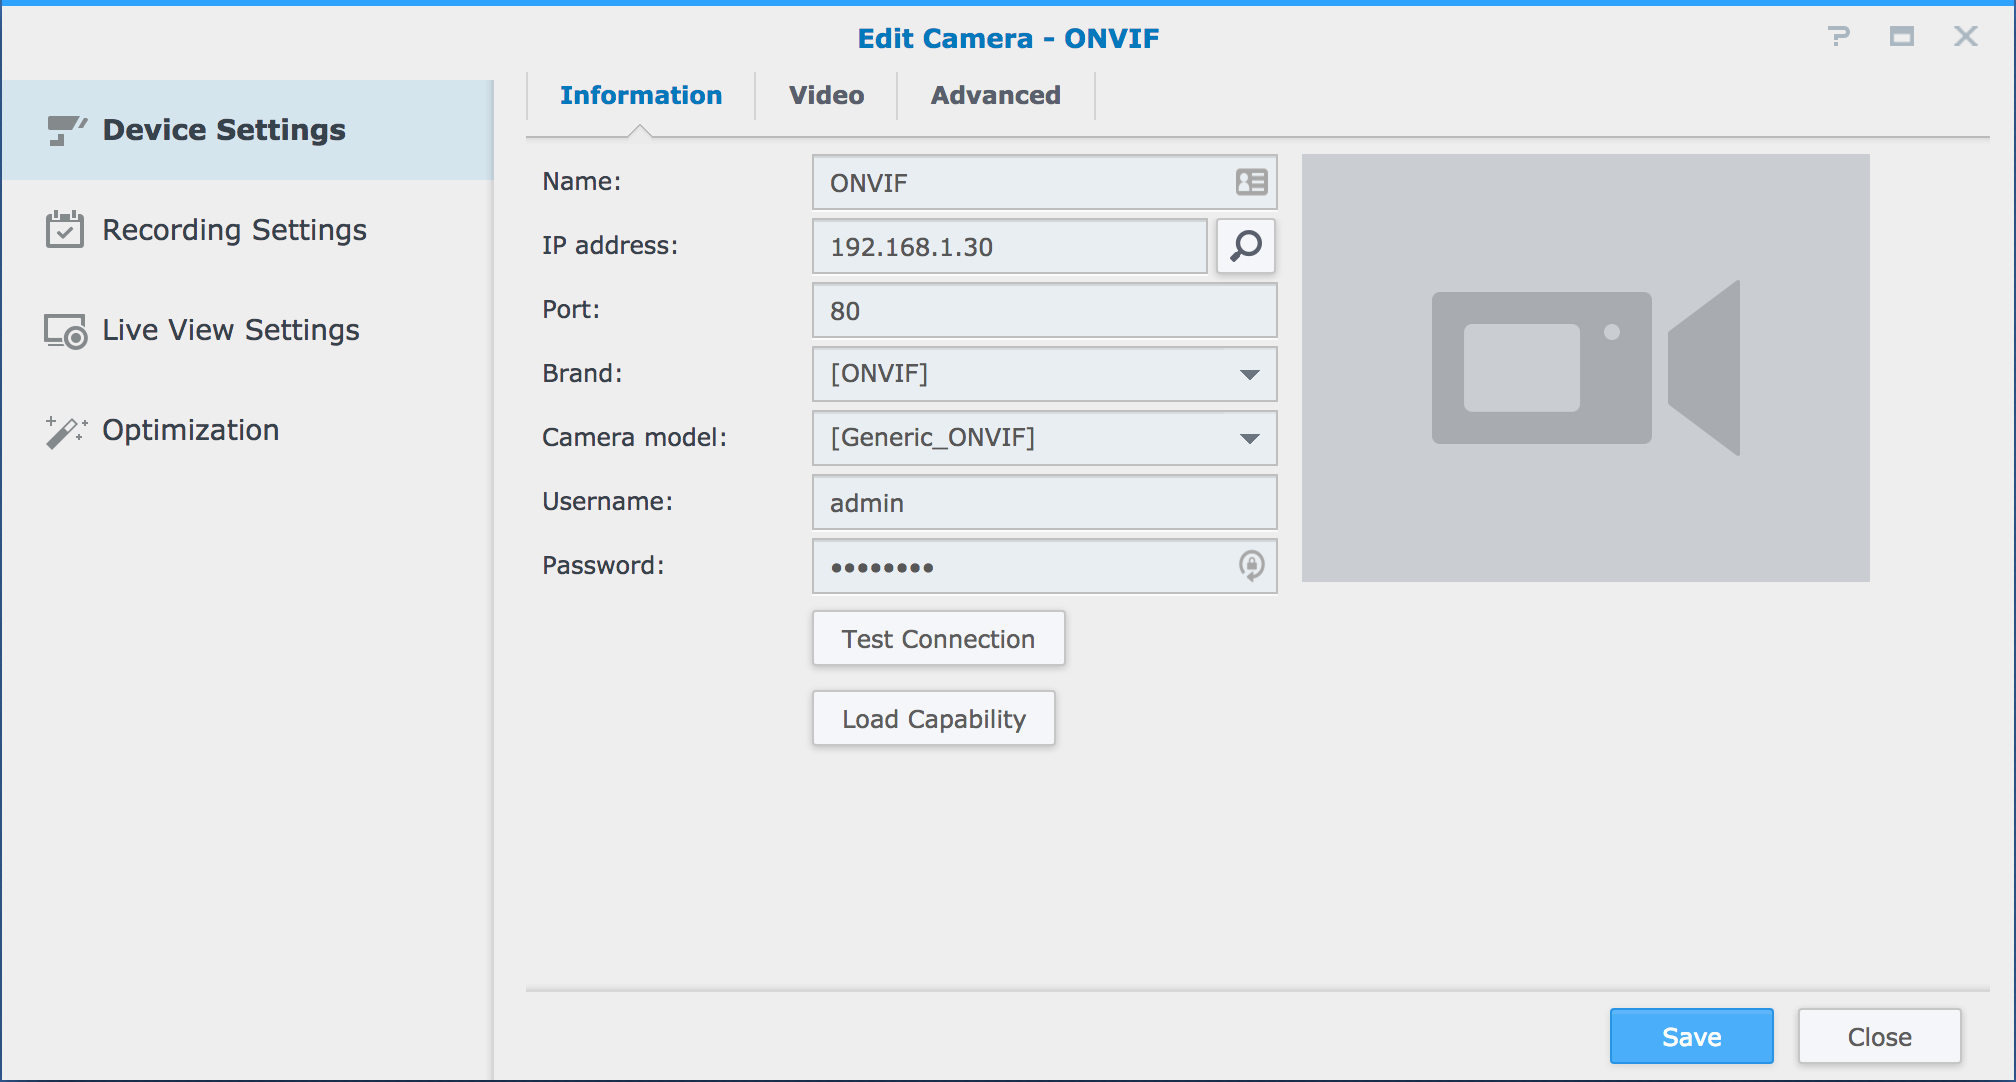
Information
This section allows you to edit the cameras name, you can change other details here but they won’t actually change the camera’s details. For example, if you change the IP address here it won’t change the IP address of the camera it will just try to connect to that address on your network, and if there is no camera at that address you won’t connect to anything.
The only time you want to change the other details here is if you access the camera outside of the surveillance station software and you change settings, you will then want to log back into the NAS and manually change cameras IP address, port, password, etc to match, otherwise the camera will remain at the old settings and show up as disconnected on the NAS
Video
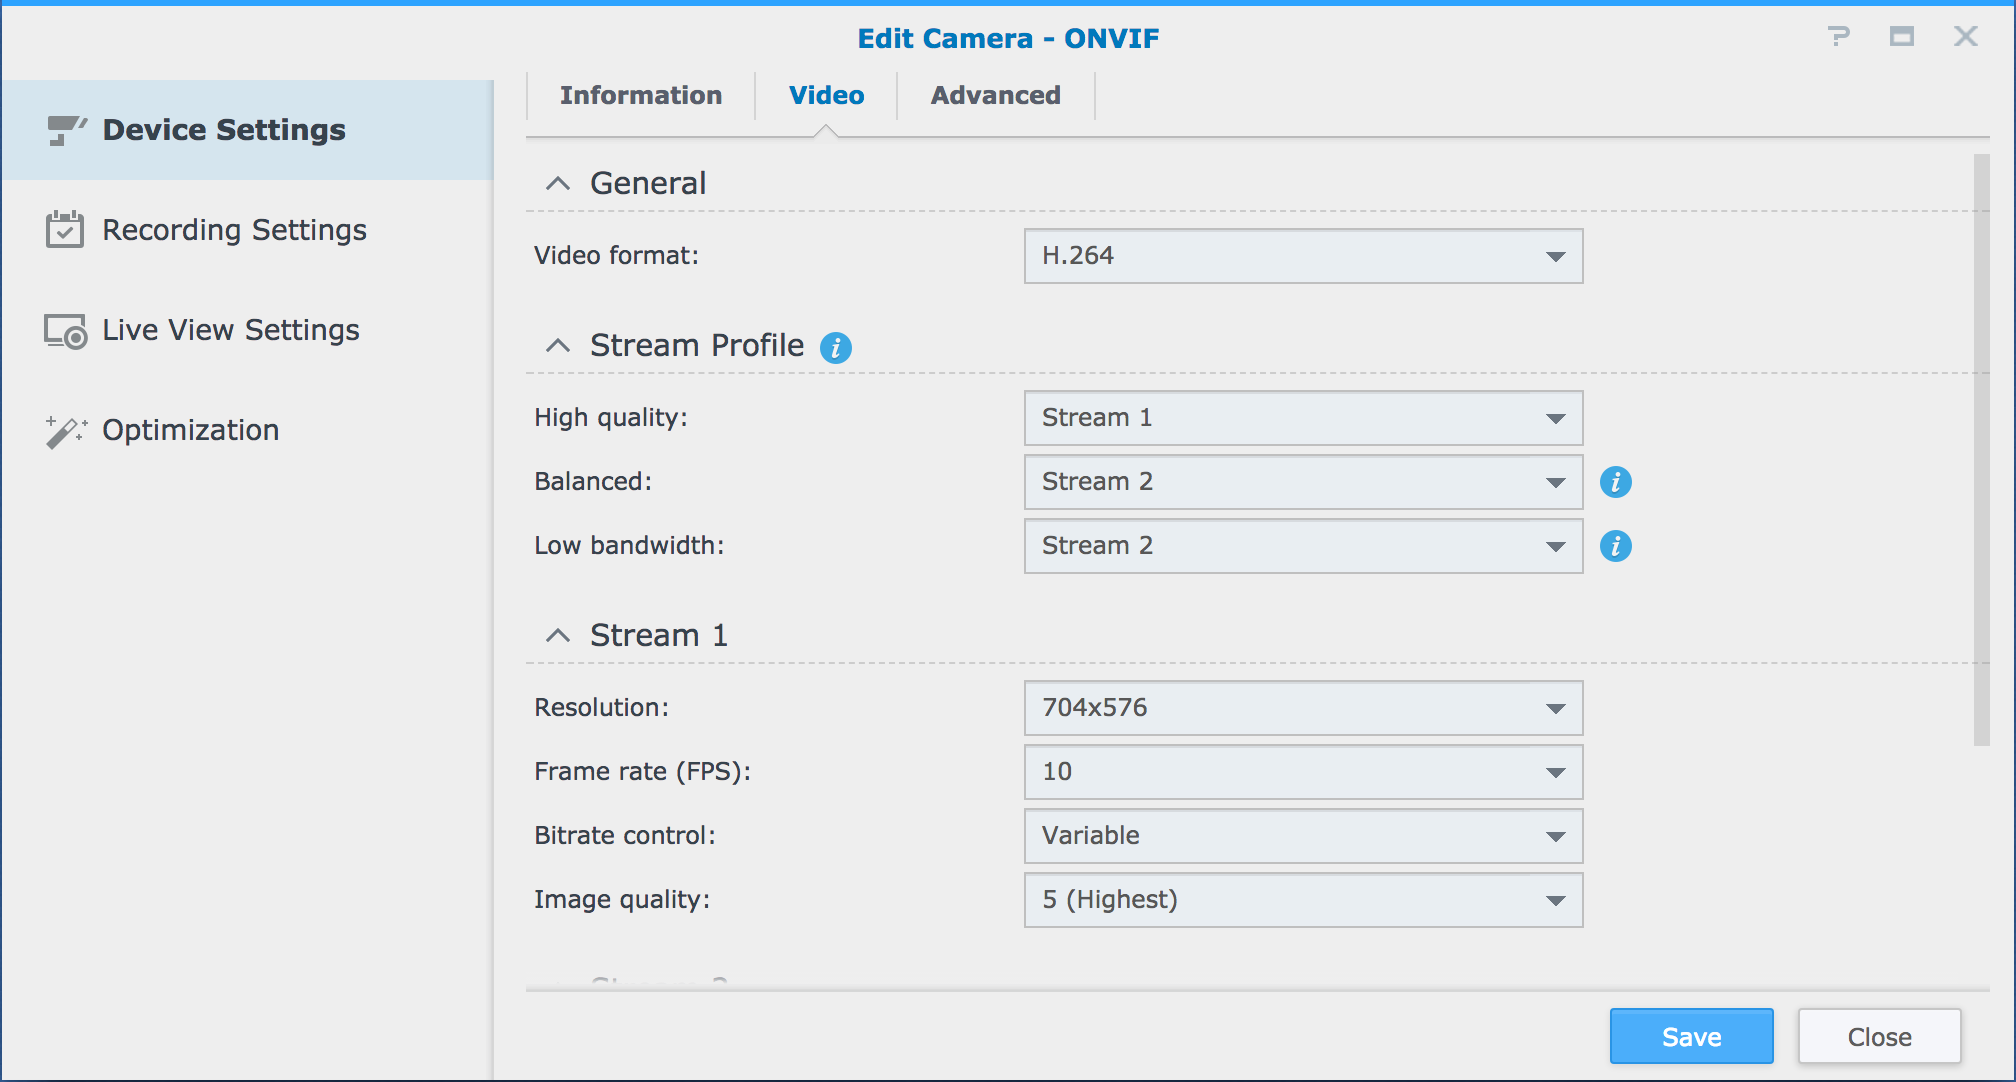
The video page lets you select the format/CODEC that the camera will stream and record at (in most cases your options are H.264 or MJPEG, we recommend H.264 unless other options are available) as well as letting you set the settings of the cameras different streams and then select which stream is used for each of the Surveillance Station stream profiles (e.g. High Quality/Balanced/Low Bandwidth) – the number of streams you have available and the settings of streams varies between different models and brands
Advanced
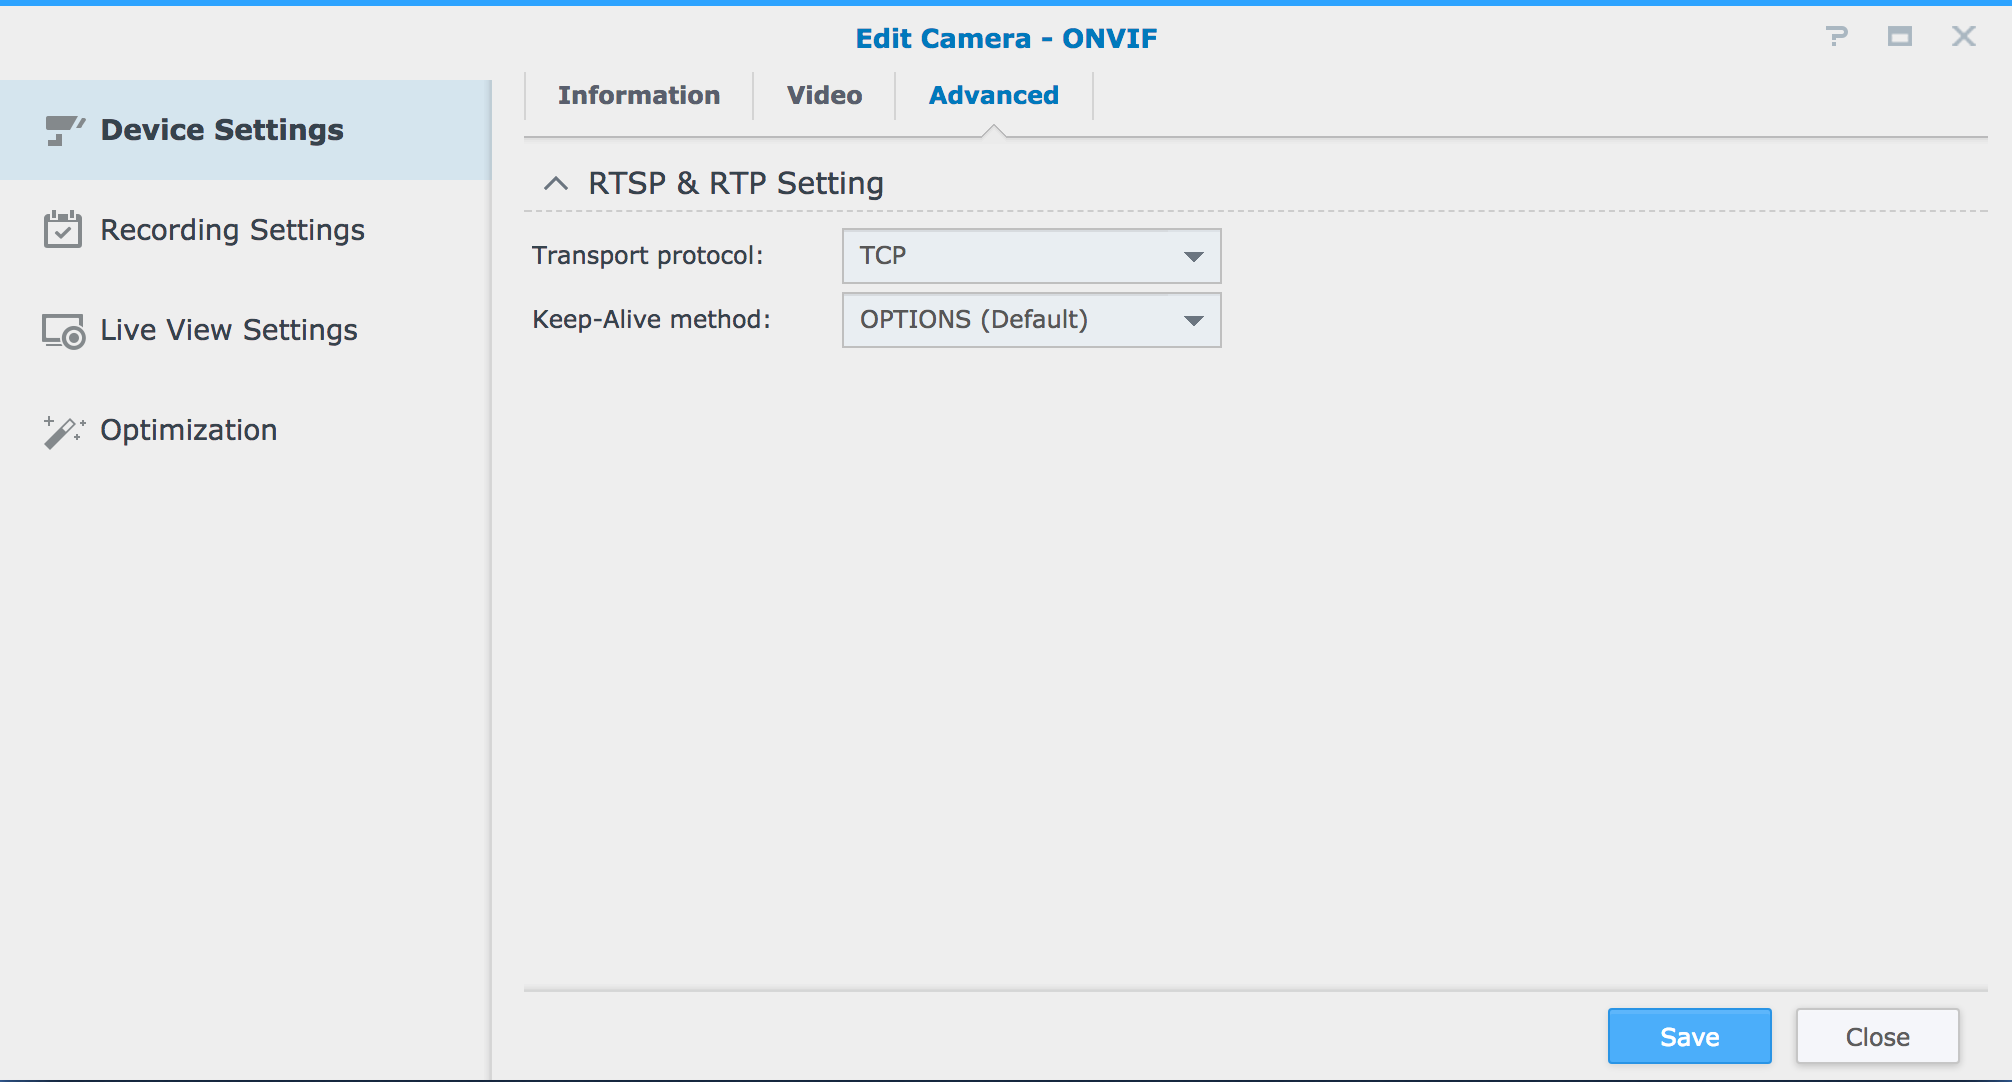
On our demo Milesight camera (connected via ONVIF) this page lets you adjust the transport protocool and the keep-alive method, for most Synology users these settings are fine as they are but if you are using a different camera for your system we would advise still checking this page as there may be other advanced features that your camera has that this demo camera does not
Recording Settings
Recording
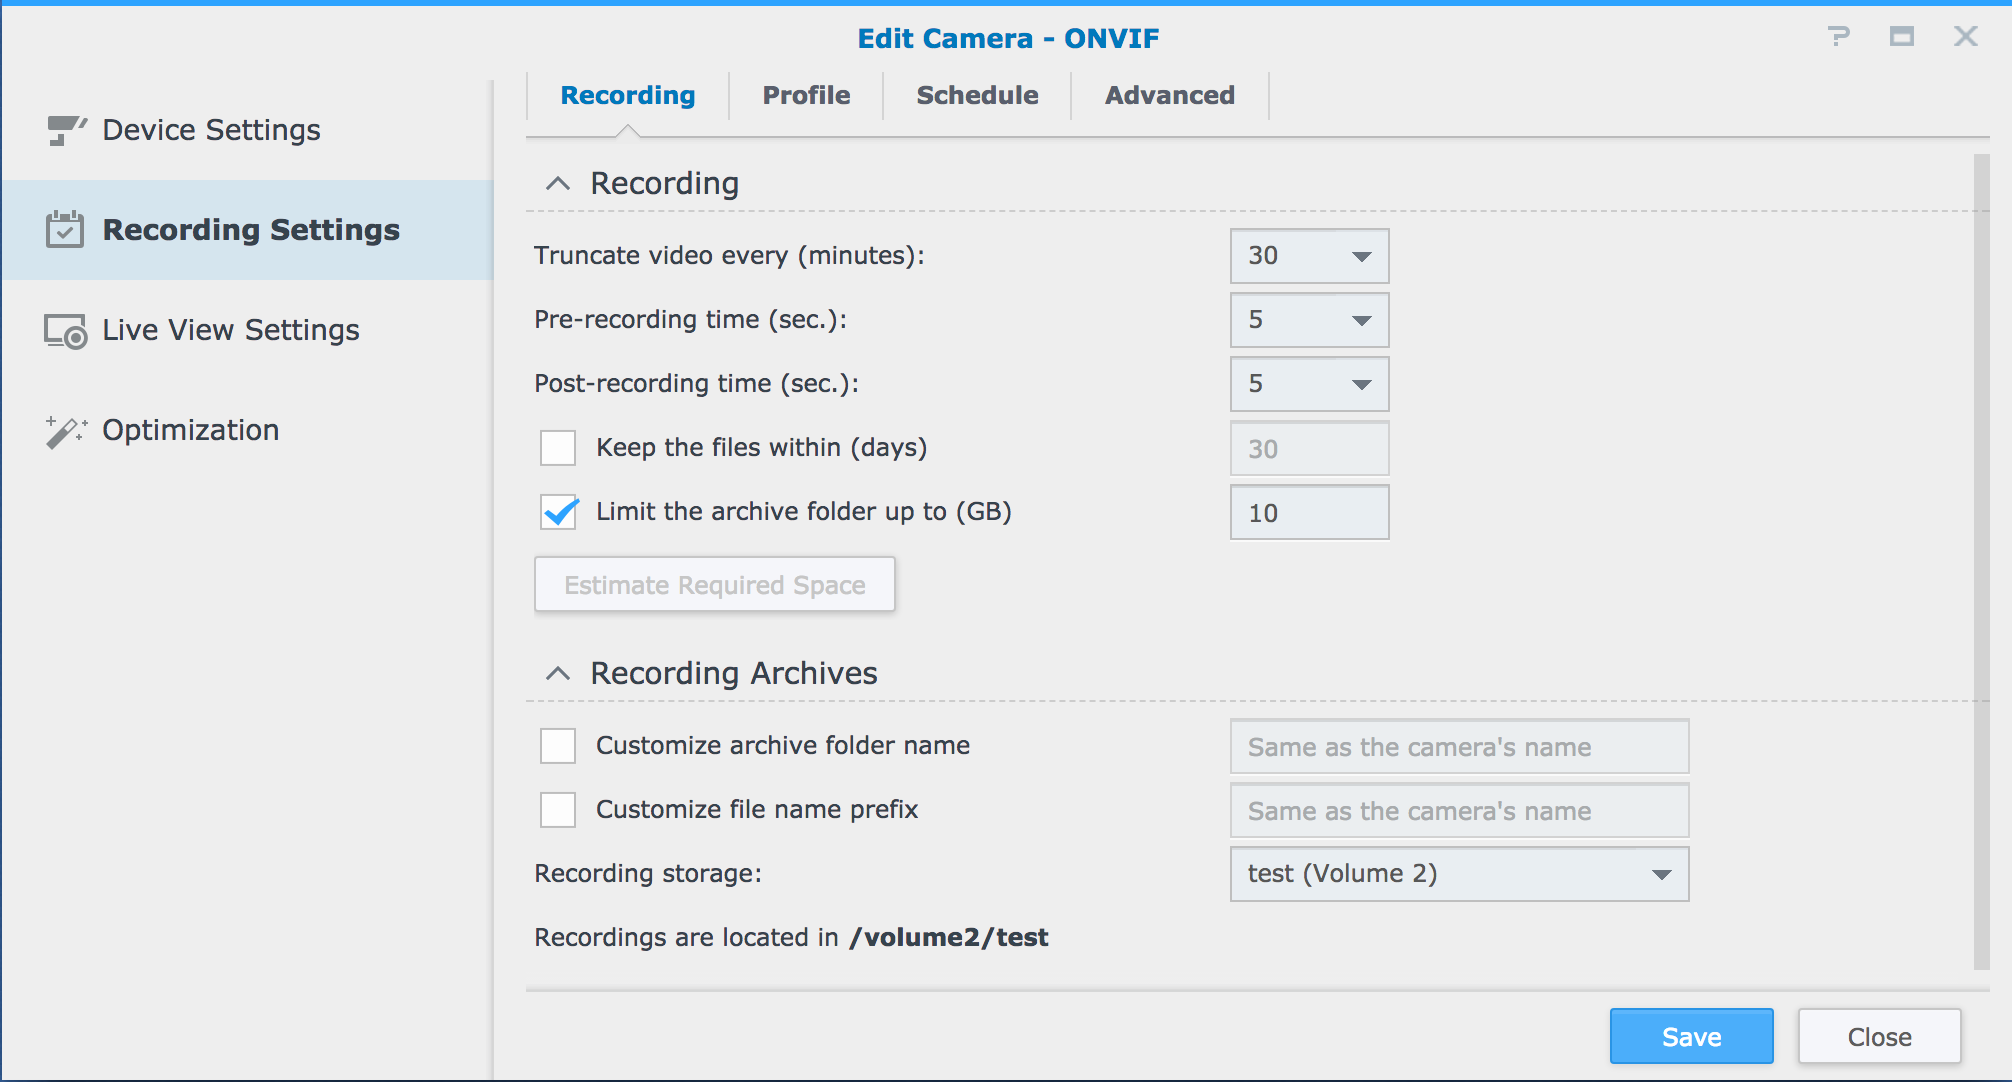
The recording page lets you set how the camera will record to your Synology NAS, you can select how long the camera records for before the recording is truncated (this is how long each file records for, so for example if you had 3 hours of recordings truncated every 30 minutes you would have 6 separate video files to cover that time frame). You can also set the pre and post-recording time, this is for when motion is detected or an alarm is triggered the camera will save a set amount of time before and after the detection.
You also have 2 tick boxes to select how you limit the camera’s recording (either only record for a certain number of days or record until a certain amount storage is filled) and then click the button to estimate the required space to record with these settings (save at this point if you want to test the space required – if you want to work out the space required quickly you can use our storage calculator).
The final part of this page lets you set custom names for the storage folder and the file name prefix, as well as letting you chose which volume you will record to
Profile
The Profile page lets you select which stream profile is used by each type of recording (including the stream profiles used when specific alerts and events are triggered)
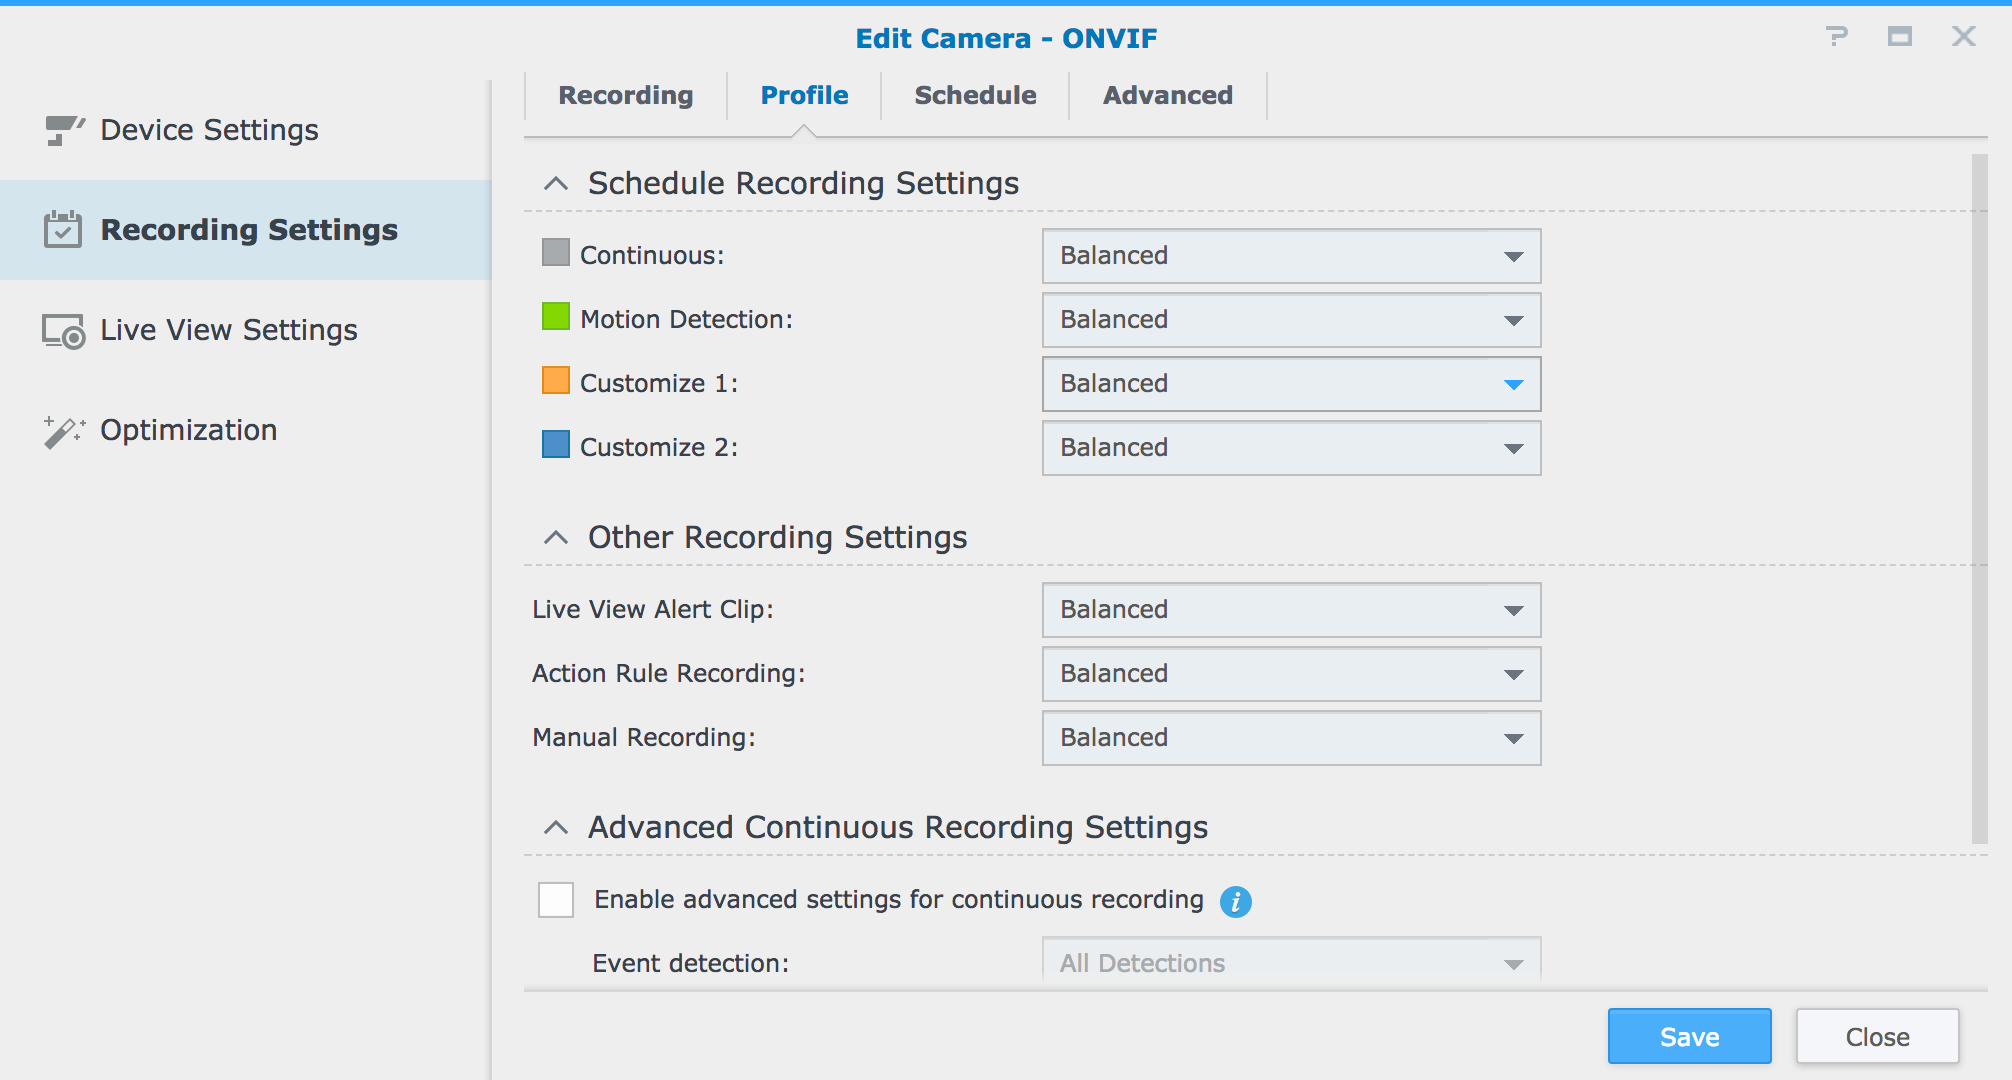
The Profile page also features the ability to enable advanced continuous recording settings that let the recording switch streams when motion is detected or an alarm is triggered (e.g. if the camera is continuously recording at a lower quality to save space, it can be set to switch to a high-quality stream when motion or an alarm triggers the camera)

Schedule
The schedule page lets you set a custom schedule for when the camera should record and whether the camera should record continuously, only when motion is detected, or custom type of recording.

Advanced
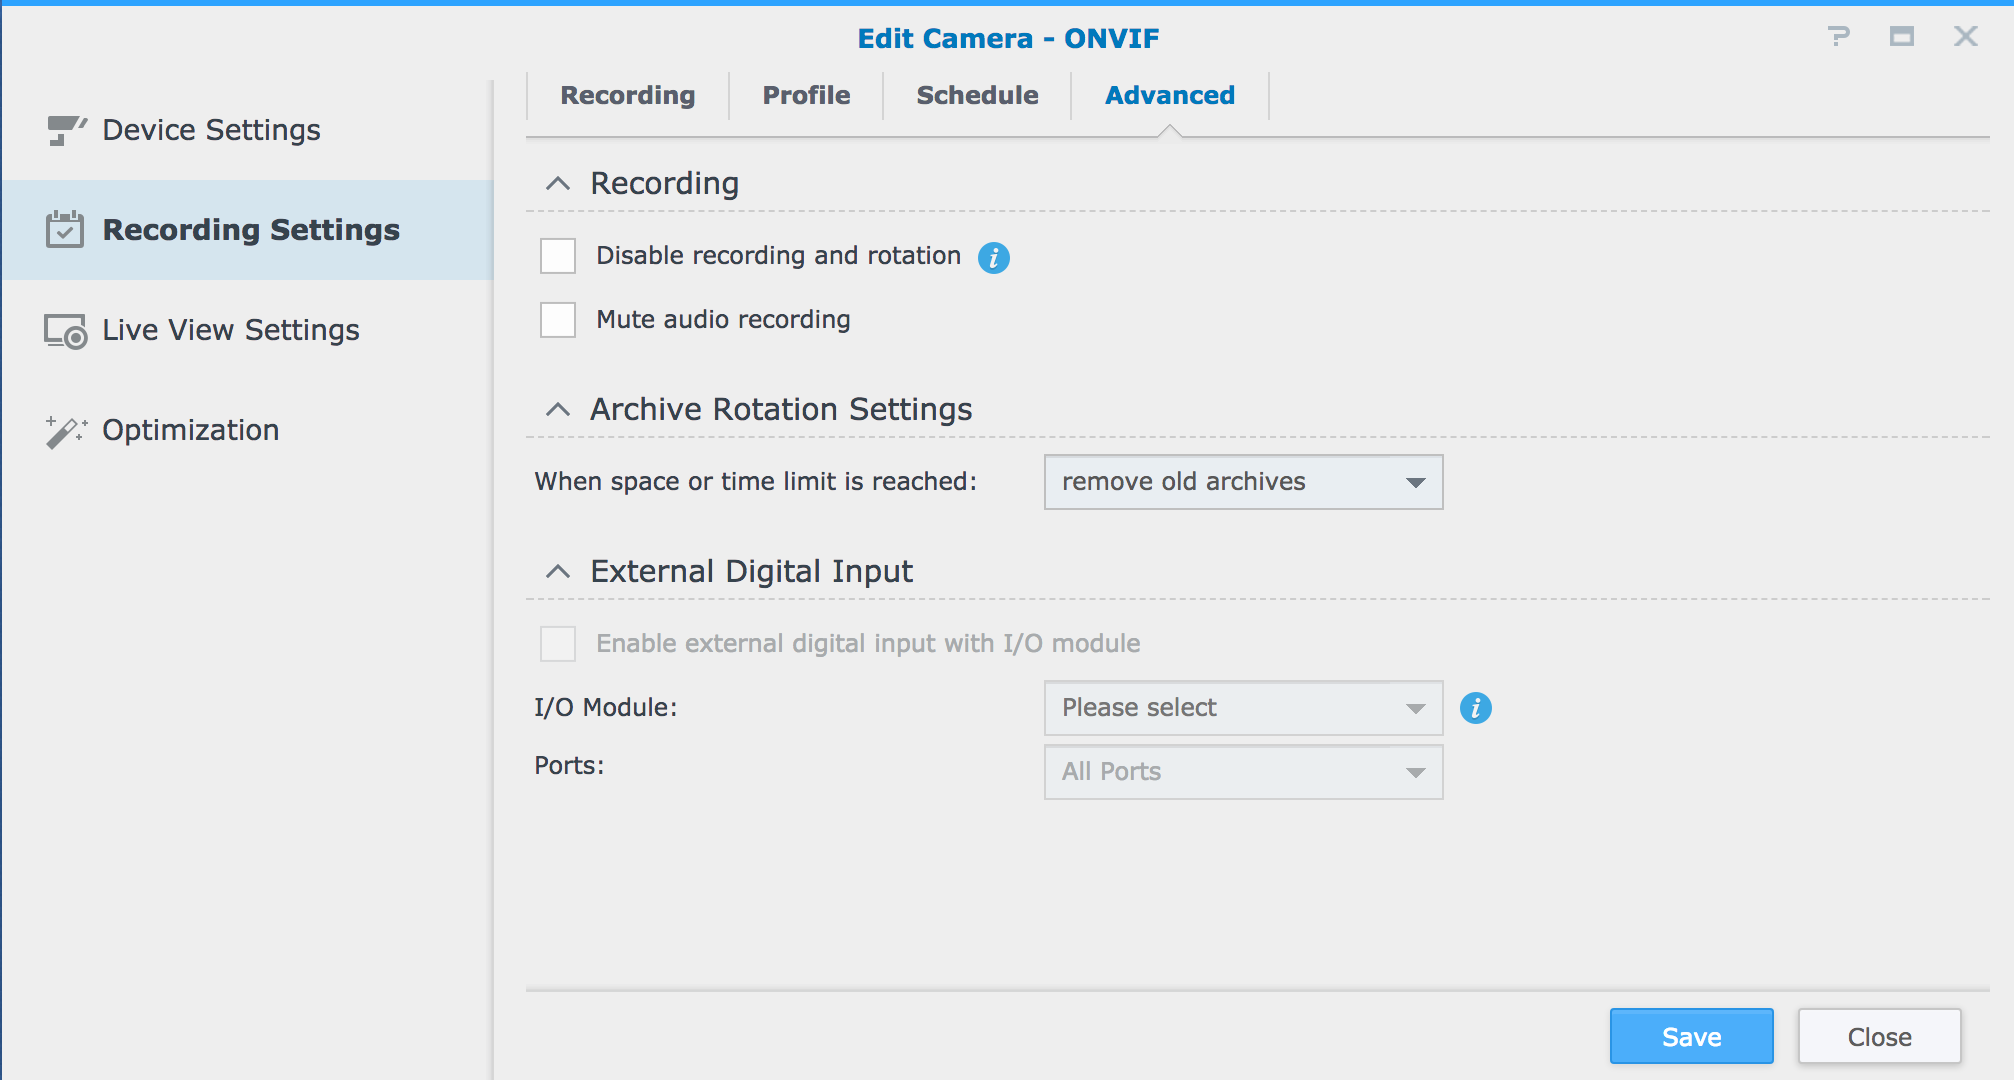
The advanced page has some other important recording settings like tick boxes to disable all types of recording and disable audio recording (it is important to be aware that recording audio will increase the storage used by the camera). This page will also let you set what the camera does when the recording space is full, you can either have it set to overwrite the oldest footage or the camera can be set to just stop recording. On this Advanced page you can also set up an External Digital Input – this feature is only available on certain camera models
Live View Settings
General
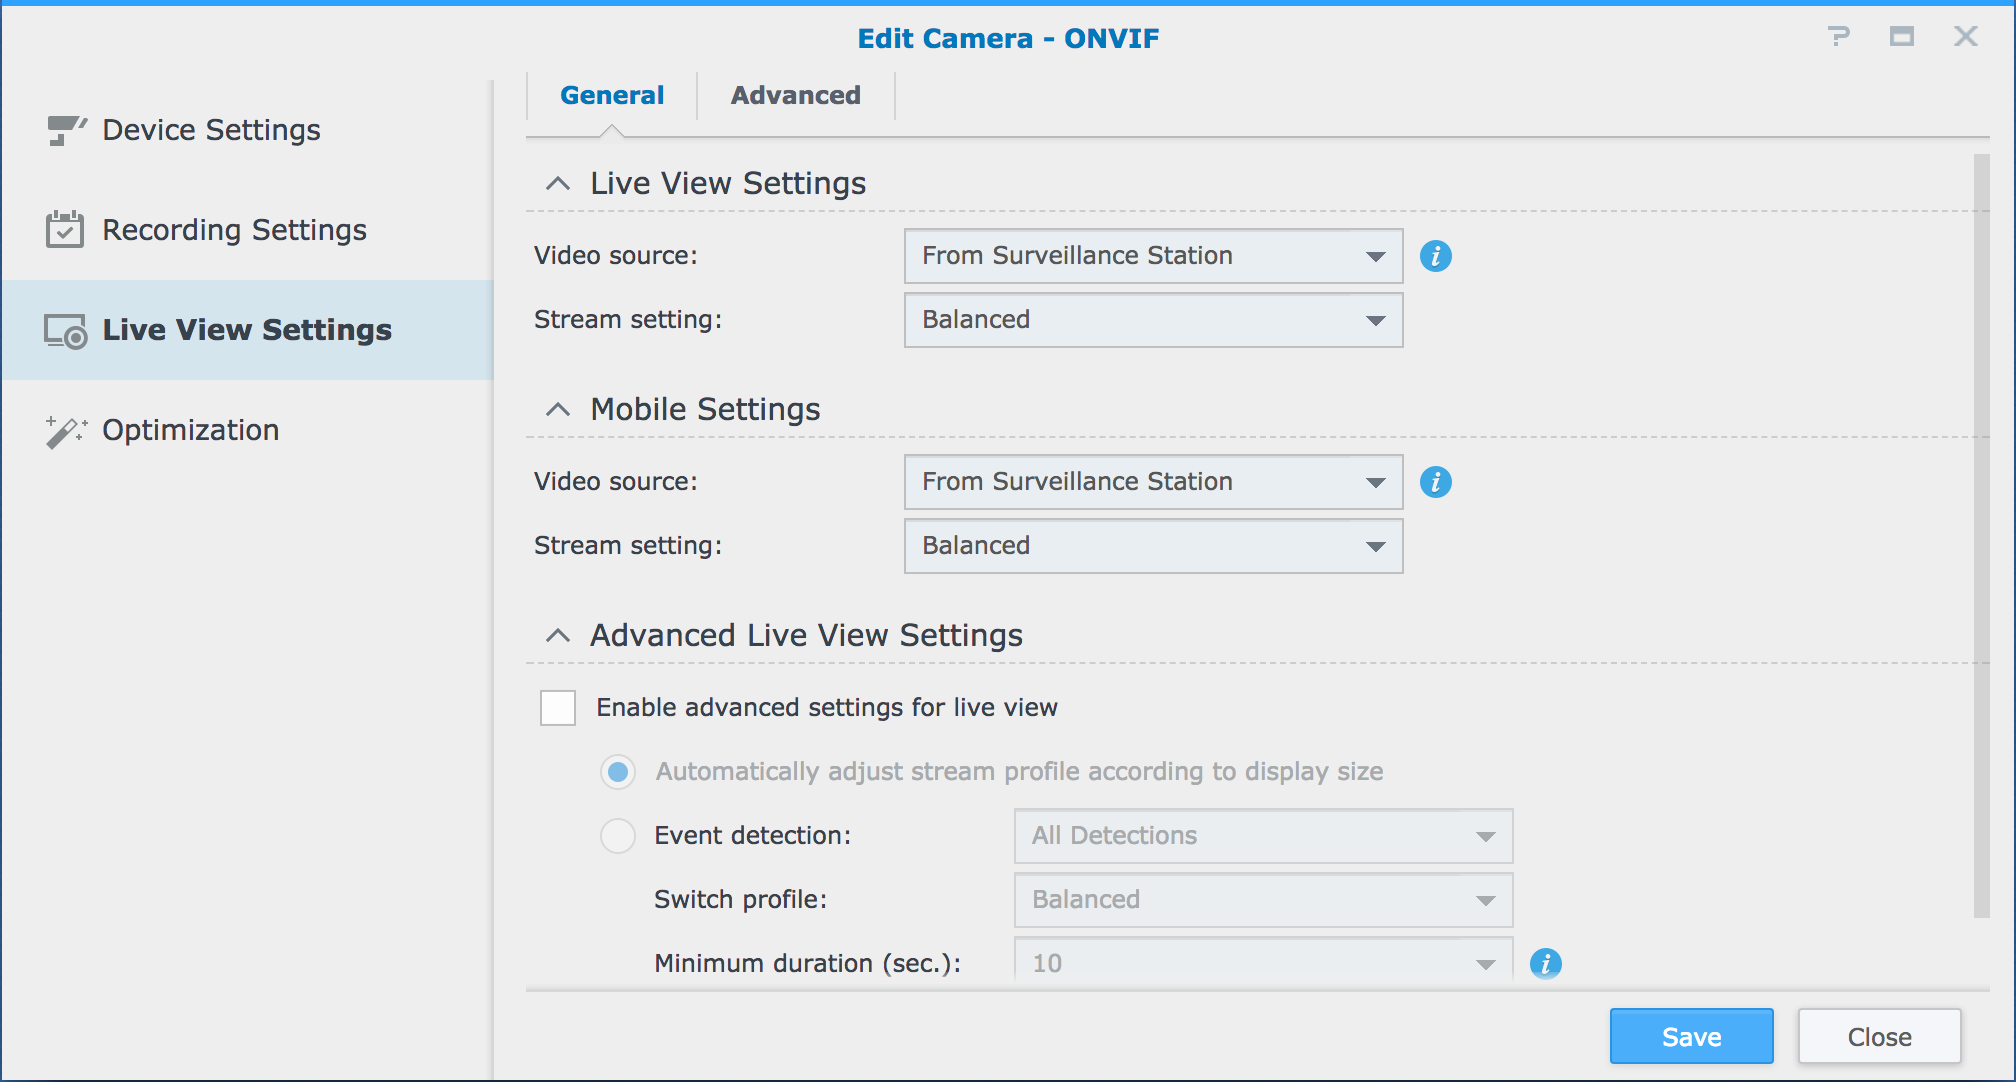
The General settings page lets you set the stream that the camera will use when you are live viewing the camera from a browser and on the mobile app (the video source will default to “from surveillance station”, you can change this to from the camera but you will have to port forward the camera first), also on this page you can set up advanced settings to have the stream settings change when motion or events are detected.
Advanced
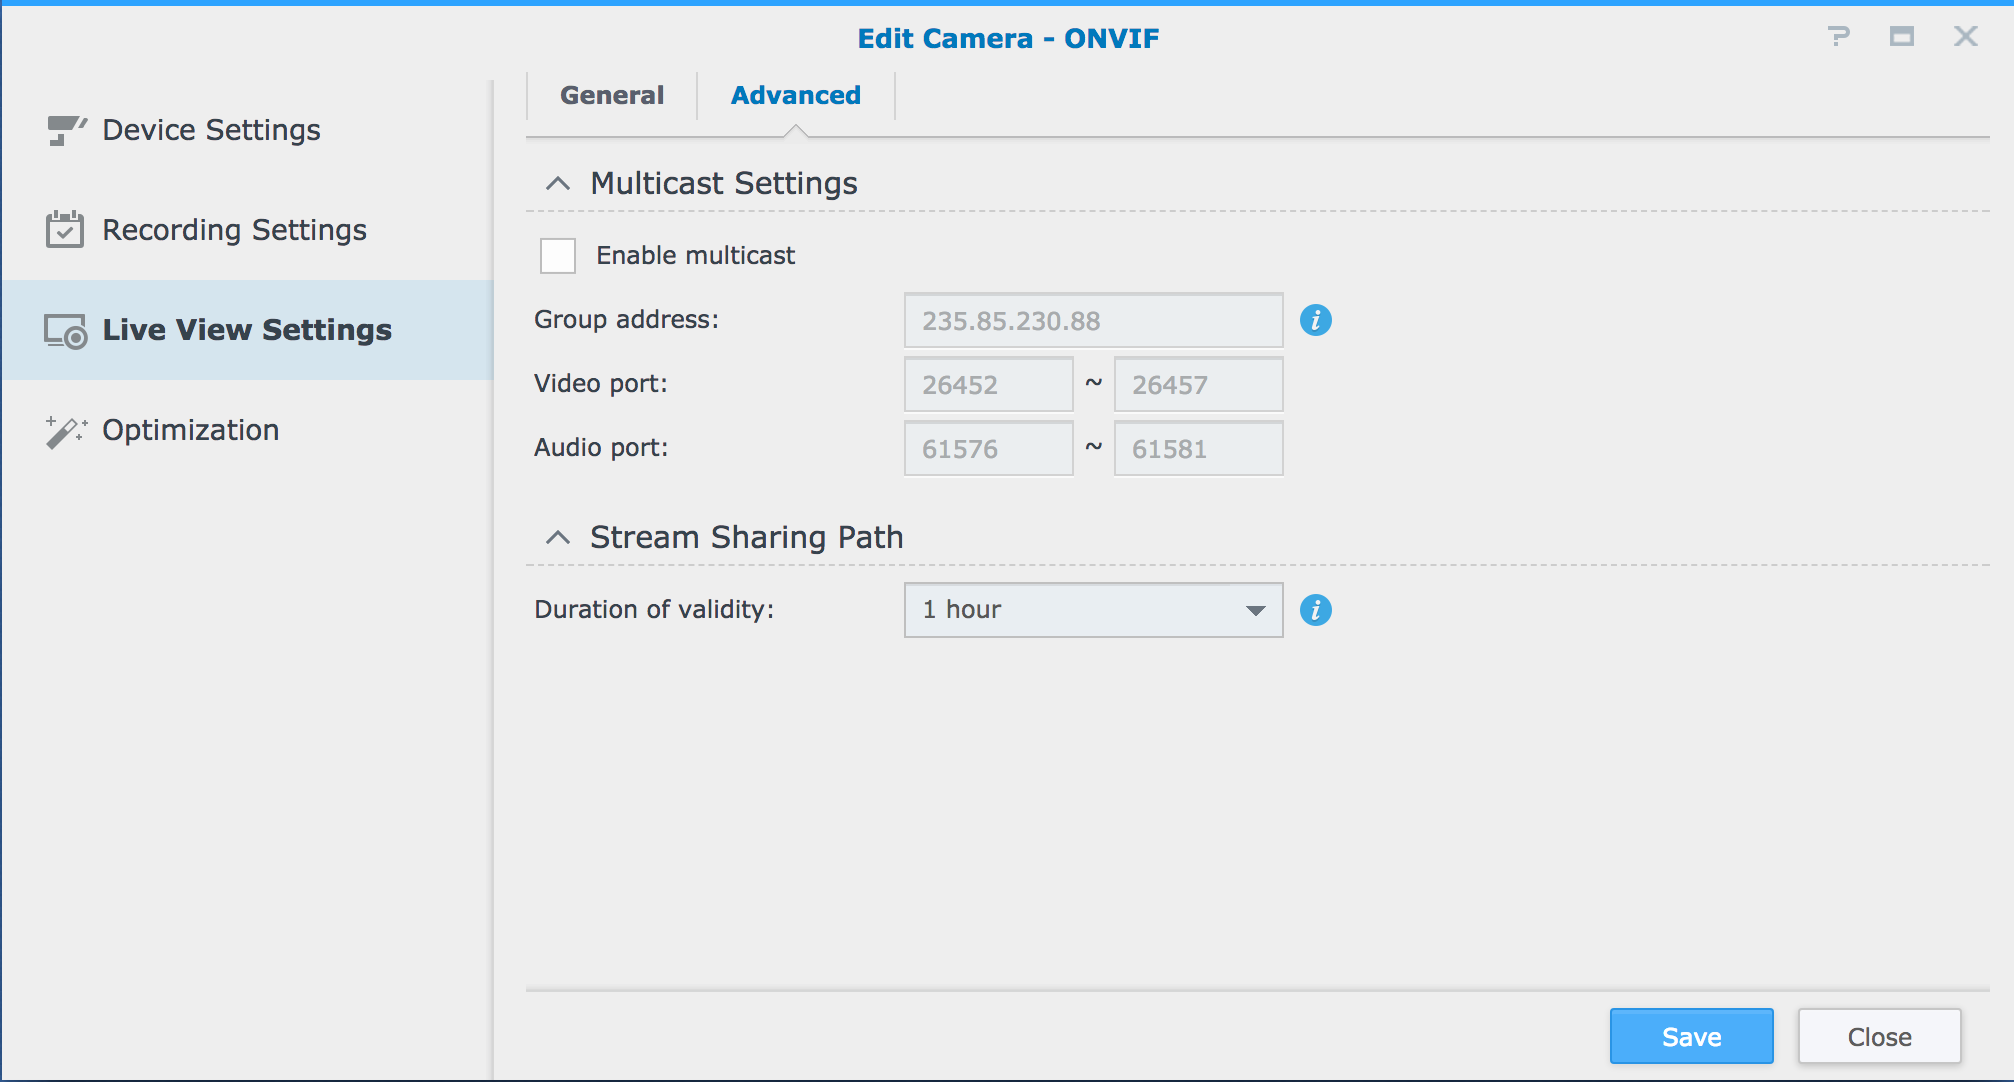
Advanced page lets you enable a feature called multicast, this is a feature that for most people operating a small IP system won’t be necessary, but if you need more support with it just ask)
Optimization
General
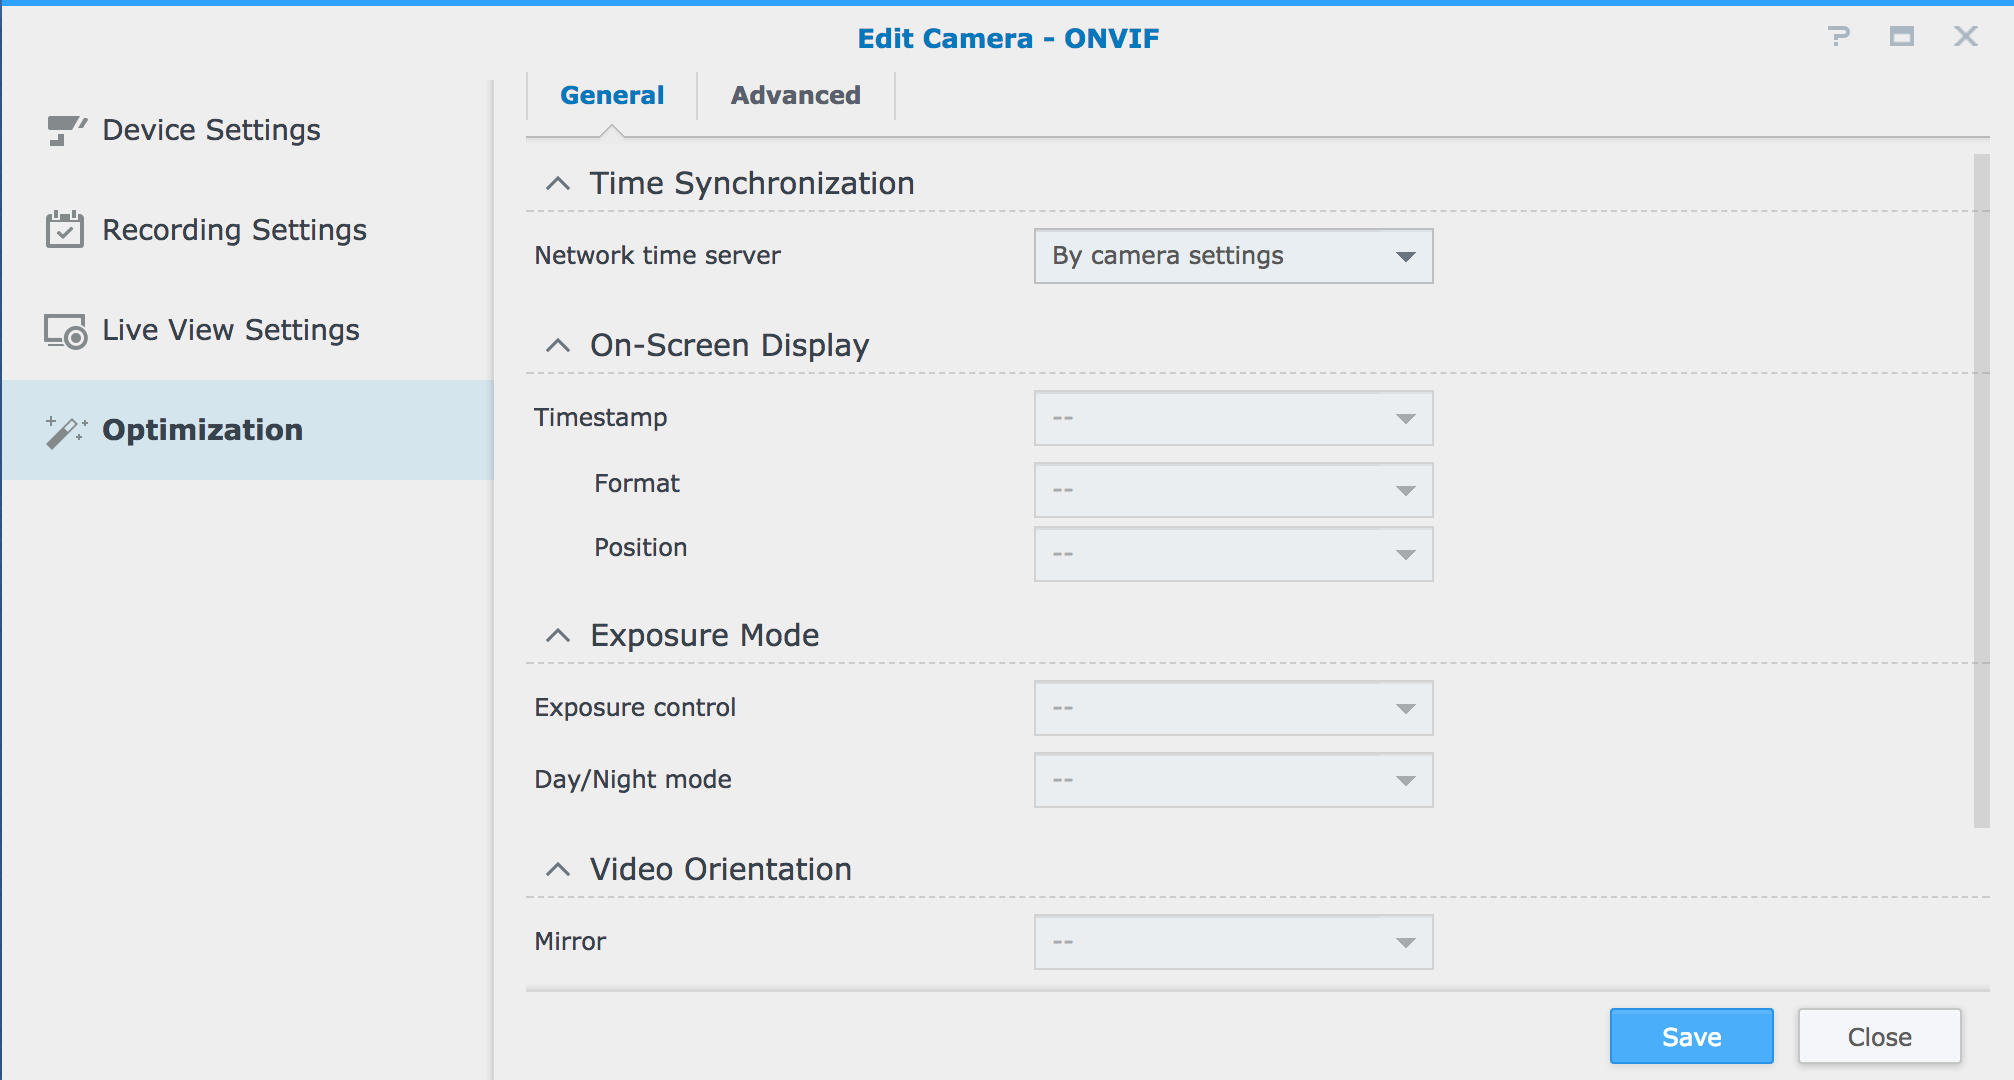
The general page allows you to edit some settings of the camera like Time/Date, Exposure Mode, Video Orientation, etc. The extent of how much control you have here all depended on the camera model and whether it is fully compatible with the Synology software (don’t worry if you are connected via ONVIF and these settings are greyed out, as you can still log in to the cameras individually and adjust the cameras from their own menus)
Advanced
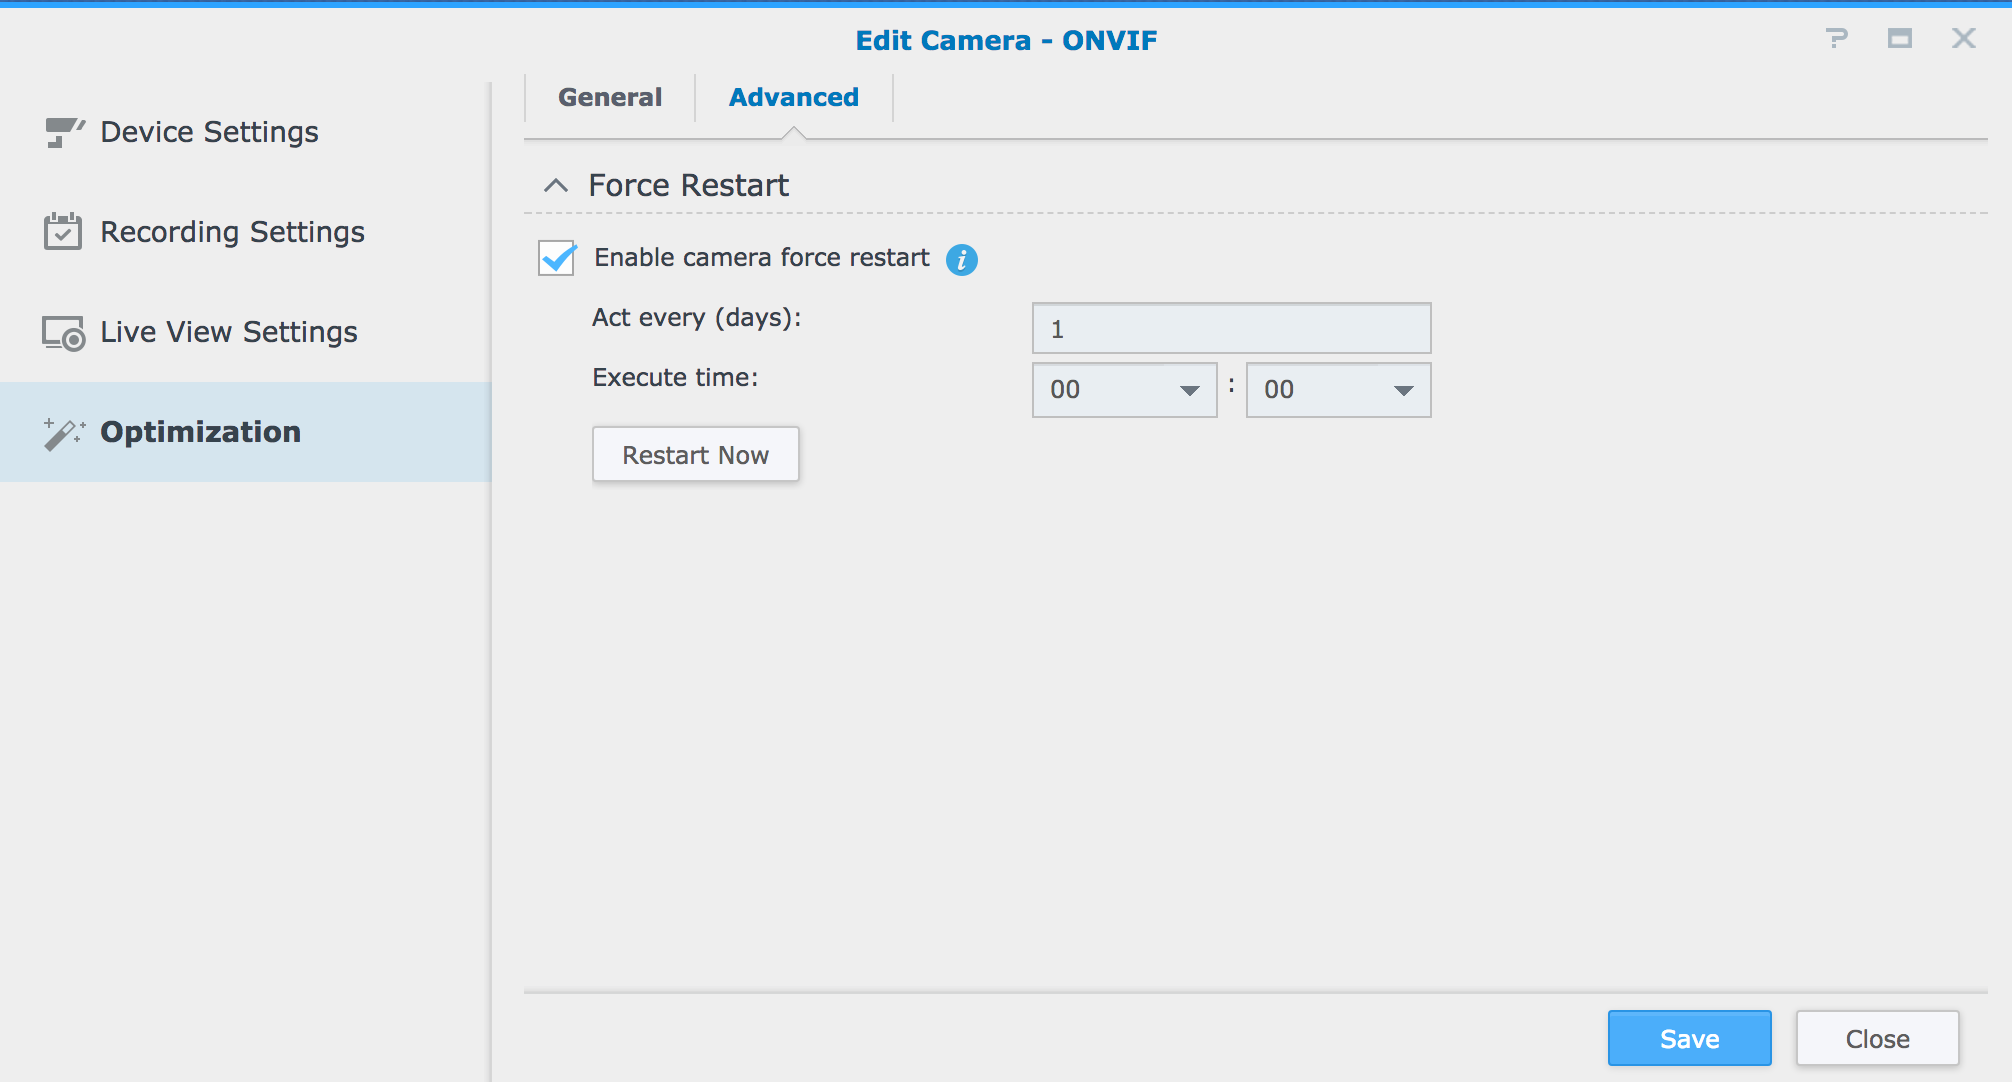
The advanced page is the final settings page and it allows you to enable the camera to force restart, this feature is only really important if you are using cheaper cameras as they can sometimes shutdown or drop of the network if left running for too long without a reboot, so this setting lets you set the camera up to automatically restart when a certain time is reached (this isn’t really needed for the higher quality products we sell e.g. Hikvision, Milesight, AXIS, Wisenet as we very rarely see cameras from these manufacturers disconnect or shutdown)
And that is all the settings covered, once you are happy you have the settings the way you like you can click save and you will be taken back to the IP camera window and if did disable the camera you can now enable the camera and you should see a red record circle appear on the thumbnail of the corresponding camera.
You can now live view the camera by clicking the icon on the home screen or after few minutes of recording you can click the timeline or recording icons to view your stored footage – we will go over the features of the Recording, Timeline and Live View windows in another forum post
