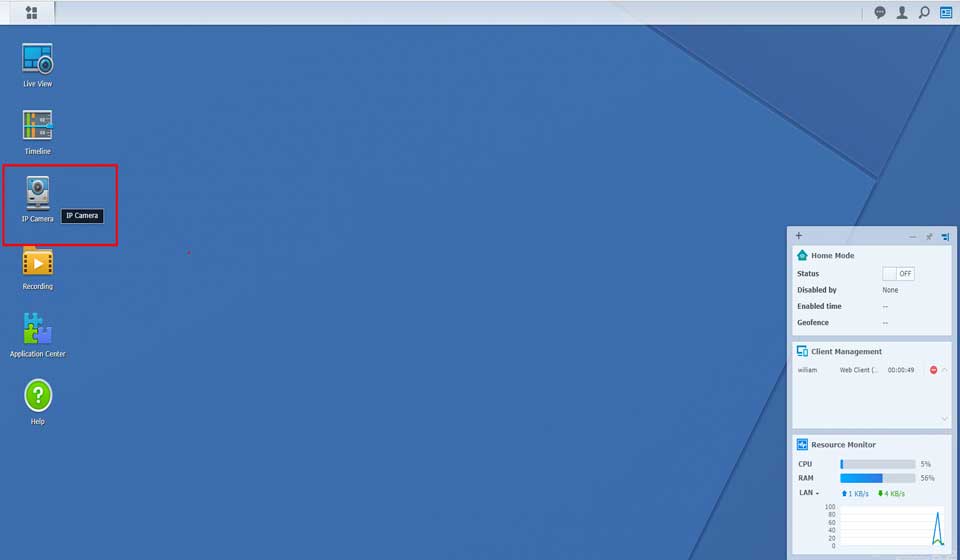
Method 1: NFS Connection
1. Please power on the camera and the NAS system.
Both the NAS and camera should be connected to the same router/network by Ethernet cables.
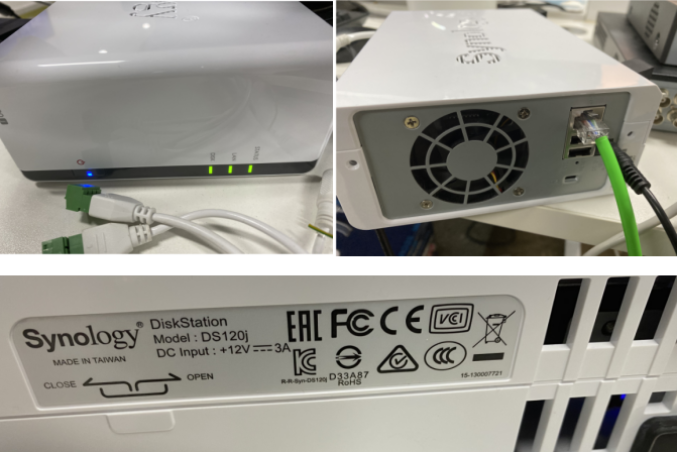
2. Download the Synology Assistant software via the link below.
https://www.synology.cn/zh-cn/support/download.
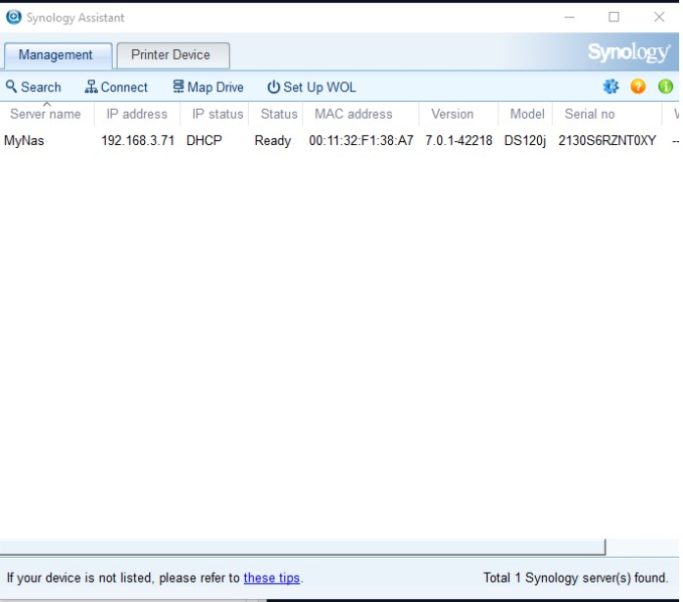
3. Please run the Assistant software on the computer. If the NAS is running, it will be detected.
How to Connect The IP POE Camera to NAS
Read More : CCTV Super Password
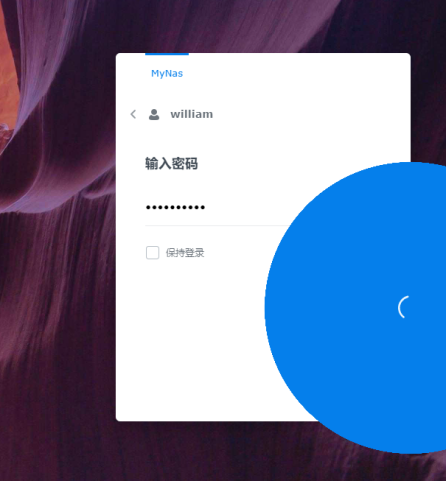
4. Access the NAS with its IP address.
5. The user name and password is the account of your NAS.
6. Please check the Storage status that should be “Healthy”.
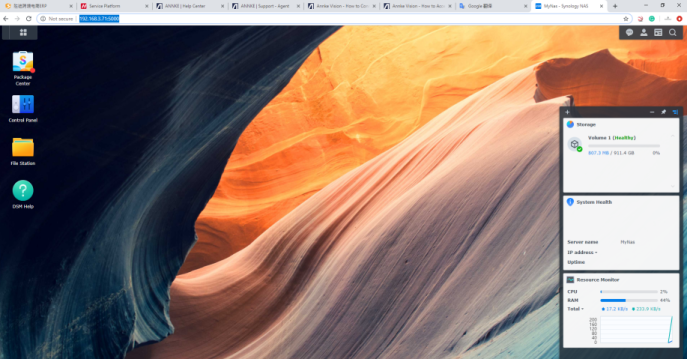
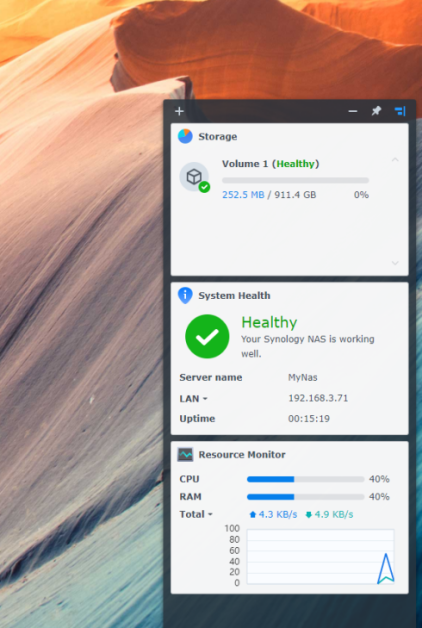
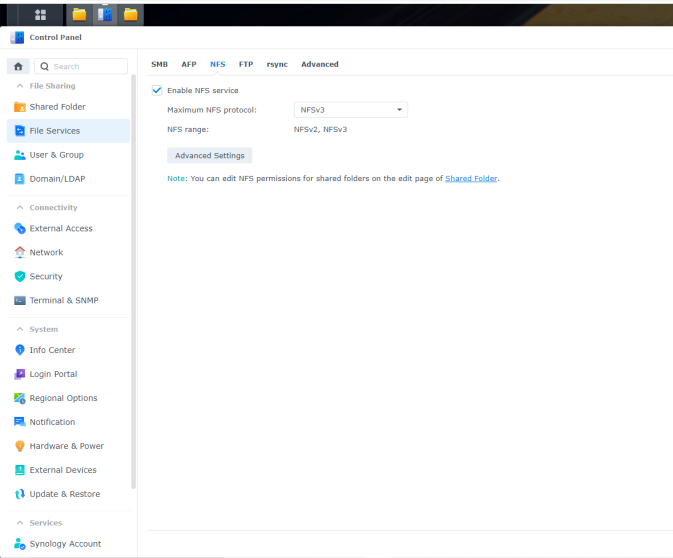
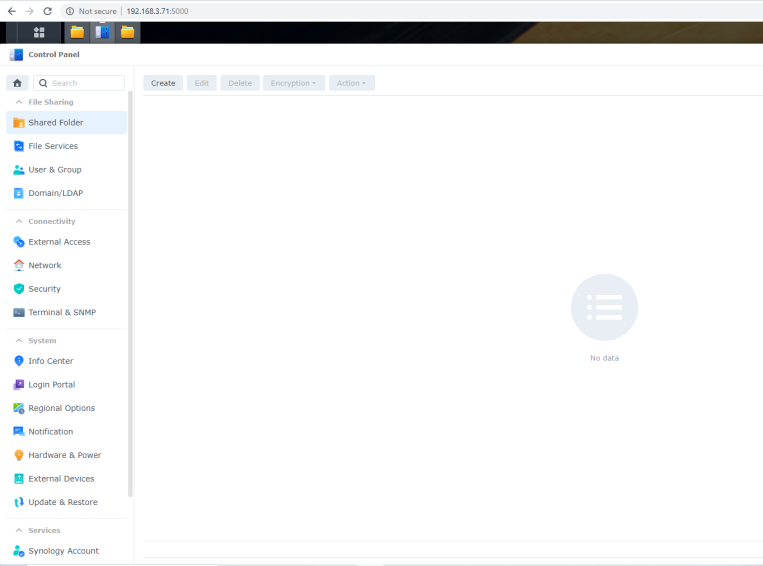
7. Go to File Sharing–File Service to enable NFS service.
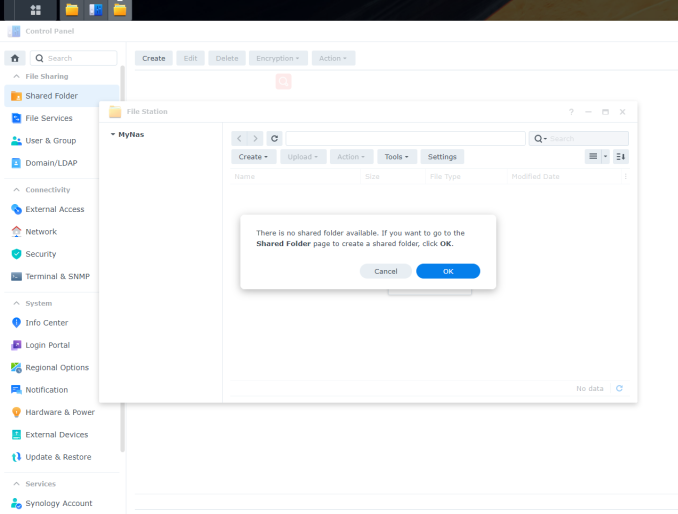
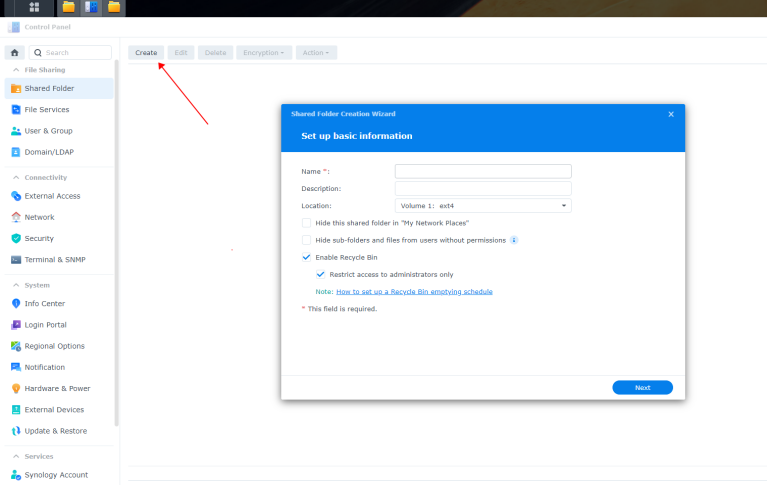
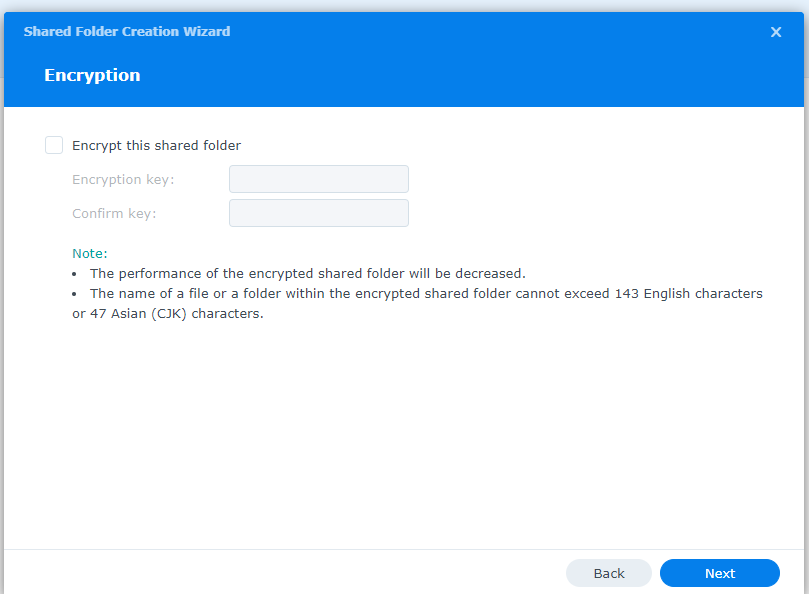
8. Go to Shared Folder to create a file to save the records from the camera. The Name can be anything. And click Next until you see the “NFS permissions”.


9. Click “Create” to allow permission for the camera.
Hostname or IP: it can be * or the IP address of the camera (see step 10).
Privilege: Read/Write
Squash: No mapping
Security: sys


Then you will see the result like the picture below.
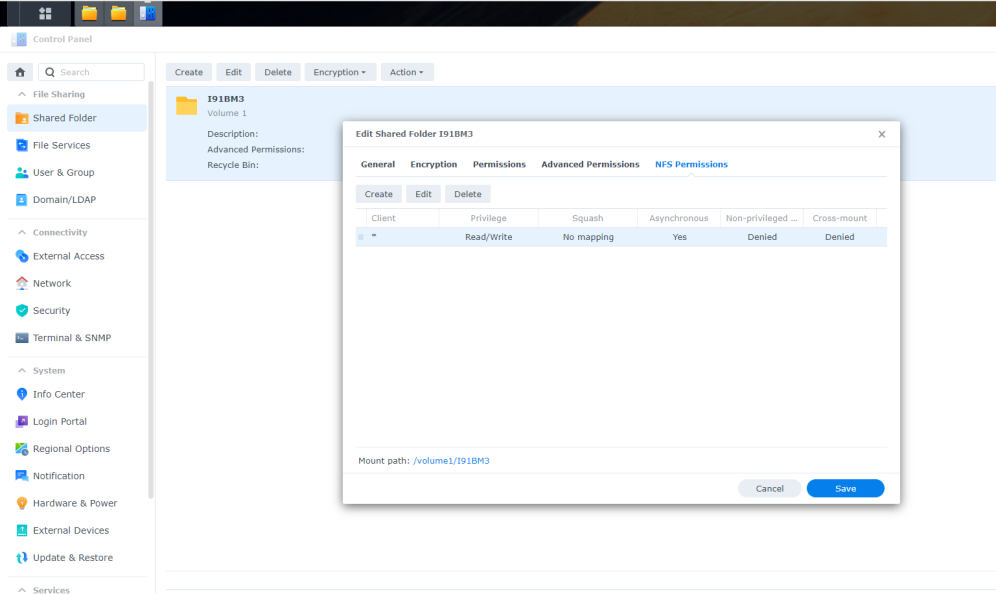
Finally, the settings on NAS are finished. Please remember the path of the camera on NAS. The path can be found in the left corner of the picture above.
Now let’s go to configure the settings on the camera.
10. Please refer to this instruction to find the IP address of the camera and access the Configuration. https://help.annke.com/hc/en-us/articles/900003867006
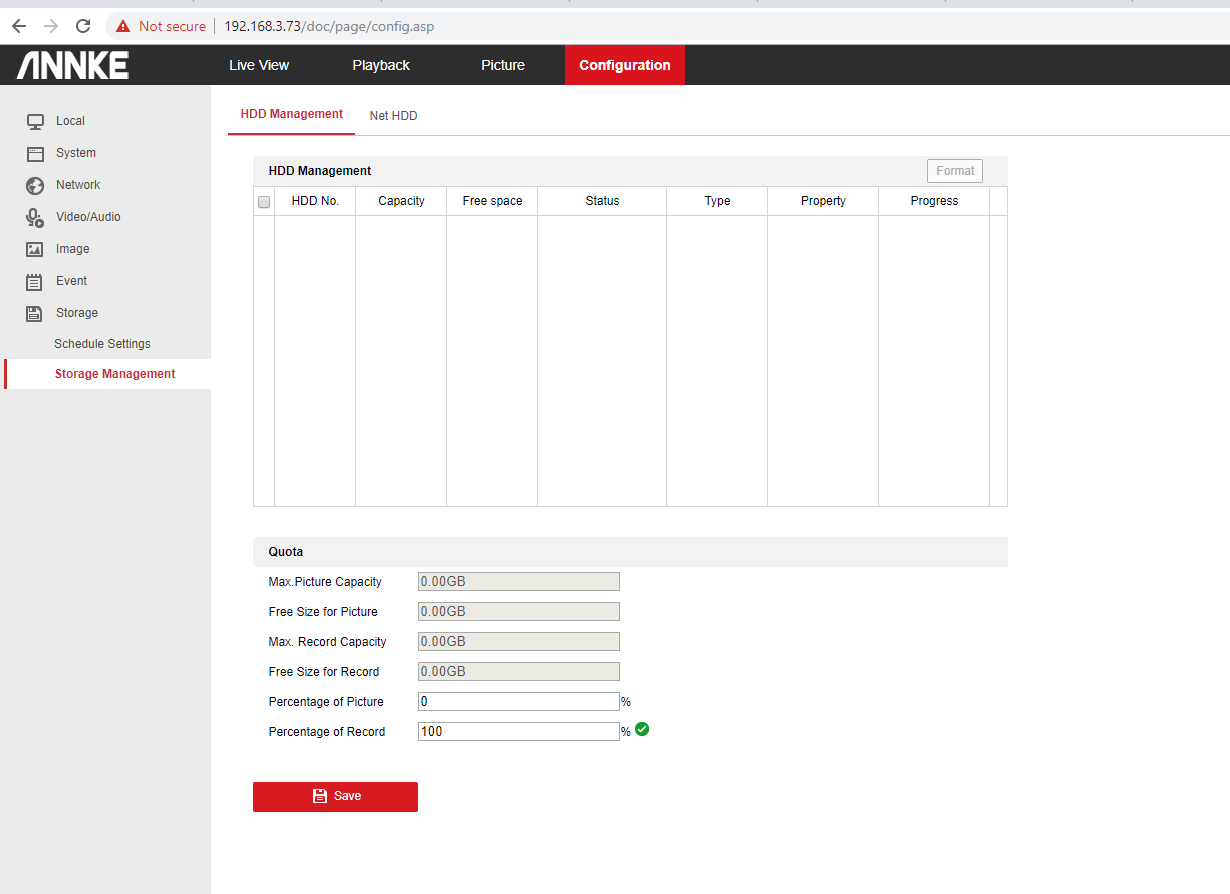
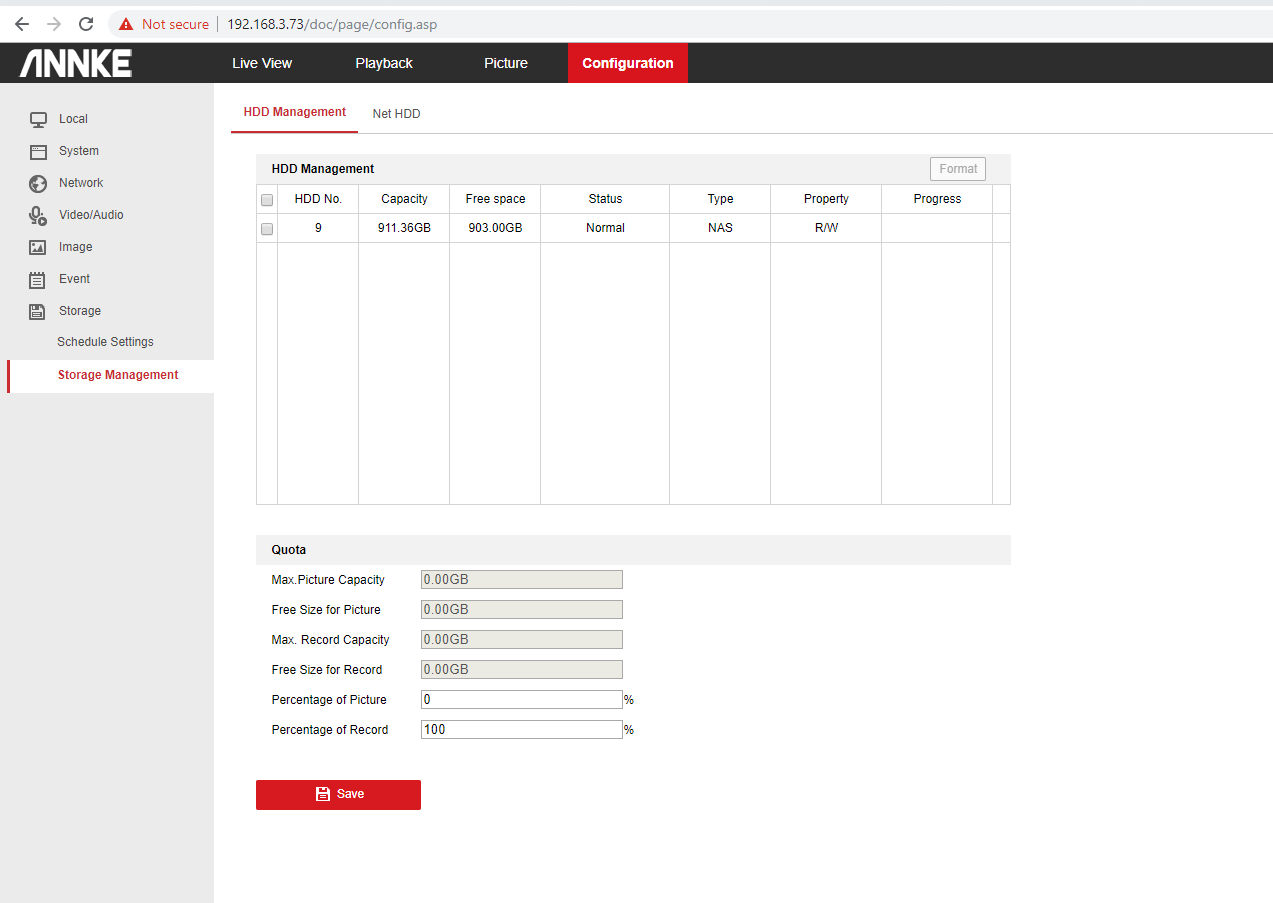
11. Go to Storage Management–HDD Management. Please adjust the “Percentage of Record” to 100%. Otherwise, the HDD formatting will be failed.
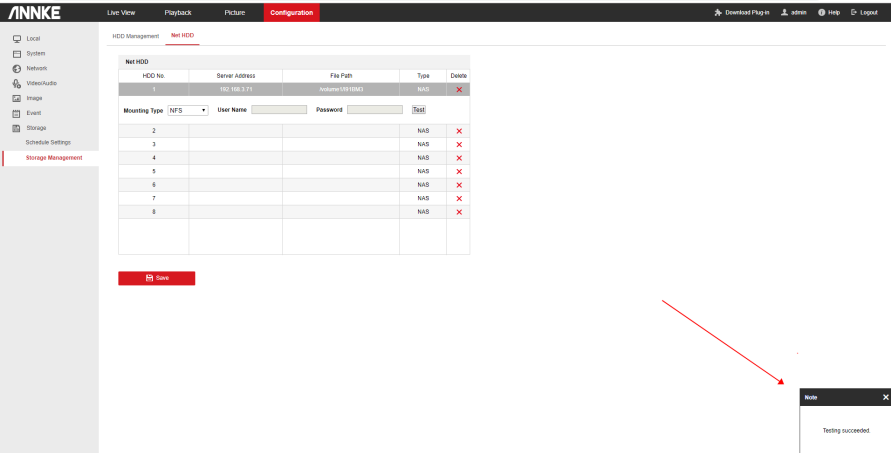
12. Go to Net HDD. Click the Gray shift to enter the IP address of NAS. And the file path that you created for the camera on step 9.


13. After that, please click Test. If you can see “Test succeeded”, the connection is working.
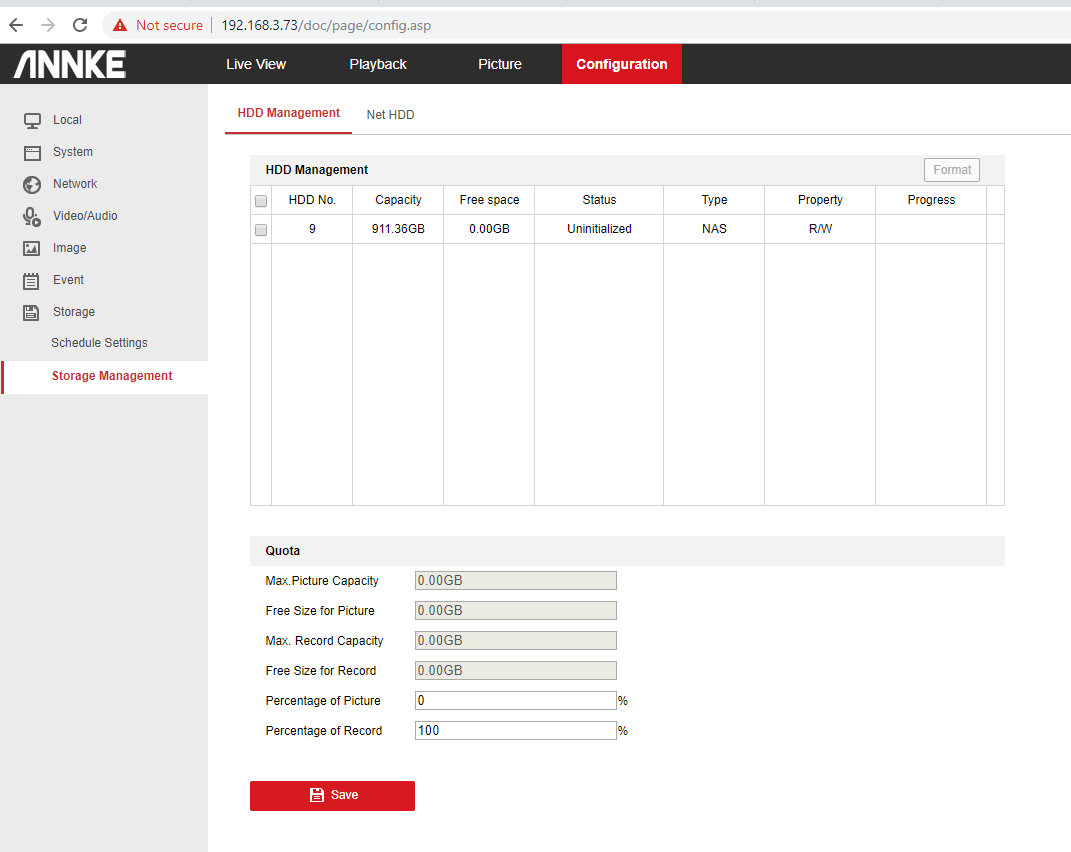
14. Go back to HDD management, you will find the NAS as the HDD.9
The HDD status will be Uninitialized.
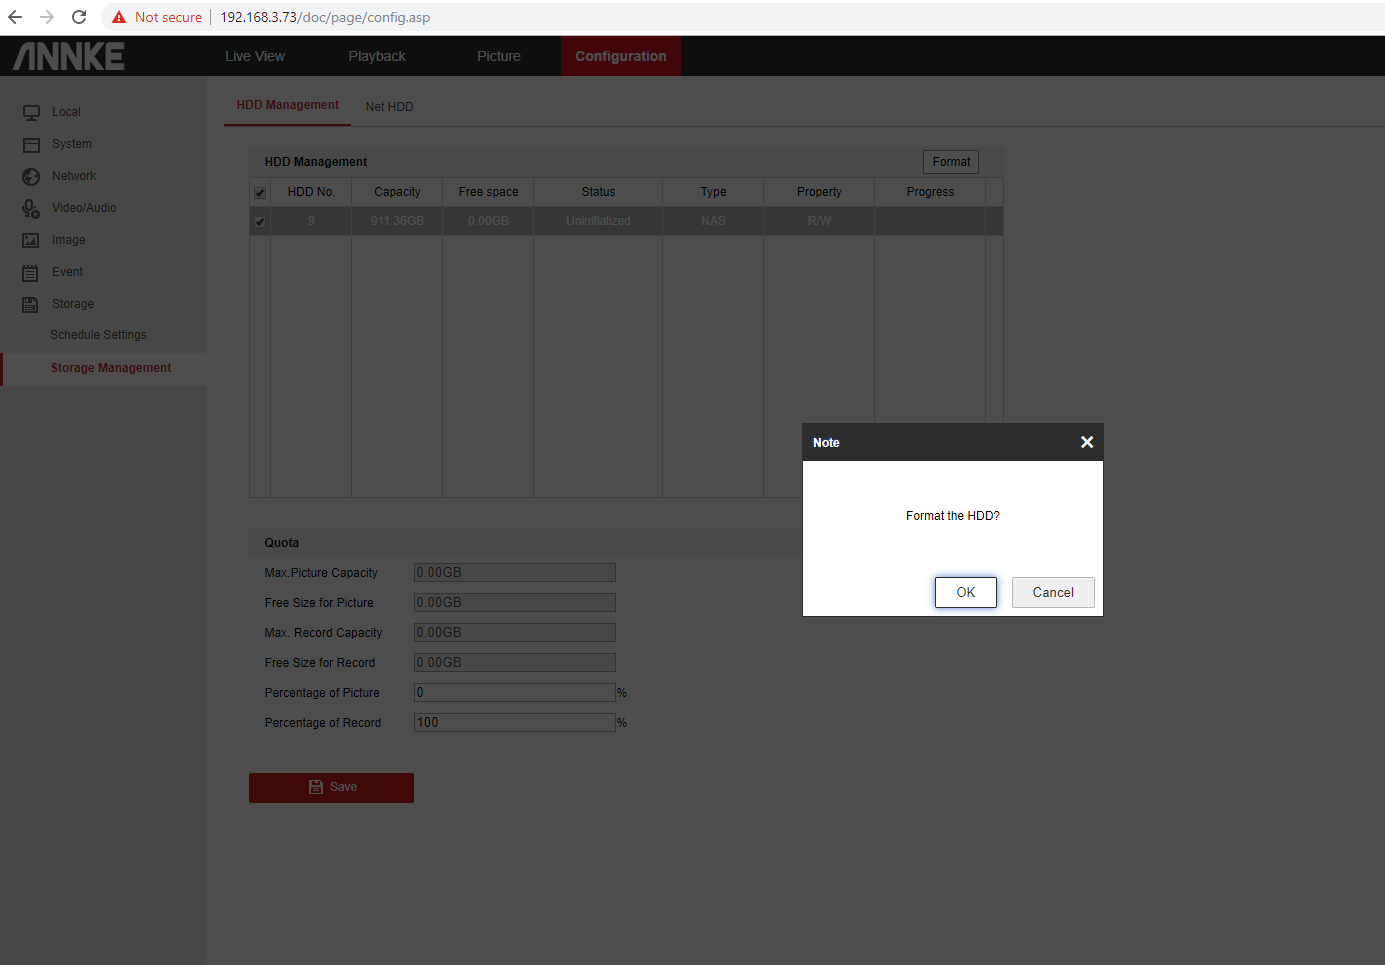
15. Click “Format” to format the HDD. The disk formatting duration depends on the disk capacity. A 1TB HDD may take 10 minutes for formatting. Please wait patiently until the status is automatically back to Normal.
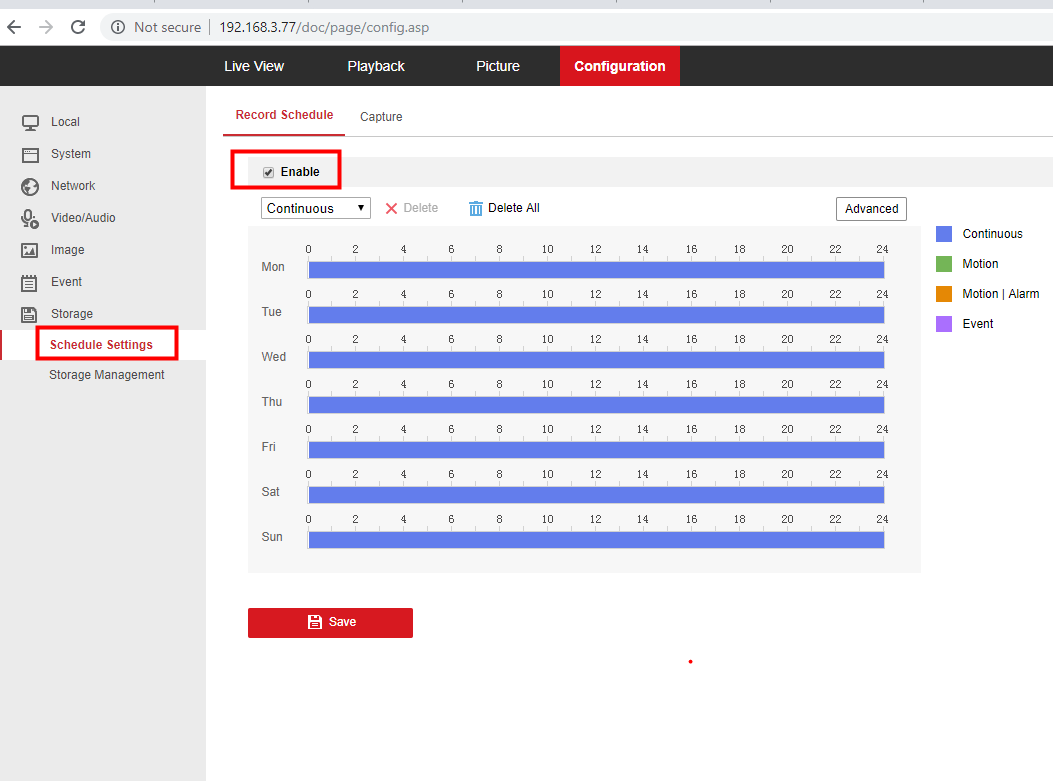
16. Go to Storage to set up a recording schedule.
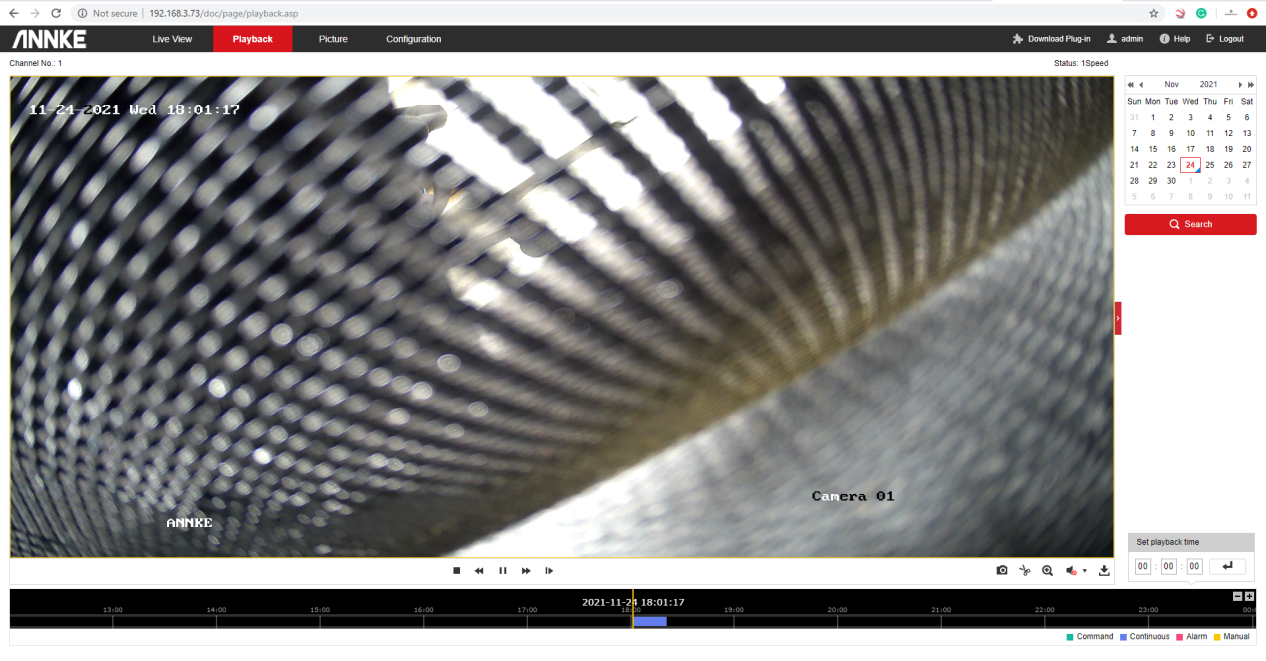
17. Waiting 10 minutes for recording and going to Playback to see if you can playback the footage.
If yes, the NAS is working.
Tips: You can also download the footage from NAS.
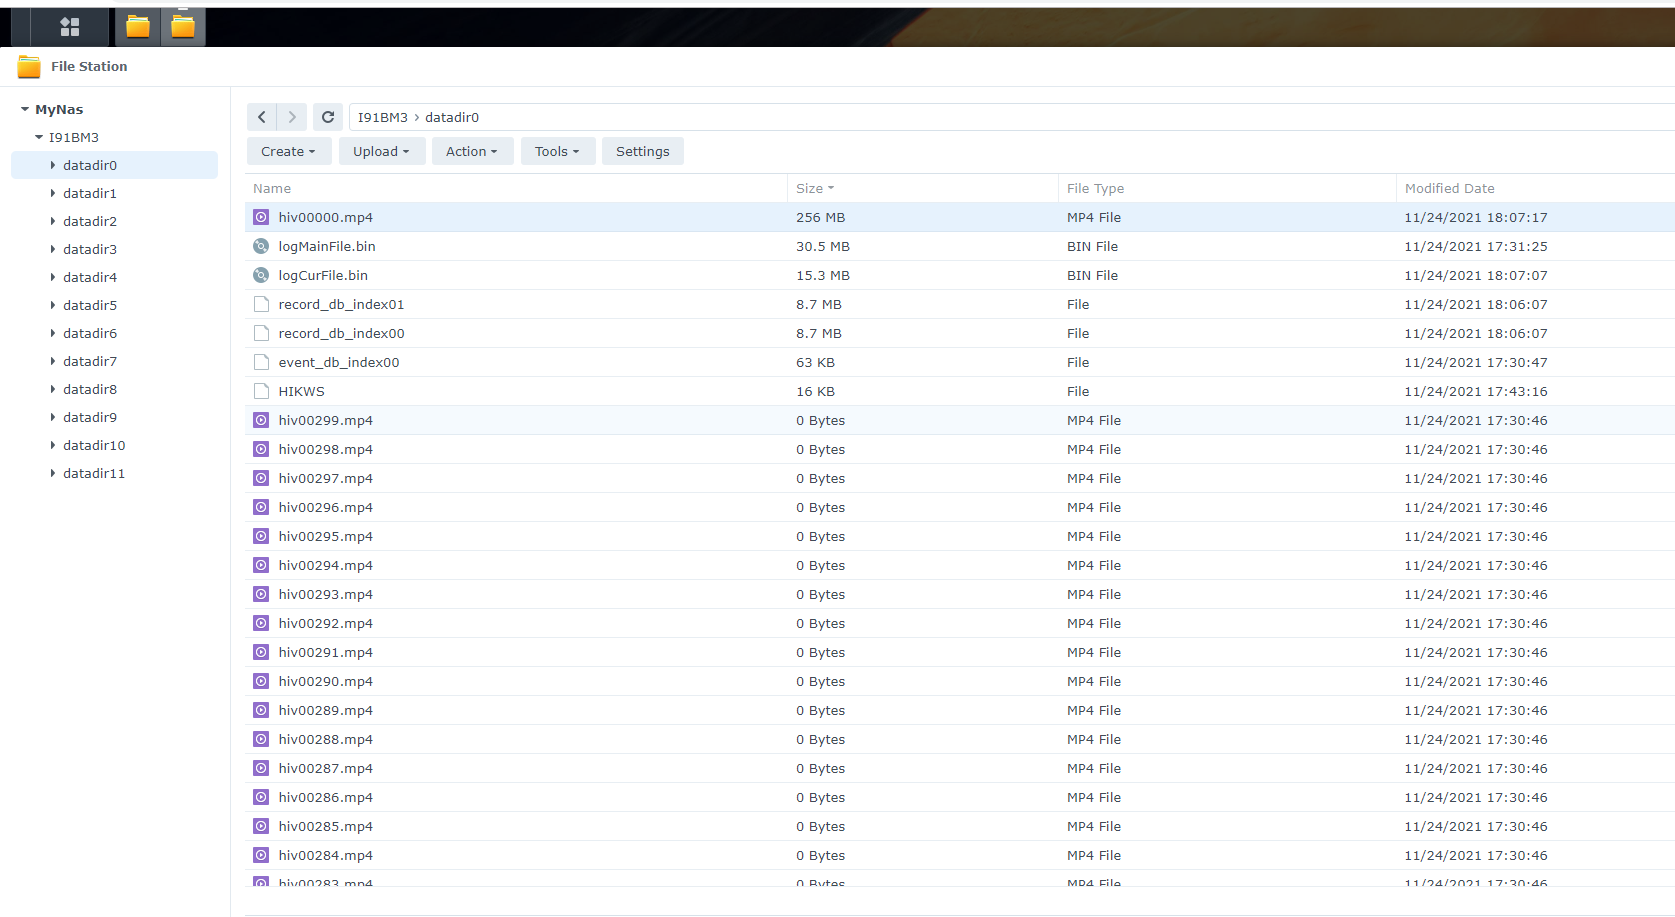
1. Access the NAS setting, and you will find there are many files that were automatically created.
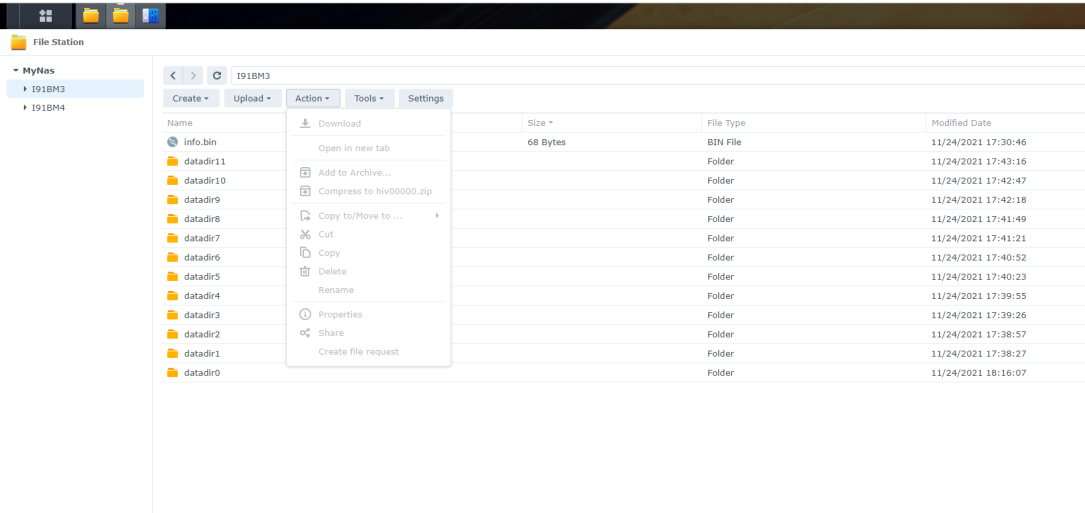
2. Find the MP4 files. Please note the size of the file.
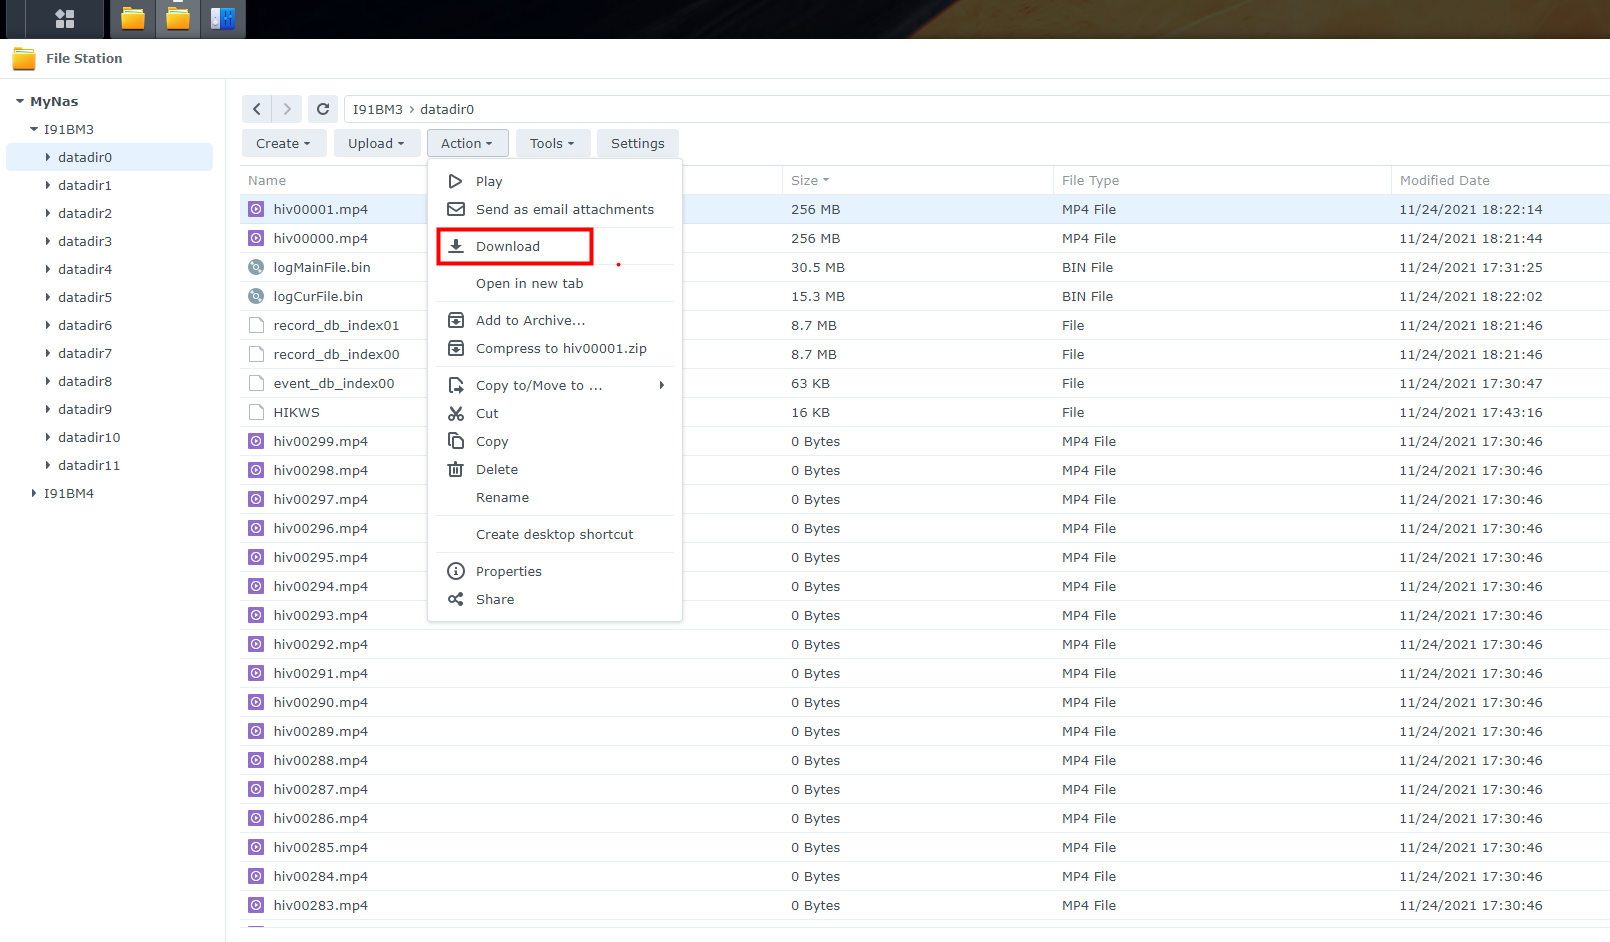
3. Right-click the mouse to download the MP4 file.
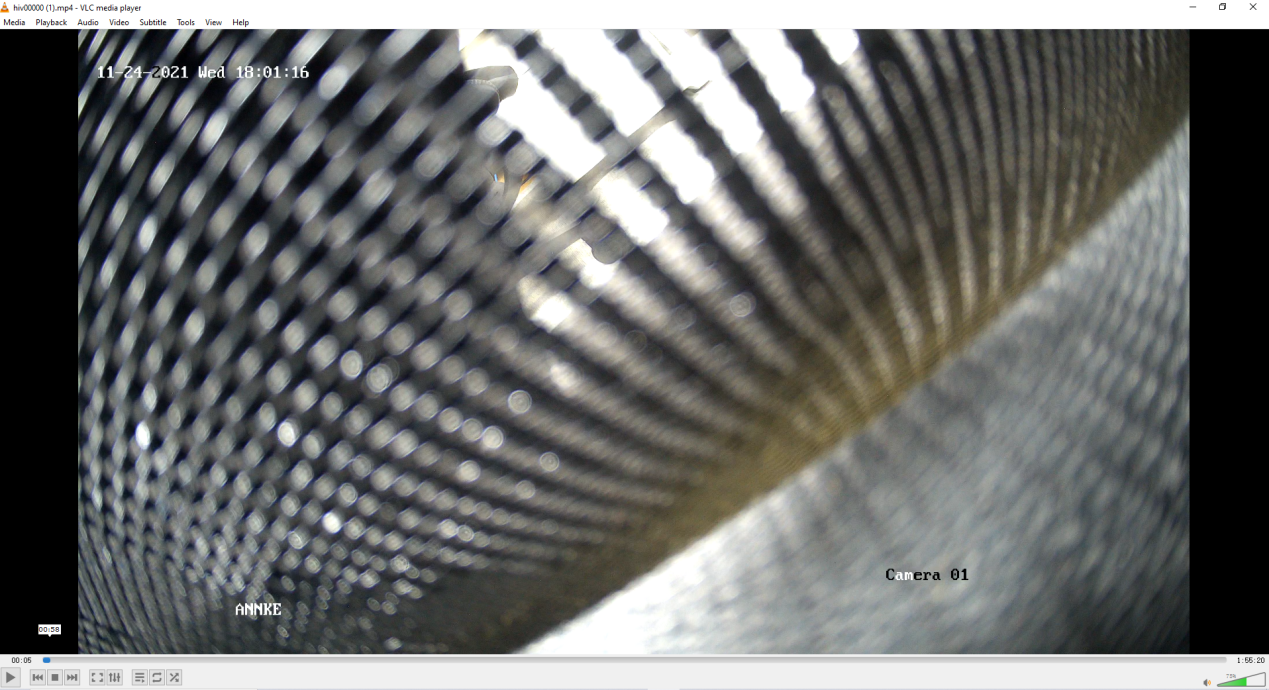
4. Please open the file with the VLC player or other player that supports H.265 format.
Method 2: ONVIF Connection
1. To start with, please refer to the instructions below to access the camera on the web browser. Then enable and create an Onvif account. Please follow steps 1-6 in the instruction below:
https://help.annke.com/hc/en-us/articles/900000598226
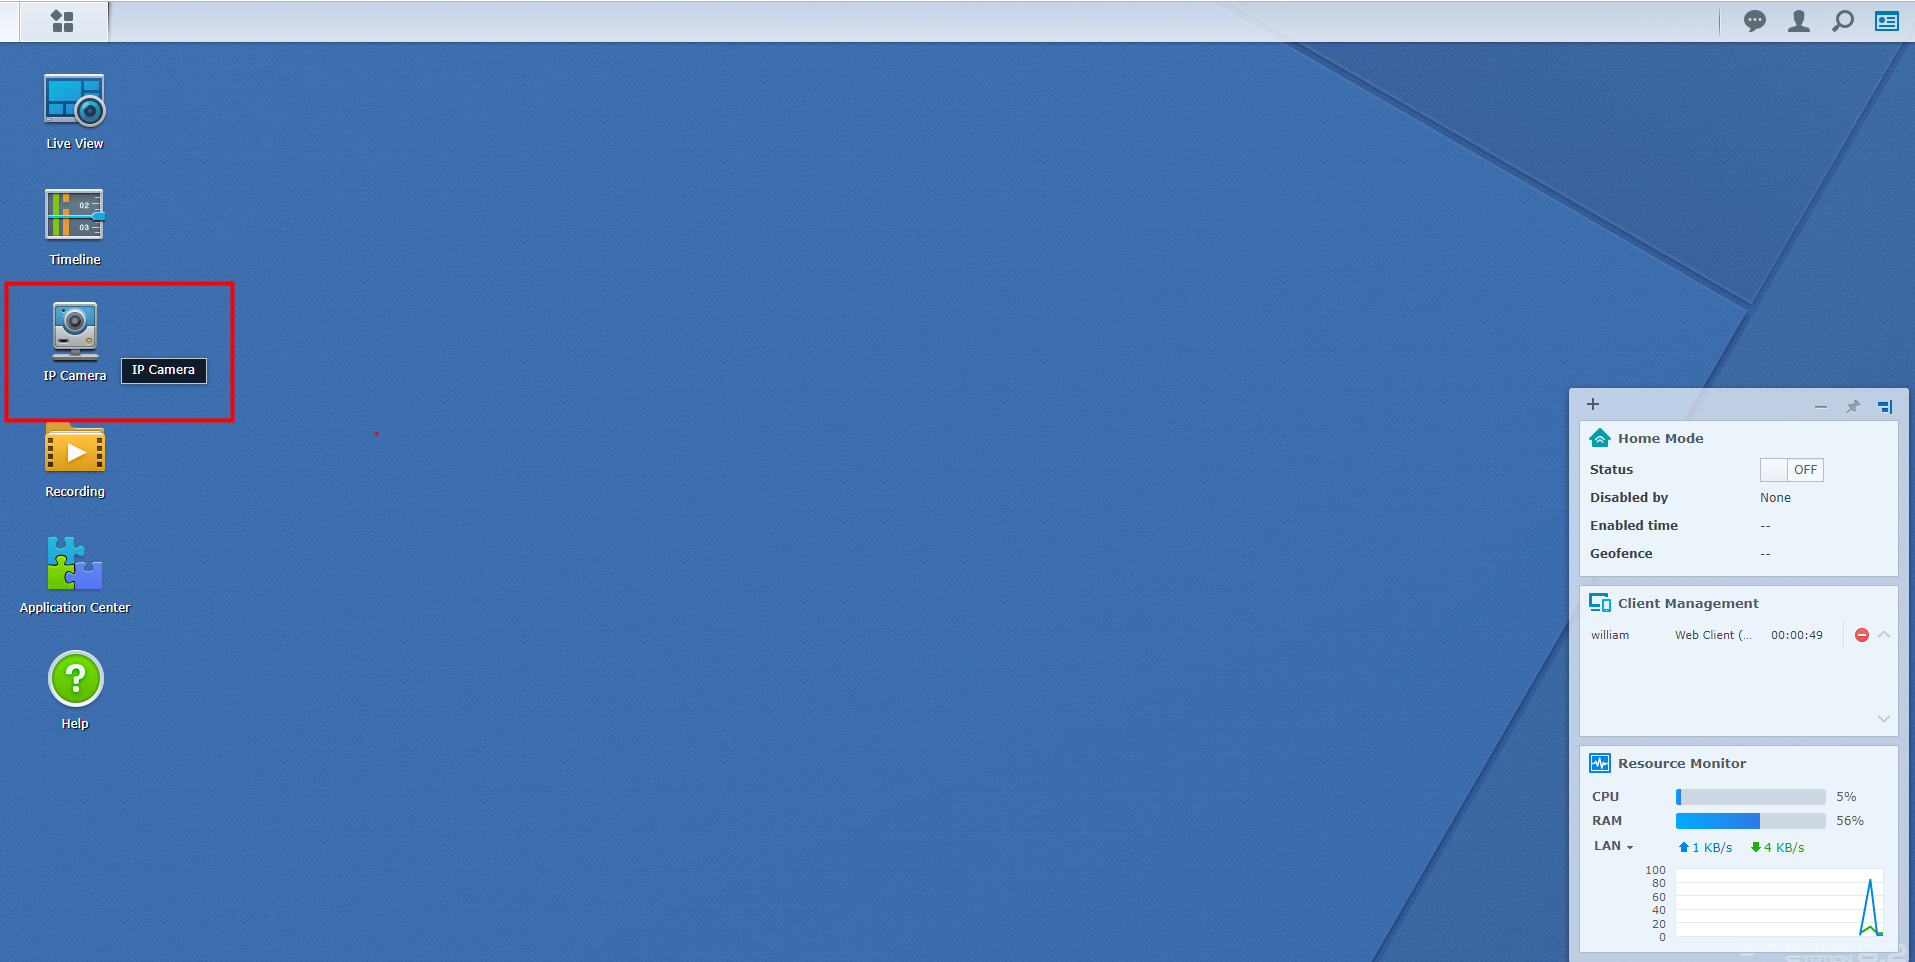
2. Access your NAS first and go to the control panel to find the Surveillance Station.
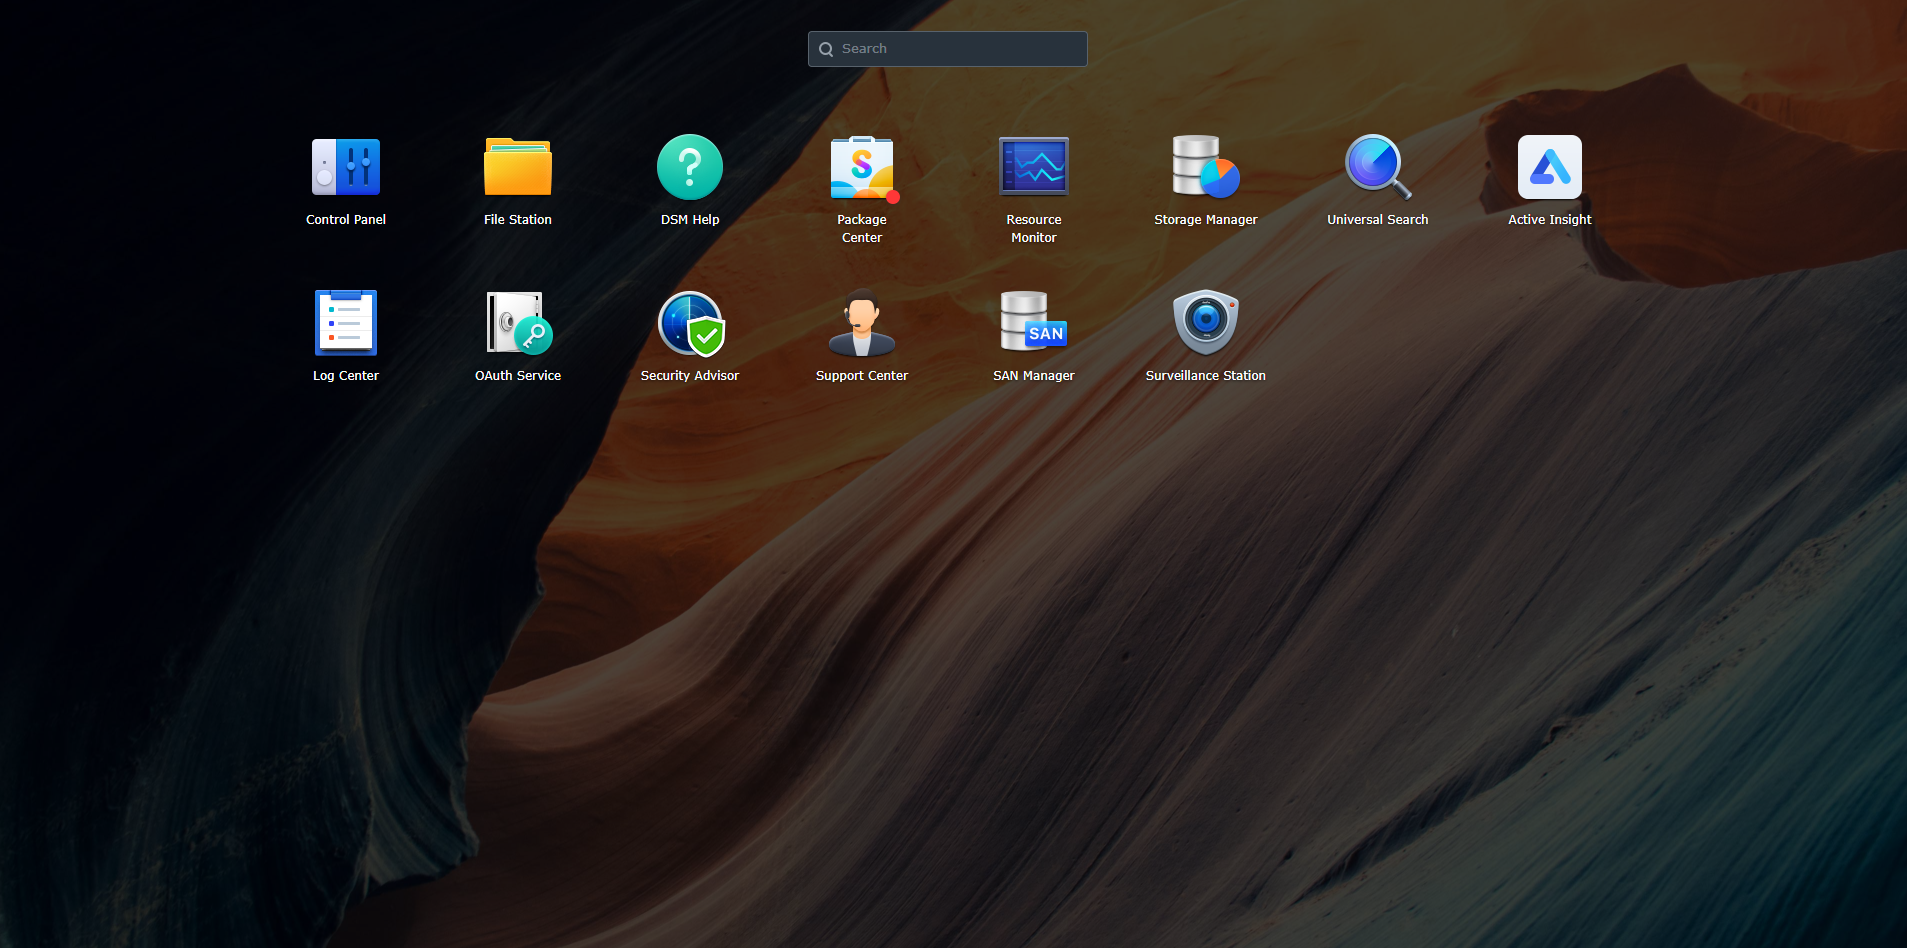
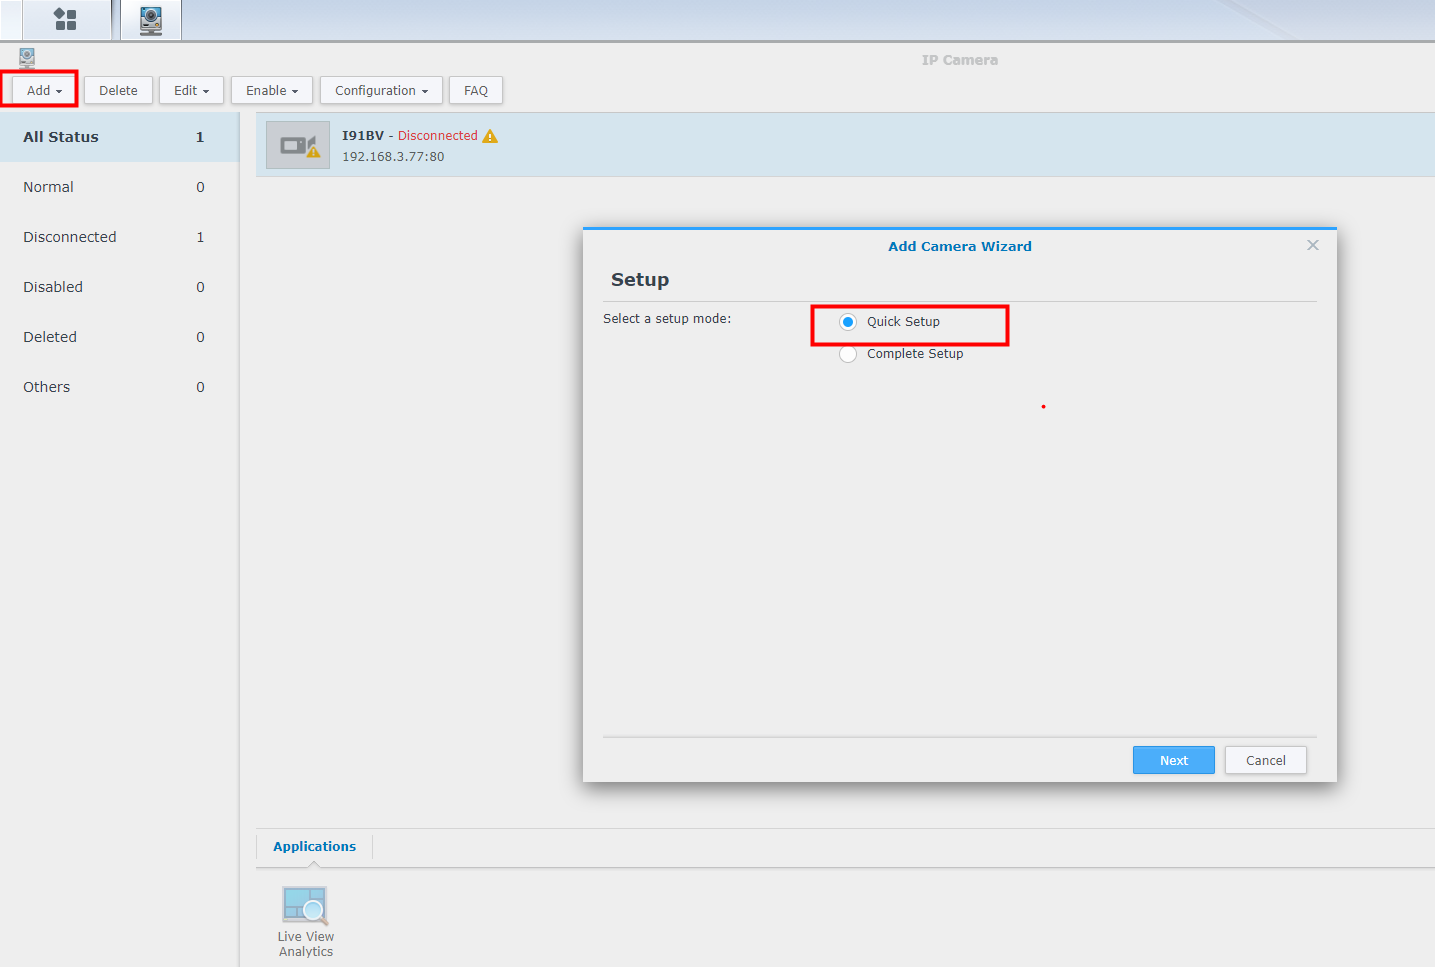
3. Go to IP camera–Add camera–Quick setup.
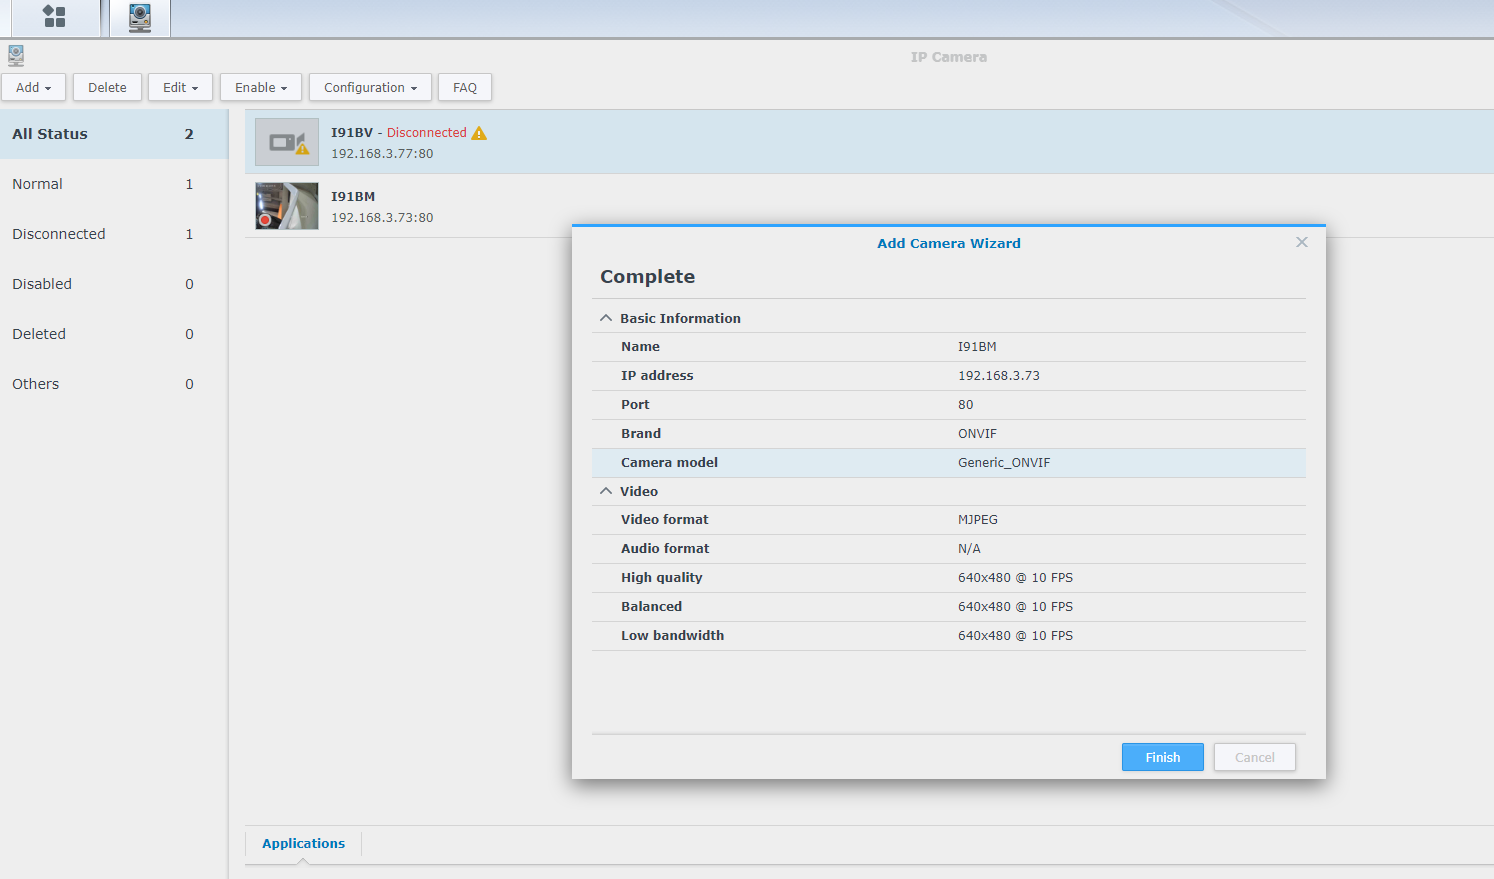
4. Fill in the information about the camera.
Name: Created by yourself. It can be anything.
IP address: IP address of the camera. Please find it on the SADP tool.
Port: 80
Brand: Onvif
Camera model: All functions
User name: Username of ONVIF account you create on step1.
Password: password of the Onvif account.
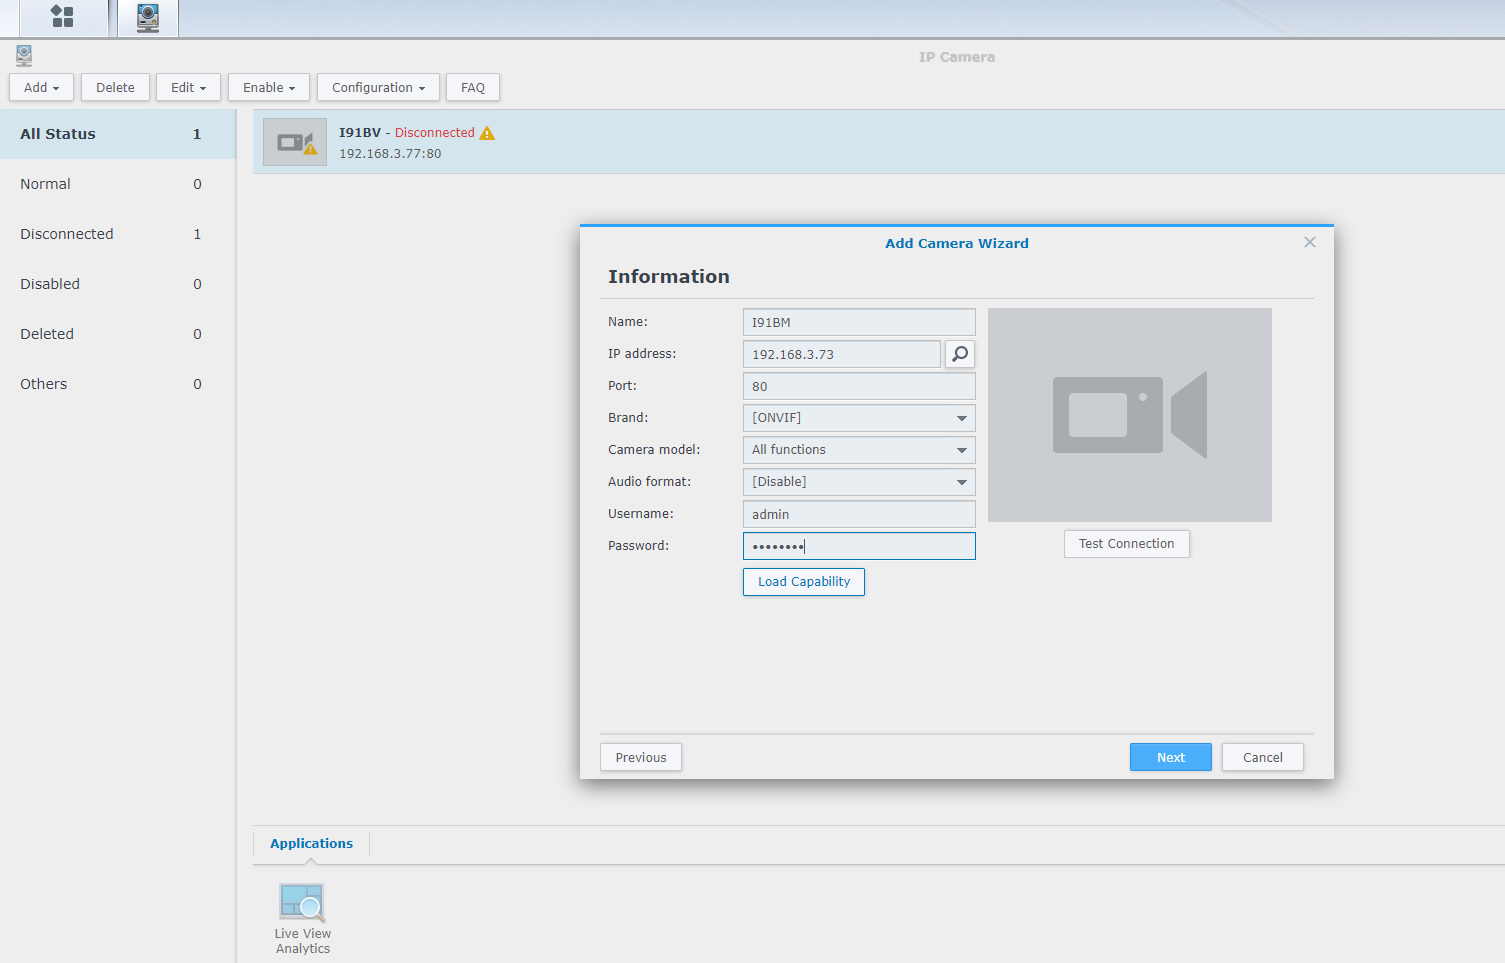
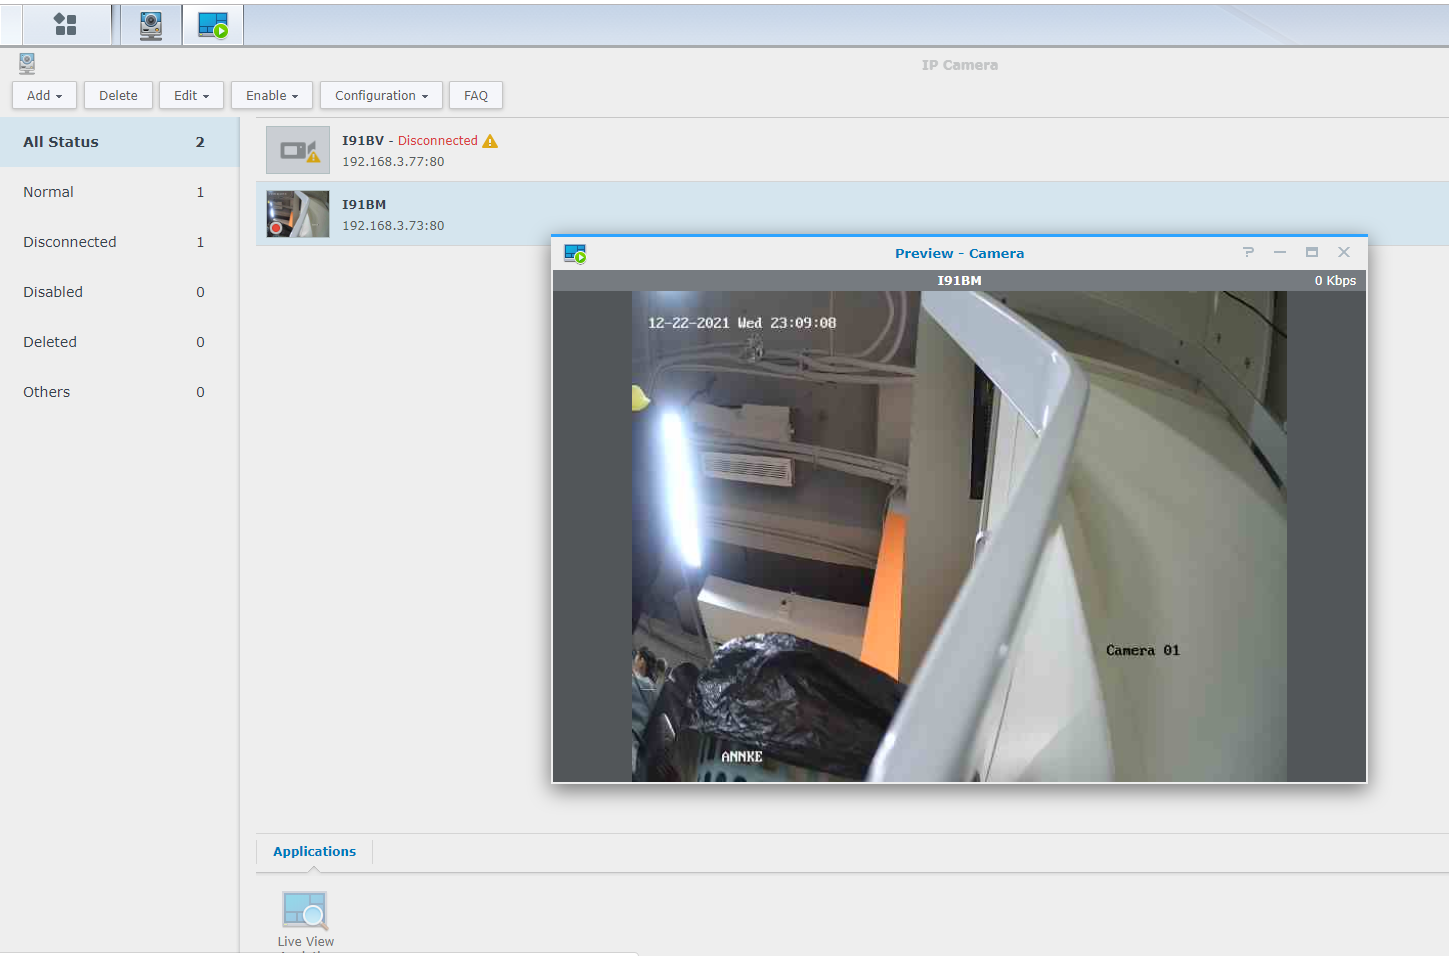
5. Click Load Capability and test connection to verify the adding result. If you can see the live view image of the camera, the connection is successful.
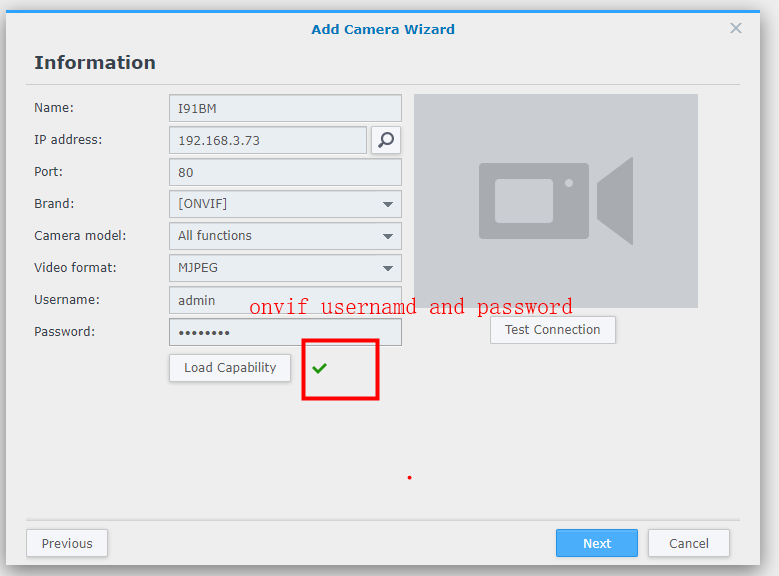
6. Click Next and confirm the information and click Finish.
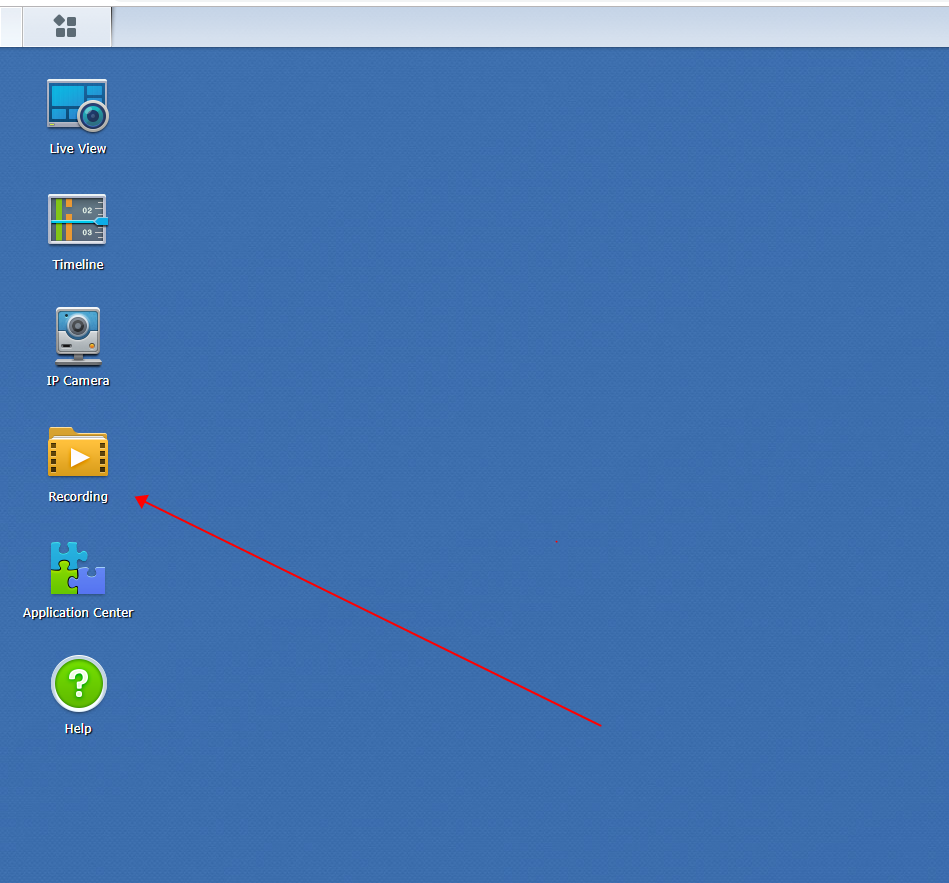
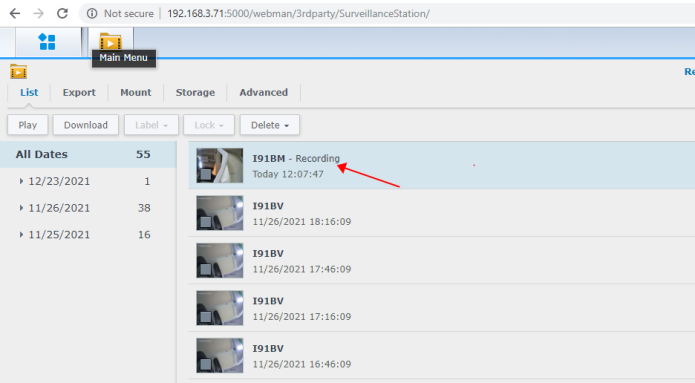
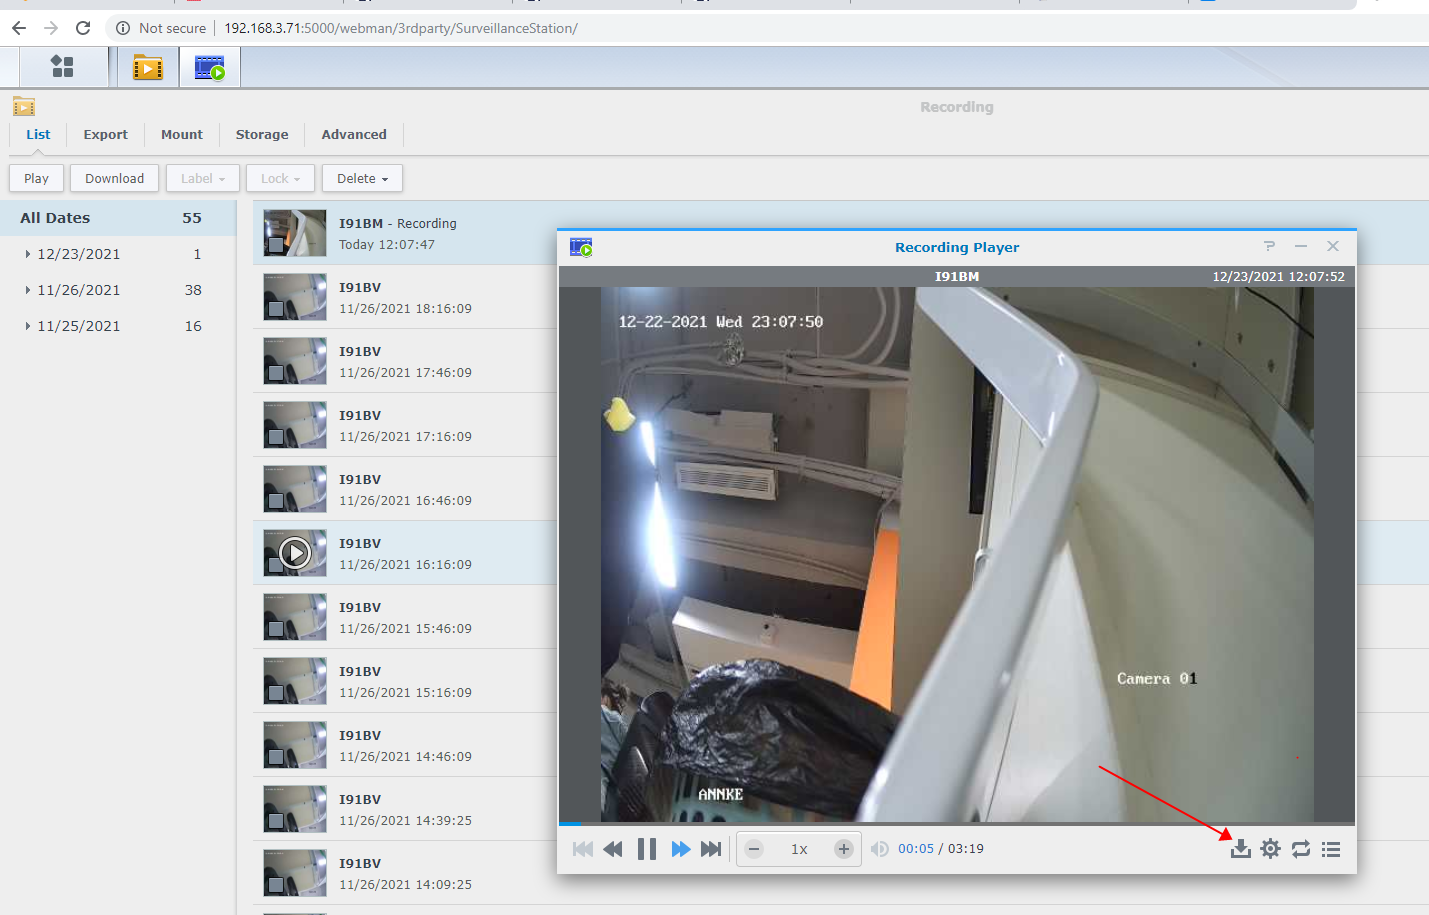
7. To download the video, please go to Control Panel–Recording–find the footage you need–download.
If this article is helpful to you, please click the “helpful” button after you review it. Any comments would be appreciated.
FAQs
Why should I use a Synology NAS?
A Synology NAS is one of the most secure and cost-efficient ways to store data. Our suite of data management and backup applications gives you control and complete ownership over the way you manage data without incurring costly recurring fees.
Is Synology NAS good for home users?
If you and your family are looking for a secure and cost-effective way to back up all of your devices, photos, and videos without paying expensive monthly fees, a Synology NAS is a great option.
Can I back up my photos to my Synology NAS?
Yes, Synology Photos is an all-in-one photo management solution that allows you to back up, organize, and share your photos intuitively. Learn more
Can I back up my Synology NAS to the cloud?
Yes, data on your Synology NAS can be backed up to a variety of cloud services, including our own Synology C2 Storage. Learn more
Which Synology NAS model should I buy? How many drive bays do I need?
Picking the right NAS model will depend on your storage and performance needs, as well as what purpose you intend to use your NAS for. For help with deciding which model is right for you, check out our NAS Selector tool.
What is Synology DiskStation Manager (DSM)?
Synology DSM is the intuitive operating system that powers every Synology NAS. It includes powerful license-free solutions for file and media management, sharing, backup, surveillance, and more. Learn more
What is Synology Drive?
Synology Drive is Synology DSM’s file sharing and syncing solution that allows you to sync, share, and access your files from anywhere, transforming your NAS into your own, private cloud. Learn more
Is NAS storage better than public cloud storage?
While public cloud storage can be a great option to store limited amounts of non-sensitive data, NAS storage may work better if you are concerned with privacy and data ownership. NAS storage can ensure privacy for your most important and personal data and can also be more cost-effective than public cloud storage if you intend to store large amounts of data.
How to connect IP Camera to Different Brands of DVR/NVR System via Onvif Protocol?
Note: For security reasons, we do not suggest the camera to connect to other third brand’s NVR systems, we are responsible for our product and your security demand. If you confirm the product is really from you and correctly it is base on your decision, kindly please follow the below guide to enable the Onvif protocol and create an account first. The Onvif account is used for the other brand’s receiver to adding.
Video Guide:
Text Guide:
Power on the cameras and connect them to the same router as your computer. (Not directly to the NVR’s POE port).
Install the SADP Tool to find the IP address of the camera. Here is the download link:
For Windows PC:https://download.annke.com/document/Computer_Software/SADPToolV3.0.3.3.zip
For Mac PC: https://download.annke.com/document/Computer_Software/SADPTool.pkg.zip
- Tick on one of the cameras then activates it by creating the password and security question.
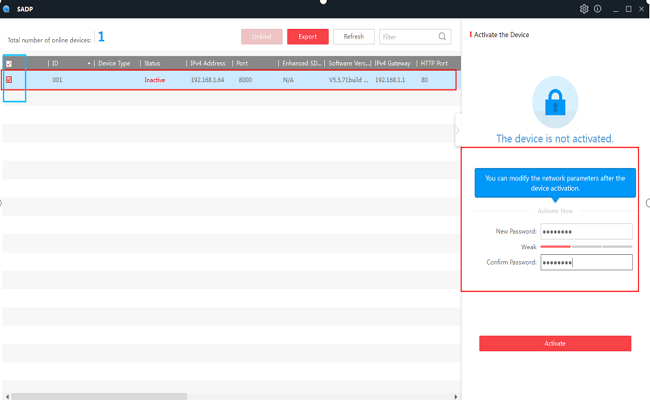
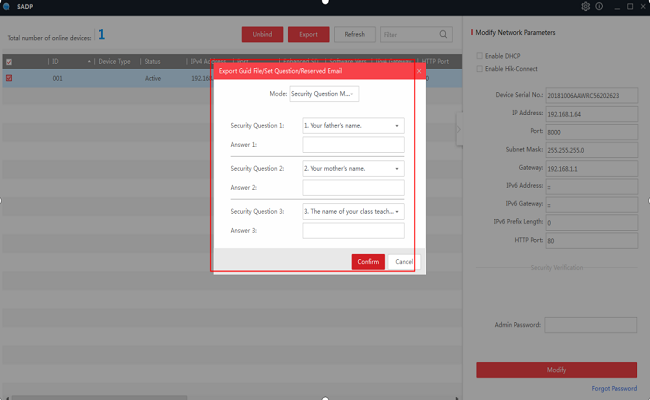
- When the camera is activated, please kindly please check the IP information if it is correct with your computer internet. If not, please enable the DHCP to make the device can successfully get the IP information directly from your router.
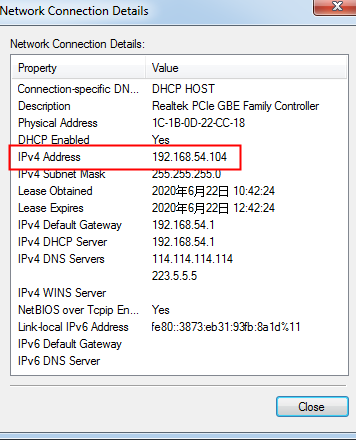
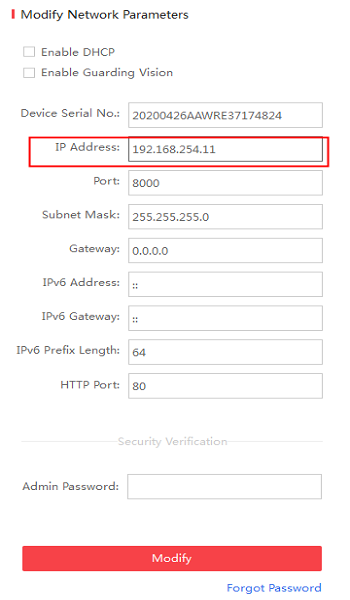
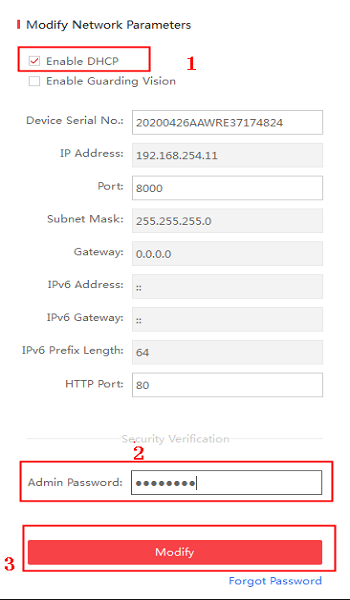
- After that, you can go to the setting page to enable the Onvif protocol setting. Double click the camera or you can input the IP address to your browser to have the login page, the default account is admin ; the password is the one you just set up previously.

- When logged in, please go to the Configuration–>Network–>Advance Setting–>Integration Protocol. Enable the “Onvif” and create an Onvif account.
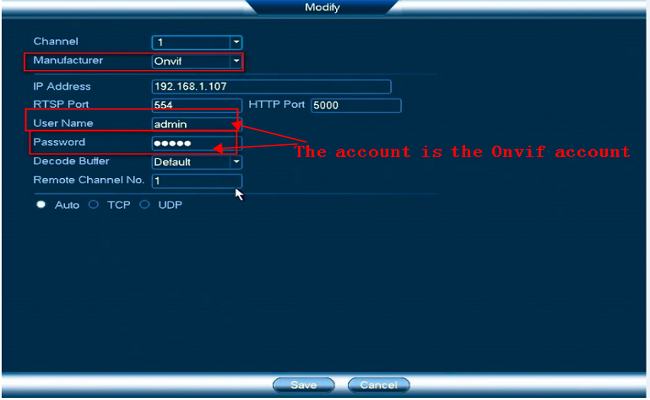
Please notice that the account and password are the Onvif Account that you use when you add the Annke camera to the third-party NVR.

- After that, reboot the camera to make the change effective.
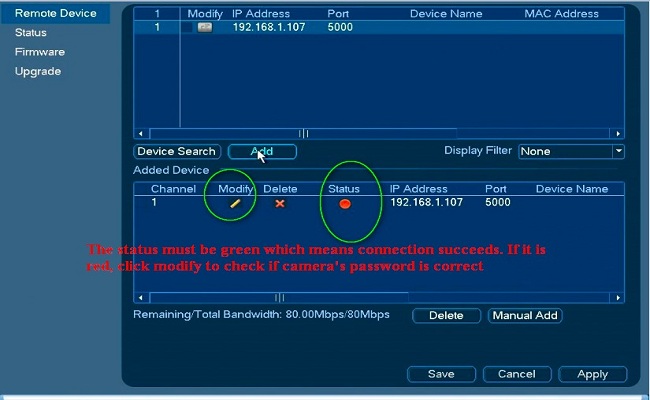
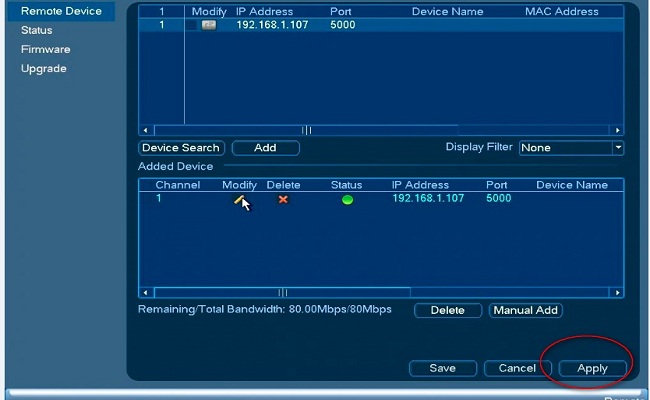
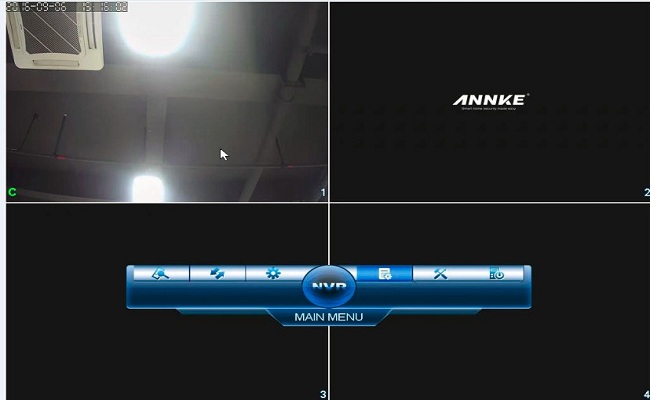
Here is an example for the Onvif adding with NVR:
Right-click mouse to Remote option to add Onvif IP camera. Please kindly refer to the steps in the pictures show to have a try.
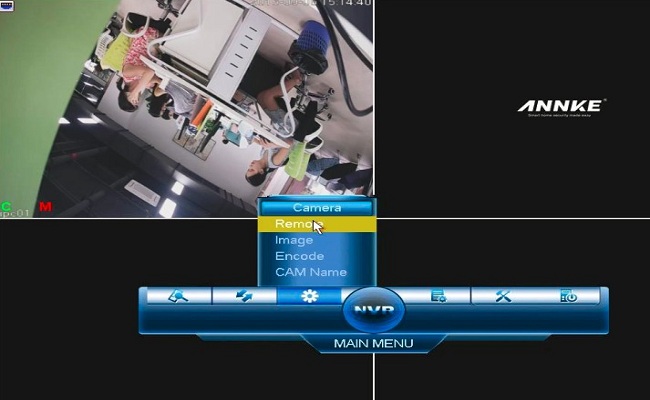
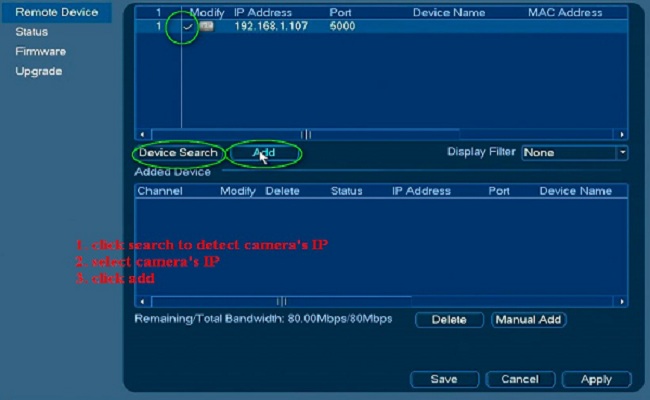
If this article is helpful to you, please click the “helpful” button after you review it. Any comments would be appreciated.
