Hikvision How-To Tutorials Part1, Hikvision provides top-of-the-line AIoT solutions and reliable security camera systems to empower advanced monitoring and automation and improve security.
How do I use a Hikvision NVR’s “Virtual Host” feature?
One of the most successful selling points of a Hikvision NVR to many small-setup customers is the “Plug and Play” functionality that simplifies the setup process of their surveillance system. However, plugging a camera directly into a port on the NVR, unfortunately, does not allow you to access the camera via its own internal LAN IP using a browser due to it being on the NVRs internal network, and this can significantly reduce the number of configuration options you have access to.
The NVR does allow you to configure many options for each connected camera, but some essential features are only accessible via connecting to the camera itself (such as audio codec options). This was of course a big problem previously.
With the advent of newer firmware and models of NVR, Hikvision has introduced a feature called Virtual Host. Activating this feature turns your NVR into a “host” for the cameras allowing you to connect to them via a browser. Essentially, the NVR forwards all traffic received from your browser to the appropriate camera you’re trying to connect to, eliminating the biggest problem of plug and play functionality.
Hikvision How-To Tutorials Part1
Read More : How to set up a Hikvision CCTV system
Step 1:
First of all, access your NVR via a web browser. If you do not know the LAN IP of your NVR, download Hikvision’s tool SADP tool, which scans your network for any Hikvision devices that are connected and allow you to see and change their network settings, including the IP address.
Step 2:
Once you’ve logged in, navigate to:
Configuration → System → Camera Management
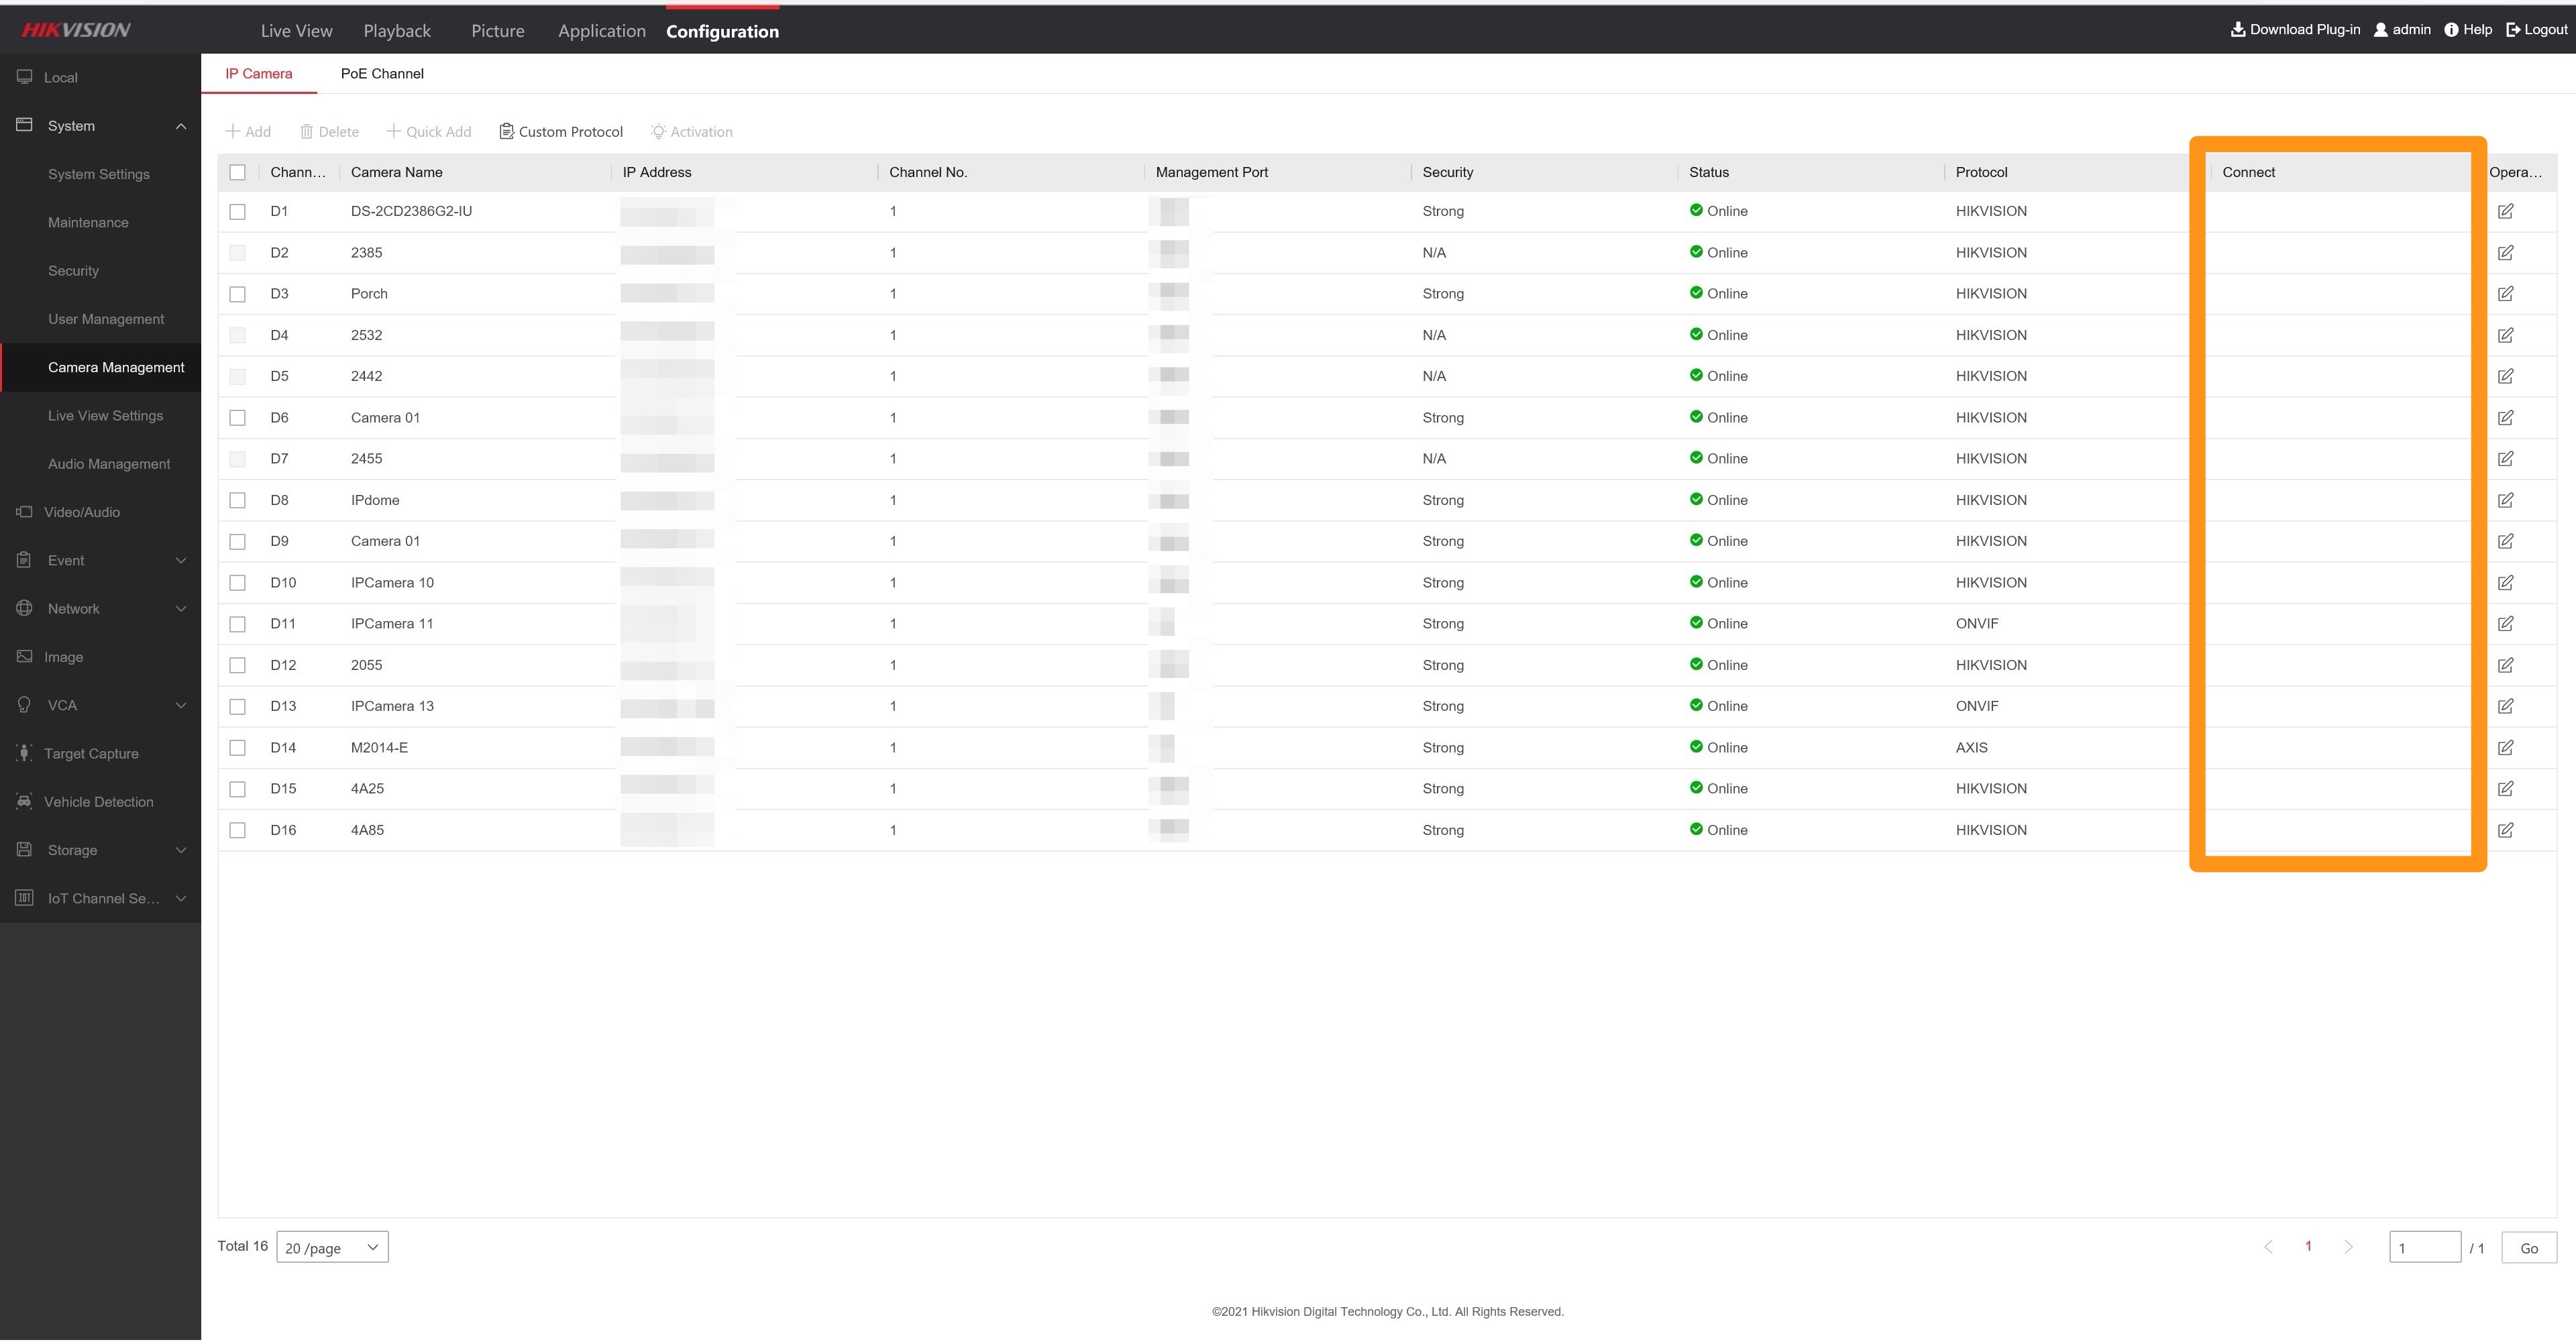
This screen displays all the connected cameras on your NVR. Notice that the final column labelled “Connect” is currently empty. We’ll be coming back here in a moment.
Step 3:
Now, navigate to:
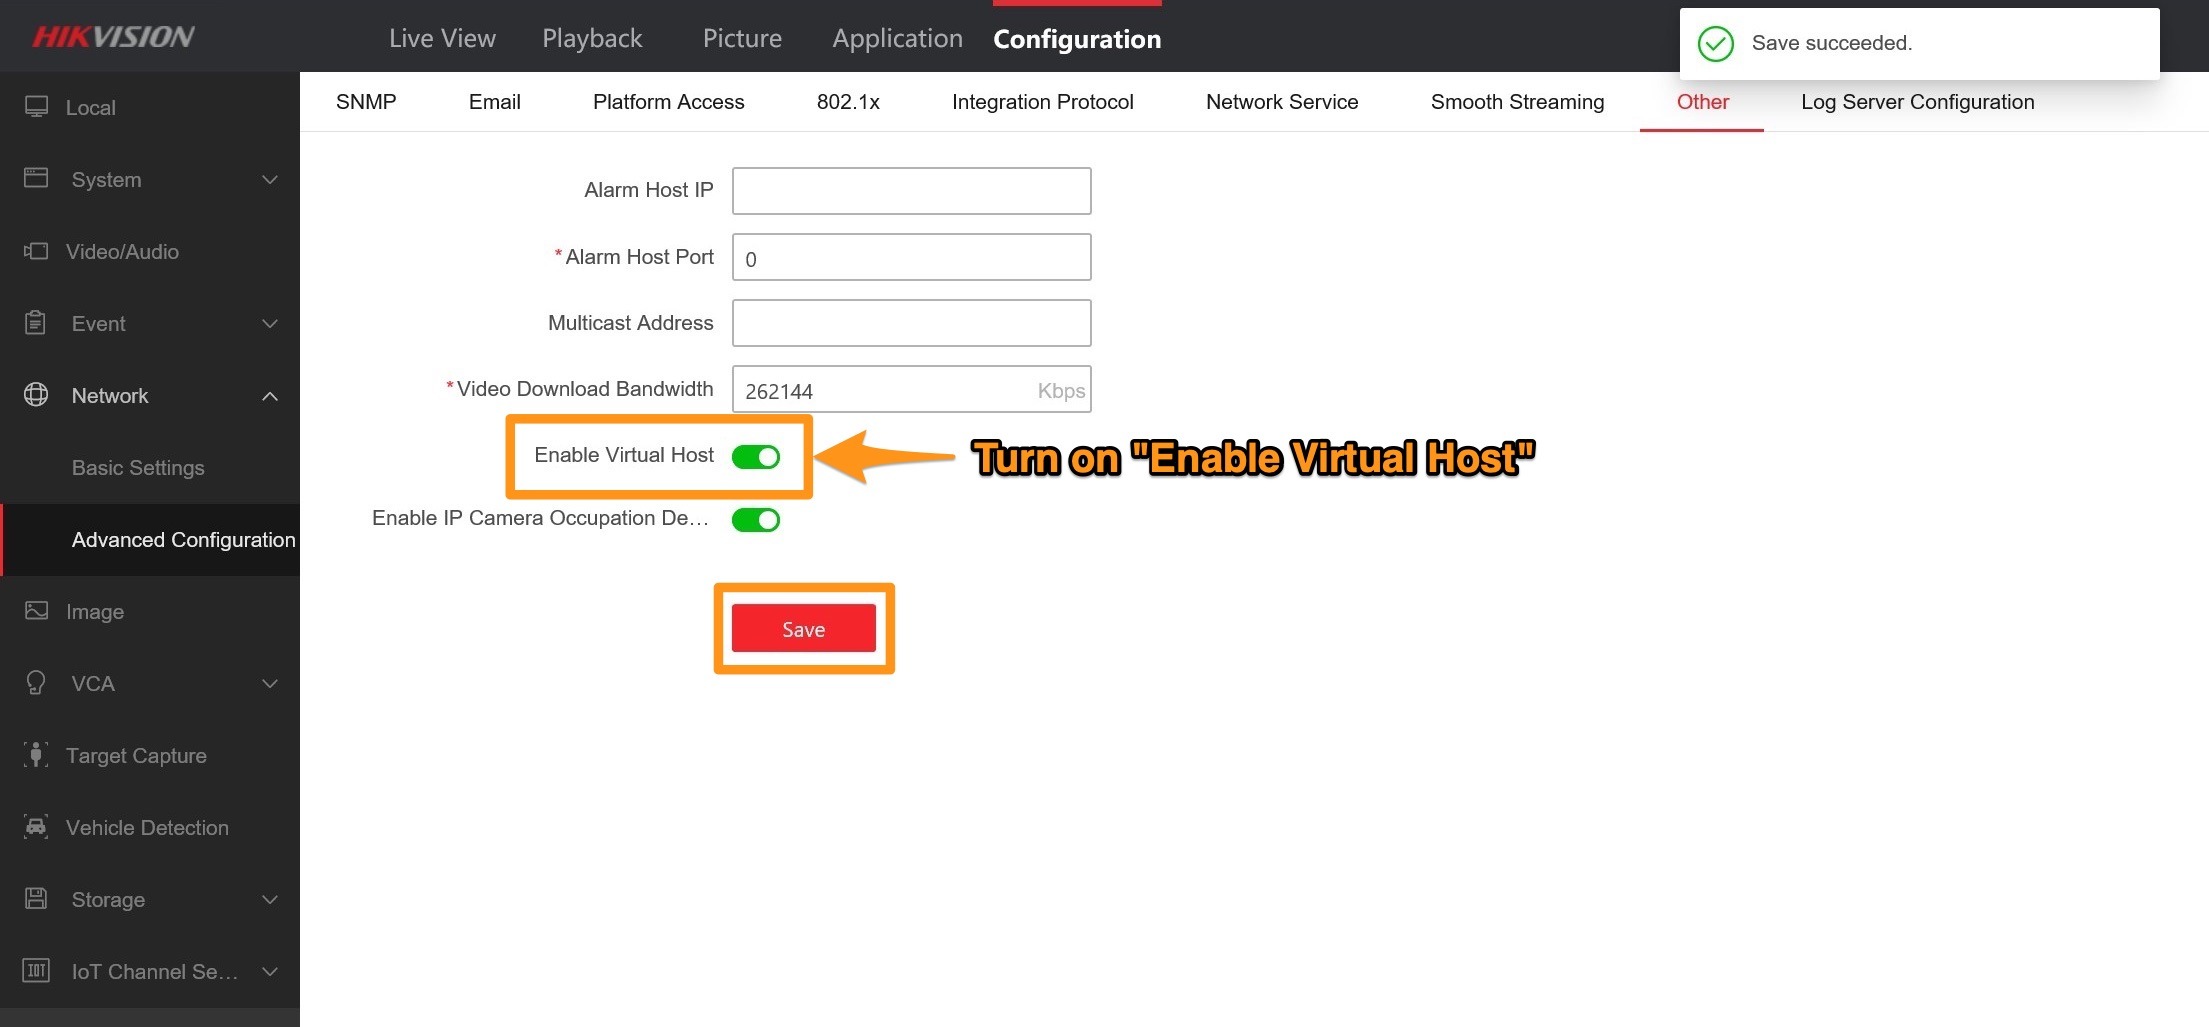
Network → Advanced Settings → Other
Turn on the Enable Virtual Host option.
Note – Your NVR will reboot when you click “Save”.
Step 4:
Now, navigate back to the Camera Management window from earlier. You’ll notice that the previously empty connect tab now features links for each camera currently connected to your NVR.
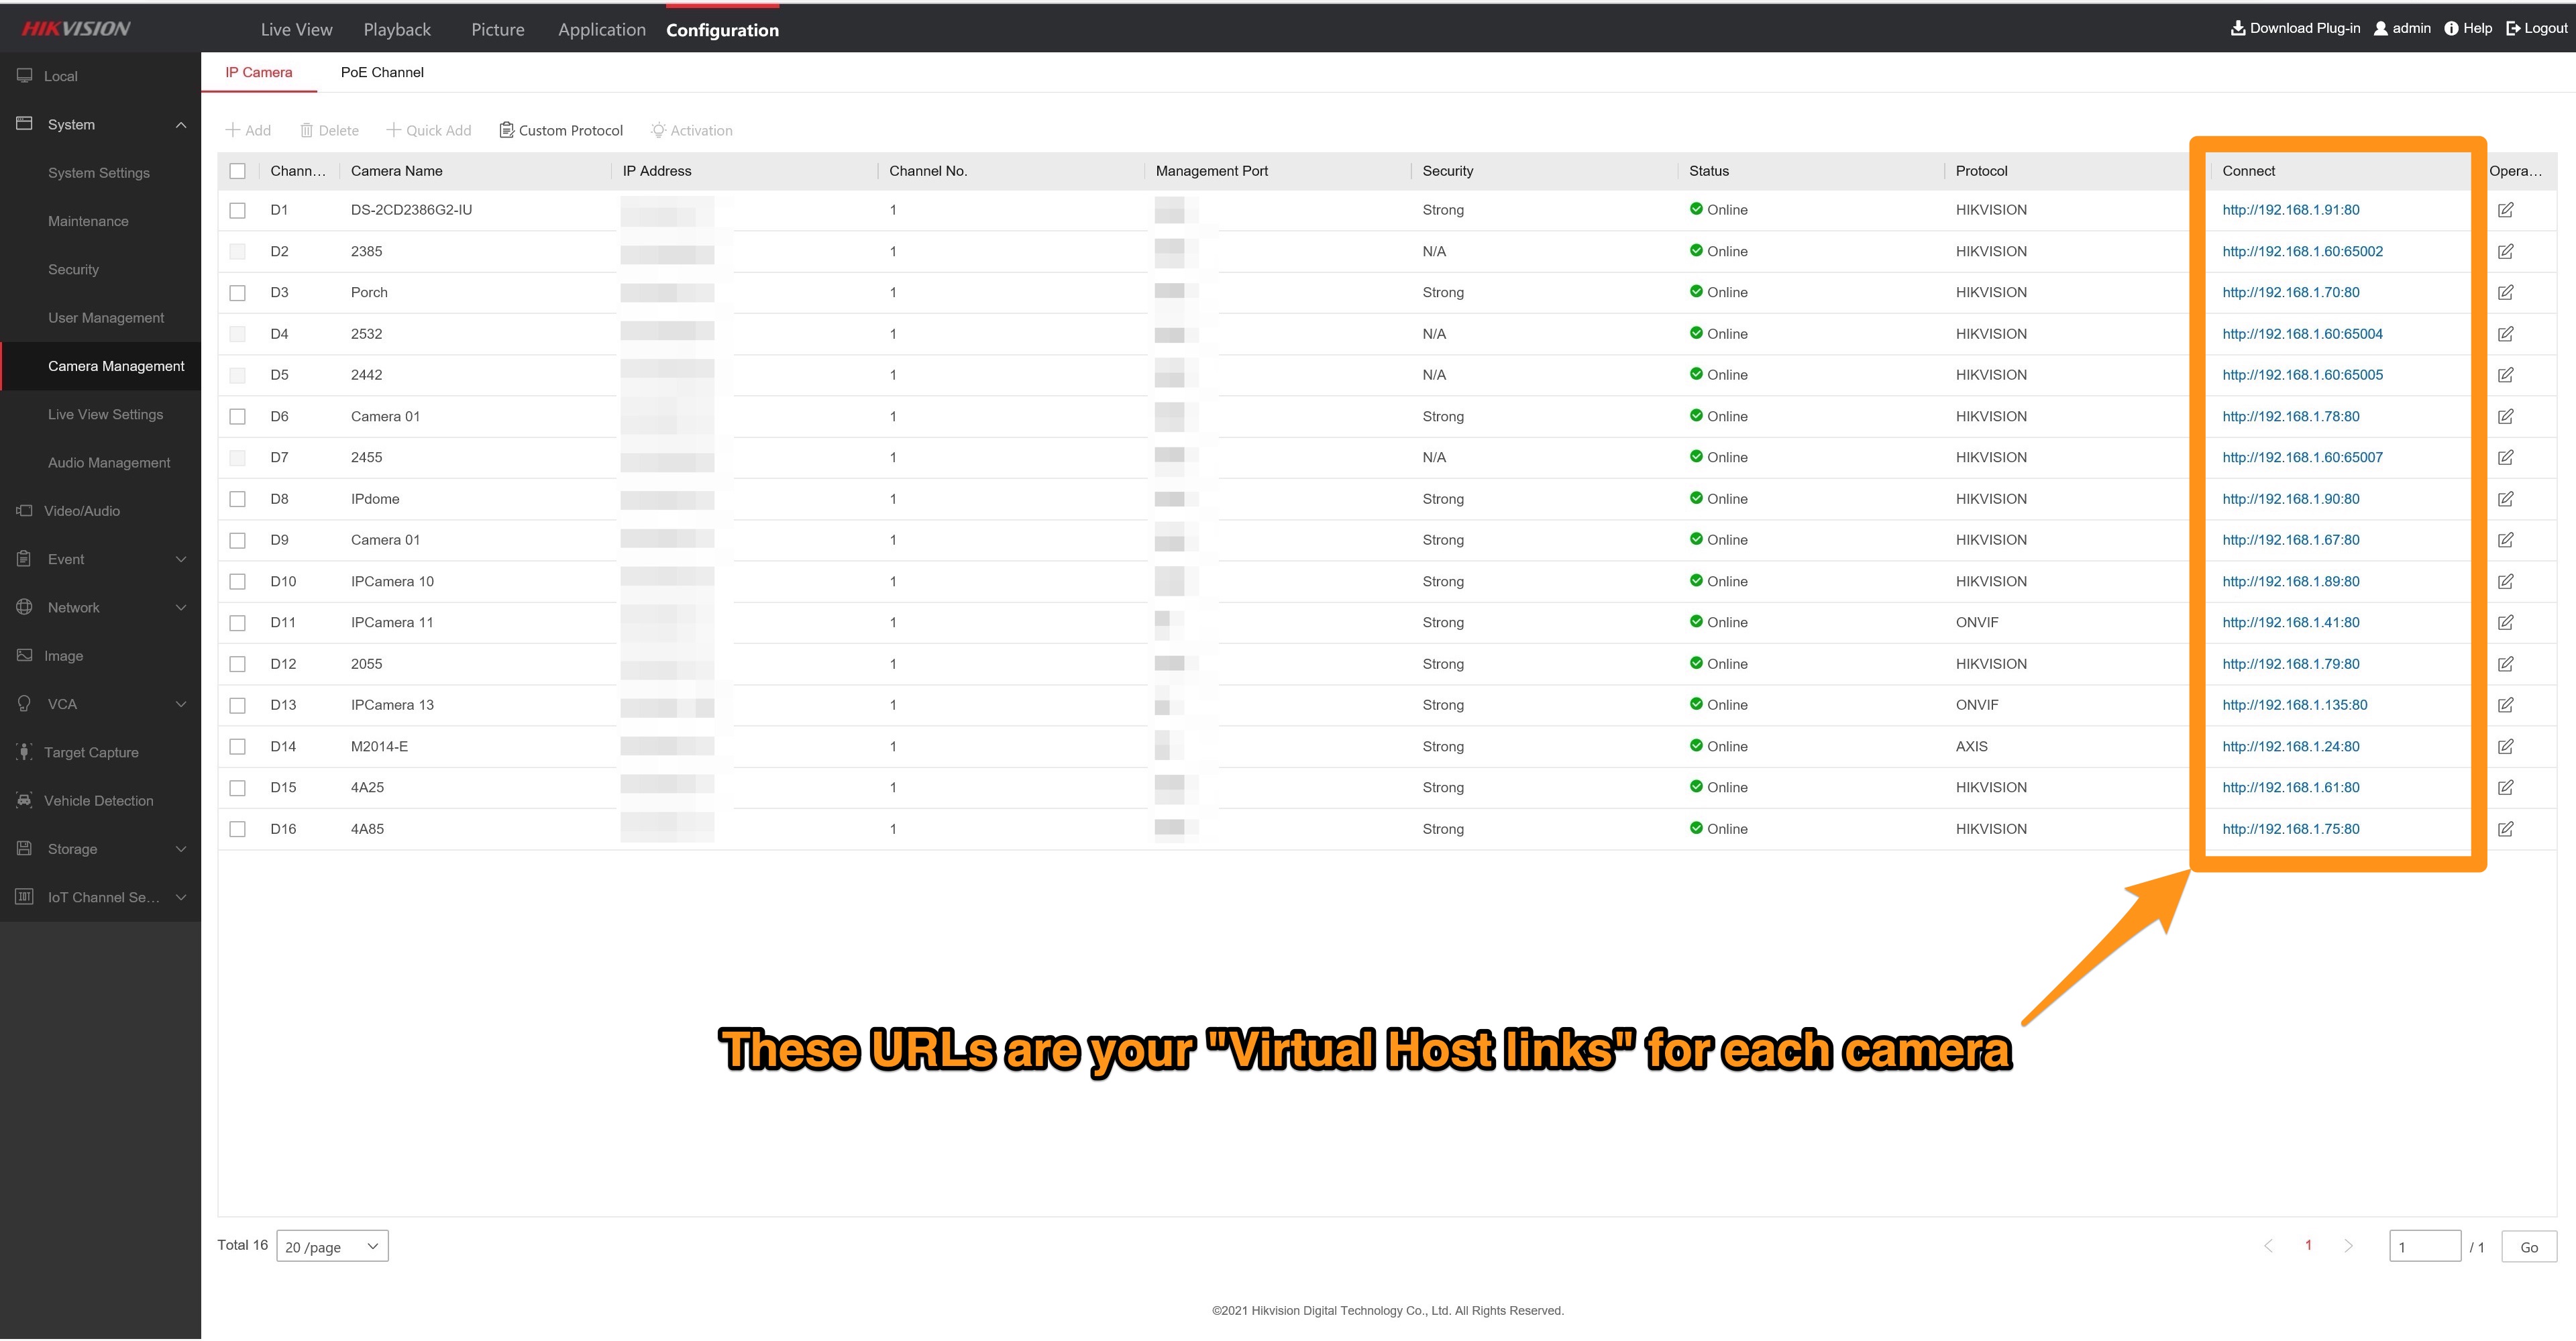
Step 5:
Click on any of these links to access the respective camera via your web browser:

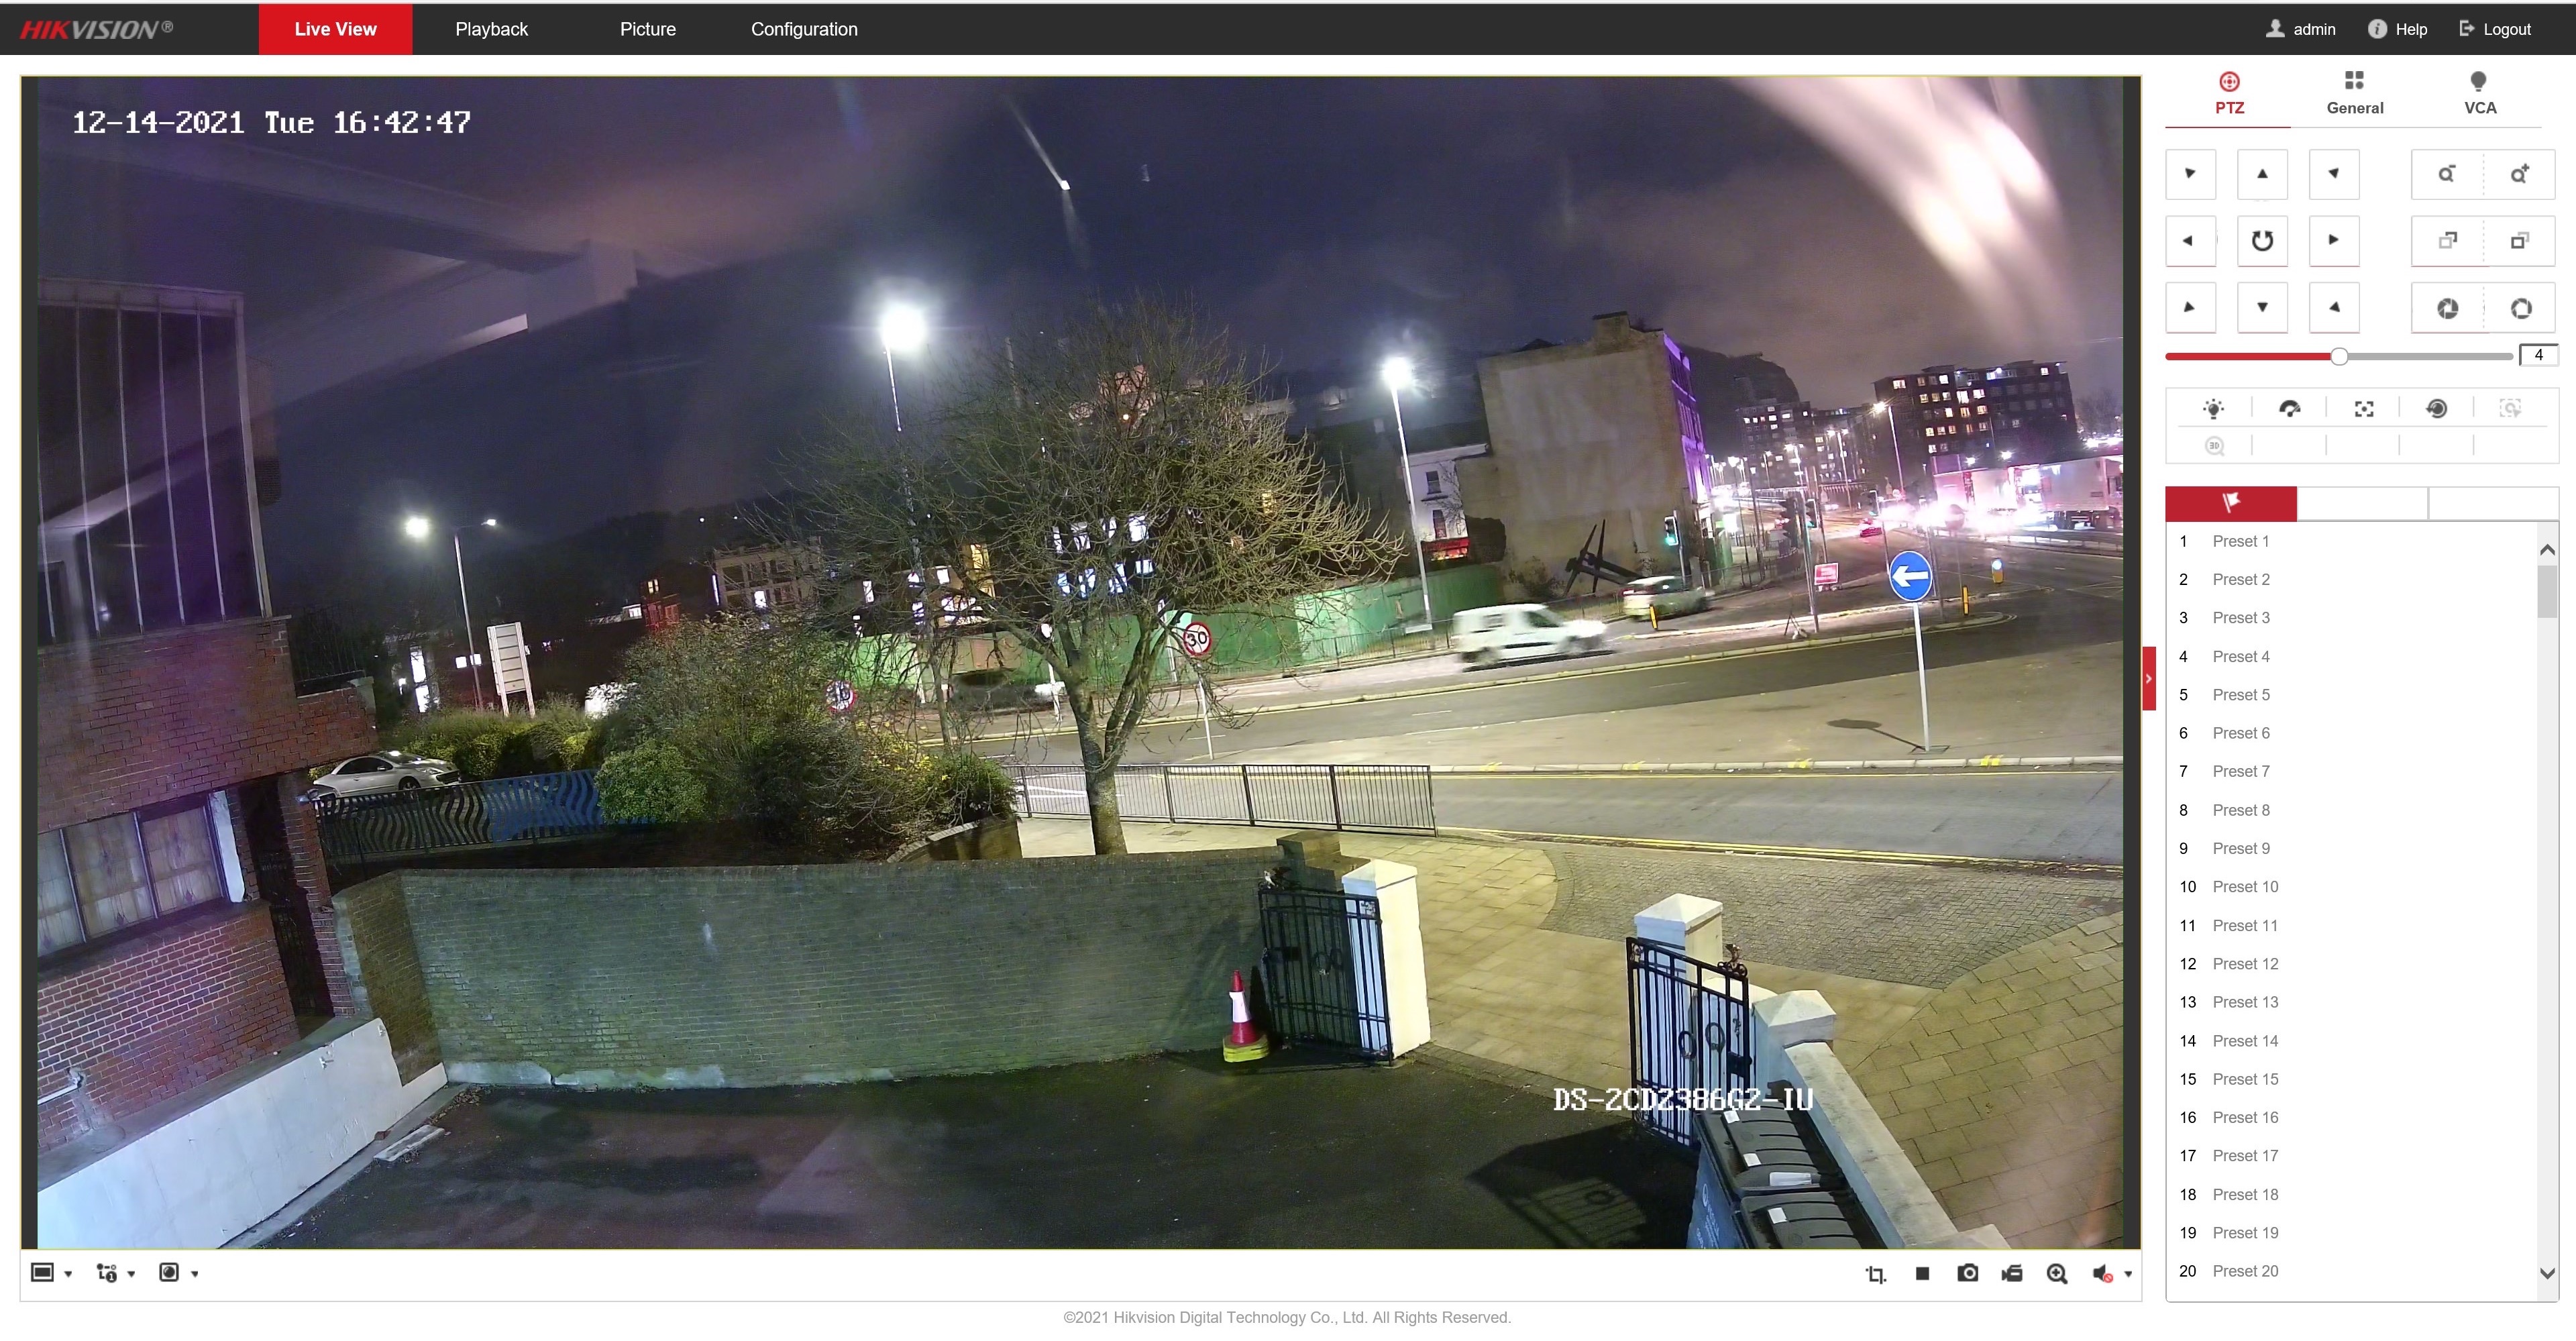
That’s it, you’re done!
This should be useful when you want to access options on your camera that your NVR doesn’t feature. If you have any further questions feel free to ask, we’re happy to help.
How Do I Configure the Camera’s Onscreen Display Text?
All Hikvision users will have seen that when you first log in to a camera the live view will have overlayed text stating the date & time and the default name of the camera “IPcamera 01″, depending on your requirements you may want to change some or all of this overlay text and below is the instruction for how to do that.
Method 1 – In a Web Browser
Log in to the camera and go to Configuration > Image > OSD Settings

Below we will take you through each of the above settings and what they do:
Character Set – This lets you select the characters/language the OSD settings use, by default all UK stock will come with this set as GBK for English characters but if you are a European customer and you want to enter special characters from your particular language (e.g. é, ü, ç, etc…) you can switch it to EUC-KR to access those characters (do this will require the camera to reboot).
Display Name / Date / Week – These tick boxes let you show/hide the camera name (Display Name), the current date (Display Date), and the day of the week (Display Week)
Camera Name – This box lets you set the displayed name of the camera, it will also change the name of the camera shown in the System menu and if added to an NVR it will change the name shown in the live view camera list and the Camera Management list.
Time Format – This dropdown lets you select how the time appears in your live view, either 24-hour format (00:00 – 23:00) or 12-hour format (00:00 – 12:00)
Date Format – This dropdown lets you select how the day, month, and year are displayed. Your options are DD/MM/YYYY (UK format), MM/DD/YYYY (US format), and YYYY/MM/DD (Chinese/International Standard format). You also have the option of separating the day, month, and year with either a “–” or a “/“.
Text OverLay – On most cameras, you should have the option to add up to 4 additional text overlays to the live view. You can use all of them or none of them depending on your requirements.
Display Mode – This dropdown lets you choose how the text behaves on screen, by default it will usually be set to Not Transparent & Not Flashing which means the text will obscure objects/people behind it and it will be onscreen all the time. You have the option to change it to one of the following – Transparent & Flashing / Transparent & Not Flashing / Not Transparent & Flashing – When set to transparent the text will become semi-transparent so that you can see objects/people behind the text and if set to flashing the text will flash on & off screen every few seconds (there are no controls for the flashing duration).
OSD Size – Technically this setting should adjust the size of the OSD text but we’ve found that when changing it there was little change to the text and so we would just stick to the default Auto option because this will allow the text size to adapt based on where you are viewing the live image (e.g. whether a small phone screen or a large TV).
Font Color – This dropdown lets you select the colour used by the OSD text, by default the camera will use Black&White Self-adaptive which means the text colour will automatically switch between black & white based on what is behind the text (e.g. if a person walks through the text) and for high-security sites, this can be an important feature for using the footage in court because the adaptive text shows that the image/text has not been manipulated in post. If the scenario requires it you can select Custom which will allow you to pick the text colour from a standard colour table.
Alignment – Again like OSD size this setting doesn’t appear to have a huge impact so we would just leave it as the default Custom and you can adjust the positioning/alignment of the OSD text by dragging the red boxes around the live view window above (these red boxes are only for adjusting the text position and will not appear on the actual live view image).
Method 2 – Via the NVRs GUI
You can access similar OSD settings from the NVR by going to Camera > Display and selecting the camera you want to configure.
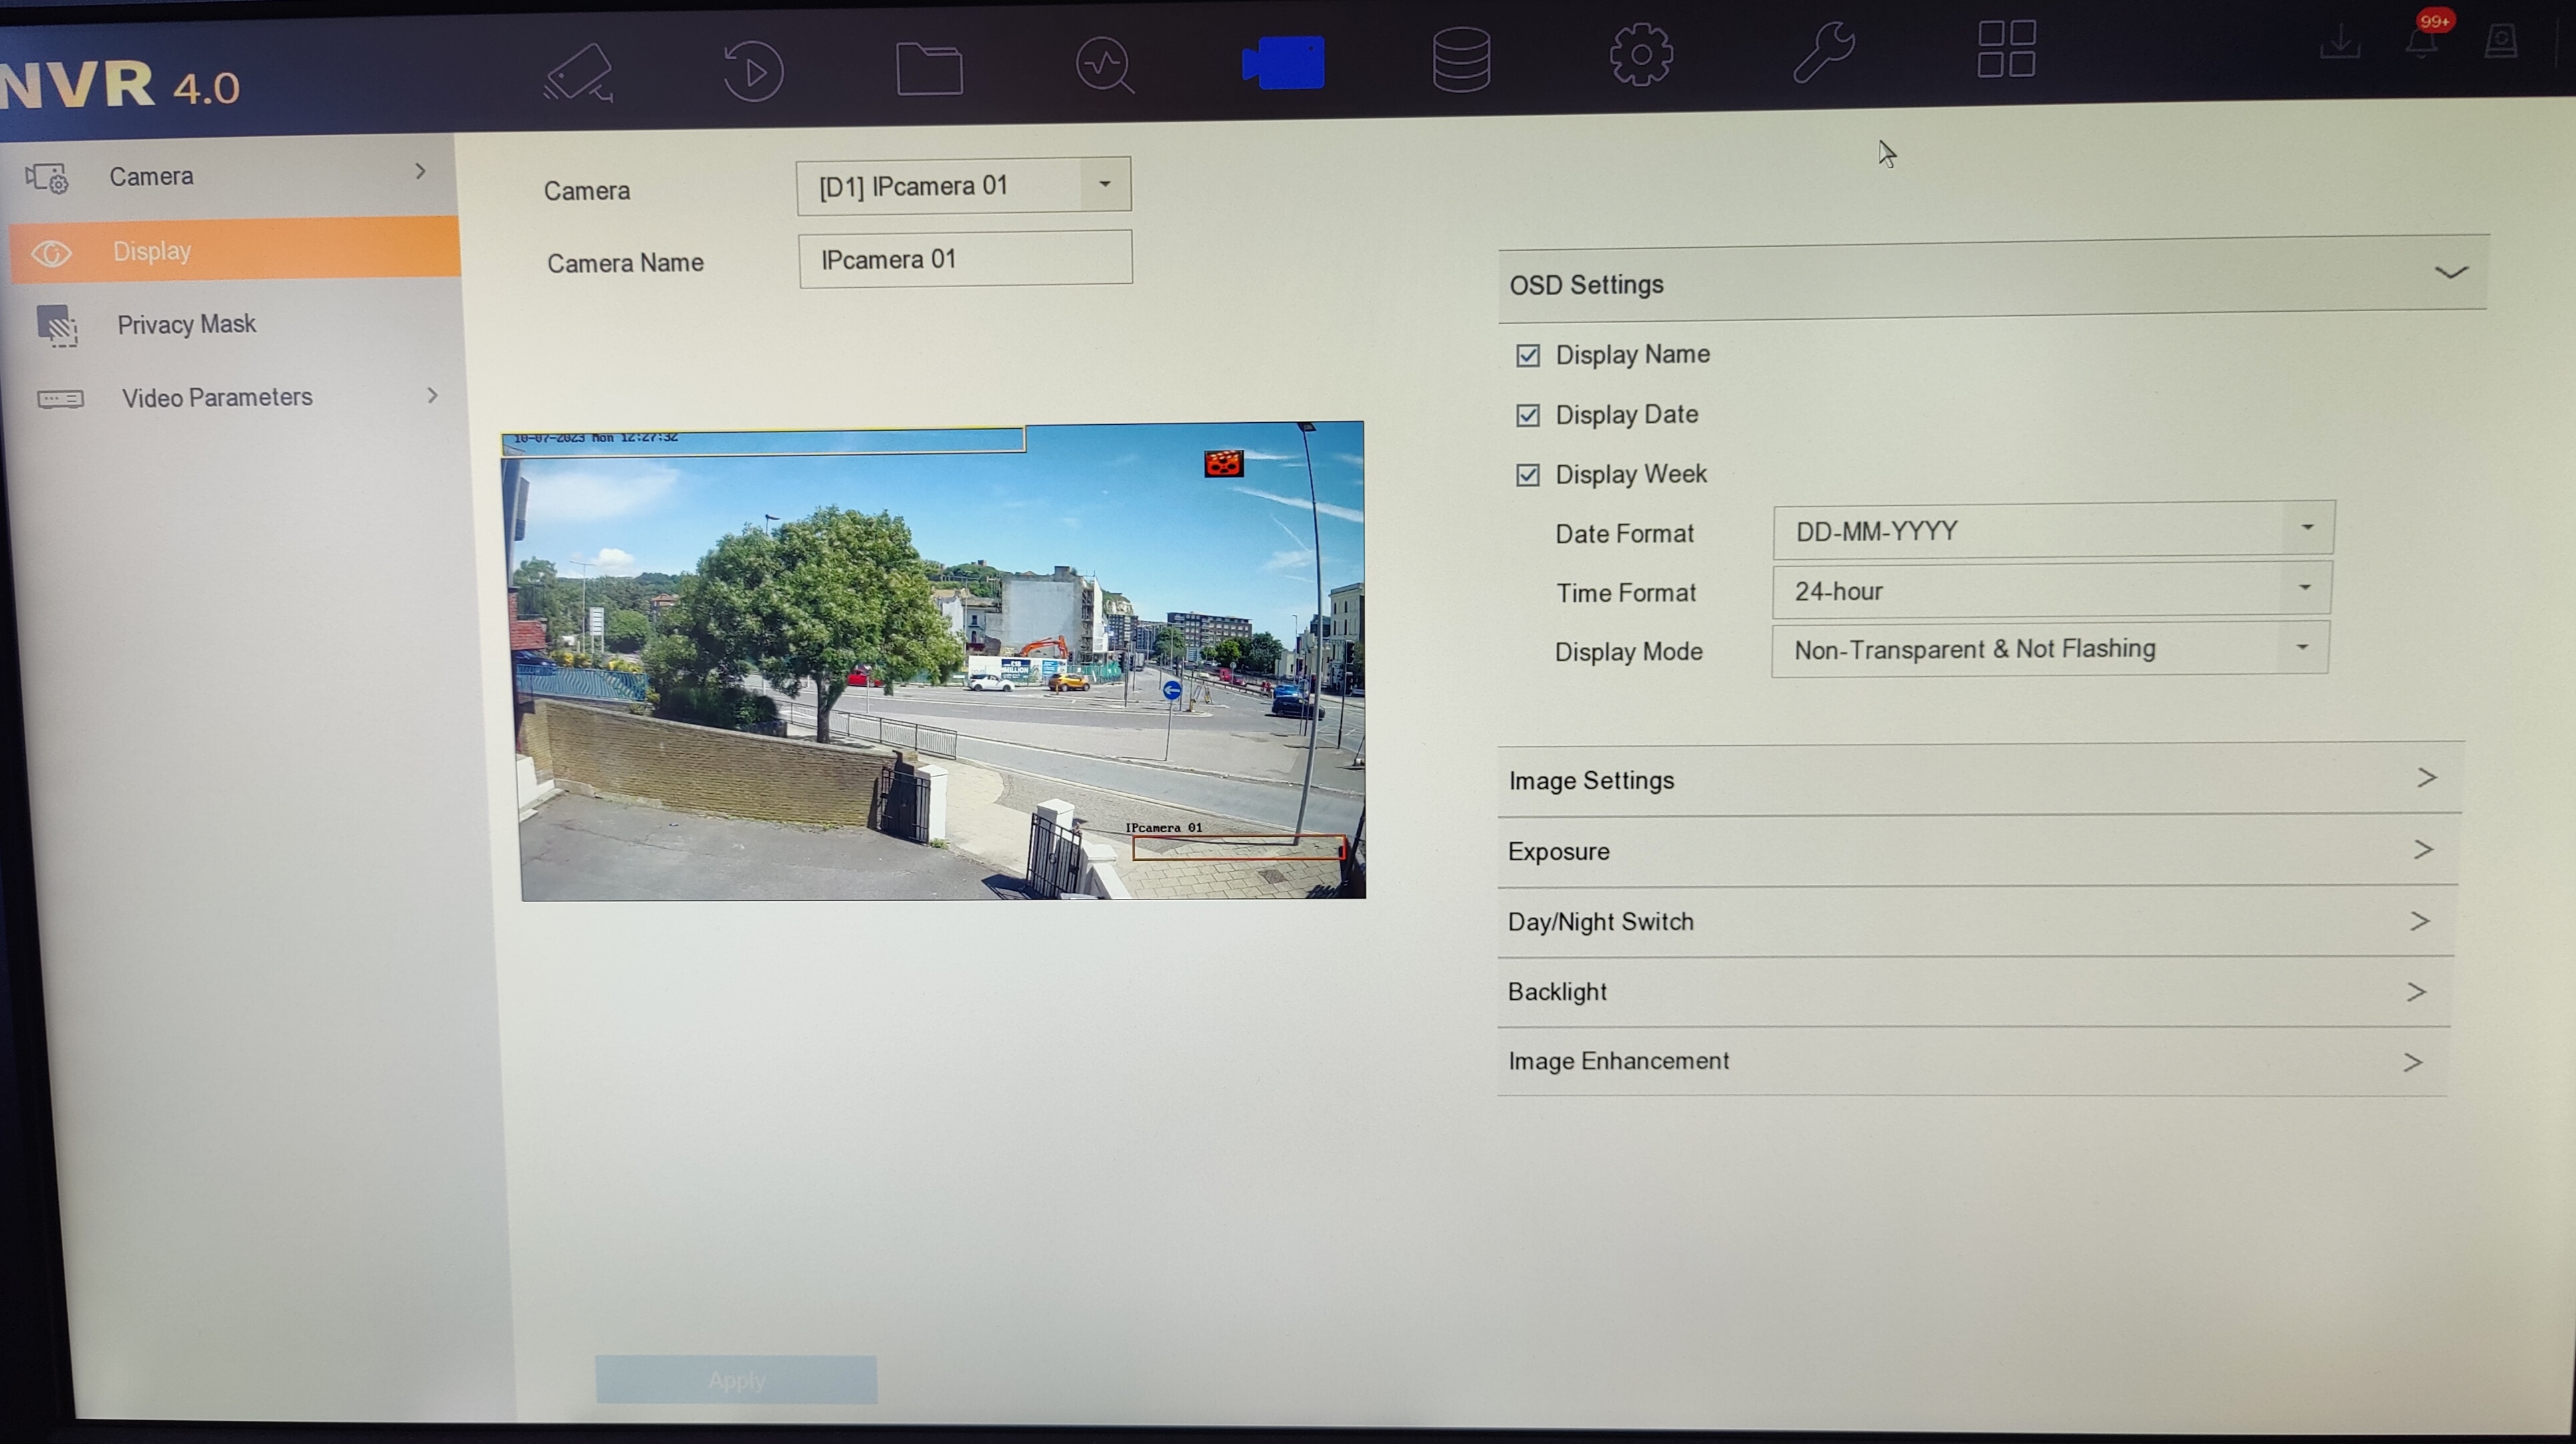
Although, as you can see from the above screenshot you won’t get all the settings that can be found by logging into the cameras directly.
How do I stop my Hikvision NVR from beeping?
If a Hikvision NVR notices what it deems to be a critical error, or “exception”, it will make a constant beeping sound to draw your attention to this.
These exceptions can occur when:
Of course, ignoring these exceptions are not recommended. However, you can disable the beeping while you address whatever the issue is by following the steps below.
Step 1:
Connect to your NVR in a web browser by using its IP address and logging in.

Step 2:
Check what the exception that is causing the beeping is in the NVR’s logs. To find these, go to:
Configuration → System → Maintenance → Log
Set the log search so that the “Major Type” is “Exception”, with the start and end time covering a period when the beeping has occurred.
For example, you can see that it is an IP address conflict causing it in this case.
Note – Camera disconnections will not cause the NVR to beep.

Step 3:
Go to:
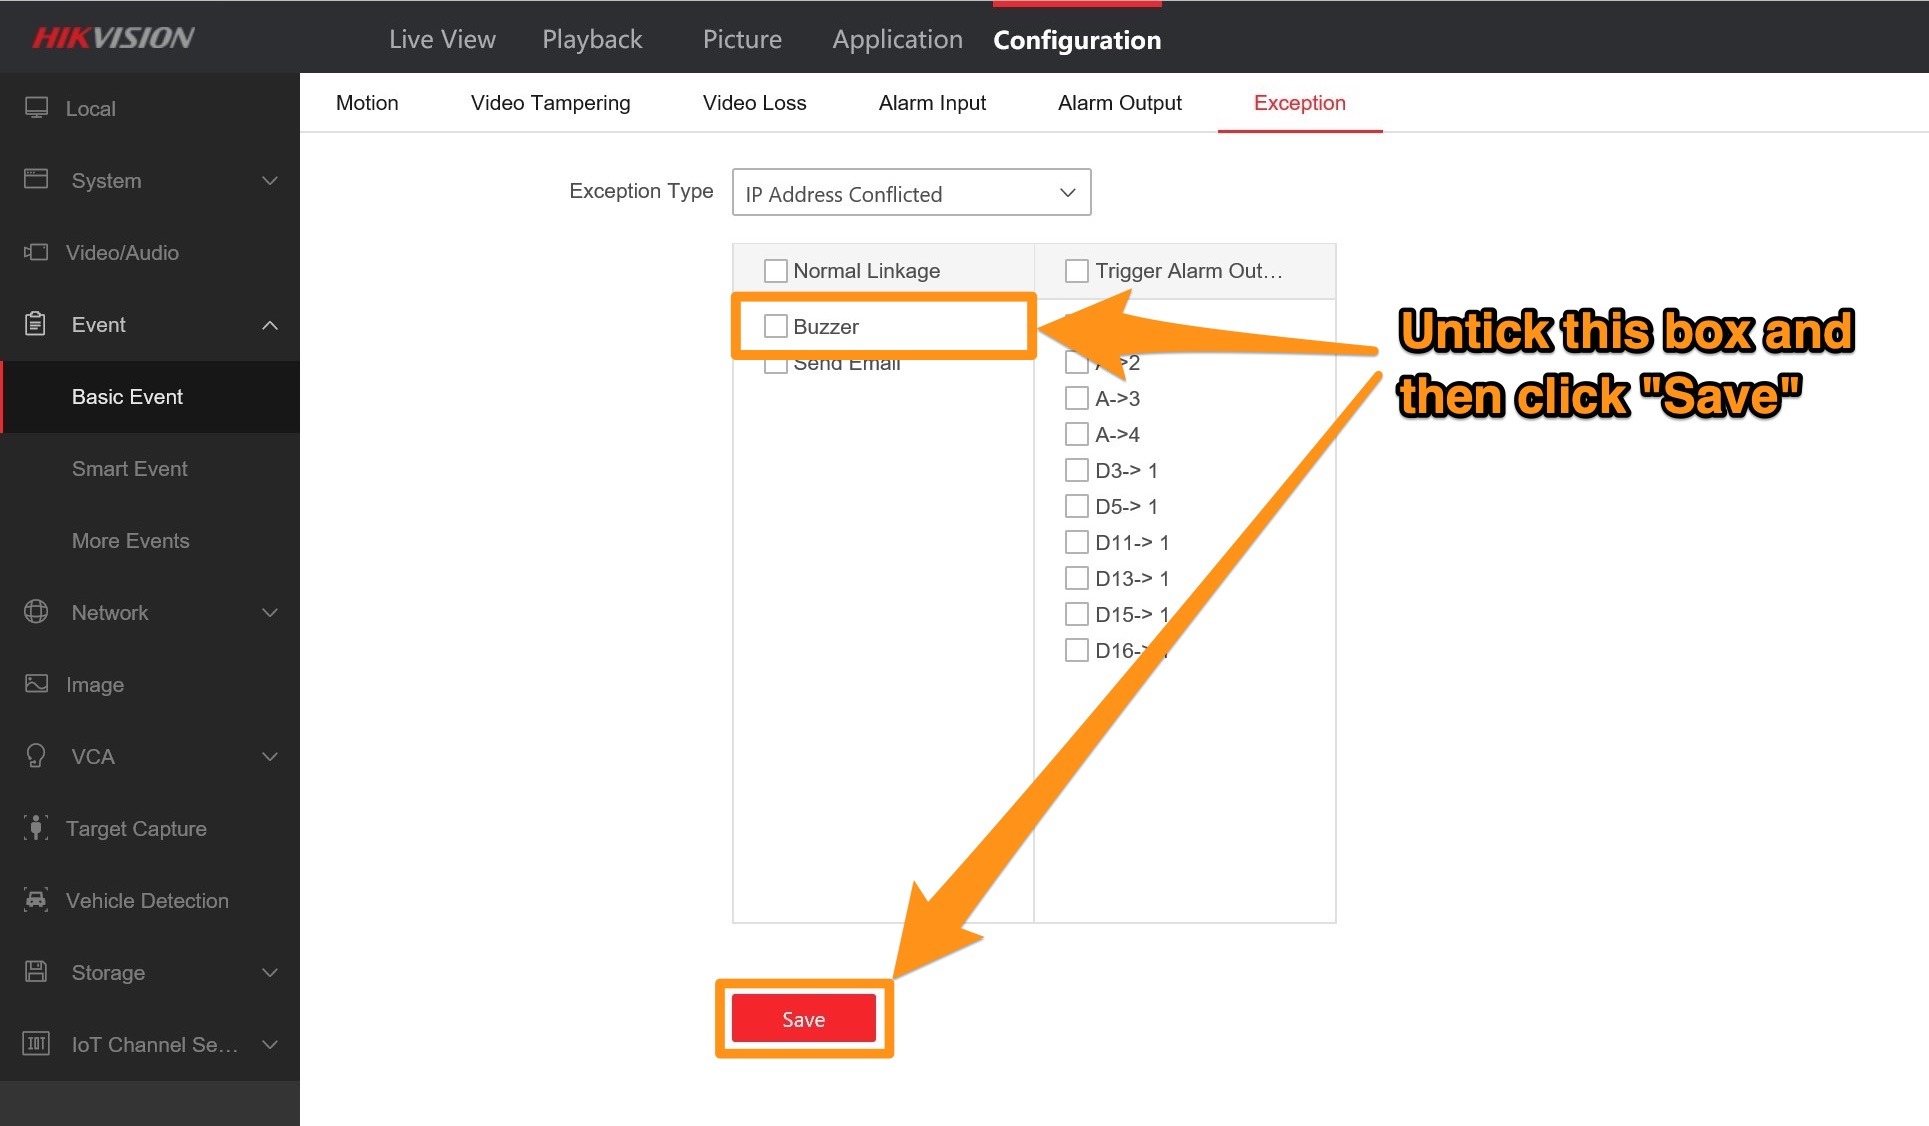
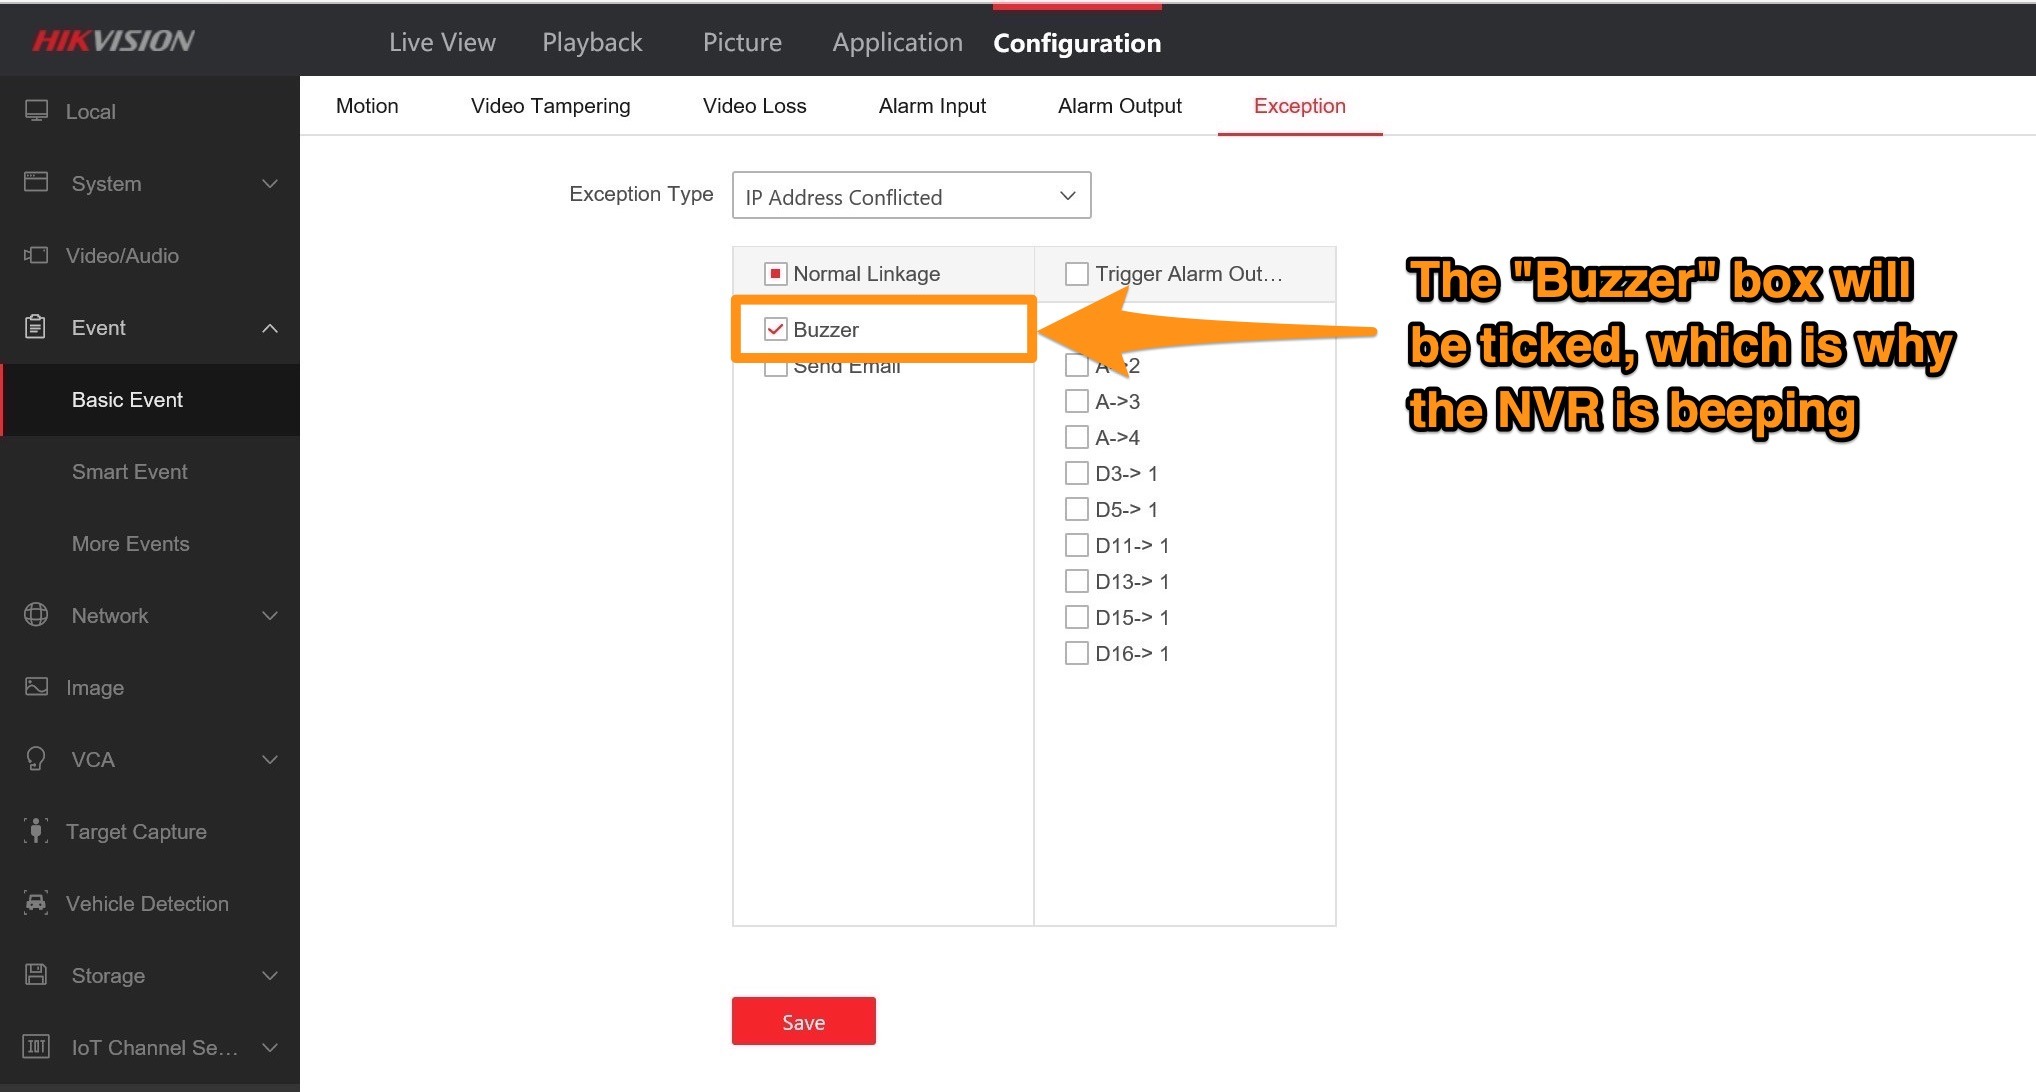
Configuration → Event → Basic Event → Exception
Find the “exception type” identified in step 2 in the dropdown on this page.
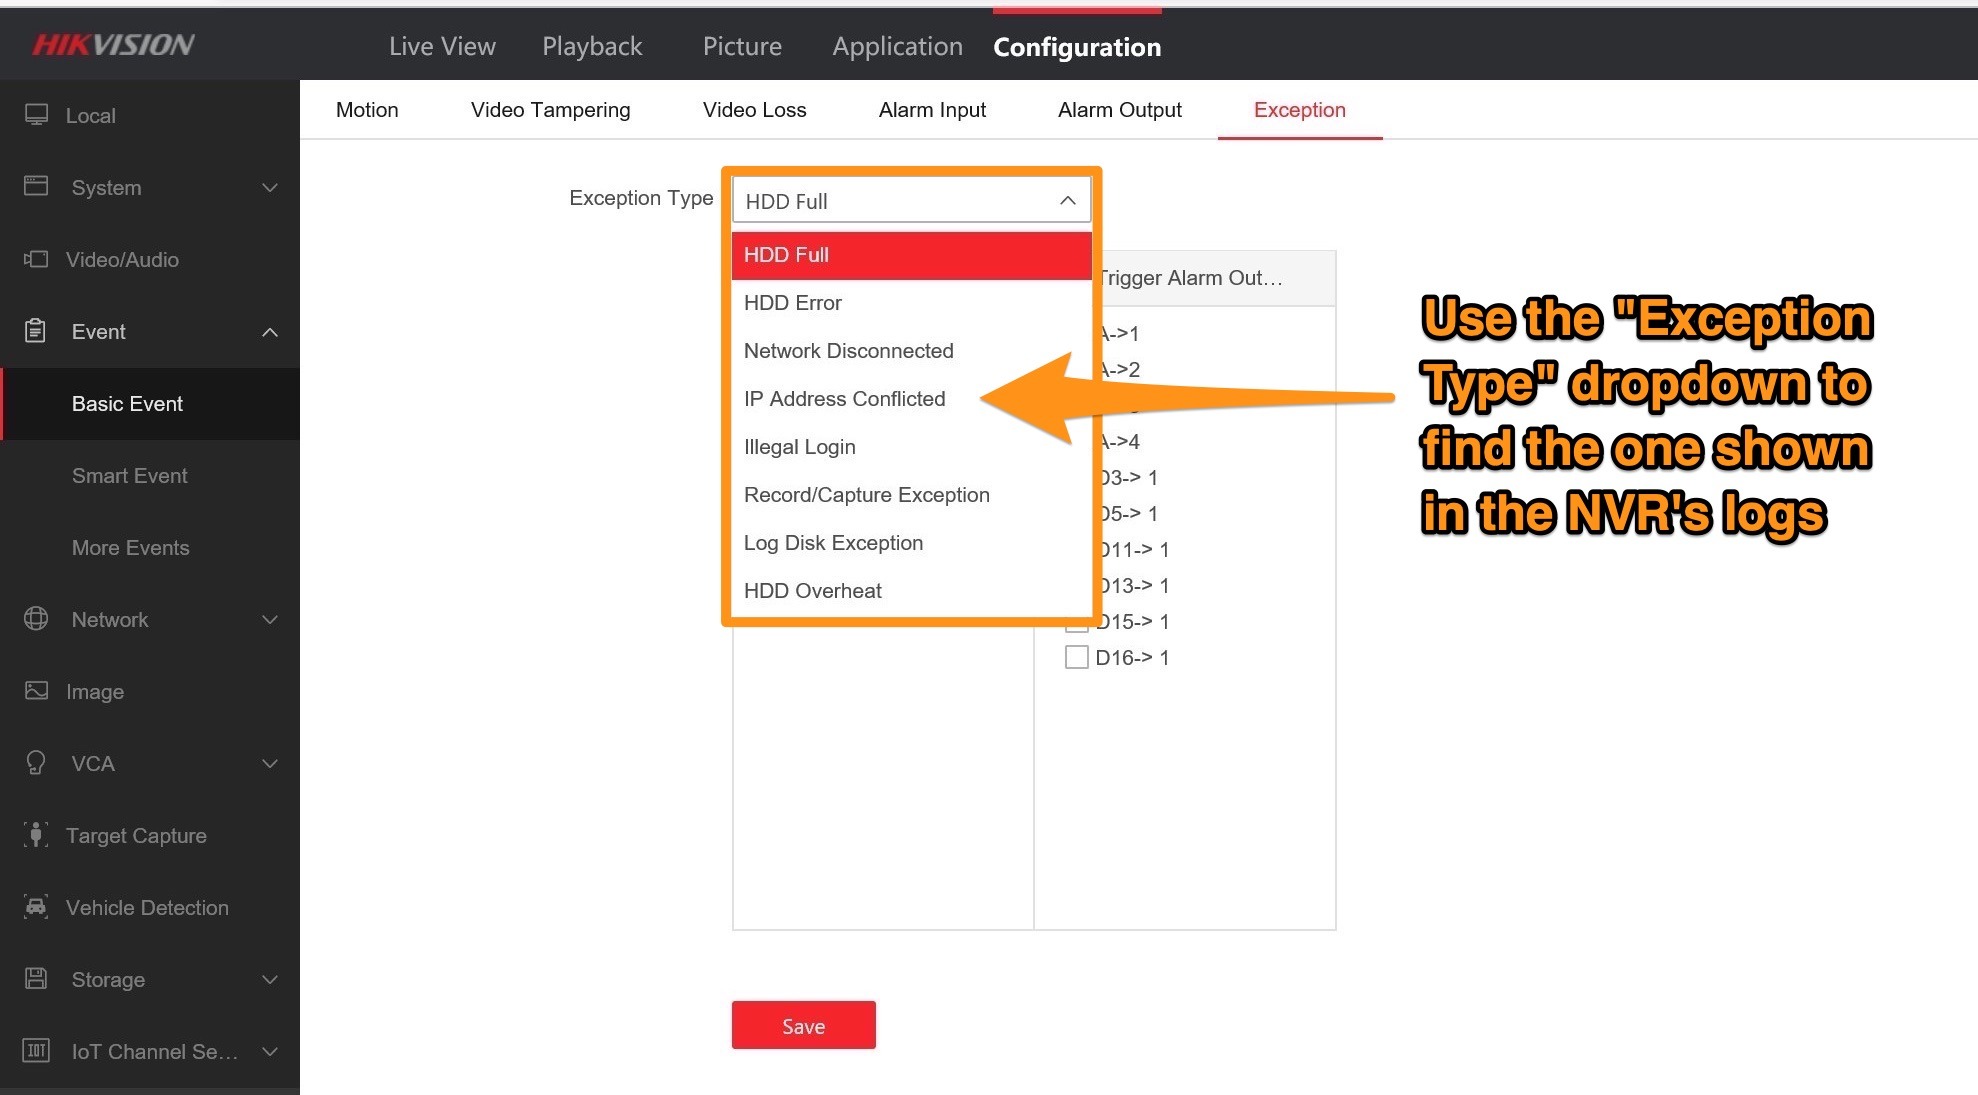
Step 4:
Select the exception shown in your logs from the dropdown.
You will see that “Buzzer” is ticked as a “Normal Linkage” action, which is what is causing the NVR to beep.
Step 5:
Untick this, click “Save”, and the beeping should stop.
