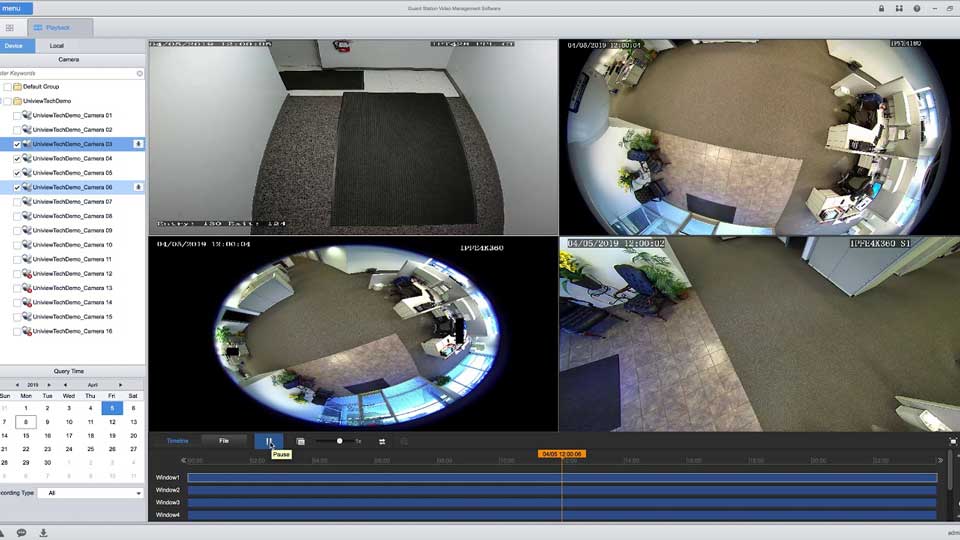
Guard Viewer Mobile App User Guide, Now, the power of uniview tec fits in the palm of your hand. The Guard Viewer mobile application (app) is available for iPhone and Android devices from the respective app store or can be downloaded directly from the links below. The systems allow you to make your phone a part of your security network by enabling you to remotely view a multi-page view of your security cameras or a larger single camera view, position a camera, zoom in or out, and focus the camera. With these applications you can check security from anywhere.
Our general solution, based on the mobile surveillance software, cloud servers and smart terminal devices, is a new generation of IT-based solution that employs the technologies of cloud computing, mobile Internet and big data. Comprising mobile service and Web service, the solution aims to offer healthy, low-carbon, smart, comfortable and secure information services to small and medium sized enterprises.
P2P server
![]()
Mobile client 1
P2P Web
Router
Mobile client 2
1

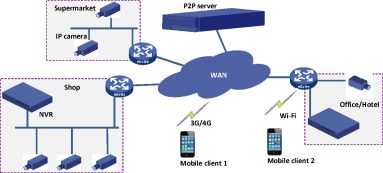
The terminal devices mentioned in this manual refer to IP cameras or network video recorders (NVR).
For the installation of devices, please refer to the user document delivered with the devices.
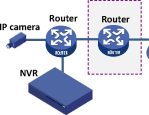
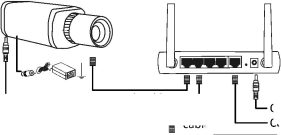
The connection of IP camera and NVR is illustrated as follows:
Network cable
Connect to power
Connect to Internet
Network
cable
Connect to power

![]()
2
Guard Viewer Mobile App User Guide
Read More : Uniview Guide EZStation
3 mobile service
iOS device: iOS 6.1 or later.
Android device: Android 4.0 or later.
Display resolution: 480*800 or higher.
CPU: 1 GHz or higher.
Memory: 1 GB or higher.
Search and download Guard Viewer in Google Play.
Search and download Guard Viewer in App Store.
![]()
NOTE!
3
![]()
NOTE!

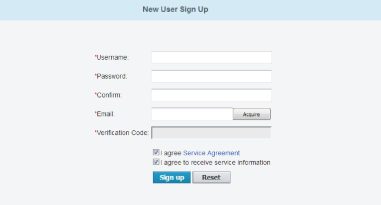
I have read and agree to Service Agreement
Change Password
My Devices
«4 My Sharing Records
^ My QR Codes
![]()
![]()
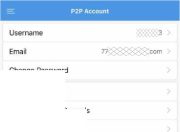
You may also register an account later by tapping
Menu >
P2P
Account.
When opening the app for the first time, you can either log in with your P2P account or skip the login and experience the local functions.
P2P Login Add P2P Device
Get Started
4
Tap Skip to enter the live view page. You can view live videos, play back recordings, manage files and more. For details, please see the following chapters.
P2P Login
You need to have a P2P account to log in. To sign up for a P2P account, see Sign Up for a P2P Account.
![]()
NOTE!
The service area is International by default. If your device is in Mainland
China, tap in the upper right corner and choose 中国服务区.
Password.
Reset Password (Forgot Password?)
If you forgot your password, tap Menu > P2P Account >
Forgot Password. Reset the password as instructed.
To add devices at any later time, tap Menu > Devices and
repeat the above operations.
Scan the QR code on the device or enter the register code manually, or access the Web interface of the device and scan the QR code on the P2P page. Only devices that support the P2P function can be added by P2P.
6
Enter the IP address of the device.
follow the instructions to add devices. For details, see Add
![]()
The above operations are based on the live view page, and are similar to
those of the playback page.
To share devices:
7
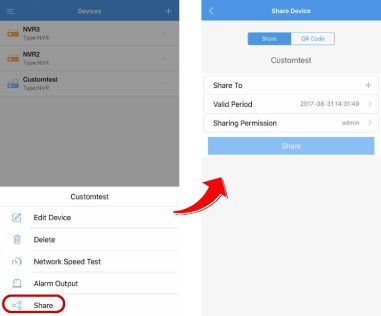
To view sharing records or cancel sharing:
3.
Tap Edit Device and edit device information as required. Tap
![]()
to save and quit.
For details, see Edit Devices.
8
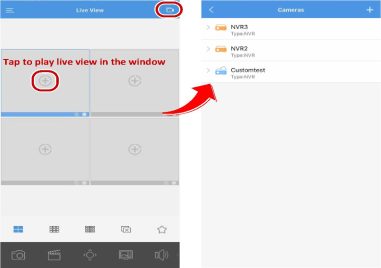
2. Tap or
![]()
of the specified window to enter the camera list.
Select one or more cameras and tap Start Live View.
![]()
NOTE!
will appear under the windows to indicate pages.
The toolbar is displayed under the live view windows. See the table below for descriptions of the live view toolbar.
9
|
Icon |
Description |
|
ocS sggg OO QQQ gggg |
4 9 16 split view |
|
|
Start Stop live view |
|
|
|
|
|
Snapshot |
|
|
Start Stop recording |
|
oOf □□< |
Audio on off |
|
<o> <®J |
Open Close PTZ control panel |
|
gl®! |
Select image quality |
|
aa |
Enable disable alarm output |
To close a live video:
Long press the live video window and drag it to the above to close
the live video
To close or resume all live videos:
videos.
To enlarge a live video and switch between views:
10
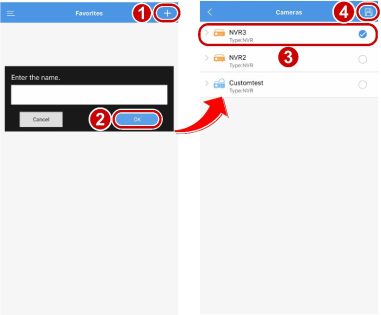
You can add desired live videos to favorites for future quick access. Adding a live video to favorites will save its view mode, image quality, camera info and window location. To add live videos to favorites:
panel and the button will become
See the table below for descriptions of the PTZ toolbar.
Video Quality
1.
Select the desired live video window. Tap
![]()
to open the video
quality panel.
|
Icon |
Description |
|
K | Focus control |
|
|
|
| Zoom in out |
|
|
| Call preset |
See the table below for description of the video quality toolbar:
11
![]()
NOTE!
Video quality options are valid only for devices that support the stream.
In the live view page, you may drag a window to the desired position.
Digital zoom is enabled by default. The icon $ will appear in the window status bar.
|
Icon |
Description |
|
Clear |
The video is played by the first stream. |
|
Balanced |
The video is played by the sub stream. |
|
Smooth or custom |
The video is played by the third stream. You can also edit the resolution, frame rate and the bit rate. |
navigate in the desired direction. When zoomed in, double-tap to zoom out to the original image.

In the live view page, select the desired window and you can record videos and take snapshots to your mobile device.
12
Tap
to take snapshot.
Tap
![]()
to start recording and tap
■ to stop recording.
![]()
NOTE!
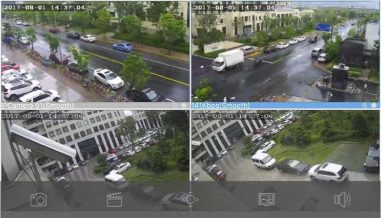
To use the landscape mode, tap
Menu >
![]()
Settings and make sure
that Portrait Orientation Lock is disabled.
To search by time:
13
1. Tap Menu > ΠPlayback.
2.
![]()
, and select the desired camera for playback.
3. Specify the start time of the playback and tap OK.
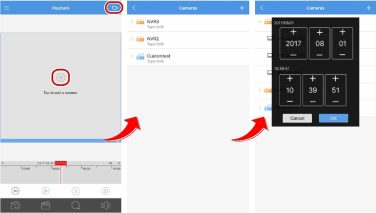
To search by timeline
time scale from the dropdown list.
|
Icon |
Description |
|
@ |
Time interval scale. Switch the scale between 5 30 60 minutes on the timeline. |
|
® ® |
Reduce the speed to play recordings |
|
|
Increase the speed to play recordings |
|
© ® |
Play Pause |
|
|
Snapshot |
|
|
Start Stop recording |
|
Q |
Query |
|
<4; o(]* |
Audio on off |
For details, see Local Recording/Snapshot.
![]()
Saved local recordings are available in Files. For details, see File
Landscape Mode
toolbar, see Recording Toolbar.
![]()
NOTE!
To use the landscape mode, tap
Menu >
& Settings and make sure
that Portrait Orientation Lock is disabled.
![]()
Make sure Do Not Disturb is disenabled when alarm notification is
enabled. For details, see Other Local Settings.
15
View/Edit Events
![]()
Events.
Tap
![]()
to acknowledge, share and delete events as needed.
![]()
Motion detection alarm.(350)
![]()
Motion detection alarm.(350)
![]()
![]()
Motion detection alarm cleared.(351)
Motion detection alarm cleared.(351)
![]()
![]()
2017/08/0114^611
Motion detection alarm.(350)
![]()
Motion detection alarm cleared.(351)
Motion detection alarm.(350)
Motion detection alarm cleared.(351)
¡Device
![]()
2017/08/0114:36:39
From N’
![]()
Motion detection alarm.(350)
![]()
2017/08/01 14:36:36
Motion detection alarm cleared.(351)
Motion detection alarm.(350)
![]()
Acknowledge
Delete
View Alarm-Triggered Recording/Live View
2.
For the desired event, tap
to view its alarm-triggered
recording and tap
![]()
to view its live video.
16

Other Functions and Configurations
In the live view page:
Add your desired live view to favorites, the cameras, windows and other settings will be saved. For details, see Add Live View to Favorites.
In the Favorites page:
favorite entry and tap OK to confirm.
To edit the favorite entries:
![]()
to add cameras.
camera.
18
To delete the favorite entries:
delete, export or share.
By Time/By Type
Tap Menu > © Help to view the help information.
19
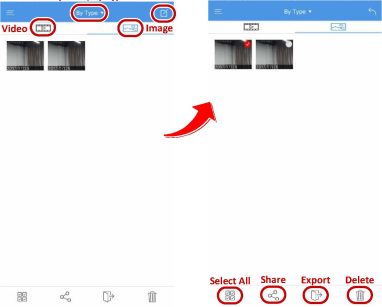
The app language will change according to the mobile operating
system language.
Tap Menu > & Settings to modify local settings.
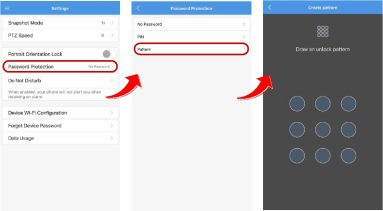
Password Protection
![]()
NOTE!
The app has no password protection by default.
To set a PIN:
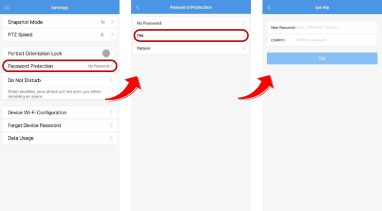
To set a pattern:
20
22
Reset Password (Forgot Password?)
23
Forgot Password
New Password:

Confirm:

24
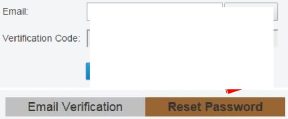
![]()
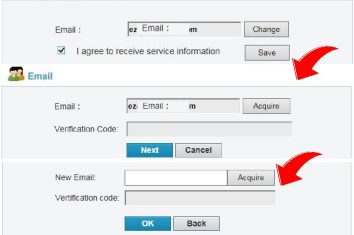
Persona! Information
|
Email Verification |
Reset Password |
in the upper right corner.
Login History (To view the latest 10 login information)
|
No, |
Login Time |
Login IP |
|
1 |
8/3/2017 7:20:00 PM |
122.224.109.114 |
|
2 |
8/3/2017 7:12:53 PM |
122.224.109.114 |
|
3 |
8/3/2017 7:12:45 PM |
122.224.109.114 |
Device/Organization Management
![]()
To make full use of the management features of the Web service, please
ensure the network accessibility of the managed devices.
25
1.
On the Device List page, click
F Add Device
to enter the Add
Device page.
![]()
You can get the register code of your device by logging in to Web
interface of the device. For details about the operation, please refer to
the user document.
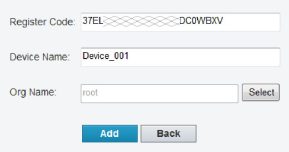
![]()
NOTE!
To delete a device, select the device in the device list and then click
You can add one or multiple devices to the same organization for easy management.
1.
Click
![]()
to enter the Add Org page.
26
Upper Org Name:
root
Select
Org Name: Org a
3.
Click
■ Add Device
Confirm
Back
, enter the register code, device name, and
select the new added organization, then click Add.
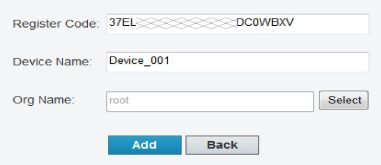
![]()
To change an organization name or delete an organization, select the
desired organization in the organization information list and then click or . An organization that contains devices cannot be deleted.
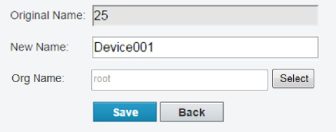
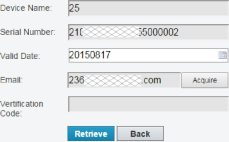
Select the desired device(s) and then you can share your device, change the device name, retrieve your password or access the device.

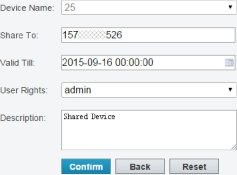
• Share Device: Click Share and then enter the device information.
27
Fill in sharing device information.
28
Retrieve Password
Access Device: Click Access to enter the Web interface of the device
and operate as required.
I cannot access my devices (NVR/IP camera) through the WAN.
Please follow the steps below to check.
Go to www.star4live.com and log in to check whether the device is
listed under My Cloud Devices. If not, click
F Add Device
or use the
mobile phone client to add the device.
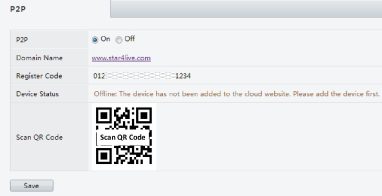
Go to the Web interface of your device and click Setup > Network > P2P. Check whether P2P is enabled and the Device Status is Online (connected to the P2P server).
29
Go to the Web interface of your device and click Settings > Network > P2P. Check whether P2P is enabled and the Device Status is Online (connected to the P2P server).
30
