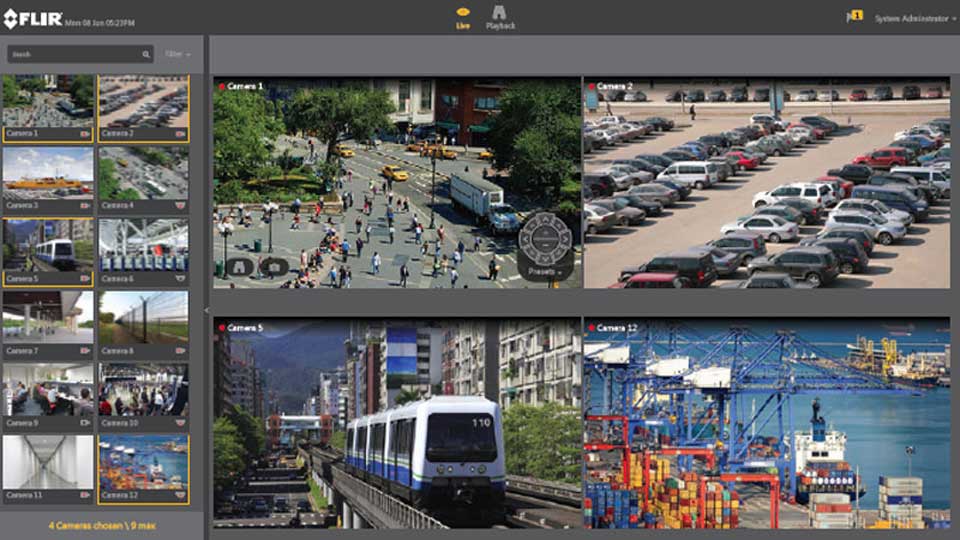
FLIR United VMS Installation Guide,FLIR United VMS delivers best-in-class video management that can grow with your security needs—from a single location to multiple sites around the world. United VMS is a family of products including Latitude software, and Horizon and Meridian network video recorders—built on common core components. Users can monitor any number of devices sharing the same familiar user-interface, enhancing operational efficiency and improving ROI.
Flexible integration capabilities facilitate custom add-ons such as Radar Integration, Condition Monitoring, and Face Redaction. The Health Monitor tool proactively monitors the system and alerts security personnel to issues before downtime occurs. United VMS allows you to securely access video assets and receive event alerts anywhere, any time using dedicated workstations and the UVMS Web Client for fixed and mobile devices.
Upon Startup, or when you re-populate your layout at any time, go to the View menu, and use the drop-down menu to choose options in the Default Layout, Viewing Modes, Content Panes, and Full Screen drop-down menus.
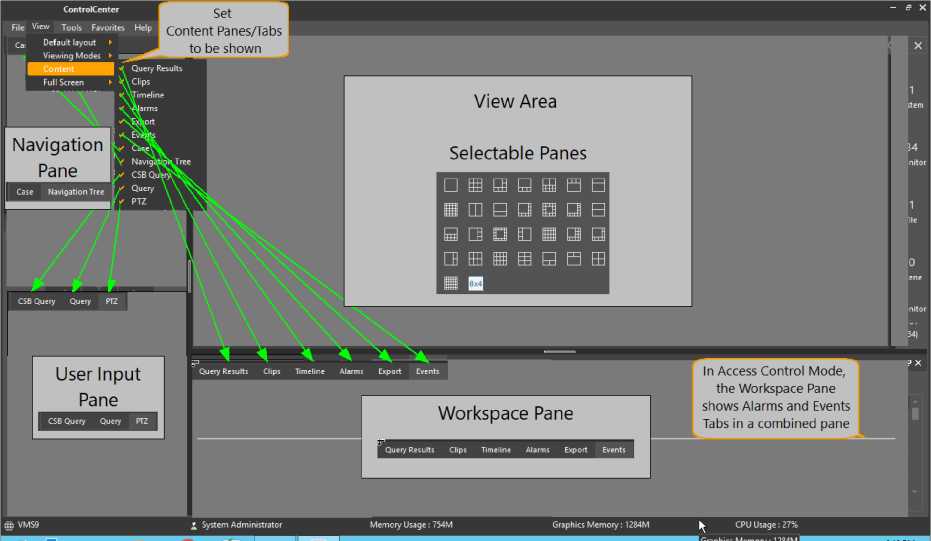
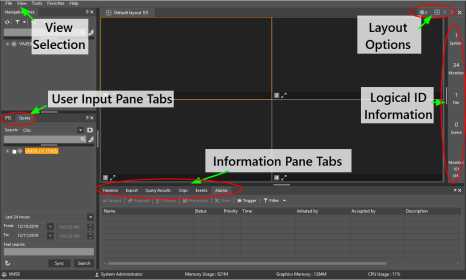
How the Panes and Tabs are positioned
Where did they go?
UVMS 8x
UVMS 9
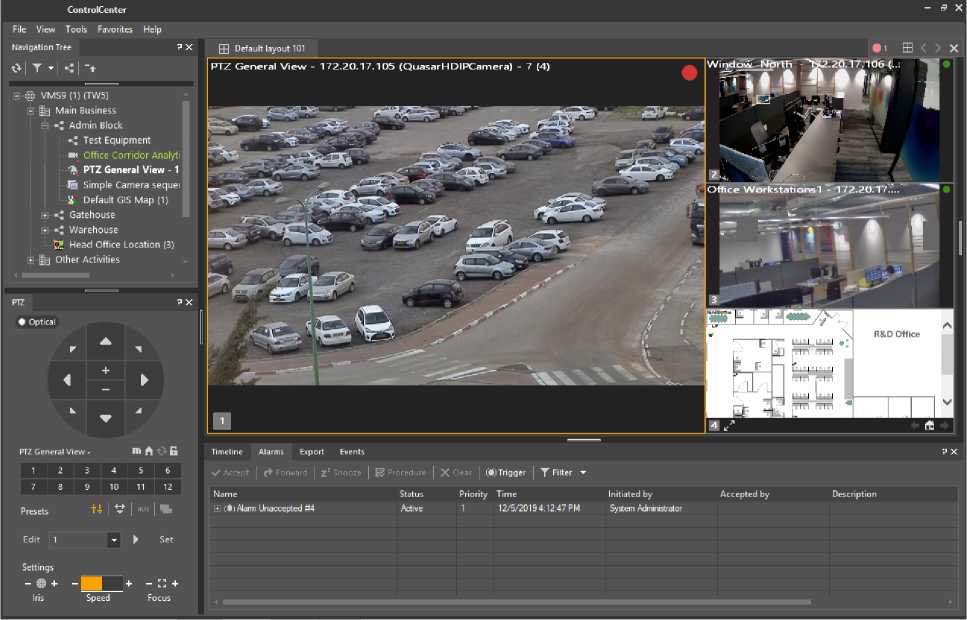
Fig 1 – Control Center General View
FLIR United VMS Installation Guide
Read More :
The Control Center provides users with a highly customizable platform for viewing live and recorded video.
Features include:
- Each Control Center enables the user to view up to sixteen live and archived video sources per monitor, with multiple monitors supported on each workstation.
- Full control of content playback with powerful time line controls.
- Powerful query capability to assist in locating specific content or identifying recordings associated with motion events.
- Monitor and manage alarms.
- With proper hardware and encoders (or IP cameras) video can be viewed at full motion (30 fps NTSC, 25 fps PAL) 4CIF quality.
- Detailed Help information on all facets of the system.
Click here to view details of how to use the Help features.
Other major application features include:
- Audio and video independence. Audio inputs and outputs are no longer tied to a video source. The relationship between the two types of media in the system has been transformed from one-to-one to many-to-many, giving users the ability to mix audio sources and link any combination of such sources to multiple camera scenes.
- Sequences and Layout tours allowing multiple scenes to be displayed in predefined sequences and for defined durations.
- PTZ Control and Digital Zoom – integrated into a single intuitive interface, which enables users to easily take advantage of the best available tool without having to switch windows. Digital and analog PTZ functions can also be controlled directly from the tile using a mouse with a scroll-wheel.
- Multiple-source bookmarking. Bookmarks are now augmented by incidents, a powerful feature that enables users to associate multiple media sources to a single occurrence simply by highlighting multiple tiles prior to clicking the bookmark button. The set of bookmarks created this way constitutes a single incident.
- Full alarm management capabilities.
- Inter maps. Multiple maps and web pages can now be placed in each site.
- Instant replays with or without alternative content arming. The user can choose to allow instant replay of the buffered video either in the next available tile or only in armed tiles specified for alternative content. Alternative content tile arming is similar to alarm arming but used for instant replays. This enables users to determine in advance where and how the alternative content is displayed.
- Workspace customization. The location and size of all workspace areas other than the Application Menu can be modified.
- Simplified and enhanced navigation. All logical entities are now shown in a single Navigation Tree.
Welcome to the UVMS 9.2.3 Control Center Help File.
Version 9.2.3 Build 1111
WindowBlinds: DirectSkin™ Stardock®
Access the Help file
Click on Help in the Main menu bar to access the Help button.

The Control Center is normally loaded on the local machine when you click on the Control Center icon.
When the Control Center does not have a dedicated operator (example, where it operates purely as a display manager), it may be convenient to start the application and log in using the Command line.
Note:
- The processes described do not work if the Control Center is already running on the workstation.
- Each of the following instances refers to a NEW installation. For systems that have been upgraded from previous versions, the file path begins:
C:\Program Files (x86)\DVTEL…
Single Directory Control Center Log On
This procedure describes single directory Control Center log on syntax.
Do the following:
• From the Command Prompt, enter the following:
“C:\Program Files\FLIR\<%SOFTWAREPREFIX%>\ControlCenter\ControlCenter.exe” -u=”admin” -p=”password” -s=”server-address”
Command Line Login
Multiple Directories Control Center Log On
This procedure describes multiple directory Control Center log on syntax.
Where multiple directories are needed, use the Command Prompt to enter all the addresses of all the required servers:
Do the following:
• From the Command Prompt, enter the following:
“C:\Program Files\FLIR\<%SOFTWAREPREFIX%>\ControlCenter\ControlCenter.exe” -u=”admin” -p=”password” -s=”server-address1 server-address2 server-address3 <RESULT?>
Automatically Run Activities after Log On using Command
Line
This procedure describes how to run a command to open Control Center upon computer start. You create a task in the Task Scheduler, set a trigger, and create an action with arguments, and save the task.
Follow these steps:
- From the UVMS 9.2.3 open Task Scheduler.
- Create a Task:
- Enter a task name, navigate to Triggers, and create a new Trigger
- Choose Begin the task “At startup” or “At log on”
- (Optional and recommended) – Mark “Delay task for 1 minute” – so the computer can get ready after startup
- Click OK to save the trigger).
- Set Actions:
- Navigate to Actions, create a new action, and choose the Start a program option action.
- Enter the ControlCenter.exe path: (example)
C:\Program Files (x86)\<%SOFTWAREPREFIX%>\ControlCenter\ControlCenter.exe
-u = “Username” -p=”Password” -s = “Server1 Server2 Server3” (or substitute “Encrypted Password” – See below)
- For a pop-up regarding the text in the arguments, select the No option.
- Click OK to save the Action, and then click OK to saves the Task.
Log On via the Command Line using Encrypted Password
![]() When using Command Line Log On, the process text and arguments are readable to any operator of the target Control Center machine. To prevent exposing the normal User password, it is recommended to encrypt a password.
When using Command Line Log On, the process text and arguments are readable to any operator of the target Control Center machine. To prevent exposing the normal User password, it is recommended to encrypt a password.
Cautio n
Follow these steps:
cd C:\Program Files\FLIR\<%SOFTWAREPREFIX%>\Tools\PasswordEncryptor
and then:
[Application folder].PasswordEncryptor.exe Password
C:\Program Files\FLIR\ [Application folder] \Tools\PasswordEncryptor
The file “encrypted.txt” contains your encrypted password
Use Encrypted Password
In the Startup arguments above, use the text in the encrypted.txt file as the password in the Password argument.
This password text only works for the Command Line Log On. When an operator tries to use this encrypted password to gain regular access to a client workstation through the Login screen, it is not accepted.
Command Line Log On Layout Selection
These processes have been created as part of the Multi-Directory Tools which enable the user to define and run Activities on a Control Center that is started using the Command Line.
The document “Multi-Directory Tools – User Manual ” describes this feature.
Note: For Multi Factor Authentication (MFA), enter the verification code to complete log in.
When Multi Factor Authentication is enabled in the Admin Center, you must
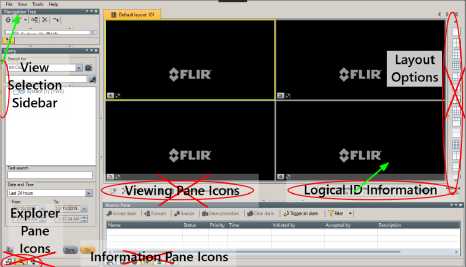
One of the major Control Center features is that the user can customize the most of the workspace. Only the menu area at the top of the screen is static — every other pane can be moved or hidden. The example below shows a typical layout:
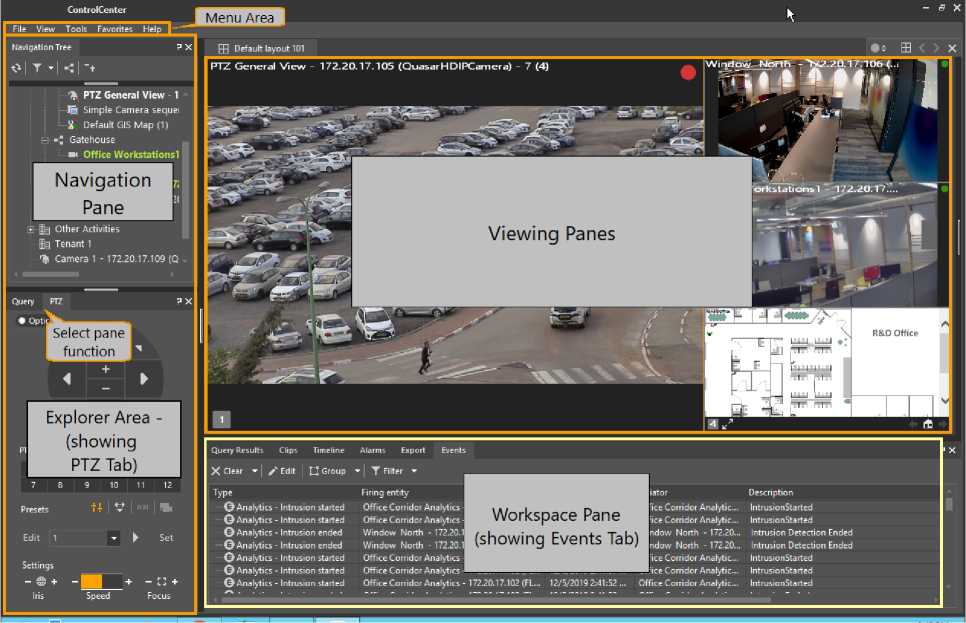
Fig 2 – Control Center General View
The following links provide detailed information on the main components in the Control Center screen:
- Menu Area – Presents these menus: File, View, Tools, Favorites, Help.
- Viewing Pane – Displays cameras, sequences, alarms, maps, instant replays and archived video clips. It is also used to receive and transmit audio. The Layout tabs, located at the top of the pane, enable the user to access the different available layouts.
- Navigation Pane – Browse for logical system entities and display or play them in the Viewing Pane, or through external output devices (i.e. analog monitors and speakers). The following panes can be displayed below the Navigation Pane (or can replace it): o PTZ Pane – Control PTZ cameras/domes and digital zoom.
o Query Pane – Search for archived scenes based on a scene; date and time; and recording trigger.
- Workspace Pane: This area can contain any of the panes below (but only one at a time):
o Alarm Pane – Trigger and manage alarms.
o Events Pane – Display events the user has been configured to receive o Timeline – Displays the active viewing tile’s time line and can be used to quickly browse through a video or audio clip, and export a partial or whole video clip.
o Query Results – Displays query results and enables users to review them in the Viewing Pane or via analog monitors.
Other panes that can be opened by clicking on their corresponding icon in the Control Center screen are as follows:
- Navigation Tree is used to create new cases, open exported cases and manage them.
- Export Status Pane displays the status of exported clips during their export and after the export is completed and can be used to stop exports.
- File Playback Pane synchronously plays and validates exported clips.
- CaseBuilder Query Pane is used to search for cases based on case name, serial number, the user who created the case or free text.
The Menu area (Application Menus) is stasis and its size and position remains unchanged. The Menu area consists of the following menus:
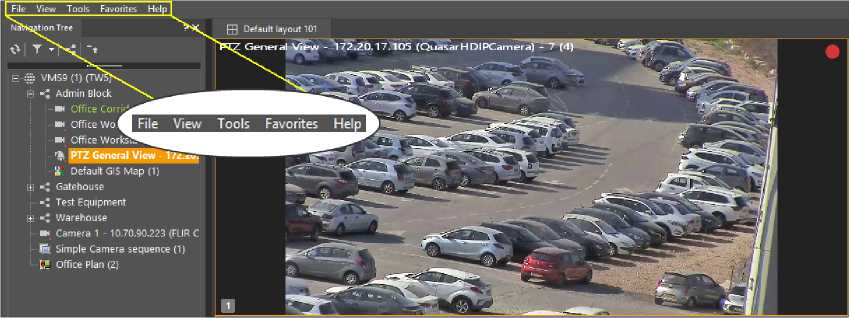
File
The File menu enables users to do the following:
- Manage the system (connect or disconnect from the system, and change password)
- Open a DVT file
- Lock Application
- Exit the application
View
The View menu enables users to do the following:
- Show/hide the default audio and video layouts of the viewing pane
- Select pre-set viewing modes
- Choose panes to display (the viewing pane cannot be hidden)
- Enter full screen mode
To view the contents of the viewing mode section, see Viewing Mode
Tools
The Tools menu opens the Options window, from which you configure a number of application settings.
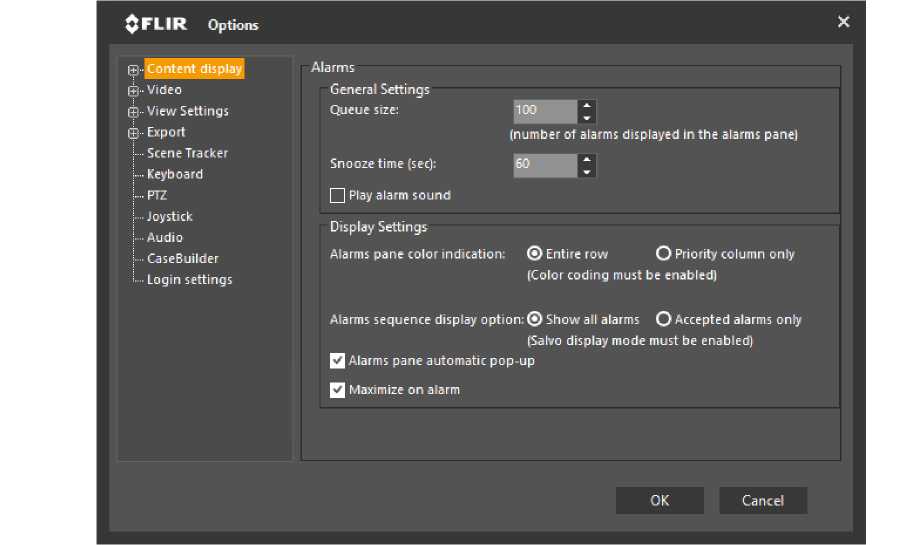
To view the contents of the Options dialog box in detail, see Options Menu.
Favorites
Favorites enables the user to create and save additional custom workspace configurations to best suit their security environment and maximize operation efficiency. To view the contents of the viewing mode section, see Favorites.
Help

The Help menu opens the online Help File, and enables the operator to verify if Control Center software updates are available, and to view the information held in the About screen.
Right-click on any Control Center viewing tile or on the navigation tree to open a Context menu.
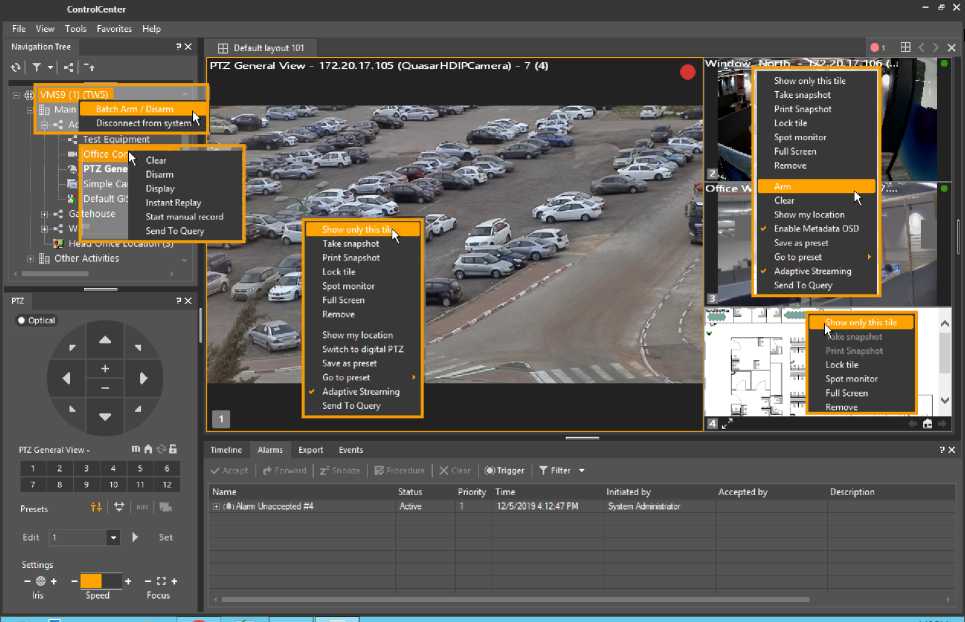
The Context menu varies depending on the contents of the window from which it was opened.
For example – when watching a Live camera, the context menu displays the Send to Query option so the user can search for clips from that camera.
When the user is watching a recording, the context menu removes that option, and displays the Switch to Live option.
Show only this tile Take snapshot Print Snapshot Lock tile Spot monitor Full Screen Remove
Show only this tile Take snapshot Print Snapshot Lock tile Spot monitor Full Screen Remove
Go to preset Switch to live
Clear Disarm
Save as preset Go to preset Send To Query
Context Menu when playing Live
Context Menu when showing Playback
This is a list of all the Context Menu entries.
| Context Menu Item | Comments |
| Show only this tile/ All tiles | Changes this tile to a single-tile display |
| Context Menu Item | Comments |
| Take Snapshot | Saves a snapshot of the video from the selected tile in the default export folder defined in the Tools menu. Snapshots are saved as .png files. |
| Print Snapshot | Prints a snapshot of the video from the selected tile. See Print Snapshot Dialog
Note: The ‘Export’ Privilege must be set in the User/Privileges screen to use this function. |
| Lock/Unlock tile | No other content can replace this until the Lock Tile option is deselected. |
| Show my Location | An open GIS map is repositioned to show this camera in the center of the view tile. (Requires that GIS location has been stored for a camera and that you have defined a GIS Map). |
| Spot monitor | Clicking on Spot Monitor defines this tile to be the destination for any video opened by double-clicking on a camera in the Navigation tree or a clip in the Query list.
The Spot Monitor will also be used when video from a remote Control Center is to be shown. Note: Only one tile can be set as the Spot Monitor at any one time. |
| Enter/Exit Full Screen | Displays this tile in full-screen mode. Revert by right-clicking again and select the Exit Full Screen option, or click the Esc keyboard key. |
| Remove | Clears this tile. |
| Properties | Extended OSD information that displays or conceals tile statistics in General and Advanced tabs.
Note: The Properties option is active only when video content displays in the tile. General Tab The following information displays in the General tab:
Note: This parameter displays the CLIENT stream connection type. Advanced Tab The following information displays in the Advanced tab:
|
| Context Menu Item | Comments |
|
|
| Switch to Digital/Optical PTZ | PTZ cameras only – activates digital PTZ functionality, taking current PTZ position as starting point. |
| Activate/Deactivate Privacy Masking | Allows the operator to remove/replace the Privacy Mask (System Administrator sets whether operator/s have access to this option). |
| Clear | (ioi units only)
Clears the current state of the ioi camera. |
| Save as preset | If the user has used the in-pane controls to change the view in a viewing tile, the resulting view can be saved as a digital preset. |
| Go to preset | If digital presets have been saved for the camera being displayed in this viewing pane, the user can select them by clicking on Go to preset, and then selecting the required view. |
| Adaptive Streaming | Activate/Deactivate Adaptive Streaming (saves bandwidth when displaying video in smaller tiles) (Only for supported devices). |
| Send to Query | Sets the selected unit as a filter in the Query pane so that all recordings from that unit can be selected. |
| Switch to Live | Changes contents of the tile from Recorded content to the live view of the same camera.
Note: For regular playback – not available when playback is Synchronized, Thumbnail mode, or triggered by an Alarm. |
| Start/Stop Manual record | Only in Nav. Tile menu – same function as clicking the Record button in a camera tile. |
| Display | Only in Nav. Tree menu – Displays video from this camera in the next available tile. |
| Instant Replay | Only in Nav. Tree menu – Starts replay of Manual recording in next available tile that is armed to show replays. |
Analytics-Related Context Menu Entries
| Context Menu Item | Comments |
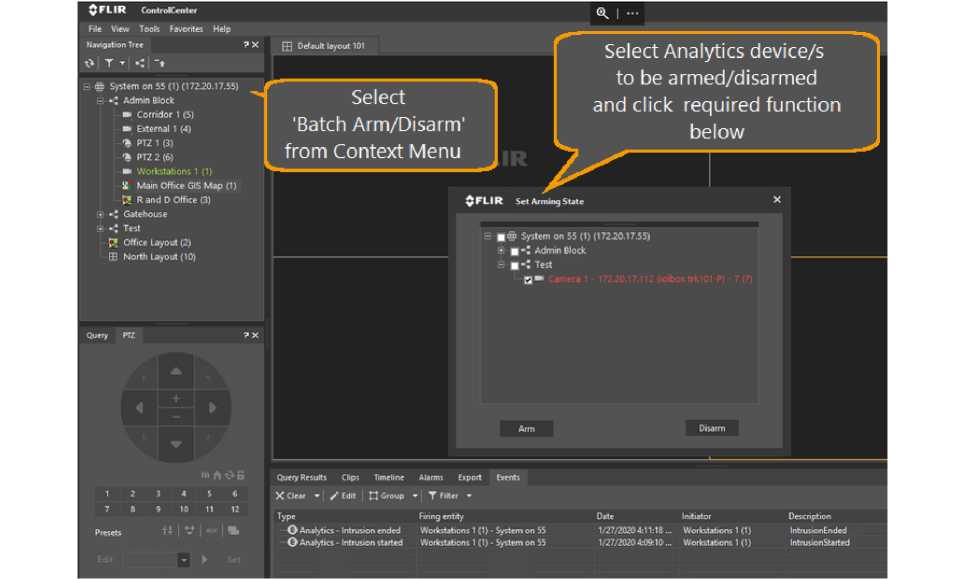
| Batch Arm/Disarm | (Shown in the Context Menu when the System is selected in the Navigation Tree) |
| Context Menu Item | Comments |
| Opens the Batch Arm/Disarm dialog box, listing all Analytics-capable cameras, and allowing the user to arm or disarm Analytics in one or more cameras. | |
| Arm/Disarm | (Shown in the Context Menu when an Analytics-enabled camera is selected in the Navigation Tree)
Allows the user to arm or disarm Analytics in the selected Analytics-capable camera. |
| The Analytics arming status of individual cameras is shown in the Navigation tree. |
When using ioi Analytics-enabled cameras, the user can open a Batch Arm/Disarm Dialog box to arm or disarm the Analytics feature in one or more cameras.
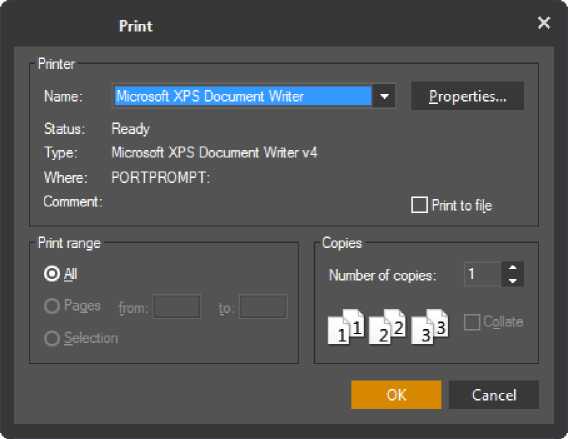
If the Print Snapshot option is clicked in a Viewing Tile Context menu, then the Print dialog opens, allowing the user to set the required Print parameters.
Note: When printing a larger image (high resolution video) than the size of the page used for printing, the image is scaled down to fit to page.
The ControlCenter user can easily manage different tasks by adjusting the application workspace in a single button click.
By selecting the view mode, different pane content tools display according to a set view, presenting a set of tools. You can add and delete content to display in addition to the pre-set tools displayed.
To select a viewing mode:
• Access View, Viewing Modes from the Application Menu, and then select the desired mode.
View Tools Favorites Help
File
Case Default layout ►
Supervisor
Monitor
Forensic
CaseBuilder
Access Control
Viewing Modes Content ►
Full Screen ►
■< Office W(
K ClfFiro Ul/t
The following modes are available:
- Supervisor – Adjusted for a supervisor overview of the security environment.
- Monitor – For live video and audio monitoring.
- Forensic – Optimized for searching and reviewing of recorded information.
- CaseBuilder – Authoring tool used to collect and review recorded data in specific cases.
- Access Control – Optimized for real-time handling of Alarms and Events.
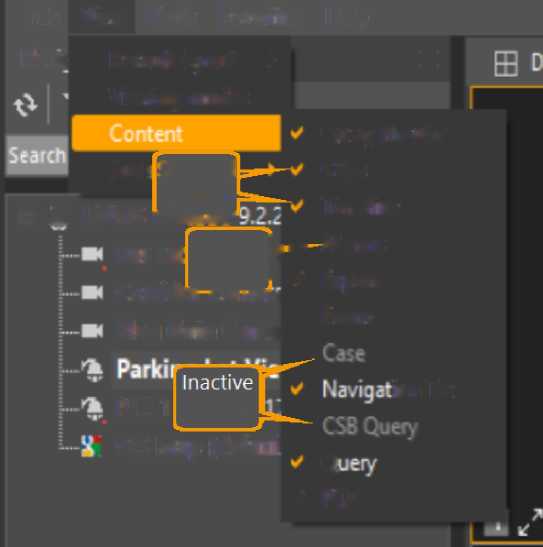
To add available content:
- Access View, Content from the Application Menu.
Displayed content panes appear with an orange check mark in the list, available content panes have white lettering, and inactive content panes are grey.
The selected content pane displays.
To delete displayed content:
• In the Control Center, locate and click the Close pane icon Q usually located in the upper right pane corner.
The selected pane is deleted from view.
To redisplay a deleted pane, go to View, Content, and select the non-selected pane.
Note: For panes with multiple tabs, you have to delete each displayed tab individually.
File
View Tools Favorites
Help
Naw
? X
ion Tree
Default layout ►
Viewing modes ►
Query Results Clips Timeline
■- Alarms
* Export
Events
Full: Selected _ content
E)~£SJ UVMS Catuuue*’
Bus St< Active k content!
Corridoi laıııeit
Flag Gate Came
PTZ 1 content
GIS Map (default Q
* PTZ
The following table describes and lists Control Center Viewing Modes and default content panes:
| Mode | Content |
| Supervisor | Query Results, Clips, Timeline, Alarms, Export, Events, Navigation Tree, Query, PTZ |
| Monitor | Timeline, Alarms, Export, Events, Navigation Tree, PTZ |
| Forensic | Query Results, Clips, Timeline, Export, Events, Navigation Tree, Query |
| CaseBuilder | Query Results, Timeline, Events, Navigation Tree, Query |
| Access Control | Query Results, Clips, Timeline, Export, Navigation Tree, Query, PTZ |
See Quick summary of ControlCenter UI changes.
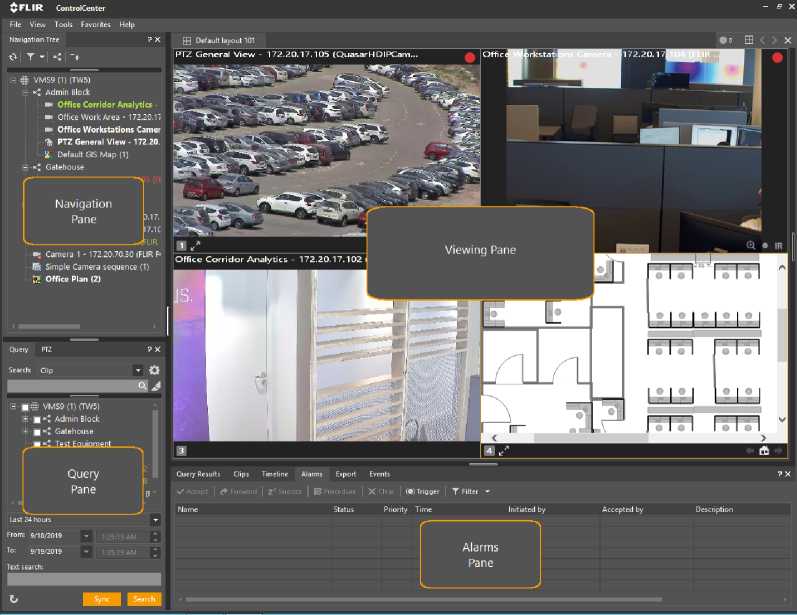
The following panes display in Supervisor mode:
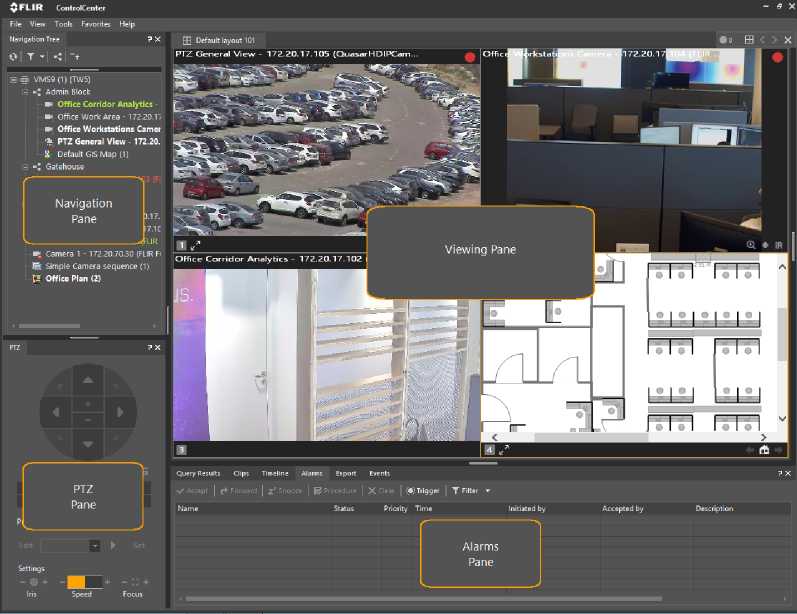
The following panes display in Monitor mode:
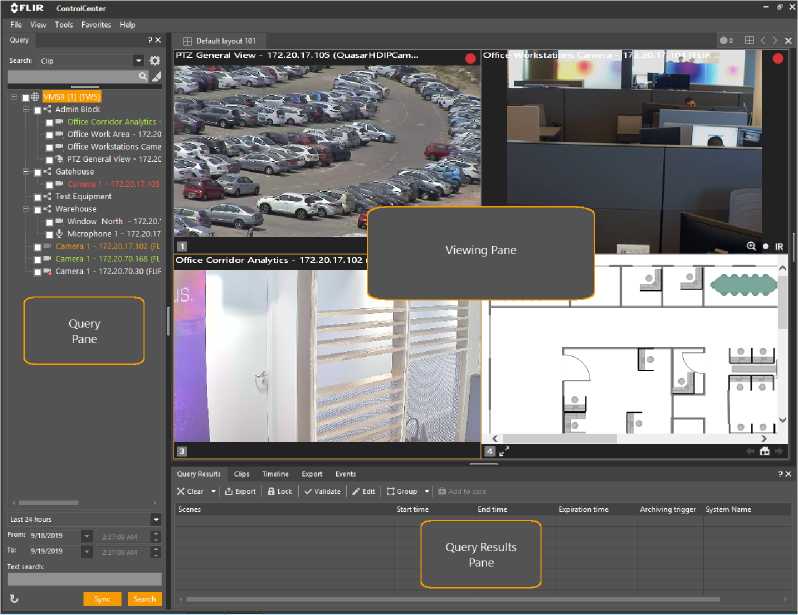
The following panes display in Forensic mode:
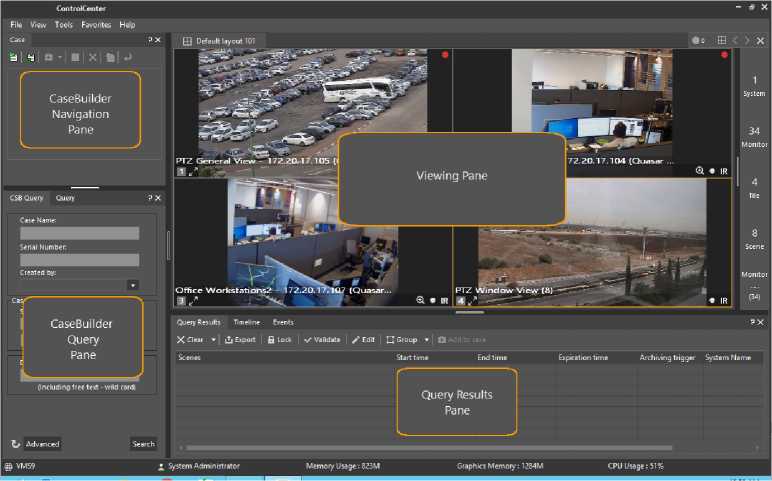
The following panes display in CaseBuilder mode:
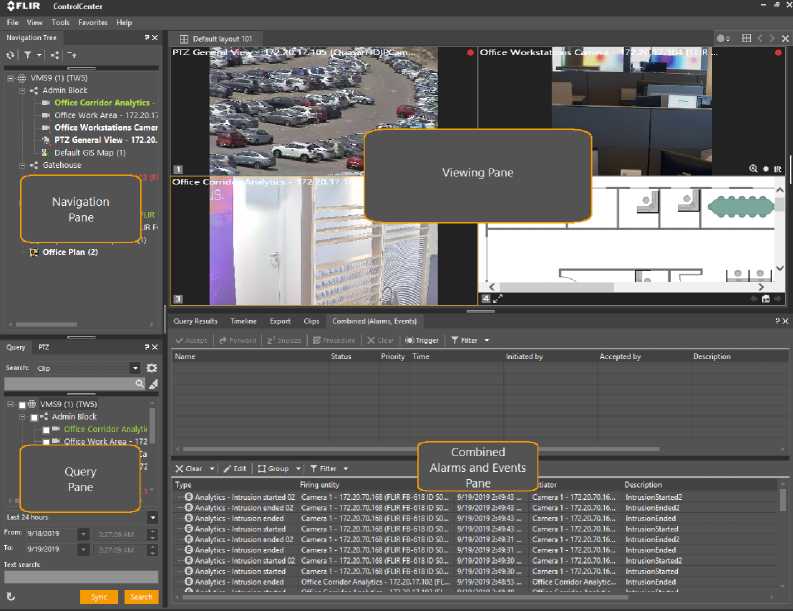
The following panes display in Access Control mode:
- Navigation Pane
- Query Pane
- Combined Alarms Pane & Events Pane
- Viewing Pane
Notes
Options
Navigation Tree
|- Alarms
İ – Events
I- Timeline
i i- Query
(=)■■ Video
İ – General
i • Instant replay
iPlayback
g.. View Settings
İ– General
İ— Full screen
i Layout
|— Advanced
İ– Layout patterns
j (j- OSD
İ – Tile Toolbar
İ (+)- Notifier
(=)■■ Export
İ- Snapsnot
I (t)Clip
= L… Burn
i— Scene Tracker
i~. Keyboard
İ– PTZ
İ Joystick
1 Audio
İ- CaseBuilder
Use the Options menu to customize your ControlCenter settings.
To access the Options menu:
• In the Applications menu, select Tools / Options.
Use the Options Navigation Tree to access the customizable parameters.
The following are category sub-menus:
Alarms
Use the Alarms sub-menu to set the General Settings and the Display Settings parameters:
Alarms sequence display option: O Show all alarms ® Accepted alarms only (Salvo display meatmust be enabled)
Options X
Content display
Alarms
Events
Timeline
I-Query
Video
General
Instant Replay
Playback
View Settings
General
Full Screen
Layout
Advanced
Layout patterns
– OSD
A
lt is necessary to restart the application
For some of the changes to take effect.
Alarms
OK Cancell
| General bettings | |||
|---|---|---|---|
| Queue size: | 100 | IM | |
| (number of alarms displayed in the alarms pane) | |||
| Snooze time (sec):
I | Play alarm sound |
60 | n | |
Display Settings
Alarms pane color indication: ® Entire row O Priority column only (Color coding must be enabled)
Q Alarms pane automatic pop-up
□ Maximize on alarm
Note: When the Accepted alarms only option is selected, a warning dialog displays to remind you to restart the system.
 General Settings
In the General Settings field, the following options are available:
- Queue size: Determine the number of alarms displayed in the alarm queue.
- Snooze time: Determine the time interval (in seconds) after which the alarm is triggered again when the Snooze button is clicked.
- Play alarm sound: Determine to play a sound when an alarm is triggered.
Display Settings
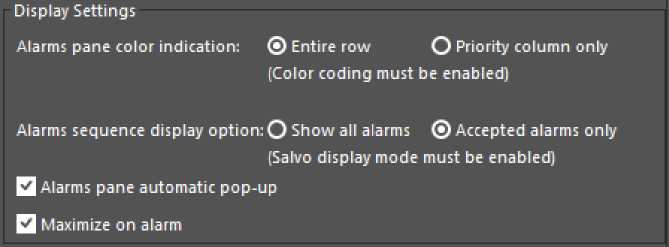
In the Display Settings field, the following options are available:
- Alarms pane color indication: Select to color an entire row or a priority column only.
- Alarms sequence display option: Select Show All Alarms or Accepted Alarms only.
- Alarms pane automatic pop-up: Select to automatically display the alarms pane when triggered.
- Maximize on alarm: Select to maximize a ControlCenter application (see note). Note: When a ControlCenter application has at least one tile “armed for alarm”, is
minimized and appears as an icon in the Windows taskbar, this option is selected, AND an alarm is triggered, the ControlCenter application maximizes to fill the monitor screen.
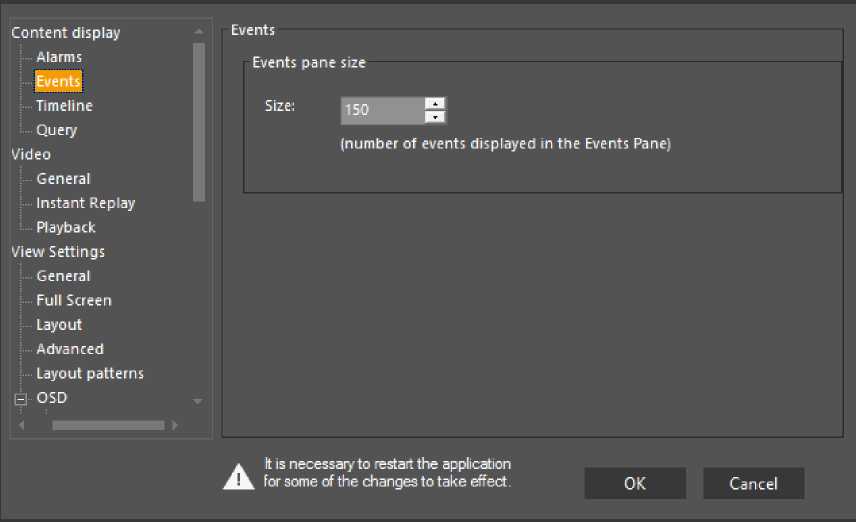
The Events sub-menu specifies how many events are displayed in the Events pane.
The Timeline sub-menu specifies whether to Show Motion in the Timeline pane.
Options
Timeline
I Motion
□ Show Motion
OK
Cancel
Content display
!■ Alarms
i- Events
Timeline
L.. Query
Video
: General
Instant Replay
L Playback
View Settings
İ- General
İ- Full Screen
Layout
Advanced
Layout patterns
Ö OSD
Alt is necessary to restart the application for some of the changes to take effect.
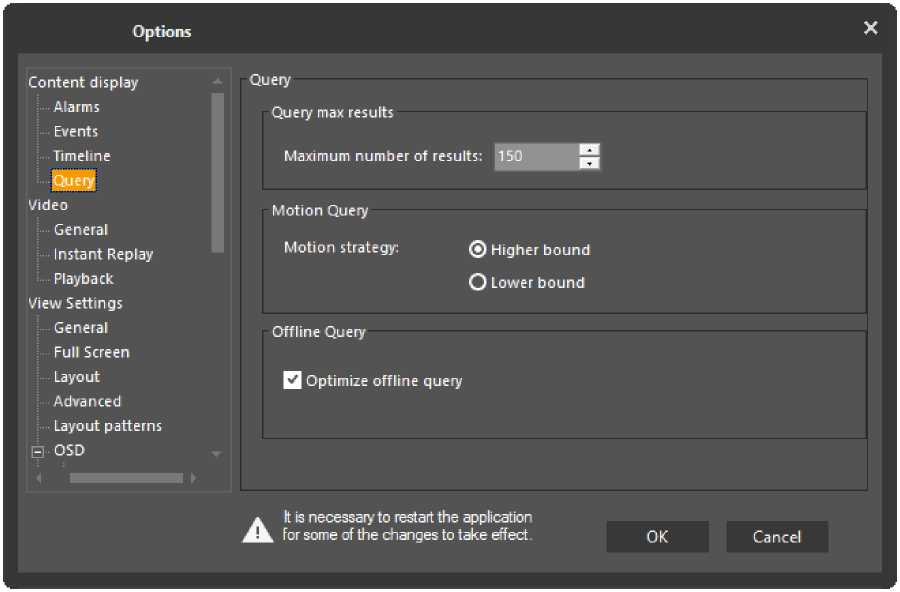
- The Query sub-menu sets the following parameters in the Query Results pane:
- Query Max Results: Determine the maximum number of results shown in the Query Results pane.
- Motion Query: Specify the motion strategy used in motion-based searches (either higher bound or lower bound).
- Offline Query: Select the Optimize offline query option to optimize offline query.
The Video options screen has the following sub-menus:
VF1_IR Options
Ç-Content dıtpLay
Ljimttıest
e- Vıdw
General
U Instant replsy
Playback
M Vie™ Sittings
■ General
Full T erten
[- ley-out L Advanced
i- layout patterns
© OSD
Tile Tooltnr
! Hatifler
ıTj Export
□K
Caneel
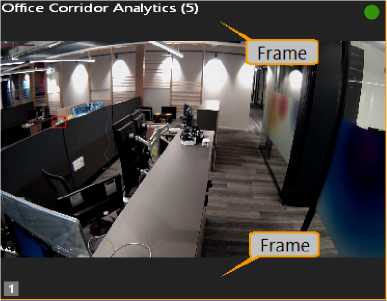
When the Maintain Aspect ratio option is
selected,
When the Maintain Aspect ratio option is
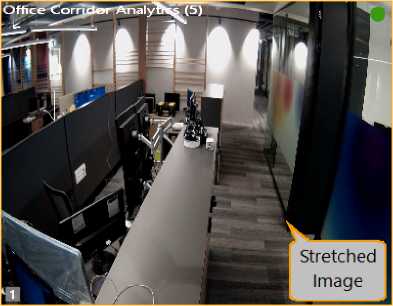
deselected,
Video
Settings
Q Maintain aıpetl ralıû
Q Adaptive streaming
Ûuatity
□ Delntetladng
S Cfeh-lockın-g
Hardware A.ç<elerat ıç>n
Max CM cores to utNtac per ıtresm 1 | *
Lırnrt CPU «res when retotıriıpn niıgnı it – putu
Q Enable CM video decodme
Alt it necessary to restart the application for some of the chan-ges to take effect,
The Video General sub-menu has the following sections:
Maintain aspect ratio
Li Maintain aspect ratio (default ON) This controls how video scenes are displayed in the Control Center.
the display has ‘frames’ to fill the unoccupied
portions of the tile.
the display stretches to fill the available tile.
Note: This setting can be toggled in real time for individual tiles by selecting the tile and clicking Shift-R on the keyboard.
Adaptive Streaming
U Adaptive streaming (default ON) – This enables the system to choose the optimum available stream from a camera, depending on the size of the viewing tile. The system selects a high-resolution stream when the image displays in larger tiles or full-screen mode. When the viewing tile is smaller, lower resolution is needed, so a lower-resolution stream can be chosen.

Adaptive Streaming – Shows Resolution Changes between Large and Regular Viewing Panes
Adaptive Streaming is currently available with FLIR and DVTEL’s Ariel, Quasar, and Quasar Gen 2 edge devices.
Adaptive streaming is enabled by default, but can be disabled on each ControlCenter by deselecting this option. It can be disabled for an individual camera using the Context menu in an open camera Viewing Tile.
The system uses various video filters to improve the appearance of displayed scenes. Filters consume system resources, so the user can switch them off on client machines with performance limitations.
The Video Quality sub-menu specifies whether the following filters are applied:
i_i Deinterlacing (default ON)
Deinterlacing is the process of converting interlaced video, such as 1080i format HDTV signals, into a non-interlaced form.
U Deblocking (default ON)
The deblocking filter is applied to decoded compressed video to improve visual quality while decoding video.
Hardware Acceleration You can set the number of CPU cores to utilize per live stream, and limit CPU cores per resolution settings.
Max CPU cores to utilize per stream
Set the maximum cores to utilize per video stream.
Limit CPU cores when resolution height is above
Regulate the number of CPU cores used when a resolution height is above a set threshold.
Enable GPU video decoding
When selected, the system default setting uses GPU Hardware Acceleration for H.265 streams that are 1080P or above.
Notes:
- When the Enable GPU video decoding option is selected, the yellow OSD text displays the camera decoder information, while the Properties tab information displays the GPU decoding resolution.
- When you manipulate the timeline (fast forward/backwards), the display is interrupted. When you click Resume, the GPU can restart.
Hardware Acceleration Options
The following procedure describes hardware acceleration options.
Follow these steps:
- In the Options dialog, Video, General dialog, locate the Hardware Acceleration section, and in the Max CPU cores to utilize per stream option, use the directional arrows to set the CPU threads used.
Note: A value of 1 indicates disabled, values greater than 1 indicate enabled. When you set this value as enabled, the Enable only when resolution height is equal to or above option is active. This option sets the minimum resolution height for this feature.
- For the Limit CPU cores only when resolution height is above option, use the directional arrows to limit CPU cores for resolution height.
Example: If you set the Limit CPU cores only when resolution height is above option to 1080, then all streams that are greater than the set resolution height of 1080 (like 1080P, 4K) use multi decoding.
Notes: For this setting, verify the following:
- The minimum resolution is enabled and disabled according to the maximum CPU value.
- After clicking OK in the Options dialog, the open/new stream uses those configurations.
- Upon closing ControlCenter and reopening it again, that these are the correct ControlCenter values.
Instant Replay
The Instant Replay sub-menu sets the rewind time before a replay (in seconds).
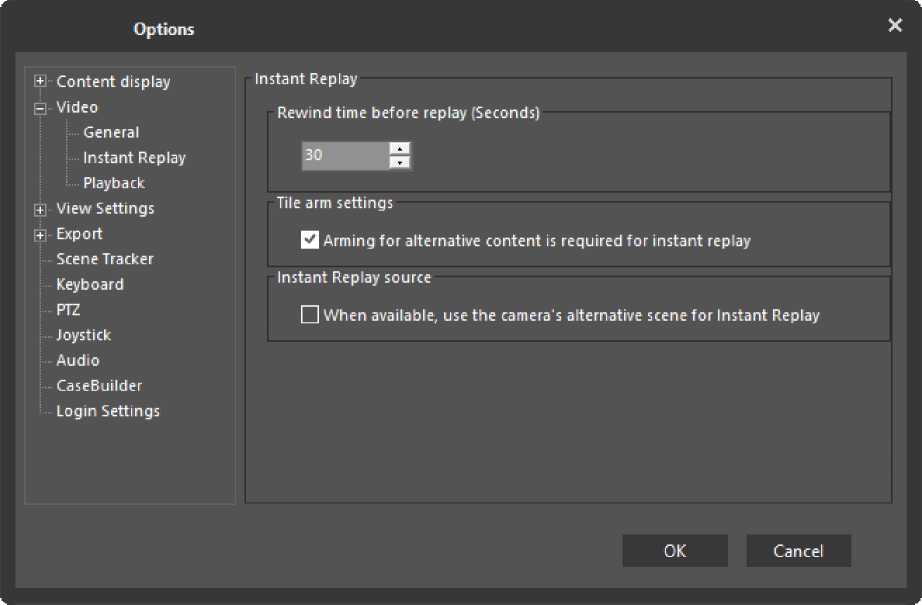
The Tile arm settings enables the user define whether instant replay is done in a video tile specified by Arming it for alternative content is required for instant replay as the playback tile, or whether the playback defaults to the next available tile. If no tile is available, this becomes the first tile.
The Instant Replay source enables you to choose if, when using the Instant Replay option, to always use the camera’s ‘alternative scene’ for IR.
Normally, clicking on Instant Record for a camera results in a recording being made from the Live camera stream, using its resolution parameters. When the camera is defined as ‘Dual Scene’, clicking on this option enables the IR function to use the alternative stream – thus the IR clip is at the ‘Recorded Stream’ resolution.
Playback
The Playback sub-menu is used control the load imposed on the client machine during playback. Defaults are set for dealing with lower number of streams, but higher quality. If a client machine experiences load issues, the operator can change settings to provide higher throughput, but possibly impacting on video quality.
The user can set the type of online playback (TCP or UDP), smooth playback, streaming buffer length, the number of scenes that can be played synchronously, and max. number of CPU cores to be used during decoding.
These settings are unique to the specific client machine on which they are set, so the user can ‘tune’ specific workstations depending on the power of the client machine, and
whether it is more important to keep high quality playback, or allow more streams to be handled.
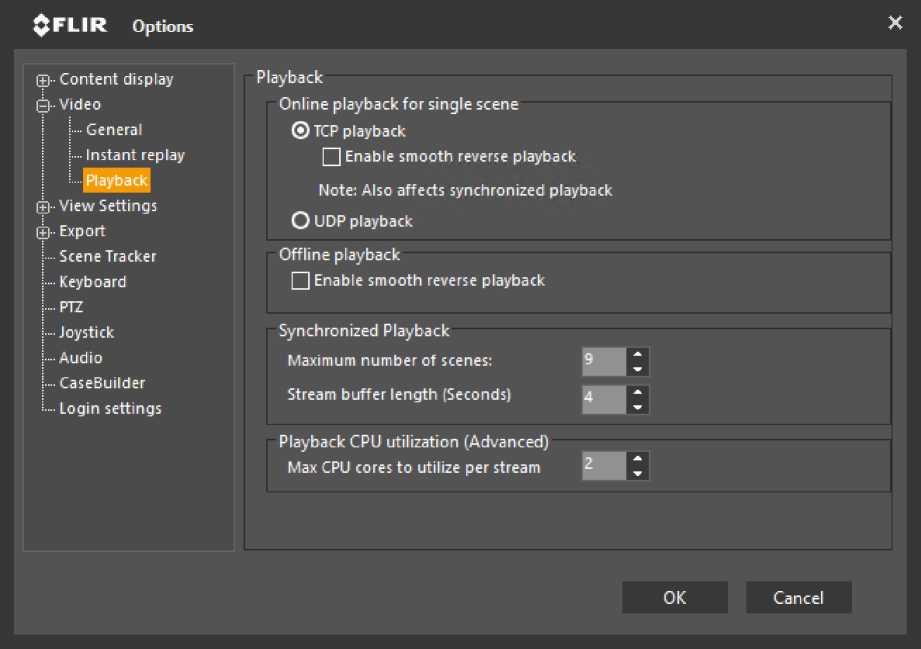
Default setting is TCP. UDP allows more streams to be played, but may allow dropped frames.
Fast playback normally displays only key frames. This may provide some jerkiness in the image.
When the Enable smooth reverse playback option is selected, playback is not limited to only key-frames but displays all video frames. This prevents the jerky motion that can occur during reverse playback. This option requires TCP playback.
Note: Smooth playback is not supported on Transcoded video.
Additionally, smooth playback can be enabled independently for online and offline playback
Default set to six (6) streams. If higher quality playback is required, reduce the number of simultaneous synchronous streams.
Playback CPU utilization (Advanced)
By default, this is set to two (2). The maximum number of cores that is available corresponds to the number of cores on the computer being utilized (and hence can vary on ControlCenter applications being run on different computers).
If only one or two streams are to be watched in fast forward/reverse, then increase the number of cores used to the maximum available on the target machine.
Note: Playback of final frames of a clip:
Under certain specific conditions, when using multiple CPU cores (see CPU Utilization parameter), the final (n-1) frames is not played back (where n is the number of cores specified in the CPU Utilization parameter).
This occurs if the following conditions are satisfied:
- This is the final clip available for the device (no later clips exist), and
- A single stream is being played (not Synchronized Playback), and
- The Enable smooth reverse playback option is deselected.
If the user needs to view the final frames:
- Use the Pause and Play controls to play the frames individually, or
- Reset the number of cores to be used can be reset to 1 in the Tools/Options/Video/Playback menu, and start the playback again.
The sub-menus in this category are as follows:
The General sub-menu specifies the global screen parameters for this ControlCenter.
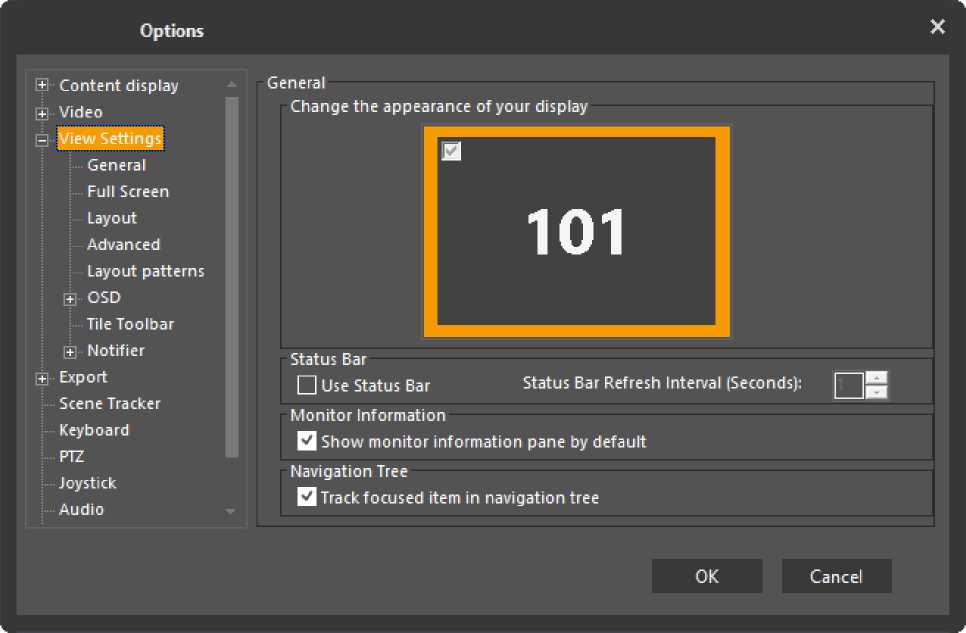
- The General section displays icons for each of the ControlCenter monitors attached. The check-box in each top left corner indicates that the corresponding screen is to be used for the ControlCenter display. When a screen icon is selected, the corresponding entity number is shown.
- The Status bar section determines if the Windows Status Bar displays or not.
- The Monitor Information section provides the controller with system information in the far right monitor side.
Example: In the example provided, the monitor information pane displays on the right side of the monitor. The controller is viewing system 1, monitor 50, tile 1, scene 10.
 • The Navigation Tree section determines whether a Navigation tree entity entry displays in bold when that entity is displayed in the ControlCenter, and if logical IDs display in the Navigation tree.
Full Screen
The Full Screen sub-menu is used to specify which GUI elements display in full screen mode.
| Options | X | |||||||||||
| Fl | ||||||||||||
| m content aispia; | y | jII Screen | ||||||||||
| H Video
– View Settings i İ – General |
JLdl L
I | Start in full screen |
|||||||||||
| 1 E | ■ | Full Screen
Layout Advanced Layout patterns OSD |
General
1 | File menu
|
|||||||||
| Til*> Tnnlhai | J- | |||||||||||
| : : I ■««. iwwiuui
+ Notifier + Export Scene Tracker |
zapi i LLer
|
|||||||||||
| Keyboard | T” 1 L- ■ | |||||||||||
| i- PTZ
Joystick Audio |
i uuiuau
□ Tile’s toolbar |
|||||||||||
| OK | Cancel | |||||||||||
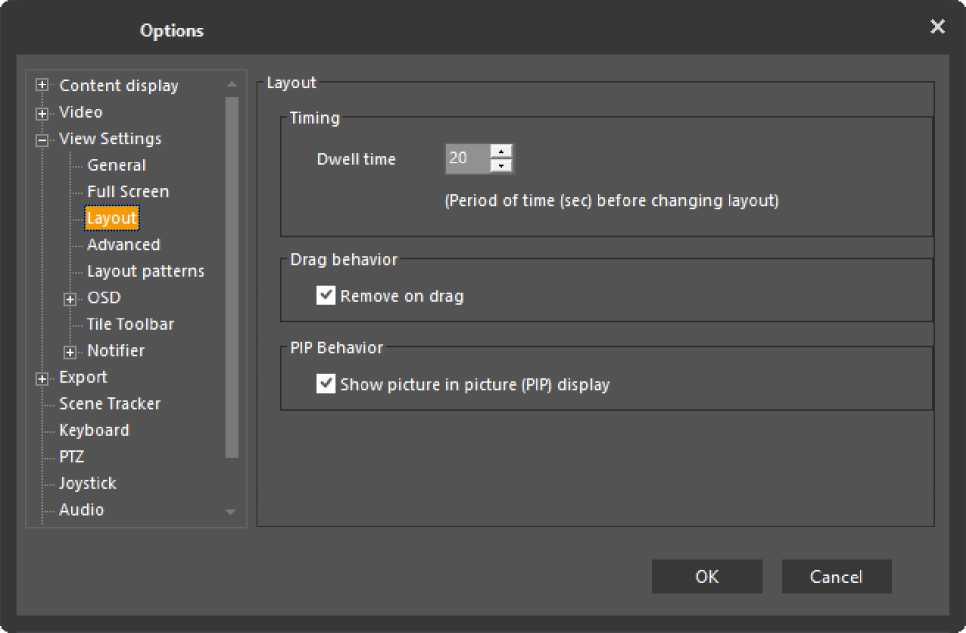
The Layout sub-menu contains the following parameters:
• Dwell Time: Specifies the time interval each layout is displayed during layout tours (the dwell time).
- Drag behavior: Indicates if a stream can be removed by dragging it out of the layout.
- PIP Behavior: Enable/disable the ability to show a PIP (Picture in Picture) view of a camera with multiple streams (dual Thermal/visible PTZ, Multi-imager with 5th lens, etc.)
Advanced
Use the Advanced sub-menu to define the stack length, stream disposal, limits on system resources, and video retry control, and auto lock.
Options
Advanced
Ş– Content display gl- Video
Ö-View Settings
1 i -General
1 i -Full screen
1 i -Layout
i i-Advanced
i İ — Layout patterns
i l+l ■ OSD
i İ –Tile Toolbar
i £)■■ Notifier
£!■■ Export
İ– Scene Tracker
İ– Keyboard
!■■■■ PTZ
!■■■■ Joystick
i-Audio
!■■■■ CaseBuilder
L– Login settings
Stack Length
length: 1 T unt of item; in the tile memory)
| Dispose Stream
1 3
E System Resources
| | Number of active video tiles may not exceed
Q Notify user when CPU usage is over 90 *
Q Notify user when memory usage is over 95 *
Retry Playing Video
□ Retry playing after failure 15
E Auto Lock
Enable Auto Lock
OK Cancel
Stack Length
- The Length variable enables you to set the Stack Length, the number of streams layered on a single ControlCenter tile. Five is the maximum streams allowed (default is 1 stream).
Dispose Stream
- The Stream cache time interval (seconds) variable enables you to set the delay interval, expressed in seconds, when closing streams in the Archive (default is 1 second).
System Resources
The following parameters are available:
- Number of active video tiles may not exceed – By default this option is deselected (disabled), as the normal setup uses the Memory usage flag (below).
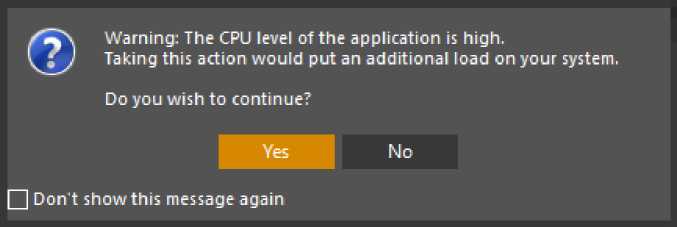
- Notify user when CPU usage is over – By default this option is selected (enabled) and the default value is 90%.
- Notify user when memory reaches – By default this is selected (enabled) and default value is 90%.
Under certain conditions, warning messages display, as described below.
The following warning displays when too many streams are individually opened:
When invoking a new function that requires memory resources, a message displays that provides the option to take steps to reduce memory usage such as reducing the number of viewing tiles, before invoking the next instruction.
When the defined memory usage level is reached, a warning message displays:
$FLIR
A The machine is close to reaching its memory limit and might stop functioning properly.
, To ensure proper functionality, you can reduce the memory level by clearing some of the video tiles.
OK
Retry Playing Video
• Retry playing after failure enables you to set a retry interval for playing video if the client and Archiver connection is interrupted (default is 15 seconds).
Auto Lock
The Auto Lock feature locks the Control Center application after a set time interval (in minutes) if there is no user activity.
Note: This feature applies to authorized Admin Center users only.
The Auto Lock feature is disabled by default. The user can enable and set the time interval, and unlock the ControlCenter when locked.
Follow these steps:
1. In the Control Center, Tools, Options, Login settings, Auto Lock section, select the Enable Auto Lock option.
The Idle time (minutes) field becomes active.
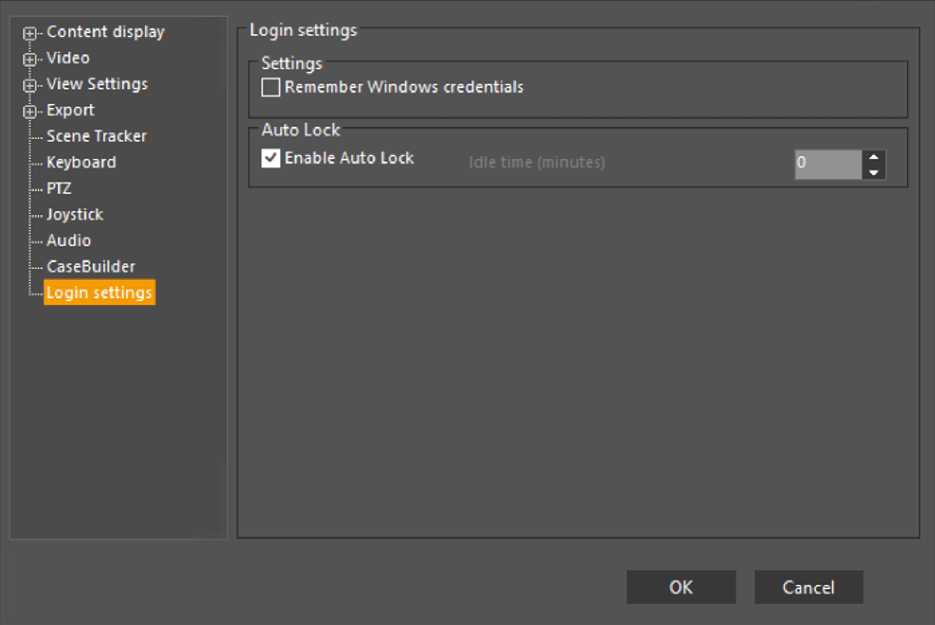
2. Use the Idle time (minutes) directional arrows to set the idle time interval greater than 0, click OK, and close and reopen the ControlCenter.
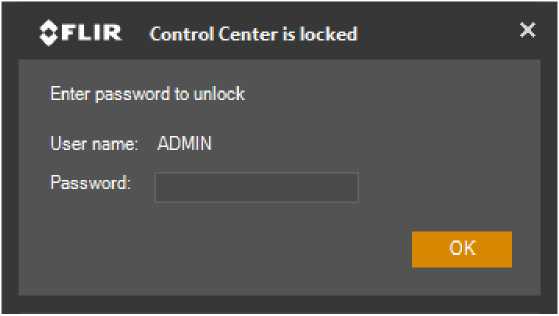
The ControlCenter automatically locks when input devices (mouse or keyboard) remain inactive for the set interval. A Control Center is locked dialog displays:
Notes:
- The Auto Lock feature is disabled by default.
- When the feature is enabled and the Idle time is set to 0, the feature is disabled.
To unlock the Control Center:
• In the Control Center is locked dialog, enter the user password in the Password field, and click OK.
The ControlCenter displays from the point that it was idle and locked.
Note the following:
When you close the Control Center is locked dialog by clicking the Close dialog button, the following dialog displays:
Oflir
Controlcenter will be closed and it’s state will be lost. Are you sure you want proceed?
Yes No
Yes – Proceed with closing the Control Center. This means that the Control Center closes and the current state is unsaved.
Note: When you next reopen the Control Center, the tiles are blank as if you just opened the Control Center.
No – Do not proceed with closing the Control Center. The dialog disappears and the ControlCenter is locked dialog displays.
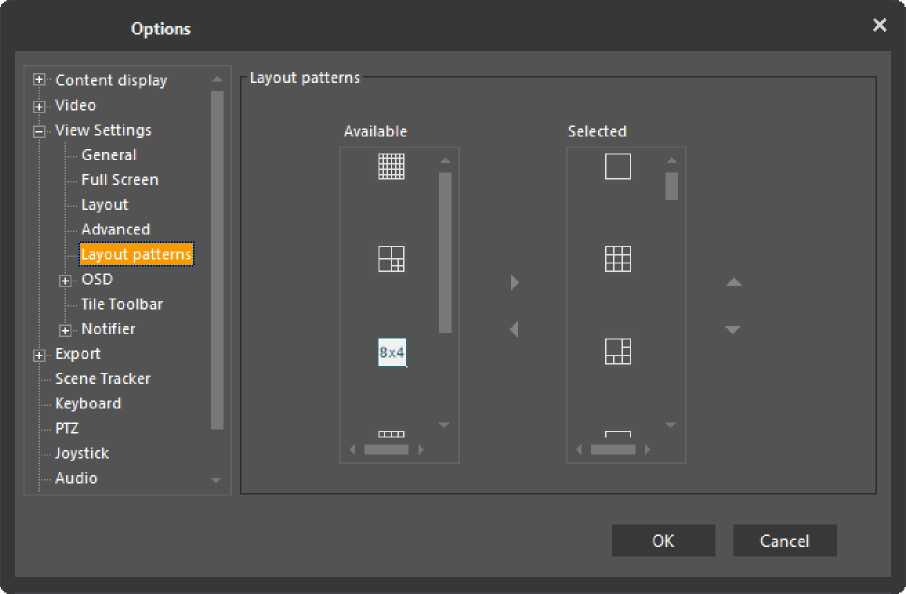
The Layout patterns sub-menu determines which layout patterns are available. Use the screen arrows to move the desired layouts from the Available list to the Selected list.
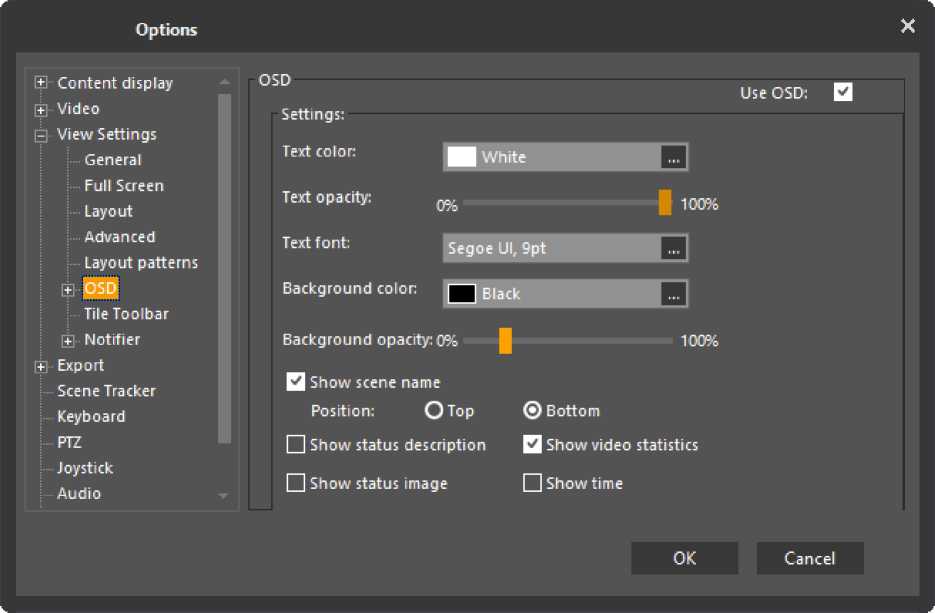
The OSD sub-menu sets the font and background parameters of the information displayed on screen, and determines which information is displayed. You can select to display the following:
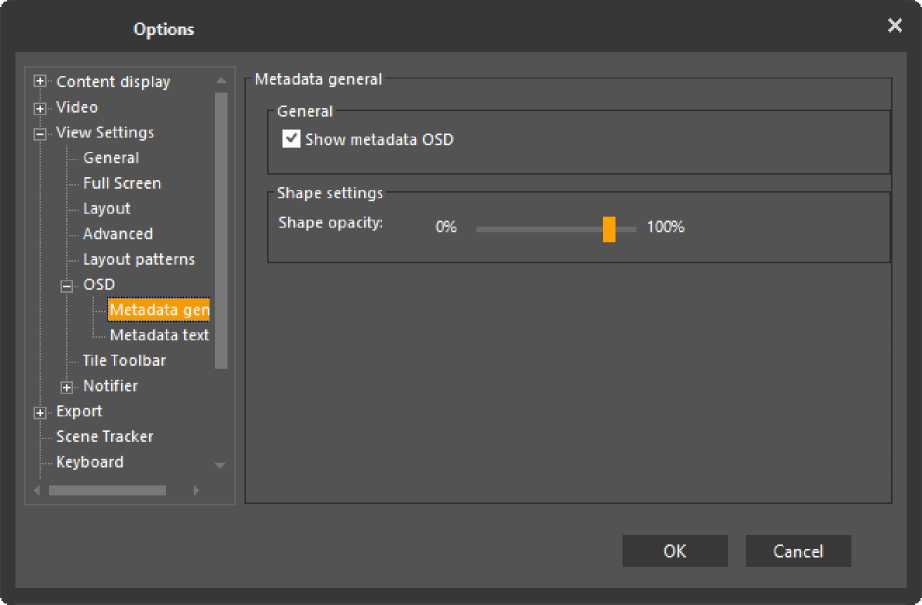
Metadata General
The Metadata general section enables you to display OSD metadata, and set shape opacity settings.
Metadata Text
The Metadata text section enables you to set various metadata text variables such as:
Alarm text (font, default color, default opacity) Normal text (font, default color, default opacity) Header text (font, default color, default opacity)
| Options | 1 X | ||||
| S Content display | Metadata text | ||||
| + ■■ Video | Alarm text: | ||||
| – View Settings | Font: | Segoe Ul, 11 pt | |||
| General | Default colon | □ Red | |||
| Full Screen | |||||
| Layout | Default opacity: | C% | I 100% | ||
| Advanced | Normal text: | ||||
| Layout patterns | Font: | Segoe Ul, 9pt | |||
| – OSD | |||||
| Metadata gen | Default colon | White | |||
| Metadata text | Default opacity: | C% | 100% | ||
| Tile Toolbar | |||||
| E0 Notifier | Header text: | ||||
| + Export | Font: | Segoe Ul, 11 pt | |||
| Scene Tracker | Default colon | ■ White | |||
| Keyboard | |||||
| Default opacity: | C% | 100% | |||
| OK | Cancel | ||||
| j |
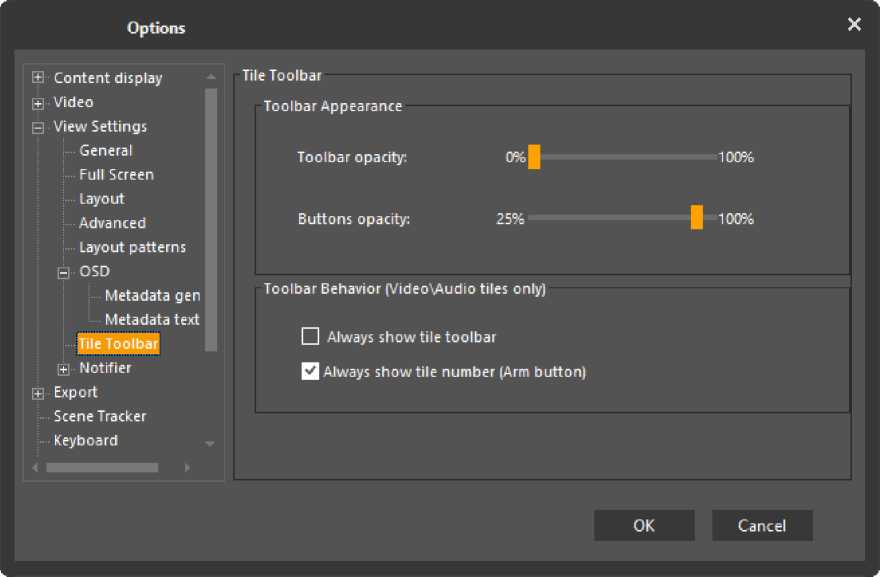
Tile Toolbar
The Tile Toolbar sub-menu is used to determine the opacity level of the toolbar background and buttons as well as the visibility of the tile toolbar and the tile number. By default, the toolbar background is very opaque and fades when the cursor is not placed on top. The buttons are visible and the Arm tile button is always visible.
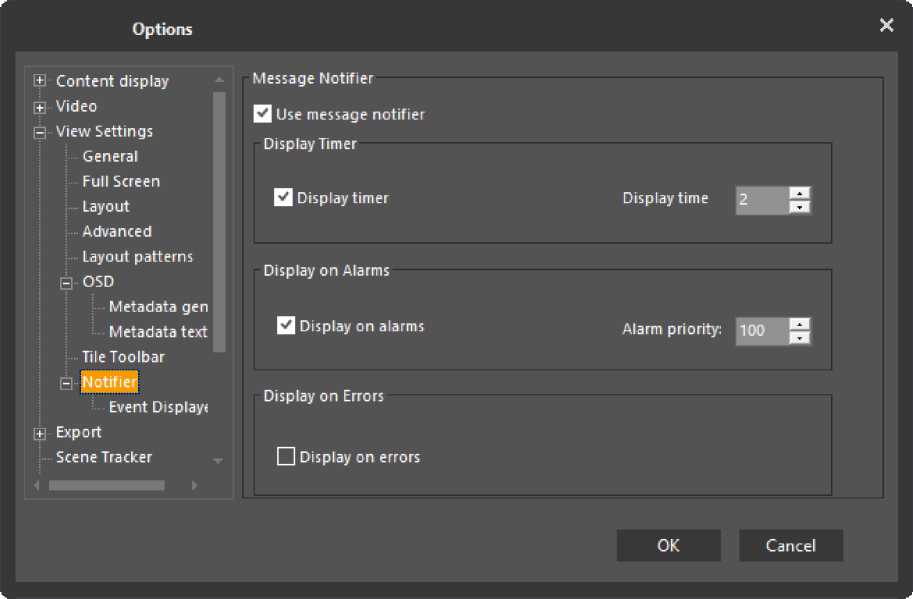
The Notifier sub-menu determines whether the message notifiers, display timers, displays on alarms, and displays on errors are visible, display time, and alarm priority.
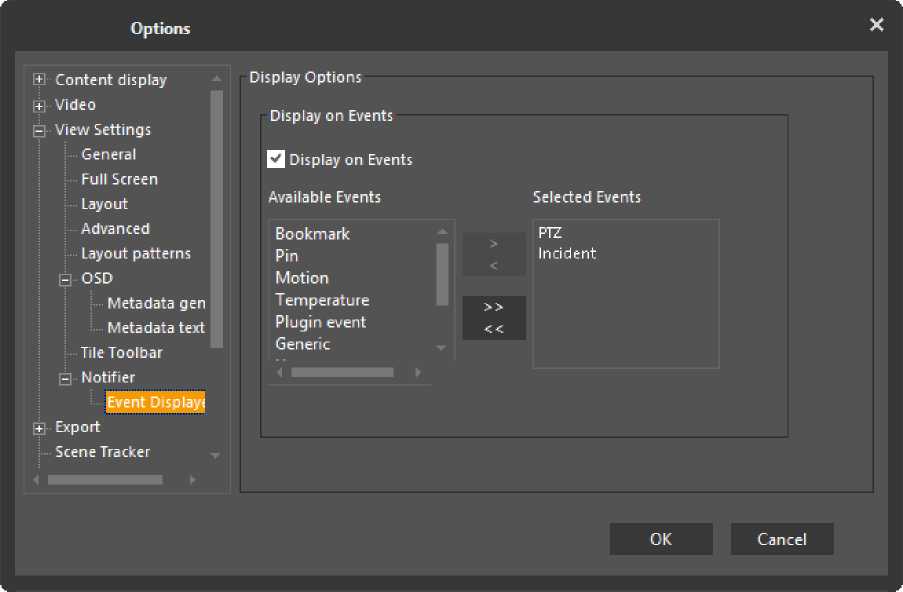
Event Display
Use the Event Display sub-menu to select which event types are displayed.
The following are Export sub-menus:
• Burn
The Clip sub-menu sets the default export format (.dvt, .mp4 or .avi). If required, these settings can be over-ridden in the Export dialog at the time a specific export is initiated.
Snapshot
The Snapshot sub-menu sets the snapshot export parameters
Options
![]() {NAME}= entity name
{NAME}= entity name
| c:\exp orts\ | ||
|---|---|---|
| □ Include Analytics OSD | ||
| Snapshot Title Format | ||
| {NAME},{TIME},{USER},{FEDERAT1ON} | ||
Snapshot
Saved Location
[J Use advanced time format
H View Settings
i i – General
Full Screen
i i ■■ Layout
Advanced
Layout patterns
– OSD
Metadata gen Metadata text
Tile Toolbar
i B- Notrfier
l~. Event Display)
– Export
! — Snapshot
! + Clip
i I-Burn
[TIME}=time of snapshot
{TIMEZONE}=time zone of the entity
{USER}=user who took the snapshot
{FEDERATION^ federation the entity is part of.
You can change the order of the items, or add more text in between them
OK Cancel
This location is also used to store the thumbnail pictures that display the PTZ Preset snapshots. (For more information, see PTZ).
Note: This can also be done using an environment variable such as %temp%.
• Include Analytics OSD: Select this option to include analytic OSD information on exported snapshots
To export snapshots without captions, delete the title in this field.
• Use advanced time format: Determine the displayed custom date and time format strings.
Note regarding Snapshot file location when using PTZ Preset Thumbnails:
This field should be in a shared folder accessible to all Control Center Clients that may access this camera, otherwise operators on different Control Center Client Workstations may not view the same snapshot pictures.
Clip
The Clip sub-menu sets the clip export parameters.
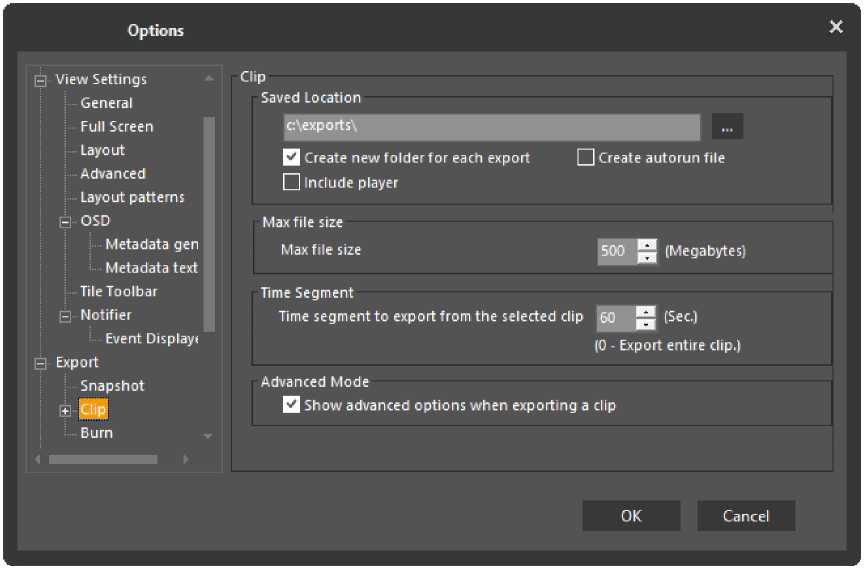
The following are Clip export parameters:
- Saved Location: Set the export folder locations.
- Create new folder for each export: Select this option to create a separate folder for each exported clip.
- Create autorun file: Select this option to create an autorun file for all exported files to automatically run the files after they are burnt on a disk.
- Include player: Select this option to automatically export and burn an executable player along with exported files that are burnt on a disk.
- Max file size: Enables the user to set a maximum clip size.
- Time Segment: The duration of the exported clip. This parameter is only applicable when exporting from the query results pane, since export from the timeline requires specifying start and end points.
- Advanced Mode: Select the Show advanced options when exporting a clip option to access the export settings from the Query Results pane when exporting a clip.
By default, this option is selected. If deselected, the user does not have the option of changing the parameters at export time.
For more information, see Export a Clip.
Format, Bookmark and OSD
Within the Clip menu there are the following sub-menus:
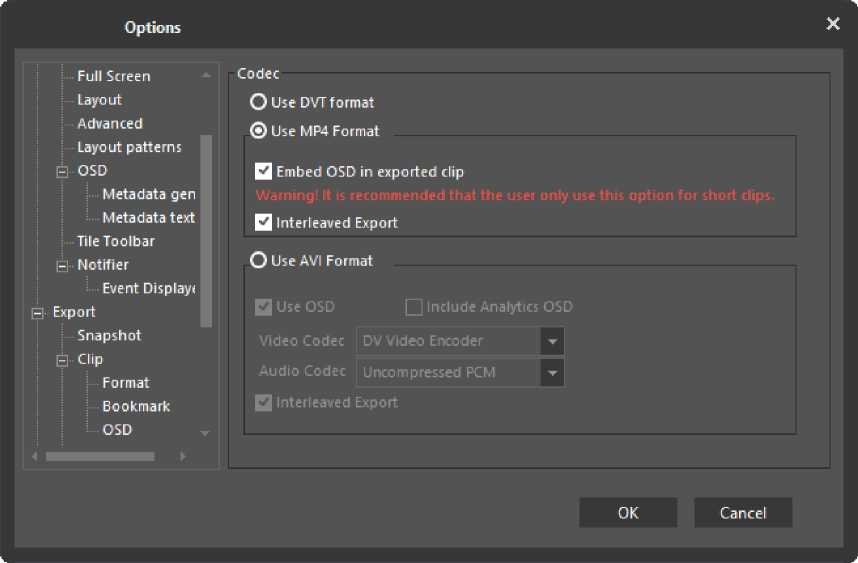
Format
The Format sub-menu determines the clip format. The available options for the related fields (Embed OSD, Video and Audio Codec, Interleaved Export) change depending on the selected format.
Notes:
When you use the default option of NOT embedding the OSD, if the clip is approximately 15 minutes or longer, the subtitles update once every second to reduce delay.
When you embed OSD into MP4 clips, it is recommended that you only use this option for short clips. Interleaved (video and audio) export (the Interleaved Export option) is selected by default for all formats.
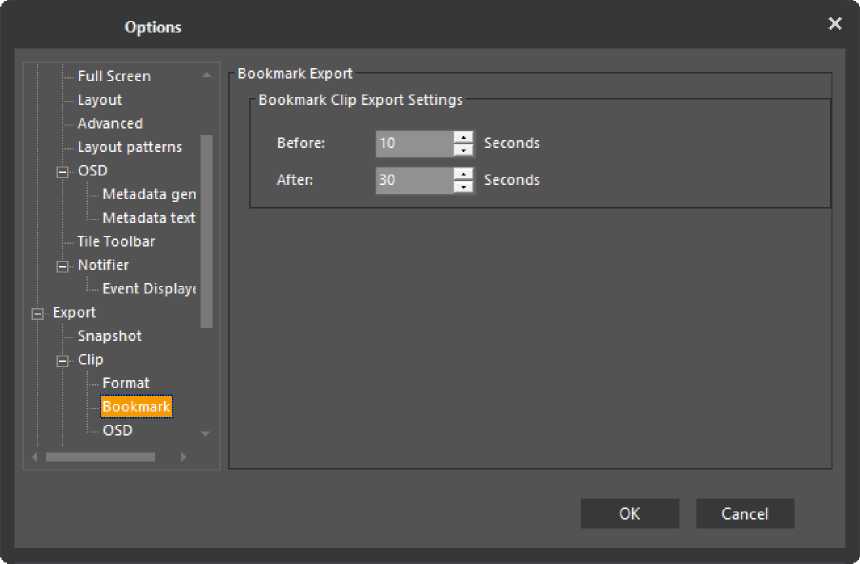
The Bookmark sub-menu displays the Bookmark Clip Export Settings.
The OSD sub-menu sets the font and background parameters of the information displayed on screen to determine displayed information.
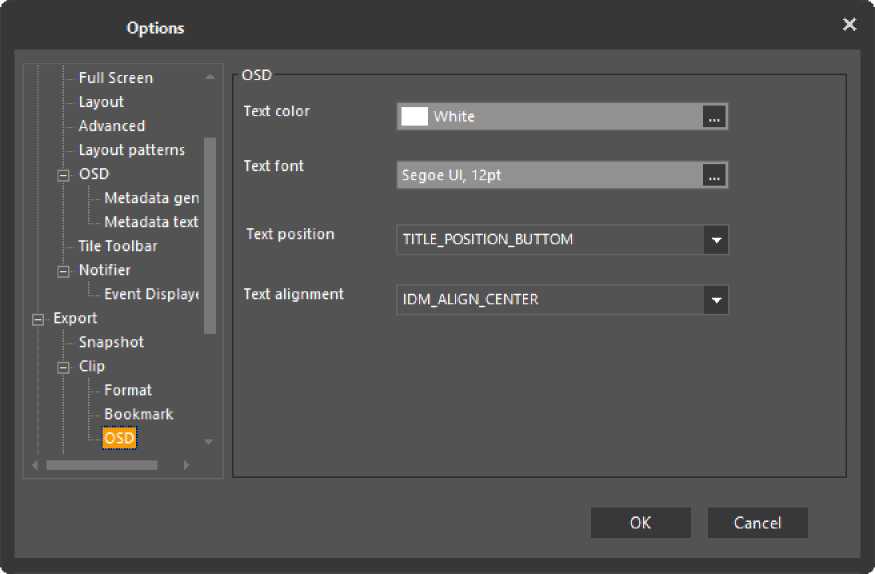
The Burn sub-menu enables you to set burn parameters for exported files, and if required, to delete these files at the end of the burn operation.
The Burn dialog contains these fields:
Temp burn location:
Click the browse icon to navigate to and specify a temporary location for the burned file.
-or-
Select the Use default location option to use a default location.
Delete files after burn operation: Select this option to delete the files after the burn process is complete.
Options
![]()
Layout patterns
! – OSD
Metadata gen Metadata text
i Tile Toolbar
j E) Notifier
Event Display*
– Export
Snapshot
! – Clip
Format
Bookmark
‘ ‘ : OSD
Scene Tracker Keyboard
Bum
Temp burn location C:\Users\ADMINI~1\AppData\Local\Temp\2
□ Use default location
K Delete files after burn operation
I | Delete files after burn operation
OK Cancel
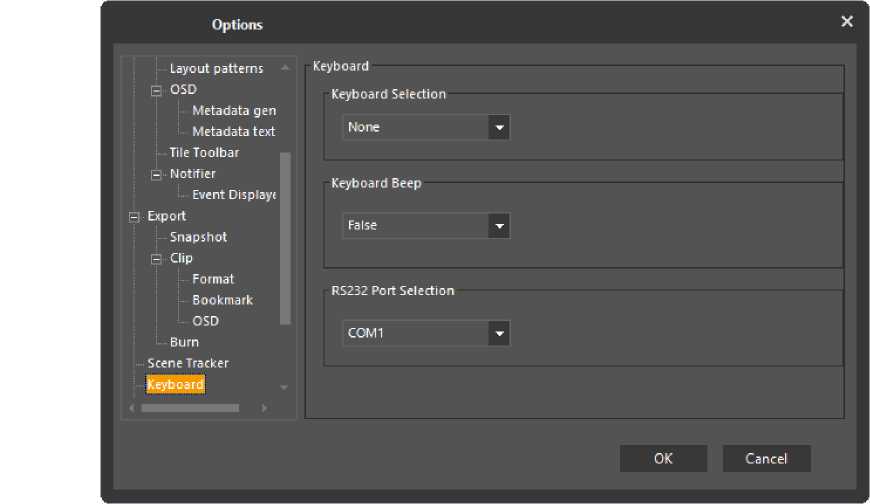
The Keyboard menu specifies if a keyboard is connected, if the keyboard beeping sound is enabled, and the type and port address of a keyboard connected to the client machine’s RS232 serial port.
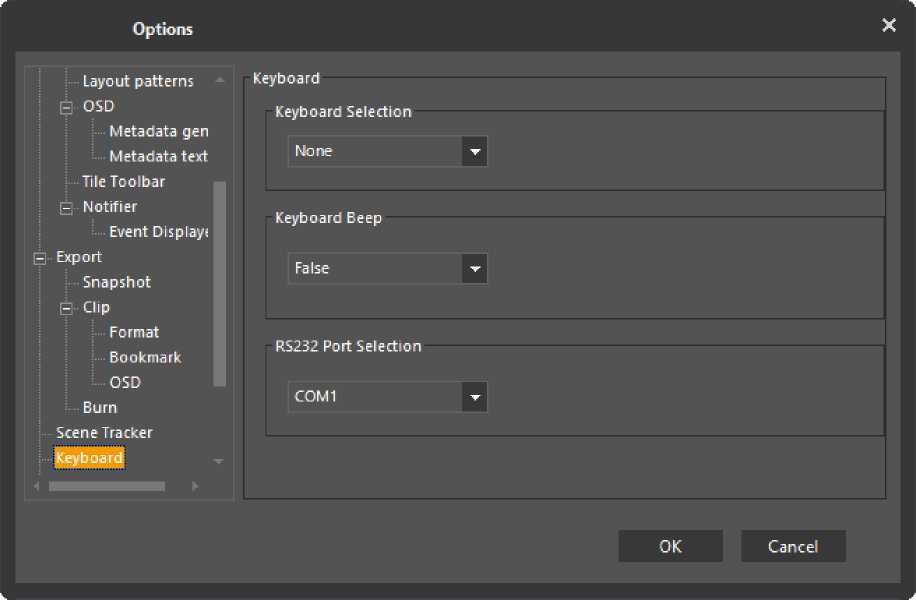
The PTZ (Pan-Zoom-Tilt) menu determines whether to display a message informing the user about overriding a PTZ lock.
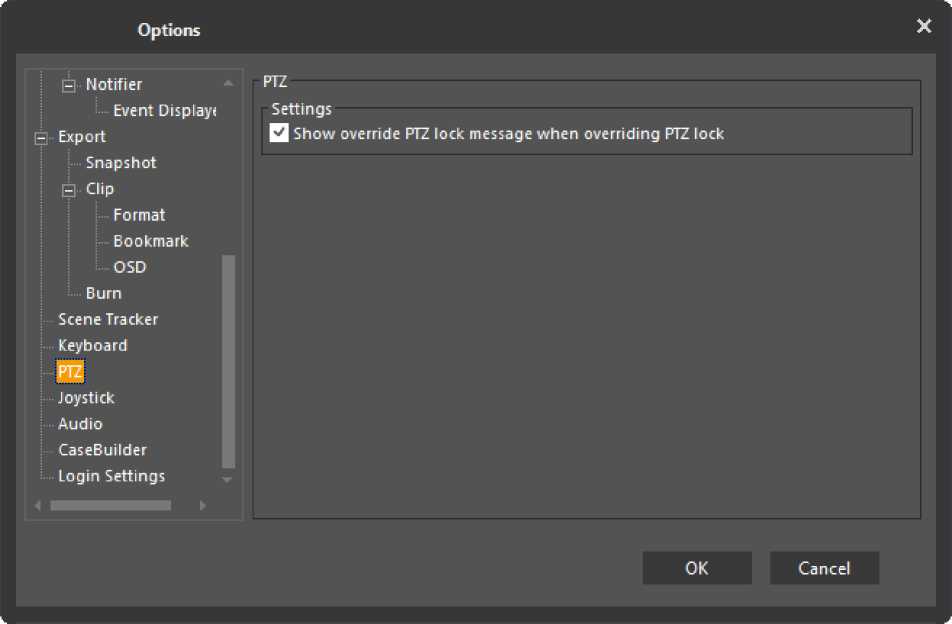
The Joystick menu is used to select the joystick type and determines joystick settings.
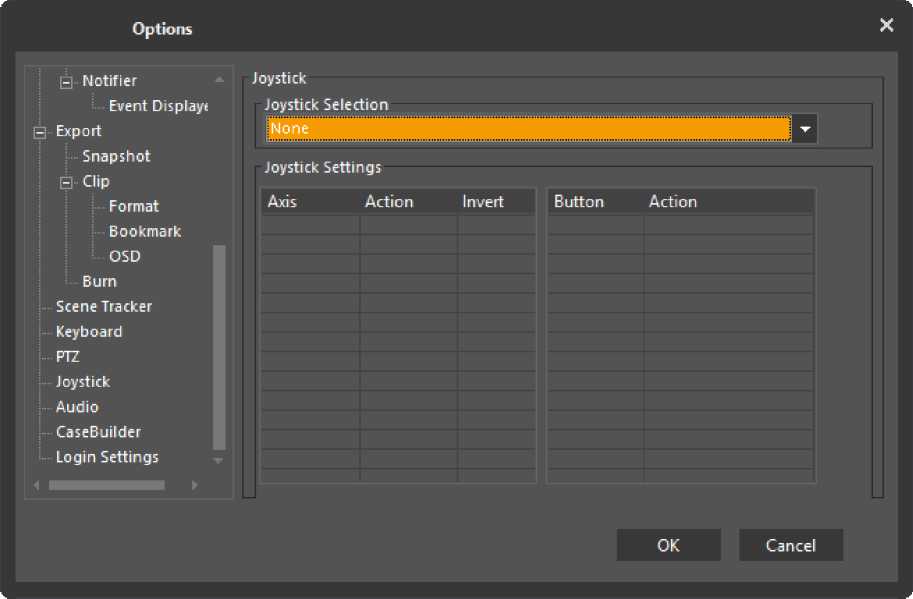
For more information, see USB Joystick.
3.3.8
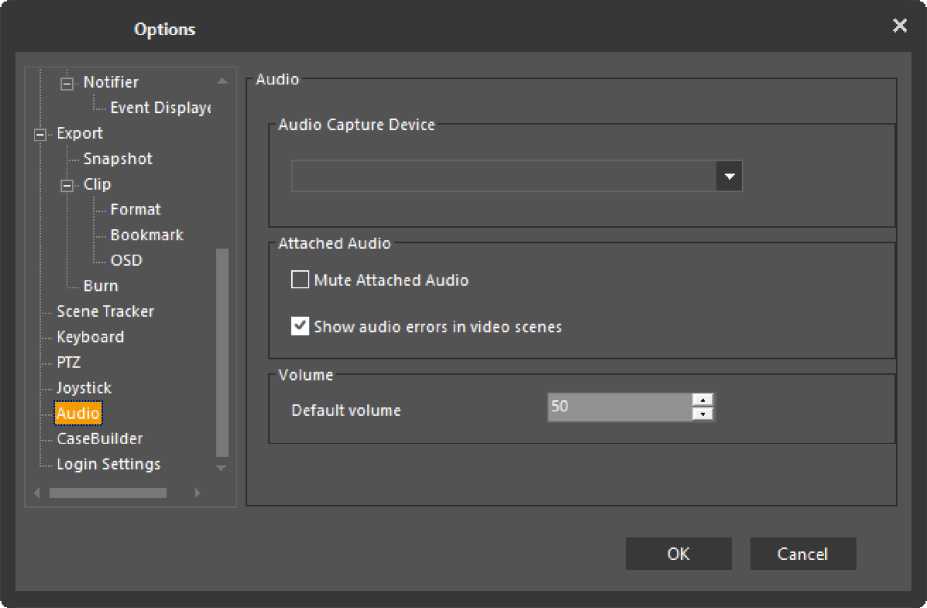
The Audio menu is used to select the Audio Capture Device, determine whether to mute the attached audio, display audio errors, and set the default volume.
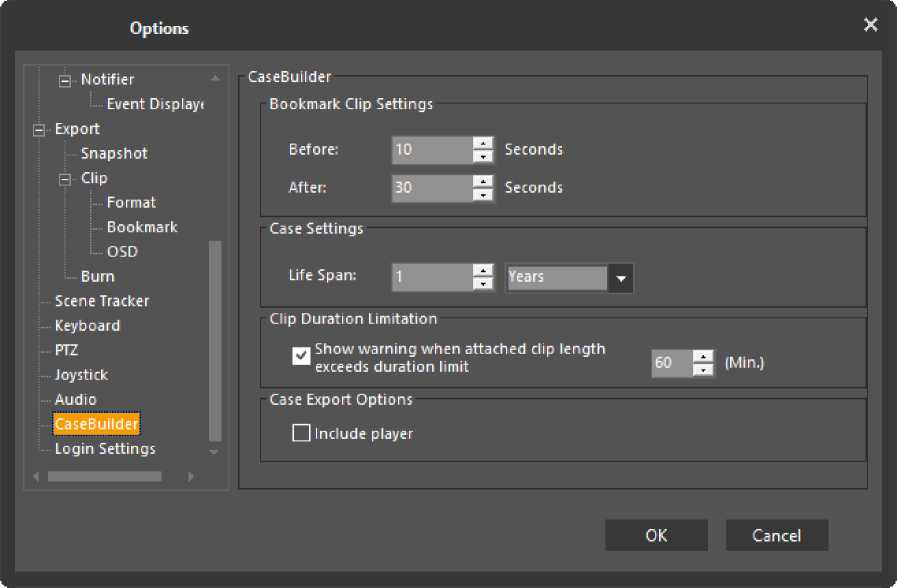
The CaseBuilder menu sets the Bookmark Clip settings (i.e. how long before and after a bookmark the clip is saved, the case lifespan, the Clip Duration Limitation warning, and a player inclusion option.
The Login Settings menu includes the following:
Şflir Options X
g-Content display
Login settings
Settings
2] Remember Windows credentials
Auto Lock
Q Enable Auto Lock Idle time (minutes)
g- Video
g- View Settings
g. Export
i -Scene Tracker
|— Keyboard
I– PTZ
I-Joystick
i Audio
CaseBuilder
■ Login settings
OK Cancel
Login settings
The Login Settings feature determines if login settings such as Windows credentials are saved.
The Login Settings feature is disabled by default, and the user can enable this feature.
Do the following:
• In the Tools, Options, Login settings, Settings section, select the Remember Windows credentials option, and click OK.
Windows credentials are saved.
Auto Lock
The Auto Lock feature locks the ControlCenter for a user-determined interval when the ControlCenter is idle.
The Auto Lock feature is disabled by default. The user can enable and set the time interval, and unlock the ControlCenter when locked.
Follow these steps:
- In the ControlCenter, Tools, Options, View Settings, Advanced dialog, Auto Lock section, select the Enable Auto Lock option.
The Idle time (minutes) field becomes active.
- Use the Idle time (minutes) directional arrows to set the idle time interval greater than 0, click OK, and close and reopen the ControlCenter.
The ControlCenter automatically locks when input devices (mouse or keyboard) remain inactive for the set interval. A Control Center is locked dialog displays:
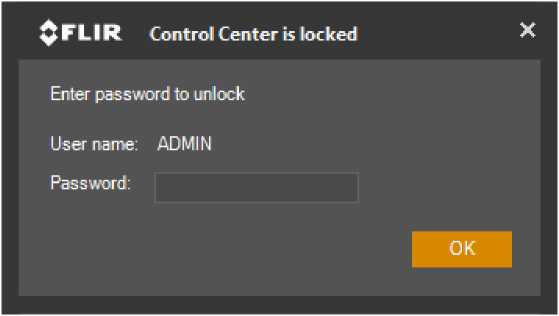
To unlock the ControlCenter:
• Enter the user password in the Password field, and click OK.
The ControlCenter unlocks and the screens display.
Closed-circuit television (CCTV) keyboards can be connected to a client PC’s RS232 serial port. Since the connection is local, the use of a keyboard does not have an effect on privileges. Some functions, however, may not be available on some or all supported keyboards.
Configure keyboard settings in the Tools, Options, Keyboard tab.
Command sequences for common tasks:
| PTZ Keyboard Command | Function |
| X MON | Switch to a viewing pane or analog monitor with logical ID X. |
| Y MON | Switch to a tile Y within the selected viewing pane. |
| Y MON, X MON | Switch to tile Y of viewing pane X. |
| X CAM | Display camera X on the focused tile/analog monitor or switch the viewing pane layout to layout X. |
| Joystick and dedicated PTZ
buttons (IRIS, PRESET, etc.) |
Operate a PTZ camera displayed on the focused tile/analog monitor. |
Additional controls are available through the FLIR Inc CCTV keyboard or the PC keyboard of the Workstation running the Control Center Client Application.
For complete information, see Controlling the ControlCenter via CCTV Keyboard and Controlling the ControlCenter via the PC Keyboard.
Using the CCTV keyboard, you can control the ControlCenter application (both local and remote).
Selecting and Controlling Entities and Tiles
All entities (cameras, camera sequences, tiles, layouts, monitors, etc.) have a unique ID represented by a logical number (xxxx).
DVT-KBD-G2
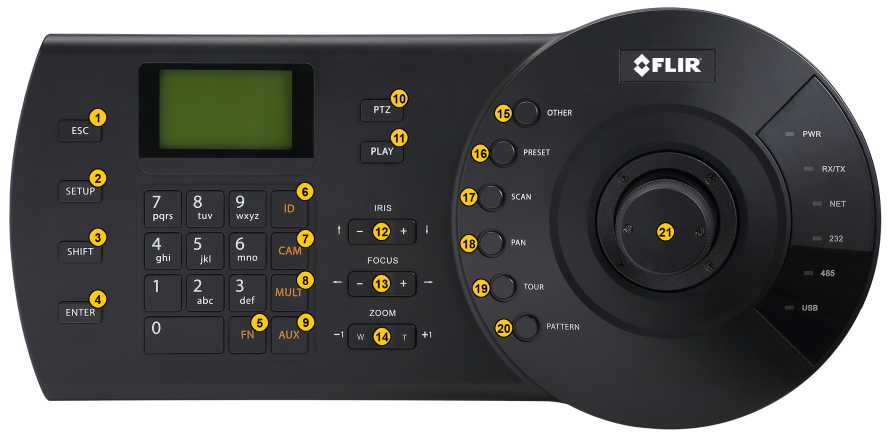
Keyboard Commands:
Note: The SHIFT button works as a toggle for other buttons on the keyboard. When
SHIFT is used to trigger a function, it remains in the SHIFT state until the button is pressed again to toggle back to the previous mode.
| Function | Keyboard Command | Key |
| Select a ControlCenter Monitor | Monitor Number —> MULT | 8 |
| Select a View tile | Monitor Number —> MULT | 8 |
| Display a camera on the selected monitor or tile | Tile Number —> CAM | 7 |
| Toggle through viewing pane layouts with 4 tiles | 2 -+ SETUP | 2 |
| Toggle through viewing pane layouts with 9 tiles | 3 -+ SETUP | 2 |
| Toggle through viewing pane layouts with 16 tiles | 4 SETUP | 2 |
| Expand currently selected tile to fill viewing pane | MULT | 8 |
| Clear currently selected tile | SHIFT CAM | 3+7 |
| Display a sequence on the selected monitor or tile | Sequence number —> TOUR | 19 |
| Pause Sequence | TOUR | 19 |
| Switch to next camera of a paused sequence | SHIFT -> FOCUS+ | 3+13 |
| Switch to previous camera of a paused sequence | SHIFT -> FOCUS- | 3+13 |
| Turn recording of the selected camera’s video stream on/off | SCAN | 17 |
| Audio PTT | OTHER | 15 |
| Audio Listen | SHIFT -> OTHER (enabled by default) | 3+15 |
| Trigger an alarm | Alarm Number -+ PAN | 18 |
| Acknowledge alarm in active tile | SHIFT -> PAN | 3+18 |
| Full Screen | 11 -> FN | 11+5 |
| Display CC Help File | 1 -> FN | 1+5 |
| Switch between Systems (while logged in to multiple systems) | System number —> SHIFT —> MULT | 3+8 |
Instant Replay Commands:
Note: Moving the joystick pauses the video, moving the joystick to the left or right moves the playback needle within the time-line. When a desired spot is determined, press PLAY to continue watching.
| Function | Keyboard Command | Key |
| Display Instant replay on next available tile | PLAY | 11 |
| Play | IRIS + | 12 |
| Pause | IRIS – | 12 |
| Rewind | FOCUS – or joystick left | 13/21 |
| Fast Forward | FOCUS + or joystick right | 13/21 |
| Bookmark the selected tile | SHIFT+SCAN | 2+17 |
Controlling PTZ Domes:
Note: Entering the PTZ menu, by pressing the PTZ Button (10) will display a menu with the options listed below as PTZ.
To learn more about navigating the menu, see the UVMS_Keyboard_DVT-KBD-G2_UIG
| Function | Keyboard Command | Key |
| Pan left/right | Joystick left/right | 21 |
| Tilt up/down | Joystick up/down | 21 |
| Zoom in/out | ZOOM +/- | 21 |
| PTZ preset | Preset Number -» PRESET | 16 |
| PTZ Pattern | Pattern Number -» PATTERN | 20 |
| Send to ‘home’ position | PTZ | 10 |
| Lock/unlock | PTZ | 10 |
| Flip position | PTZ | 10 |
| Control Iris | IRIS +/- | 12 |
| Focus | FOCUS +/- | 13 |
| Auxiliary controls ON | AUX Number AUX | 9 |
| Auxiliary controls OFF | AUX Number -»SHIFT – AUX | 3+9 |
PTZ
HOME
LOCK: OFF
FLIP
Change Camera Mode
Note: To utilize this function, there must be a video profile assigned the the camera. The Default timeout for these functions is 3 minutes at which time it reverts back to the system picture profile settings
Supported only for FLIR CP-6302-31-I
| Function | Keyboard Command | Key |
| Set night mode | 6 FN | 6+5 |
| Set Night mode with IR On | 7 FN | 7+5 |
| Set Day mode | 8 FN | 8+5 |
| Reset to current system picture profile | 9 FN | 9+5 |
DVT-KBD (Legacy)
| Function | Command |
| Select an analog monitor or ControlCenter viewing pane | Monitor number and MON |
| Select a viewing tile | Monitor number and MON |
| Display a camera on the selected monitor or tile | Camera number and CAM |
| Toggle through viewing pane layouts with 4-8 tiles | 2×2 |
| Toggle through viewing pane layouts with 9-13 tiles | 3×3 |
| Toggle through viewing pane layouts with 16 tiles | 4×4 |
| Expand currently selected tile to fill viewing pane | MON |
| Clear currently selected tile or analog monitor | CLEAR |
| Clear contents of the keyboard screen’s ENTER field | CLEAR |
| Display a sequence on the selected monitor or tile | Sequence number and SEQ |
| Display a sequence on the selected monitor or tile | Press SEQ twice |
| Function | Command |
| Hold a sequence | NEXT |
| Switch to the next camera of a paused sequence | LAST |
| Display an instant replay on the selected analog monitor (not available on a viewing tile when using the keyboard) | INST. REPLAY (See additional table for more instant replay controls) |
| Bookmark the selected file | BOOKMARK |
| Turn recording of the selected camera’s video stream on/off | RECORD ON/OFF |
| Trigger an alarm | Alarm number and ALARM |
| Acknowledge an alarm in its active tile | ACK |
Controlling Playbacks
Following are the CCTV keyboard commands used to control playbacks:
| Function | Command |
| Play | IRIS OPEN |
| Pause | IRIS CLOSE |
| Rewind | FOCUS NEAR or joystick left |
| Fast Forward | FOCUS FAR or joystick right |
| Increase playback speed | IRIS OPEN |
| Decrease playback speed | AUX ON |
Controlling PTZ Domes
Following are the CCTV keyboard commands used to control PTZ domes:
| Function | Command |
| Pan left/right | Joystick left/right |
| Tilt up/down | Joystick up/down |
| Function | Command |
| Zoom in/out | Twist joystick clockwise/counter-clockwise |
| Call a dome preset | Preset number and PRESET |
| Call a dome pattern | Pattern number and PATTERN |
| Send a dome to its home position | HOME |
| Lock/unlock a dome | LOCK |
| Flip a dome’s position | FLIP |
| Control a dome’s iris | Press and hold IRIS OPEN or IRIS CLOSE |
| Focus a dome | Press and hold FOCUS FAR or FOCUS NEAR |
| Utilize a dome’s auxiliary controls | Aux number and AUX ON or AUX OFF |
Using the PC keyboard, you can control the ControlCenter application (local and remote). The following are the supported PC keyboard commands.
Select Entities and Tiles by ID
All entities (cameras, camera sequences, tiles, layouts, monitors, etc.) have a unique ID represented by a logical number (xxxx). To apply a command to specific entities, they must be entered after the entity ID. To help the user keep track of what number has been entered, all digit keystrokes (‘0’ through ‘9’) are shown in the toolbar. The number displayed in the toolbar is the ID used by the next keyboard command.
Note: The keypad NUM LOCK must be on for the following commands.
Following are the PC keyboard commands used to select entities and tiles by their IDs:
| Command | Function | |
| xxxx and keypad ‘.’ | Select monitor or tile xxxx.
The current monitor, tile and camera selections are all indicated in the toolbar. |
|
| xxxx and keypad
ENTER |
Select camera or layout xxxx. | |
| xxxx and CTRL and keypad ENTER | Select camera sequence xxxx. |
| Command | Function |
| xxxx and M | Select system (Latitude system) xxxx. |
| ESC | Clear led display. |
Example
To put a camera on a tile, type the following:
<monitor ID>.<tile number>.<camera ID>ENTER
Control the Selected Tile
The following are the PC keyboard commands used to control the selected tile:
| Command | Function |
| A | Selected tile – Arm/disarm toggle. |
| keypad ‘.‘ | Selected tile – Expand/collapse toggle. |
| BACKSPACE | Remove displayed entity. |
| B | Camera – Add bookmark. |
| R | Camera – Start/stop recording. |
| , (comma) | Camera – Talk (push-to-talk). |
| . (period) | Camera – Listen (on/off). |
| CTRL and Up arrow | Camera sequence – Start/stop. |
| CTRL and Right arrow | Camera sequence – Next camera. |
| CTRL and Left arrow | Camera sequence – Next camera. |
Control Alarms
The following are the PC keyboard commands used to control alarms:
| Command | Function |
| xxxx and CTRL and A | Trigger alarm. |
| CTRL and Space | Acknowledge alarm on selected tile. |
Controll Playbacks
The following are the PC keyboard commands used to control playbacks:
| Command | Function |
| I | Instant Replay on selected tile. |
| G | Play/Pause. |
| K | Rewind. |
| L | Fast Forward. |
| Shift and keypad ‘+‘ | Increase playback speed. |
| Shift and keypad ‘–‘ | Decrease playback speed. |
Control PTZ and Digital PTZ
The following are the PC keyboard commands used to control PTZs and digital PTZs:
| Function | Command |
| Pan left | Shift and Left arrow. |
| Pan right | Shift and Right arrow. |
| Tilt up | Shift and Up arrow. |
| Tilt down | Shift and Down arrow. |
| Zoom in | Shift and keypad ‘/‘. |
| Zoom out | Shift and ‘*‘. |
Advanced PTZ Controls
The following are the PC keyboard commands used for advanced PTZ control:
| Command | Function |
| Shift and keypad ‘-‘ | Decrease PTZ speed |
| Shift and keypad ‘ + ‘ | Increase PTZ speed |
| xxxx and Shift and Insert | Go to preset |
| xxxx and CTRL and Insert | Set preset |
| xxxx and Shift and Home | Run pattern |
| xxxx and CTRL and Home | Record pattern (start/stop) |
| Command | Function |
| xxxx and Shift and Page up | Auxiliary On |
| xxxx and Shift and Page up | Auxiliary Off |
| Shift and Delete | Open iris |
| CTRL and Delete | Close Iris |
| Shift and End | Focus near |
| CTRL and End | Focus far |
| Shift and L | Lock |
| Shift and H | Go Home |
| Shift and F | Flip |
Change Camera Mode
Note: To utilize this function, there must be a video profile assigned the the camera. The Default timeout for these functions is three (3) minutes for these functions at which time it reverts back to the system picture profile settings.
FLIR CP-6302-31-I support only:
| Function | Keyboard Command |
| Set night mode | F6 |
| Set Night mode with IR On | F7 |
| Set Day mode | F8 |
| Reset to current system picture profile | F9 |
Connect USB joysticks to a client PC’s USB port. Since the connection is local, the use of a joystick does not have an effect on privileges. You can use joysticks with Direct USB connections in the ControlCenter.
Add a USB Joystick. Settings for this device are located in Tools, Options, Joystick tab.
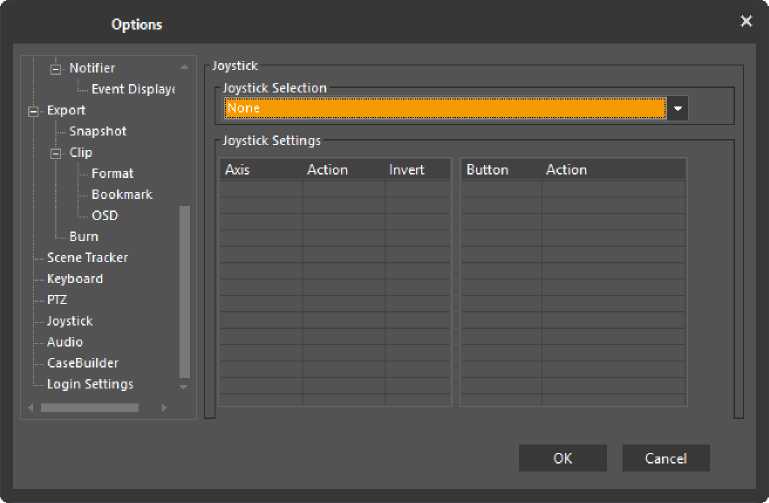
The Control Center user can save workspace configurations and recall them to display on the monitor using the Favorites menu. These favorite workspaces, when saved, display in the entity tree on the left side of the Control Center screen.
After customizing the Control Center to display the panes and tile layout of your choice, you can add the workspace to your Favorites and access them by selecting them from the Favorites drop-down menu in the Application Menu.
The following are described here:
- Add a customized layout to your Favorites menu
- Access a customized layout
- Edit a saved layout
- Delete a customized layout
You can add a customized workspace layout to your Favorites menu.
Follow these steps:
This includes adding components and setting configurations.
- In the ControlCenter application menu, click on the Favorites menu option, and click the Save as favorite option.
The Save as favorite dialog displays, and the Save option is inactive.
Favorites
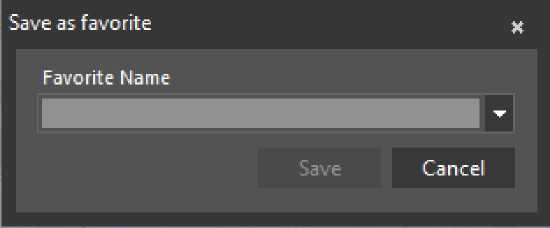
- In the Favorite Name field, type the name for the workspace layout, (the Save option is active) and click Save.
The Favorites menu adds the workspace layout and displays it in the entities tree on the left and when you select the Favorites menu option.
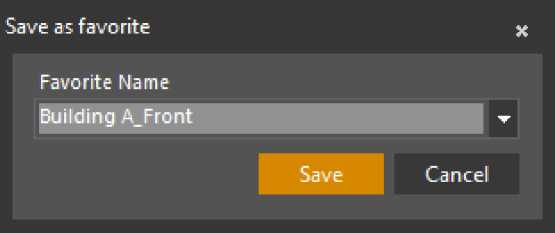
You can access a customized favorite workspace from the Favorites menu.
Follow these steps:
1. In the ControlCenter application menu, click on the Favorites menu option.
The Favorites menu expands to display available options and saved favorite layouts.
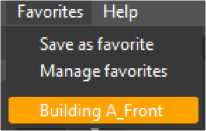
2. Select an available layout.
The selected layout displays and the Favorites menu closes.
You can edit and save an existing saved favorite workspaces accessed from the Favorites menu.
Follow these steps:
1. In the ControlCenter application menu, create and save a workspace. This includes adding components and setting configurations.
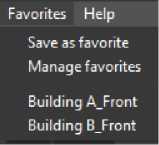
2. Click on the Favorites menu option, and select the Save as favorite option. The Save as favorite dialog displays, and the Save option is inactive.

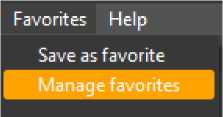
In the ControlCenter application menu, click on the Favorites menu option. The Favorites menu expands.
3. In the Favorite Name field:
Use the drop down arrow to display a list of saved favorite workspaces
or
Begin typing a name, and the auto-complete text predicts and displays available name matches. The Save option becomes active.
- Choose an existing workspace from the list, edit as desired, and click Save. The displayed workspace is edited and saved.
- Delete a customized layout
You can delete a customized favorite workspace from the Favorites menu.
Follow these steps:
1.
Click the Manage favorites option, and in the Manage favorites dialog, select the layout to delete.
2.
The selected layout is highlighted and the Delete option in the upper left of the dialog becomes active.
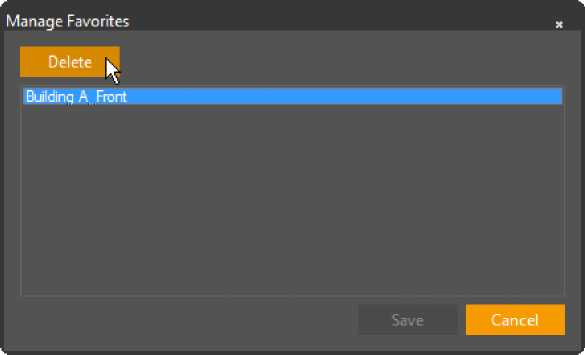
3. Click the Delete option.
The Save option in the lower right becomes active.
4. Click Save to complete the delete action. The selected layout is deleted.
![]()
– ân [System (1) (TW5) j B-*i Admin Block
]•• ■< Corridor 1 (5)
■< External 1 (4)
| | [ ■* PTZ 1 [3]
[ [ | » PTZ 2 (6)
m Workstations 1 (1)
I X Main Office GIS Map (1) tS R and D Office (3)
I f=)-«î Gatehouse
i. m Ped and Veh Gate (2)
I – Test
■* Camera 1 – 172.20.17.112 (ioi
j- ■! Camera 1 – 172.20.17.52 (Men1
i- Camera 1 – 172.20.17.55 (Meni
I 03 North Layout (10)
CS Office Layout (2)
Ö ân System (1) (172.20.17.51)
B-gg Main Office
B-«J Northern Area
i Ü Default GIS Map (1)
The Explorer Area is the navigation pane where the various features for locating and displaying the content you want in the Display area. Select items to be viewed and used in viewing panes and layouts.
The following Explorer area content and features are covered in this section:
The Navigation Tree presents a hierarchical view of the system’s logical entities (e.g. cameras, audio sources, etc.). It is most commonly used to start displaying live video or playing live audio within the application or via external output devices.
Navigation Tree Entries
The Navigation Tree contains all Sites (these can be expanded to show all logical entities within each Site) and all entities not allocated to specific Sites.
When the Latitude is connected to more than one System, use the Site Filter to display or hide selected Systems and Sites within those Systems.
Note: Displayed Sites and Entities can be limited by the privileges associated with specific users or groups of users as set up by the system administrator.
The following display modes show information about the entities in the Navigation
Tree:
o Bold entries refer to camera entities which are currently displayed in viewing tiles.
o Colored entries show the status of analytics-capable cameras:
■ Green entries – Currently armed.
■ Red entries – Currently disarmed
■ Orange entries – Analytics currently unavailable (low visibility/poor signal/etc.)
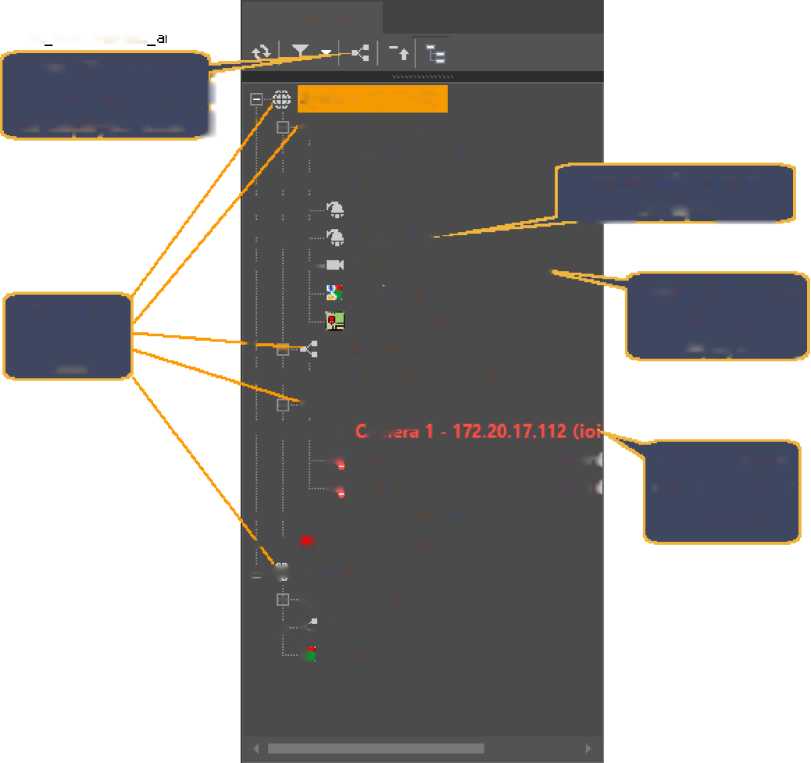
cc NavTreeBasic
? X
Navigation Tree
Site Filter allows . Systems and Sites to I be displayed/hidden J
System (1} (TW5)
Armed Analytics camera, currently displayed
Disarmed Analytics camera, currently displayed _
Camera entity, currently
displayed
/ -/•! Admin Block
/ i ■< Corridor 1 [5)
< i i ■* External 1 (4)
i i i PTZ 1 (3)
| I I PTZ 2 <6>
: : : Workstations. 1 (1)—-
Mam Office GIS Map (1)
R and D Office (3]
“İ 1 – Gatehouse
i i i ■< Ped and Veh Gate (2)
– < Test
i I I m Camera 1 – 172.20.17.11
■- Camera 1 – 172.20.17.52 (Meni
■“ Camera 1 – 172.20.17.55 (Meni
: : EB North Layout (10)
\ : Eg Office Layout (2)
|=HŞ» System (1) (172.20.17.51)
+ 3i Main Office
S •« Northern Area
& Default GIS Map (1)
Systems and Sites
Dual-Sensor Cameras in the Navigation Pane
Dual-Sensor cameras that are integrated into the system (e.g. the FLIR PT-Series) display as two entries in the Navigation pane:
– < Northern Area İ İ ■< Entrance {?}
PT 1 Thermal Head – North (3j
I İ PT 1 Visible Head – North (1) İ I ■< Road i {j}
Tile Component Display
You can display a camera, a sequence or a map scene on a tile.
Do the following:
- Drag and drop the scene onto a viewing tile or double-click it to display on the first unoccupied tile (or the Spot tile, if one is configured).
Audio sources activate if they are associated with a camera.
Monitor Component Display
You can display a camera, sequence or map scene on a monitor.
Do the following:
- Drag and drop the scene onto the desired analog monitor in the Navigation Tree. Audio streams linked to a camera utilize the audio input/output devices linked to the monitor where defined.
Camera Audio
You can play camera audio through a workstation speaker.
Do the following:
- Drag and drop the speaker onto a Viewing Pane audio layout, and use the audio tile’s controls to adjust volume and other parameters.
Microphone Usage
You can transmit audio using a connected microphone.
Do the following:
- Drag and drop the microphone onto a Viewing Pane audio layout and click the microphone button to begin talking and transmitting.
Aside from the tree display, the Navigation Tree contains buttons at the top of the pane, as follows:
| Butto n | Name | Description |
| Refresh | Manually refresh the Navigation Tree. | |
| Filter | Displays a drop-down list that enables users to toggle visible or hidden entity types. Settings are kept and restored when the same user logs in again. | |
| B | Site Filter | Displays a window showing all the system defined sites. The user can search, select\deselect the relevant sites to display in the navigation tree at a given time. |
| B3 | Collapse All | Collapses all expanded tree entities. |
| e | Camera Flat View | View only resources in alphabetical order. |
Icon State Symbols
The state of an entity is sometimes reflected in the appearance of its icon as viewed in entity trees throughout the system, including those in the Navigation Pane.
| Icon state | Description |
| • | Entity being recorded. |
| Icon of Offline entities display as grayed out. | |
| 2 | Entity is in a warning state. |
| O | Disconnected entity. |
| <] | Entity linked to a microphone. |
| 0 | Input/output pin device in an abnormal state. |
| a | input/output pin device in an unknown state. |
| X | Archiver for this entity failed. |
Note: Multiple state symbols may be integrated into a single entity icon, as in the case of a recording camera linked to a microphone
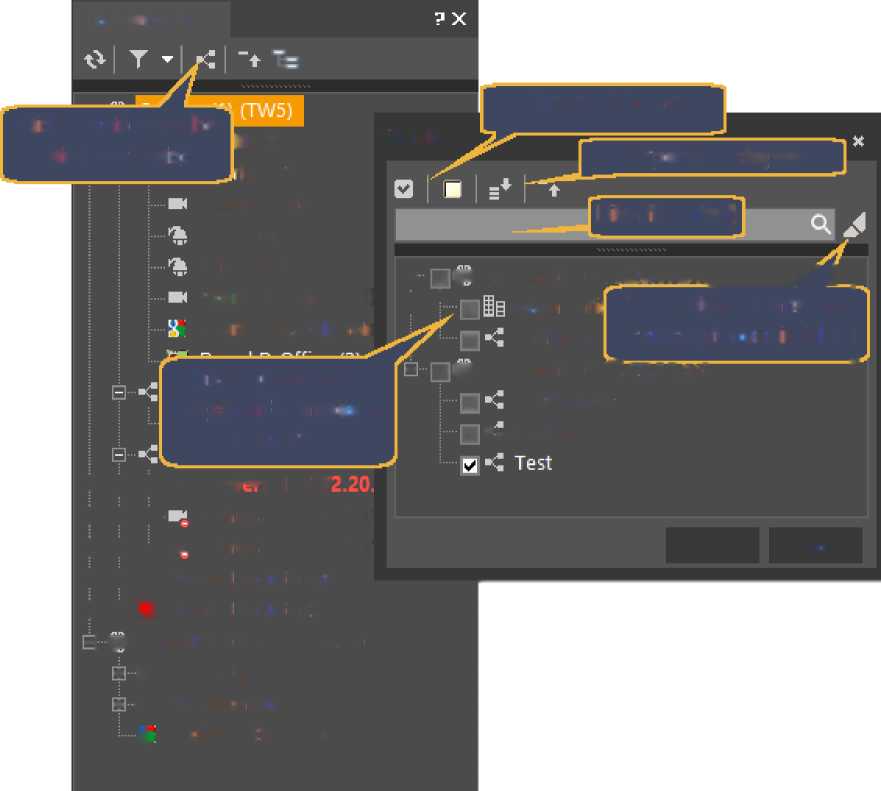
Site Filter
When the Latitude is connected to more than one System, use the Site Filter to display or hide selected systems and sites within those Systems.
Navigation Tree
Check All / None
Site Filter
Expand / Collapse
Filter field (text)
(1]
Click icon to open the Site Filter Dialog
Checker uncheck to display/hide entities in Systems/Sites
Block
-idor 1 (5)
External 1 (4)
PTZ 1 C3J
PTZ 2 (6)
Workstations 1
Main Office GIS Ma
i i i m Camera 1 – 172.20.
İ i i Camera 1 – 172.20.’
I I > » Camera 1 – 172.20.’
İ i EH North Layout {10)
İ 1 El Office Layout (2)
-İşe System (1) (172.20.17.51)
+ gg Main Office
+ ■■<; Northern Area
S Default GIS Map (1)
Ş’ÇŞB System (1) d72.20.17.51] /! r
İ İ a Main Offii Show Filtered Items only
a Northern or highlight them in full list
– DŞŞ System (1) (172.20.1 /.üj ‘
D Admin Block
a *• Gatehouse
| OK | Cancel | ||
|---|---|---|---|
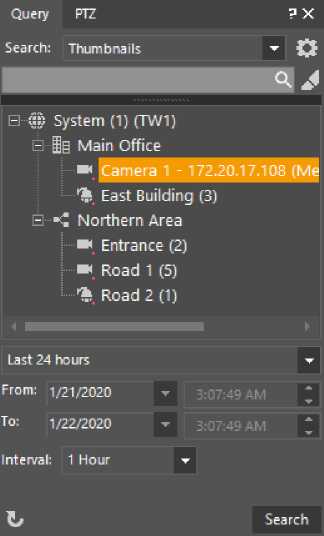
The Query pane, located in the lower left corner of the ControlCenter, provides an easy- to-use interface for searching the system’s video and audio archives. It supports search based on date and time for clips, bookmarks, incidents and alarm. It is also used to launch playback.
Query PTZ ? X
Clip t| Q
Drop-downj
Search Box
■ Ş? System (1) (IW1)
– ■ i§ Main Office
D» Camera 1 – 172.20.17.108(1
_ < ‘ s’* East Building (3)
^mei^^eej ğ… a <; Northern Area
I ■ ■< Entrance (2)
S » Road 1 (5)
■ * Road 2 (1)
Query Types
All queries can be conditioned on camera/s (or other type or source), Text filter (opt), Date and Time.
Depending on the Query type, additional advanced parameters may be used.
Bookmark
Clip
Incident
Motion bookmark Motion indication Smart search Thumbnails Face
License plate
Search Types
The following are supported Query types:
| Name | Notes |
| Alarm | Can include parameters on how Alarm was triggered, etc. |
| Background Export Clip | Search for recorded data (video and audio). |
| Name | Notes |
| Note: The search path must be a local or a network folder to which the Archiver has write permissions. | |
| Bookmark | Search the timeline for manually created Bookmarks including:
|
| Clip | Search for recorded clips. |
| Incident | Search for incidents triggered by Actions defined in Admin Center. |
| Motion bookmark | Search for motion bookmarks and display them in the Timeline in the Query Results pane. |
| Motion indication | Search for indicated detected motion in recorded video and display it in the Timeline in the Query Results pane. |
| Smart search | Search for motion in specific regions of recorded video. |
| Thumbnails | Allows user to see thumbnails and search visually. |
| Face | Search for recorded faces in recorded data. |
| License plate | Search for recorded vehicle license plates in recorded data. |
To search for Cleared Alarms (associated clips):
![]()
on the bottom left to assure a default search,
and in the Search field, use the drop down arrow to select Clip.
![]() arameters for an advanced search, click the Additional search and do the following in the Additional clip parameters dialog.
arameters for an advanced search, click the Additional search and do the following in the Additional clip parameters dialog.
2. To define additional
parameters icon
Note: Auto-cleared alarms have no user defined. You cannot return auto-cleared alarms select any users.
- Description that can be added by the operator when triggering an alarm manually.
- In the Archiving triggers section, use the drop down menu to select from the list of available triggers.
- In the Protection status section, use the drop down menu to select a status.
- Select the Show motion preview option to display motion preview for clips.
- Select the Search redundant Archivers option to search only redundant Archivers.
Note: If enabled the primary Archiver is not searched.
g. Click OK.
The additional clip parameters are selected.
From the Search menu, use the drop down menu to select Alarm, click the
3.
Additional alarm parameters icon
and in the Additional alarm parameters
dialog, select the recorded source from the tree and click OK,
-or-,
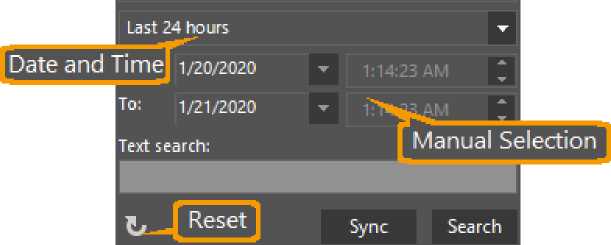
In the From and To the date and time menu, select a preset time option
-or-
Select Manual selection in the drop down menu and then enter From date and time and To date and time.
- In the Text search, type optional text to find in the Alarm Name, and click Search.
- To view the associated clip segments of an Alarm (if defined with alarm type) in the Query Results pane, expand the Alarm by clicking on the (+) and then double click the video you want to view.
![]()
6. Click the Reset icon
to reset your query parameters.
To search for Background Export Clips:
![]()
1.
In the Query tab, click the Reset icon
on the bottom left to assure a default search,
and in the Search field, use the drop down arrow to select Background Export Clip.
- In the Search field, type optional text to find in the Alarm Name, and click Search.
- To view the associated clip segments of an Alarm (if defined with alarm type) in the Query Results pane, expand the Alarm by clicking on the (+) and then double click the video you want to view.
![]()
4. Click the Reset icon
to reset your query parameters.
To search for Bookmarks (with related clip segments):
![]() 1. In the Query pane from the Search for menu, select Bookmark.
1. In the Query pane from the Search for menu, select Bookmark.
and and in the Additional
2. Click the Additional clip parameters icon
bookmark parameters dialog:
- From the Initiated by tree, select one or more users.
- On Latitude systems, an additional check-box is shown:
Select the Search redundant Archivers option to search only redundant archivers.
Note: When enabled, the primary Archiver is not searched.
- Click OK.
- Select the recorded source scene by marking the tree entities.
- In the Text search field, type optional text to locate in the Bookmark Name. Predictive text begins to highlight semi-matching options in orange.
- In the From and To the date and time section, select a preset time option, or select Manual selection from the drop down menu, enter From date and time and To date and time, and click Search.
The returned results display in the Query results pane.
- To view the associated clip segment of a bookmark in the Timeline playback, in the Query results pane, double click the bookmark you want to view.
To perform a simple search for a Clip (Clips that satisfy the search are listed in Query Results):
![]()
From the Search for menu, select Clip.
To reset Query parameters and return to a default search, click the Reset icon
, and
select the recorded source scene by marking the tree entities.
-or-
Select the Manual selection option and then enter From date and time and To date and time.
4. Click Search.
To perform a simple search for a Clip (Synchronized Playback):
1.
To reset Query parameters and return to a default search, click the Reset icon
, and
from the Search for menu, select Clip.
- Select scenes for recorded source scenes, by marking the tree entities. You can select from one up to the maximum number of scenes as defined in the to the maximum as defined in the Tools, Options, Video, Playback screen settings. The default is six maximum.
- From the Date and Time menu, select a preset time option
-or-
Select Manual selection and then enter From date and time and To date and time, and click Sync.
The clips located by the search load into the Timeline – Synchronized Playback layout.
- Once the sync playback layout is opened, the User can drag to open scenes from the main camera tree.
- When a scene is dragged into an empty tile, it is automatically synced with the other scenes in the layout. The unified Timeline is updated to include the new scene.
- If the scene is dropped into a populated tile, it opens the new scene in the next available tile. If no tile is available, the layout is automatically modified to include more tiles.
- Scenes with linked audio occupy two tiles, which causes the layout to expand, if necessary.
- Scenes can also be dragged out of the layout to remove them, and the unified timeline is removed for that scene.
Note: One scene (the “original” scene in the top left tile) must always remain in the Sync Playback layout to keep the playback times.
To perform an advanced search for a Clip:
1. From the Search for menu, select Clip, then click the Additional clip parameters icon
, and do the following:
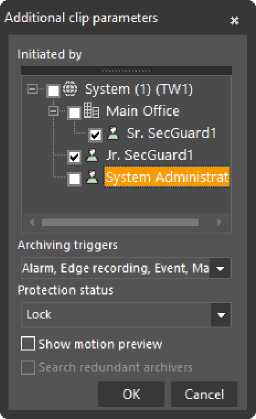
- From the Initiated by tree, select one or more users.
- In the Archiving triggers drop-down menu mark or deselect the triggers to search for, and then click the menu arrow again.
- From the Protection status drop-down menu, select Locked for only locked clips, Unlocked for unlocked clips, or Both for all clips.
- To enable or disable the optional display of motion preview on the clip in the Timeline pane, select or deselect the Show motion preview option.
- On some systems, an additional check-box is shown:
To search only redundant Archivers, select the Search redundant archivers option.
Note: When enabled, the primary Archiver is not searched.
To display found clips in Query Results pane, select one or more.
To display found clip results in a Synchronized Playback, select clip.
Note: Set the maximum number of clips that may be defined in the Tools, Options, Video, Playback screen.
-or-
Select Manual selection and then enter From date and time and To date and time.
- In the Text search, type optional text to locate in the Clip Name field, an do the following:
- For listing found clips in the Query results pane, click Search.
- For automatically playing found clips in Timeline and in a Synchronized Playback, click Sync.
Note: Changes remain in effect until reset. If the changes made are only for this search or you want to reset them, click the Reset icon .
/!\Query results are displayed time ascending. When the query results exceed the limit that is specified by the query, only partial results are returned. Change the time filter to include the required time span in the query.
To search for incidents (with all related bookmarks with clip segments):
![]()
In the Query pane from the Search for menu, select incidents.
Click the Additional clip parameters icon,
, and do the following:
- From the Initiated by tree, expand and select one or more users.
- Select the Search redundant archivers option to search only redundant Archivers.
Note: The primary Archiver is not searched when enabled.
- Click OK.
- Select the recorded source scene by marking the tree entities.
- In the Search field (text), type optional text to locate in the Incident Name.
- From the Date and Time menu towards the bottom of the pane, select a preset time option or select Manual selection from the drop-down menu, and enter From date and time and To date and time.
For a list of results in the Query Results pane:
The query results display in the Query Results pane.
- To view the associated bookmarks and clip segments of an incident in the Timeline playback, in the Query Results pane, expand the incident by clicking on the (+) and then double click the bookmark you want to view.
/t\Query results are displayed time ascending. When the query results exceed the limit that is specified ” by the query, only partial results are returned. Change the time filter to include the desired time span in
the query.
For a list of results in the Thumbnail search format.
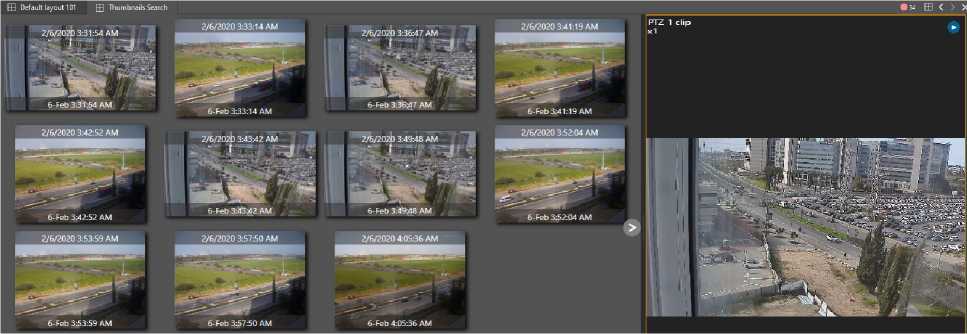
• From the Search field, use the drop-down menu and select the Thumbnails option.
A Thumbnail search layout displays. The results appear in chronological order of all cameras selected.
Use the Motion bookmark option to search for motion bookmarks in recorded scenes and see if any motion occurred during a specified time. The results display in the Query Results pane timeline.
To Use Motion Bookmark:
- From the Query Search type drop-down list, select the Motion bookmark option.
- In the Select Scene tree, select the scenes to search (you can select a logical location, such as a site, to search all applicable scenes in the location).
- From the Date and Time menu, select a preset time option,
-or-
![]() Select the Manual selection option, and enter the From date and time and To date and time.
Select the Manual selection option, and enter the From date and time and To date and time.
select the Search redundant
4. If required, click the Additional clip parameters icon,
archivers option, and click OK.
For a list of results in the Query Results pane.
The query results appear in the Query Results pane.
For a list of results in the Thumbnail search format:
• Click Thumbnails.
A thumbnail search layout displays. The results appear in chronological order of all cameras selected.
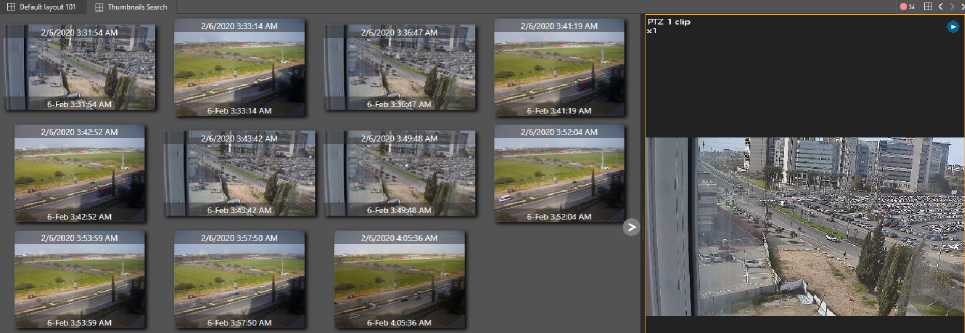
Use the Motion Indication option to search for motion in recorded scenes and see if any motion occurred during a specified time. The results will appear in the timeline of the Query Results pane.
To Use Motion Indication:
- From the Query Search drop-down list, select the Motion Indication option.
- In the Select Scene tree, select the scenes to search (you can select a logical location, such as a site, to search all applicable scenes in the location).
- From the Date and Time menu, select a preset time option,
-or-
Select the Manual selection option and then enter From date and time and To date and time.
- Click Preview, and in the Search Parameters pane, set the required level of motion indication using the slider.
If required, select the Search redundant archivers option.
The query results appear in the Query Results pane.
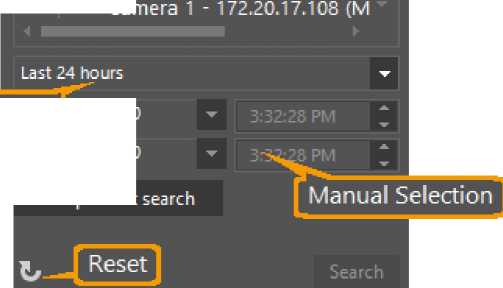
Smart Search
Use the Smart Search to select an area of interest and search if any motion occurred during a specified time in recorded scenes.
You can run multiple searches concurrently.
Query
PTZ
Drop-down
–“th:
,—Smart search
Search Box
ŞB VMS9 (1) (TW5)
– Main Business
Camera Tree
i ■* Corridor Analytics (5)
i ■< Office Workstations Fixed
■< Veh Ped Entr Anaytics [12
i@ Other Activities
Tenant 1
To: 1/9/2020
Date and Time 1/3/2020
Setup smart
To perform a Smart Search:
- From the Search drop-down list, select the Smart search option.
- In the query camera tree, select the scene you would like to search (you can only select one scene at a time), and from the Date and Time menu, select a preset time option e.g. 24 hours,
-or-
Select the Manual selection option from the bottom of the menu and then enter From date and time and To date and time.
Note: Disable the displayed Privacy Mask by right-clicking and select the Deactivate privacy mask option.
5. Select the specific area to query motion by using the icons described in the table below (it displays as a green layer).
Note: Disable the displayed Privacy Mask by right-clicking on the image and select the Deactivate privacy mask option (dependent on user permissions).
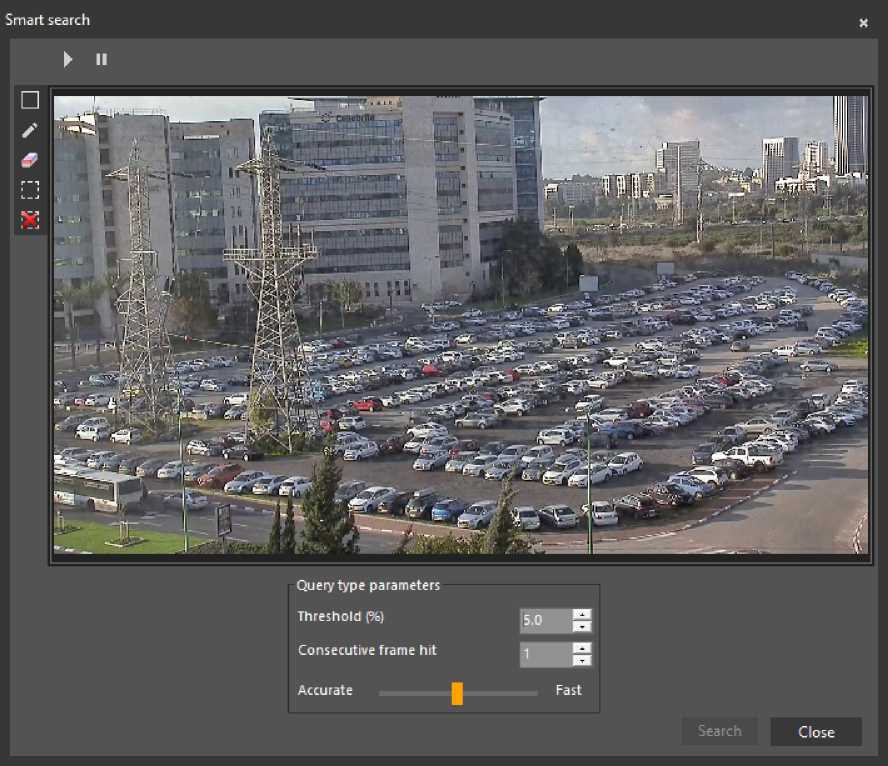
| Button | Description |
| ia | Mark a rectangle-shaped area as area of interest. In the Preview screen, mark the desired area. |
| H | Mark the whole screen as area of interest. |
| Erase single macro blocks from a previously marked area of interest. In the Preview screen, erase the macro blocks removed from the selected area. | |
| □ | Mark single macro blocks as area of interest. In the Preview screen, mark the desired area. |
| H | Clear the entire screen. |
After the zone of interest is defined, motion is displays (green layer) in the Preview pane.
6. In the Query Type Parameters section, the default Smart search parameters display.
You can change the following parameters:
- Threshold – The motion threshold which, when passed, the state alternates to Motion on, i.e. when motion is detected.
- Consecutive Frame Hit – The number of consecutive frames that pass the motion on threshold to alternate the state to Motion on status.
• Accuracy/Speed – Select the accuracy level, as opposed to speed using the slider.
- Select the Search redundant archivers option if desired, and click Search to start the Smart Search. The search may take a while. The query results display in the Query Results pane.
- Click Stop to end the query.
After stopping the query, the results found up to that point display in the Query Results pane.
When the results are played, the timeline changes from green to red whenever motion is detected.
To Perform a Thumbnail Search
Select the Thumbnails search option to provide a visual method of browsing through recorded content.
- Set up the query.
- Select only ONE camera in the Query pane Navigation tree.
- Set date and time parameters.
- Set the interval.
(Thumbnails commence from the Start Time, and are displayed at the selected Interval.)
- Click Search, and the Viewing pane displays a new Thumbnail Search Layout, with the recorded material from the selected source,
with the set of associated thumbnails.
- From the Query Search type drop-down list, select the Face option.
- In the tree, select the cameras that supports facial recognition.
- In the From and To the date and time section, select a preset time option (Last 24 hours, Last 48 hours, Past week, Anytime)
-or-
Select the Manual selection option and then enter From and To date and time.
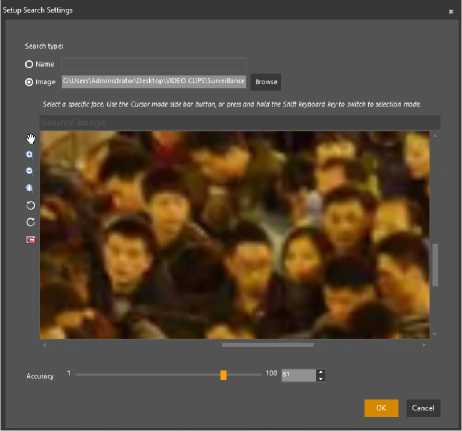 In the search type field, use the drop down arrow to select from the available options:
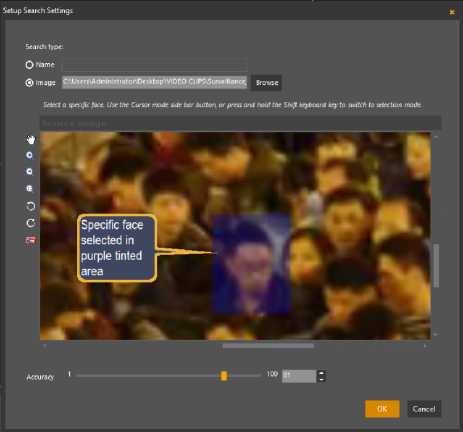 Name – The query searches for a name (full or partial) in the database:
■ Enter a name or a partial name in the Name field, and click Search.
The Query searches for the name.
Note: This field supports free text.
- Image – The query searches for clips containing the matching face:
- Click the Setup Search Settings button.
The Setup Search Settings dialog displays.
The image displays in the window.
Note : This feature supports the following image formats: *.jpg, *.gif, *.bmp, *.png, *.tif, *.tiff, *.wmf, *.e mf.
Or, Press and hold down the Shift keyboard key to mask off an area and select a specific face. The selected area displays with a purple tinted area.
Use the tools on the toolbar on the left margin to select a specific face, and set the Accuracy value using the slider bar or directional arrows for a value.
Note: The Accuracy option narrows or enlarges the selection results to contain matches with equal or higher probability percentages in an attempt to ensure selection correctness.
The tools available are Cursor mode, Zoom in/out, Fit to screen, Rotate left/right, and Preview.
Note: The Preview option enables the user to view the full image and selection.
The query searches for clips containing the selected face.
- Click Stop to end the query in the middle of the action or wait for it to complete, and Reset 0 to reset the query fields.
After stopping the query, the results found up to that point display in the Query Results pane.
Note : Only cameras that support face recognition analytics display in the camera tree. The user can choose the search query cameras and time range.
- From the Query Search type drop-down list, select the License plate option.
- In the tree, select the camera.
- In the From and To the date and time section, select a preset time option (Last 24 hours, Last 48 hours, Past week, Anytime)
-or-
Select the Manual selection option and then enter From and To date and time.
- In the License plate number field, enter a vehicle license plate (full or partial) as free text, and click Search to start the search.
The search may take a while. The query results display in the Query Results pane.
- Click Stop to end the query in the middle of the action or wait for it to complete, and Reset 0 to reset the query fields.
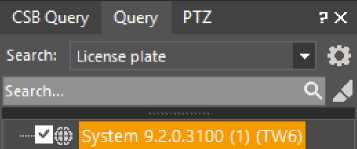
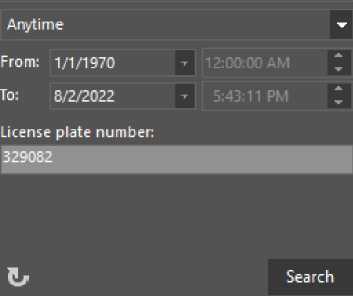 After stopping the query, the results found up to that point display in the Que ry Results pane.
Note: Only cameras that support LPR (License Plate Recognition) analytics display in the camera tree. The user can choose the search query cameras, timerange, and enter the license plate number.
To Use Digital Zoom within Thumbnail Search:
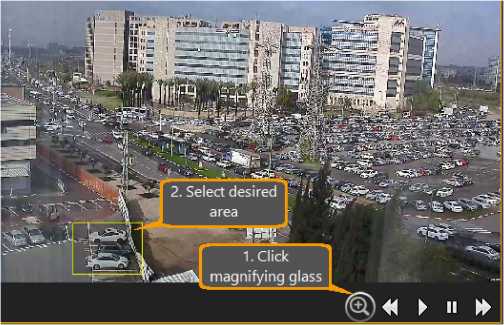
 • Click the magnifying glass icon on the bottom right of the video tool bar, and select the area to magnify.
Thumbnails display.
Note: For clarity, maximize the video prior to performing the digital zoom. See Thumbnail Search Layout for more information.
You can perform a bookmarks search using Bookmarks for cameras as mapped to a specific location, and bookmarks that include text. Cameras included in GIS map queries must include the required string.
This feature is useful for searching for license plates (LPR), a human face (facial recognition), motion, analytics events (intrusion), and real-time.
The GIS map bookmark query displays the area map with the queried cameras displayed in a timeline with directional sequential arrows and icons, and the incident time (hours:minutes) displayed in a beige mapped circle. A toolbar displays with a Show trail option to display/hide the trail, and a Clear option to clear the current search results, change the camera icons to their normal state, and hide the toolbar.
When an alarm that is linked with a camera displayed in GIS map is triggered, that camera includes an icon with a bell (indicating an alarm). The camera icon reverts back to normal state when you clear the alarm. The map recenters and zooms to include these alarmed cameras. When you double click on a camera in the query results, the relevant clip opens in a new tile and plays the clip.
The same behavior applies on the camera that is shown as a part of bookmark search result. Alarmed cameras should still have bell indication:
In the GIS map query results:
- Cameras display in the activated order, with directional arrows to indicate activity progression.
- Display/hide dynamic trails available.
- Tooltip display camera parameters (IP address, camera type, time, action text) in the tooltip.
- When a search yields multiple bookmarks linked with the same camera, only the latest bookmark displays on the map.
- Double click on the camera in the search results opens the clip in a viewing tile.
- When an alarm linked to a camera displayed in GIS map is triggered, that camera displays as an alarmed state (using icon with bell). Clearing the alarm changes the icon back to normal state. The same behavior applies on the camera that displays as a part of bookmark search result.
1Y
eltzer Rd – Hamoshavot Rd
□
X
R3 No results found
0
To search for GIS Map bookmarks:
- In the ControlCenter, in a GIS Map view, click Query in the upper right corner The Query dialog displays.
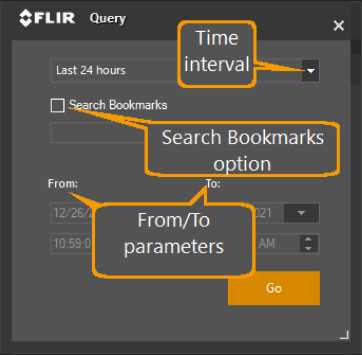
- Do the following in the Query dialog:
- Use the drop down menu to select time interval.
- Select the Search Bookmarks option, and enter in text in the field.
- Set the From and To parameters (MM/DD/YYYY and HH/MM/SS).
- Click Go.
The search query displays with a Show trail /Clear dialog, and any cameras involved display with a light beige background.
When Show trail is selected (default), a red pointed arrow displays that indicates the cameras and sequence of the search. When you hover over one of the search query cameras, a video query preview displays with a tooltip that displays relevant bookmark information (time stamp and text).
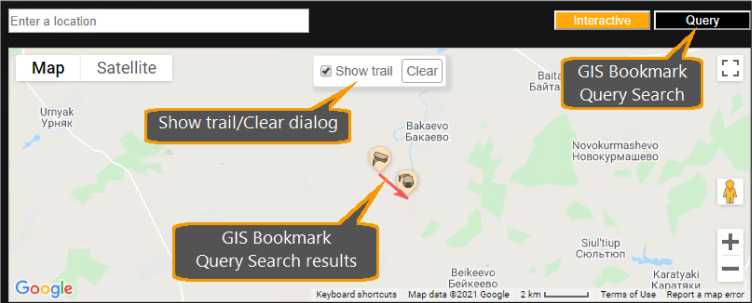
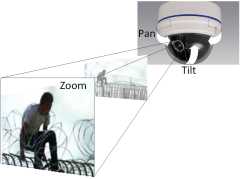
This term previously applied only to a camera with a motorized mount able to rotate to pan left and right, tilt up and down, and use motorized lens magnification to zoom in and out on the scene.
With the high resolution offered by modern cameras, PTZ capabilities within the image from a fixed camera are also provided, allowing the user to zoom in and then digital pan, tilt and zoom.This capability is further extended by allowing the user viewing the image from a PTZ camera to choose a view , and then use Digital PTZ facilities within the selected scene. (See Digital PTZ, below)
The PTZ pane for the selected camera is displayed below the Navigation pane in the ControlCenter.
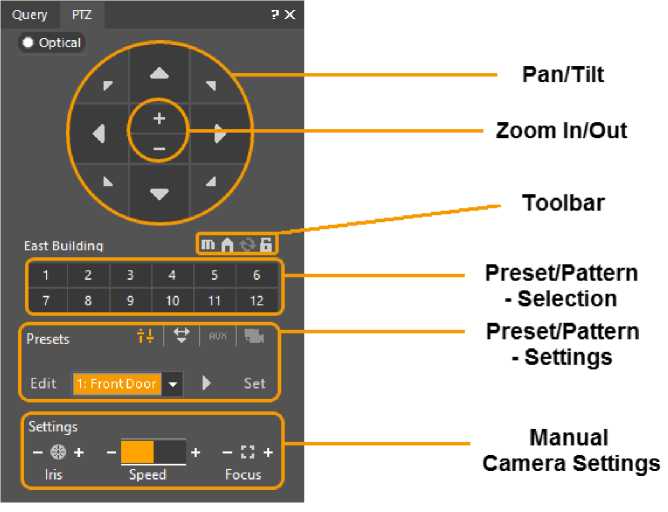

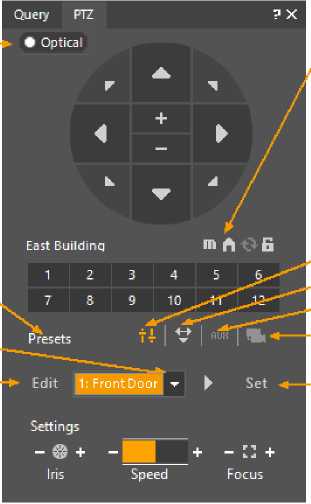 Menu
Menu
Selection
Zoom Mode
Toggles ‘Optical/Digital’ (not shown for
Fixed cameras)
Current Mode
Dropdown—
Edit
(Edits the current
Selection)
Toggles zoom
and ‘Select/Back’
for changing settings
Note:
Menu items and Modes
are disabled for fixed
cameras
Modes:
Presets
^Patterns
^Auxilliary
Scene Tracker
– Set/Record
‘Set’ when
Mode is ‘Preset’
‘Record’ when Mode is ‘Patterns’
Zoom mode – Click to change from Optical to Digital (only for PTZ cameras)
Notes:
- Fixed cameras do not offer Optical Zoom mode, and Presets are disabled.
- On PTZ cameras, when returning to Optical mode from Digital, the camera is reset to the current Optical view.
To move the camera: Use the pan/tilt directional buttons.
To zoom in and out: Click the and buttons, respectively.
To move the camera to the home position: Click the H button.
To flip the camera: Click the button.
To lock the camera: Click the button.
The PTZ Control panel Preset area enables you to do the following functions:
- PTZ control: Direct control. When a PTZ camera type is selected, the camera can be directly controlled.
- Preset Selection: Preset view. Click on a selection button to move the camera to display the preset view associated with that button.
- Preset Settings: Preset settings. This enables each preset to be named (Edit), and stored (Set). The camera pan, tilt, and zoom settings are stored in the camera, and the Preset Snapshot is stored in the file specified in the Tools/Options/Export/Snapshots field. Allows one preset defined for each numbered load button.
Once a Preset is defined, Control Center Operators view a thumbnail of the camera view when hovering on the Preset number.
Important Note:
The location used to stored the Preset Snapshots is defined in the Tools/Options menu.
See Tools/Options/Export/Snapshots
This field should be in a shared folder accessible to all Control Center Clients that may access this camera, otherwise operators on different Control Center Client Workstations will not see the same snapshot pictures
Aux Mode: When an auxiliary, PT or PTZ auxiliary device is selected, much like standard PTZ presets, the auxiliary mode enables a preset of a pan tilt and zoom stored to memory. It is for devices that work on the same principles as a PTZ camera (e.g. a PT motor or servo), and enables one preset defined for each numbered button.
- To move the camera to a preset: Click the corresponding button.
- To adjust the Iris, Speed and Focus settings: Use their respective + and – buttons.
This section includes the following:
- Digital PTZ using a fixed camera
- Using Digital PTZ mode on a regular PTZ camera
- Cancel digital PTZ mode
- Additional PTZ capability
- Digital PTZ using a fixed camera
Digital PTZ Using a Fixed Camera
The system provides a digital PTZ capability on fixed cameras. By zooming in on the initial picture (using the + symbol in the PTZ control), the system provides a virtual zoom into the scene. Then, the user can use the PTZ controls to move the display to a particular area.
Using Digital PTZ Mode on a Regular PTZ camera
When using a regular PTZ camera, the user can select a view using the standard PTZ controls, and then change to Digital PTZ mode in one of the following ways:
- Right-click in the PTZ camera pane and from the context menu select the Switch to Digital PTZ option.
or
Using either method, the scene allows the user to use the Digital Zoom capability within the scene.
Cancel digital PTZ Mode
Digital PTZ mode is canceled either by clicking the Optical/Digital button in the PTZ pane (The button is set to ‘Digital’ when in that mode), or by again right-clicking in the PTZ camera viewing pane, and selecting ‘Switch to Optical PTZ‘ from the context menu.
Additional PTZ Capability
Once viewing an image in the viewing tile, the system provides additional magnification and movement around the magnified tile image using the mouse.
The CBS Query pane enables you to search the CaseBuilder server database and Data Location Path for saved cases. (To see more about how cases are created and updated, see Cases – CaseBuilder Features.)
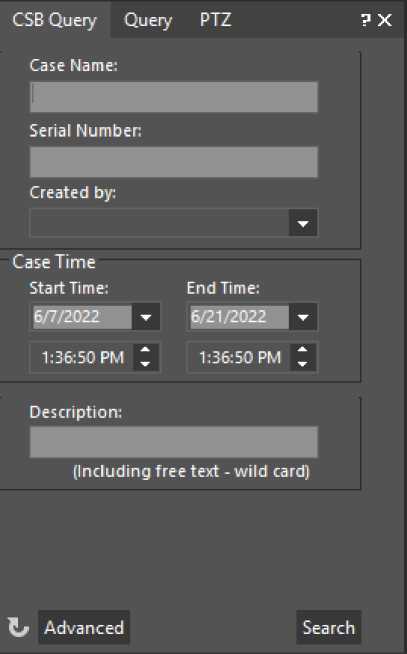
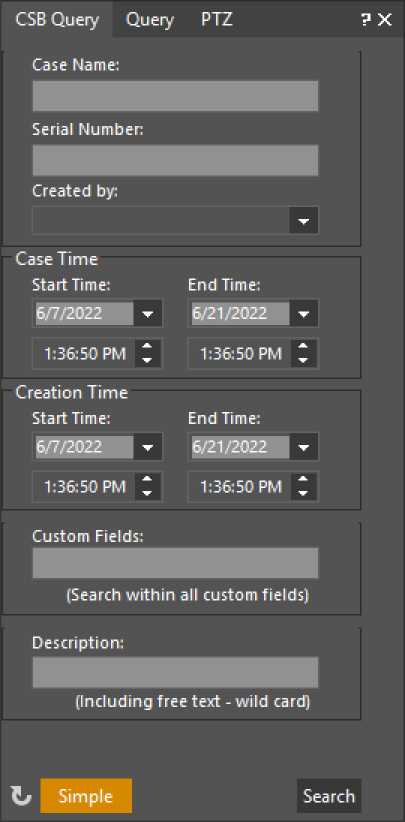
CaseBuilder Query Pane – Advanced
CaseBuilder Query Pane – Simple
The features of the CaseBuilder Query pane allow targeted searches using a variety of filters and matching options.
The following fields are available in the CaseBuilder Query Pane:
| Name | Description |
| Case Name | Search for any case with a Case Name that matches the entered text (Full or partial). |
| Serial Number | Find a specific Case Number (Case Numbers are allocated automatically by the system when Cases are first created) |
| Created by | Drop-down opens list of Users. Checking one or more users in the list will limit the search to cases created by that/those users. |
| Case Time | Limit the query to cases that were created between the start time/date and the end time/date. |
| Description | Search for cases where the ‘long’ description contains the specified text. |
| Advanced | Opens the Advanced search options dialog that enables the specification of advanced search parameters |
| Go | Initiates the search according to the settings and returns any results in the Query Results pane. |
Cases matching the criteria in the CaseBuilder Query Pane are listed in the Query Results
pane.

Results of a CaseBuilder Query appear in the Query Results pane.
Selecting a Case from the Query window opens that case, with the CaseBuilder Navigation tab showing all the materials that have been added to the selected Case, and a dedicated CaseBuilder Layout tab. Selecting a bookmark, clip or incident from the CaseBuilder Navigation tree will open the selected item in the Case Builder Layout. The Timeline shows the playing position of a retrieved item.
See CaseBuilder Navigation Tree Pane.
Select the CaseBuilder mode from the Side-Bar. The CaseBuilder Layout opens in the display area and the CaseBuilder Navigation Tree displays in the Explorer area.
The CaseBuilder Navigation Tree contains the CaseBuilder Toolbar and a tree to view and select the added and configured elements in the open case.
Note: The Case Builder Navigation tree displays only open case detail. It is not used for browsing the available cases.
Case Builder Navigation Tree Toolbar Icons
The following table shows the CaseBuilder Navigation Tree toolbar icons and features:
| Icon | Name | Description |
| New Case | Adds a new case to the CaseBuilder Navigation Tree for adding and saving material. | |
| □ | Open Exported Case | Opens a dialog for selecting an exported case file to load into the CaseBuilder Navigation Tree and Layout. This is not for opening saved cases in the default CaseBuilder directory.
To open a saved case, you must use the CaseBuilder Query and select it from the Query Results pane. |
| a H ■
File URL |
Add | Menu for selecting to add a file or URL.
File: (add file) Opens a dialog for browsing and selecting a file to add to the case. URL: (add URL) Opens a dialog to enter a URL (path) for browser for compatible content to be linked to the case. |
| a | Save | Saves the case and any changes to the CaseBuilder centralized default location on the network. |
| X | Delete | Removes the selected item in the CaseBuilder Navigation Tree from the case. |
| Export | Opens a dialog for exporting the case and any supporting content to the location specified. If the CaseBuilder Options are set to export an included Player, exports folder and a zip file. If no player is included, exports a zip file only.
Notes:
|
| Icon | Name | Description |
| correct historical password. For more information, see Privacy Mask Password. | ||
| Undo | Reloads the last saved case in the CaseBuilder Navigation Tree. |
The CaseBuilder Navigation Tree provides nodes for items added. When selected, properties for the item load into the CaseBuilder Layout Case Properties area and can be modified and saved.
The CaseBuilder Layout pane displays the contents of any item selected in the CaseBuilder Navigation Tree Pane:
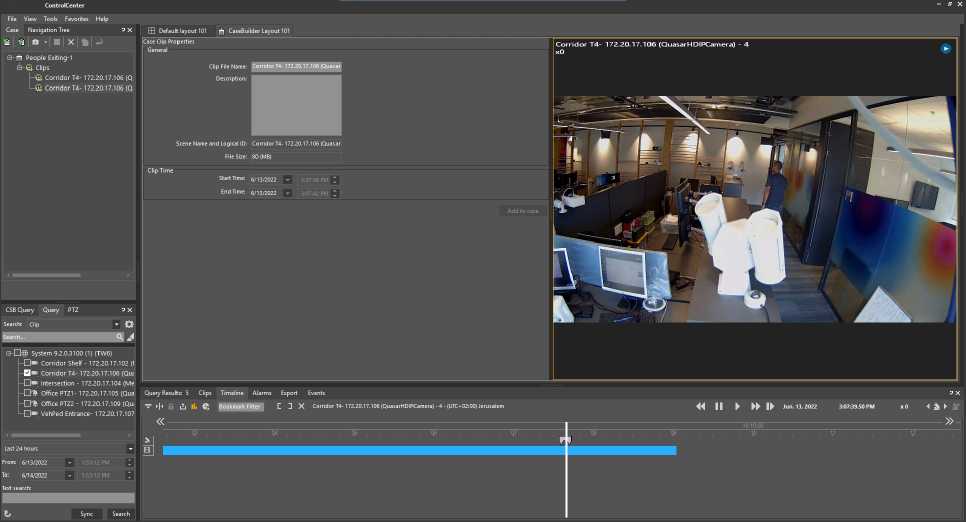
The CaseBuilder Navigation Tree displaying the items and sub components added to a case,
with one Case clip open
By double clicking on attached files, the ControlCenter calls the default file system program for the file extension specified to run. For example, a file with a .exe extension is added to a case, double clicking on the file in the CaseBuilder Navigation Tree runs the executable file. If the file is a image .JPG file, the file system configured image program for that file extension opens and display the file. The exception is web browser .HTML files, that open in the layout viewing widow.
When you export content that contains a Privacy Mask, you may need to retrieve the original password to remove the privacy mask.
Privacy Mask Password Export Behaviors (Historical vs. Current)
The Privacy Mask password behavior changes depending on the export method. Because the Privacy Mask password can be changed yet remains historically attached to video clips when they are recorded, the behavior under the following export types are as follows:
| Where | Type | Behavior |
| When exporting clip from the Query Results or Timeline | Create Clip – use Source video and apply current. | The Privacy Mask password attached to the exported DVT file is the current system-wide Privacy Mask Password. |
| When a
Backgroun d Export occurs. |
Copy Clip from Archiver
static. |
The export assumes the clips are being moved to an insecure status.
For each clip segment (single Archiver container), the Privacy Mask Password set at the time the clip was recorded (not exported) is enabled. |
| When exporting a CaseBuilde r case with clip | Copy Clip from Archiver
static. |
The clips exported are for portable external use. The Privacy Mask Password for each clip segment (single Archiver container) set at the time the clip was recorded (not exported) is enabled. |
| When execution of a Mass Export occurs. | Copy Clip from Archiver
static. |
The export assumes the clips are being moved to an insecure status.
For each clip segment (single Archiver container), the Privacy Mask Password set at the time the clip was recorded (not exported) is enabled. |
Privacy Mask Password Export Rules – Current or Historical
CAUTION: When exporting, the password used is not always the system-wide Privacy Mask Password at the time of export.
This section addresses only the ability of a user to remove the privacy mask while viewing an exported video clip. Users who want to view the files with the mask on the video clip are not be affected as there is no need to enter a password to view the clips with the privacy mask on.
When exporting a clip of video that has Privacy Mask configured on the video, the file immediately gets password protected against disabling the Privacy Mask. This password has no relation to the ControlCenter user password or permissions.
If you have changed your password within the period of the exported file range, how you export those files will determine the password mechanism employed.
Export either the Current Privacy Mask Password or the Historical Privacy Mask Password at the time the file was recorded.
The Historical password for each of the files remembers the password from that time. Thus if a range of files is exported, a historical mechanism makes each file password protected for its point in time. Depending on the number of Privacy Mask password changes that have occurred, there may be as many different passwords required to Deactivate Privacy Masking. This is because the Password is embedded in the clips being recorded during the time when the password was active.
The Privacy Mask Password is stored in the recordings made by the Archiver from the video stream of the camera. Each of these is stored in a container according to your system settings. By default the file size in this container is 80mb. When a Privacy Mask Password is changed, the new password is applied at the time the file is closed and written to the Archiver container. Thus, the password covers some video that was being buffered for recording before the file closed:
LIVE STREAM

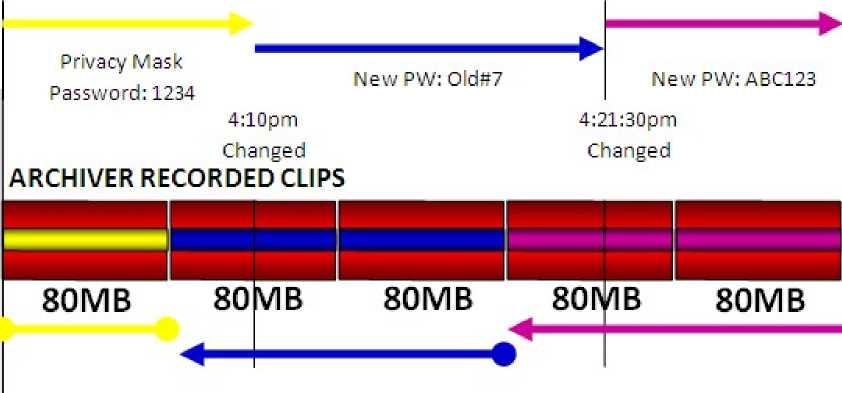
The Archiver Privacy Mask validation process for internal ControlCenter users is done via the user permissions of the Latitude system. The data of the of the Privacy Mask Password for future offline use is kept in the clips of the containers. In the diagram above this is represented by the yellow, blue and purple data core. In the color representations of different passwords in the graphic, you can see how the password changes in real-time with the live stream. The passwords changes in the middle of a clip not fully written to a file, are embedded in the recorded video from the start of the clip.
As of yet the three different embedded Privacy Mask passwords are not required for hiding or showing the Privacy mask for online users. It is when the recorded files are moved out of the Archiver storage that the Privacy Mask Password is implemented.
Privacy Mask Password – “Current” password behavior
When Exporting from a Results Query or Timeline the same video that is in the Archiver is exported with a single file Privacy Mask password whether it is the full clip or a partial. Additionally only the selected times are exported and no matter how large the clip is, it is exported into as many files as needed based on the max size setting in the Export settings.
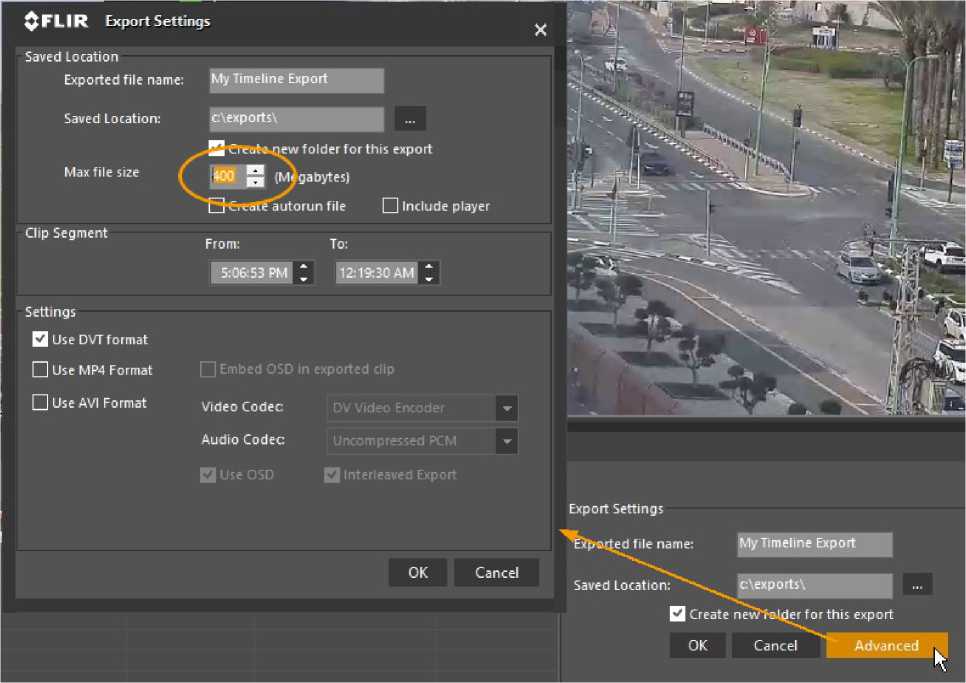
When you export from the Query Results or the Timeline pane where you can select entire clips or set video range in and out points for taking a segment. In this type of export, the embedded historical passwords are ignored and the current Privacy Mask password is used for every file created by exporting. In the example diagram that follows, two exports are represented (one of a range and the other of the entire selected file). Only the password defined in the system advanced settings at the time of the export is applied even though the clip spans several Historical passwords. The password “ABC123” (colored purple) is used for all files exported from the Query Results or the Timeline pane export features.

TIMELINE EXPORT (Range 4:02pm-4:16pm)

186MB
QUERY RESULTS EXPORT

400MB
Note that the file size in the above example is based on the trimmed segment or range of the video exported.
Privacy Mask Password – “Historical” password behavior
In the following example a different mechanism is used to export. In this instance the files are directly copied from the Archiver container storage as-is and the historical passwords as imbedded are simply enabled on the files being copied outside the security zone of the Archiver.
ARCHIVER RECORDEDCLIPS
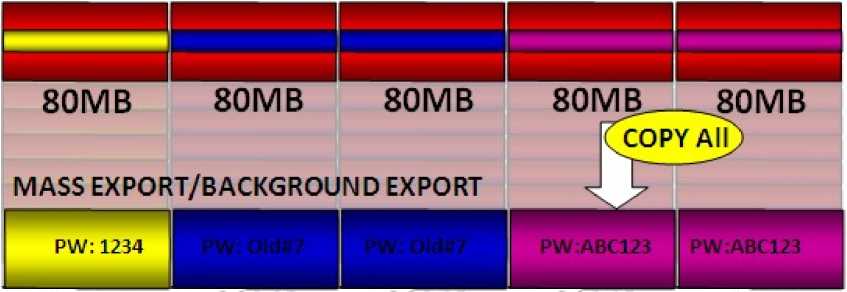
80MB 80MB 80MB 80MB 80MB
In the above instance, each file if viewed independently and the user chooses to disable the Privacy Mask, the password they will be required to enter will be the password of the clip. Thus of the five clips, the first clip requires the password 1234, the second and third clip requires the password Old#7 and the fourth and fifth requires the password ABC123.
Because the clips are all from the same source, if they are viewed in a timeline together, only the most recent password is needed for disabling the mask of both clips.
Likewise the export of clips from the CaseBuilder has the same behavior as the Mass Export, in that it copies with the password files as-is from the Archiver. Thus if the password has changed, the selection of clips will influence what password is embedded from the historical Archiver data.
Additionally, the export file size is based one-to-one with the Archiver container files. Even if the range of the clip is limited, the file size will match the container sizes of the range and not the specific in and out points of the range.
CASEBUILDER EXPORT CASE (Range 4:02pm-4:16pm)
PWl 1234
ld#7
80MB
80MB
80MB
In the above example, the segments of the DVT export file that are not specified in the range, will not be viewable to the end-user. The viewing of the clip in a timeline with a disabled privacy mask can be done by selecting the clip and entering the latest historical password. In this case “Old#7”.
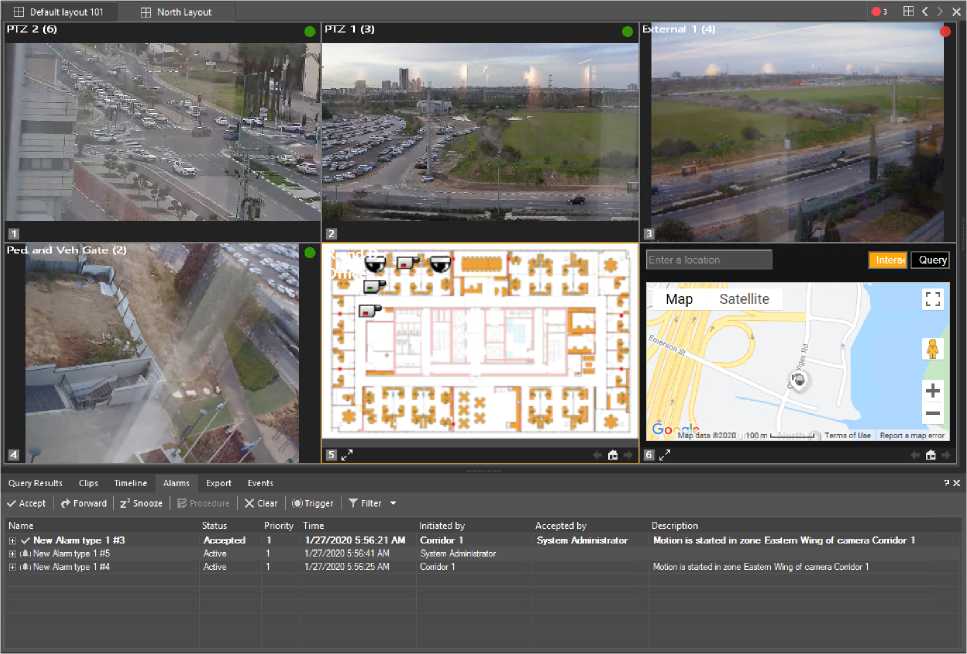
Use the Viewing Pane to view live and recorded video, maps and web pages, respond to alarms and to
listen to and transmit audio. The Viewing Pane consists of a viewing area made up of video tiles in the center, a toolbar on the right, and layout tabs at the top.
The following sections present detailed descriptions of these areas of the pane:
The Viewing Pane’s layout tabs enables users to easily switch between layouts. The tabs appear automatically when layouts are opened.
![]()
![]()
![]()
File View Tools Favorites Help
Navigation Tree
Default layout 101
Layouts are the only types of entities that are created and configured via <ControlCenter> rather than <%ADMINCENTERNAME%>.
A tile layout consists of a tile pattern, content (the entities displayed on the tiles), arming states, and digital presets (when in use).
Configure Tile Layout
You can configure tile layout in the Control Center.
Follow these steps:
1. From the Viewing Pane toolbar,
![]()
File View Tools Favorites Help
Navigation Tree
FR Default layout 101
[J] MySavedLayoutOI
Click the Layout icon IÜ1 to open the Layout dialog.
2.
A selection of screen layouts displays.
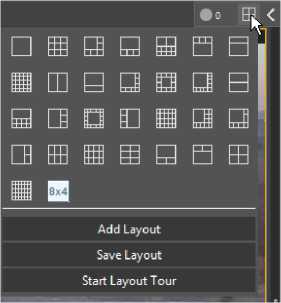
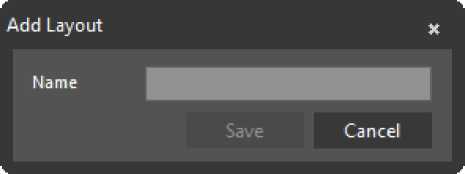
3.
Click Add Layout.
Single System – Add
| Add Layout | ‘ X |
|---|---|
| Name | TestSx4 |
| System | HV6 – 8.0.5.6127 (1) (HV6) -r |
| Save Cancel |
Multiple Systems – Specify where the Layout is saved
- Enter a name for the new layout, and click Save to save the new layout. You have configured a new tile layout.
Customize a Layout
You can customize a layout by selecting display patterns, cameras, sequences, maps, and presets.
Follow these steps:
- From a blank layout (or an existing one if you want to overwrite it):
- Choose a tile pattern by opening the Layout dialog (see above) and clicking one of the tile pattern buttons.
- Drag and drop cameras, sequences and maps from the Navigation Pane onto viewing tiles.
- For Digital Presets, select them by using the in-pane controls (right click and select Go to Preset) or use the PTZ pane to select a Digital Preset for the current viewing tile.
- Arm viewing tiles for alternative content or alarms as applicable.
- When the Layout contains the required components, click the Save Layout option on the Layout dialog.
The available layouts display in the Navigation tree:
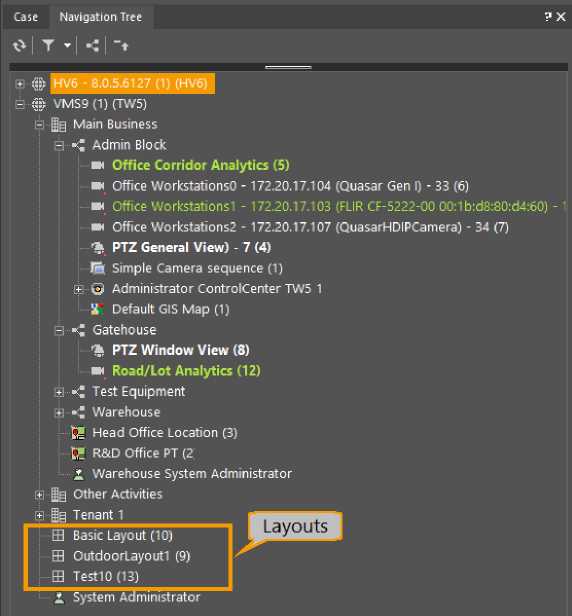
In the Viewing Pane, click the Close icon to the right of the layout tab strip to clear the currently active Layout.
![]()
Click X to close current Layout.
Note: Save the Layout before closing if you .want to keep the current setup
You can configure a tile layout with cameras, presets, and other display parameters. A tile layout consists of a tile pattern, content (the entities displayed on the tiles), arming states, and digital presets (when in use). (Audio layouts are associated only with content)
Follow these steps:
- In the ControlCenter, switch to the layout that you want to modify by clicking the tab at the top of the Viewing Pane, or double clicking the icon in the Navigation Pane (use Default Layout 101 if none others exist).
- Click the icon or the Layout Pattern Menu option to the top-right of the viewing pane, and select a tile pattern.
- Drag and drop cameras, sequences, and maps from the Navigation Pane onto viewing tiles.
- (Optional) To use Digital Presets, select them by using the in-pane controls (right click and select the Go to Preset option), or use the PTZ pane to select a Digital Preset for the current viewing tile.
- Arm viewing tiles for alternative content or alarms as applicable.
- In the Layout Pattern Menu, click the Save Layout option to save your layout. You have configures a tile layout.
- Thumbnail Search Layout
Each time the Thumbnail Search option is used as a Query Type in the Query pane, the Thumbnail Search Layout is opened, showing a set of thumbnail images from recordings available during the ‘From:’ and ‘To:’ times in the Date and Time settings.
Using Thumbnail Search is briefly described below.
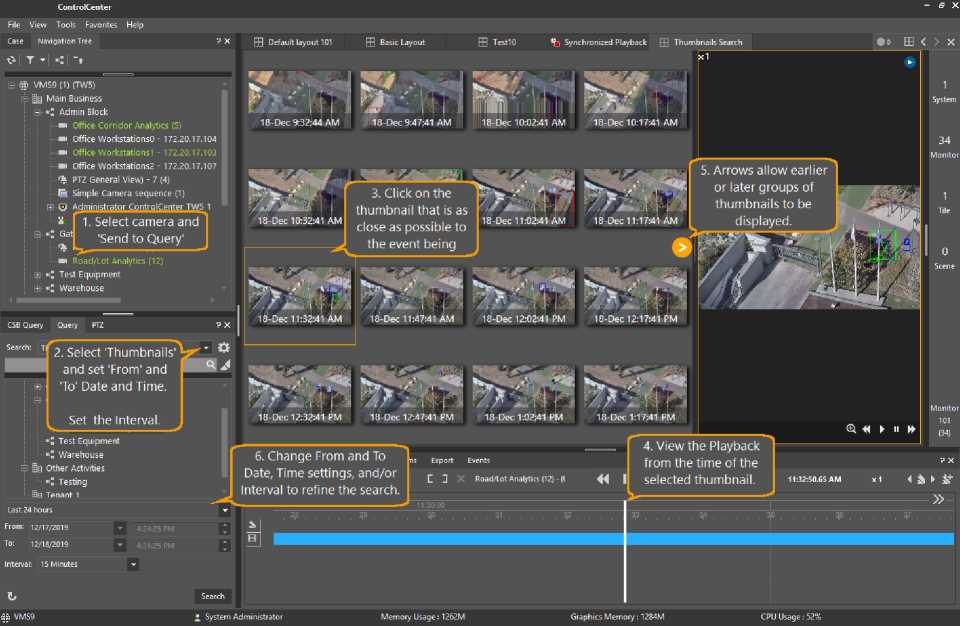
The CaseBuilder Layout differs from Default Layouts and Audio Layouts, as it serves a specialized task of helping a user build cases and configure information that are used for research and investigative purposes. Additionally it enables users to review and display the materials after the case is completed and exported.
The layout displays properties for the case and components of the case based on the selection made in the CaseBuilder Navigation Tree.
Where the other layouts are tied to the Archiver server only, the CaseBuilder Layout requires that the CaseBuilder Server is accessible when working with a server side case, but can work offline when viewing an offline exported case.
To view, a server case, the CaseBuilder Query must be run and a case must be selected and opened. At start up, no case or items are displayed in the layout.
The CaseBuilder Layout is divided into the following sections:
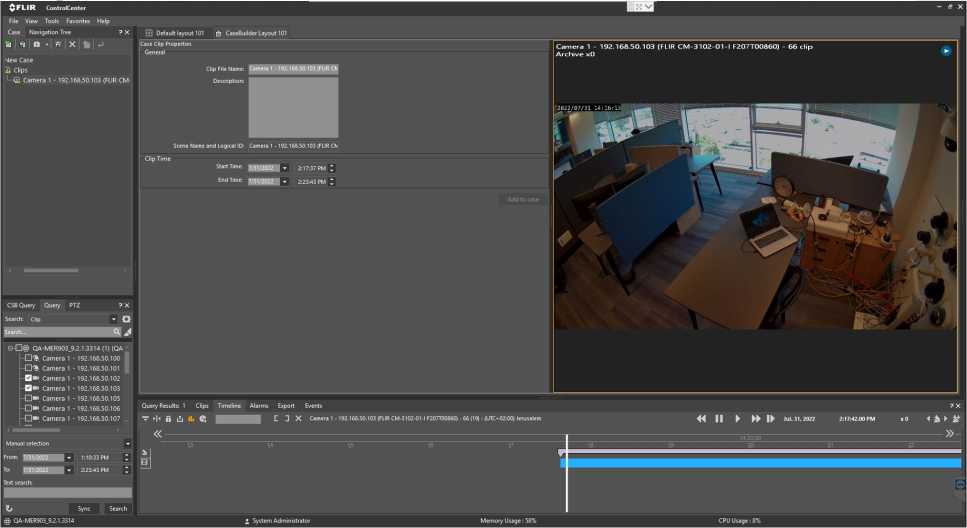
The CaseBuilder Layout tab displaying a video clip and properties that is ready to be added to a case
The Properties may contain settings that cannot be changed. When viewing a new or saved case there may be some values that are inherent to the selected entity that are not permitted to be change.
When viewing exported cases, it is considered a static case at the time of export. If the exported case is out of date or incorrect, the CaseBuilder user who generated will need to modify the source and regenerate it.
The Viewing Window enables the viewing of video clips that are either opened by double clicking on the video clip (or bookmark) in the CaseBuilder Navigation Tree or by dragging and dropping video from clips in the Query Results.
Additionally the Viewing Window supports viewing of HTML content from URLs as well as snapshots that have been added to a case and are shown in the CaseBuilder Navigation Tree.
The Viewing Window also works with Privacy Masking and enables a user with the password to remove the privacy mask from Archiver recorded clips. Once a case is exported with a privacy mask, the Privacy Mask Password (or passwords) from that timeline must be used to remove the privacy mask. For more information, see Privacy Mask Password Export Rules – Historical.
The viewing tile contains a viewing area and a toolbar.
Where possible, Adaptive Streaming automatically selects the best video stream resolution to enhance performance and save bandwidth.
When the Maintain Aspect Ratio setting in Options/Tools is set, then if the aspect ratios of the video frame and viewing are unequal, horizontal or vertical bars fill the unused parts of the tile.
The user can change the Aspect Ratio setting for a selected tile by clicking Shift-R.
The toolbar and On-screen display are configurable.
Note: Latitude does not support Windows presentation display mode (Windows logo key ■■ + P) for setups with viewing tiles on multiple monitors.
- On Screen Display
- Digital Zoom
- Digital Presets
- Dual Sensor Camera
- Viewing Tile Toolbar
- Armed Tiles
- Toggle Privacy Mask
- Spot Monitor
- Viewing Live and Recorded Video from connected DVRs
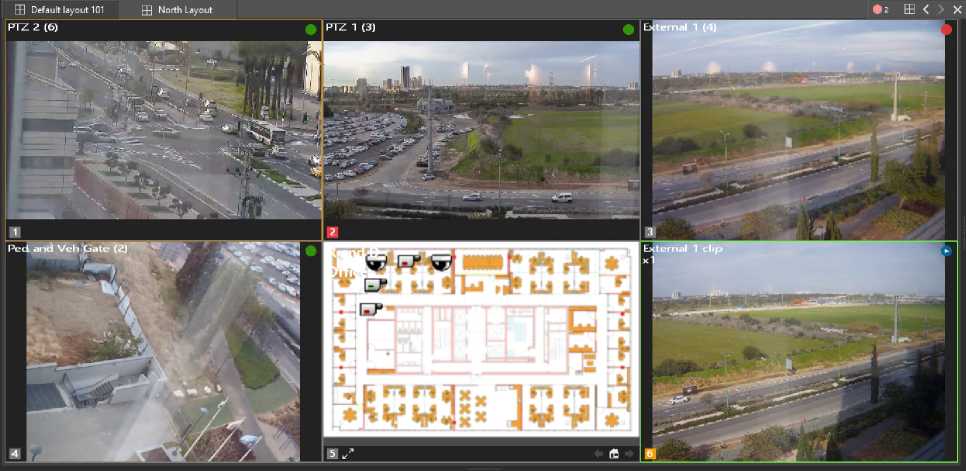
The tile viewing area border provides important information about the tile’s state:
| Color | Indication |
| Yellow | The tile is focused.
Notes:
|
| Red | The tile viewing area border blinks red when content for which it has been armed begins playing. The border disappears as soon as the tile is clicked. Multiple tiles can have red borders at the same time. |
| Grey | Normal tile – No specific status. |
| Green | The tile is selected. A focused tile becomes selected when another tile is control-clicked (thus becoming focused itself). Selection is only meaningful when trying to apply an action to multiple tiles. The most common uses for this is when bookmarking or trashing multiple tiles at the same time. |
Multi-layering
The viewing tile can be configured to be multi-layered. When a scene is displayed on a non-empty tile, it “covers” the tile’s former content but does not remove it. When the scene is removed, the previously hidden content on the now-top layer displays again.
You can display relevant information (e.g. scene name, status description, status image, video statistics and time) on the screen.
Using the Tools – Options Menu, you can now set the font and background parameters of the information displayed on screen and determine what information is displayed.
Note: Any changes made to the On Screen Display only apply to tile content that is dragged to the Viewing pane after the configuration, and not to the content already displayed in the Viewing pane.
The following methods are available: – Zoom the Viewing Tile – Draw to Zoom
For fixed cameras, a Magnify icon is provided g!
, which enables the user to use the mouse to draw a rectangle around the area to be viewed.

Click Magnify icon Select area Zoomed image
After clicking the Magnify icon, use the mouse to click-and-drag the area you wish to magnify. The selected area is displayed.
To return the tile to normal display, right-click to open the Context menu, and select Reset digital zoom.
Zoom the Viewing Tile – Manual Control
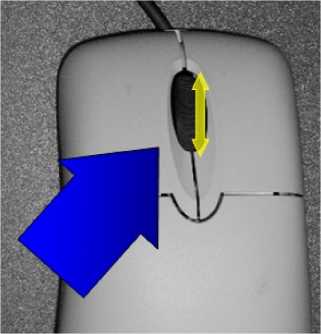
Use the mouse wheel to digitally zoom a video in a tile
When using a mouse with a scroll-wheel, you can control digital and optical PTZ functionality directly from the tile.
To enter/exit PTZ control mode:
• Click the scroll-wheel while the mouse is over the tile.
Depending on the mouse’s location in the tile, the cursor turns into one of eight directional green arrows.
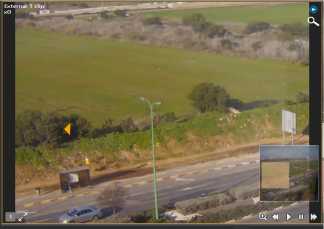
To pan or tilt:
• Move the mouse so that the cursor points in the direction in which you would like to move the camera in and click the left mouse. The movement speed is proportional to the distance from the of the cursor from the middle of the tile.
To zoom in:
To zoom out
Digital Pan
When in digital zoom, the tile displays orange directional arrows as the mouse pointer icon. These arrows shift as you move the mouse around the image to indicate the move direction that occurs if the mouse is clicked.
When clicked, the move is small if the cursor is nearer to the center of the tile, greater if it is closer to the edges.
While in Digital Move mode, a small zoom window indicates the current state – i.e. showing the current size and location of the displayed area relative to the total camera field of view.
Diagonal Up Diagonal
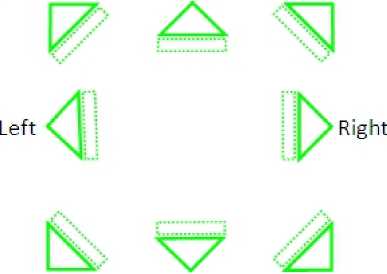
Diagonal Down Diagonal
Digital zoom pan (move) icons
Digitally-zoomed Tile Navigation
This section describes how to navigate on a digitally zoomed tile.
Consider the following:
- To move up (towards the top of the image): Move the mouse pointer to the central upper part of the magnified video tile so that the green cursor arrow points up and then click the mouse.
- To move down (towards the bottom of the image): Move the mouse pointer to the central lower part of the magnified video tile so that the green cursor arrow points down and then click the mouse.
- To pan right: Move the mouse pointer to the central right edge of the magnified video tile so that the green cursor arrow points right and then click the mouse.
- To pan left: Move the mouse pointer to the central left edge of the magnified video tile so that the green cursor arrow points left and then click.
- To move diagonally: Move the mouse pointer to the corner edge (upper-right, upper-left, lower-right, lower-left of the magnified video tile) so that the green cursor arrow points in the diagonal angle you want to go and then click the mouse.
- Restoring the video image to full size centered image can be done using the Reset digital zoom menu option.
To remove digital magnification (zoom) from a tile:
On the ControlCenter tile, right mouse-click the magnified video image and select Reset digital zoom option from the Context menu.
Dual Sensor Camera Picture-in-Picture (PIP) Display
When viewing output from a Dual Sensor Thermal/Visible camera that has been integrated with Latitude, such as the FLIR PT Series, the viewing tile presents a Picture-in- Picture (PIP) view of the Thermal and Visible scenes.
Both cameras appear in the Navigation Pane.
– Northern Area
i i M Entrant {2}
j ; ■■■’* PT 1 Thermal Head – North (3j
| I –1* PT 1 Visible Head – North (1)
i M Road ‘ {j}
Both Images display in the Viewing Pane. The Primary image (full tile) is shown highlighted in the Navigation Tree.
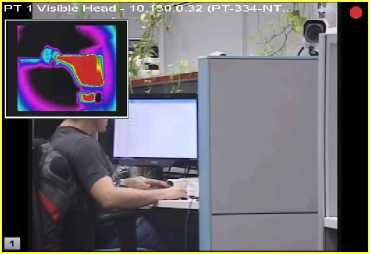
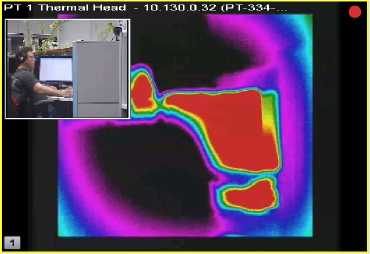
Visible Image Primary
Thermal Image Primary
Dual Sensor Thermal/Visible Camera
Picture-in-Picture (P-i-P) Display
The user can switch between viewing the Visible or Thermal images as primary by double-clicking in the viewing tile’s P-i-P window. Double-click the main window of the Viewing tile makes the viewing tile full-screen, as for any other viewing tile.
When the mouse is inside the P-i-P window, the user has additional controls:
®
• To minimize the P-i-P window, click the Minimize icon
3
![]() (To re-open the P-i-P window, click on the P-i-P icon
(To re-open the P-i-P window, click on the P-i-P icon
that appears in the margin when the image has
been minimized.)
To re-size the P-i-P window, drag the Re-size icon
View an EST-Enabled Thermal Camera

EST-enabled thermal cameras are displayed with the same pane features as regular Thermal or Visible-spectrum cameras.
EST-enabled and regular Thermal Cameras displayed in adjacent Viewing Panes
An EST-enabled camera can generate the following Events:
- “Screening: Alarm triggered”.
- “Screening: Temperature within limits” – Camera successfully read the temperature and it was not above the threshold.
- “Screening: No face covering” – Triggered when camera detects that a person’s face is not covered.
- “Screening: Alarm – Missed reading “- Camera that the reading failed – shows in event description.
View Tile Toolbar
The view tile toolbar displays basic information about the displayed entity – principally, its name, but may also include various buttons depending on the displayed entity’s type. To enable maximum video real estate and a more comfortable way to control it, the viewing tile toolbars are semi-transparent overlays.
The opacity level of the toolbar background and buttons as well as the visibility of the tile toolbar and the tile number can be set using the Tools — Options Menu. By default, the toolbar background is very opaque and it fades when the cursor is not placed on top. The buttons are visible and the Armed Tile button is always visible.
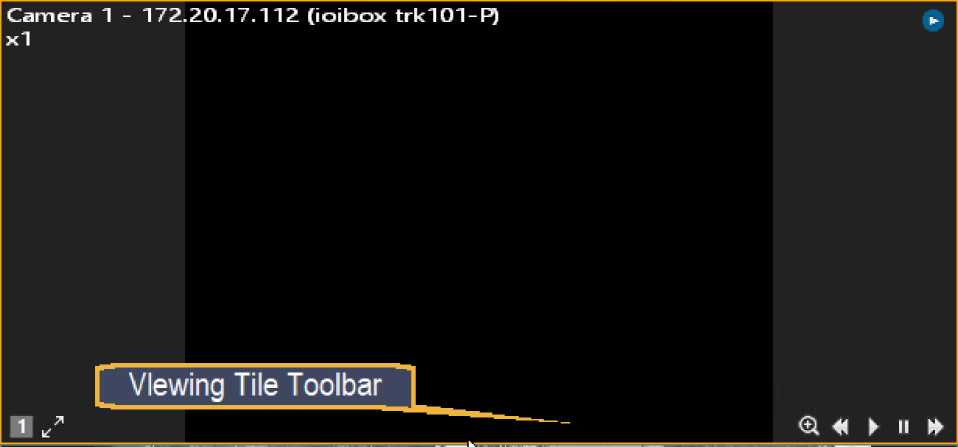
Note: Any changes made to the toolbar display settings do not show on a tile that , and not to the content already displayed in the Viewing pane.
View Tile Control Icons
| Button | Entities | Description |
| All | Tile’s logical ID. Also used to arm it for instant replays/alternative content (one click)(Orange) or alarms (two clicks) (Red).
Blinks when an alarm/instant replay activates. |
|
| -nnnnnlinn | Microphone, Video Clip | Adjust the volume from the source. |
| Camera | Digital zoom – Click to activate and then use click-and-drag in the Viewing tile to define the area to be displayed. | |
| Camera | Start and stop listening to the audio inputs linked to the displayed entity. | |
| Camera | Start and stop transmitting audio through a linked microphone.
Notes: This microphone can send audio to all cameras that are:
|
|
| o | Camera | Start and stop manual recording of the camera scene. |
| Button | Entities | Description |
| Camera | View an instant replay of the live video. You must have at least one tile armed for alternative content to view instant replays. | |
| 0 | Video Clip, Sequence | Increase a video clip’s playback speed (displayed by the tile ID) or start forward playback when in reverse mode.
When viewing a sequence, use the button to jump to the next camera. |
| ffl | Video Clip, Sequence | Pause a video clip’s playback or, when viewing a sequence, to prevent progress to the next camera until you click the button again. |
| Video Clip, Sequence | Increase a video clip’s reverse playback speed (displayed by the tile ID) or start reverse playback when in normal mode. When viewing a sequence, use the button to go back to the previous camera. | |
| Map | The Back button when viewing a map (same as in a web browser). | |
| fo°l | Map | The Home button when viewing a map (same as in a web browser). |
| Map | The Forward button when viewing a map (same as in a web browser). | |
| Alarm | Acknowledge an alarm. | |
| g | Alarm | Snooze an alarm. |
When the contents of a live video tile is being recorded, a red circle appears in its toolbar to the right of the arming/logical ID button.
Armed Tiles
The user can ‘arm’ one or more tiles, so that those tiles are used for specific uses.
For example, one or more tiles can be set to Armed for Alarms. Then, if an alarm that has an associated camera is triggered, the video from that camera is displayed on an available ‘Armed for Alarms’ tile.
Similarly, when content needs to be displayed from a non-alarm-related event, it is directed to an Armed for Alternative Content tile. If the ControlCenter user clicks Instant Replay on a tile showing live content, the 30-sec delayed video of that tile starts in an Armed for Alternative Content tile.
How to arm tiles:
• Arm tiles by clicking on the Tile number in the lower left corner of the tile.
The possible arming states, indicated by the color of the left part of each tile’s ID button, are as follows:
A tile’s arming state does not effect its capabilities (i.e. what kind of entities it can display) but does determine whether its content may be replaced, under certain circumstances, without any user action.
| Access/Icon | Description
(The number indicates the Tile Logical Number which can be used for navigation via the number pad input. The color indicates the armed status.) |
| Click 0-0 | Unarmed: Indicates that the Tile is not armed and behaves according to the configured default Layout behavior for unarmed tiles. |
| Click 1-0 | Armed for alternative content: Indicates the Tile has been armed as the target Tile for incoming “alternative content”. When this content is sent to the ControlCenter (such as the IR button being clicked) the Layout will use this tile to load it. |
| Click 2-0 | Armed for Alarm: Indicates the Tile has been Armed for Alarm. |
| Click 3-0 | Return to Unarmed |
The following rules govern how armed tiles are activated:
For Instant Replays:
- If any tiles armed for alternative content are empty, the instant replay displays on the first (i.e. lowest numbered) of them.
- If all tiles armed for alternative content are in use, the instant replay displays on the first tile displaying something other than an instant replay.
- If all tiles armed for alternative content are displaying instant replays, the instant replay is not displayed. You must clear one of the armed tiles or arm an additional tile to display an instant replay in this case.
For Alarms:
- When an alarm is triggered, Control Center first verifies if any ‘armed for alarms’ tiles are available – i.e. not currently displaying an active alarm. If so, the alarm is displayed on the lowest numbered of them (even if it is displaying some other content).
- If all armed tiles are displaying active alarms, the new alarm replaces the one with the lowest priority if its own priority is higher.
- If the new alarm’s priority is equal to or lower than the lowest of the displayed alarms’ priorities, it will not be displayed until an armed tile becomes available (i.e. if one of these alarms is acknowledged, forwarded or snoozed). If multiple alarms of the same priority are active but waiting to be displayed, the oldest will be shown first (i.e. the first criteria is priority, the second age).
If multiple alarms occur, the highest priority will load first, and subsequent lower priority cameras will display following in sequence. When a number of alarms occur, their cameras will be distributed each in turn with the individual alarm across the available “Armed for alarm” panes. For any particular user, display will be activated according to that user’s alarm display setting (Block mode, Flat mode, or Salvo mode).
For greater explanation of these modes see AdminCenter Help – Configuring an Alarm with Cameras and explanations of the behavior in Displaying a Camera on Alarm (manual and automatic).
/t\ You can always view an alarm by dragging and dropping it from the Alarms Pane to an unarmed tile.
Once an alarm is displayed you cannot replace it with any other content. It must be dealt with to free up the tile.
/j\ An alarm may be “copied” to another tile in the form of a client-side sequence. This enables a user to switch between the scenes displayed by the alarm manually, regardless of the dwell time. Copying an alarm has no effect on its status.
In-Tile PTZ Controls
When using a mouse which has a scroll-wheel, you can control digital and analog PTZ functionality directly from the tile:
- To enter PTZ control mode with your mouse hovering over a tile, click the scroll-wheel button. Depending on the mouse’s location in the tile, the cursor will turn into one of eight directional green arrows.
- To pan or tilt, move the mouse so that the cursor points in the direction in which you would like to move the camera in and click the left mouse. The speed of the movement is proportional to the distance from the of the cursor from the middle of the tile.
- To zoom in, scroll upwards with the scroll-wheel, to zoom out, scroll down with the scroll-wheel.
- To exit PTZ control mode, click the scroll-wheel.
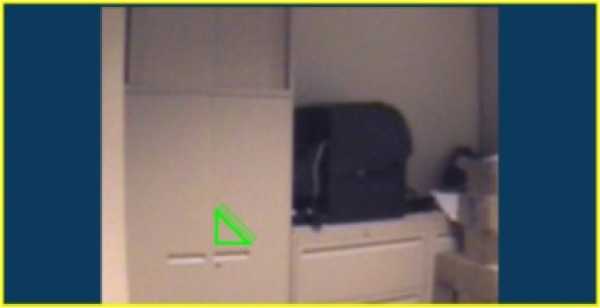
When a Query is executed with Thumbnail Search as the Query type, a new Thumbnail Search Layout is opened.
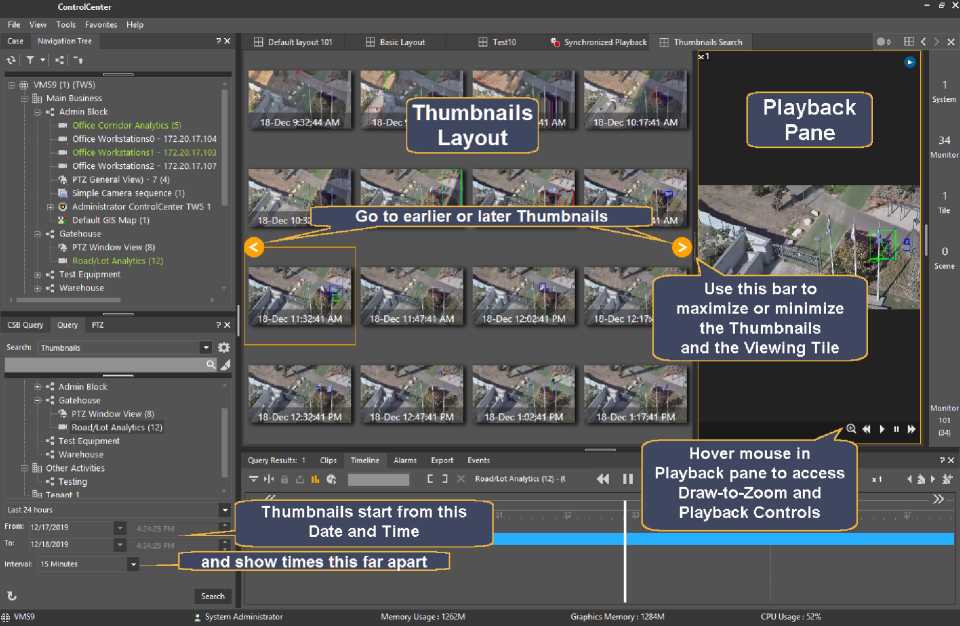
When viewing Playbacks using a thumbnail search, it can be useful select a specific area and then zoom into that area in the thumbnails, in order to isolate an event.
Note: Draw-to-zoom’ capability is not available on Panoramic cameras – see Panoramic cameras.
Hover the mouse in the Playback Pane to access the Draw-to-Zoom control.
Select the area to magnify.
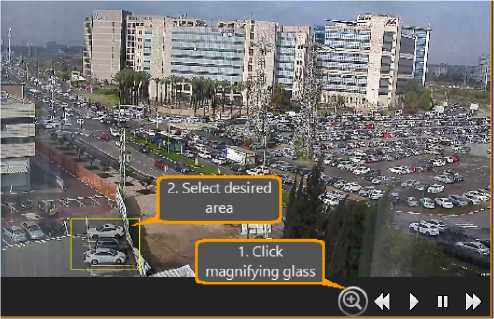
The Thumbnails are all sized to display the selected area.
Hover the mouse in the Playback pane to see the extent of the zoom.

In addition to the presets that can be used for regular PTZ cameras, the user can also treat input from a fixed camera as if it came from a PTZ. By zooming in so that only part of the view is shown, the normal controls (in-screen or via the PTZ pane) can be used, and different resulting images saved as Digital Presets.
The picture below shows an external camera, with various parts shown as potential ‘Presets’.
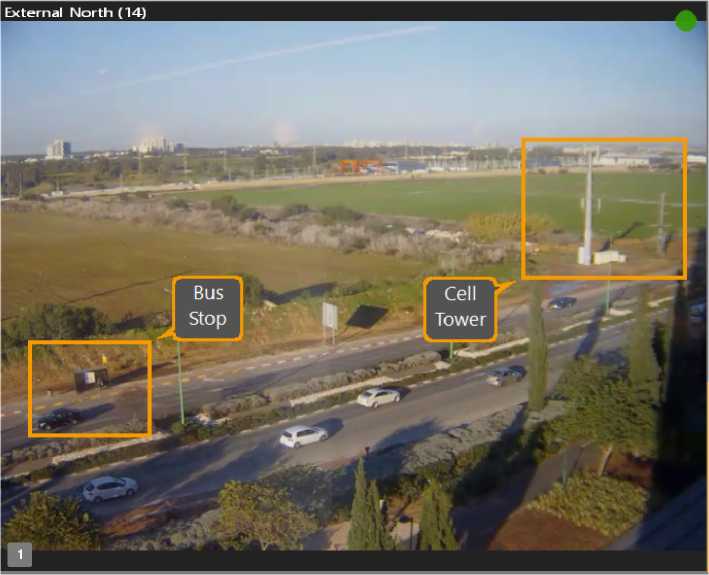
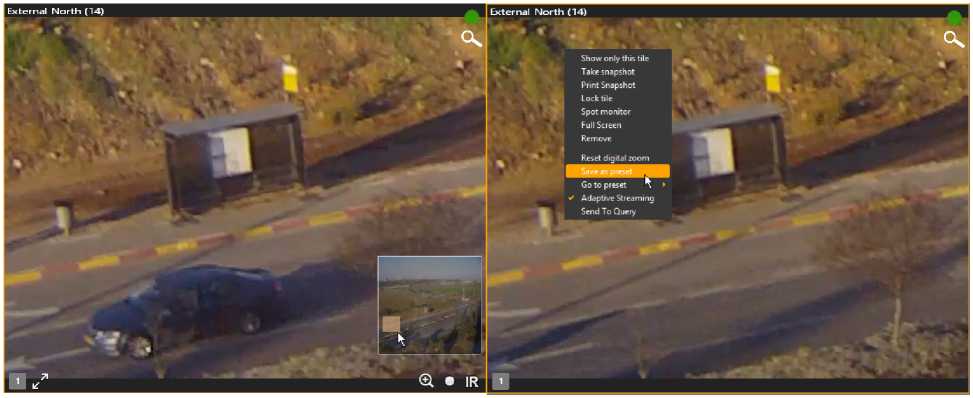
1. Use the viewing controls (in-screen or via the PTZ 2. Right-click to open the Context Menu, and click on pane) to zoom and pan Save as Preset.
until the required scene is shown.
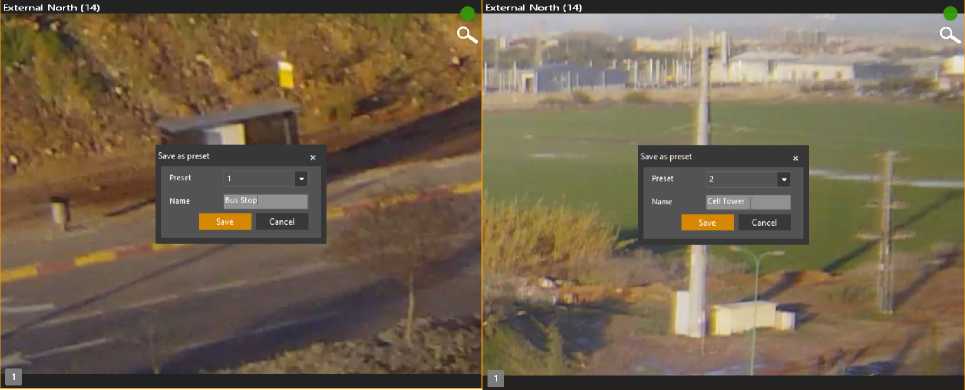
3. Choose the Preset number to be associated with this scene,
enter an appropriate Name, and Save.
4. Continue to define additional Presets.
Preset numbers and names can also be set in the PTZ pane
- Click the drop-down arrow (to the right side of the Edit area) to select the number to be used for the preset.
- Click Edit and enter the name to be used.
- Click Save (this only saves the name).
- Click Set to set the current view as the Preset.
Edit 1: Bus Stop t ►
Set preset
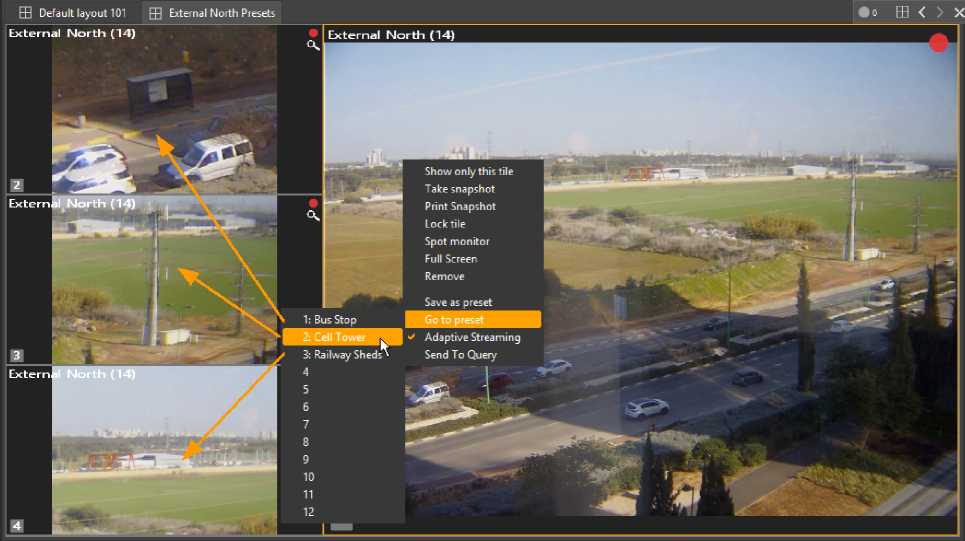
Fixed Camera – Normal View and three Preset Views (Live)
- When viewing live or recorded content from fixed digital camera, the user view content from the Preset view of that camera by right-clicking to open the context menu, and selecting Go to Preset
- Even when viewing recorded content, presets can be defined that allow a specific view to be shown from the recorded material.
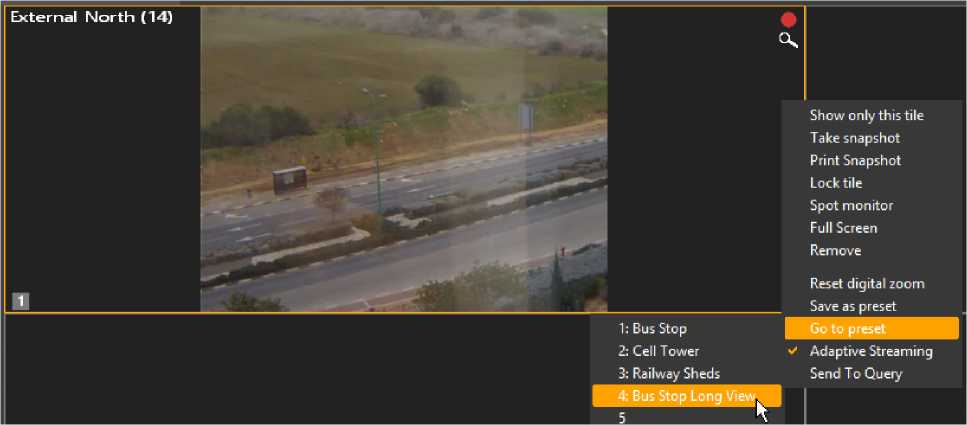
New Preset created to give a wide view
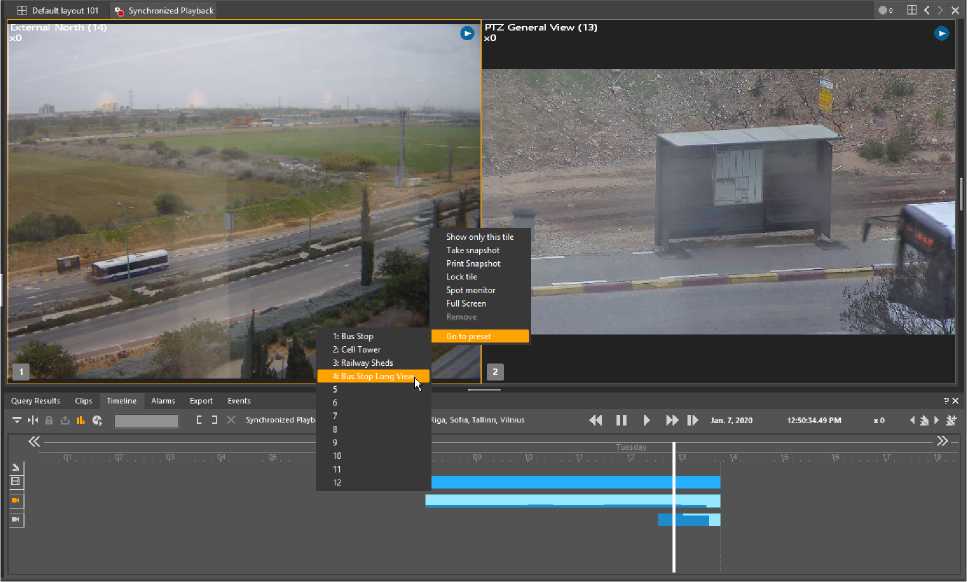
Using the Preset view in recorded content
(here giving a long view of a detailed subject from another camera)
Note: The Context Menu only provides access to the first 12 Presets (similar to the way the PTZ window only has 12 buttons for selecting Presets. Where additional Presets have been defined, they can be accessed from the PTZ Pane, by clicking on the drop-down button and selecting from the list.
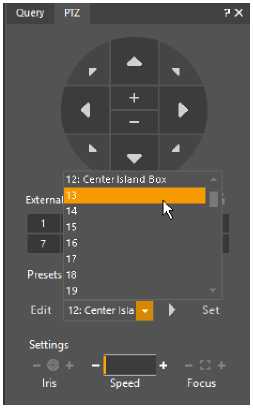
Camera Sequences
“Go to Preset” can be set as an Action from fixed cameras.
Quick View enables the ControlCenter operator to click on predefined screen overlays to switch view from the current camera to an alternative. This is typically another camera that covers an ‘off-screen’ area – such as an adjacent room.
A Quick view can be defined for any camera/s in the system (This is done on the Admin center).
Once the camera’s Quick View is defined, the camera’s normal view screen displays overlays that act as switch icons, taking the operator to the alternative screen.
— IMPORTANT NOTES:
Amhoktant . . r • r .
- The following criteria must all be met for this feature:
- Quick View is defined and enabled for the camera
- The Operator has rights to use the Quick View feature for this camera
- The operator is in regular View or Playback mode
(The feature cannot be used for a screen activated by an Alarm, displayed as par of a camera Sequence, or played as part of a Synchronized Playback).
This is how the alternate cameras might correspond to the ‘direction’ the operator might want to look if, for example, a person in view moved off-screen in the area indicated by the overlay.
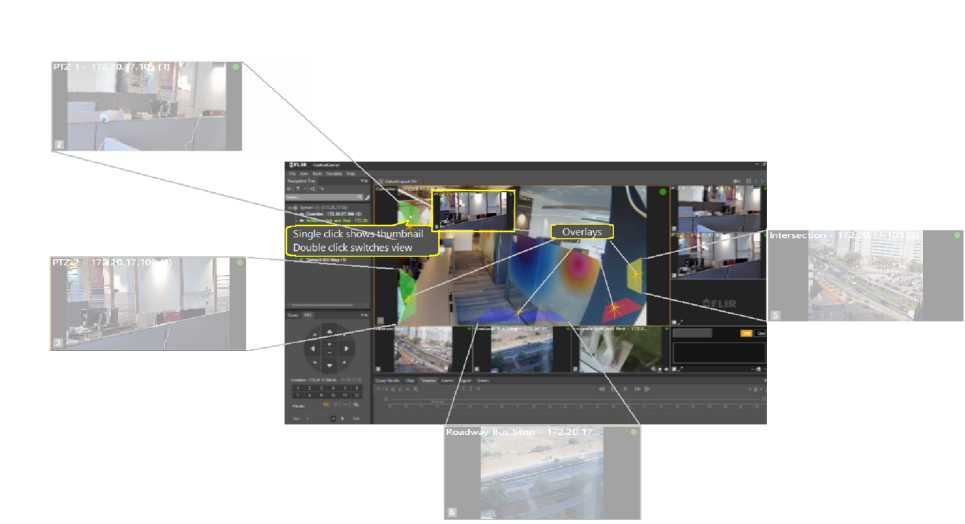
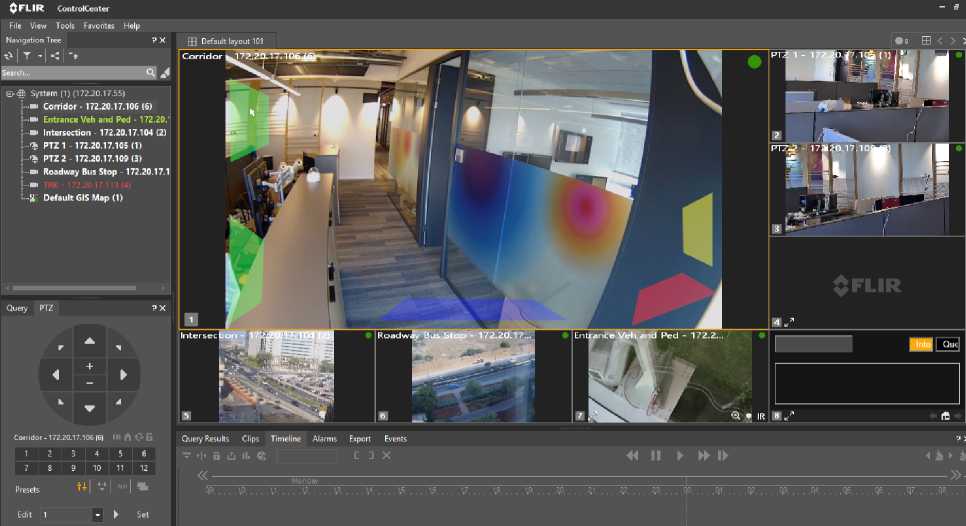
![]()

The large pane (1) below has 5 overlays in view – each corresponding to an alternate camera which was defined as being relevant to that ‘direction’.
Quick View enabled in a Pane
The Quick View Zone overlays are only visible when:
the user has the rights to use it,
the feature is enabled for this screen, and
• the mouse is inside the viewing pane
Quick View can be toggled on and off by clicking the Quick View icon
Quick switch
Double-click on an overlay immediately replaces the current camera with the camera represented by the overlay.
Highlight and check camera name
Mousing over an overlay highlights it, and a Tooltip shows the name of the camera that it represents.
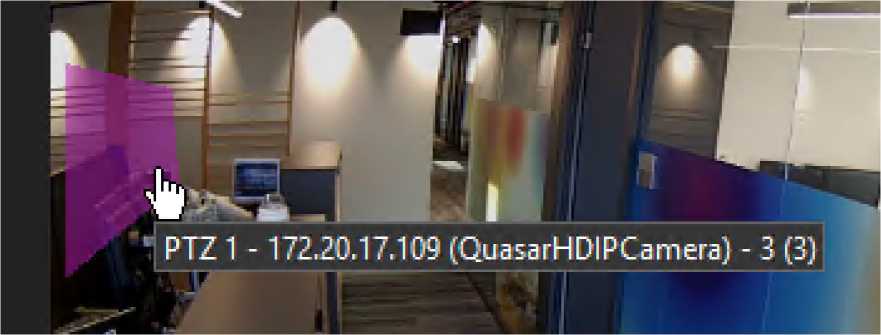
Highlighting a Zone with the mouse
 IMPORTANT – If the current user is not authorized to view one of the cameras defined in the Quickview, then the overlay corresponding to that camera will not be shown.
See Preview
A single click on the overlay shows a live Thumbnail view of the indicated camera (or a video of the relevant clip when in Playback mode), and the mouse cursor changes to a “hand” type in order to indicate to the user that Quick View zone area is clickable.
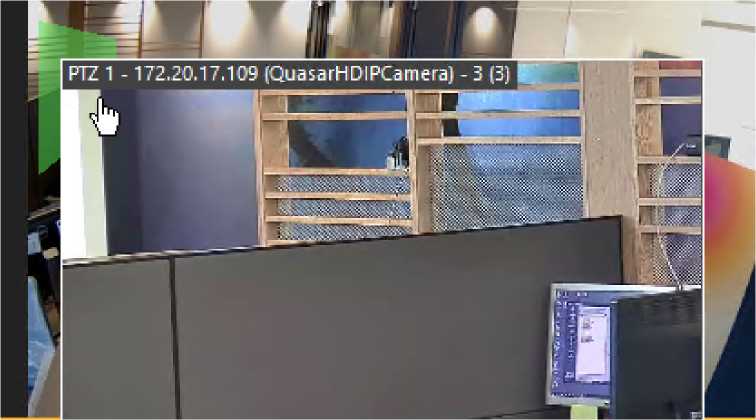
Initially, this window presents the associated camera’s name and show a loader until the video stream is ready. The Loader also is shown if retrieving the video clip takes time. @
Preset view in the Preview window
The overlay may represents a Preset view
Digital presets (I.e. on fixed cameras), will be shown in the preview immediately.
PTZ presets are not shown in the preview window, because the users has not selected the view (Click the preview or double-click the overlay).
The system will not initiate moving the camera until the actual selection is made.
Problems with displaying the designated camera
If the video cannot be displayed for some reason: communication issue, absence of the video (in case of playback) or other error, an error message will be displayed in the preview window.
Switch from Preview window
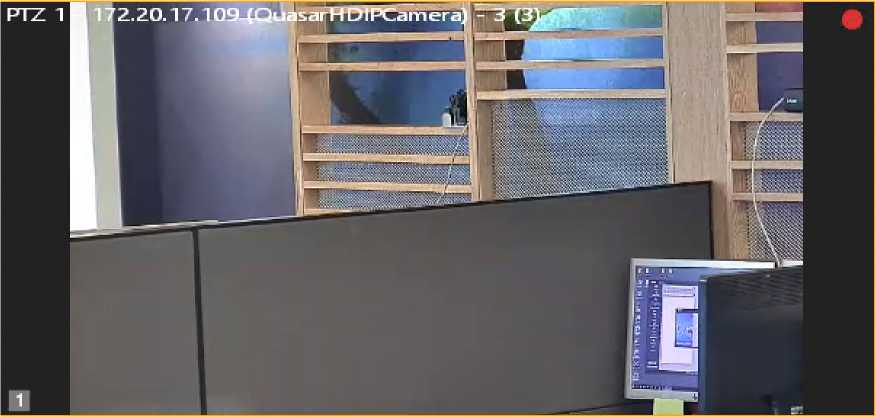
If user clicks anywhere inside the preview window, he will switch to the linked camera.
If there is a Quick View defined for the second camera, then Quick View will already be enabled when you reach the second camera.
Returnng to the first camera – (the second camera needs it’s own Quick View)
JUr
A Useful
1?
REMEMBER: There is no automatic ‘Return Path’ once the second camera has been selected, unless a Quick View has been defined for the second camera, with a zone that corresponds to back to the first. (The Setup in the Admin Center has a specific facility to make this setup easy)
Quick View allows the Operator to shift to a different camera, and this can replace the view in the current tile.
However, it may be important that the original camera also stay in view. When this is required, use the ‘Lock tile‘ option in the tile’s Context Menu.
Show only this tite
Take snapshot
Print snapshot
Lock tile
Spot monitor
Full screen
Remove
Properties
Save as preset
Goto preset ►
** Adaptive streaming
Send to query
‘LockTile’ in the Context Menu
Where a scene containing a QuickView scene is Locked (from the context menu), a subsequent scene opened by clicking on one of the QuickView icons is opened in the next available tile, while the scene from which it was opened remains in view.
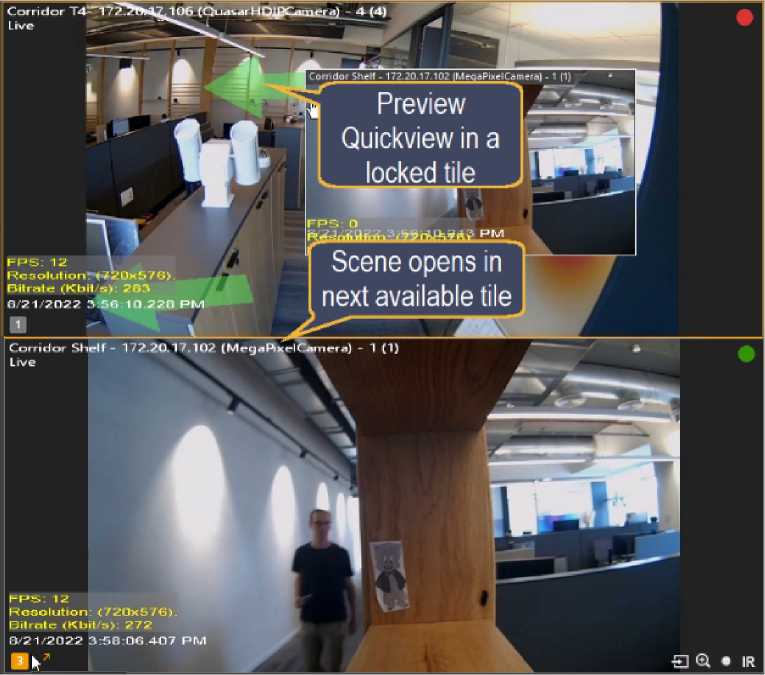
Open Quick View in New Tile
- Quick View – further details
- When Quick View is enabled in the tile, it remains as such throughout the navigation process, unless a new camera is dragged into the tile or an incoming alarm replaces the scene in the tile (if it was armed).
In that case, the Quick View button resets and Quick View zones, even if available for the new scene, is initially hidden.
- When selected tile is presenting Quick View zones and user selects another tile, the Quick View zones in the previously-selected tile are hidden but the Quick View enable button remains toggled on. If user moves back to that tile and selects it again or hovers over it, the Quick View zones automatically reappear, without needing to enable the Quick view feature in that tile again
- When a camera is opened in a tile by incoming alarm, since the tile is locked, the Quick View feature is disabled, and the Quick View enable button is not visible.
- Quick View in Playback
Preview when in Playback
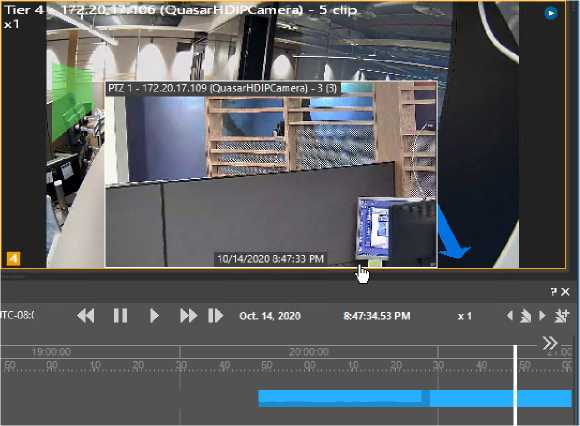
Time and speed in Preview window
Playback Time and Speed in Preview Window
When the preview is being shown, the playback time is shown in the preview window, and the speed of the preview playback will be the same as in the camera in the playback window.
- When a user opens a playback of a camera which has Quick View zones, and he has access rights to at least one of the Quick View zones (to the linked cameras) the Quick View enable button will appear in the tile. Initially its state will be off.
- When Quick View is enabled and zones are displayed, preview windows will show a related playback video of the SE zone.
- When playback is played at increased speed, the preview window will show a video at the same speed as the playback window.
- When user is watching a playback video in the tile, and Quick View is enabled and zones are displayed, preview windows will show the related playback video of the Quick View zone from that corresponding time.
- If a camera is detached from the system, Quick View zones from the detached camera will still be available, since detached cameras still contains recordings.
- Controlling Output Pins linked to Cameras
When an Output Pin is linked to a camera, then, if the operator moves the cursor to within the camera’s viewing tile, the Output Pin icon is shown, and the icon shows the ‘current’ state.
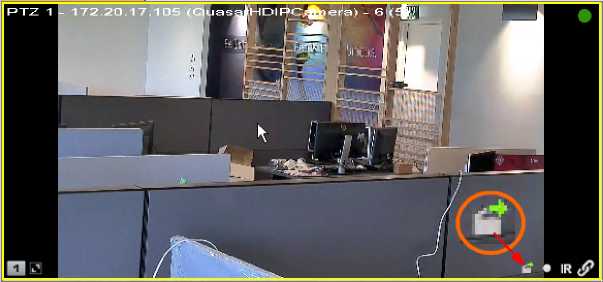
Figure – CC Viewing Pane showing Camera with Linked Output Pin in ‘Normal’ State
Hovering on the Output Pin Icon shows a tooltip and the state the pin changes to if clicked.
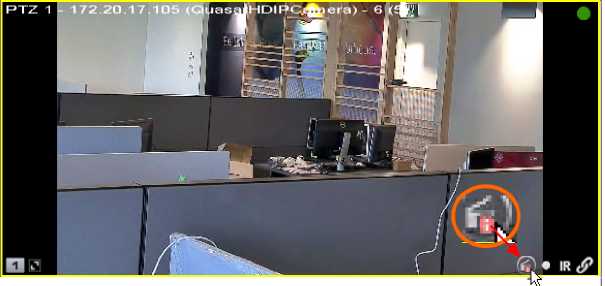


Figure – Linked Pin Status
Change output pk state to normal
Change output pin state to abnormal
Figure – Linked Output Pin Tooltips
Linked Output Pin Inaccessible
If the camera on which the Output Pin is defined becomes inaccessible, the Output Pin Icon is shown greyed-out, and if the mouse is placed on it, a status tooltip is shown.

Adaptive Streaming saves bandwidth and enhances system performance by tailoring a video stream’s resolution to the size of the viewing tile. The system displays high- resolution images when the image is shown in larger tiles or full-screen mode. When shown in smaller tiles, not so much resolution is needed, so the stream can be reduced.

By default, Adaptive Streaming is enabled in each ControlCenter client.
To disable Adaptive Streaming for a ControlCenter:
• Navigate to Tools, Options, Video and deselect the Adaptive streaming option.
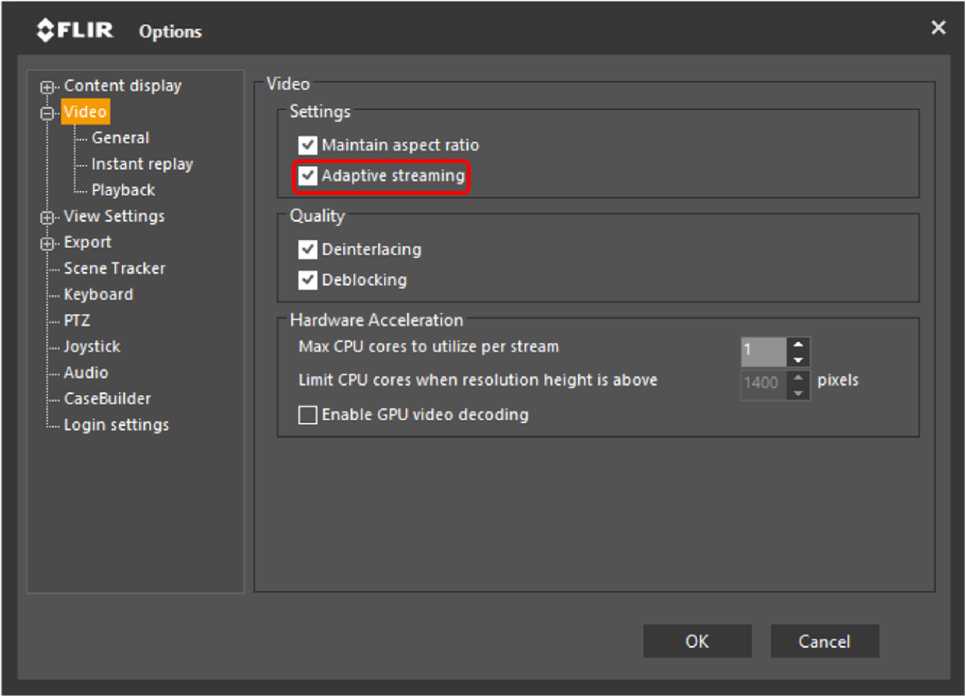
To disable Adaptive Streaming for a given camera:
• In the CC tile, right-click the tile in which it is displayed and deselect Adaptive Streaming.
On systems that support Privacy Mask, cameras and camera sequences can have an overlay grayed-out are on an image that prevents viewing that part of the video image.
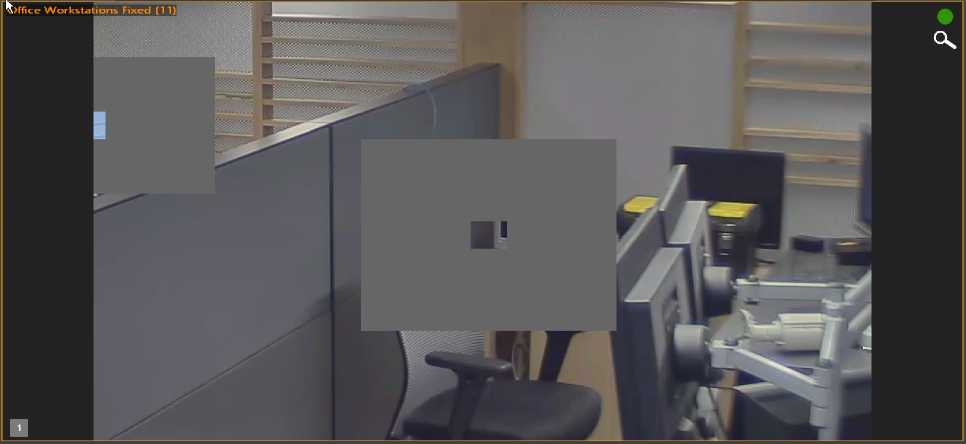
Caution: The reasons that masking was created on the video can vary and thus before a user removes masking from a video that may be displayed in view on a monitor, a certain level of discretion and background as to why the mask was put on the video in the first place should be considered. You may want to consult a Supervisor or Administrator of the system to learn more about the scene’s Privacy mask. In some jurisdictions, privacy masking laws may apply.
For live video scenes and exported video, the following behaviors can be expected:
- If the video is from a live display in the Tile layout, the login credentials automatically enable an authorized user with mask privileges to remove the Privacy Mask and see the privacy zone underneath it.
- If the video is from a Archiver recording being played in the Tile layout, the login credentials automatically enable an authorized user with mask privileges to remove the Privacy Mask and see the privacy zone underneath it.
- If the video is from an exported recording in DVT format (only) and being played in the Tile layout, to remove the mask during playback, you must enter the system assigned Privacy Mask password that was in use when the video file was exported. This is a separate password unrelated to System login and can vary based on the active systemwide Privacy Mask password at the time the file was export and which System entity system it was exported from.
• If the video is from an exported recording in AVI format, the masking is permanent as part of the image and cannot be removed.
It should be noted that some cameras have privacy masking capabilities that may have been configured outside of the system that may embed the masking in the video.
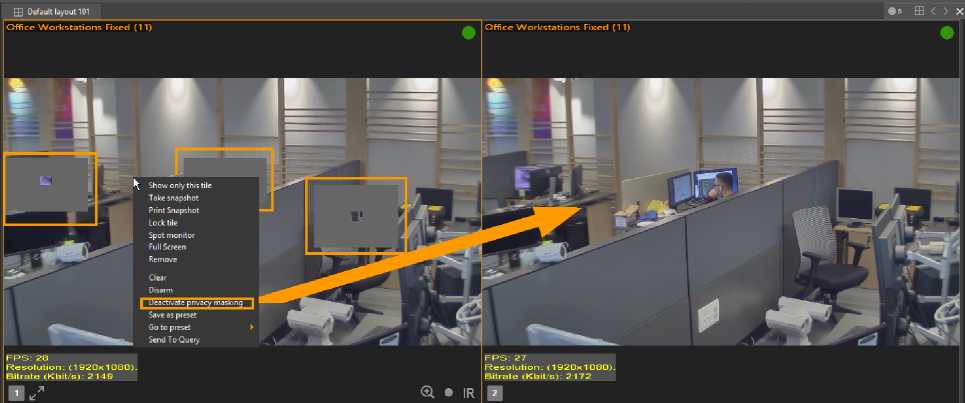
Privacy Mask is turned on and the Privacy Zone is hidden – right click menu to disable
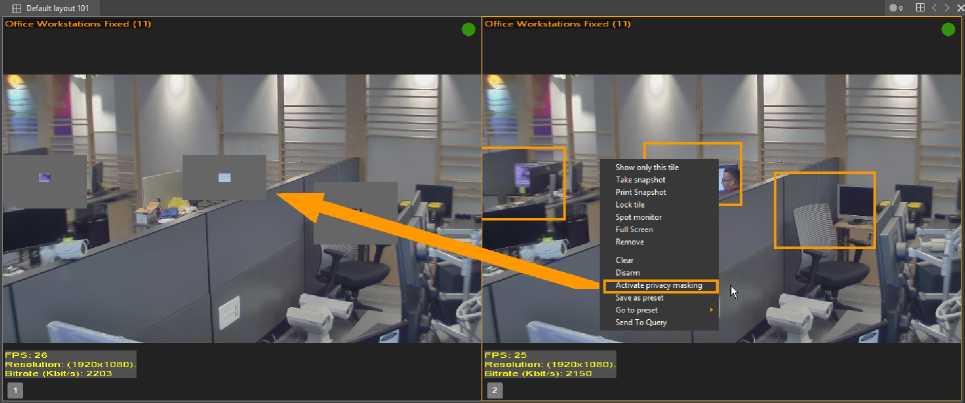
Privacy Mask is turned off and the Privacy Zone is visible – right click menu to enable
To hide/show a privacy mask on a ControlCenter tile
- If the Privacy Mask is displayed on, on the video image displayed in a Layout Tile, do the following:
- Right-click and select Deactivate privacy mask.
If the video is live or an Archiver recording playback, the hidden area becomes visible.
If the video is from an exported video clip, you will be prompted for a password.
- If prompted for a password, enter the Privacy Mask system-wide password that was active when the specific video clip was exported and then click OK.
Note: This password is stored and does not need to be entered again. Only after unloading the clip from all panes or from closing the ControlCenter does the password get clear.
Caution: If you leave the an exported clip which you entered a password for loaded in the ControlCenter and you log out from the System,, the ControlCenter will only switch to offline and the passwords you entered will remain for each video still loaded in the offline ControlCenter panes. It is recommended when you are finished viewing a clip that you have entered a Privacy Mask password for, that you remove it from the tiles, Timeline and File Playback pane.
- If the Privacy Mask is turned off, on the video image displayed in a Layout Tile, right-click and select Activate privacy mask.
- Spot Monitor
Spot Monitor enables the user to select the tile in which a scene displays by default when double-clicked.

To enable Spot Monitor:
• Right-click the desired tile in the Tiles pane, and then select Spot Monitor.
Once a tile is selected as spot monitor, its edge remains highlighted even when another tile is selected.
The GIS Map entity enables the ControlCenter Operator to display the initial map according to its stored GIS parameters (Longitude, and ‘Eye Altitude’).
Select the GIS Map you want to display, and drag it to the required tile. (In this case, the example is the Default GIS Map).
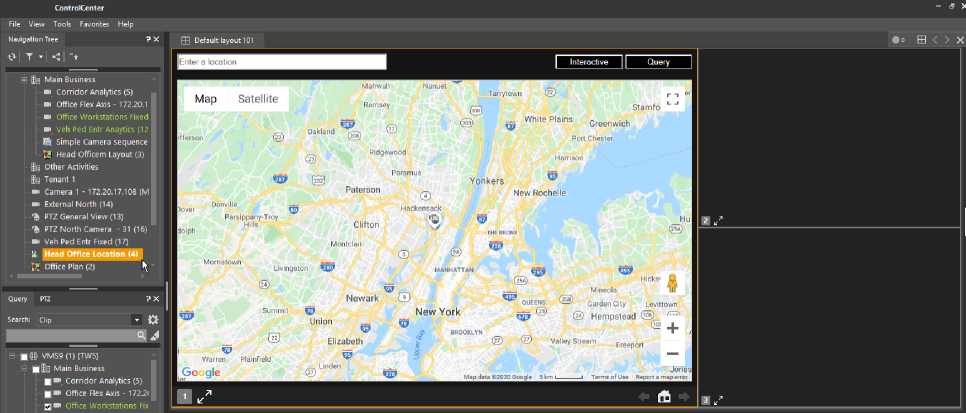
It is possible that, because of the location of the map and the selected ‘Eye Level’, that none of the selected GIS entities are shown.
You can use the standard map zoom and navigation tools to change the map until you see the GIS entities displayed.
Note: For Radar integration, see Manage Radar Zones/Tripwires to add/delete zones/tripwires in real time.
GIS Map Zoom-in
• To zoom in on GIS maps, click and hold the keyboard Ctrl key and use the mouse scroll wheel to enlarge the tile.
Alternatively, you can select one of the entities that are defined with GIS coordinates, display it in one of the Viewing Tiles, and then right-click and select the Show my location option from the context menu.
This causes the GIS map to zoom and center the selected GIS entity. The entity’s icon appears in the GIS map.
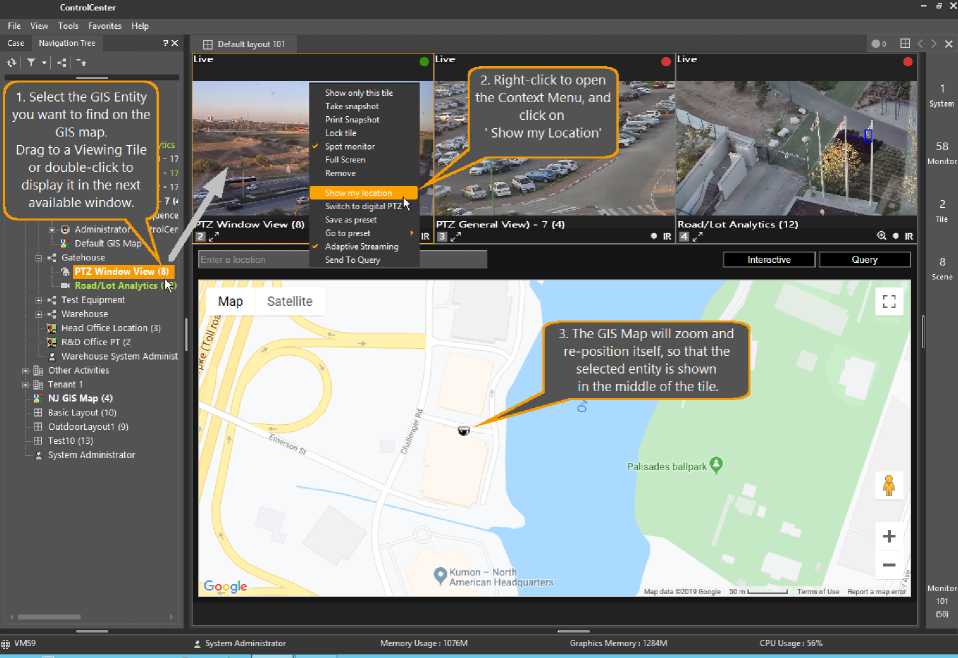
GIS Entities in a GIS Map
The following entities may be shown in a GIS Map.
| Icon | Entity |
g- Fixed Camera
Fixed Camera, Alarm
ep, PTZ Camera

PTZ Camera, Alarm
Mobile Camera, Live
Mobile Camera, Playback
Mobile Camera, Alarm
Show video when Hovering
If the GIS Map is defined with the Show video when hovering option enabled, a small window showing the video from the selected camera can be shown by hovering the mouse on the relevant icon. A tooltip also displays the entity’s name.
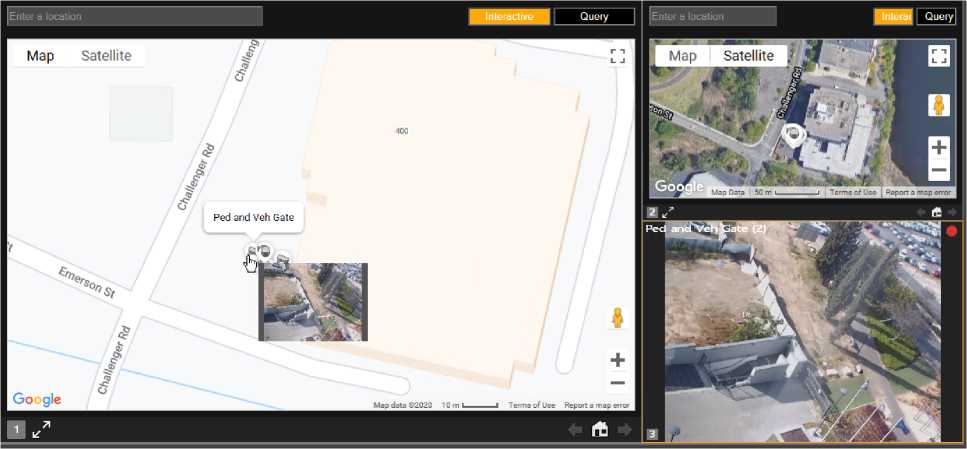
The Detection Systems (Radar integration) enables you to add, delete zones/tripwires in real time, or cancel current drawings with the proper equipment connected to your system.
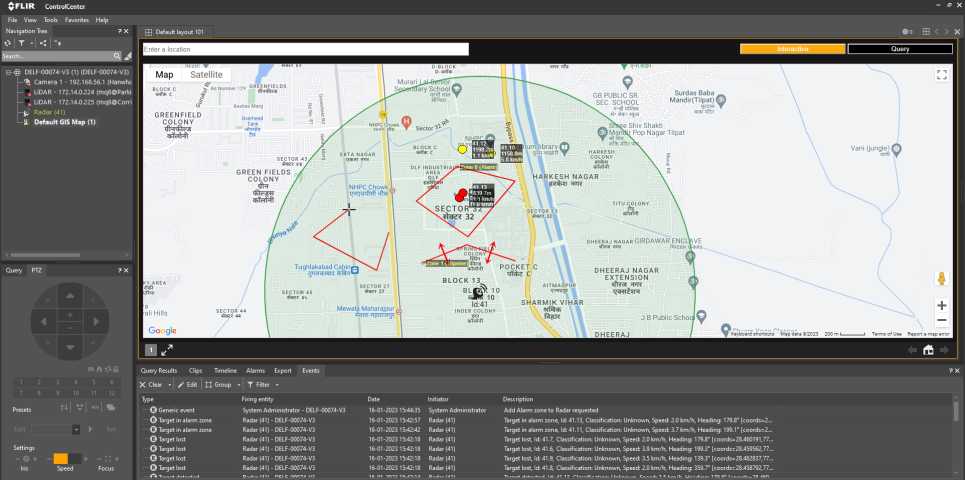
You can add a new radar zone/tripwire in the Control Center using the opened GIS map.
Follow these steps:
- In the Control Center, on the System pane, right-click on the Radar entity, and select the desired zone type from the context menu.
When you select an Add zone context menu item option (E.g. Add alarm zone, Add detection zone, Add exclusion zone, Add a tripwire, Add tripwire (left only), etc.), the mouse pointer on the GIS map changes from a hand icon to a plus icon that indicates that the user can start drawing a zone/tripwire on it. When the drawing completes, the mouse pointer returns to the hand icon.
- Left-click on multiple points (desired geo-locations) to draw a zone/tripwire on the GIS map, and double-click to complete the zone/tripwire.
The new radar zone/tripwire is added to the opened GIS map.
Cancel Current Drawing
You can cancel the current drawing.
Do the following:
- In the Control Center, on the System pane, right-click on the Radar entity, and select the Cancel the current drawing context menu option.
You have aborted the current drawing in progress.
Delete a Radar Zone/Tripwire
You can delete existing radar zone/tripwires in the Control Center using the opened GIS map.
Do the following:
- In the Control Center, on the System pane, right-click on the Radar entity, and select the relevant context menu item prefixed with the Delete keyword.
Example:
In the following example, the context menu Delete Zone 0 (Alarm) and Delete Zone 1 (Tripwire)
options are outlined in red:
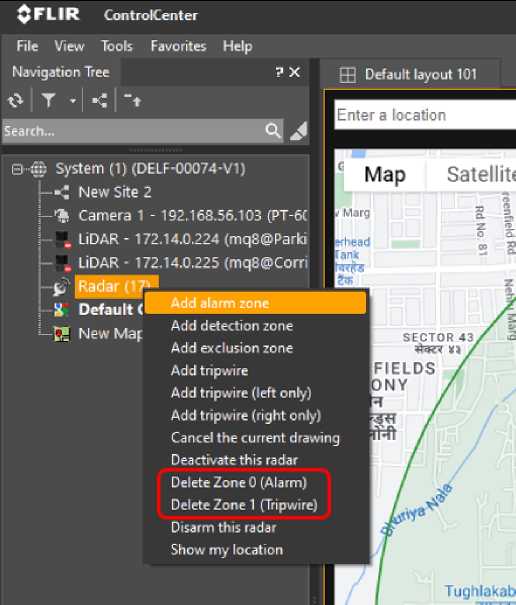
Notes:
- A zone (alarm/detection/exclusion) consists of a minimum of three (3) points and a maximum of 25 points.
- For a connected standalone/fused primary radar, these menu options are visible but are enabled only
for users having “Plugins and Integrations” Modify privilege.
- These menu options are disabled for disconnected radars.
- These menu options are hidden for connected fused secondary radar and unsupported devices.
- Editing an existing zone is not supported. Users must create a new one with relevant Geo-coordinates and delete the incorrect one.
Panoramic cameras such as the Quasar Gen 2, or cameras equipped with Immervision Panomorph© lenses allow the user to ‘plunge’ into the picture. The illustration below shows the typical ‘fish-eye’ image from a panoramic camera, and how the PTZ compass control (or the mouse PTZ control) is used to navigate ‘into’ the picture.
Note: Panoramic cameras do not provide ‘draw to zoom’ capability. The mouse controls are used to ‘plunge’ into the picture, and to navigate within it.
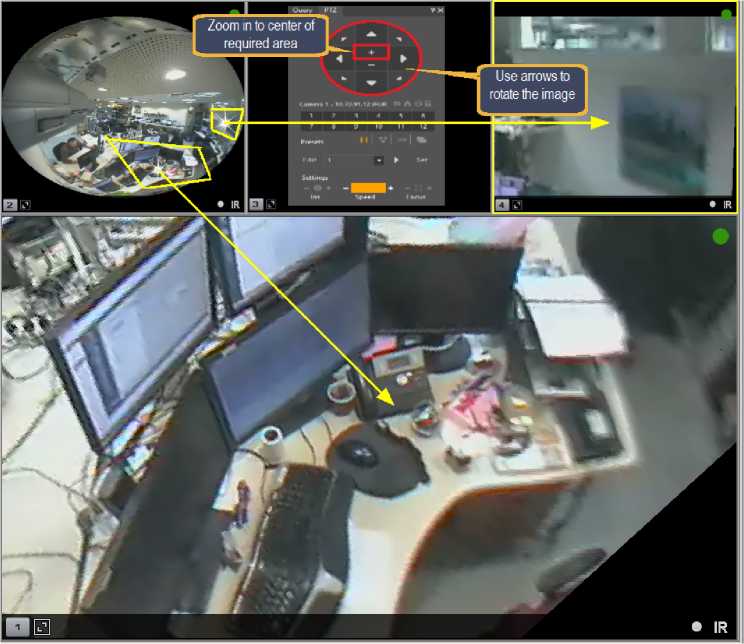
Multiple pictures can be generated from the fish-eye image, and shown in a Tile Layout.
To Create Tile Layout with multiple views
1. In the ControlCenter, choose a tile layout for setting up the camera, and save it using the Save Layout option.
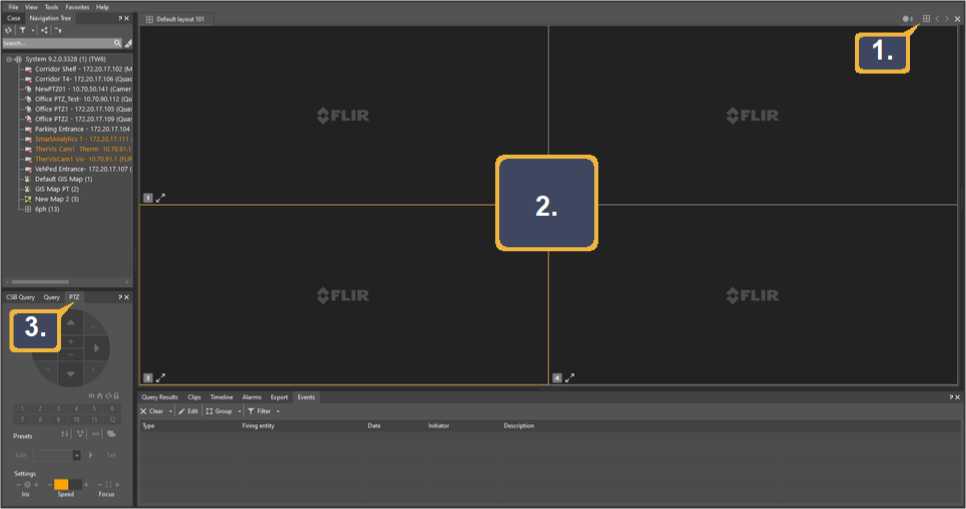
- Drag the camera image into each of the tiles.
- Using the PTZ compass controls, or the mouse PTZ control capability (described in the Viewing Tile section), set up different views in each of the tiles.
4. If any of the individual views might be used in other layouts, you can save them as individual Digital Presets.
Digital Video Recorders (DVRs) that have been integrated into the Latitude system may be connected to the system. Cameras attached to the DVRs may be viewed ‘live’, and recordings can be accessed and played back. However, video recorded on DVRs remains stored ‘on the edge’, and is not transferred to the main system.
Functions handling content from the DVRs are slightly different from content residing on the main system. These are described below.
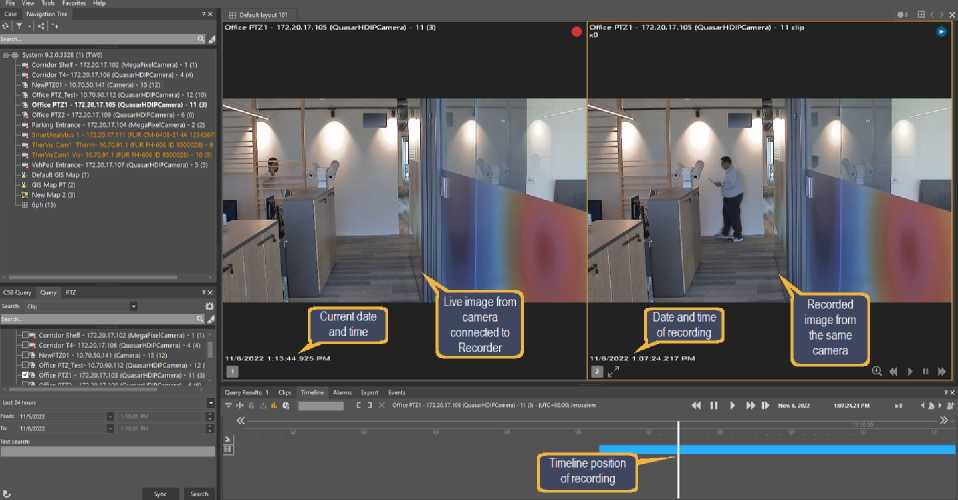
Cameras attached to the DVR are shown in the Logical View as regular cameras.
Supported DVR features:
- Live Video – Displayed by dragging an attached camera to a viewing tile.
- Query – normal query – e.g. select the camera, right-click and choose ‘Send to Query’ from the drop-down. Available clips from that camera are shown in the Query results pane.
Note – Queries are cached, so the second time a query is accessed, response is much quicker – useful when looking though a clip using the Timeline.
- Playback
- Jump To Time (via timeline).
- Slow Forward.
- Fast Forward.
- Pause.
- Continuous Playback – When playback of the current clip completes, the next cached queried clip will start playing.
Limitations on Content stored on DVRs
- No Export from Timeline.
- No Motion indication on the Timeline.
- Playback
- No Step Forward/Backward, Reverse Playback.
- No Operations on selected portions of the Timeline (such as Lock, Start Loop Playback, etc)
- No Synchronized Playback.
- Viewing Modes for Alarms
Automatic and Manual Display
When alarms have been configured to display content from cameras when triggered, the display can be Automatic or Manual.
Automatic Display
A queue is maintained for all alarms that have been configured to display content (live and/or recordings). When an alarm is triggered and one or more cameras (or recordings from cameras) associated with it must be displayed, then it is added to the queue. Items in the queue will be displayed in Armed tiles, according to the display mode set for that user (User/General/Alarms Display Mode).
See below: Alarm Display Modes.
For Automatic mode to be used, the user must set one or more viewing tiles to ‘Armed for Alarms’ status.
Note: In all cases, Alarm Priority takes precedence over Trigger time – this means that the higher-priority alarms are placed higher in the queue than lower priority ones. Alarms of equal priority are queued according to their trigger time.
Manual Display
If the user does not set any tiles to ‘Armed for Alarm’ status, this means that Manual display will be used.
Content from cameras associated with alarms are displayed by the user:-
- Double-clicking on an alarm in the Alarms pane. Cameras associated with the alarm will then be displayed in the next available viewing tile
-or-
The display sequence in the viewing tile follows the rules for Block Mode. A subsequent alarm can be opened in another ‘next available’ tile, or dragged to a user-chosen tile, where it is displayed in Block Mode.
Alarm Display Modes
Flat Mode
Flat mode is a simple method of showing alarms one after another (as they occur in priority sequence). Each alarm is sent to the next available ‘armed for alarms’ tile/s. If an alarm has more than one associated video, all available ‘armed for alarms’ tiles will be used. If an alarm has too many associated videos for the available tiles, the available tiles will be used and the remaining videos for that alarm will not be displayed. When alarms are cleared, meaning that tiles become available, then the next alarm in the queue will be
displayed. There is no cycling of scenes. All the displayed scenes of an alarm remain in their tiles until that alarm is cleared.
Alternative Modes
In addition to Flat mode, the system supports other alternative modes – Block and Salvo, for handling the situation where two or more alarms are automatically loading into a Layout that has one or more Tiles enabled with ‘Armed for Alarms’.
Block Mode: All scenes associated with an alarm type will be shown, in sequence, in one tile. You can see information about multiple alarms at the same time, if you have more than one tile ‘armed for alarms’.
Salvo Mode: Only one alarm is displayed at any one time. As many scenes as possible of that alarm are displayed on the available ‘armed for alarms’ tiles and they remain there for the ‘dwell time’ of that alarm. Provided all scenes for the alarm have been displayed, the next alarm in the queue according to priority will be displayed. If you do not have enough ‘armed for alarms’ tiles for the scenes of one alarm to be shown, then when the alarm dwell time passes, the remaining scenes of that alarm will be displayed before the next alarms starts being displayed.
Detail
The following table describes the graphic representations in the explanations that follow:
| Graphic | Description |
| One Alarm color coded (priority) and showing associated cameras. The number at the side shows the order the alarm occurred in time. | |
| | |j | One Associated Camera configured to the Alarm as Live View |
| • ►*’ ■) | A graphical representation of a cycle. Two types of cycles, one nested in the other, that are possible a cycle of alarms and a cycle of cameras for a single alarm. |
| IF II | A representation of the same four tile ControlCenter layout at a point in time during a camera cycle.
Includes color coding of the frames to match the Alarm examples, Cameras being displayed from that alarm and green tiles for free tiles not being used by the current Alarm period. Also includes the icons on the lower left of the tile indicating if the tile is Armed for Alarm, by the ControlCenter user. |
Block Mode
Each alarm sequences all its associated video onto a single Armed for Alarm (note the red
number in the lower left corner indicating this) tile. The highest priority gets the tile if
there is competition.
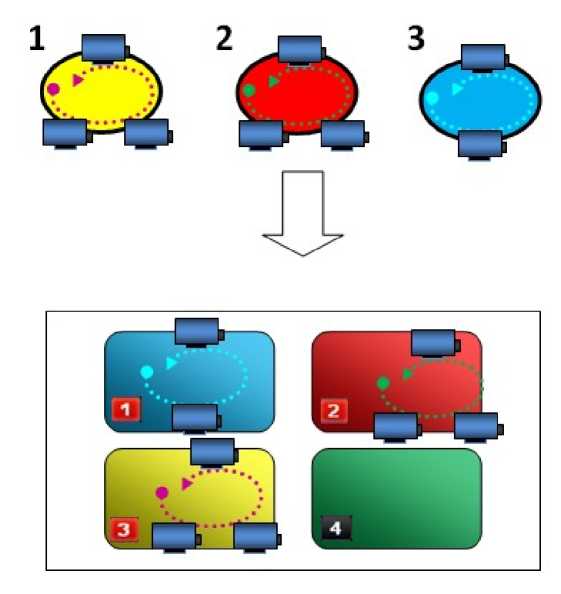
Salvo Mode
Each alarm attempts to display its associated video on as many tiles as possible, trying to
show as many cameras as possible at once. The sequence of the each alarm cycle is based
on priority.
Thus the highest priority alarm will go first in displaying all its associated
cameras before passing it to the lower priority alarm, and so on. (Red high priority,
Yellow intermediate, and Blue low priority.) The following represents a individual tiles in a
time sequence (four per layout) and layout (three, one for when each alarm displays) a
timed cycle. The small blue nodes represent different cameras associated with each alarm
(count 3,3, and 2).
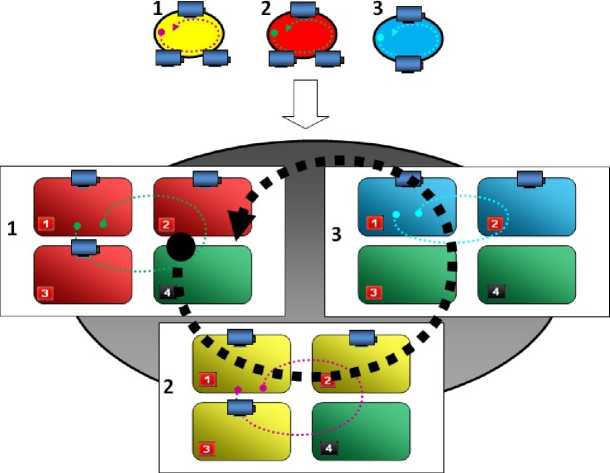
There is no pause button for Salvo mode. in order to see a video you will need to drag out the sequence into a free tile. For more information see the following section Dragging and Dropping One Alarm Sequence Out of a Salvo Group.
Note: If your user settings have been set for you to work in Salvo Mode, it is important that you keep sufficient tiles ‘armed for alarms’ so that you can view all the scenes associated with an alarm.
Dragging and Dropping One Alarm Sequence Out of a Salvo Group
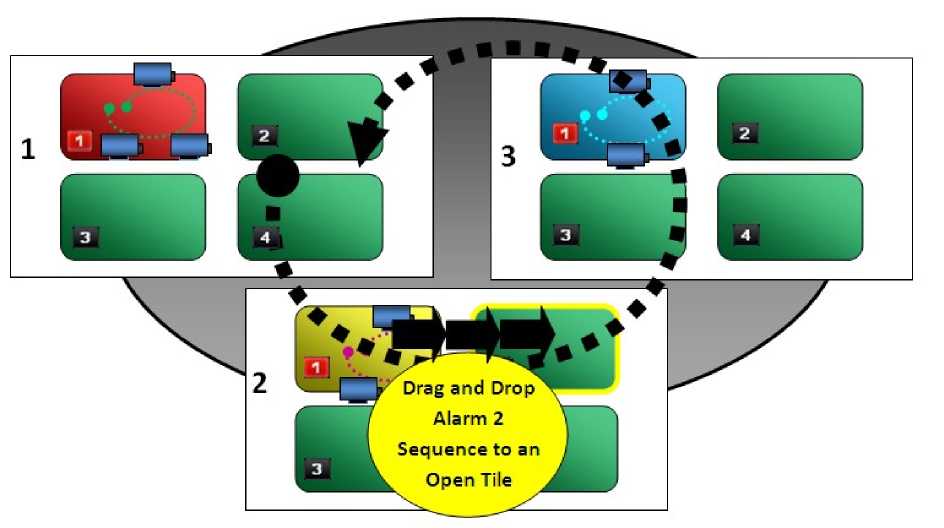
The result is that the Salvo continues with the remaining Alarm video cycles, and the removed Alarm cycle sequences on its own in block mode.
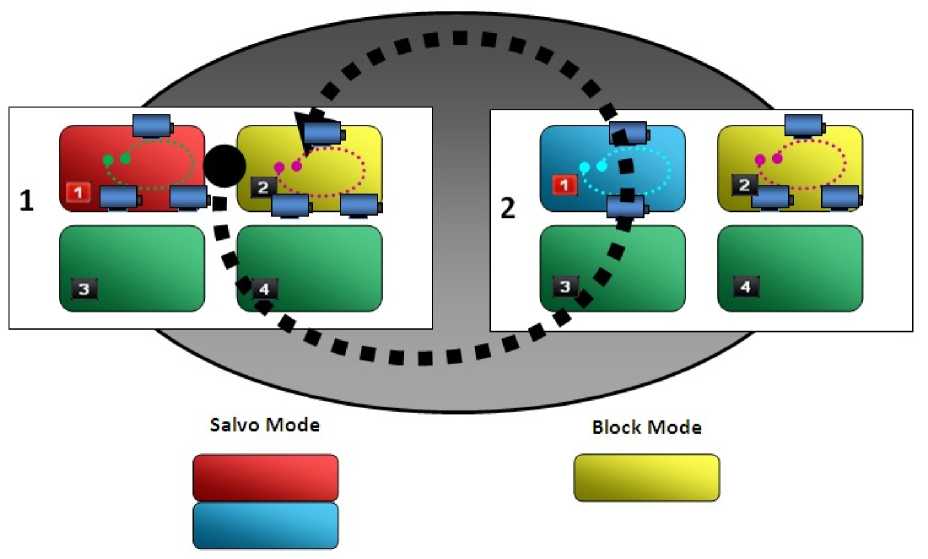
The benefit is that the Alarm that is pulled out can now be paused using the OSD pause button overlay that stops a block mode sequence from rotating while you view the video.

A pause video sequence on a drag-n-drop from a Salvo to a Block mode
A block mode sequence displays an alarm and multi-video indicator
Note: To remove a Salvo, clear or snooze all the Alarms displayed with videos.
Synchronized playback is used to play multiple synchronized video clips. It is launched from the Query Pane by clicking Sync after conducting a query.
Synchronized playback may also be initiated from the Play button, if multiple clips are selected. See Query Results Pane.
Viewing Synchronized Clips
In the Query Pane, check the cameras you wish to view in a Synchronized Playback Layout.
/^\ This feature is very resource-consuming.
ControlCenter may exhibit unpredictable behavior if too many clips are played back simultaneously.
To reset Query parameters and return to a default search, click
1.
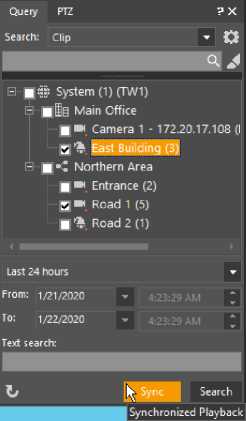 From the Search for menu, select Clip.
Select scenes for recorded source scenes, by marking the tree entities. You can select from one up to the maximum number of scenes as defined in the to the maximum as defined in the Tools
► Options ►VideosPlayback screen settings. The default is six maximum.
4. From the Date and Time menu, select a preset time option
-or-
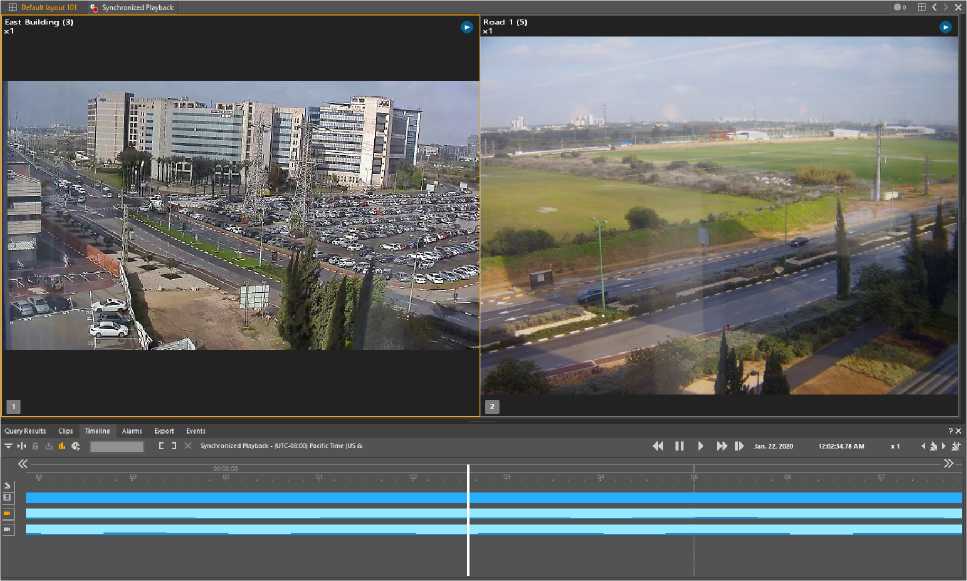 Select Manual selection and then enter From date and time and To date and time.
5. Click Sync.
The clips found by the search load into the Timeline – Synchronized Playback Layout.
6. Once the sync playback layout is opened, the User can to drag to open scenes from the main camera tree.
- When a scene is dragged into an empty tile, it is automatically synced with the other scenes in the layout. The unified Timeline is updated to include the new scene.
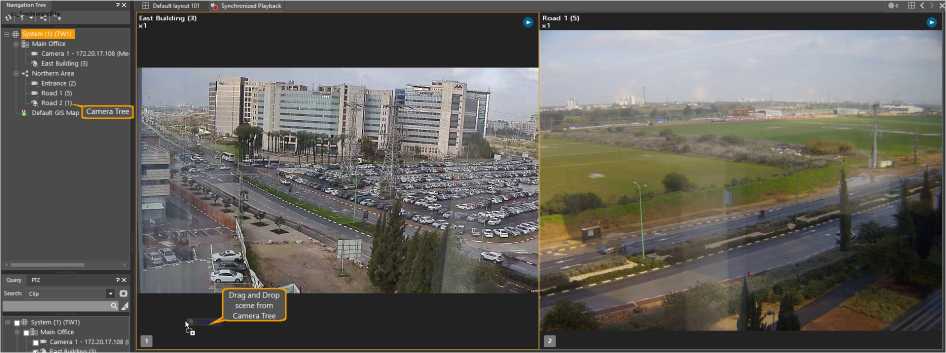
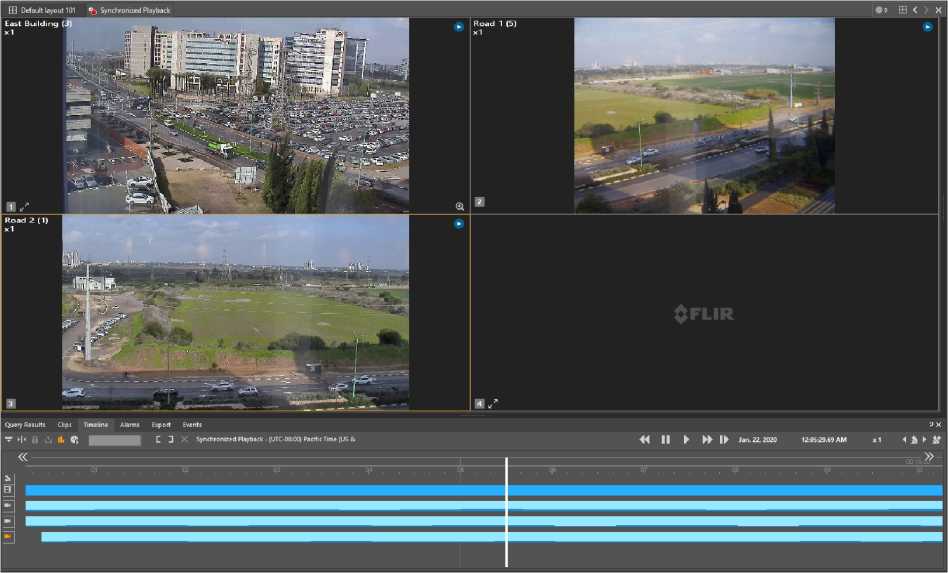
Drag and Drop camera from tree into Sync Playback layout
Camera drops into layout, expanding the number of tiles if needed.
- If the scene is dropped into a populated tile, it will open the new scene in the next available tile. If no tile is available, the layout will be automatically modified to include more tiles.
- Scenes with linked audio occupy two tiles, which also expand the layout if necessary.
7. Scenes can also be dragged out of the layout to remove them and the unified timeline is removed for that scene.
JlM PORTANT I
L
One scene (the “original” scene in the top left tile) must always remain in the Sync Playback layout in order to keep the playback times.
You can fast-forward, rewind or jump to a new time in the displayed clips by using the timeline.
Privacy Mask Passwords when using Synchronized Playback
Because the Synchronized playback may include multiple files that can be from other systems, different scenes and span various times, the possibility that the files were exported with different Privacy Mask passwords.
Playback automatically plays with masking enabled and areas of the video occluded.
The functionality of Synchronized Playback with regards to removing Privacy Mask with passwords is as follows:
- You must enter the Privacy Mask password for each scene you want to disable the Privacy Mask on before you can disable the Privacy Mask.
- You do not need to enter the Privacy Mask password more than once when the clips are loaded in the Synchronized layout.
- You can enter newest scene clip’s password and you will need to enter the older clip passwords that are loaded with it in the Synchronized layout.
- The password remain viable as long as the clip is loaded in the Synchronized layout, Timeline and File Playback panes whether or not you are working online or offline (i.e. If you logout from the system and leave the clips loaded, the passwords and access remain available for you on the offline workspace.)
Enabling and disabling the Privacy Mask works the same in the Synchronized layout as it does in the default layouts.
See links below for specific information:
o Selecting a clip
o Scrubbing
o Timeline scale and Viewing point
- Export Status Pane
o Exporting a Clip
o Loop Playback
- Events Pane
- Alarms Pane
o Displaying a Camera on Alarm (Automatic and Manual)
The Workspace pane is located on the lower right section of the workspace. The user can select what to show in the Workspace by selecting the appropriate tab.
Query Results Clips Timeline Alarms Export Events
The workspace content can also be determined by selecting a different Mode from the View/Viewing Mode menu. Each viewing mode has its own preselected Workspace setting. Using the Thumbnail Search opens a Thumbnail Search Layout.
Pane Toolbar – Switching Panes
The Pane Toolbar is used to navigate among the various panes (As toggled in the Main Menu/View/Content selections).
| Pane Name | Description |
| Query Results Pane | Shows the returned results of queries and provides features for displaying the results in the other panes and Layout. |
| Clips Pane | Provides tools for browsing, opening and selecting recordings and playing them |
| Timeline Pane | Provides the ability to view clips, bookmarks and associated content in an organized linear time/date oriented workspace. |
| Export Status Pane | Provides an interface for organizing and monitoring the exporting of recordings and clips with optional advanced file export features. |
| Pane Name | Description |
| Events Pane | Provides a workspace for viewing, filtering, and researching events and event relational info. |
| Alarm Pane | Provides features and information for researching, assigning, following procedures, clearing, entering resolutions and generating alarms. |
Note: If you do not see a particular icon, this is because the associated pane has been removed. Restore the icons and their associated panes by selecting them in the Main Menu/View/Content drop-down.
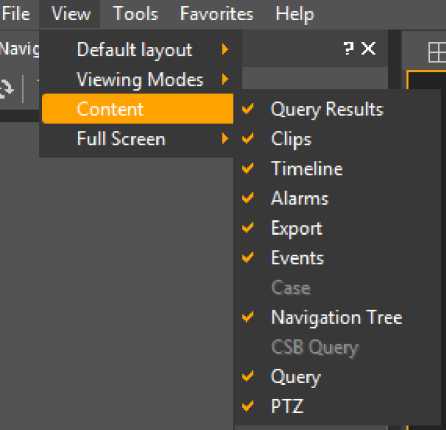
The Query Results Pane lists the results of queries performed in the Query Pane, and Motion Query Pane.

Lock Multiple Scenes
You can lock/unlock single or multiple scenes. When locked, a scene is never removed from the archive. An unlocked scene retains the default expiration time and may be deleted from the Archiver.
Note: The Lock and Unlock options each have separate user privileges.
When you lock a scene, the following changes display in the Query Results table pane:
- A special icon displays on the locked camera in the site tree – ^3.
- The row in the Query Results pane where the clip appears is duplicated and highlighted in orange.
- The Expiration time column displays Never.
You can select single or multiple scenes to lock/unlock.

To lock multiple scenes:
- In the ControlCenter, once a query is executed and the Query Results pane is populated, click on a scene, or use the keyboard Ctrl key to select multiple scenes. The selected scene rows highlight in orange.
- Locate and select the Lock option in the Query Results pane toolbar.
The selected scenes row(s) are duplicated, the Expiration time column displays Never, and a lock icon displays on the camera in the tree.
- To unlock scenes, reselect the locked scenes, and click the Unlock icon in the Query Results toolbar.
The selected scenes are unlocked, unhighlighted, the lock icon is removed from the camera, and the duplicate rows are removed.
Play Multiple Clips
If multiple clips are selected in a Clip or Bookmark Query, the Play button will open a synchronized playback layout and play the clips there.
The Query Results pane also lists results from CaseBuilder Queries.
Aside from the retrieved clips’ start and end times, the results pane displays each clip’s Expiration Time (the time it is scheduled to be erased from storage), Archiving Trigger (scheduled, manual, event or alarm-based recording, or ‘Edge’ for recordings recovered from Storage-on-the-Edge devices) and whether or not it has been locked (to prevent the clip from being erased even after its expiration time).
The query results are sorted by time in ascending order. The query may return partial results because the amount of results exceeds the limit that is specified by the query. Sorting the query enables the user/SDK to change the time filter and page to the next results.
The following table describes the buttons at the top of the pane:
Button
X Clear
Description
Click this button to clear the selected query result from the list. To clear the entire list, click – and choose Clear All.
i2j Export
Q Lock
Click this button to export the selected clips.
Click this button to lock or unlock the selected clips. Multiple clips may be locked/unlocked.
Validate
Allows user to validate the clip by checking the digital signature
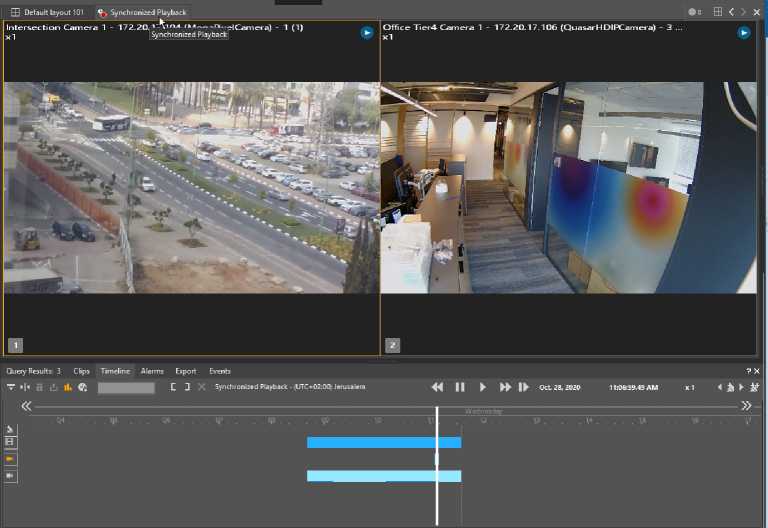
| Button | Description | |
| Note: Clips have a digital signature appended if, at creation time, the Archiver to which they were attached had the option ‘Tamper proof archiving’ enabled. This setting is made in the AdminCenter Archiver/Storage Tab. | ||
| Not used. | ||
| E Group J| | Click this button to change how results are grouped. The available options are: no grouping, by scene, and by incident. | |
| Click this button to add the selected clips to the open case in the CaseBuilder Navigation Tree. | ||
When a clip is exported, an “Export” event appears in the Event Status Pane, displaying the export progress. When the system completes exporting the clip, the progress displays as 100%. This provides a confirmation that the exported clip is now safe to view.
The Clips pane is used to play exported clips in .DVT Format. It enables the concurrent playing of multiple media clips that occurred at the same time and were recorded by different cameras or audio sources. In addition, media clips that were exported in segments can be played as one clip. In the File Playback pane, you can also validate the authenticity of any .DVT Format clip, and indicate whether or not a clip has been tampered with.

The top of the pane contains the following buttons:
Button
Description
Click to add files or folders to be played in the File Playback pane.
Folder
Click to clear an alarm or alarm related action from the table. An alarm may be cleared only after it has been acknowledged or forwarded.
X Remove
Click to remove all clips, with a check mark, from the table.
Validate checked clips
Click to validate the selected files .

You can perform the following actions:
Adding Clips to the File Playback Pane
You can select individual clips or whole folders to be added to the File Playback pane.
Note: You can only add folders that contain clips. The content of sub folders are not automatically added.
To add clips:
The Open dialog box displays.
Note: You can select one clip at a time.
The selected clip is added to the File Playback pane.
To add folders:
![]()
1. Select the
Folder
button.
The Browse for Folder dialog displays.
Notes:
- You can select one folder at a time.
- Verify that the folder contains clips.
- Clips that are located in sub folders can not be added automatically.
The selected folder and the clips contained in it are added to the File Playback pane.
Removing Clips from the File Playback Pane
You can remove clips from the File Playback.
To remove clips or folders:
1. Select the desired clips or folders.
![]()
2. Click the
button.
A confirmation message displays, asking you whether or not to delete the selected items.
Validating the Digital Signature
Every clip exported in the .DVT Format contains an encrypted watermark to ensure against data tampering. You can validate the files in the .DVT Format and indicate whether or not the files have been tampered with in the File Playback pane.
Files can be playedback even if they are indicated as invalid. The clip validation status appears in the Digital Signature column. A clip can be validated, unchecked, or not valid.
To validate the digital signature of a clip:
1. Select the desired clip(s).
2. Click the
Validate checked clips
button.
While the system is validating the clips, the Digital Signature column displays the Validating status.
After the validation process is complete, the clip Digital Signature displays as valid or not valid.
Once a clip is added to the File Playback pane, it can be played and is displayed in the Viewing pane.
You can play:
- Clips continuously, using Loop Playback.
- Multiple clips simultaneously by selecting several clips at once.
- Clips synchronously. For more information, see Synchronized Playback.
Once a clip is played, the Timeline pane is displayed.
To play a clip, do one of the following:
- Double-click the desired clip(s) in the File Playback pane.
- Drag and drop the desired clip to a tile in the Viewing pane.
- Select the desired clip(s) in the File Playback pane, and then click the Play D button on the toolba r.
Notes:
- It is recommended when you are finished viewing a clip that you remove it from the tiles, Timeline and File Playback pane.
- If you log out of the associated System system, files loaded in this pane will remain available for offline playback.
Removing Privacy Mask During Synchronized Playback
If you have loaded a clip that was exported with a Privacy Mask, it is password protected. Once you enter a Privacy Mask password for a scene, the system remembers it during your current session and you do not need to enter it again.
If a clip has been added and is playing, you can right-click and select the Deactivate
Privacy Mask option.
You are prompted for the password for the file you clicked on. Enter the password of the file and click OK.
If you have multiple exported clips with different passwords but for the same scene, you need only enter the latest password to unlock all of the scenes.
Caution: If you leave an exported clip which you have entered a password for loaded in the ControlCenter and you log out from the System, the ControlCenter only switches to offline, and the passwords you entered remain for each video still loaded in the offline ControlCenter panes. It is recommended when you are finished viewing a clip that you have entered a Privacy Mask password for, that you remove it from the tiles, Timeline and File Playback pane.
See links below for specific information:
When a focused Viewing Tile is showing the playback of a clip, the Timeline Pane displays detailed information for the archived clip (or clips, in the case of Synchronized Playback), in the form of colored bars representing the recordings, and flags or colored highlights to depict information contained in the recordings – such as Alarms, Bookmarks and Motion events.

The Timeline provides tools for navigating the content – zooming to provide finer granularity, and moving earlier or later to view other clips that may be available from the selected source/s.
The display includes a Time Ruler (hours above, minutes below) showing the time scale that applies to the recording tracks. The user can move this left or right by clicking on the the Scroll bars to move earlier or later.
Below the Time Ruler, the pane displays one or more Recording tracks. The first line displays times during which any of the selected sources have recordings. Below that, the pane shows any other recorded information for the selected source/s.
Recording Triggers
A recording may be associated with multiple recording triggers. For example, a user may start manually recording a camera that is already being archived by a schedule. In such cases, the quality and time-to-live settings applied to the clip are, respectively, the highest and longest for the relevant triggers.
This procedure describes how to lock or export an archived clip segment using the timeline.
Note: Click and drag when the mouse is positioned on a track marks a clip portion for Export or Locking, and does not alter the time scale.
Do the following:
1. Click and drag the mouse over a pertinent track section.

2. When the desired time frame is selected, release the mouse to mark for export or lock.
Note: When you hover over the marked indication, the start and end time as selected displays.

- To lock or export the selected clip section, click the Lock or Export buttons, respectively, in the toolbar section on the top left, or right-click the timeline to open the Context menu.

When you export a clip, the status, time and progress of the ongoing export appears in the Export Status Pane. When the system finishes exporting the clip, the status and time provides a confirmation that the exported clip is now safe to view.

For video playback, scrubbing means to manually move the cursor or playhead across the video timeline to locate a specific point in the clip.
The following are scrubbing methods:
Direct Video Scrub in the Playback Pane
Do the following:
- On the timeline, drag the timeline cursor earlier or later, and watch the playback in its current window.
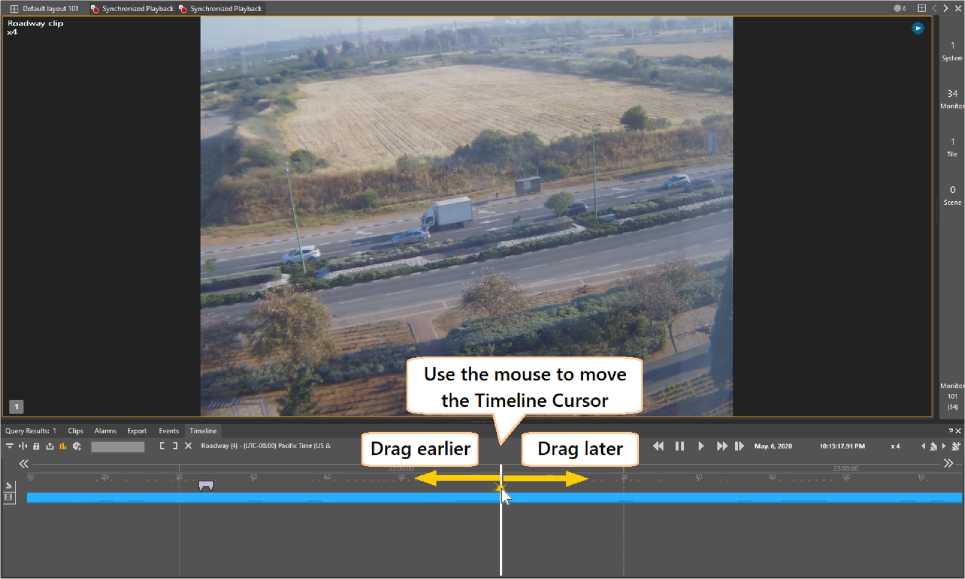


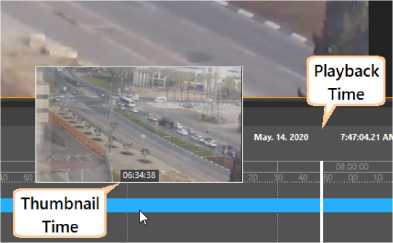 Timeline Scale and Viewing Point
Scrub Thumbnails on the Timeline
Do the following:
• Hover over the timeline and check in the thumbnails.
Thumbnails show their own time details.
Using the Mouse for Timeline Control
The following facilities are available:
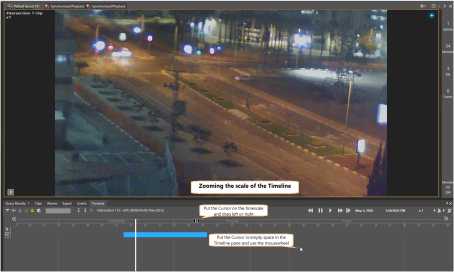
With the mouse positioned anywhere in the Timeline pane, the corresponding vertical position on the timescale is held constant, and moving the mouse wheel zooms the timescale wider or narrower (displaying more or less time).
2. Move to another point in the timescale:
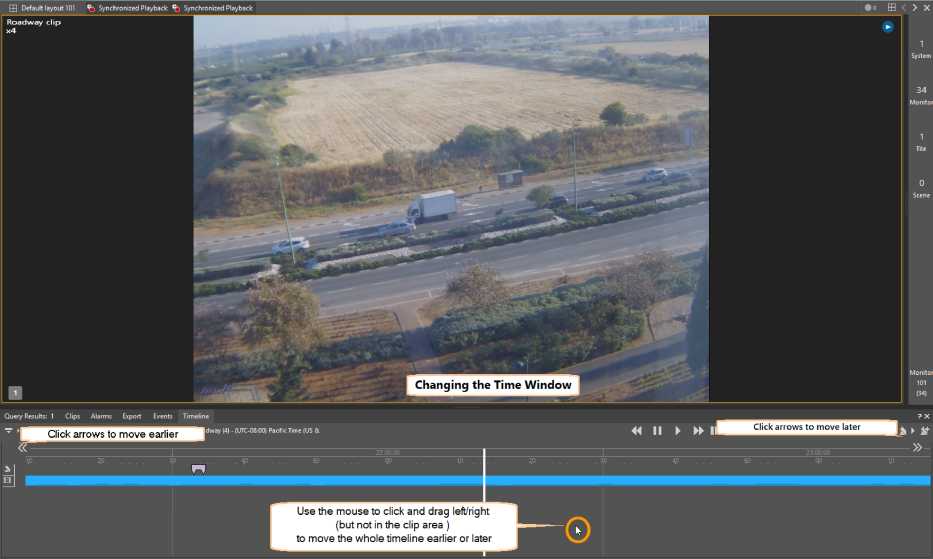
*
With the mouse anywhere in the Timeline pane (but NOT on a specific clip/track ), then clicking and dragging the mouse slides the timeline earlier or later.
With the mouse positioned below a track, the user can select a part of the clip by rightclicking at a starting time and dragging the mouse to a later time.
When the mouse is released, the timescale expands so that selected portion of the clip fills the timeline.
![]()
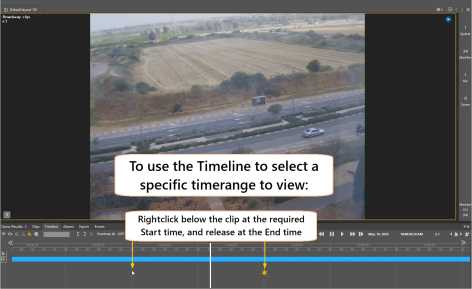
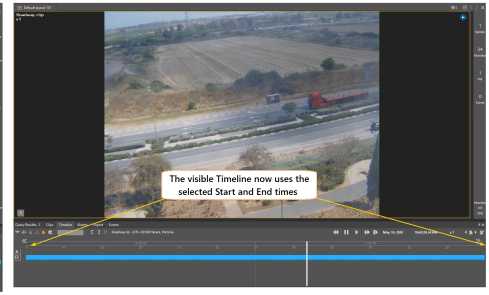

Click on the Export icon in the Query Results pane to initiate an export.
The Export Status pane displays the status, time and progress of ongoing and completed exports and to stop one or all ongoing export processes.
When the progress bar is green, the export is either in progress or has successfully completed.
When the progress bar is red, the export has either stopped or aborted (manually or by the system).
You can clear one or all export events from the Export Status pane by selecting the desired export events and clicking the
button.
X Clear

Note: This action does not affect the export process itself.
For more information about the export process, see Lock or Export a Clip.
The following topics are included:
- Export a Clip
- Export a Clip (Advanced Mode)
- Export a Clip or Partial Clip via the Timeline Pane
- Burn a Clip
- View OSD Information in MP4 Exports
- Loop Playback
You can export a specific clip directly from the ControlCenter via the Query Results pane and then burn it onto a DVD. The results are viewed in the Export Status Pane. For more information on the burn process, see Tools, Options, Export, Burn.
Follow these steps:
- At the bottom pane of the Control Center, click the Query tab, select resource(s) (system/camera) from the tree, and perform a search query for Clip.
The Query Results pane displays results listing parameters (Scenes, Start time, End time, Expiation time, Archiving trigger, System name, Digital Signature).
The related camera plays in a tile, and the Timeline pane displays with clip control, time stamp, and other tools. in the query results pane.
click the Export icon ( ).
The Export tab displays with the clip name, selected timestamp, progress, and desecription (including path file location, name, and type).

The export process starts, and the Export Status pane displays the progress.

You can also export a specific clip directly from the ControlCenter via the Query Results pane and then burn it onto a DVD using the advanced mode. View the results in the Export Status pane.
This mode requires you to select the Show advanced options when exporting a clip option from the Tools menu.
Follow these steps:
The Options dialog displays.
- Navigate to Export, Clip, and in the Advanced Mode section select the Show advanced options when exporting a clip option, and click OK.
- At the bottom pane of the Control Center, click the Query tab, select resource(s) (system/camera) from the tree, and perform a search query for Clip.
The Query Results pane displays results listing parameters (Scenes, Start time, End time, Expiation time, Archiving trigger, System name, Digital Signature).
The related camera plays in a tile, and the Timeline pane displays with clip control, time stamp, and other tools. in the query results pane.
The Export Settings dialog displays.

- Complete the following:
- In the Exported file name field, enter a file name for the exported clip.
- In the Saved Location field, enter in a path or click Browse to navigate to a
location for the exported clip.
- Select the Create a new folder for this export option to create a new directory for this clip.
- (Optional) Click Advanced for additional clip export options.
- Click OK.
The export process starts, and the selected clip is exported to the directory.
The Advanced option on the Export Settings dialog enables you to set various export parameters.
| 0FLIR Export Settings | X | ||
| Saved Location | |||
| Exported file name: | fDefiautt filename] | ||
| Saved Location: | c:\exp orts\ | ||
| Q Create new folder for this export | |||
| Max file size | 500 | *’ (Megabytes) | |
| | Create autorun file Q Include player | |||
| Clip Segment | |||
| From: | 12/25/2022 3:00:00 AM C | ||
| To: | 12/25/2022 2:54:46 PM 2 | ||
| Settings | |||
| □ Use DVT format | |||
| □ Use MP4 Format | □ e | mbed OSD | |
| Q Use AVI Format | Video Codec: | □V Video Encoder ▼ | |
| Audio Codec: | Uncompressed PCM t | ||
| Q Use OSD | Q Interleaved Export | ||
| OK Cancel | |||
Export Settings dialog
The following parameters are available in the Saved Location section:
- Exported file name – Enter a file name for the exported clip.
- Saved Location – Enter in a path or click Browse ^9 to navigate to a location for the exported clip.
- Create new folder for this export – Create a new directory for this clip.
- Max file size – Use the directional arrows to set the maximum file size in Megabytes.
- Create autorun file – Select this option to create an autorun file for all exported files to automatically run the files after they are burnt on a disk.
- Include player – Select this option to automatically export and burn an executable player (QCC) with exported files that are burnt on a disk
The following parameters are available in the Clip Segment_section where you can set the clip segment interval:
- From – Use the drop down arrows to set the day, month, year, and hour, minute, seconds to start the clip export.
- To – Use the drop down arrows to set the day, month, year, and hour, minute, seconds to stop the clip export.
The following parameters available in the Settings are dependent on the options selected in this section.
- Use DVT Format – DVT (DepoView Digital Video Transcript) select this option to display a transcript when the video plays.
- Use MP4 Format – When this option is selected, the following option is enabled:
o Embed OSD in exported clip – Insert OSD information into the exported clip.
o Video Codec – Use the drop down arrow to select available video codec. o Audio Codec – Use the drop down arrow to select available audio codec. o Use OSD – Use On Screen Display (OSD) information into the exported clip.
o Interleaved Export – This option enables you to set the number of export files created. When selected, a single file is created that contains both audio and video. When deselected, separate files (video and audio) are created.
This topic describes how to select a clip segment in the Control Center.
This is useful when exporting clip segments or other related activities.
The starting point is in the Control Center, playing back a clip, and using the Timeline pane usually located in the bottom half of the monitor.
You can use timeline tools, or the mouse the drag and mark a clip segment.
Timeline Tools
This procedure describes how to select a clip segment using the timeline tools.
Follow these steps:
The clip plays in a tile, and the Timeline pane displays with clip control, time stamp, and other tools. in the query results pane.

a. On the timeline, click the Mark in tool. A mark displays on the timeline to indicate the selection start point:
b. On the timeline, click the Mark out tool. A mark displays on the timeline to indicate the selection end point:
The clip selection indicator icon displays including the start and end points:
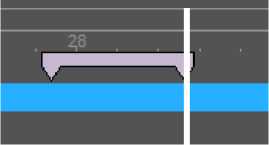
The clip selection is selected.
Mouse Drag and Mark
This procedure describes how to select a clip segment using the mouse to drag and mark a clip segment..
Follow these steps:
1. Select and play a clip.
The clip plays in a tile, and the Timeline pane displays with clip control, time stamp, and other tools. in the query results pane.

A white dotted rectangle displays on the blue timeline:
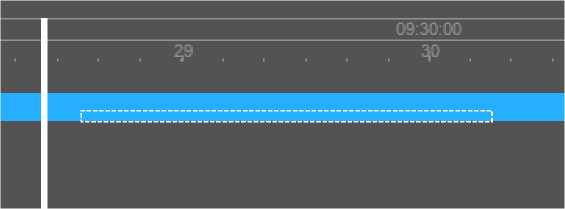
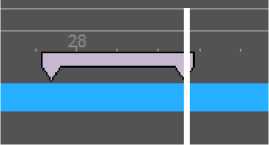
The clip selection is selected.
Export a Clip or Partial Clip via the Timeline Pane
The following procedure describes how to export a clip or a clip portion using the Timeline pane.
- While playing a .DVT file, mark the desired section in the ControlCenter timeline pane.
- On the timeline toolbar, click the H button, or right-click the desired section and select
Export.
The Export Settings slider appears in the Timeline pane.

- Set the exported file name, export location and whether to create a new folder for the exported file.
If you do not fill in the fields, the system uses the parameters defined in the Export Clip Options menu.
(This option is only enabled if set appropriately in the Tools, Export, Clip, Advanced Mode, Show advanced options when exporting a clip option)
The Advanced Export Settings dialog displays, enabling you to set non-default characteristics to this specific export.
Notes on Export Settings:
- Default output format is .DVT
- If the default .DVT format is deselected and no format selection is made, the Video/Audio codec selection fields are enabled and you can manually select the video and audio codecs used.
- MP4 is unavailable for non-H.264/H.265 streams.
- By default, MP4 files are exported with associated .smi files that contain OSD information unless the Embed OSD in Exported clip option is selected.
Notes:
o When using the default option of NOT embedding the OSD, if the exported clip is approximately 15 minutes or longer, the subtitles update once every second to reduce delay.
o When selecting to embed OSD into MP4 clips, it is recommended that you only use this option for short clips.
Playback of .mp4 Export displaying OSD information
• Privacy Masks are supported in MP4 exports, and clips with Privacy Masks can be exported in .MP4 format.
6. Click OK.
The clip is exported to the defined location.
After the clip is exported, the burn process begins. The results appear in the Export status pane.
Follow these steps:
- In the Control Center, select Tools, Options, expand Export and select the Burn option.
- In the Temp burn location field, navigate to a location to set the burn location folder.
or
Select the Use default location option.
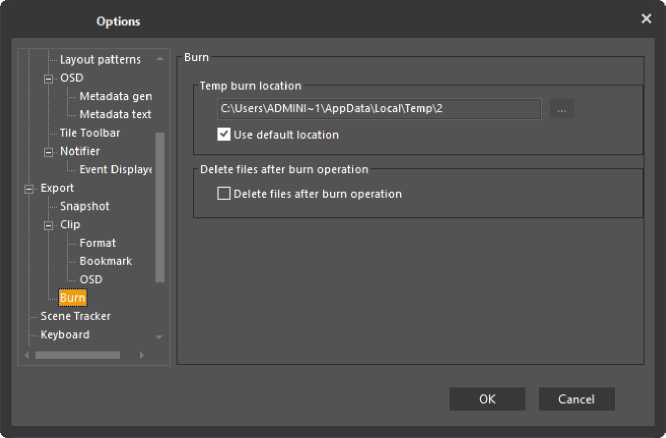
Note: Export Partial Segments
While reviewing a recorded or exported clip, you can create and export partial clips of significant events from the original clip.
You can export audio and video clips in the .DVT format and AVI format from the ControlCenter, and view them via the File Playback pane or with the QCC.
Note: If your system has the Privacy Mask feature and there is a privacy mask on an exported AVI format clip, the mask in the AVI file is embedded in the image and cannot be disabled. If you export in DVT format, anyone attempting to disable the Privacy Mask must have the authentication password issued at the time the file was generated. The Administrator manages the System entity password where the masked scene belongs. During Synchronized Playback if multiple masked files with differentpasswords are included, the newest password credentials unlocks the sequence to be viewed with disabled Privacy Mask (DVT format only).
aa
For more information regarding the clip export settings, see Tools/Options menu, Export.
- To export a clip via the Query Results pane
- To export a clip or partial clip via the Timeline pane
- Time Segment – The exported clip duration. This parameter only applies when exporting from the Query Results pane, since export from the Timeline requires specifying start and end points.
- Interleaved Export – This option in the Format section enables you to set the number of export files created. When selected, a single file is created that contains both audio and video. When deselected, seperate files (video and audio) are created.
- Create autorun file – Select this option to create an autorun file for all exported files to automatically run the files after they are burnt on a disk.
- Include player – Select this option to automatically export and burn an executable player (QCC) along with exported files that are burnt on a disk.
- Video Codec / Audio Codec – Determine the clip codec.
The clip is exported to the defined location.
This section describes how to view OSD information in MP4 exported clips.
MP4 exports are accompanied by an .smi-format file containing OSD information. This .smi file is the default subtitle format used by Windows Media Player and several other Video Player applications.
If the subtitles do not appear automatically upon opening the video file in WMP:
Verify that the Show local captions when present option in the Security tab is selected (press “Alt” and then Tools, Options).
If the OSD still does not display:
Click Alt/Tools, Play and set Lyrics, captions and subtitles to On if available
While reviewing an exported clip in the ControlCenter, you can play the clip continuously.
Follow these steps:
- While playing a .DVT file, mark the desired section in the ControlCenter time line.
- On the time line toolbar, right-click the desired section and select Start Loop Playback.
- To stop the continuous playing of the clip, right-click the desired section and select Stop Loop Playback.
- Privacy Mask Note
Privacy Mask NoteWhen a clip that uses a Privacy Mask overlay is exported, the Privacy Mask feature does not use the logged-in user’s privileges, but is password-protected by the system-wide Privacy Mask password. Users may be unable to remove the Privacy Mask for that exported clip during playback, unless they enter the system-wide Privacy Mask password.
The Events pane presents a list of events that have occurred since the current user logged on to the system. Only events of the types to which the user is subscribed are displayed.
| Query Results: 5 Clips rimeline | Export Events Alarms | |||||||
| X Clear IV | z* Edit H Group ▼ | 1 T FiiHleir ▼ | |||||||
| Type | Firing entity | Date | Initiator | Description | ||||
| O Analytics – Intrusion ended | Workstations 1 | (1) – System | on | 55 | 1/27/20202:51:45… | Workstations 1 | (1) | IntrusionEnded |
| 0 Analytics – Intrusion started | Workstations 1 | (1) – System | on | 55 | 1/27/20202:50:37… | Workstations 1 | (1) | IntrusionStarted |
| 0 Analytics – Intrusion ended | Workstations 1 | (1) – System | on | 55 | 1/27/20202:36:03… | Workstations 1 | (1) | IntrusionEnded |
| 0 Analytics – Intrusion started | Workstations 1 | (1) – System | on | 55 | 1/27/20202:34:51 … | Workstations 1 | (1) | IntrusionStarted |
| 0 Analytics – Intrusion ended | Workstations 1 | (1) – System | on | 55 | 1/27/20202:11:18… | Workstations 1 | (1) | IntrusionEnded |
| 0 Analytics – Intrusion started | Workstations 1 | (1) – System | on | 55 | 1/27/2020 2:09:10… | Workstations 1 | (1} | IntrusionStarted |
For each event, the pane provides a description and information on the firing entity; date and time; initiator; and the event type.
The top of the pane contains the following buttons:
Button
Nam e
Clea r
Edit
Gro up
Filte r
Description
Clear the selected event from the list.
To clear the entire list, click – and choose Clear All.
Edit an incident description (not applicable to other type of events).
Change the grouping method.
Filter events by type.
The Alarm pane is used to trigger and manage alarms. The table contains basic alarm information the user received during the current login session. Above the table are a number of buttons providing the actions the user can carry out.
| v* Accept | Forward | | 2s Snooze | | Procedure X | Clear (•) Trigger X Filter | |
|---|---|---|---|---|
| Name | Status | Priority Time | Initiated by | |
| El-Z Gate #6 | Accepted | 1 1/27/2020 4:20:50 PM | Corridor 1 | |
| İ ••••^Gate #6 | Triggered | 1 1/27/2020 4:20:45 PM | Corridor 1 | |
| i (*)Gate#6 | Activated | 1 1/27/20204:20:51 PM | Corridor 1 | |
| V Gate tffi | Accepted | 1 1/27/2020 4:20:50 PM | Corridor 1 | |
| EH Door #2 | Active | 1 1/27/2020 4:21:07 PM | System Administrator | |
| t-QDbor#2 | Triggered | 1 1/27/2020 4:21:07 PM | System Administrator | |
| E) •(•] Gate #7 | Active | 1 1/27/2020 4:20:54 PM | Corridor 1 | |
| i 0Gate #7 | Triggered | 1 1/27/2020 4:20:54 PM | Corridor 1 | |
| Ar+iwateri | 1 1/77/70» â-71-nn PM | Cnnvtftr 1 |
Accepted by Description
System Administrator Motion is started in zone Eastern Wing of camera Corridor 1
Motion is started in zone Eastern Wing of camera Corridor 1
Motion is started in zone Eastern Wing of camera Corridor 1
System Administrator Motion is started in zone Eastern Wing of camera Corridor 1
Motion is started in zone Eastern Wing of camera Corridor 1
Motion is started in zone Eastern Wing of camera Corridor 1
The top of the pane contains these buttons:
| Butto n | Name | Description |
V Accept
Accept
Click to accept an alarm. When one recipient accepts an alarm it is locked for use by any other recipients. It is possible to unaccept an alarm after it has been accepted to release it to other users.
Forward
z2Snooze
Procedure
X Clear
(•) Trigger
T Filter ▼
Unacc ept
Click to unaccept an alarm. When a user accepted and alarm and wants to reverse the acceptance and allow others to accept and clear the alarm.
Forwar Click to forward the alarm to another user.
| Snooz e | Click to snooze the selected alarm (the snooze duration can be specified by going to Options in the Tools menu. The default value is 60 seconds). |
|---|---|
| Proce dure | Click to view the procedure associated with the alarm (if applicable). |
d
Clear
Click to clear an alarm or alarm related action from the table. Once an alarm is cleared, it is released and can be used by any other recipient who has received the same alarm.
Trigge r
Click to manually trigger an alarm.
Filter
Click to filter the alarm information shown in the pane based on
alarm state.

Active
Accepted by logged-in user
Accepted by other user Forwarded
Snoozed
When triggering and alarm or forwarding an existing one, a new section is added to the right-hand side of the pane, as shown below.

Alarm Priority
Each Alarm has a priority associated it when it is defined.
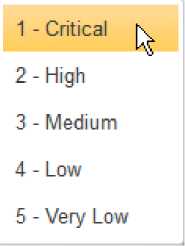
The priority is displayed in the Alarm pane.
Displaying Alarms in Tiles
In the ControlCenter ‘s customizable screen configuration there is an option to dedicate one of the workstation monitors solely for alarm management, providing more real estate for the alarm task.
Display alarm video in one of the following ways:
- When one or more tiles are ‘armed for alarms‘, the application automatically switches the highest priority alarms to be displayed in those tiles.
- When an active alarm icon is double clicked in the map or drag and dropped from it onto on an available tile, the alarm displays.
- Double click or drag and drop an alarm from the alarm pane and onto a tile.
Alarm Life Cycle
ControlCenter supports a tri-state alarm life cycle:
Consider the following workflow:
- Once an alarm is triggered, it is sent by the system to multiple recipients and its status changes to activated.
- One of the recipients can accept the alarm by clicking the accept button on the GUI, this then changes the alarm status to accepted.
- When the alarm handling is complete, one of the users can clear it and in this way ends the life-cycle of that alarm instance, causing it to disappear from all recipient workstations.
Clear Alarm Description
When the AdminCenter option is selected to force clear alarm description, the ControlCenter operator must enter a description for why the alarm was cleared.
This can be accomplished with the following:
- Free text description based on the situation.
- Predefined description entered into AdminCenter field when alarm is created.
Clearing description • Alarm #6
False Alarm
Clear
Color Coding
Each alarm is defined with priority and the priorities are mapped to color codes:
In the ControlCenter application the user can view the list of active alarms in the Alarm pane together with color coding so the user can instantly understand the alarm priority:
- Each alarm instance in the list is presented with its color code.
- The user can sort the alarm list by priority.
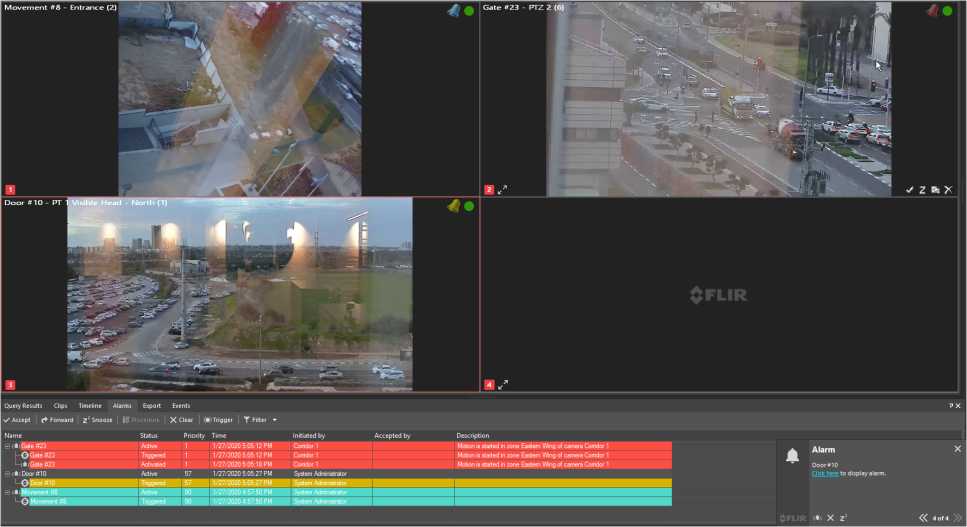
When an alarm is triggered, an alarm notification pops up in the bottom-right corner of your desktop. The alarm entry is added into the Alarm pane with the proper color coding.
When you configure alarms to display content from cameras when triggered, the display can be Automatic or Manual.
Automatic Display
To use the Automatic mode, you must set one or more viewing tiles to Armed for Alarms status. Cameras associated with alarms automatically display in Armed tiles, according to the display mode set for that user. See: View Modes for alarms.
Manual Display
Manual display is used if the user does not set any tiles to Armed for Alarm status.
Content from cameras associated with alarms are displayed by the user in the following ways:
- Double-click on an alarm in the Alarms pane. Cameras associated with the alarm are displayed in the next available viewing tile.
-or-
- Drag-and-drop the alarm directly to a viewing tile.
The display sequence in the viewing tile follows the rules for Block Mode.
(A subsequent alarm can be similarly opened in another ‘next available’ tile, or dragged to a user-chosen tile, where it is also be displayed in Block Mode).
While scenes from an alarm are being displayed, the user can click the OSD pause button and stop the cycle to view the single camera. Click play to return to the sequence.
Display Alarm OSD Information
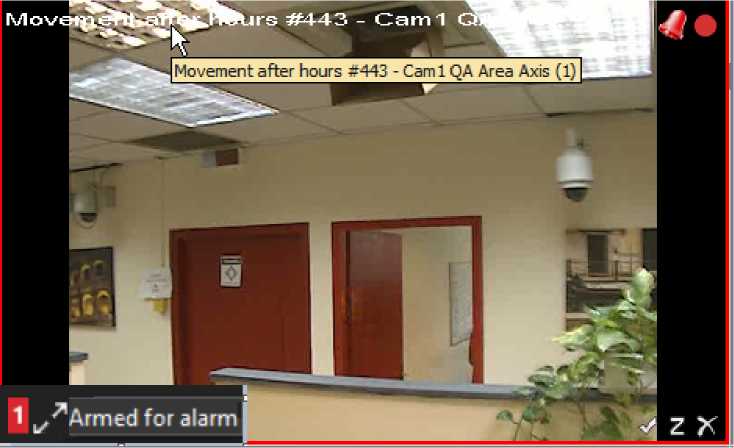
OSD text and icons indicate what alarm and which of the alarms cameras is now displaying
T o enable the OSD text as shown in the image above:
In the ControlCenter, navigate Tools, Options, View Settings, OSD, Metadata general, and select the Show metadata OSD option.
The CaseBuilder features enable users to collect items and put together supporting documentation and video clips into a single entity for research and investigative purposes.
You can add the following to a Case:
- Clips: Archiver Recorded Video Clips.
- Bookmarks: Existing video bookmarks (with text) and video sections before and after the bookmark.
- Incidents: Information about existing incidents and related content.
- Alarms: Alarms and the supporting alarm information, descriptions (resolution), and procedures where available.
- URLs: Allows the inclusion of hyperlinks to HTTP content.
- Snapshots: Include snapshots (frame capture to image file) from a viewed clip in the CaseBuilder Layout.
- Files: Allows including user selected files in a case. No restriction on file types.
For example, material might include exported DVT files, readme instructions, letters to the user, audio clips, previously captured snapshots (from the Default Layout), etc.
The following image shows the CaseBuilder Mode interface and its features:
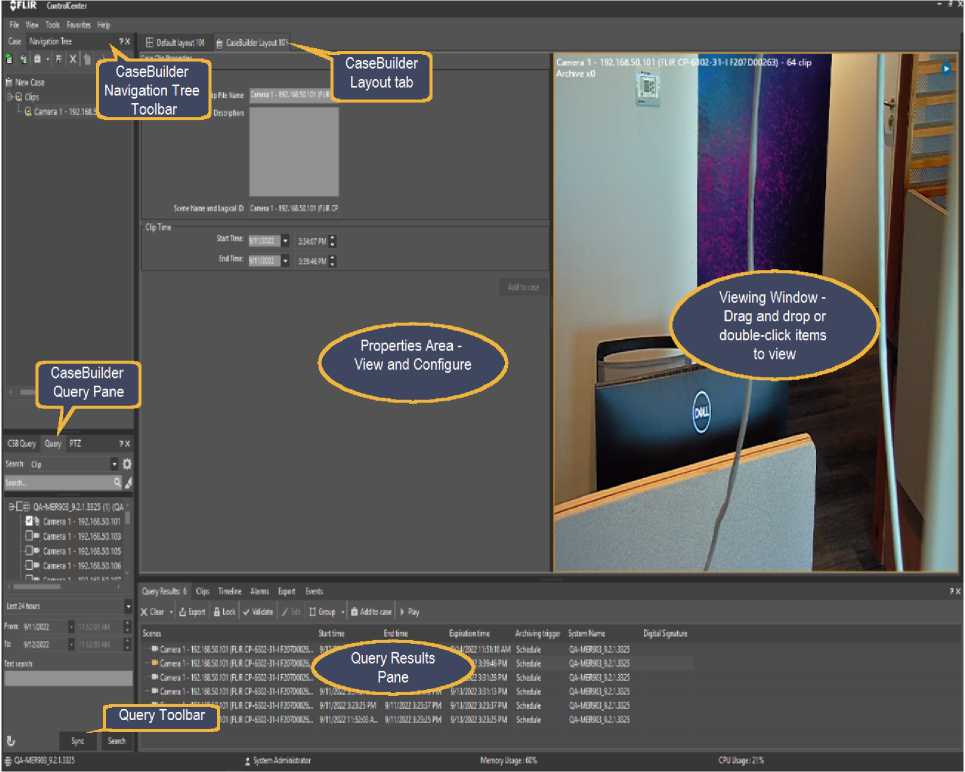
For more information about these features, see the following:
- CaseBuilder Navigation Tree Toolbar
- CaseBuilder Navigation Tree
- CaseBuilder Query Pane ( How to open a saved case)
- CaseBuilder Layout
- Query Results Pane
Note: Only available when connected to a Latitude system
The CaseBuilder enables you to prepare and label various case components and then save the case to the CaseBuilder server.
A created case has the following settings and properties:
- Case Name – A short descriptive name of the case.
- Serial Number – A unique ID number assigned to the case when it is saved.
- Case Time – The range of dates (times) when a case began and when it was closed.
- Creation Time – The range of dates from when a case was first created to the last time a
case was modified.
- Creator Name – The name of the logged in user who created the case.
- Custom Fields – A group of fields that enable you to enter case values.
Note: The CaseBuilder Server definition in the AdminCenter enables these fields to be given meaningful names.
- Description – An optional field for entering a description of the case.
- Status – Specifies the status of the case and whether it has been exported (Created/Exported Successfully/Export failed).
The following topics are discussed in this section:
- Opening a Saved Case in CaseBuilder Mode
- Add an Existing Clip to a Case and Adding a Clip Segment to a Case
- Add an Existing Clip Bookmark to a Case
- Add an Existing Alarm to a Case
- Add a New Snapshot (on-the-fly) to a Case
- Add an Existing Incident to a Case
- Add a File to a Case (documents, images, exports, etc.)
- Add a URL to a Case
- Open and View an Exported Case
You can add an entire existing recorded clip recorded by an Archiver by searching for the clip and adding it to a case.
A clip that is added to a case has the following settings and properties:
- Clip File Name – A short descriptive name of the clip.
- Clip Time – The range of Date/Times that mark the beginning and end of a clip.
- Scene Name and Logical ID – this is the scene that was the video source which the clip was recorded from.
- File Size – The size in MB of the video clip.
- Description – An optional field for entering a description of the clip.
Tip: If the clip only contains small segments of interest that are useful to the case, consider adding only the segment. This can be done using bookmarks (Bookmark query) and adding them to the case or by marking the in and out times of the clip (viewing the clip and setting in and out times).
For more information, see Add a Clip Segment to a Case.
To Add an Existing Archiver Recorded Clip to a Case:
do the following:
- In the Query pane, from the Search for menu, select Clip.
- Select the recorded source scene, by marking the tree entities.
- From the Date and Time menu, select a preset time option or select Manual selection, and then enter From date and time and To date and time, and click Go.
- From the results that display in the Query Results pane, select the clip you want to add.
- Click Add to case and if prompted about the duration of the clip, click Yes to add the clip.
(Clip length exceeds the Tools, Options, CaseBuilder, Clip Duration Limitation.) The case displays in the CaseBuilder navigation tree and in the CaseBuilder layout.
In Clip Properties, enter an optional new name in the Clip File Name field and option
description in the Description field, and click Save .
You can search and add existing video bookmarks to a case which can include the video segment that surrounds the bookmark. This is a clip whose length is determined by the settings defined in the Options CaseBuilder settings.
The added bookmark to a case includes the following features and properties:
- Clip File Name – The Latitude bookmark name.
- Description – A long description for the bookmark.
- Bookmark time – The time and date stamp that the bookmark represents on the recorded clip timeline.
- Related clip – The video clip from the scene before and after the bookmark (This displays a child entity of the bookmark and contains Case Clip Properties).
To Add an Existing Bookmark to a Case:
- Click the Side-Bar menu arrow and from the Side-Bar menu, select CaseBuilder.
- From the Explorer area on the bottom toolbar, click and do the following in the
Query pane:
- From the Search for menu, select Bookmark.
- Select the recorded source scene, by marking the tree entities.
- From the Date and Time menu, select a preset time option or select Manual selection and then enter From date and time and To date and time, and click Go.
- From the results that display in the Query Results pane, select the bookmark you want to add, and click Add to case.
The bookmark and associated clip appear in the CaseBuilder Navigation Tree.
The Bookmark properties display in the CaseBuilder layout.
Tip: If the video playback does not display properly, it may help to minimize and restore the ControlCenter window to refresh the display.
5. Make any optional changes to the Description and Bookmark Name properties and then click Save ® .
You can add to a case a snapshot image of a video loaded in the CaseBuilder display window.
An added snapshot has the following features and properties:
- Snapshot File Name – Name for the snapshot image.
- Description – Optional short description area for the image.
- Scene Name and Logical ID – Name of the scene that was the video source from which the image was grabbed.
- Snapshot Time – Date stamp from the video frame that the image represents.
Note: Snapshots that are taken from a video that was displayed in the Monitor Mode on the Default Layout, cannot be added to a case as a “snapshot” but can be added as a file. For more information, see Add an Existing Snapshot to a Case (Monitor-Tile).
To Add an On-the-Fly Snapshot to a Case:
do the following:
- From the Search for menu, select Clip.
- Select the recorded source scene, by marking the tree entities.
- From the Date and Time menu, select a preset time option or select Manual selection and then enter the From date and time and the To date and time, and click Go.
- From the results that display in the Query Results pane, click and drag the clip you want to add into the viewing window of the CaseBuilder Layout.
The clip loads in the CaseBuilder Layout window, automatically displays the Timeline pane, and starts playing.
- Right-click the video playing in the CaseBuilder window and select Add snapshot to case. The snapshot image appears in the CaseBuilder Navigation Tree.
- In the CaseBuilder Navigation Tree, double click the snapshot image.
The Case Snapshot Properties appear in the CaseBuilder Layout and the image displays in the CaseBuilder window.
- Make any optional changes to the Description and Snapshot File Name properties and click Save ® .
- Adding an Existing Alarm to a Case
You can add existing “cleared” alarms to a case. It should be noted that Active, Snoozed, and Accepted have not been considered acknowledged and are not available to be searched or added to a case.
An added alarm in a case includes the following information about the alarm:
- Alarm Instance Name – The alarm name. (By default this is the configured alarm type.)
- Triggered Time – The time that the Alarm became active and was initiated.
- Acknowledged Time – The time the Alarm was cleared.
- Acknowledged By – The logged in user who cleared the alarm.
- Description – Optional alarm description.
- Linked Procedure URL – If a procedure URL this will be a child entity of the Alarm in the case and can be clicked by the user to see the URL content in the viewing pane.
Tip: If you have a linked procedure that is a HTML page on the network and the viewer of the case will not have access (link will be broken), you may want to add this content as a file to the case.
To Add an Existing Alarm to a Case:
- Click the Side-Bar menu arrow and from the Side-Bar menu, select CaseBuilder.
- From the Explorer area on the bottom toolbar, click and do the following in the Query
pane:
- From the Search for menu, select Alarm.
- Select the Alarm type from the Query tree.
- From the Date and Time menu, select a preset time option or select Manual selection and then enter From date and time and To date and time, and click Go.
- From the results that display in the Query Results pane, select the Alarm you want to add.
- Click Add to case.
The Alarm and any associated Procedure appear in the CaseBuilder Navigation Tree.
In the CaseBuilder Navigation Tree, double click the Alarm.
5.
The Alarm Properties display in the CaseBuilder layout.
Make any optional changes to the Description and Alarm Instance Name properties. and
6.
click Save ™ .
7.
If a procedure URL for the alarm exists, double click the URL. The Case URL Properties display in the CaseBuilder layout.
Make any optional changes to the Description and URL properties and click Save
7.1.3.2
Adding a Clip Segment to a Case
You can select and add only partial segments of an existing Archiver recorded clip to a case. Unlike the bookmark addition that takes a predefined (setting in CaseBuilder options) range of time around the bookmark, the CaseBuilder feature enables you to manually select the times of the clip you want to add.
This can be doneby either by marking a CaseBuilder displayed clip in the timeline pane using Mark In and Mark out or by setting the Start Time and End Time in the CaseBuilder Layout Clip Time menus.
To Add a Clip Segment to a Case:
do the following:
- From the Search for menu, select Clip.
- Select the recorded source scene, by marking the tree entities.
- From the Date and Time menu, select a preset time option, or select Manual selection and then enter From date and time and To date and time, and click Go.
- From the results that display in the Query Results pane, drag the clip you want to add into the viewing window of the CaseBuilder Layout.
The clip loads in the CaseBuilder Layout window, automatically displaying the Timeline pane and start playing.
Do one the following:
a. Mark the in/start time, do one of the following:
- From the CaseBuilder Layout Start Time menu, select the Start Time date and time.
- In the Timeline, click ^^, click-and-drag the playhead line to the start time and click
-.
(playhead being dragged)
b. Mark the out/end time, do one of the following:
- From the CaseBuilder Layout End Time menu, select the End Time date and time.
- In the Timeline, drag the red playhead line to the end time and click ■” ■.
(Clip length exceeds the Tools, Options, CaseBuilder, Clip Duration Limitation.)
The case displays in the CaseBuilder navigation tree and in the CaseBuilder layout.
- In Clip Properties, enter an optional new name in the Clip File Name field and option description in the Description field.
- Click Save ® .
- Adding an Existing Incident to a Case
You can add an existing Incident to a case. When you add an incident, all supporting information attached that incident is also attached. If there is a bookmark associated with the Incident, the incident will include the video segment surround the bookmarks as defined in the Options CaseBuilder settings.
An added incident to a case includes the following features and information:
- Incident Name – the name of the incident
- Description – Descriptive text related to or describing the incident.
- Incident Time – The time and date the incident occurred.
- Supporting info – These are added as child entities, for example a bookmark and the bookmark supported video clip.
To add an existing incident to a case:
do the following:
- From the Search for menu, select Incident.
- Select the source scene, by marking the tree entities.
- From the Date and Time menu, select a preset time option or select Manual selection and enter the From date and time and the To date and time, and click Go.
- From the results that display in the Query Results pane, select the Incident you want to add, and click Add to case.
The incident and any associated child entities appear in the CaseBuilder Navigation Tree.
The Incident Properties display in the CaseBuilder layout.
Save 63 .
If child entities for the Incident exist, double click each and modify the properties as needed
in the CaseBuilder layout, and when finished, click Save
You can include files in a case. Files that are included in a case can be exported and packaged along with the other case materials. Once a file is included by adding it to a case, it will appear in the case tree and can be double clicked to either launch the file in the ControlCenter CaseBuilder Layout (if a supported HTML file type) or via the workstation program associated to the file extension.
To Add a File to a Case:
- From the Side-Bar menu, select CaseBuilder.
- From CaseBuilder Navigation Tree Toolbar, click the Add icon and select the File option.
a ■
File URL
An Open dialog appears.
- In the Open file dialog, select the file you want to add and click Open. The selected file appears in the CaseBuilder Navigation Tree.
- Click Save ® .
Note: If you double click the file in the CaseBuilder Navigation Tree, it either opens in the CaseBuilder layout window (HTML based content) or the application assigned to open that file extension on the workstation launches and opens the file.
The CaseBuilder enables adding snapshots on the fly to the Case directly from the CaseBuilder Layout window, however there may be snapshots that were previously taken during monitoring.
The CaseBuilder does not allow adding previously taken snapshots to the case as “snapshots” but they can be added as files.
Snapshots taken during monitoring are stored in the location specified in the Options dialog.
To Locate the Folder Where Your Snapshots are Saved
The snapshot option settings are displayed.
To Add an Existing Snapshot as a File to a Case:
aH ■ File URL
An Open dialog appears.
The selected file appears in the CaseBuilder Navigation Tree.
Note: If you double click the file in the CaseBuilder Navigation Tree, it will either open in the CaseBuilder layout window (HTML based content) or the application assigned to open that file extension on the workstation will launch and open the file.
You can add a URL link to a case. Once you add a URL link to a case, you can add a description as needed.
You can enter any valid HTML HREF/URL (mailto: file:, etc.)
- From the Side-Bar menu, select CaseBuilder, and from CaseBuilder Navigation Tree Toolbar, click the Add icon, and select URL.
An Add URL dialog displays.
File
The URL appears in the CaseBuilder Navigation Tree.
Note: If you double click the file in the CaseBuilder Navigation Tree, it either opens in the CaseBuilder layout window (HTML based content), or the application assigned to open that file extension on the workstation launches and opens the file.
You can open an existing case that you previously saved by searching the CaseBuilder stored cases and loading it from the search results. For information on opening and viewing an exported case, see Open and Edit an Exported Case.
To Open a Saved Case:
- Click the Side-Bar menu arrow and from the Side-Bar menu, select CaseBuilder and in the CaseBuilder Query Pane do the following:
- Enter optional search parameters:
- Enter a full or partial case name in the Case Name field.
- Enter a full or partial serial number in the Serial Number field.
- From the Created by menu, mark one or more creator sources.
- In the Description field, enter an optional description text, and click Go.
- From the results that display in the Query Results pane, double-click the case you want to open.
The case displays in the CaseBuilder navigation tree and in the CaseBuilder layout.
You can open and view an exported case file for viewing and playback. An exported case file does not allow editing.
To Open and View an Exported Case File:
- Click the Side-Bar menu, select CaseBuilder, and from the CaseBuilder Navigation Tree Toolbar, click ®.
The Open Exported Case dialog displays.
- In the Open Exported Case dialog, select a case file and click Open.
- Use the CaseBuilder Navigation Tree to select and view the components in the CaseBuilder Layout.
Note: The attached files of a case can be found in the compressed file Documents folders.
You can query existing cases and then export them from the Query Results pane. Exported cases can be exported with or without an included player based on the settings for CaseBuilder in the Options dialog found in the Tools menu.
To export a case:
- Click the Side-Bar menu arrow, select CaseBuilder and in the CaseBuilder Query Pane do the following:
a. Enter optional search parameters:
- Enter a full or partial case name in the Case Name field.
- Enter a full or partial serial number in the Serial Number field.
- From the Created by menu, mark one or more creator sources
- In the Description Field, enter an optional description text, and click Go.
- From the results that display in the Query Results pane, select the case you want to export.
- Click Export.
The Browse for Folder dialog displays.
Note: If a case is exported with a privacy mask, the global Privacy Mask Password must be used to remove the privacy mask.
The CaseBuilder enables you to add video clips to a Case from the Archiver recordings, via search results. This is limited to the Archivers to which the logged-in user of the ControlCenter has access.
If a clip needs to be added from a scene source other than those available, this can be done by first exporting the file, and then attaching it to the case as a file.
It should be noted that DVT files that have privacy mask passwords will need the relevant passwords if they are to be opened by remote users. Thus you will need to send the passwords needed for the Privacy Mask whenever needed.
You can create and include a text readme file with the appropriate information and passwords as needed.
The CaseBuilder does not allow adding exported clips to the case as clips but they can be added as files.
To Add an Exported Video Clip File to a Case:
click
and select File.
An Open dialog appears.
- Navigate and load the exported clip file you want to add and click Open. The selected file appears in the CaseBuilder Navigation Tree.
3. Click Save
Note: If you double click the file in the CaseBuilder Navigation Tree, it opens in the CaseBuilder layout window (HTML based content), or the application assigned to open that file extension on the workstation launches and opens the file.
The CaseBuilder options are settings that enable you to define the behavior of some of the features used to build and manage a case.
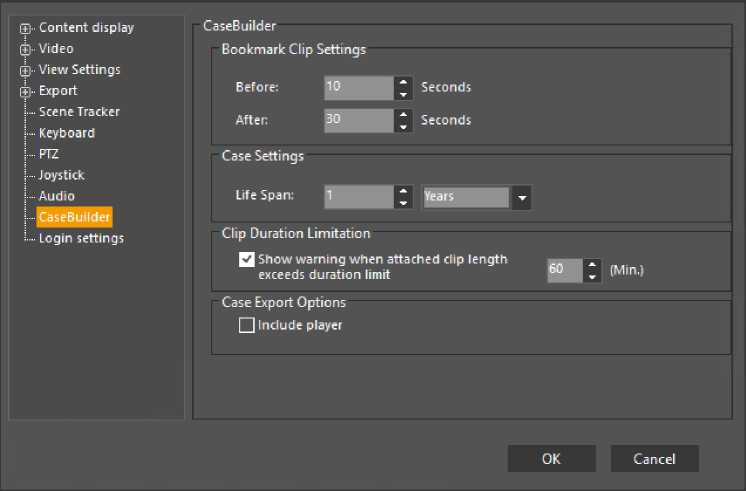
The following table describes the settings in the CaseBuilder Options:
| Setting Name | Description |
| Bookmark Clip Settings | Settings that control how much prerecorded video before and after a bookmark is included as a video clip when a bookmark is added to a case. |
| Before | Determines the start time of the video clip (mark in) included with the bookmark by specifying the number of seconds prior to the time of the bookmark. This is the first of two time values of a range that determine the length of the clip added to the case when a bookmark is added. |
| After | Determines the end time of the video clip (mark out) included with the bookmark by specifying the number of seconds after the time of the bookmark. This is the second of two time values of a range that determine the length of the clip added to the case when a bookmark is added. |
| Life Span | The time-frame that the case remains valid. After this time the case can be overwritten. |
| Clip Duration Limit –
Show warning when attached clip length exceeds duration limit. |
Enables to prompt the CaseBuilder user when the attempt to add a clip that exceeds the maximum length specified here. Useful to inform a user that a clip may be too long and should be trimmed. The user may still choose to add the clip or cancel the action when prompted. |
| Include Player | When enabled, assures that every exported Case contains a Quick ControlCenter player for viewing a case file. The application is stored inside the compressed case file package (zip file). |
To change CaseBuilder Options:
- From the main menu, select Tools, Options.
The Options dialog displays.
- Select CaseBuilder, make changes as needed, and click O
