EZCloud is Uniview‘s remote connection backend that allows for P2P device management. EZCloud provides the user with an abundance of features that make sharing device access easier and more secure. The integrator and installer can use EZCloud to connect to customer devices and troubleshoot.
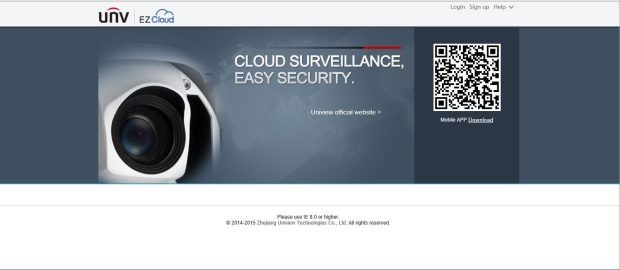
Uniview provides a web portal to sign up and register an account with EZCloud. http://en.ezcloud.uniview.com It is recommended that Internet Explorer 8 or higher be used to view the web portal.
There are a few aspects to note about the web portal:
An account can also be registered through the EZView smart phone application. See Adding A Device -> EZView
ACCOUNT SIGN UP
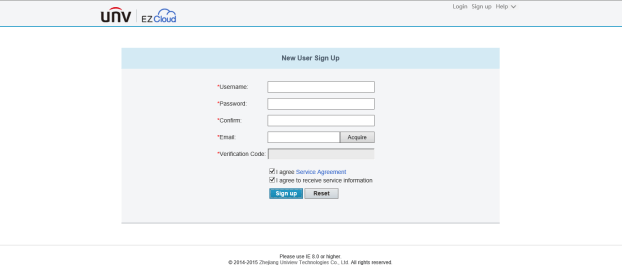
Signing up an account is very similar to most other online account registration as seen from the image above. Enter in the proper information requested such as the Username, Password and a valid Email
address. Click the Acquire button to receive a registration email which provides a Verification Code. Please note that the email may take several minutes to arrive.
Enter the Verification Code into the box provided and click the Sign-up button to register the new EZCloud account.
PRO TIP: Integrators and Installers can setup an account and then share device access to customer accounts for managing multiple devices and providing support later.
ACCOUNT LOGIN
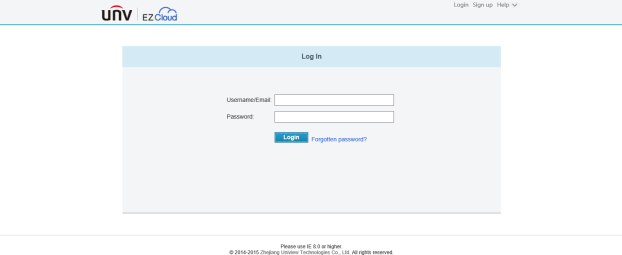
Login either with the Username or registered Email address created previously for account management. If the password has been forgotten, there is a link provide for password retrieval.
EZCLOUD MANAGEMENT
Once the register code is located, there are three different ways to add and manage devices on an existing EZCloud account; through the EZCloud web portal, through the EZView smart phone application and through the EZStation CMS.
EZCloud Quick Install Guide v2
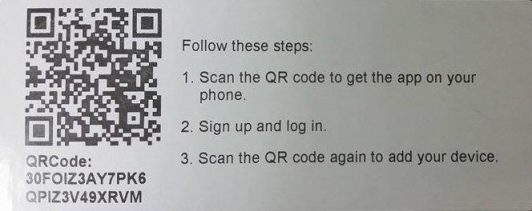
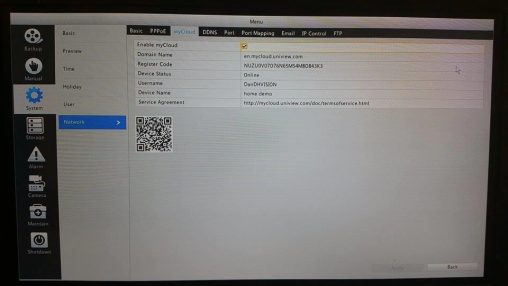
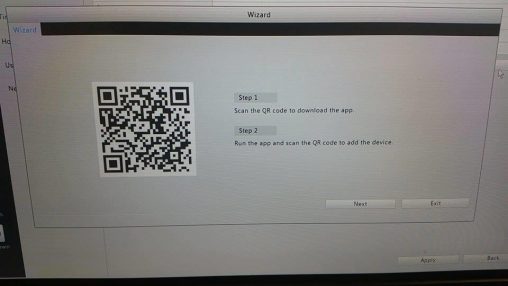
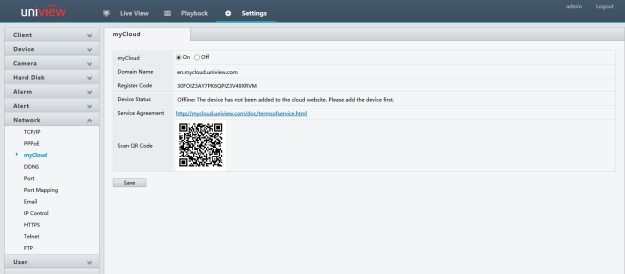
The Register Code is a unique 26 digit & character string that is used to connect a device to the EZCloud service. This code also comes in a QR format for quick scanning. There are a few places you can find the Register Code:
Note the QR Code on the sticker for quick adding the device to an EZCloud account via the EZView smart phone application (more on the EZView app later in this guide).
The myCloud feature is toggled on by default. Please note that a new myCloud account cannot be registered from the recorder interface.
NOTE: On some device firmware versions Uniview uses the title myCloud rather than EZCloud. The URL containing myCloud will redirect to the proper EZCloud URL accordingly.
NOTE: Currently (as of December 2015), the web interface of Uniview devices will only work properly on Internet Explorer version 8 or higher.
EZCLOUD WEB
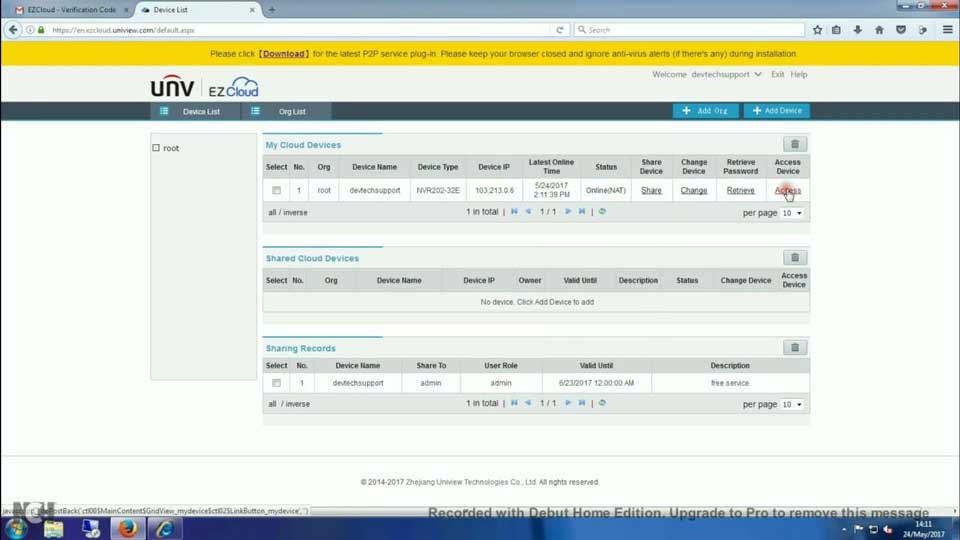
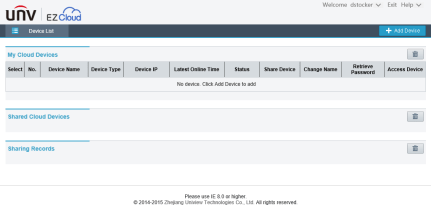
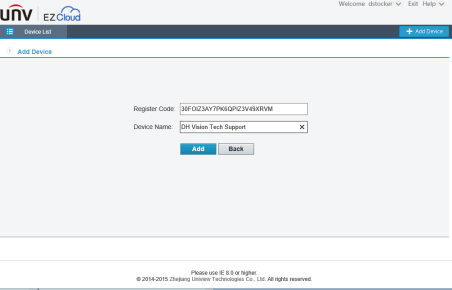
Once logged into the EZCloud web portal (as described in the EZCloud Registration guide section above), the backend will appear as the image shown above. To add a device, click the + Add Device button and a new webpage will display with entry boxes for both the Register Code and Device Name. The Register Code is the 26 digit and character string detailed in the section above. The Device Name is a title that represents the device being registered (e.g. Office B, 123 Elm St, ABC Company, etc.)
After clicking the Add button, the Device List will appear again with the newly registered device listed under My Cloud Devices. If the P2P service plug-in was not previously installed, the follow message will appear on the upper most portion of the web page:
Click the Download link and install the plug-in (the computer may have to be restarted to complete the install) After rebooting the Windows PC and accessing the EZCloud backend again, there may be a similar message on the lower portion of the web page as follows:
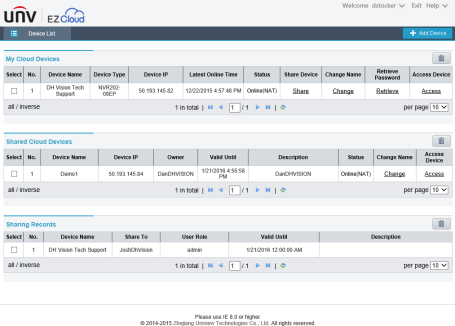
On the management page, there are three different sections: My Cloud Devices, Shared Cloud Devices and Sharing Records.
MY CLOUD DEVICES
The My Cloud Devices section of the EZCloud management page lists all added devices to the registered account. The devices can be navigated using a simple interface utilizing arrows to browse through the results (see toolbar at the bottom of each section).
As with the following sections, there are multiple columns that denote information that pertains to the recorder(s) registered to the account.
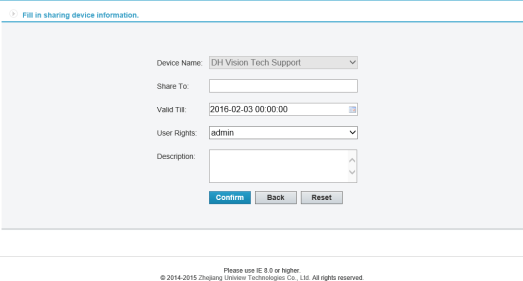
NOTE: The ‘Share To’ input box receives the email or username of the account being shared to. A date and time can be set indicating how long the device will be shared. A specific user group can be selected defining the rights given to the shared device. Finally, a description can be entered to let the user know details that represent the device.
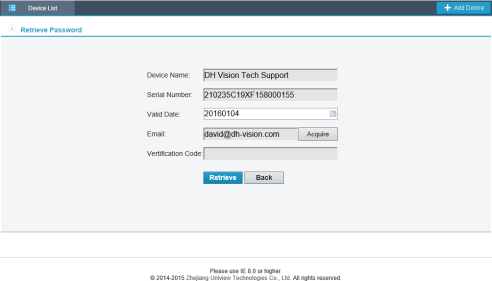
NOTE: All information will be entered automatically into the above form as it pulls it from the registered device. By clicking the Acquire button, the form will send an email with the verification code. Enter the verification code into the input box and click Retrieve to receive a password. The generated password will only work for the valid date and only if the device is properly set to the valid date. If the date is set incorrectly on the device, adjust accordingly on the Retrieve Password web page.
SHARED CLOUD DEVICES
The Shared Cloud Devices section displays a list of devices that were shared to the registered account. The columns of information in this section are very similar to My Cloud Devices, however there are some unique information displayed for shared devices.
All other columns such as Status, Change Name, Access Device and so forth, function exactly the same as in the My Cloud Devices section.
SHARING RECORDS
The Sharing Records section displays a list of devices that have been shared by the registered account. As with the previous sections, there are some columns of note.
EZVIEW
EZView is Uniview’s smart phone application for monitoring, configuring and managing multiple camera systems. Typically, a device will be added to an EZCloud account using the EZView app due to the ability to forgo using a computer for set up.
REGISTER (EZVIEW)
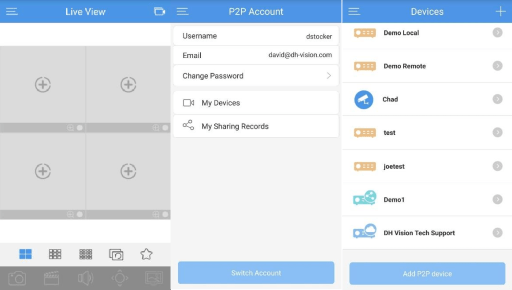
On the main screen, there is an icon in the upper left-hand corner that appears to be like three lines stacked. This is the main menu button. Click the main menu button and then click the P2P Account link at the top of the menu. This will bring up a Login screen that also has a few notable links. The first is the Sign-Up link that will allow for a new account to be registered through the app (similar to the web portal method detailed earlier in this guide). The second link, Forgot Password, gives a similar menu to allow for an email verification and password change.
Once logged in to the registered EZCloud account, the P2P Account menu will appear (referenced above). On the P2P Account menu there are a few minor options which include the ability to change the account’s username and password. The My Sharing Records menu lists all instances of when devices have been shared from the current account and sharing can be canceled on any of these instances.
My Devices links to the Devices menu which displays all devices added to EZView (includes MyCloud Devices). See the third image above; there are different icons that indicate what kind of device is being listed. The light blue recorder with a cloud symbol indicates a device added via EZCloud and the teal recorder with the share icon indicates devices that have been shared via EZCloud.
ADD A DEVICE (EZVIEW)
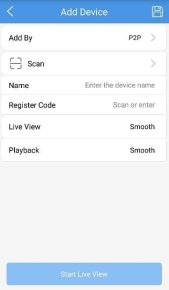
To add a new device to EZCloud, click the small + icon in the upper right-hand corner of the Devices menu. Below is an image of the Add Device menu.
The Add Device menu contains the following options:
The Save button in the upper right (looks like a floppy disk) will add the device to the logged in registered account. The Start Live Preview button will not only add the device, but it will also launch all cameras in Live View.
NOTE: A registered EZCloud account must be logged in before adding a new device via P2P.
EZSTATION
EZStation is Uniview’s CMS software that allows for monitoring, configuring and managing multiple camera systems on a Windows PC. NOTE: Currently (as of December 2015) there is no CMS software developed for Apple Mac computers.
REGISTER (EZSTATION)
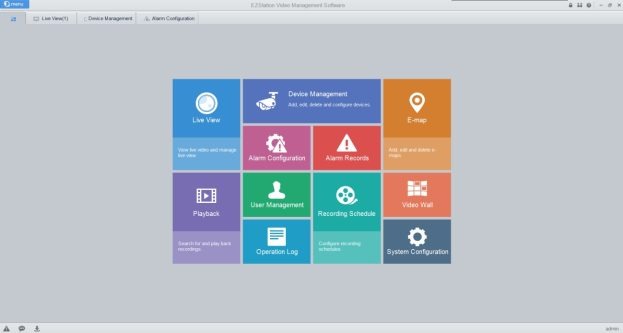
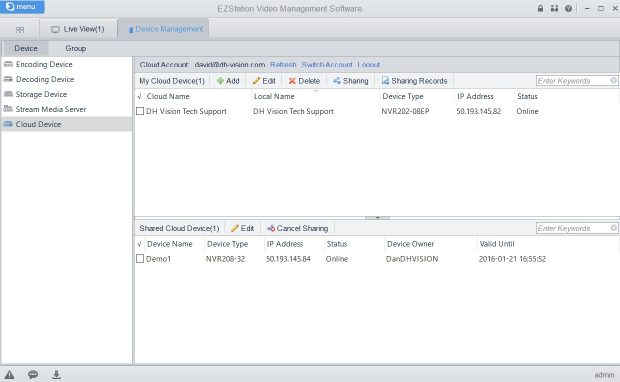
Registration of a new EZCloud account is straight forward; on the Home Screen (shown above) click the Device Management tile and then click the Cloud Device on the left toolbar under the Device tab. By clicking the Register button, the EZStation software will launch an Internet Explorer browser window to register an account online. The process of registering on the EZCloud web portal is located in the EZCloud Registration section of this guide.
Once registered (or if already registered) click the Login button to enter in the login credentials for the EZCloud account of choice. Other options include Auto Login, applying for an account from the login menu and account password recovery.
DEVICE MANAGEMENT (EZSTATION)
There are two main sections of interest here: the My Cloud Device list and the Shared Cloud Device list. Above those two lists are a header with the currently logged in EZCloud account, a Refresh link to refresh the current lists, a Switch Account link which launches a new login menu for account switching and a Logout link.
MY CLOUD DEVICE (EZSTATION)
The My Cloud Device list is dedicated to managing devices that have been added to the registered EZCloud account. The toolbar has the following features:
SHARED CLOUD DEVICE (EZSTATION)
The Shared Cloud Device list displays the devices that have been shared to the currently logged in account. If the integrator opts to share cloud devices with the end user, then the end user will be utilizing this list to see the status and have access to those devices. The toolbar has the following features:
Viewing and configuring the cloud devices listed in the Cloud Device menu is the same as any of the other device types on the Device Management page. Please see Uniview’s help file by clicking the User Manual button the topmost toolbar in the upper right of the EZStation software, to learn about how to group devices to prepare them for live viewing.
ADDITIONAL INFORMATION
Cloud Update (firmware) will not function unless the device is registered to an EZCloud account.
EZView has a speed test function that allows the user to find the upload speed for a device registered to the currently logged in EZCloud account.
A device can only be registered to one EZCloud account. All other accounts need the device to be shared to them by the EZCloud account that the device was originally registered to unless the device is deleted from the original account’s device list.
EZCloud may be referred to as MyCloud on older firmware versions.
P2P refers to Peer-To-Peer. A “Cloud” device refers to, in the case of EZCloud, a device that has been registered to EZCloud for remote connection (not a remote storage medium). The way P2P works is that the device connects to the EZCloud server and then to the end user. The EZCloud acts as a go between, rather than having to open up ports (pinholes, virtual servers, etc.) to allow remote access to offsite clients. This is the preferred method of remote connection since open ports can pose a security risk and can be difficult to setup on complex networks (especially when a firewall is implemented).
Also, many satellite internet service providers and mobile hotspots will not allow ports to be opened unless a static IP is purchased (usually at a premium).
