EseeCloud Is A Simple, Stylish, User-Friendly And Powerful Mobile Video Surveillance Software. We Are Committed To Continuously Improving Our Video Processing Technology And Video Innovation Technology, And Providing Global Security Products, Professional Industry Solutions And Superior Services To Continuously Create Greater Practical Value For Our Customers.
Download


Android
IOS
EseCloud For Pc
Related app
EseeCloud Mobile PC App Full Guide
Read More : UNV Mobile App EZView Guide
FAQ
When added by LAN or cloud lD,indicate “device is not online” or “device is not registered”
1.Please make sure the network is normal and already enable DHCP on router.
2.lf users manually change network parameter of device,please change it to default parameter. Just press reset button for 10 seconds.
Device is online and there happen alarm , but cellphone gets no message?
1.Please make sure the APP is on and allowit to get APP push message,then it can get alarm notification.
2.After enable push message,check cellphone setup-application management,find out the “Eseecloud ” and enable to get push message.
Indicate “SD card error” after insert SD card.
1.Only support SD card max 128GB and FAT32 format. If the system file is error,please formart the SD card and choose FAT32 format.
2.When SD card is ruined or file system is wrong,please try to change or re-format the SD card.
Why the playback recording video content is uncontinuous?
1.For saving the room of SD card and extend the lifetime,device will only make recording when detect the actived image ,that’s why the recording content is uncontinuous.
Can the device support be powered by USB or power bank?
1.Suggest to use original power adapter. If use other adapter with the power is not stable,the device may be damaged.
Device preview help
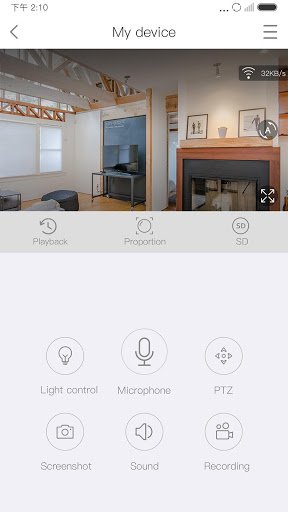
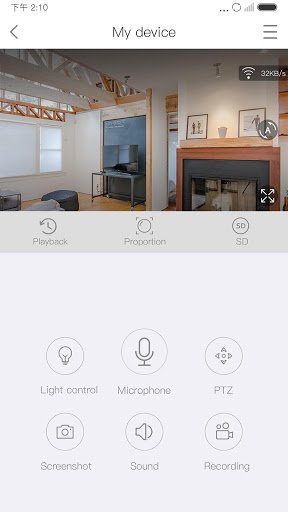
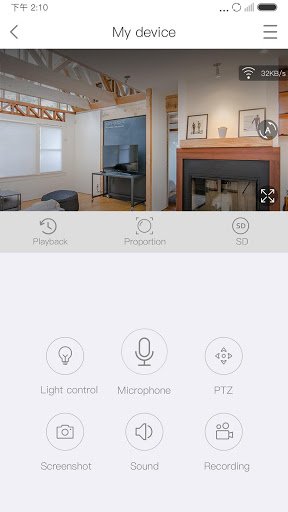
Different devices support different functions. Preview interface only shows the functions supported.
Cloud storage details
Features
1. What is cloud storage? The cloud storage function is a video storage function developed based on technologies such as moving object detection. Cloud storage is divided into two types: alarm recording and full-day recording. Alarm recording refers to triggering the camera alarm when someone passes by or moves in front of the camera. The camera will automatically record and upload it to the Cloud Space Security Center for encryption. You can use it with confidence.
Tips:
(1) As long as you purchase the cloud storage service, you can get the corresponding cloud space. For example, if you purchase the cloud deposit monthly package, the cloud space is valid for one month, and it will take effect from the successful purchase.
(2) The storage time of cloud storage video is determined by the type of package. If you open the cloud storage package for 7 days, the camera cloud video storage period is 7 days. The 30-day cloud storage package will be opened, and the camera cloud video storage cycle will be upgraded to 30 days. If you open a 7G/month cloud storage package, then your cloud recording storage space is 7G in this month. After the space is full, the cloud recording will not be saved. The stored video will be saved for one month.
2. What are the advantages of cloud storage? The video is safer: the video cloud storage can not steal, safe and reliable. More efficient viewing: generate alarm video in real time, quickly grasp the alarm situation, the video is clear and smooth without jamming Cloud storage: Camera video is stored in cloud space, no space limit, and unlimited cloud storage space.
Cloud deposit purchase and exchange
1. How to buy a cloud storage package?
Click the device list device “Cloud Record” button or the personal center “Cloud Mall” – enter the “Cloud Mall” interface – click “Switch” to select the device you want to purchase and the device channel – automatically select the appropriate package for you after the selection is completed – click ” Buy now” Once the payment is complete, you can turn on device cloud storage.
Tips:
(1) Cloud deposit does not support return and exchange after purchase, and does not support refund;
(2) The purchase channel of the device is determined by the number of package service channels of the system. If the system has only two packages with service channels 1 and 3, then the device can only select 1 or 3 purchase channels;
(3) Cloud storage is only bound to the purchase user. The device with the cloud storage is deleted and added to the new account. Under the new account, the device will not be able to continue to enjoy the cloud storage;
(4) Cloud storage is purchased by a single device and device channel, and multiple devices and multiple channels need to correspond to multiple cloud storage packages;
2. How to redeem the cloud storage package?
Click the device list device “Cloud Record” button or the personal center “Cloud Mall” – enter the “Cloud Mall” interface – click “Use Cloud Saver Code” – enter the “Scan Redemption Code” interface, scan the valid redemption code – enter the ” redemption code” Payment interface” – select the device and channel to be redeemed – click ” redeem now” to complete the redemption
Tips:
(1) The number of channels for redemption Device is determined by the number of package service channels generated by the redemption code (if the service channel of the redemption code package is 4, then the device can only select 4 channels to purchase);
(2) There is no charge for redeeming the code cloud storage package using the redemption code, and each redemption code can only be used once;
Cloud video introduction
Cloud recording is divided into two types: alarm recording and full-day recording.
Alarm recording, the video will only be uploaded when the camera detects that someone has passed, the item has been moved, and the camera alarm is triggered.
Recording all day means that the camera will automatically record when it is online and in good condition. It will be detected 24 hours a day and encrypted and uploaded to the cloud space.
The cloud video is lost when the device is deleted, the device uploads the cloud video, and the device is disconnected from the network. The device and the server are disconnected. The device network bandwidth is insufficient and the device cannot upload video and video.
After purchasing the cloud storage package, the cloud recording function will be automatically enabled.
You can click the “Cloud Recording” button corresponding to the device list to enter the cloud recording interface. Click the cloud storage service icon to enter the “Cloud Storage Service” – disable the cloud recording function.
Tips: After the cloud recording function is turned off, the validity period of the cloud storage will not be extended;
Cloud retention period
1.Cloud deposit validity period
Cloud deposits take effect from the date of purchase, that is, the validity period of cloud deposits is: “at the time of purchase” to “the same time point after one month / one year later”. For example, the cloud deposit package of 7 days/month was purchased at 0:00 on April 1, 2019, and the validity period of the cloud deposit is a natural month. It is: 0:00 on April 1, 2019, and O:00 on May 1, 2019.
Tips: The validity period of the channel cloud is the sum of the time of all the cloud storage packages in the channel. For example, channel 1 purchased two 7-day/ month cloud storage packages at 0:00 on April 1, 2019, then the cloud storage validity period is: 0:00 on April 1, 2019, and June 1, 2019. 0:00 on the day.
2. Can the cloud validity period be suspended?
Cloud storage is timed from the date of purchase, and will not stop during the time. after the user purchases the cloud storage, the action of deleting or stopping the uploading of the video can not affect the cloud expiration time
Cloud storage renewal
1. How to renew the cloud deposit package?
(1) Conditions for cloud surviving fee: The current device has purchased the cloud storage channel to purchase or renew the cloud storage package;
(2) Process of cloud surviving fee: Click the device “Cloud Recording” to enter the cloud recording interface click the “Cloud Storage Service” icon to enter the cloud storage service – select the channel to renew the fee – click the “Renew Now” button below to enter the cloud mall interface – Select the channel and package for renewal of the device – click on the renewal fee immediately to complete the renewal.
Tips: When you are renewing, if the renewal plan are using the package and the other channels of the package meet the renewal conditions, it will default to select previous package and channel.
Cloud storage migration
1. Unbound cloud service migration
(1) Conditions for migrating cloud services: The current account has a cloud storage service of unbound devices;
(2) Migration cloud service process:
After the device is added successfully, if the device meets the service migration conditions, the migration prompt box is displayed. After confirming, select the service that needs to be migrated to the newly added device, and click “Migration”.
If the device is a single-channel device, the device migrates directly to the device list interface. If the device is a multi-channel device, you need to select the number of channels equal to the number of services to migrate.
2. Offline device cloud service migration
(1) Offline device cloud service migration conditions: the current account has offline devices that have been bound to the cloud service;
(2) Migration process:
After the device is successfully added, if the device meets the service migration criteria, the migration prompt box is displayed. After the determination, the device iumps to the miaration interface.
b. Select an offline device to migrate. If the offline device is multi channel, you need to select the migrated device channel.
If the device is a single-channel device, the device migrates directly to the device list interface. If the device is a multi-channel device, you need to select an equal number of channels to migrate.
Tips: Do not migrate all day recording cloud services to NVR devices
Device preview help
Different devices support different functions. Preview interface only shows the functions supported.

Light control:setup on/off,brightness,color temperature for light control device
 Screenshot:snapshot current preview image
 Recording: record current preview video
 Full screen:tap button and switch to landscape viewing
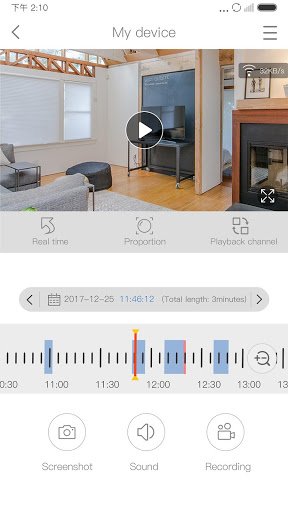
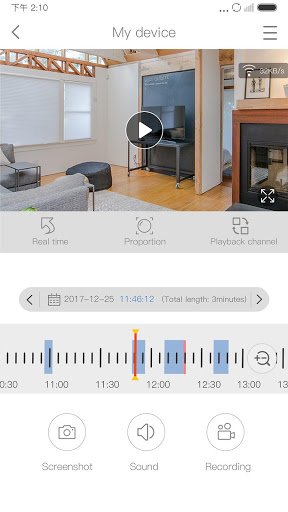
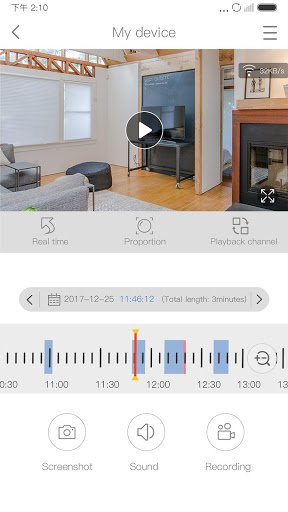
 Calendar:choose playback time to show all recording files wanted
 Remote playback: device must to be inserted TF card.
 Two way talk:press the button and talk for a long time
 Installation mode:swith to wall installation and ceiling installation mode
 Display mode: at ceiling installation mode,there have fisheye mode,cylinder mode,corridor mode and fulI screen mode
 Cruise: setup auto cruise .
 Sound:setup the sound on/off
 Swith code stream:switch HD and SD
 Split screen dispaly: choose screen channel number
 Screen aspect ratio: can set the screen aspect ratio
 PTZ control: control the movement of high speed dome
 Timeline:drag the time line left and right to choose recording period . Use fingers to zoom in or zoom out the timeline
App Operation
Log in
This APP support “account log-in”, third-party log-in” and local experience”.
Account log-in: At log-in interface, input user name/cellphone number/email address and password, click ‘0K” and log in.
Third-party log-in: Click the icon of third-party network social software, authorize the APP to log in.Local experience: Users can use the APP without log-in.
Remember the password: Supportremem-berring the account and password that have been logged in, which is convenient for switching account login.
Note: Please pay attention thatLocal experience” mode will be stored at local.Once data is lost, it can’t be restored.
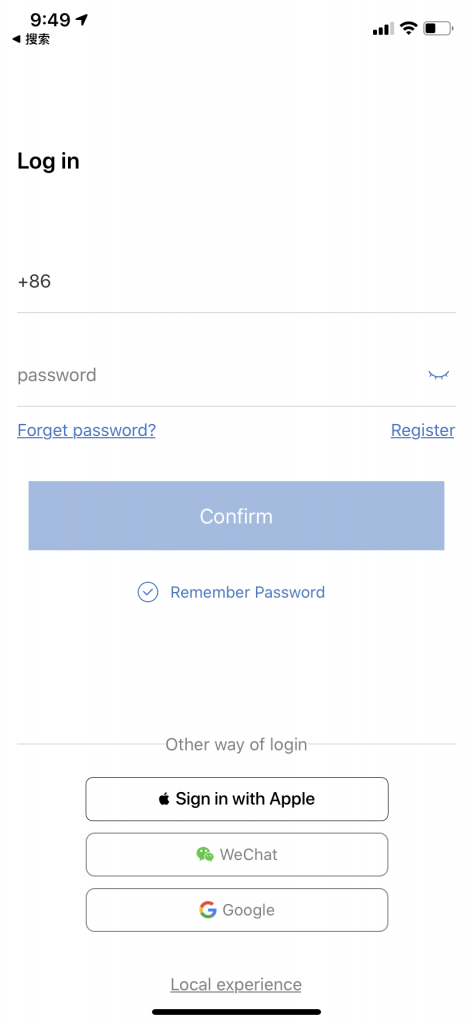 IP PRO Log in
Registration
Input cellphone number/email address to register, get verification code.
Input verification code and password, click “OK”. After registration it will move to device list.
Note: Each cellphone number/ email address can be used for registration once.
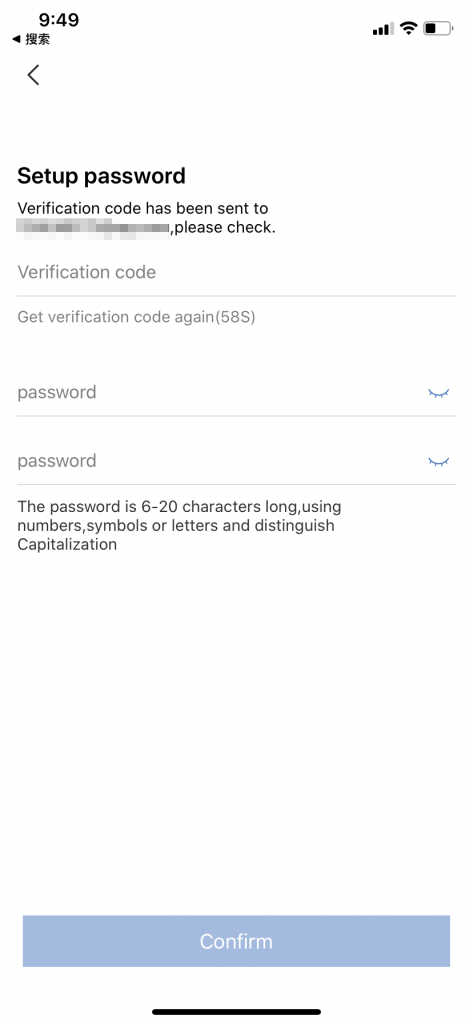 IP PRO Registration
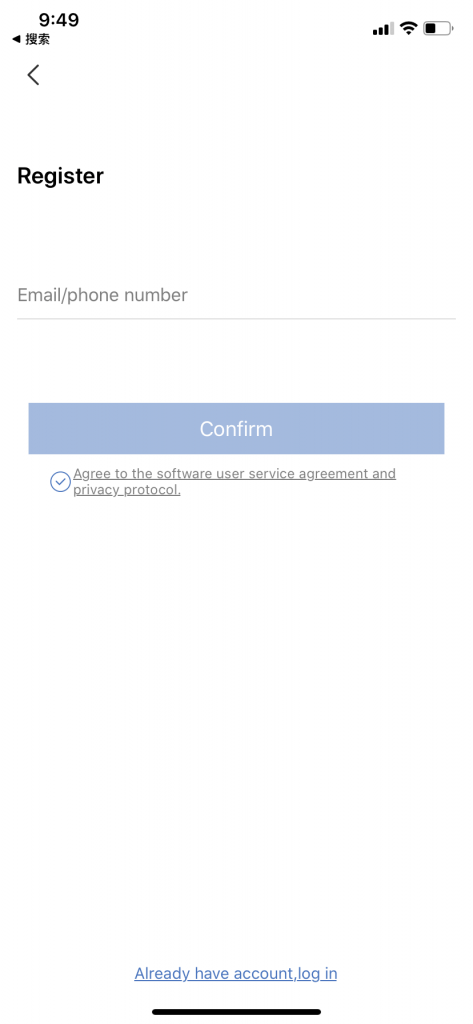 IP PRO Registration
Reset Password
Input registered cellphone number /email address to get verification code. Input verification code, reset password and click “OK”.
Then go back to log-in interface, log in with new password.
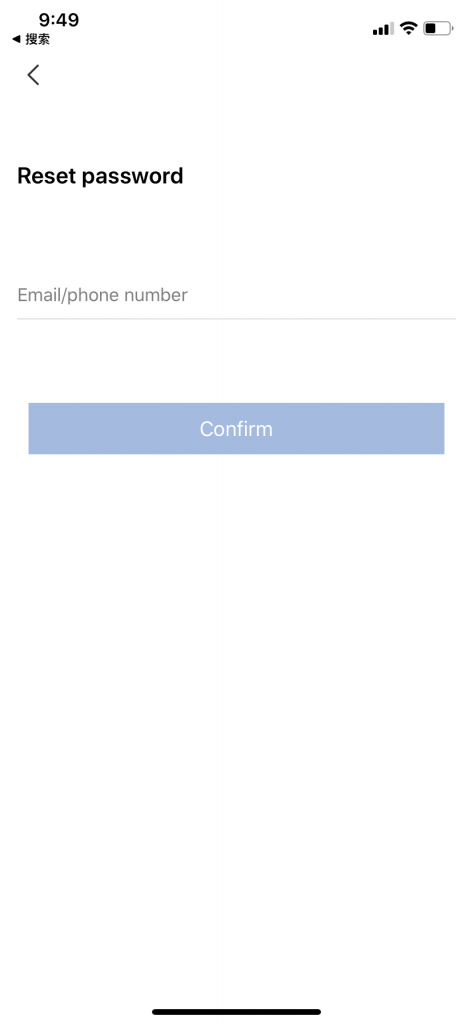 IP PRO Reset Password
Add Camera
Add device
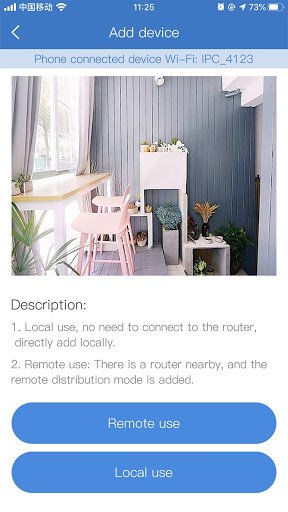
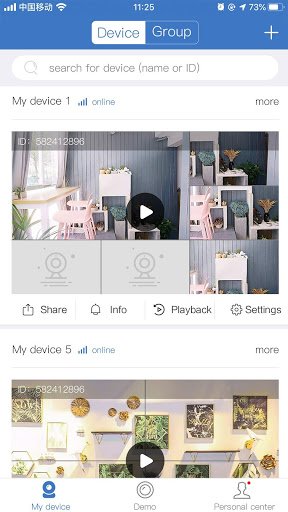
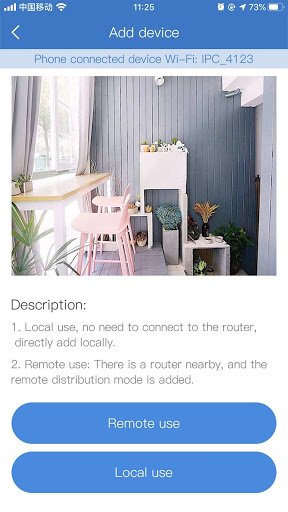
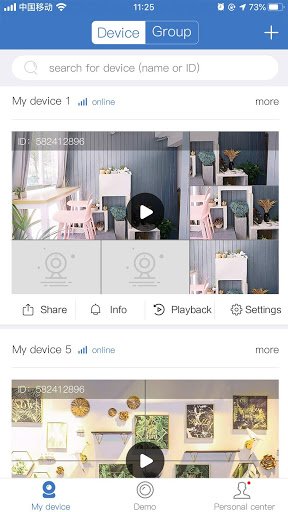
Method 1: Enter to device list interface after login, click the t’ button in the upper right corner of the interface, and select the add device” button.
Method 2: Click the’+’ button in the interface to enter directly to add device interface.
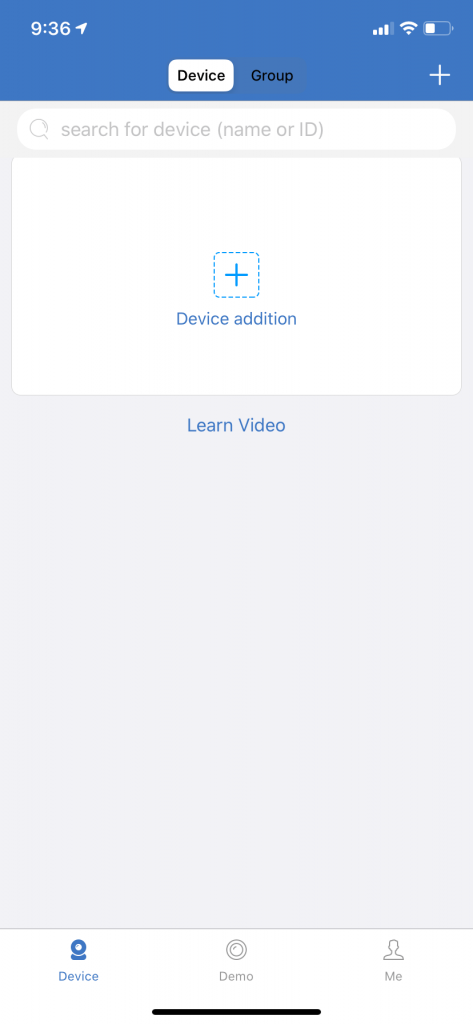 add camera
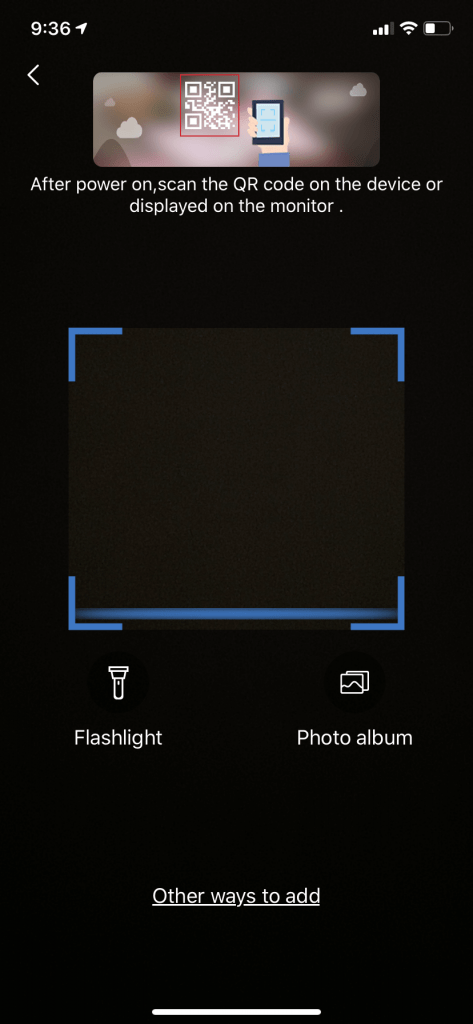
1. There is a QR code on the device body:
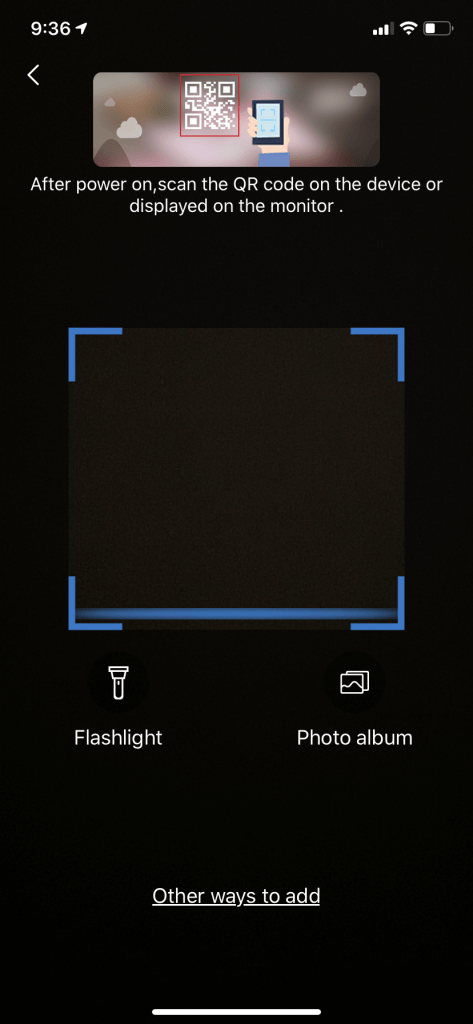
Scan the QR code on the device,display the device ID of the current device , click the Add ICON below jump to the prompt interface of operation guide.
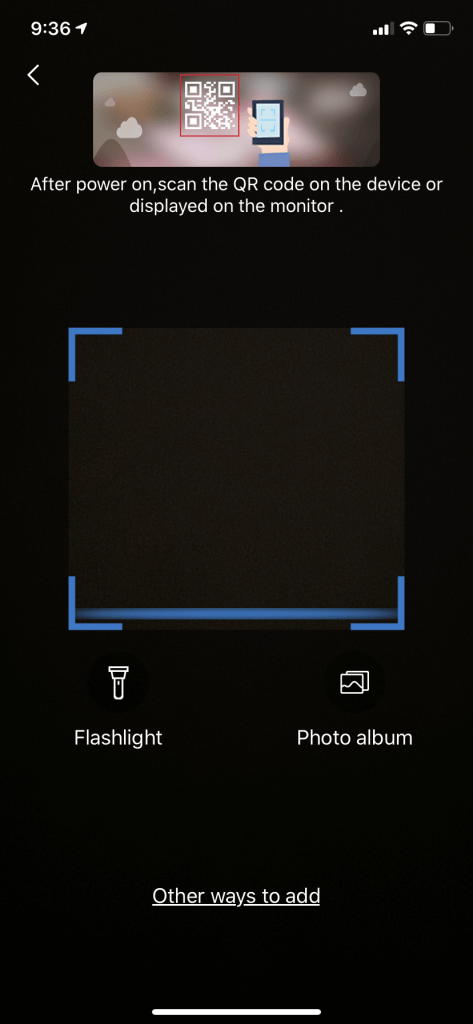 add camera
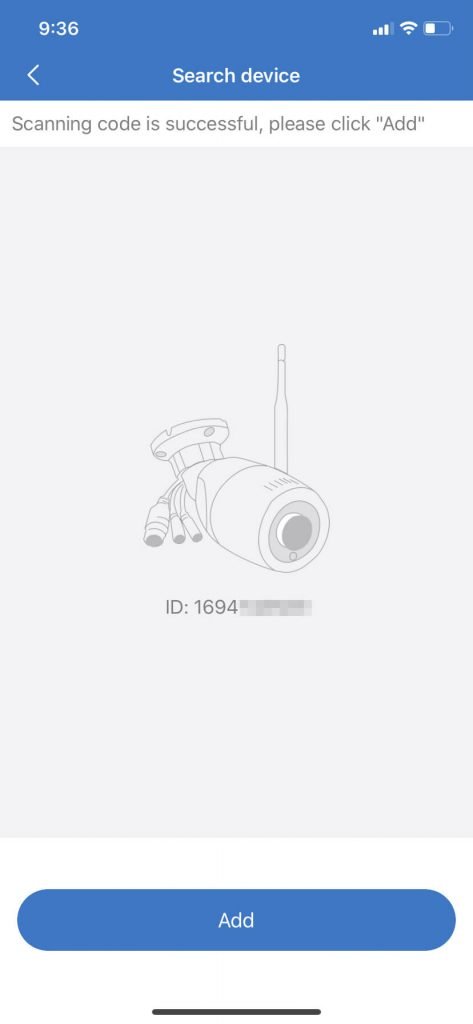 add camera
 add camera
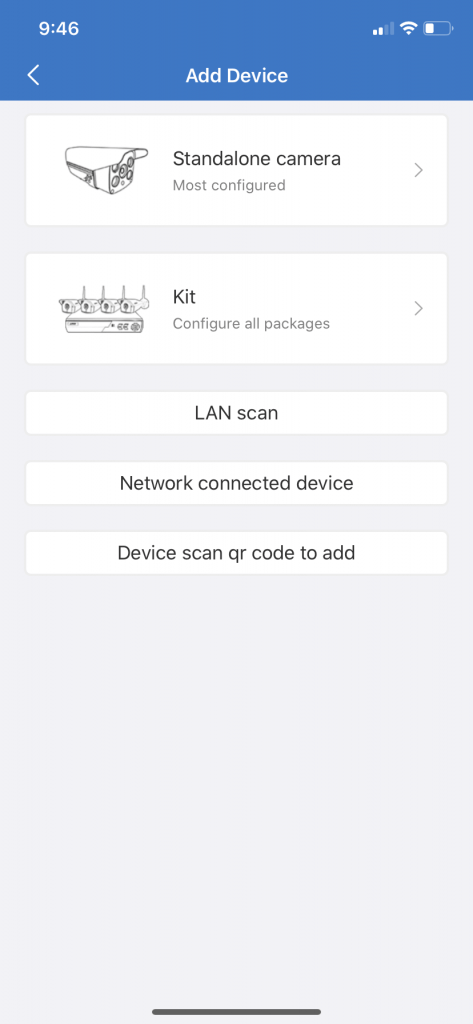
2. Can’t find the device QR code :
lf there is no QR code on the device, click ‘Other ways to add’ and then select ‘Standalone camera’.
add camera
add camera
add camera
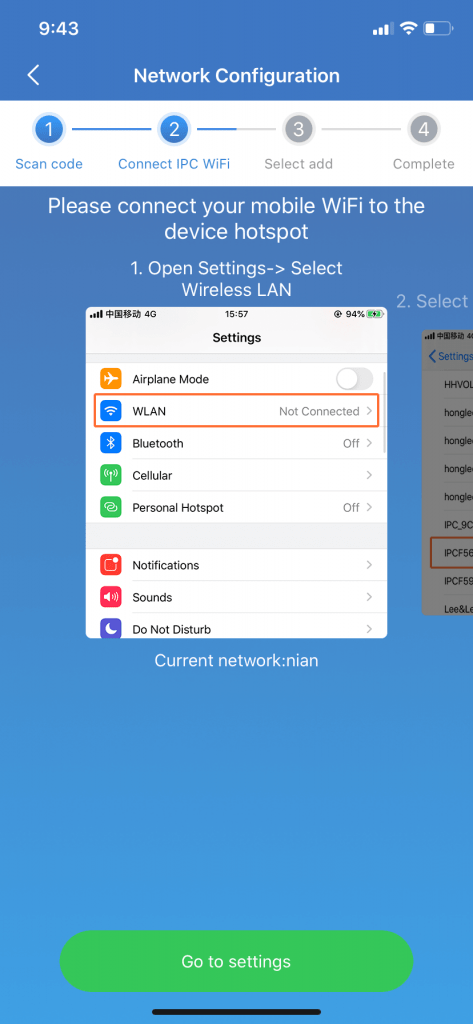
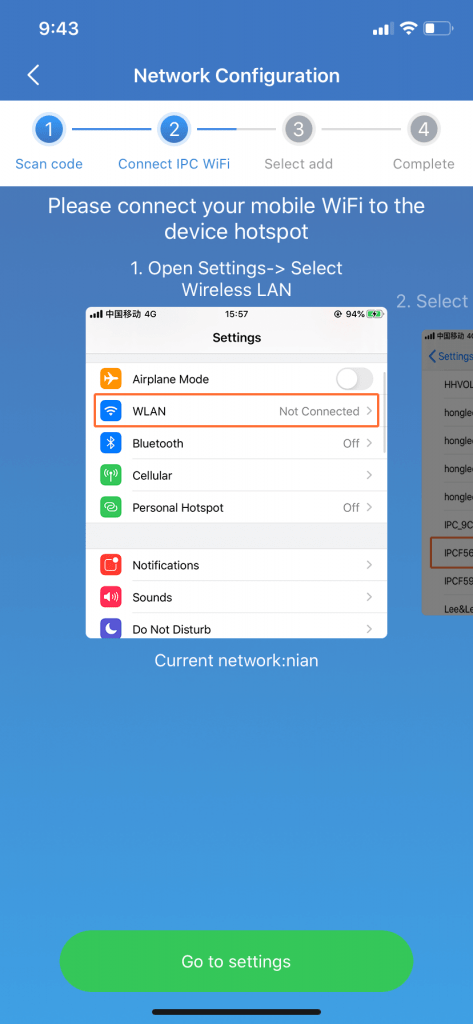
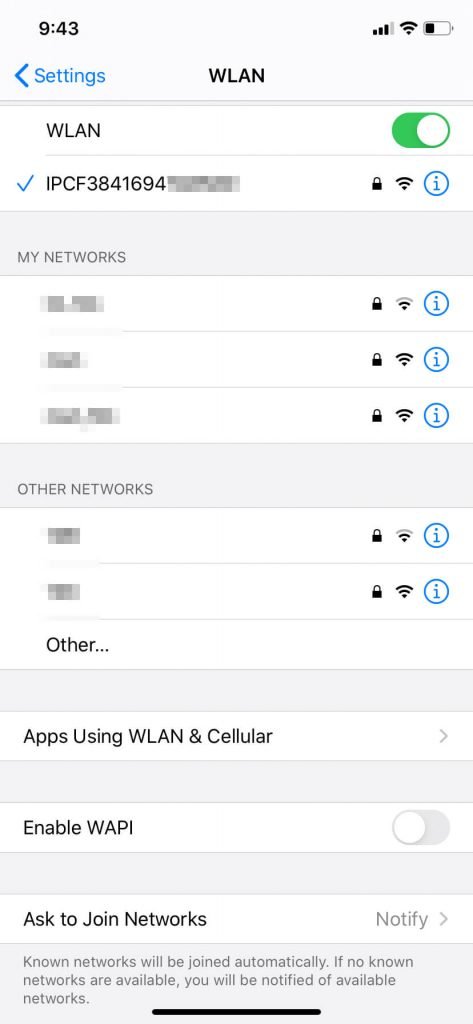
3. Please connect your mobile WiFi to the device hotspot.
Open Settings-> Select Wireless LAN > Select ‘IPCXXXXXXXXX’ device hotspot.
Connect hotspot,default password:11111111
add camera
4. After connecting successfully,return to APP.
Remote View: View video via WIFI or other network, please select Remote View.(most people choose)
Direct Connection: View video without network ,select Direct Connection. (few people choose)
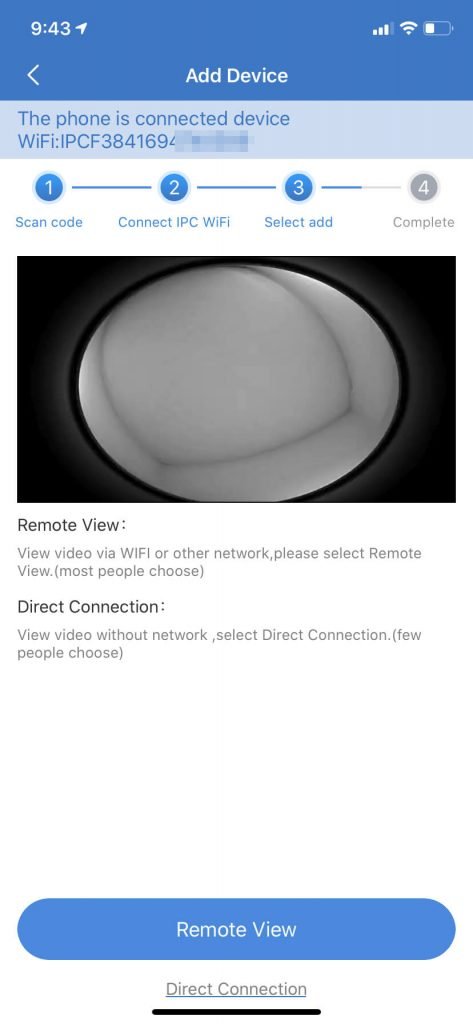
5. Select Remote View to continue.
Select your wifi and enter your wifi password, then click Confirm .
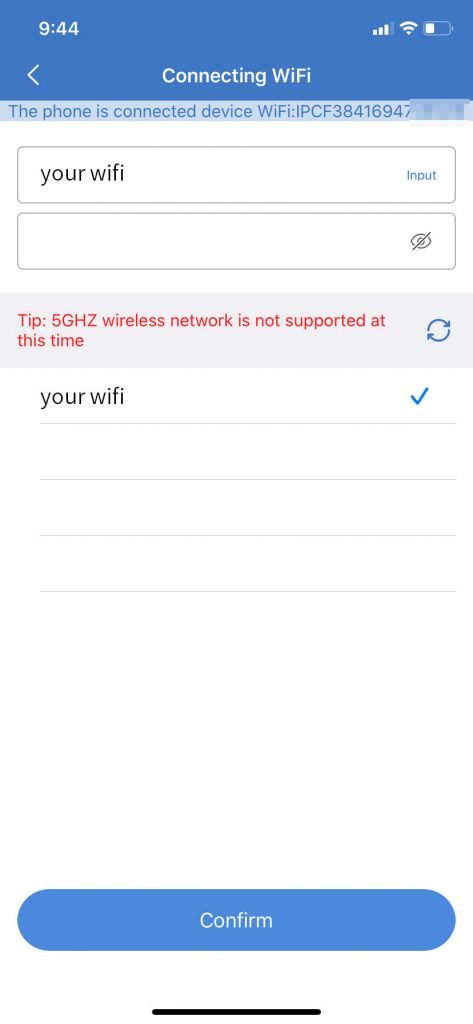
add camera
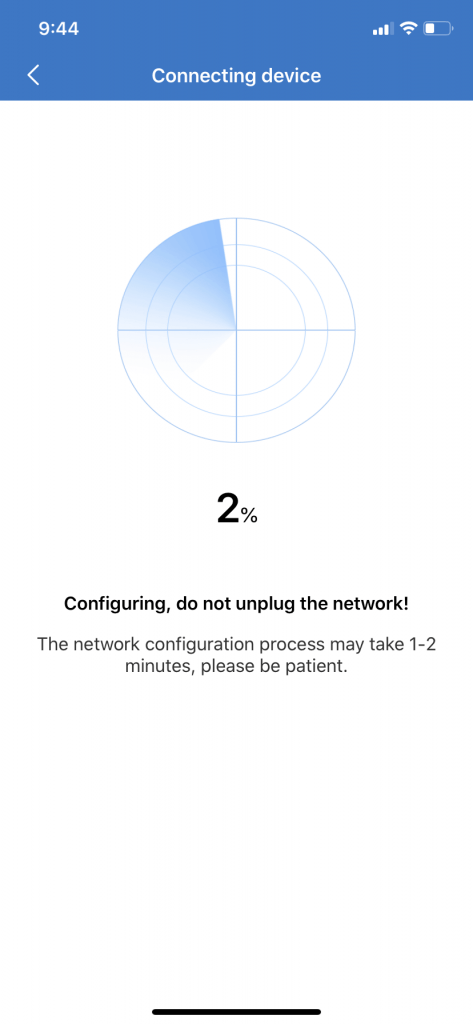
add camera
6. Configuring, do not unplug the network! The network configuration process may take 1-2 minutes, please be patient.
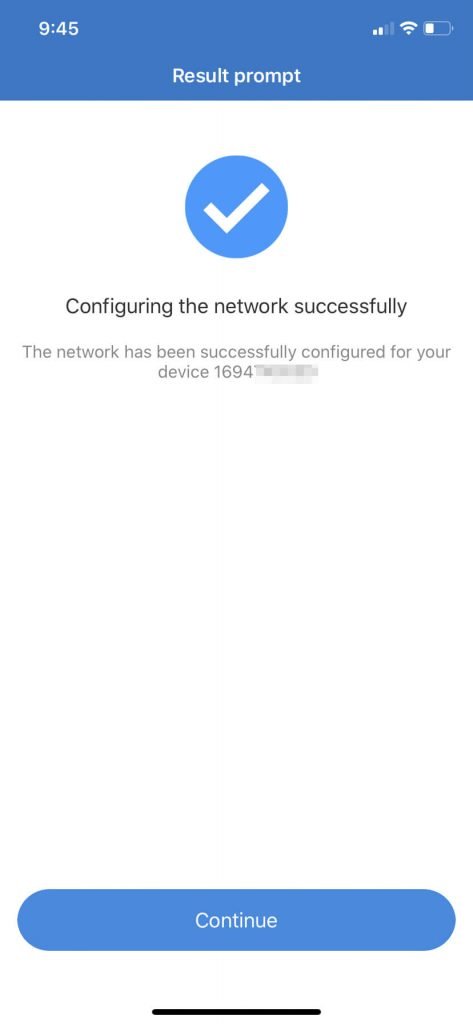
add camera
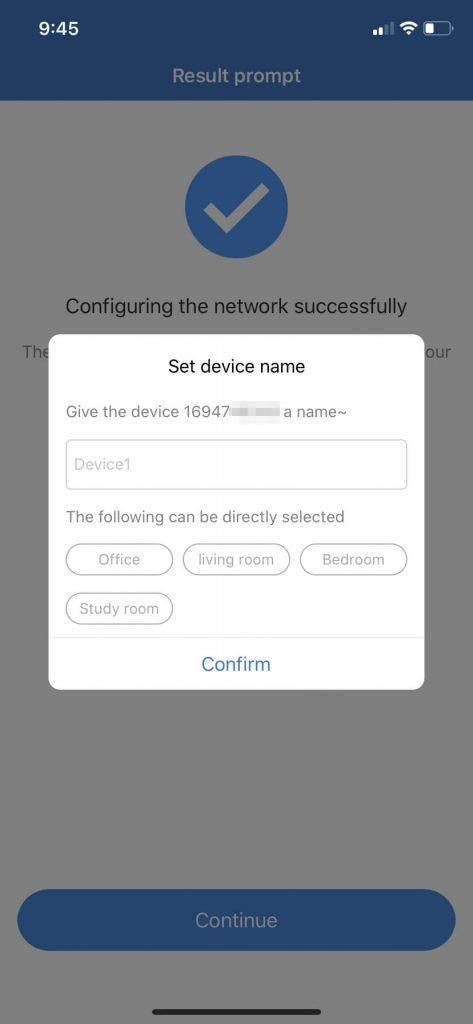
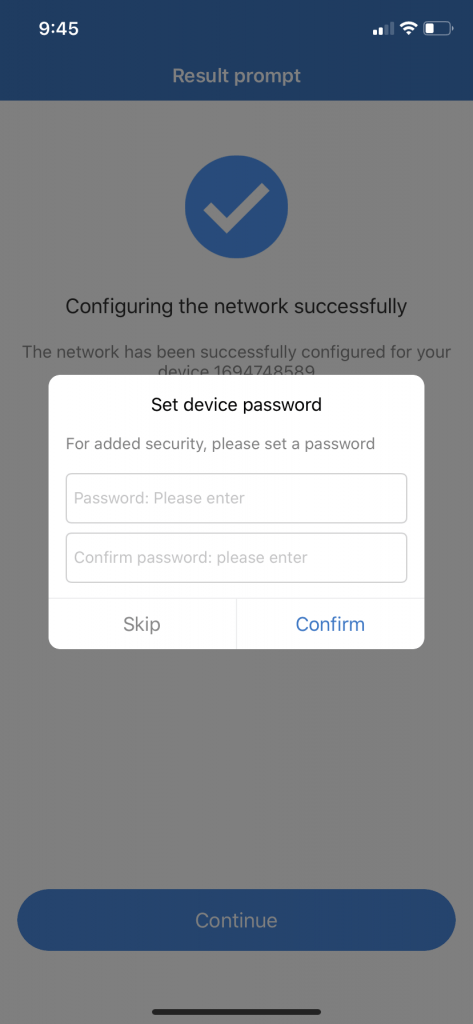
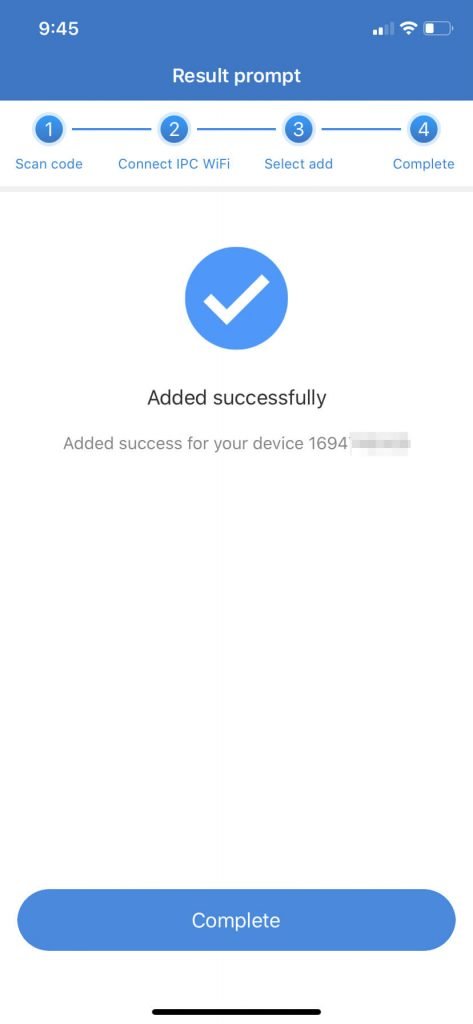
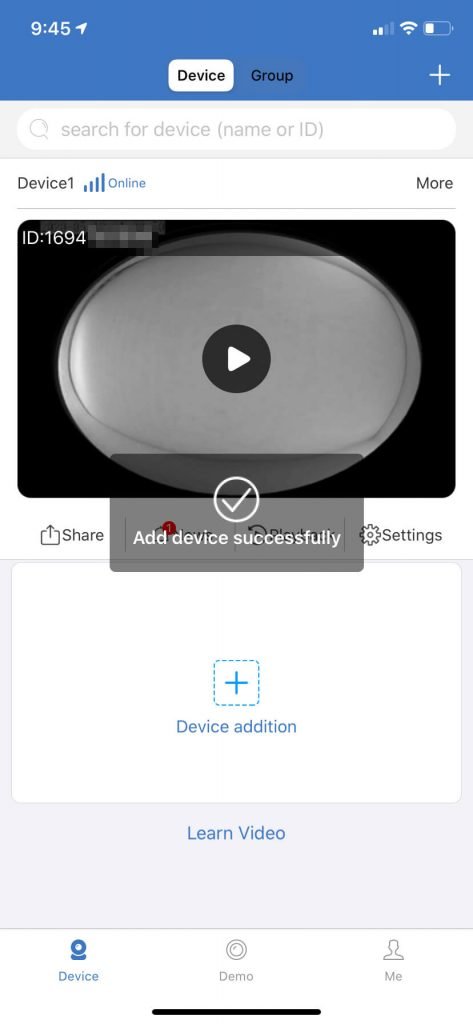
7. Set device name and device password.
For added security, please set a password.
add camera
add camera
add camera
add camera
Device Sharing
Generate shared QR codes ln the device list, click the “Share” button, set the right to share, choose to share, and generate QR codes.
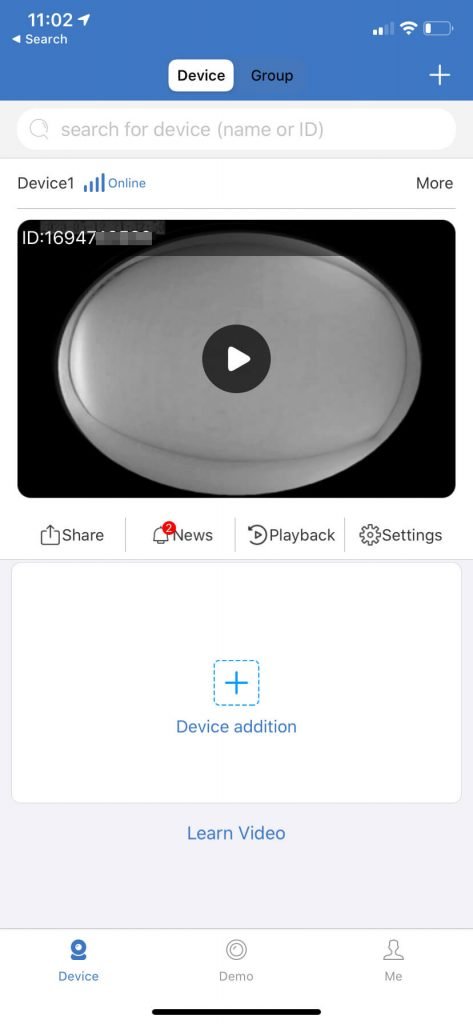 Device Sharing
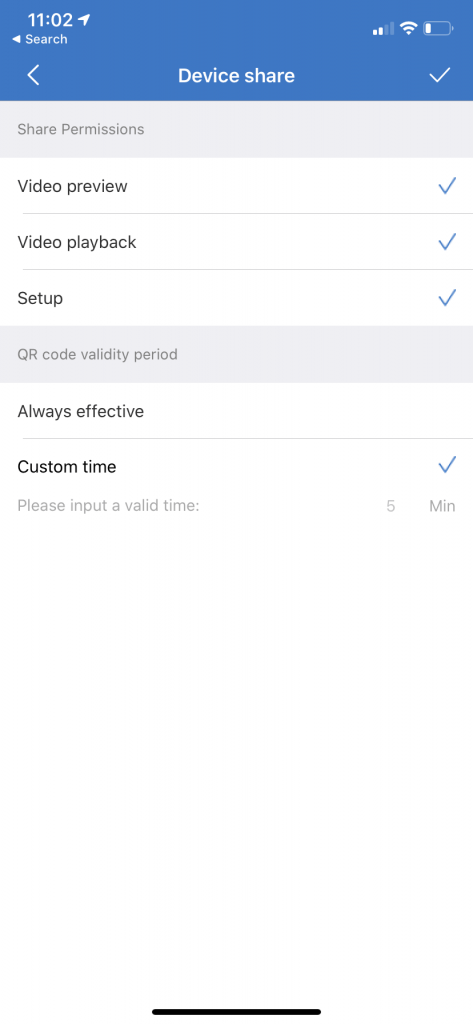 Device Sharing
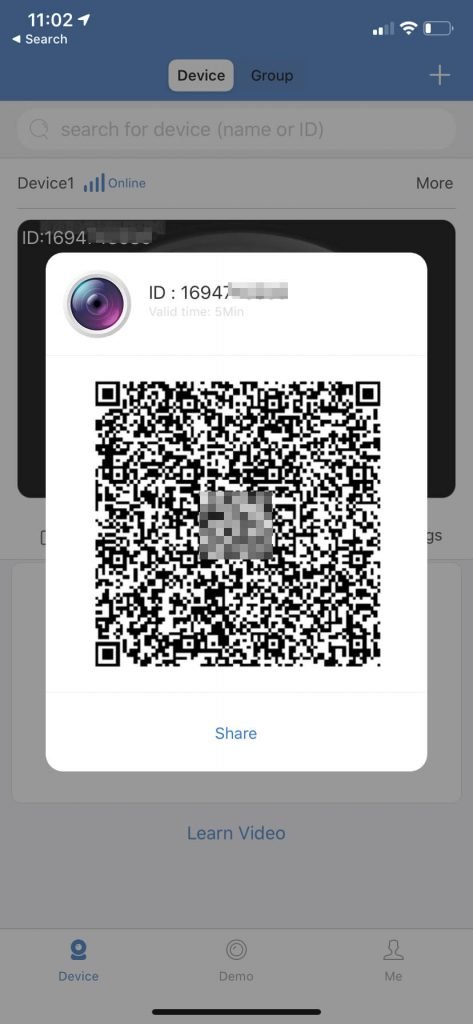 Device Sharing
Scan and share QR code.
click on the’+’button in the upper right corner of the interface to enter to add device interface, click on scan add device, enter to scan interface, scan shared device QR code, after display the scan results then return to device list interface.
Note: You need to allow access to the camera and album to use this function properly.
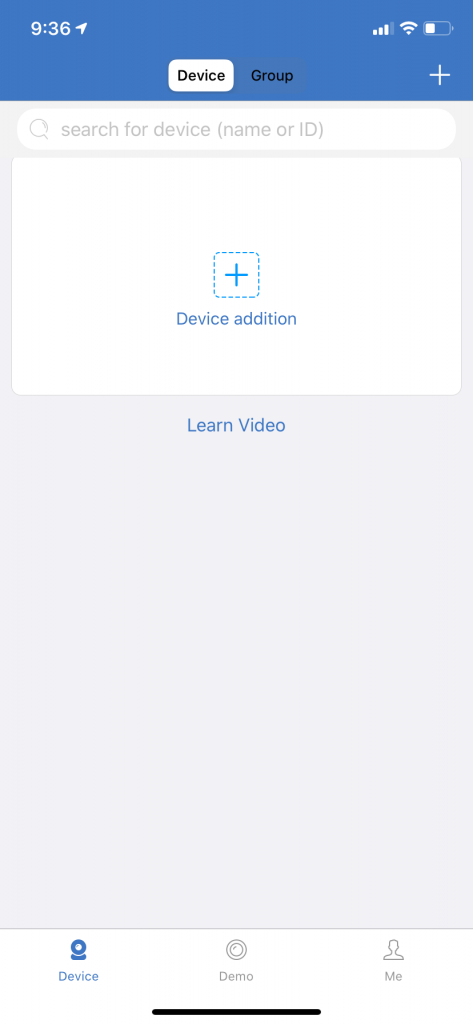 Scan and share QR code
 Scan and share QR code
Windows
Video playback
Video playback
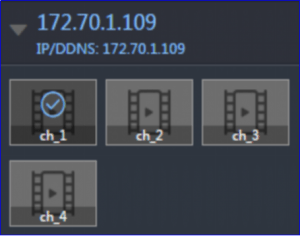
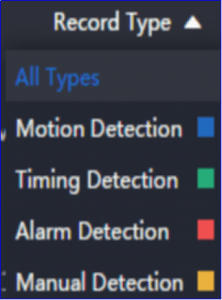
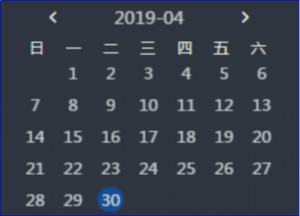
Playback four steps:①Select device channel ②Select video type ③Select playback date ④Confirm search video
 Device channel
 Video type
 Date selection
Timed playback
 Timed playback
 Timeline
Video sync
Steps:①Retrieve video ②Check sync ③Switching time point
Video download
Batch download:Enter the time period to be downloaded at the start time + end time according to the needs of the retrieved recording time range.
Time period download:The time period of the video recording will also be displayed in the download resource. Click the download button for any time period according to your needs.
![]() Custom bulk download
Custom bulk download Select time period to download
Other functions
Playback control:Support playback/pause/stop control in video playback, select the screen form in playback and click operation
Time scale adjustment:The settings in the Setup Wizard are not set. The playback timeline scale will default to 60 minutes. You can also modify the scale value by clicking ‘Reduction’ or ‘Magnify’ during video playback.
![]() Playback control
Playback control![]() Adjustment scale
Adjustment scale
User parameter
Basic Settings
Split screen number:The selected split screen number is displayed after the re-login, and the CMS provides split screen 1/4/6/8/9/16/25/36/49 nine forms of choice.
Display language:CMS currently defaults to 9 display languages, such as Simplified Chinese and English. When you choose to log in again, you will switch to the corresponding language.
Login Method:The cloud login mode is online. You need to connect to the external network when you log in. The local login does not have this hard requirement.
List style:The list style includes tree shape and graphics. The replacement is only the real-time preview interface and the display of the device list under the playback interface. The device list under other interfaces is unified into the tree list style.
Path modification:
①Screenshot path: The screenshot file is saved in the snapshot folder by default, and can be saved in other paths according to its own needs.
②Local recording path: The local recording file is saved in the record folder by default, and can be saved in other paths according to its own needs.
③Video download path: The files downloaded by the playback video are saved in the video_download folder by default, and can be saved in other paths according to their needs.
Preview sync time:Check the time when the device is previewed and the computer will be automatically synchronized (only ipc is supported)
note:After modifying the settings, click “Finish” and you will need to log in again. (It is best not to modify it to a directory containing Chinese)
advanced settings
Time zone setting:The local time zone can be selected according to the actual situation.
Automatic lock:Check the auto lock and enter the integer in minutes in the time frame. If no operation is performed on the CMS within the time of the input, the CMS will automatically lock.
Automatically connect video:After logging in to the auto-connect video, log in to the CMS and automatically connect to the device added to the device list. The number of connected channels is the number of split screens in the basic settings.
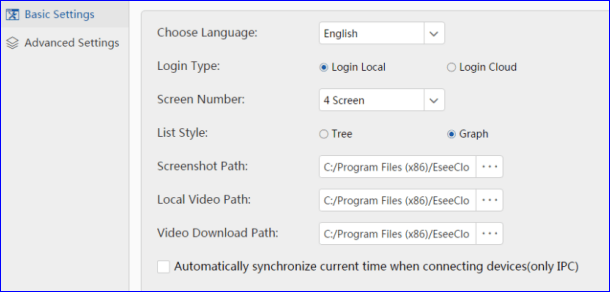 Basic Settings
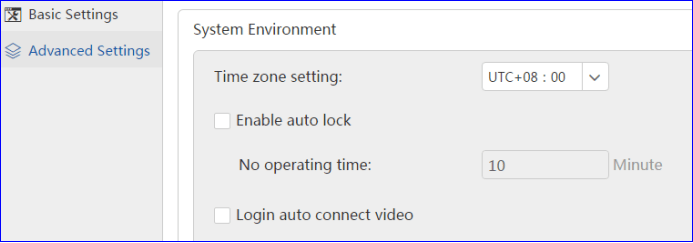 advanced settings
User login
Local login
①Enter account + password ②Click to login
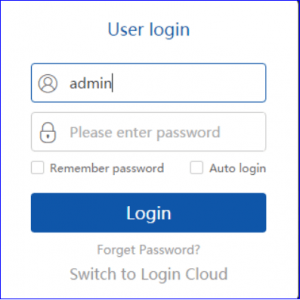 Login account
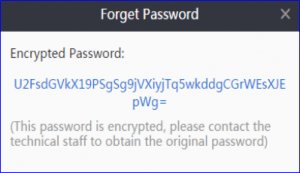 forget password
note:
Cloud login
Note:
①The cloud login should be logged in with the registered account (the account registered by the mobile app can be logged in)
②Registered account is recommended to use a valid mailbox, easy to retrieve passwords and other special circumstances
③After registering an account, you need to log in to the email address you entered during registration to activate the email address (click the received link to verify)
④The mailbox status is not activated, and cannot be retrieved after forgetting the password (activation period is two days)
⑤The first time you use EseeCloud_CMS, the software’s time zone will automatically sync with your computer, and you can change it later in the advanced settings.
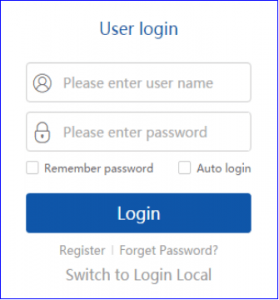 Login account
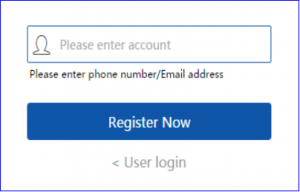 Register a new account
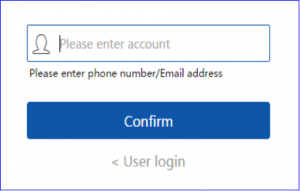 Retrieve password
More features
User Management
New user:①Click New User ②Enter username (required) + note name (optional)③Click to confirm
Modify permissions:
Default: The default permissions include screenshot, video, PTZ settings, video playback, remote download 5 items
modify:①Click edit permission ②Check the permissions and devices/channels that need to be assigned to new users (you can click to select all) ③Click to confirm
Other functions:
①Clear password: If the login password of the new user is forgotten, you can log in to the newly created user again by directly clearing the password and the internal setting data can be retained.
②Modify the note: Add a note, change the note or delete the note, go to the modify note operation
③Delete user: If you feel that the newly created user is not necessary, click delete user to delete the user.
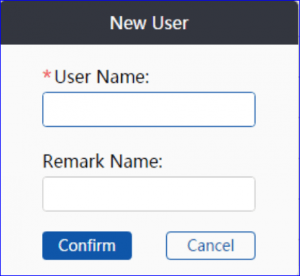 New user
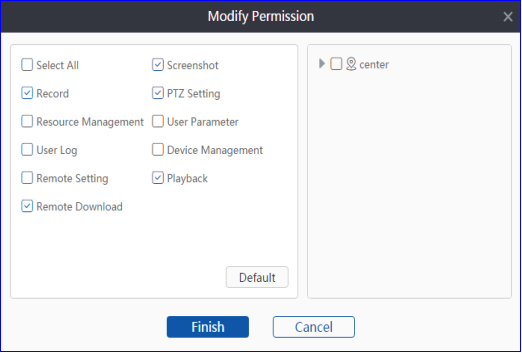 Modify permissions
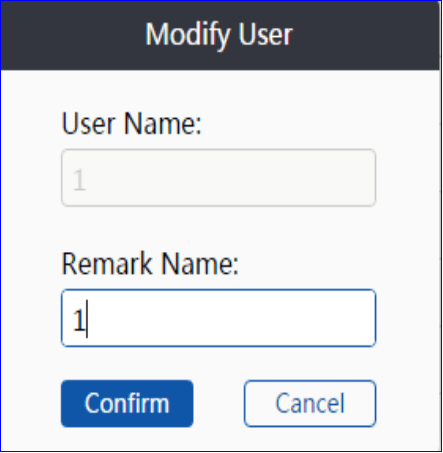 Modify user
Log query
Inquire:①Confirm ‘start time + end time’②Confirm ‘log type’ (including: alarm log, login log, operation log)③Selected area ④Click to query
 Log query
Resource management
Screenshot:
search for:①Select ‘start time+end time’ ②Click search
Preview:①Method one selects ‘preview’ for right-click operation ②The second method is the screenshot file retrieved by direct click.
delete:①Method 1 Select ‘Delete’ for the right-click operation. ②The second method is to enter the screenshot preview state and click to select ‘delete’.
location:①Method 1 Select ‘Open location’ for right-click operation②Method 2 is to click ‘Save Location’ in the resource information.
Resource information:‘user, resource size, resolution, device name, associated channel, screenshot time, save location’, including the above content (as shown in Figure 2)
Replacement size:‘Original size, maximize, zoom in, zoom out, resource information, delete’, the screenshot preview status includes the above status/function that can be switched to
video:
search for:①Select ‘start time+end time+’②Select the recording type (including: preview video, playback video, default all types)③Click search
Resource information:‘user, resource size, recording type, device name, associated channel, recording time, save location’, including the above
Other functions:The operation steps of ‘preview, resource information, location, delete’ function are the same as the screenshots. For details, please refer to the operation in the screenshot.
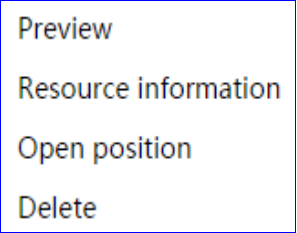 Right click operation
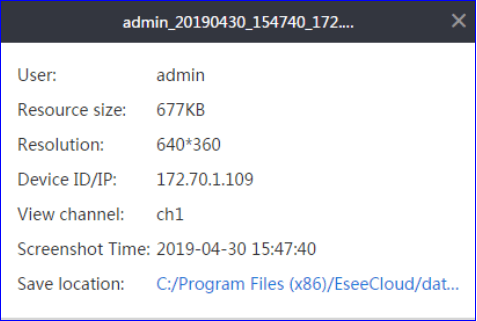 Resource information
System Info
Version Information:The content is displayed as follows ‘version number, date’
change Password:①Enter ‘original password + new password + confirm new password’②Click to confirm ③Re-login verification password
sign out:Click the ‘Exit Login’ button to quit the login status of the current account.
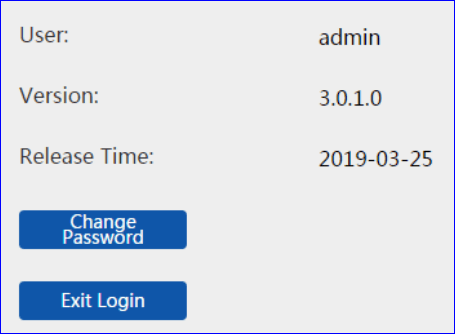 System Info
Live Preview
Connection/Disconnection
The list style is treeshape:
connection:
①Double-click on the selected device/channel to enter the connected video state.
②After selecting the device/channel, right click and select “Connect Video” to enter the connected video state (Figure 1)
disconnect:
③Double-click to disconnect the current connection after selecting the connected device/channel
④After selecting the device/channel, right click and select ‘Disconnect’ to disconnect the current connection.
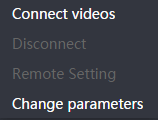 Figure 1
List style is graphic:
①After selecting the device/channel, click the play button on the device list to enter the connected video status.
②After selecting the device/channel, click the stop button on the device list to disconnect the current connection status.
③Right-click operation connection/disconnection is consistent with the tree list style. The specific operation can be referenced.
Note:poor performance of the computer will directly affect the smoothness of the preview video. It is recommended that the number of channels connected to the device be gradually increased
Video/screenshot
Video:
①Click the Record button on the toolbar to enter the video recording status (as shown in Figure 1 below)
②After the video operation, click the record button again to stop recording.
Note:
①The actual recording duration is not equal to the time difference between the start recording time and the end recording time.
②If the device network is interrupted, the recording will succeed but no video file will be saved.
③The channel is maximized or minimized during recording, and the recording will stop.
Screenshot:
Click the screenshot button on the toolbar to enter the screenshot status (as shown in Figure 1 below)
Note:
①If the switching stream video is not loaded, the screenshot operation will be saved.
②The screenshot does not have the function of continuous screenshots. Clicking the screenshot button once will capture an image.
 Figure 1
Panorama mode
enter:
①Double-click the channel screen to enter the maximized state, right click and select “panoramic mode” to switch to the panorama mode, enter the panorama, and the code stream is automatically switched to HD.
②The channel screen is in 1 split screen mode, and the panorama mode option is available on the right toolbar. Click to select to switch the panorama mode.
drop out:
①Click on Panorama mode on the right toolbar and select ‘Exit panorama’ to exit panorama mode
②Exit the panorama mode by exiting the screen from the split screen state.
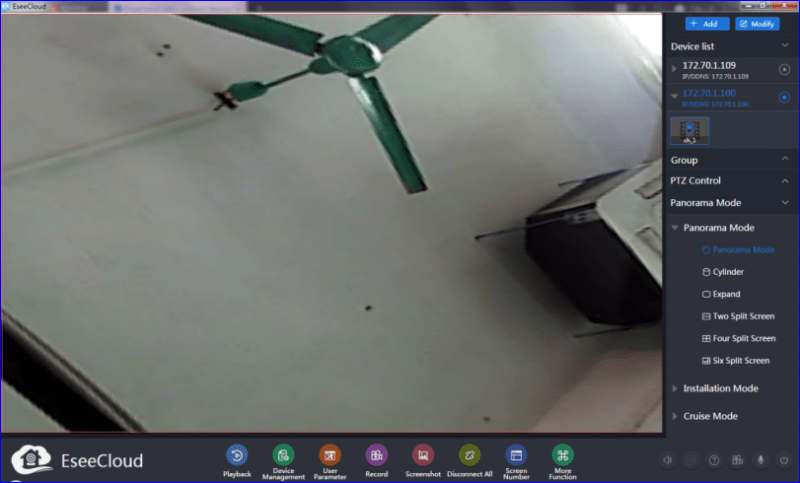 Panorama mode
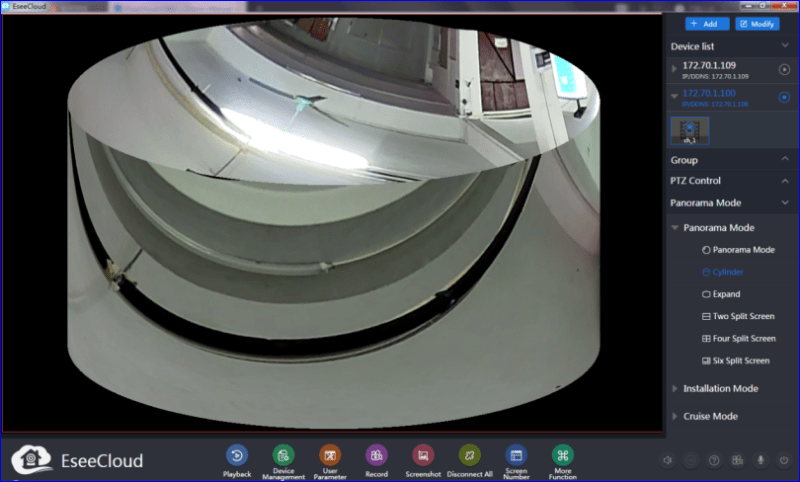 Cylindrical mode
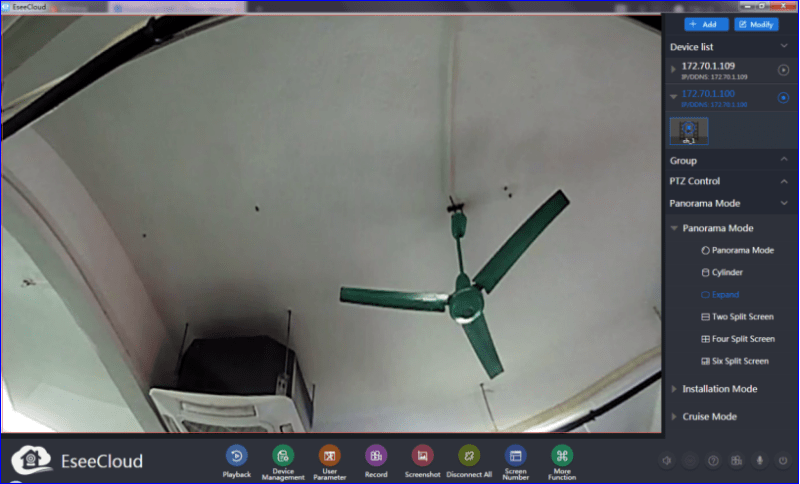 Expand mode
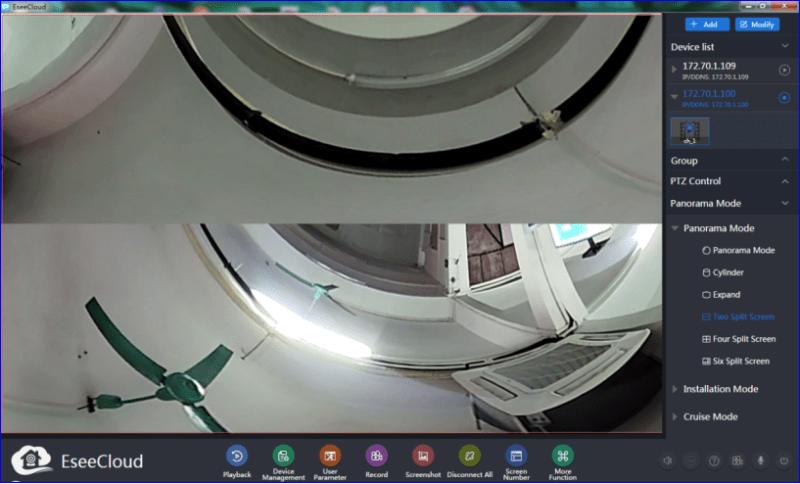 Split screen mode
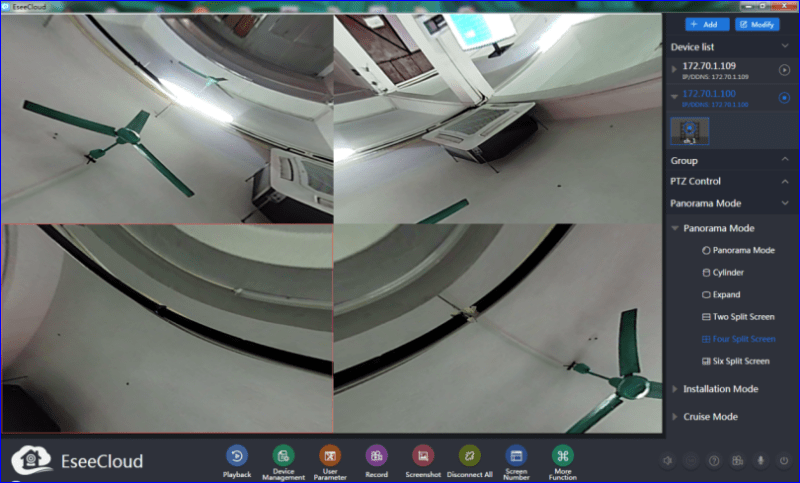 Quad screen mode
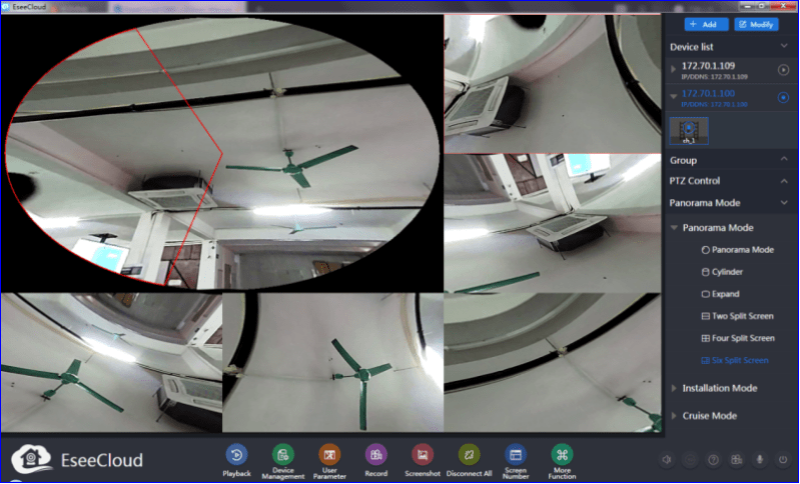 Six-screen mode
Note:
①In the local login mode, you can select 6 display modes in the panorama mode, including: panorama, cylinder, expand, 2 split screen, 4 split screen, 6 split screen
②In the cloud login mode, you can select 4 display modes in the panorama mode, including: panorama, cylinder, split screen, quad screen
Suspension: the direction of the cruise is clockwise
Wall-mounted: the direction of the cruise swings left and right
Speed: Cruise provides speed 3S / speed 40S / speed 60S three options, corresponding to slow / medium / fast three speeds
Stop: Pause the current state of the cruise, left click on the channel in the cruise or select the stop cruise button in the cruise mode to click
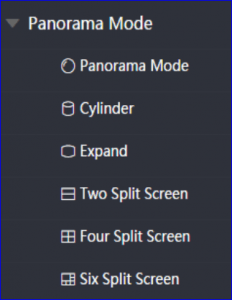 Panorama mode
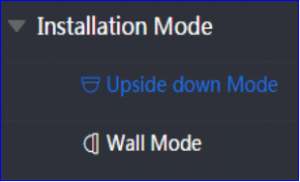 Installation mode
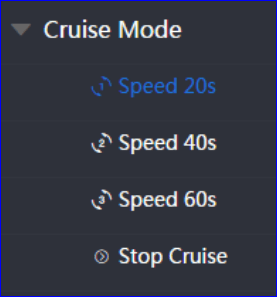 Cruise mode
PTZ control
Cruise / PTZ / Zoom / Focus / Aperture / Preset:
The PTZ control function can be used only when the PTZ device (such as a ball machine) is connected to the main control device (such as NVR or DVR).
Cruise is to directly perform the screen cruise operation. The pan/tilt is to adjust the lens direction and zoom to replace the mirror multiple.
![]() PTZ speed level control
PTZ speed level control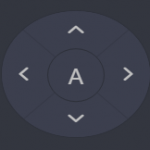 control
 Zoom, focus
 Preset
①:Adjust the PTZ control speed (default level is 6)
②:Adjust lens direction and cruise
③:Adjust the zoom and focus of the PTZ camera
④:Set and call the set bit, adjust the lens to the specified position, set the preset position, input the preset position later, click to call, the lens will automatically move to the specified position
Split screen number
When the number of connected device channels is greater than the current number of split screens, the displayed split screen will automatically increase, reaching 49 split screens.
![]() Split screen number
Split screen number
Other functions
 Other functions
 Intercom
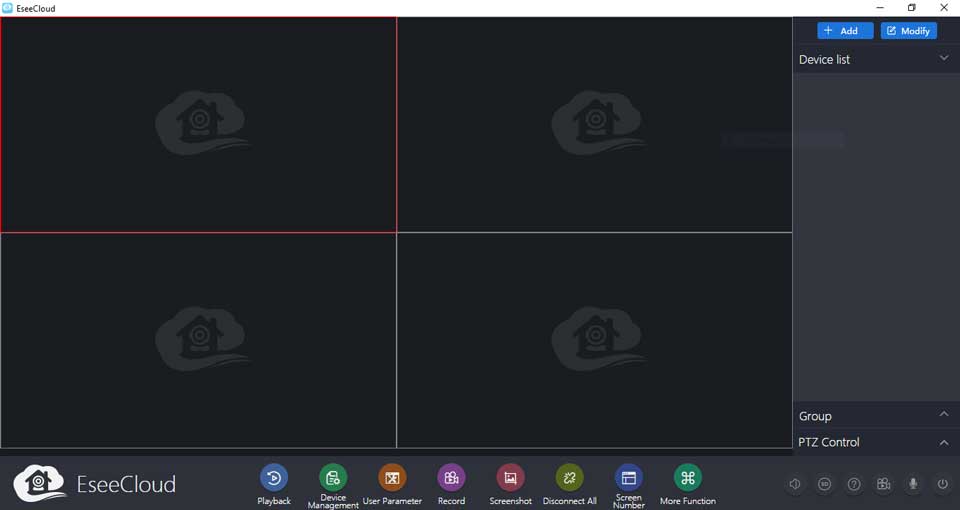
Introduction to EseeCloud CMS
Function introduction
CMS is called Camera Monitor System. It is a camera monitoring client for online preview image, video storage, remote playback, device management, video/screen download and other functions.
It is suitable for DVR, NVR, IPC, VR CAM, Wifi IPC and other devices.
Camera suitable for IP PRO, VR CAM, EseeCloud app.
CMS has the following characteristics
Interface containerization processing mode: In the interface design of the client component, the containerized processing is carefully adopted, which simplifies the processing mode of multi-screen and single-screen switching, greatly improves the multi-screen operation feeling, and adapts to the development trend of a multi-screen PC.
Channelized management mode: In the client component design, channelized management mode is added, and the traditional design mode with device as the core subject is abandoned, which is more suitable for the development direction of IP monitoring.
Operating environment
Operating system:Microsoft Windows7 / Windows 8 / Windows 10 (32/64 bit Chinese and English operating system)
OSX 10.9 or higher (64-bit Chinese and English systems)
CPU:I3/2.4GHZ or more
Memory: 4GB or more
Graphics card: integrated graphics (Intel HD 4000 and later), discrete graphics (NVIDIA GeForce GTX 460 and later)
note
Preview multiple video or high resolution video at the same time, requiring higher hardware configuration and network bandwidth
Installation login
Installation and operation
Step 1: Run the EseeCloud_Setup_3.0.1.exe installation package
Step 2: Select the display language when installing
Step 3: Read and determine whether to accept the agreement
Step 4: Determine the path to the installation
Step 5: Installation is complete and you can choose to run immediately
 1. Running program
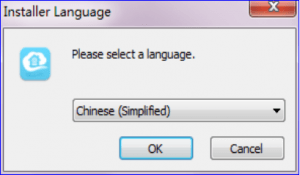 2. Choose a language
3. Reading agreement
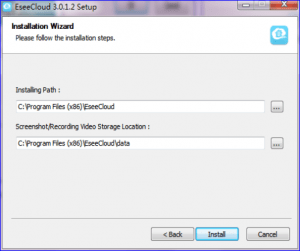
4. Determine the path
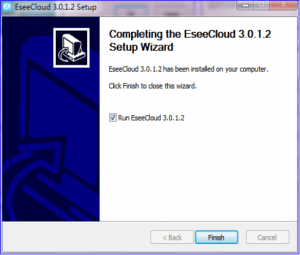
5. The installation is complete
Frequently Asked Questions
Question one:After installation, open the CMS and display “Cannot load plugin”?
Answer one:
1.Please confirm whether the installation path uses Chinese when installing, and the plugin is temporarily not compatible with Chinese path.
2.After confirming the non-Chinese path, if the problem persists, you can contact technical support for assistance.
Question two:After connecting multiple channels of video (more than 30 channels), videos stop for a few seconds , all channels are automatically disconnected into the black screen. The device connected again has no response. Do we need to restart the CMS?
Answer two:The new version of CMS3.0.1 runs with higher memory. If you connect many channels by the lower configuration computer, the computer system will run out of memory, causing the CMS to run abnormally. If the computer configuration is slightly lower, it is recommended not to connect too many channels. The optimization work has been planned for this situation.
Question three:When CMS is installed on the OSX system, it displays “File is corrupted” or “Unable to open” when it is opened?
Answer three:
1.Open “System Settings” → “Security and Privacy” → “Allow applications to be downloaded in the following location”, check “any source” (applies to versions prior to OSX10.12.X);
2.Open “Terminal”, enter the string “sudo spctl –master-disable”, press the “Enter” key, enter the sudo password (applicable to versions after OSX10.12.X). If the above method still does not work, please contact us to help you solve it.
Question four:After starting a window and flashing, it will not start or XP will appear. Open the software to indicate 0a00000000 memory referenced by 0x00000000 instruction. The memory cannot be ‘written’.
Answer four:Large probability video card driver problem, update the graphics card driver can solve
Question five:It shows mfc100u.dll lost when opening computer
Answer five:Install VC++2010 library to solve the problem
Foreword
Foreword
Welcome to use our products! We are very honored to get your trust.
In order to have a general understanding of our product CMS and facilitate your use, we have specially configured this manual for you, including the function introduction, operation steps, precautions, etc., which are essential guides for your use of this product.
Please read the instruction manual carefully before use. I believe it will be of great help to your effective use of this product. In addition, if you have any questions during the use, please feel free to contact us, we will be happy to serve you.
Applicable Model
This manual is for the camera monitoring system CMS.
Statement
This manual may contain areas where the product functions or operations do not match, or where the technology is inaccurate, or a typographical error. For such problems, our company will update the manual content according to product updates, and regularly update the hardware and software products described in this manual. The updated content will be added to the new version of this manual without prior notice.
The contents of this manual are for reference guidance only, and are not guaranteed to be identical to the actual product. Please refer to the actual product.
Agreement
In order to simplify the description in this manual, make a convention:
The camera monitoring system CMS is referred to as CMS or software for short;
DVR, NVR, IPC, VR CAM, WIFI IPC equipment, etc., collectively referred to as equipment;
Click for the left mouse button click, double click for the left mouse button to double click;
Some pictures are schematic, please refer to the actual interface of the software;
A “note” hint text may appear in this article to indicate that the operation is potentially risky, and ignoring the text may result in errors or unpredictable results.
Equipment management
Add device
Add a LAN device:①Enter the device management interface ②Refresh LAN device ③Check the device and click Add (LAN device can be filtered by entering IP/ID in the filter box)
Add cloud ID device:Manually enter the device ‘cloud ID number + channel number’, select ‘type’ according to the actual situation of the device, and the rest can click to confirm (the password can be selected according to the actual settings of the device)
Add an IP/DDNS device:Manually enter the device ‘IP/DDNS+port+channel number’, select ‘type’ according to the actual situation of the device, and the rest can click OK.
 LAN add

Modify device
Device modification:In the device management or preview interface, after selecting the device and clicking Modify, the device interface will be loaded.
Regional modification:In the modify device interface, click the area drop-down box.
Group modification:After selecting the group under the device management interface, click the modify button to load the modified group information interface.
note:Modify the channel name, panorama, and channel type corresponding to the channel number in the device.
The panorama or channel type corresponding to each serial number is independent.
The channel device in the device needs to be in the panoramic state. You can select the corresponding channel serial number to modify the panorama. And channel type
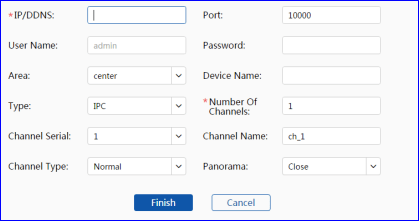 Device modification
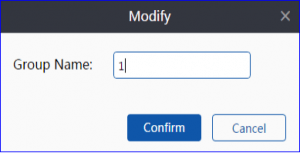 Grouping
Remote setting
VR CAM/gateway Remote setting
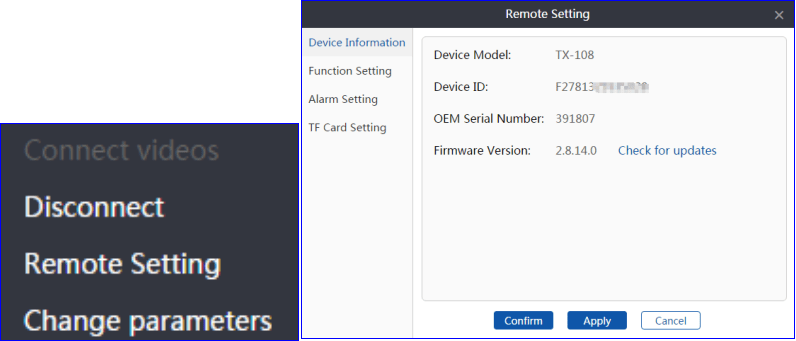
Setup steps:①Selected device ②Click Settings / Connect Device and click the Remote Settings button (as shown in Figure 1)
Device Information:Content includes device model, device ID, OEM serial number, firmware version (providing check updates)
Function setting:The audio, prompt tone, prompt language, and display mode and resolution can be set on the configuration.
Alarm system:The content includes motion detection, message push, motion detection sensitivity, and synchronization time function. If daylight saving time setting is available, you can set daylight saving time.
TF card settings:TF card status, available / total capacity, TF card formatting function
note:
①Alarm message push is not supported in local login. You need to check to switch to cloud login status.
②Currently supports VR CAM/gateway devices for remote setup
 Remote setting interface
D82 series NVR remote setting
Setup steps:①Selected device ②Click Settings / Connect Device and click the Remote Settings button
Device grouping
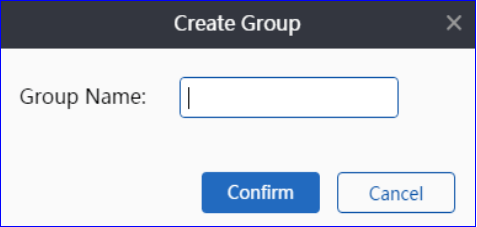
Create a group:①Click the ‘Create Group’ button ②‘Enter the content in the group name box and click OK.
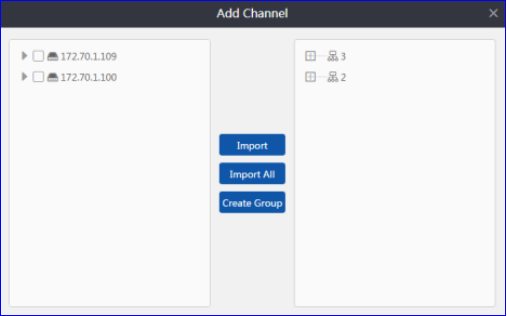
Add channel:
enter:①Select the created group ②Click the Add Channel button
Import selection:①Selected channel ②Selected group ③Click the import selection button
Import all:①Selected group ②Click to import all buttons
Modify/delete:
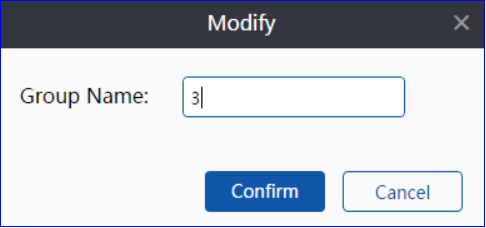
Edit: Select the group and click the Modify button to modify it.
Delete: delete the selected group or channel and click the delete button to delete
 Create a group
 Add channel
 Modify group
