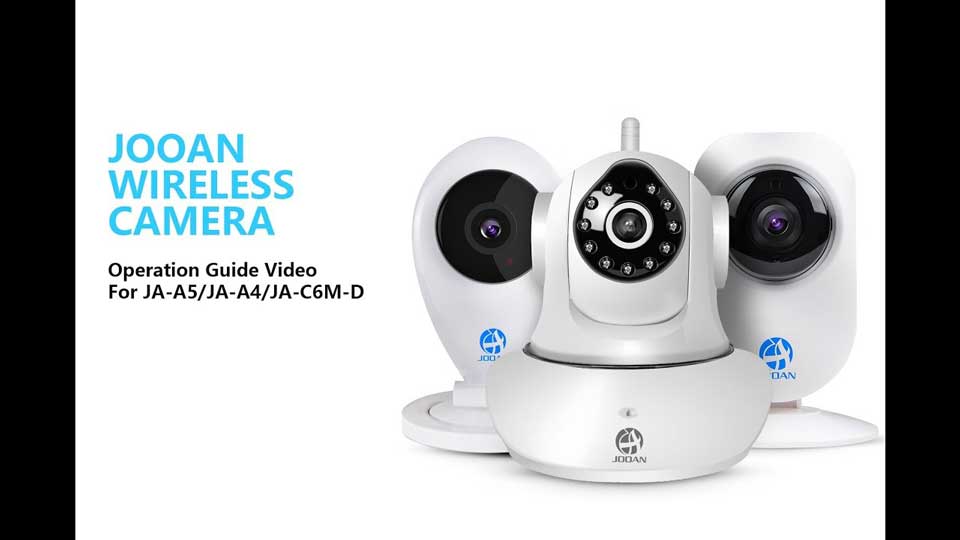
Danale Wireless Camera Installation Guide, The Device supports cloud service and you can purchase cloud service if you need. Cloud service is not activated by default.After startup, the device will issue a sound which means it has been connected successfully.
1. Installation and Connection
Before connecting, please have the following items in hand:
Camera(referred to as “Device” hereafter), 2.4GHz router, 5V2A power supply, cell phone.
Connecting Procedures:
1) Power up the Device using 5V2A power supply and wait for the startup to complete
2) After startup, the device will issue a sound which means it has been connected successfully.
3) Download and install client on cell phone
Android user: Please search for Danale from Android Market or Google Play
iPhone user: Please search for Danale from APP store
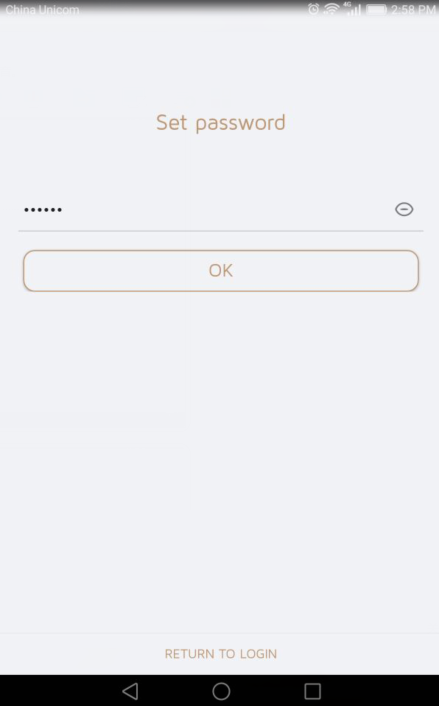
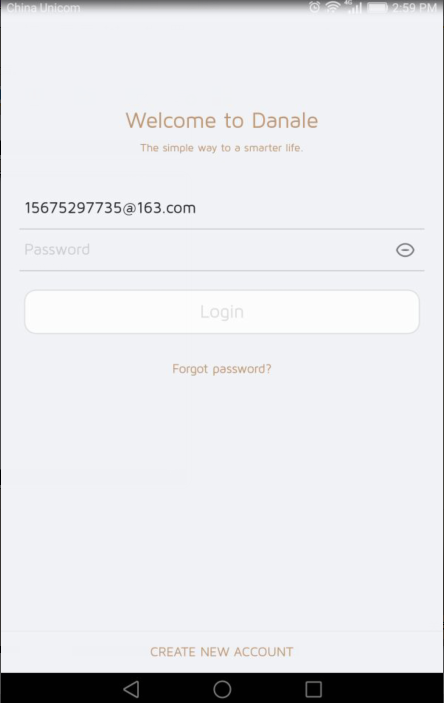
4) After downloading and installing the APP, launch it and register an account using cell phone number or email address.
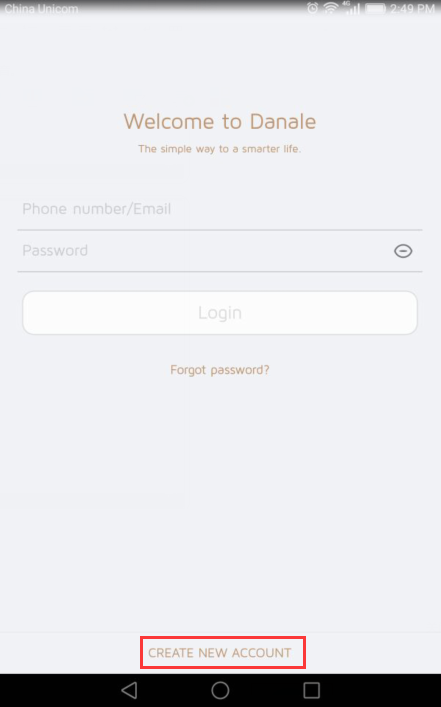
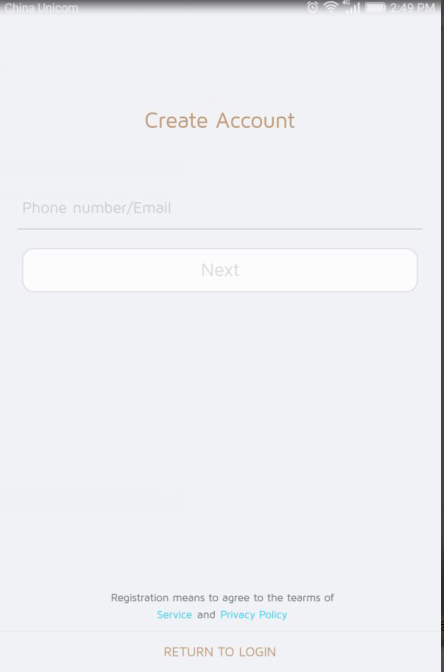
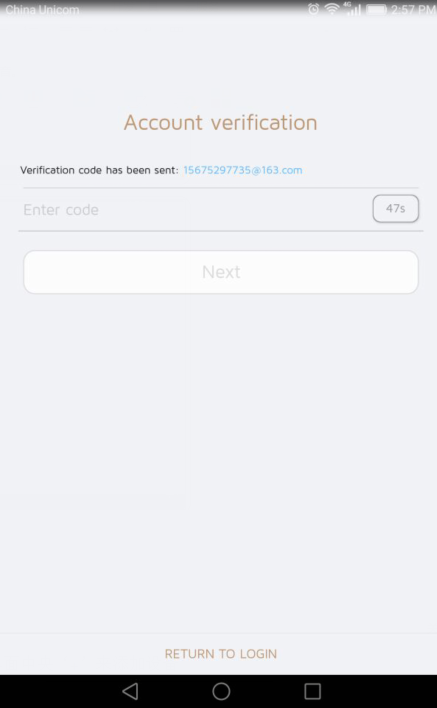
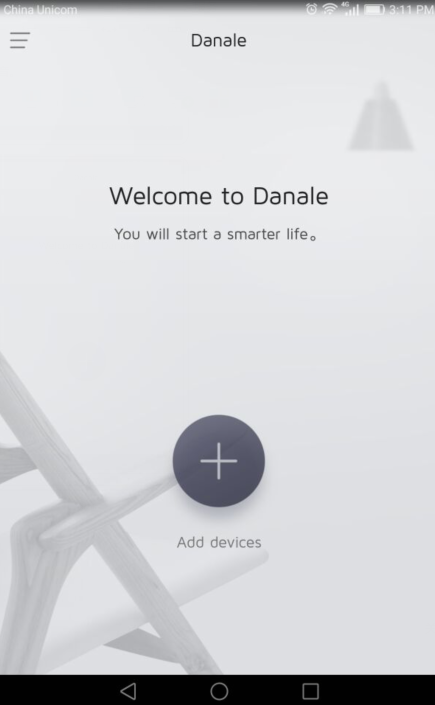
- Tap the “+” (Add Camera) in the center to add a device after registration and logging in.
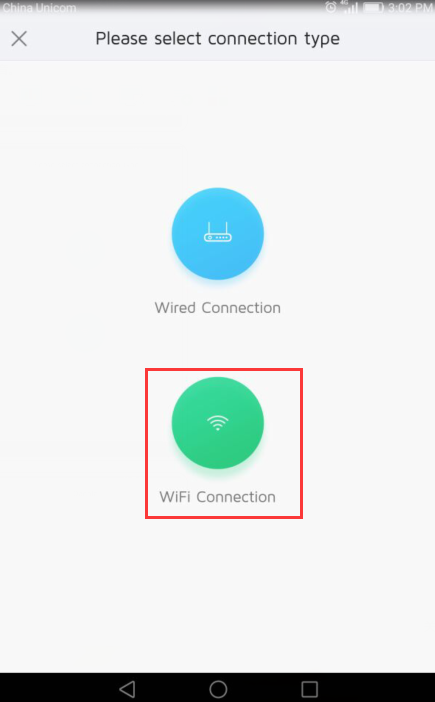
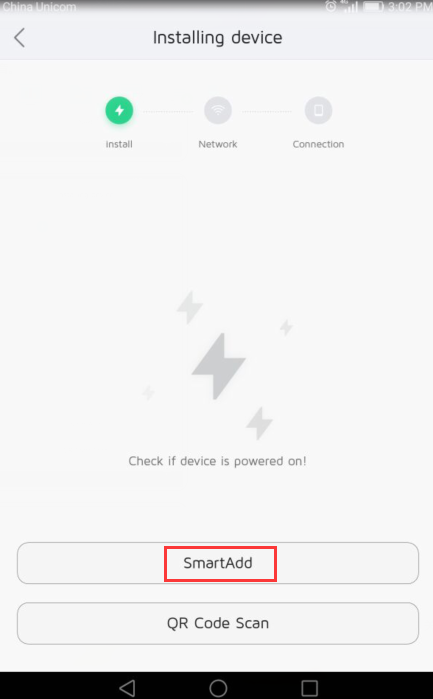
6) Choose “Wifi Connection”, then “SmartAdd”.
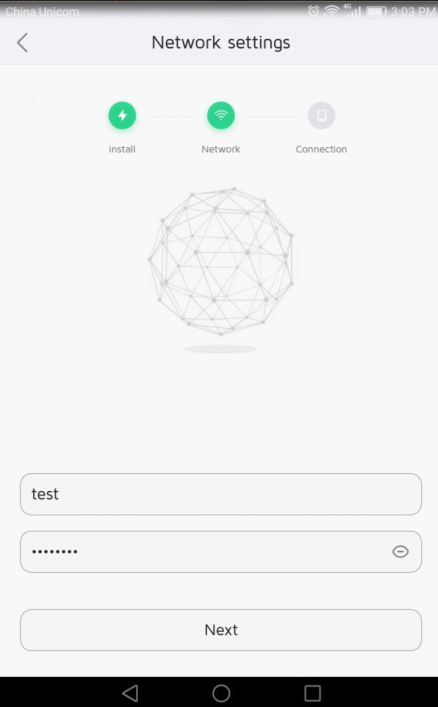
7) Choose the WiFi which the Device is to connect and enter the WiFi password, tap “Next”. The APP would automatically search cameras within the coverage of router. (note: please do not place camera too far away from router when you do this step).
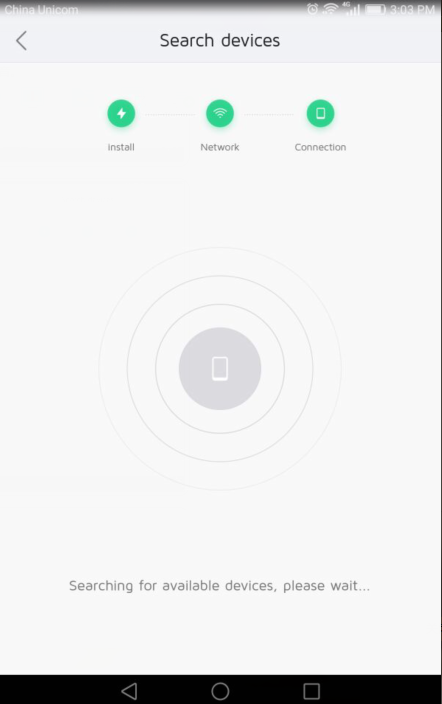
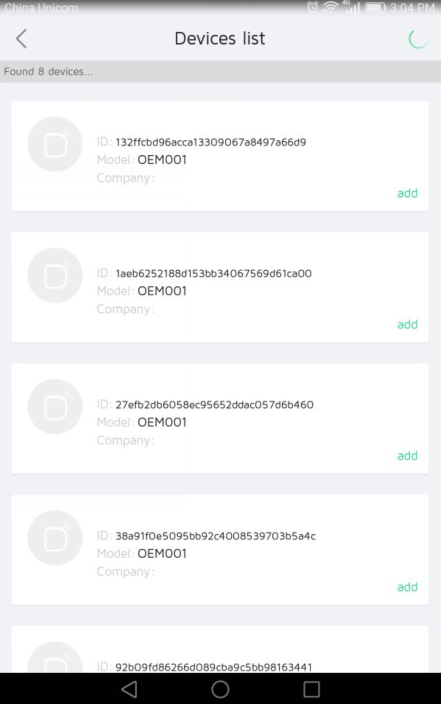
- After the device is shown on the device list, please tap “Add” next to the device to set a name for the device. Then tap “Ok”, the Device will show on the main screen.
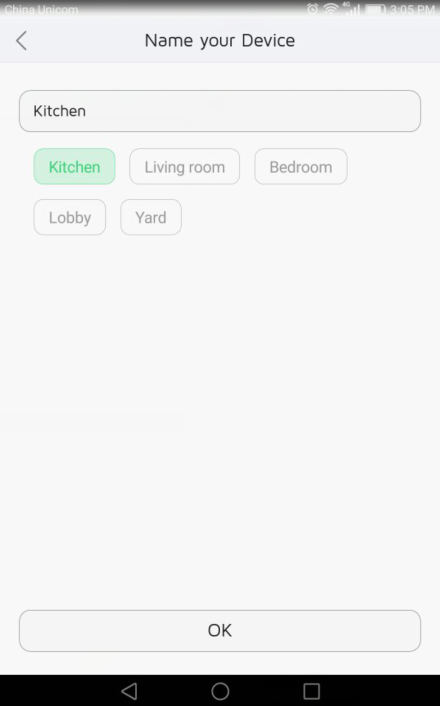
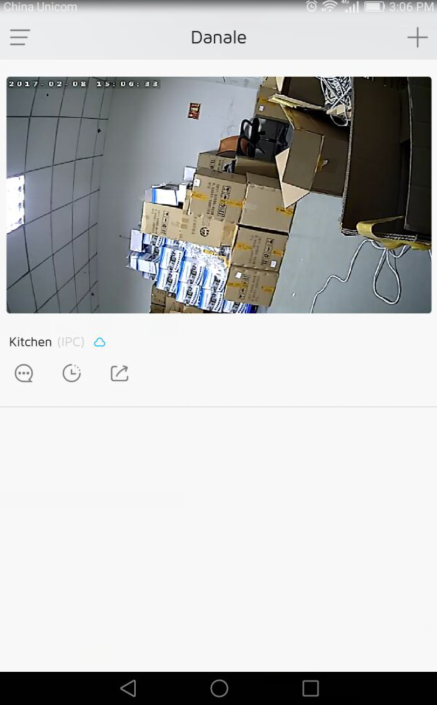
Note: If you can’t find the device via wireless wifi connection, please use the Ethernet cable to connect the device to your router.
Danale Wireless Camera Installation Guide
Read More :
2.Basic Configuration of the Mobile Client
2.1 Cloud Service
The Device supports cloud service and you can purchase cloud service if you need. Cloud service is not activated by default.
Procedures to activate cloud service:
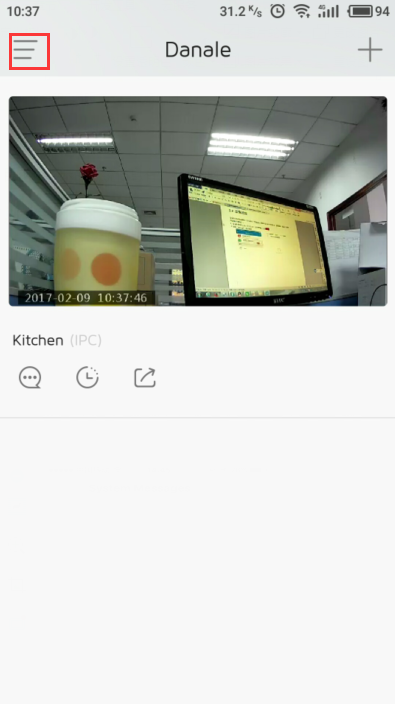
1) After successfully connecting the Device, tap the upper-left corner on the main menu screen of the cell phone APP
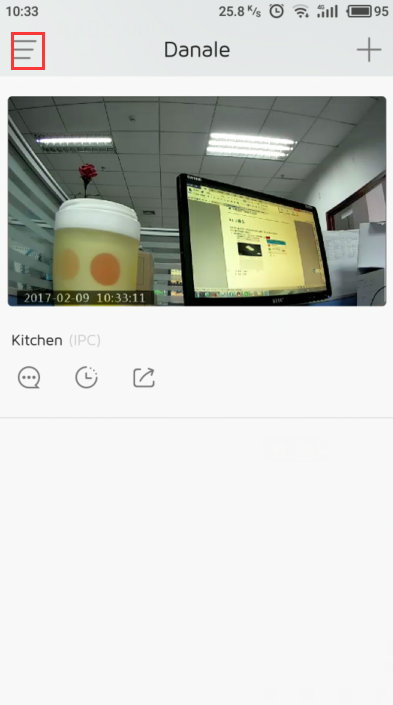
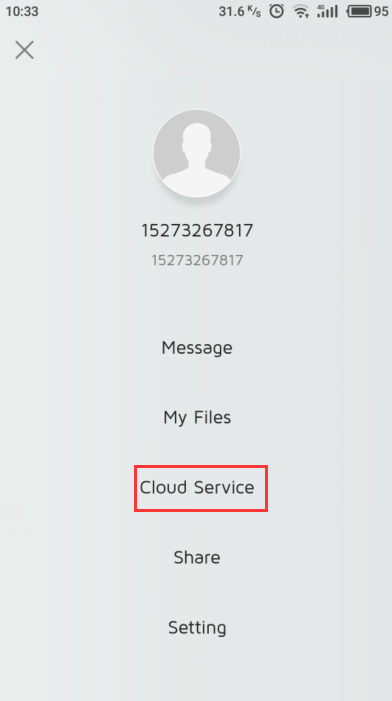
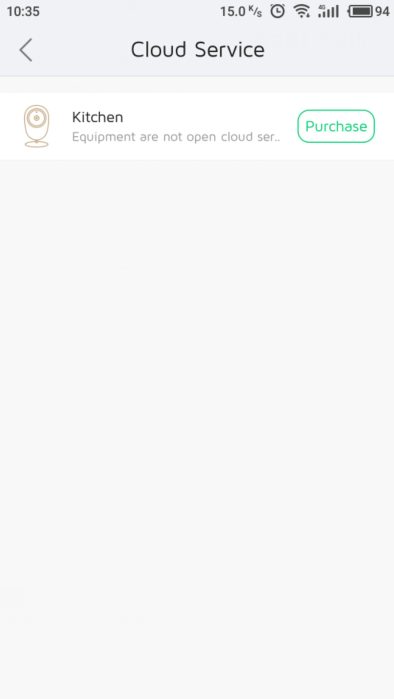
2) Select “Cloud Service”
3) Select the device that you want to open the cloud service, tap “Purchase”.
4) Please read service terms of the cloud recording then purchase different services based on your need.
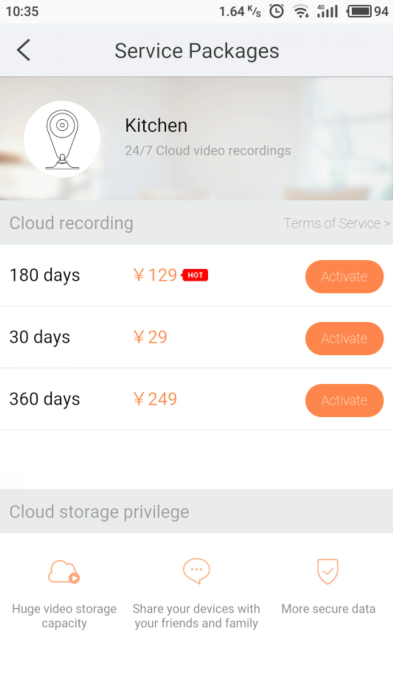
Privilege of cloud recording:
1) Automatic recording backup
2) Check warning anytime
3) Safer data
2.2 System Messages
System messages of the Device are shown in “System Messages”, currently including warning message and device sharing message.
Detailed procedures are as follows:
1) Tap upper-left corner on main menu screen of APP after successful connection
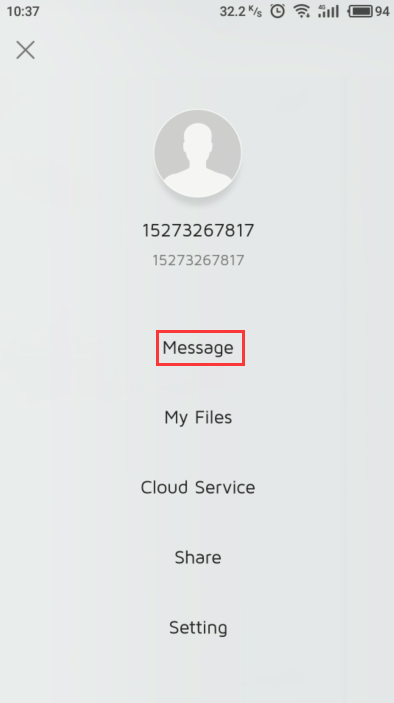
2) Select “System Messages” to check messages

2.3 Device System Configuration
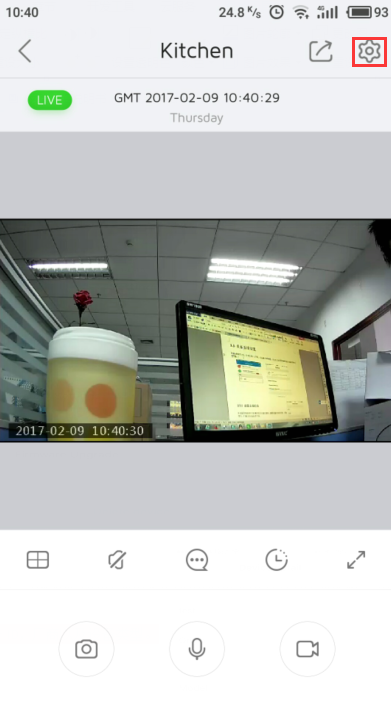
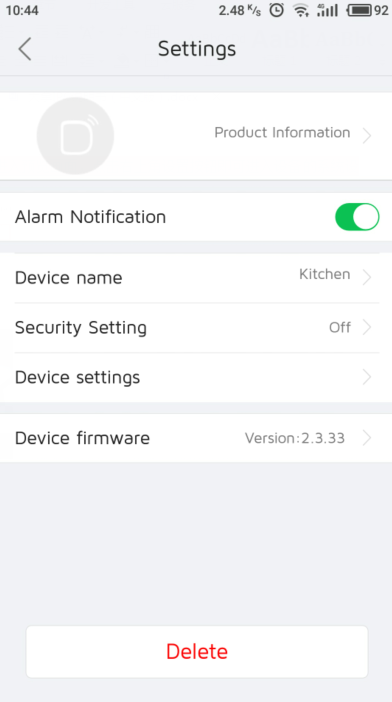
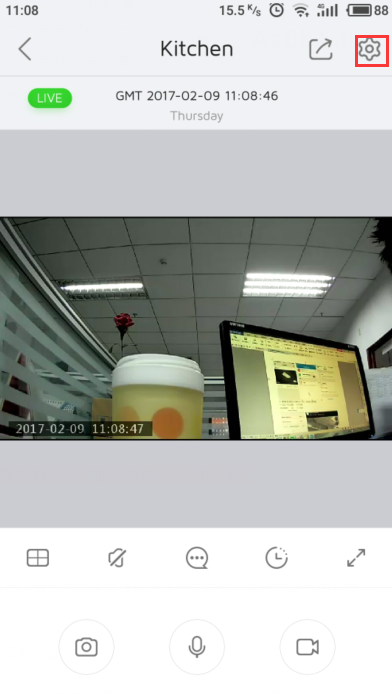
In the preview screen, click on the top right corner to set the button to enter the system configuration interface.
2.3.1 Device System Details
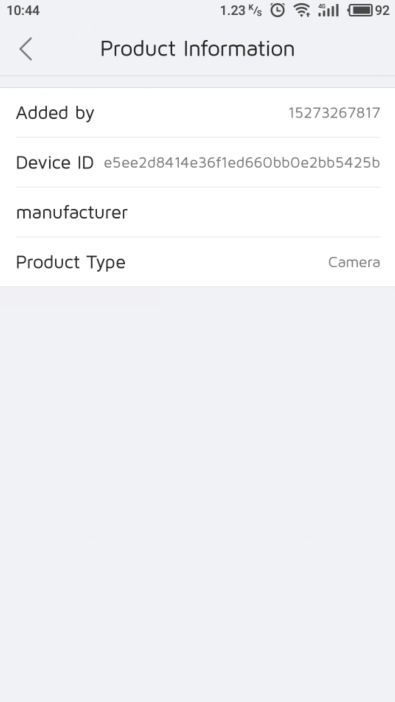
Here you can check the origin of added Device, Device ID, manufacture and product type.
2.3.2 Safety Settings
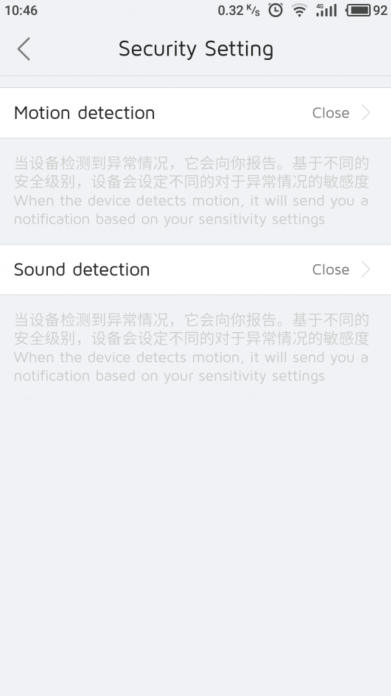
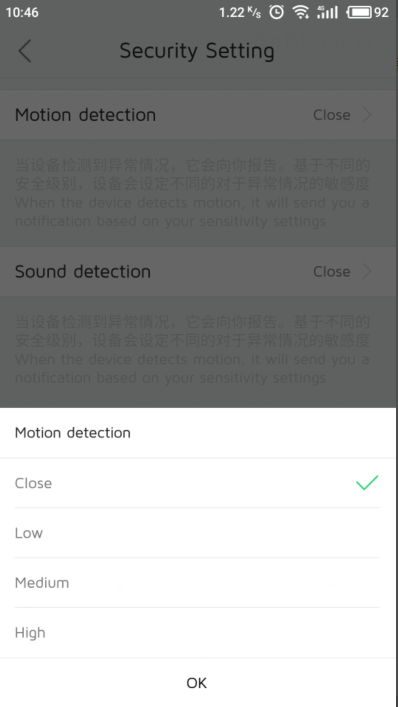
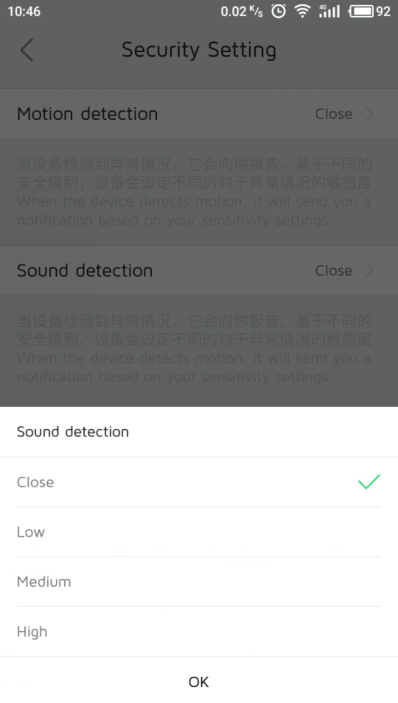
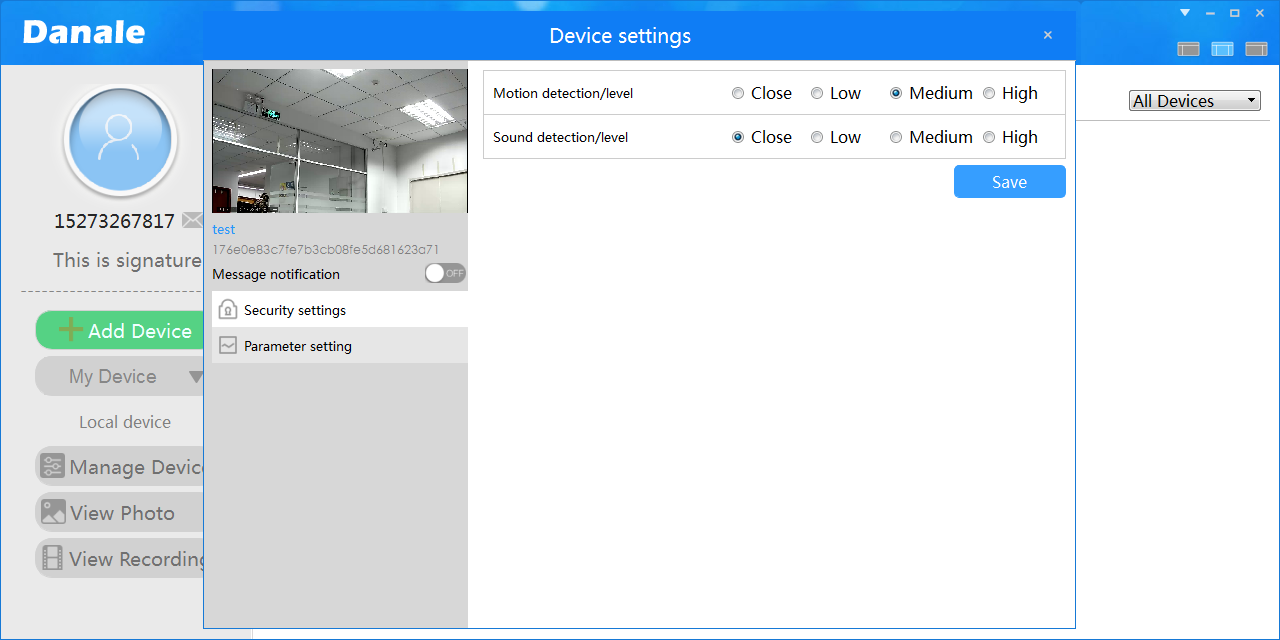
Safety settings include “Motion Detector” and “Sound Detector”.
1) Motion detector
The motion detector is off by default. The sensitivity of motion detector could be adjusted if needed (low, middle, high)
2) Sound detector
The sound detector is off by default. The sensitivity of sound detector could be adjusted if needed (low, middle, high)
2.3.3 General Settings
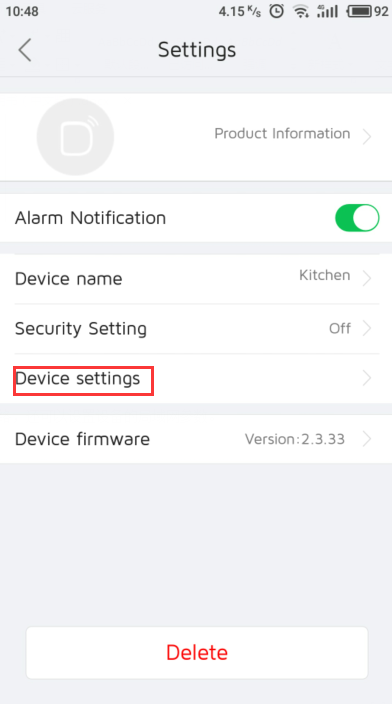
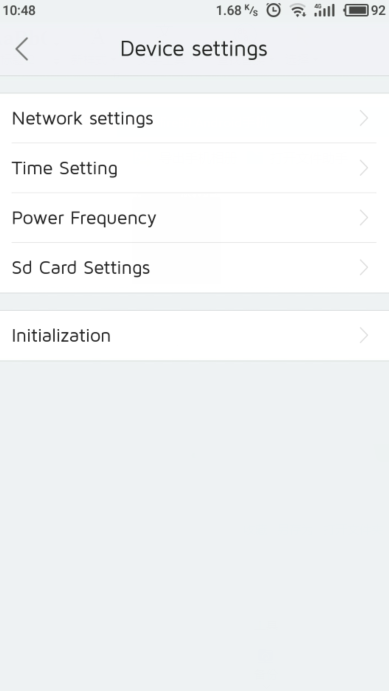
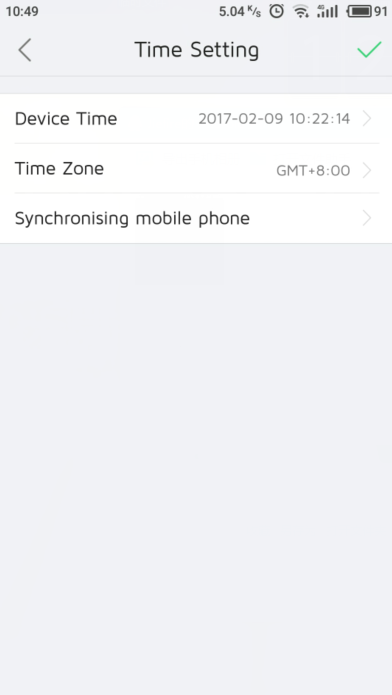
(1) Time setting
Device time settings, including device time, date and time zone.
You can also choose “Synch to Phone Time” to automatically synchronize all time settings from the phone
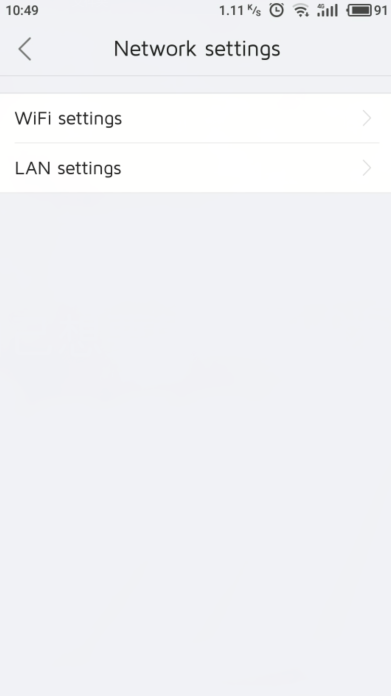
(2) Set WLAN
After connecting Device, you can check the WiFi Device connects to in “WiFi Settings” and configure LAN parameters.
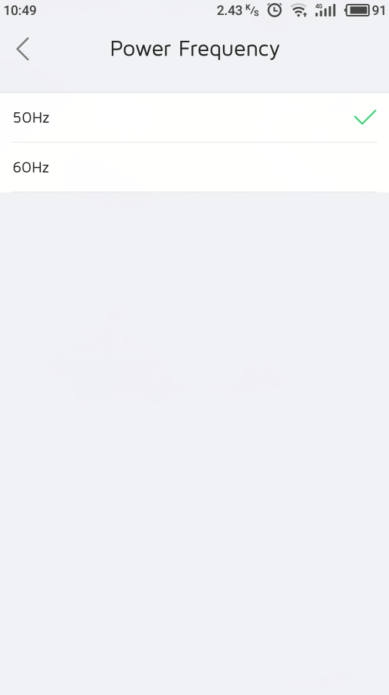
(3) Power supply frequency
You can choose from 50 Hz and 60 Hz. It’s 50 Hz by default.
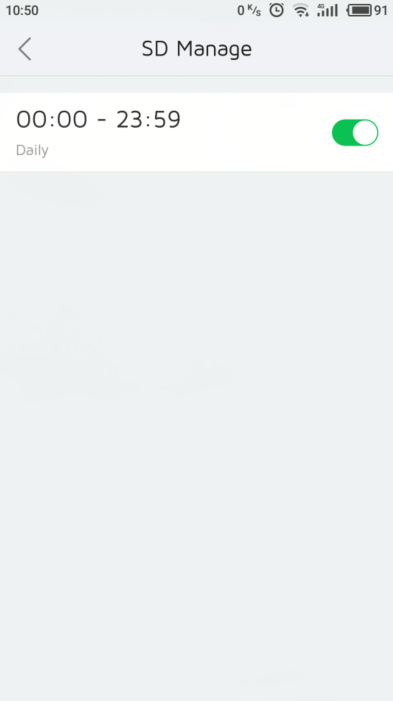
(4) SD card management
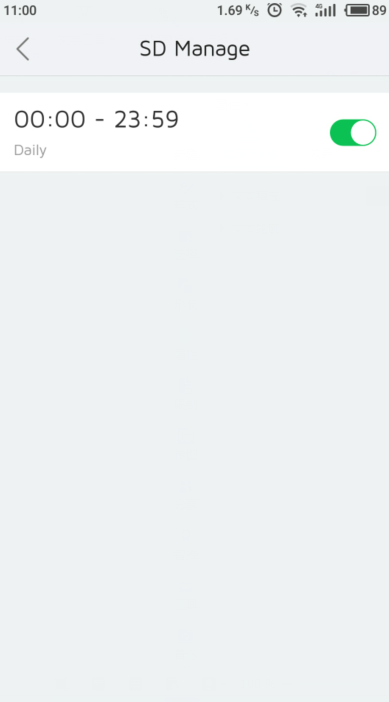
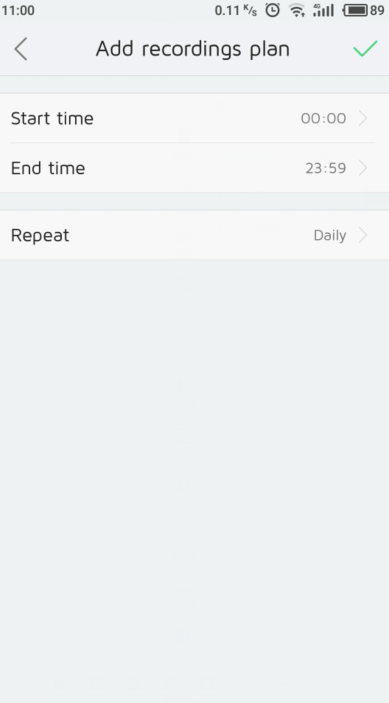
After inserting and formatting SD card, set time periods for recording according your need in “SD card management”. The Device is set to record 7/24 by default.
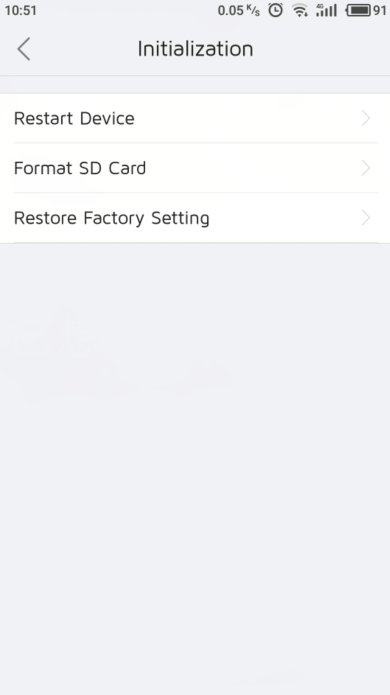
(5) Init (Initialization)
A Restart device
B Format SD card
C Restore factory setting
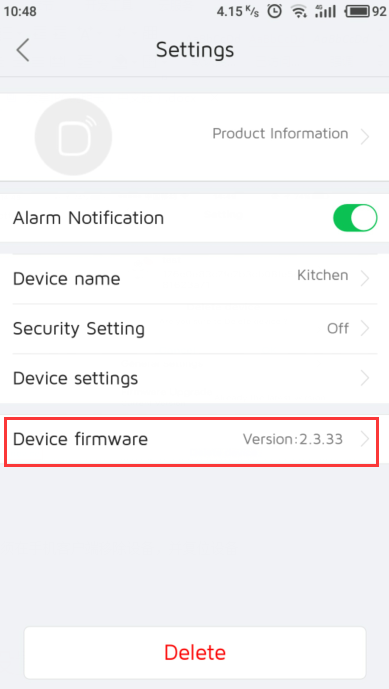
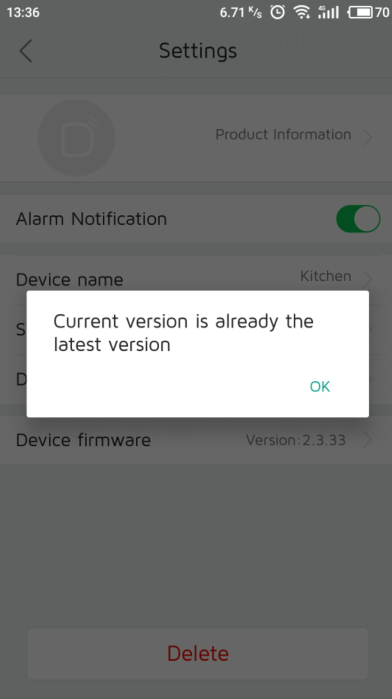
2.3.4 Firmware Upgrade
You can upgrade to the latest published firmware if needed
2.3.5 Delete Device
If the Device is no longer used or the user is to change, please make sure to remove the Device from phone client and reset Device.
3.Common Function Settings and Applications of Cell Phone Client
3.1 Recording and Playback
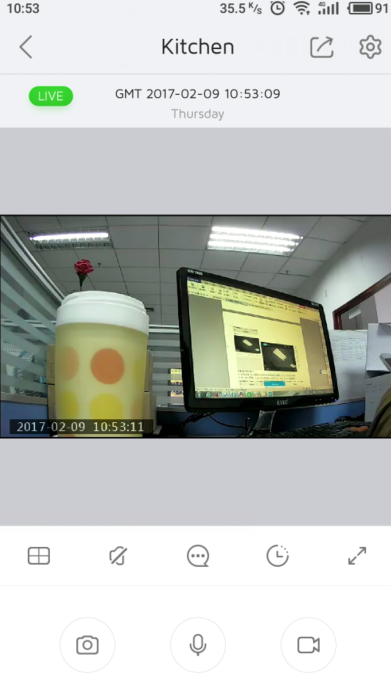
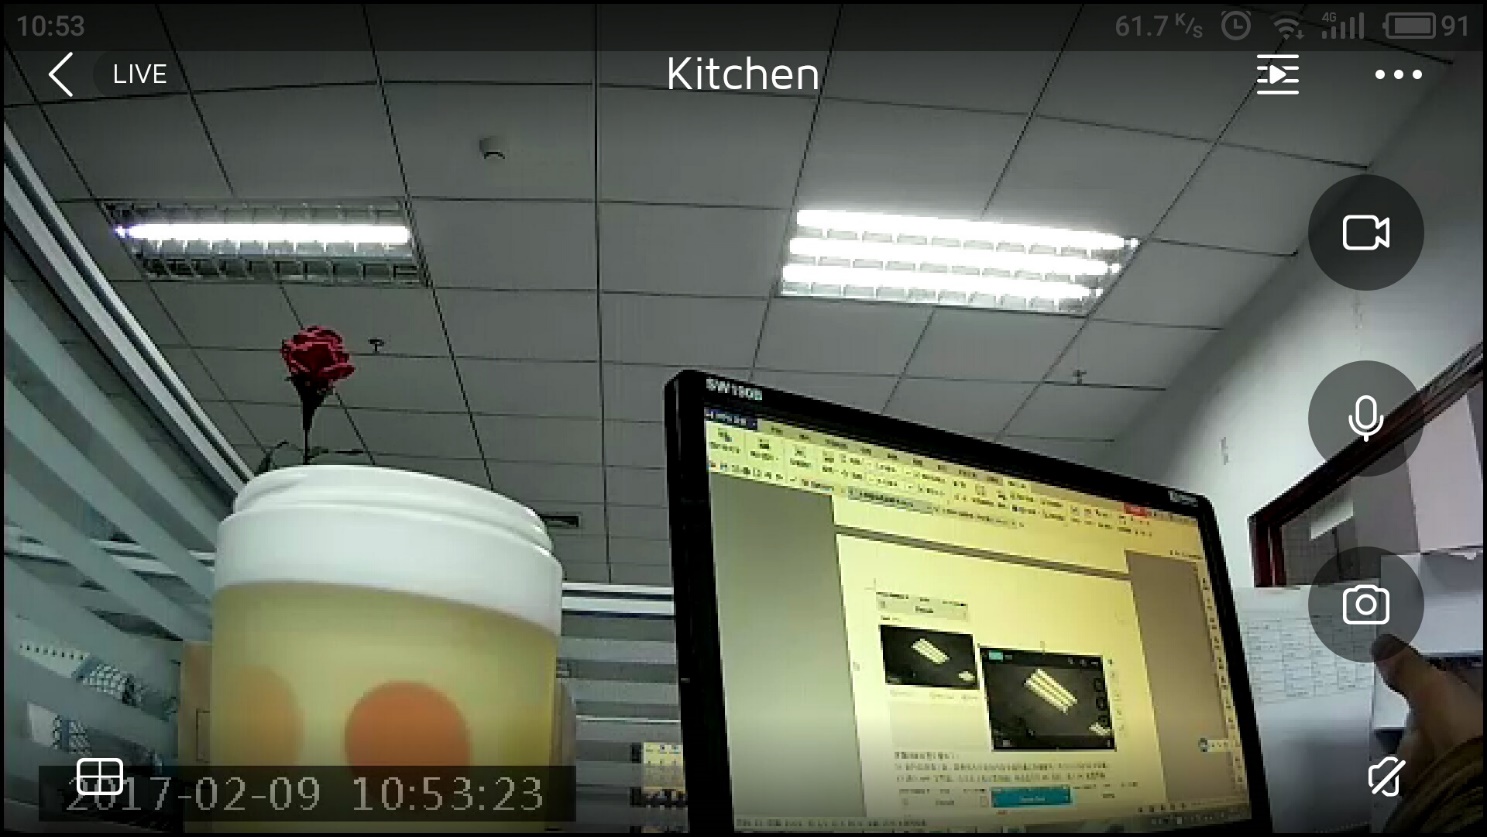
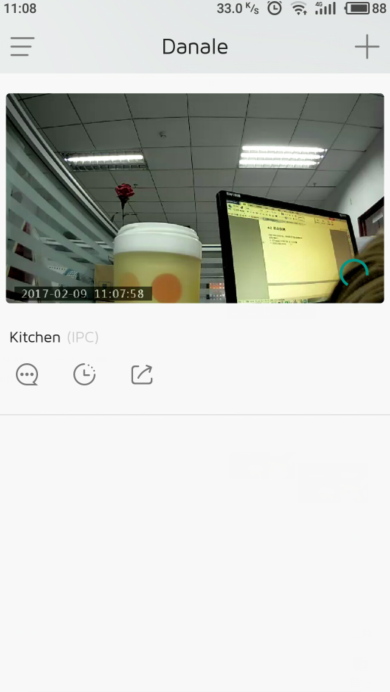
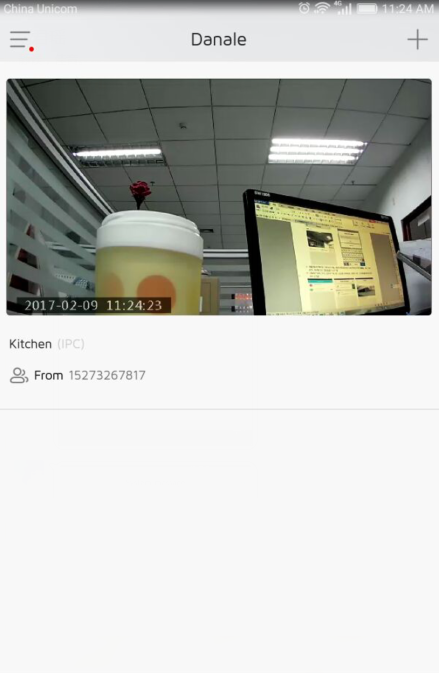
After successfully adding Device, open APP and the added Device will show automatically on the main screen. You can preview online frames by simply tapping it.
Cradle head could be rotated by finger swiping upward, downward, leftward and rightward on the preview screen.

Procedures to set up recording playback:
1) Before starting recording, make sure memory card is installed or the cloud service is activated (we only deal with memory card here)
2) On the main screen, tap up-right corner for settings and then tap Device under “IPC” to enter the IPC configuration
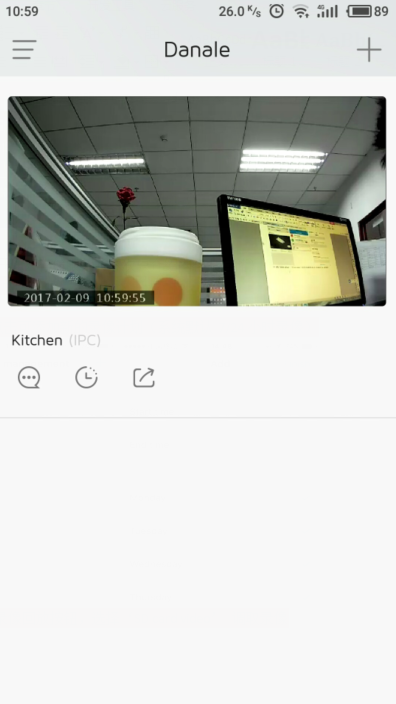
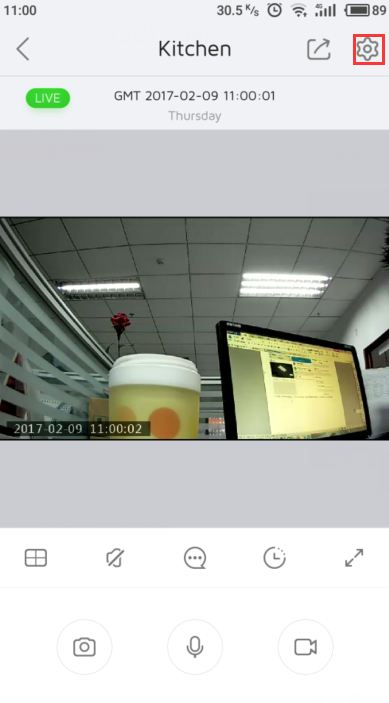
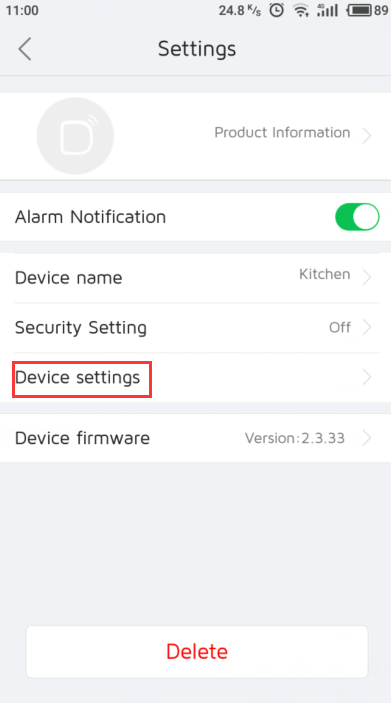
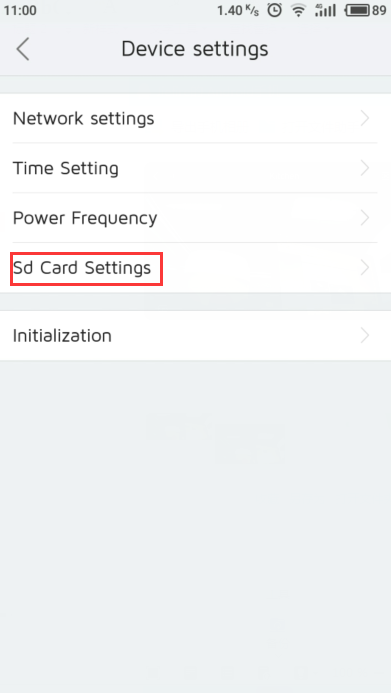
3) Tap “Device Settings”, then choose “SD card settings”, click to add a new recording plan(7/24 hour recording by default)
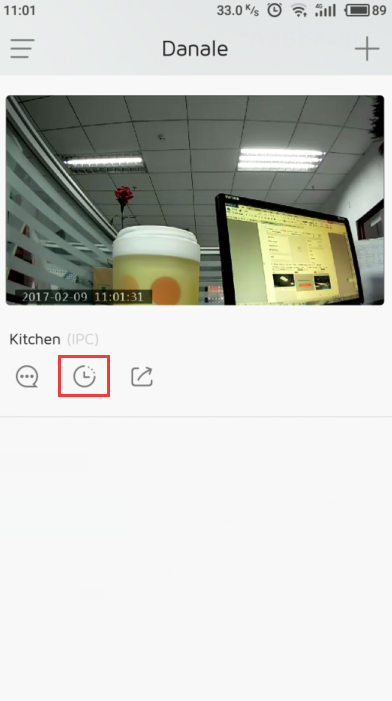
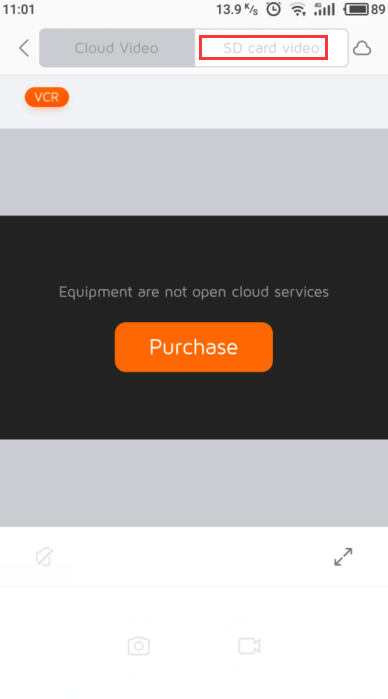
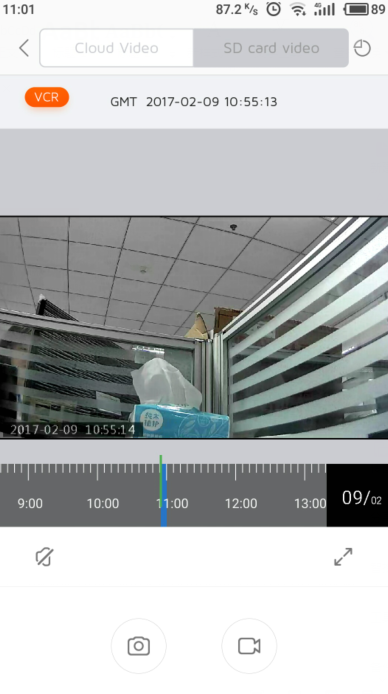
4) Wait for 30 min, go to APP main menu screen then tap playback button, select “Sd Card video” to retrieve recordings
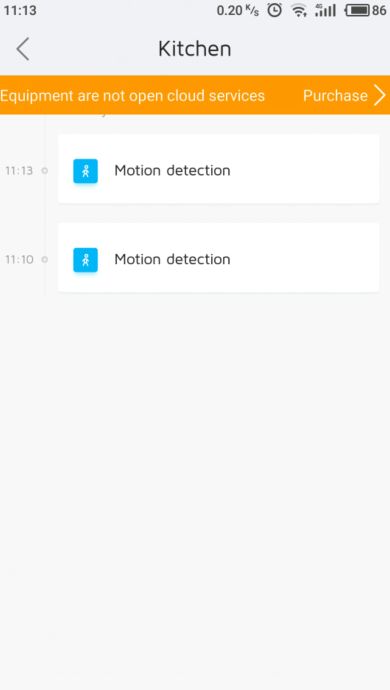
3.2 Motion Detection
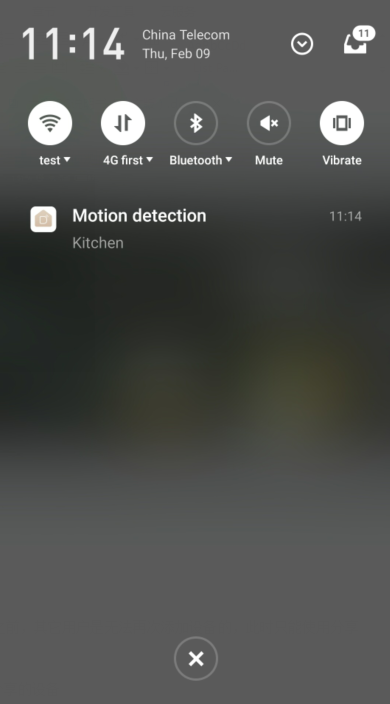
Your Device supports motion detector and it can be turned on if needed.
Setting up procedures:
1) Open Danale phone client and go to main screen
2) Tap upper-right corner for settings
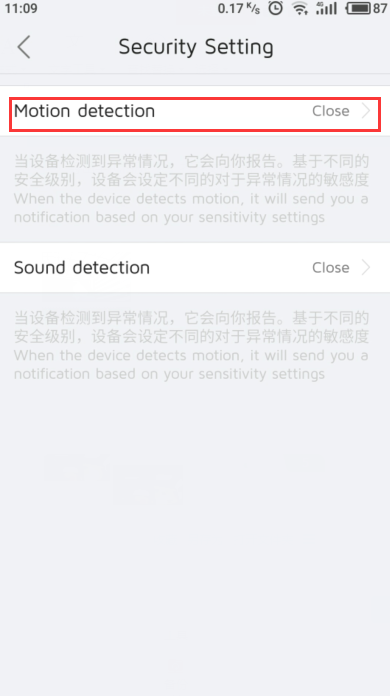
3)Click “Security setting”- “Motion Detection”
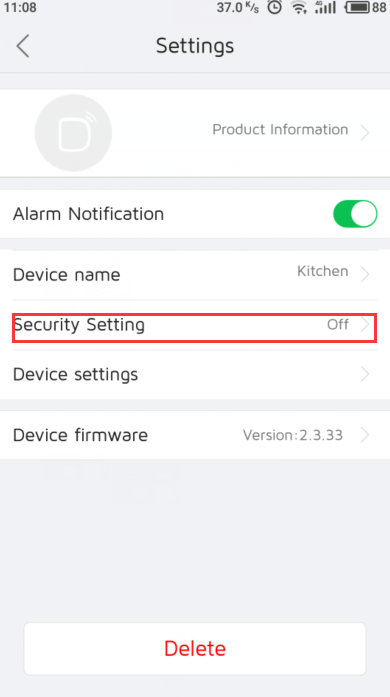
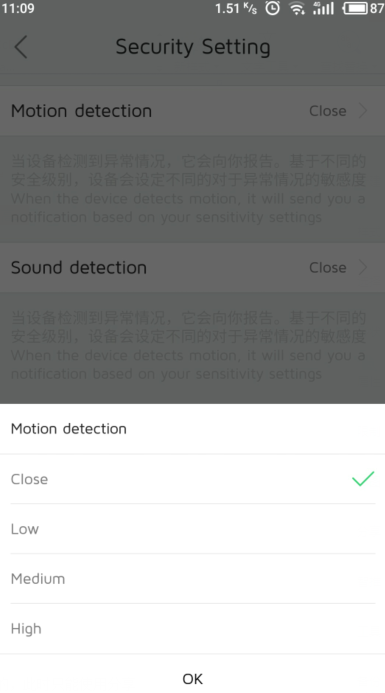
4) Motion detector is turned off by default. Three sensitivity levels (low, middle and high) can be chosen based on needs.
3.3 Device Sharing with Friends
After adding Device and before it’s deleted and reset, other users cannot add Device again. User can use share function to share Device to other users.
Procedures:
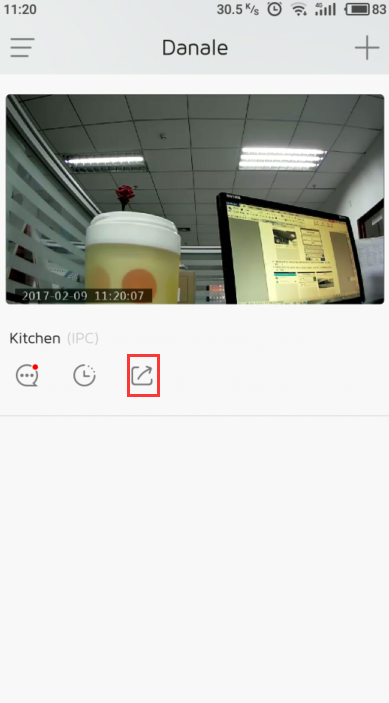
1) User goes to APP main screen and select Device to be shared
2) Tap “Share” on lower-right corner
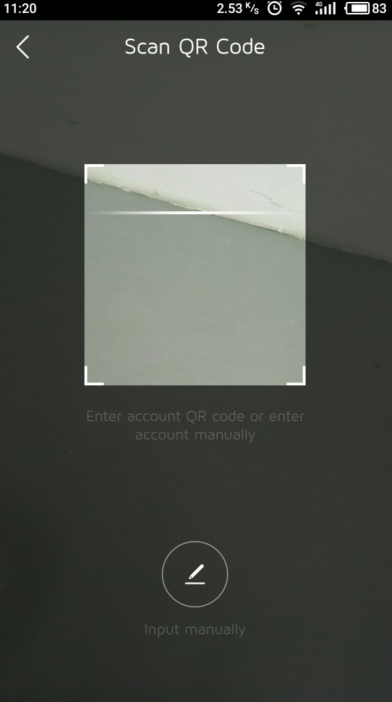
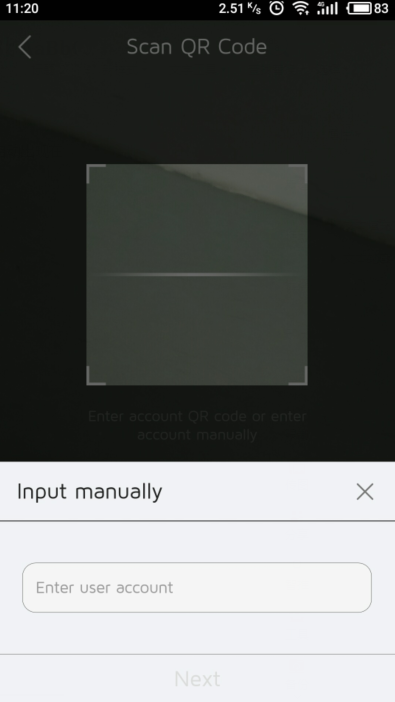
- scan the QR code of the target user’s account or manually enter the required target user’s phone number or email address which is used to register, click ‘Next’. To check the QR code of the user account is as shown below.
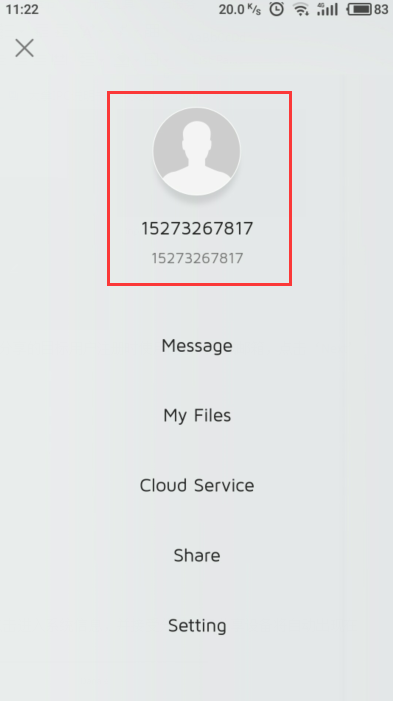
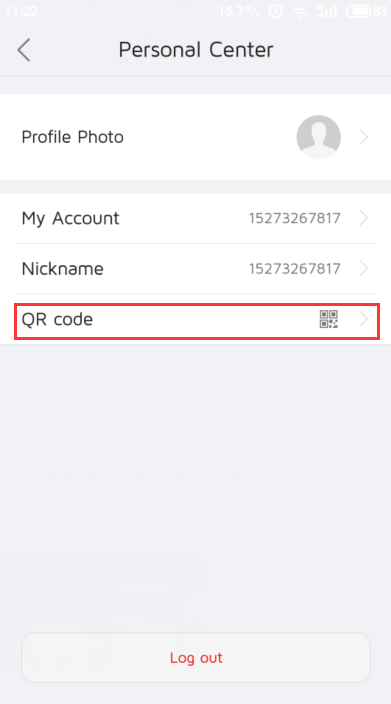
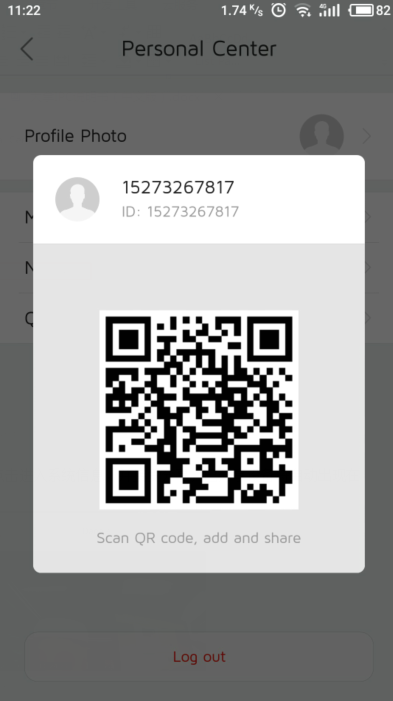
4) Target user signs in on other phone client and check system messages, where the user can accept sharing. The image of the shared Device will appear on APP main screen automatically
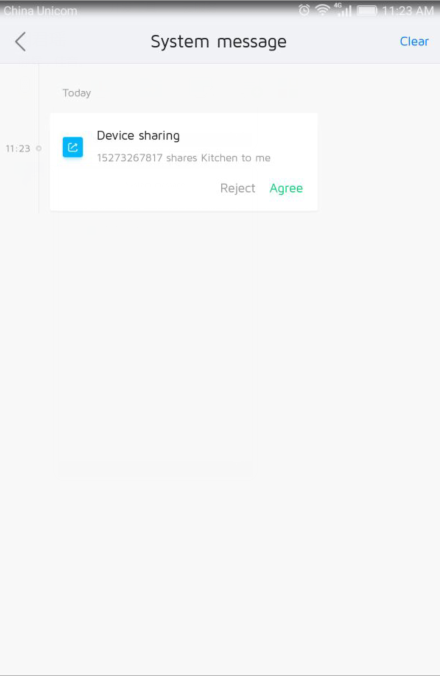
Note: target user to share must be already registered
4.Instruction on Using PC Client
4.1 PC Client Download and Installation
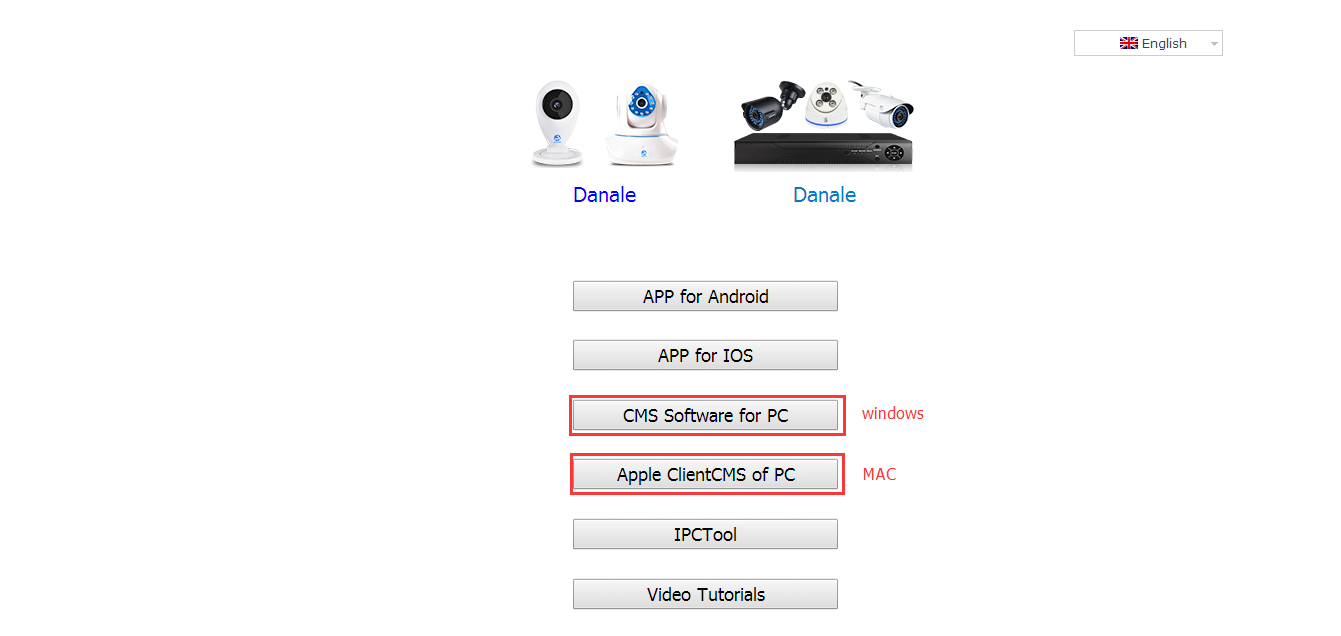
The Device supports remote operation on Windows client. Below are procedures of downloading PC client:
1) Enter in your browser with the link d.jooan.cc
2) Click “Download Now” to download and install the client
5.2 Instructions for Main Operations of the Client
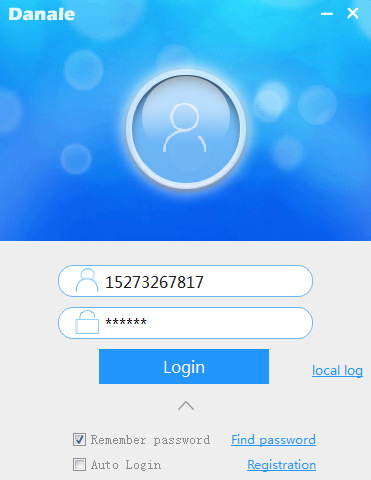 5.2.1 Client Login
If you already registered on phone client, you can directly login using that user account. Or you can also register a new account.
When logging in using existing account, the added Device will automatically show on the client main screen. If it’s a new account, the existing user needs to share the added Device to the new user or adds a new Device in order to use.
5.2.2 Adding New Device from Client
If there is no added Device and the Device is to be firstly used on PC client, you can add Device using PC client after registering a new use account.
Procedures:
1) Log into the PC client and go to the main screen
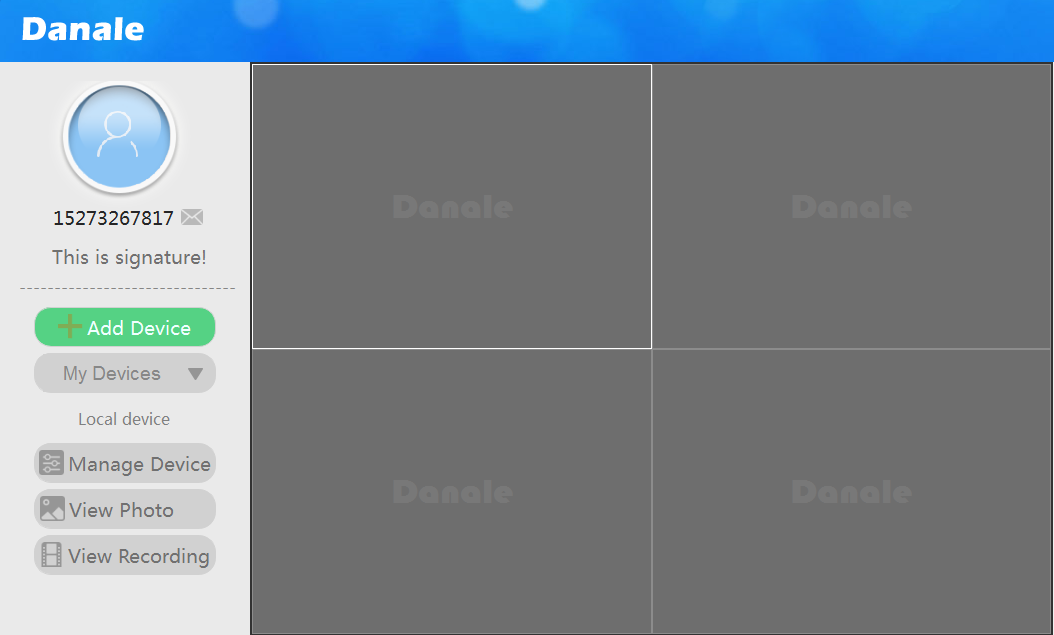
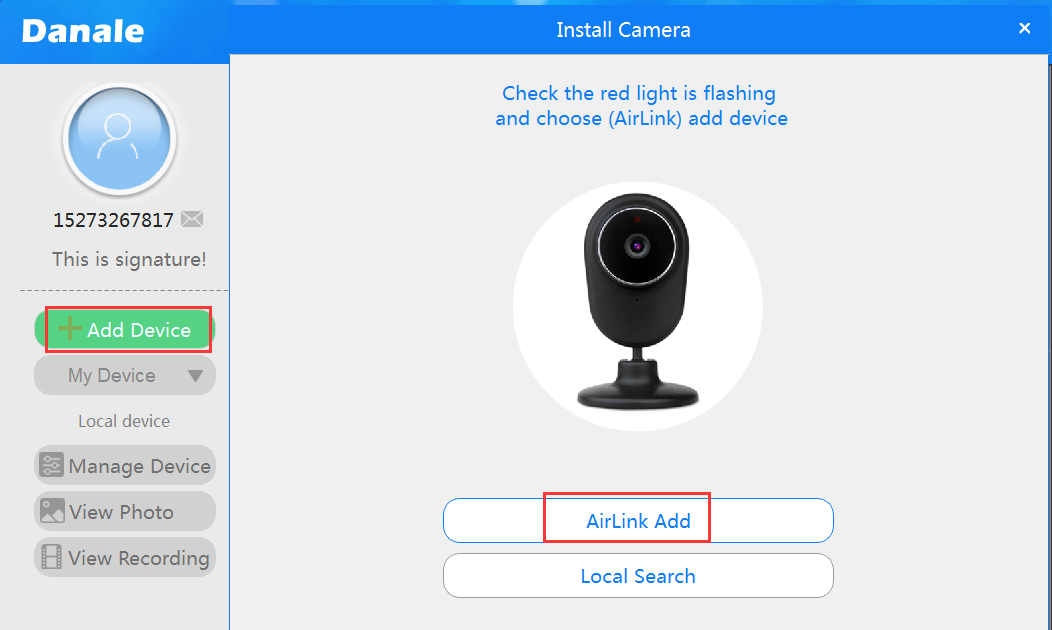
2) Select “Add Device” on left side
3) Select “Airlink Add” to add Device
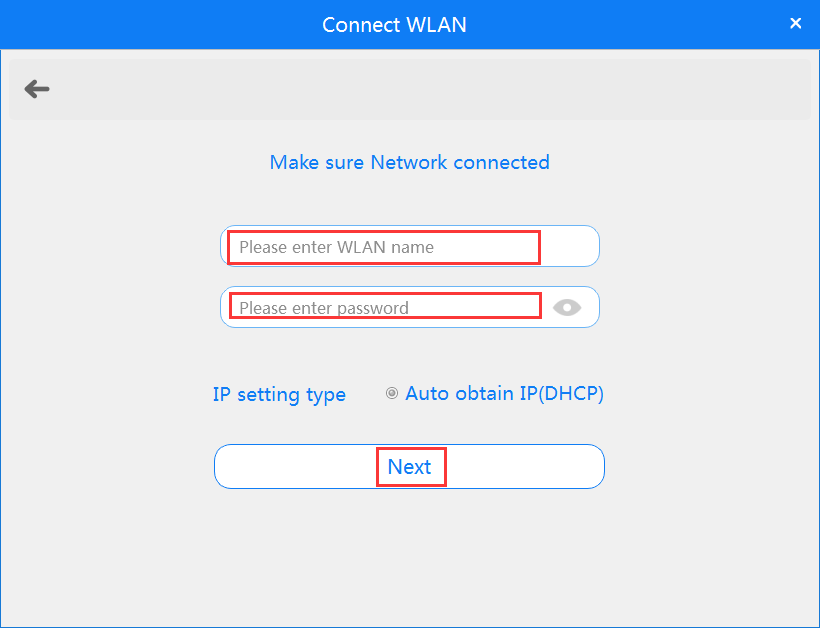
4) Enter WiFi name and password then click “Next”. Client will automatically search for Device within the local network
5) Click the searched Device, set Device name then click “Next” and it’s ready to use
Note: we recommend using phone client to add new Device
5.2.3 Preview and Playback
(1) Preview
After successfully adding a Device, double click the Device on the right to preview picture
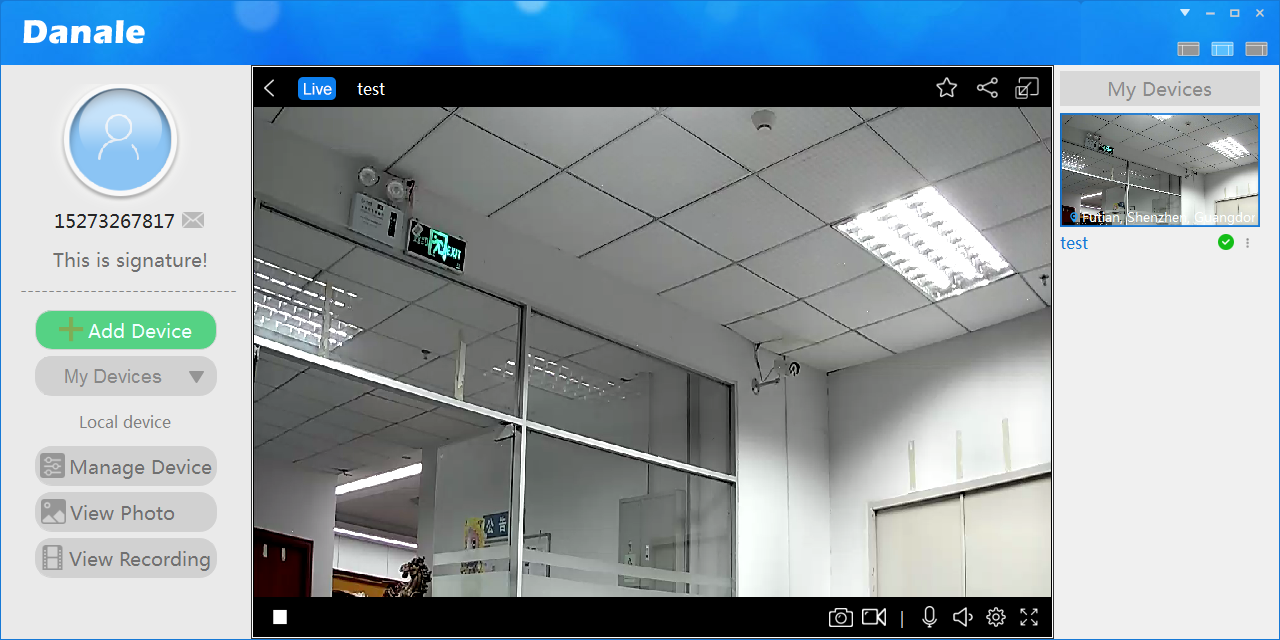
Hover mouse cursor to four edges of the preview picture and arrowheads pointing to different directions will appear. Click the arrowhead to rotate cradle head
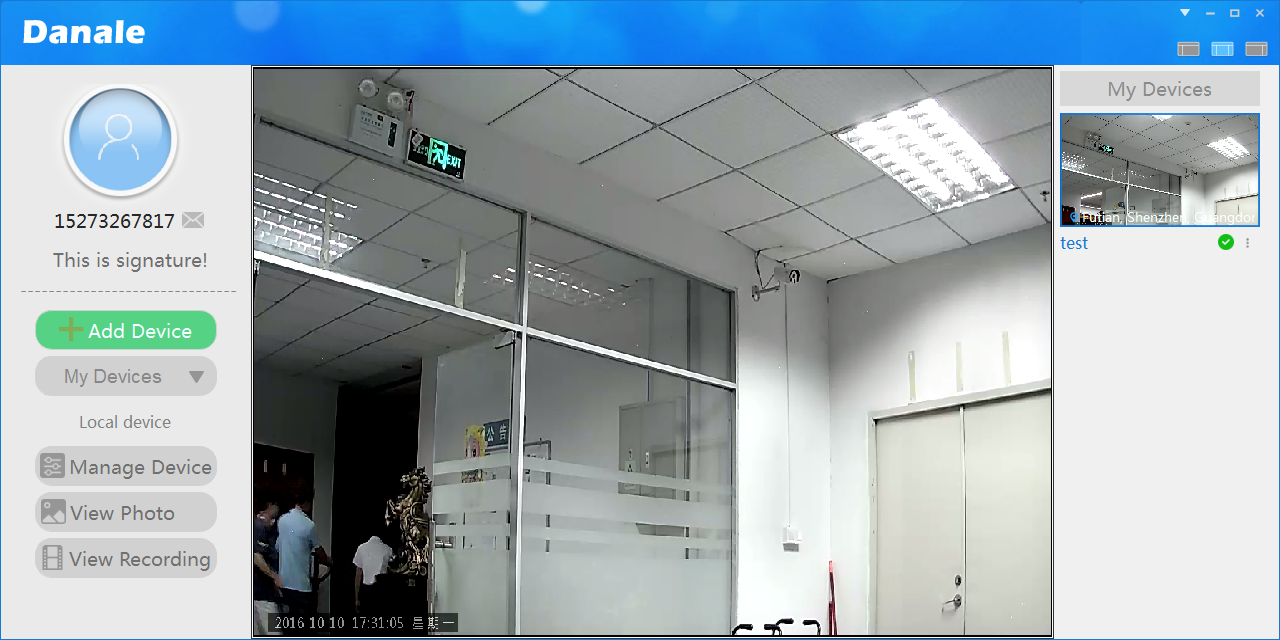
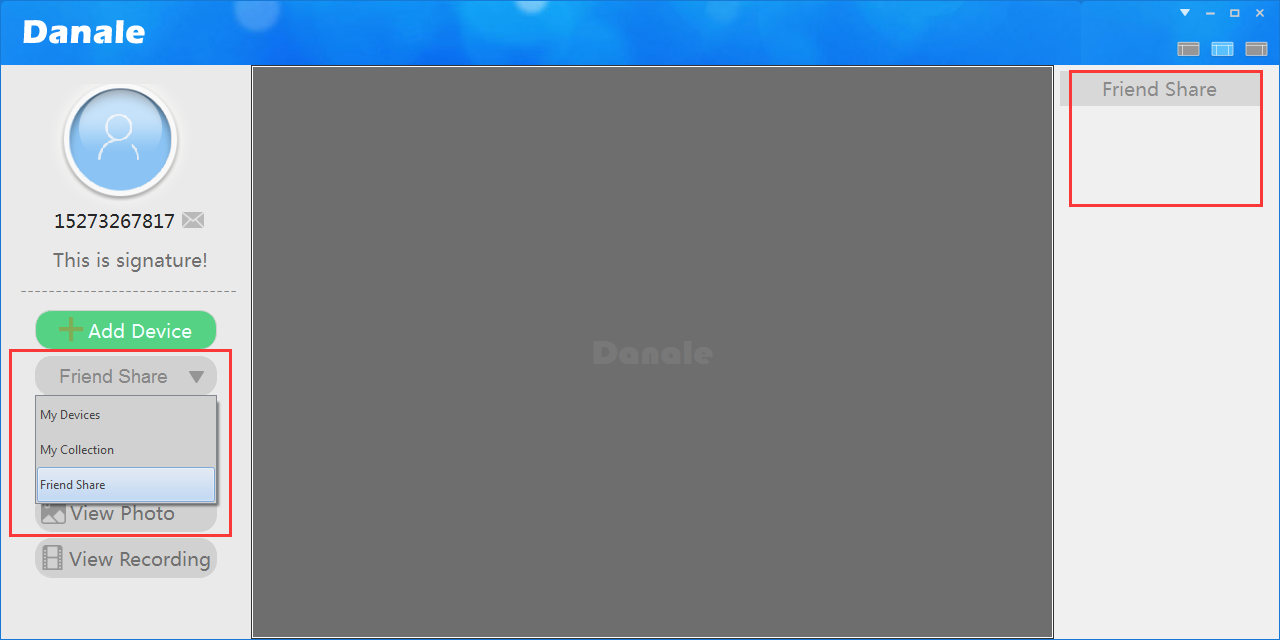
Note: PC client distinguishes Devices added by local user and Devices shared by others. If you’re using a shared Device you need to select “Friend Share” on the left side.
(2) Playback
The Device stores recording using cloud storage or SD card storage and there are two paths for playback: “Cloud Video” and “SD Video”
Procedures for playback:
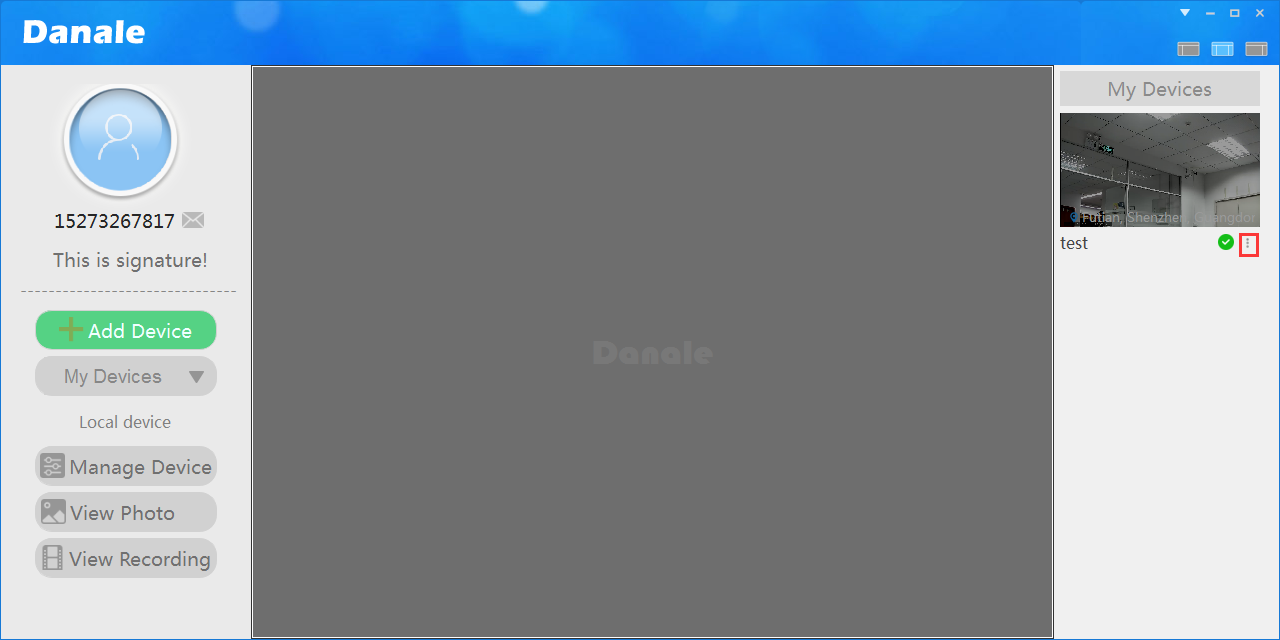
1) After successfully adding Device on client, it will show on the left side of main screen
Click the icon for setting of the Device to playback, choose “Cloud Video” or “SD Video”
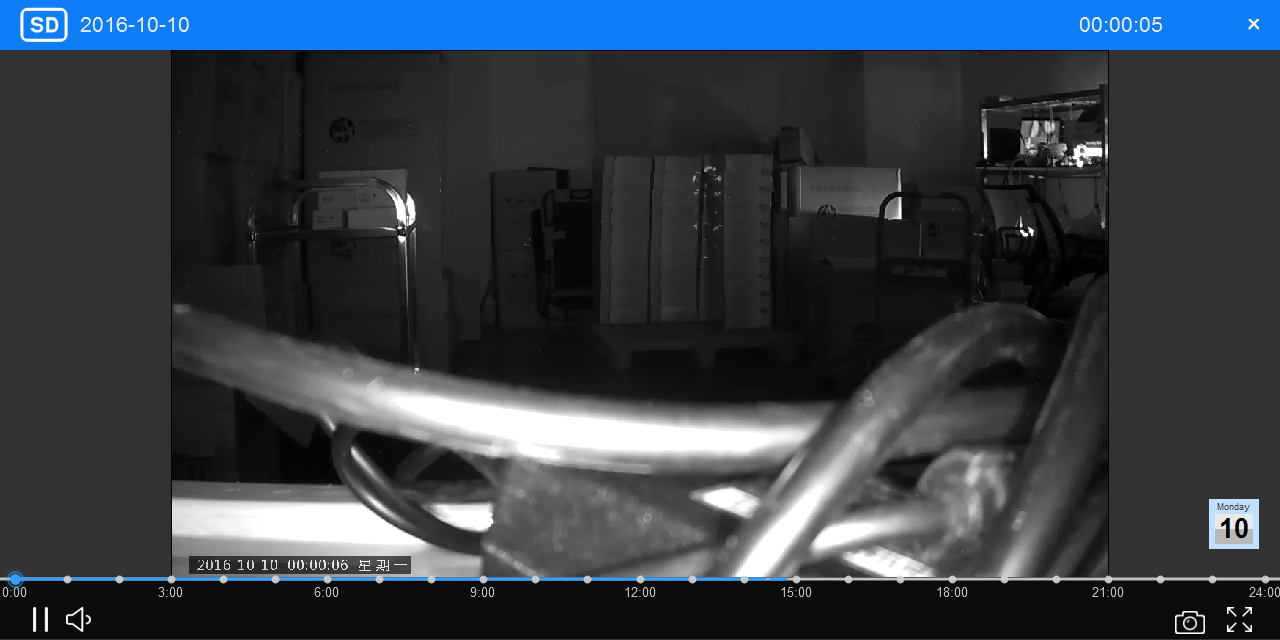
2) The client will open playback window automatically and the user can drag the slider to choose a play time
5.2.4 Device Management
PC client could be used for management of remote Devices.
Procedures:
1) After logging into the client and adding Device, click “Manage Device” on left side to see added Devices
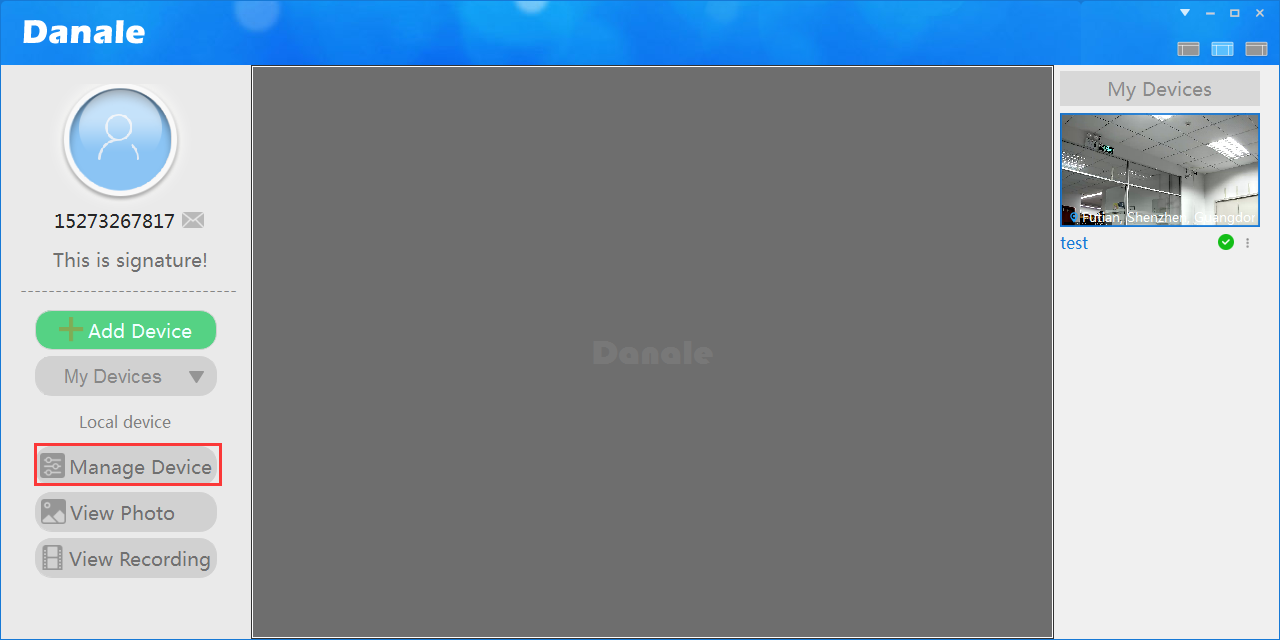
2) Choose the Device to configure and click the setting up icon
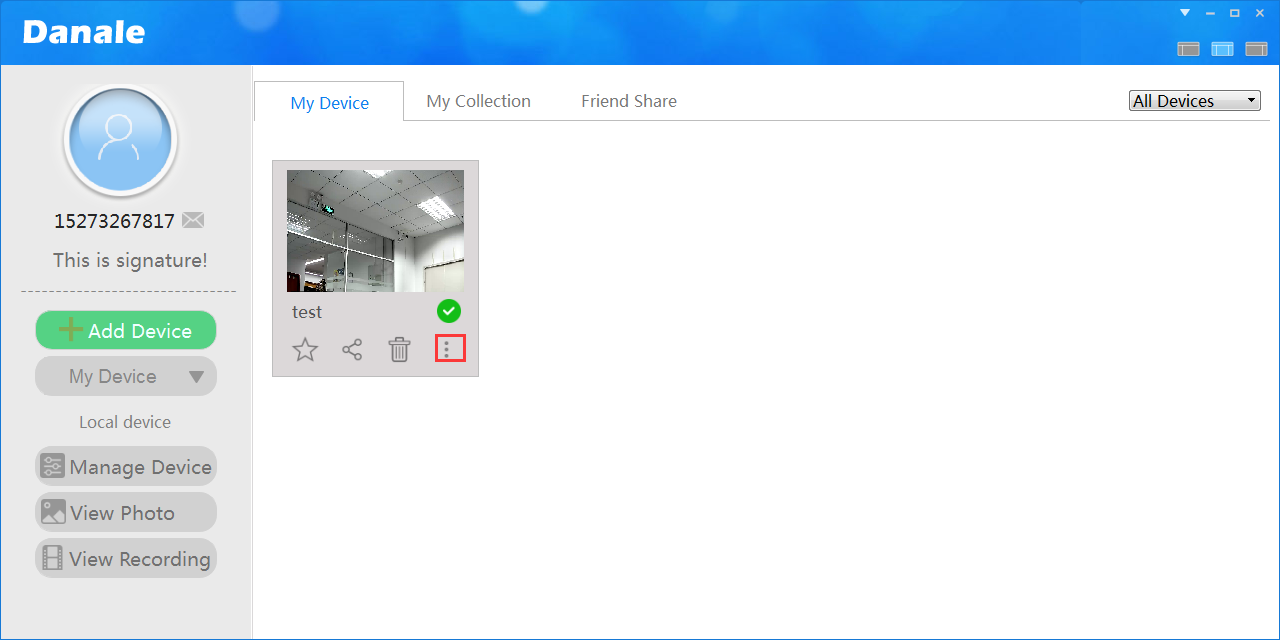
3) Choose “Config Device”. The parameter settings are the same as using phone client
Outdoor PTZ Wireless Camera installation video demonstration
How to reset danale camera?
The Danale camera brand is designed with the goal to make the latest security tech accessible, easy to use, and affordable to consumers. Their products come with some the biggest online and brick-and-mortar retailers around, from Amazon to Lowes as well as Best Buy.
How to Reset Danale Camera
In order to reset the Danale brand camera, go access the small reset button at the back of the cam then press it for 10 seconds. Furthermore, you’ll need to open the Danale app and delete the device from the account.
You can now start fresh and re-add the reset Danale cam to your app once the reset is over. Do this whenever you have to do a reset. This is the rule of thumb when resetting a nonspecific model of Danale cam.
Take note that when setting up the cam for the first time or subscribing to the cloud service, you need 15 minutes for the cloud video to become available. After it becomes available, it starts recording from the time you subscribed.
What If the Cloud Video Doesn’t Work?
A physical reset of your Danale cam will depend on the device you’re using. Usually, there’s a small reset button on the device, but where it’s placed depends on the make and model of the cam. You need to press and hold this button for 10 seconds.
Afterwards, delete the camera from the Danale app so you can add it later. Tap on the live video feed or interface for the device you wish to remove. Tap the settings button found on the upper-right hand corner of the screen. Finally, tap on the delete button the lower part of the screen.
A reset entails erasure of many settings, customizations, and whatnot. This is because a reset entails restoring the device to factory settings or its original state before adding it to the app.
Frequently Asked Questions about Danale Cam
Here are the most frequently asked questions regarding how to use the Danale camera to its optimum capabilities along with its Danale app.
How Do You Log Out of Your Account?
Open the Danale app, tap on the three lines at the top left of the screen, tap on the picture above your username, and then tap on the “Log Out” option. You can sometimes get automatically logged out of the account too by simply closing the app.
What Do You Do If You Can’t Log In to Your Account?
More often than not, this is an issue with your Internet connection. First, check the state of the Home Wi-Fi you’re connected to. Check if your mobile phone or PC, for example, have Internet connections of their own to it.
You can either use your mobile phone Wi-Fi or connect to another network. Using a data plan can allow you connection to your Danale account, but normal data plan charges do apply. If this is the issue then just power cycle your router and see if that gets your Internet back.
Can You See Previous Notifications Before You Get a Cloud Service?
Will you be able to see your previous notifications after getting a cloud subscription if you had notification alerts before adding a cloud service?
Well, no. The notification alerts prior to cloud subscription can only be seen as soon as they appear. You can only record alert notification messages when you have the cloud service available. Also, only after buying the cloud service can the camera record video accompanying such alerts.
How Do You Change the Nickname for Your Camera?
Go to the main dashboard of the app and tap on the live feed video for the camera you wish to get an update for. Tap the gear icon found on the screen’s top-right corner.
Select the “Device Name” from the menu. This will allow you to change the name of the device to whatever name you want.
How Do You Adjust the Motion or Detection Alerts?
First, go to the camera you wish to add motion/sound detection adjustments to and tap on that camera’s live feed. Click on the gear icon or the three dots on the top right of the screen. A menu will appear. Select the “Security Settings” option from there.
Select either “Sound Detection” or “Motion Detection” options then adjust these alerts’ sensitivity. You can also opt out of them by turning them off. The more sensitive the detection the likelier you’ll end up with false alarms though.
How Do You Reset or Recover a Lost Password?
To reset your password, tap on the upper-left hand corner of your main screen to access “General Settings”. Afterwards, tap on the picture above your username and select the “Change Password” option. From there, change your password.
If you’ve merely forgotten your password, tap on “Forgot Password” on the login screen. Enter your phone number or account email. You’ll go to a page requesting for a reset code. You can get that code from your email or via text message.
Just enter the code exactly as you see it and now you can enter a new password to enter your Danale account.
How Do You Share Your Device with Another User?
While on the main screen, go to the top left of the screen and tap on the three bars there. A menu will appear. Select the “Share” option on the menu then select the “Add User” button for good measure. You can enter the username of the person you wish to share videos with or scan a QR code.
Please remember that sharing videos with another user entails him having their own account made by their own copy of the Danale app. This person will only get live-viewing privileges from your cam and won’t be able to view notifications or review your cloud video history.
Always Remember
Danale’s vision is to become the world leader in the smart security market. The company wishes to take care of people and make every home or business a safe place when push comes to shove. They take care of your commercial and residential needs with technology.
They’ve continued to evolve over time in light of the trends of the industry. They’re committed to always deliver security made smarter and more cutting-edge.
