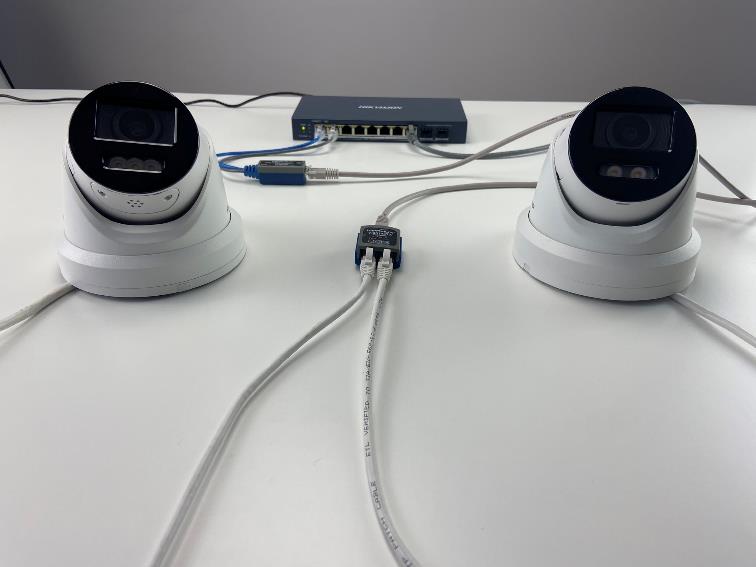
Connecting multiple IP Cameras together v1, As IP cameras become more affordable, it’s becoming common for people to expand their IP CCTV while minimising additional installation costs or efforts. However, the key challenge has always been setting up a new Cat5/6 cable to connect the camera to the rest of the system.
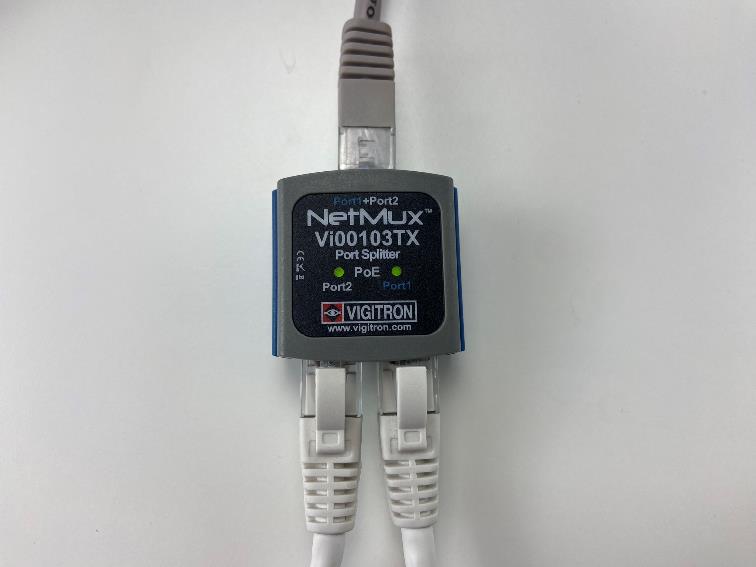
In scenarios where you already have a cable installed between the network and, say, your garage, where installing more cables is difficult, having to run a second cable is not ideal. However, we’ve discovered the Vigitron Netmux Vi00103 POE Multiplexer, a great gadget that combines two POE ports on your network side into one cable, and then splits them again at the camera-end, to solve this problem.
Below is some more important information on the specification and capabilities of the Vi00103, as well as our 6-step instructions for using it correctly.
Connecting multiple IP Cameras together v1
Instructions:
Step 1:
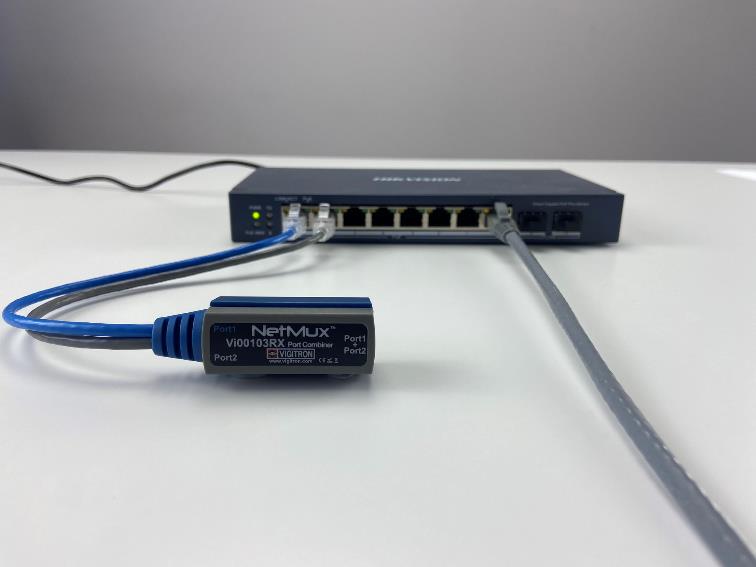
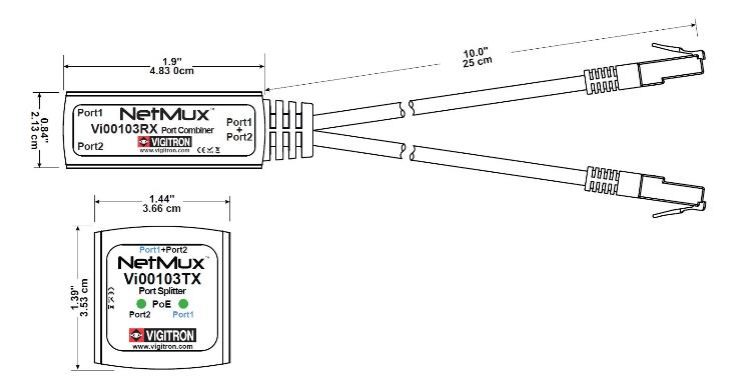
Connect the two RJ45 cables from the Vi00103RX combiner, labelled “Port 1” and “Port 2”, to two available POE ports on your POE switch or NVR.
NOTE – The cameras do not need to be activated with a password. If you are connecting them directly to an NVR, then the Plug & Play feature will still work and activate the cameras; If you are connecting them to a separate POE switch, you will be able to access them and activate them on your network later. Plug & Play setups will also work when cameras have already been activated, as long that these are set with the same password as the NVR and have DHCP enabled.
Step 2:
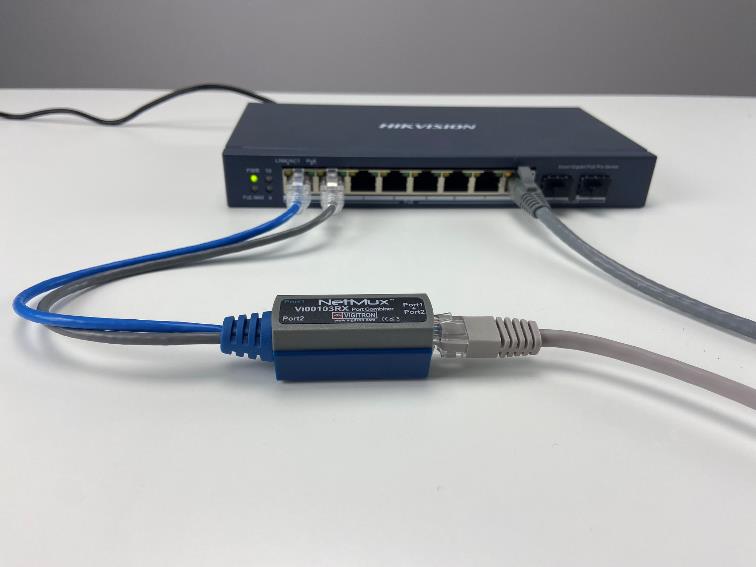
Connect your single Cat5/6 cable to the port on the Vi00103RX combiner, which is labelled as “Port 1 + Port 2”.
Step 3:
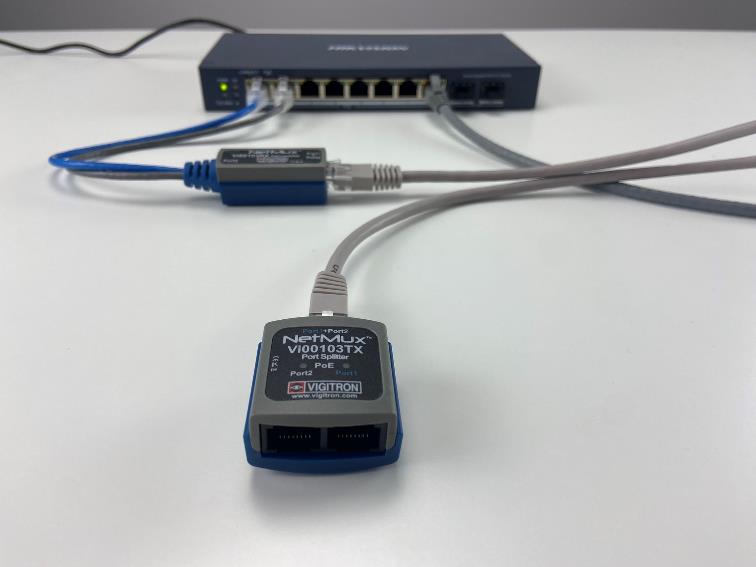
Now, plug in the other end of the long single cable to the Vi00103TX splitter’s “Port 1 + Port 2” RJ45 port.
NOTE – this cable cannot be longer than 100m / 320 feet
Step 4:
Connect your IEEE802.3af/at IP cameras or POE devices to each of the ports, labelled “Port 1” and “Port 2”, using another Cat5/6 cable for each.
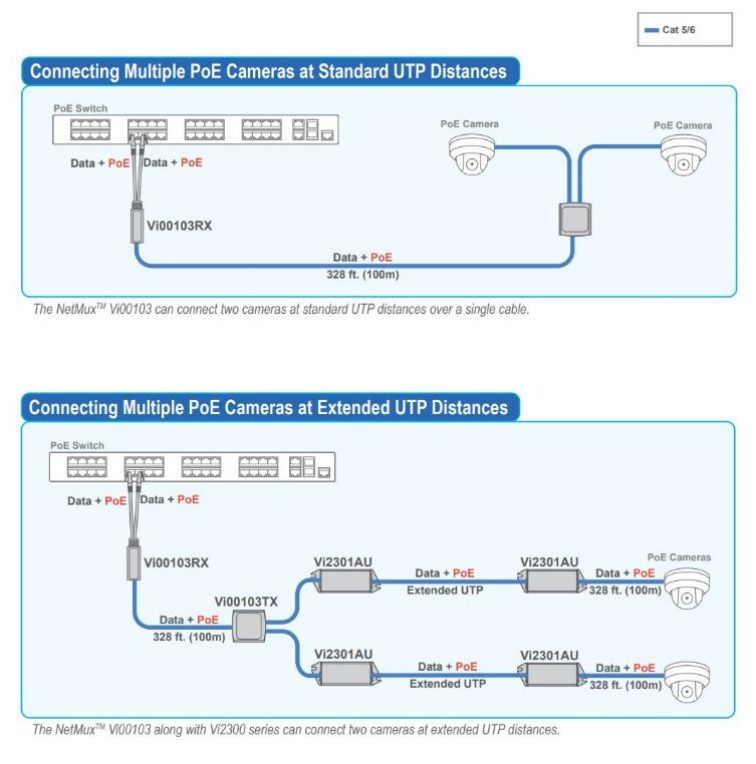
NOTE – the length of these cables, and the long single cable between the Vi00103RX and Vi00103TX cannot exceed 100m / 320 feet in total, as this is the maximum standard range of POE.
Step 5:
Green lights should appear on the Vi00103TX to confirm that each of the ports is delivering POE to your devices. If they do not, check the power supply to your POE source and all of your Cat5/6 cables are secure.
Step 6:
If you are connecting the cameras directly to an NVR as “Plug & Play”, then they will connect and appear automatically after a minute or two. Alternatively, if you are connecting them to a separate POE switch, then they should be discoverable on the network and allow you to adjust any network settings so you can add them to your CCTV system.
Key benefits:
Limitations & key points to consider:
Network topology diagram & dimensions:
Can I connect more than one camera via a POE switch to a single POE port on my Hikvision NVR?
In some scenarios, it can be useful to have several cameras connected to a POE switch but to keep that switch directly connected to your NVR rather than the local network.
If you are able to connect each camera to its own POE port on your NVR, then this is generally advisable, as using a Plug & Play setup is much simpler and avoids the need for extra hardware or power supplies.
However, if your NVR is closer to your POE switch than it is an available access point to your LAN, then it can make connecting the cameras simpler whilst avoiding the need to have an ethernet cable running from each camera back to the NVR.
One other benefit of keeping the cameras connected directly to your NVR this way, rather than connecting them across your LAN, is that the connection does not rely on your router being operational. Provided the NVR and POE switch are working, the cameras will remain connected and recording regardless of any problems that might occur with your local network.
These seven steps below explain how to connect multiple cameras on a POE switch to a single port on your NVR.
2.Activate any camera that shows as “inactive” with a password.
NB – keeping the same password for each will simplify the entire process.
5.Disable the NVR’s POE on the channels that the switch is connected to and those that you have reserved for the cameras. To do this, open the NVR’s web GUI and navigate to Configuration > System > Channel Management > POE Channel. From there, untick the channels you want to disable and click Save.
NB – for example, if your POE switch is connected to port 8 of the NVR, and you would like to add your cameras to ports 1, 2 and 3, then you will need to disable the POE on ports 1, 2, 3 and 8.
Important things to note:
These should be 192.168.254.2 for channel D1; 192.168.254.3 for channel D2; 192.168.254.4 for channel D3; and so on… The final number of the IP should be one higher than the channel.
The gateway address should also be set as 192.168.254.1.
You should then be able to add the cameras either via the Quick Add button or by the Manual adding method when clicking the edit button for that channel.
How do I use a Hikvision NVR’s “Virtual Host” feature?
One of the most successful selling points of a Hikvision NVR to many small-setup customers is the “Plug and Play” functionality that simplifies the setup process of their surveillance system. However, plugging a camera directly into a port on the NVR, unfortunately, does not allow you to access the camera via its own internal LAN IP using a browser due to it being on the NVRs internal network, and this can significantly reduce the number of configuration options you have access to.
The NVR does allow you to configure many options for each connected camera, but some essential features are only accessible via connecting to the camera itself (such as audio codec options). This was of course a big problem previously.
With the advent of newer firmware and models of NVR, Hikvision has introduced a feature called Virtual Host. Activating this feature turns your NVR into a “host” for the cameras allowing you to connect to them via a browser. Essentially, the NVR forwards all traffic received from your browser to the appropriate camera you’re trying to connect to, eliminating the biggest problem of plug and play functionality.
Step 1:
First of all, access your NVR via a web browser. If you do not know the LAN IP of your NVR, download Hikvision’s tool SADP tool, which scans your network for any Hikvision devices that are connected and allow you to see and change their network settings, including the IP address.
Step 2:
Once you’ve logged in, navigate to:
Configuration → System → Camera Management
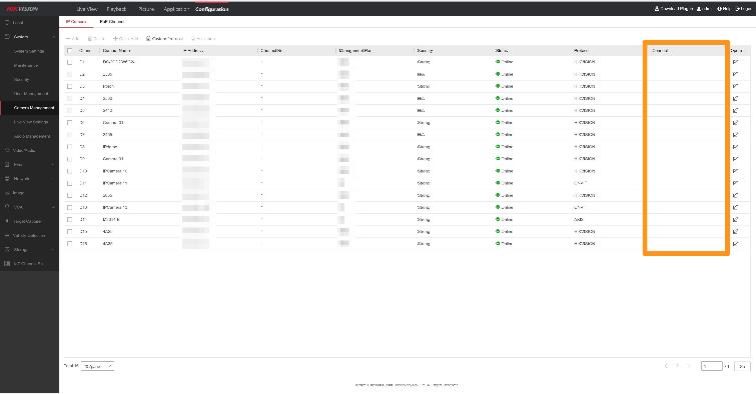
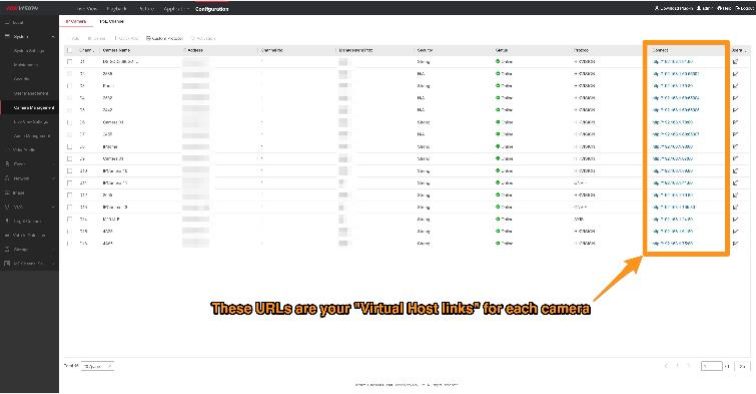
This screen displays all the connected cameras on your NVR. Notice that the final column labelled “Connect” is currently empty. We’ll be coming back here in a moment.
Step 3:
Now, navigate to:
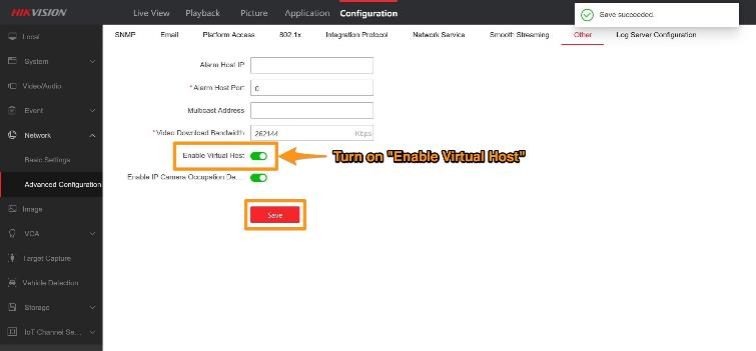
Network → Advanced Settings → Other
Turn on the Enable Virtual Host option.
Note – Your NVR will reboot when you click “Save”.
Step 4:
Now, navigate back to the Camera Management window from earlier. You’ll notice that the previously empty connect tab now features links for each camera currently connected to your NVR.
Step 5:
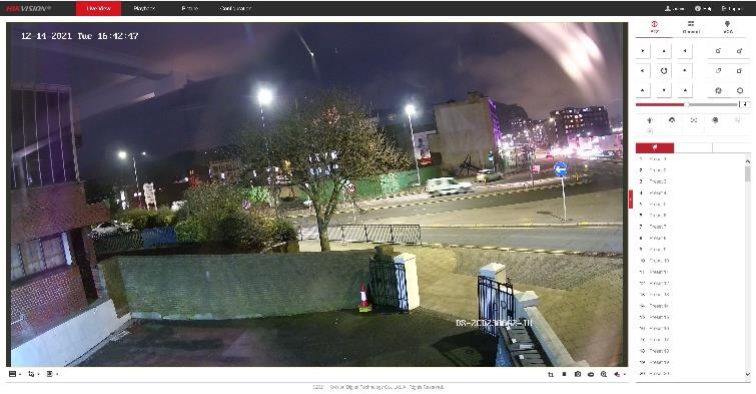
Click on any of these links to access the respective camera via your web browser:
That’s it, you’re done!
This should be useful when you want to access options on your camera that your NVR doesn’t feature. If you have any further questions feel free to ask, we’re happy to help.
