Bullet and Turret Camera Installation Guide, There are various types of CCTV cameras nowadays, turret, dome, bullet, and many more. But out of all these cameras, there are two that stand out. Turret and dome, these two cameras look very similar in appearance, yet what they offer can be very different at the same time. Knowing the difference will help you out when it comes to buying a camera.
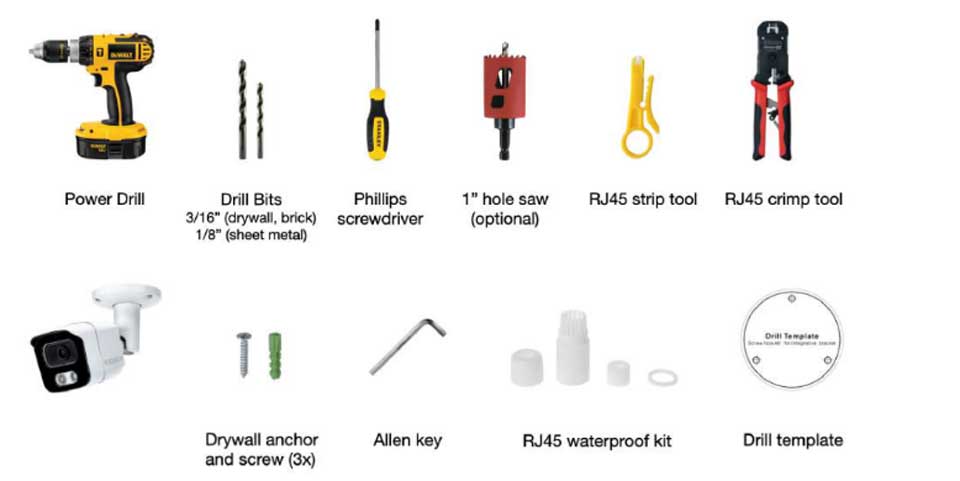
What is required:


What is included:
Optional Additional Hardware:
Cinder block and brick wall anchors
Step 1
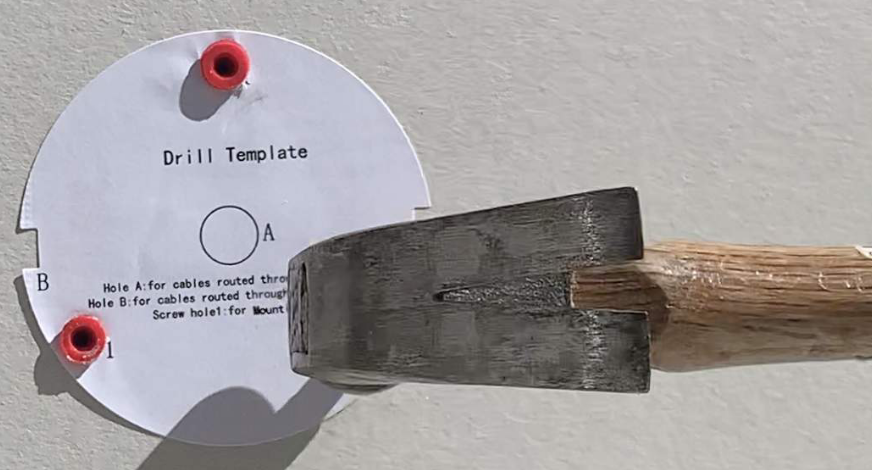
Apply the drill template sticker where you will mount the camera.
If the cable will be mounted externally, make sure to note the direction of the cable exit.

Step 2
If mounting to drywall:
Drill three holes according to the drill template using a 3/16” drill bit.

If mounting to cinder block / brick:
Drill three holes according to the drill template using a 3/16” masonry drill bit.

If mounting to sheet metal:
Drill three holes according to the drill template using a 1/8″ drill bit.

Step 3 (optional, if routing cable internally)
If routing the ethernet cable internally, use a 1” hole saw to create the routing hole according to
the drill template.

Step 4
If mounting to drywall:
Apply the drywall wall anchors and gently hammer them in.
If mounting to cinder block / brick:
Apply the cinder block / brick wall anchors and gently hammer them in.

Step 5
If mounting to drywall, cinder block or brick:
Start by screwing in the top screw. Tighten by hand to avoid stripping the wall anchors.

If mounting to sheet metal:
Directly screw into the sheet metal. No wall anchors are required.
Start by screwing in the top screw. Tighten by hand to avoid stripping the hole.

Step 6
If mounting the cable externally:
Make sure the cable exit is sitting within the cable exit groove before fully tightening the
mounting screws.

If mounting the cable internally:
Route the cables into the pass through hole.

Step 7
For the Turret camera:
Snap the camera cover onto the mounting plate.
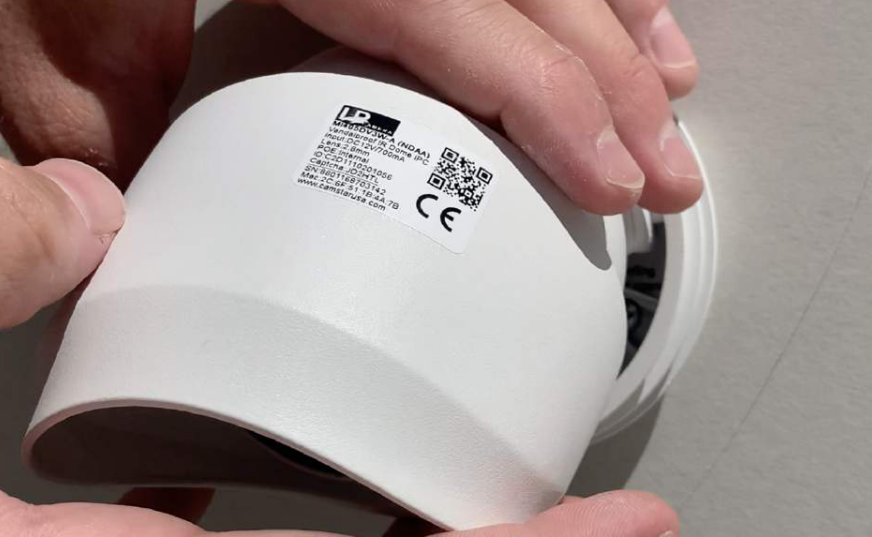
Use the Spot AI dashboard to view the camera field of view while adjusting the camera angle as
desired.

Step 8
Once the camera angle is set, use an allen key to tighten the set screw.

Step 9
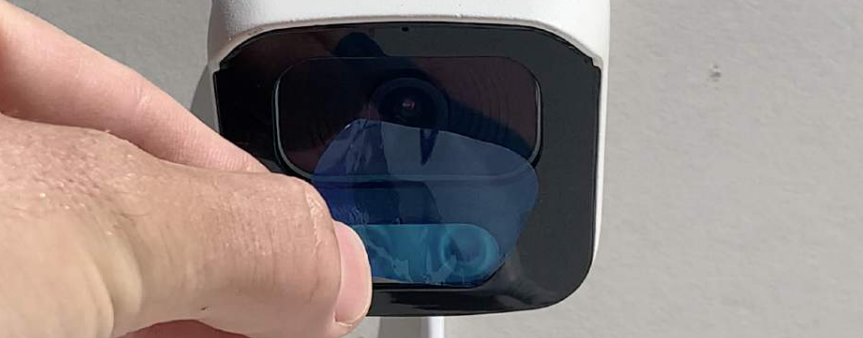
Remove the camera protective lens covers from the camera lens.
Note:
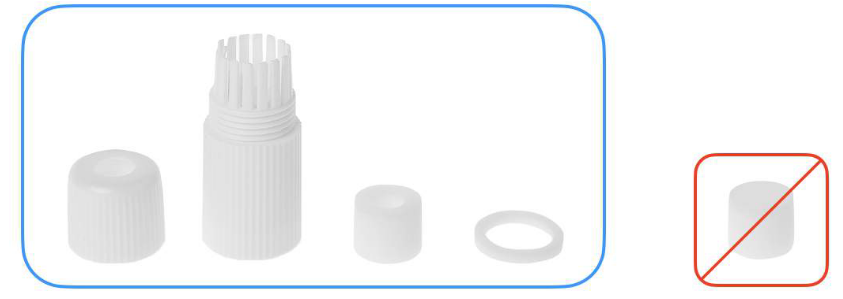
Examine the RJ45 waterproof kit provided. One gasket is to cap the ethernet end closed. It is
not needed. Discard this part. You will only need what is circled in blue.
Bullet and Turret Camera Installation Guide
Read More : How to Use Hunting Trail Cameras
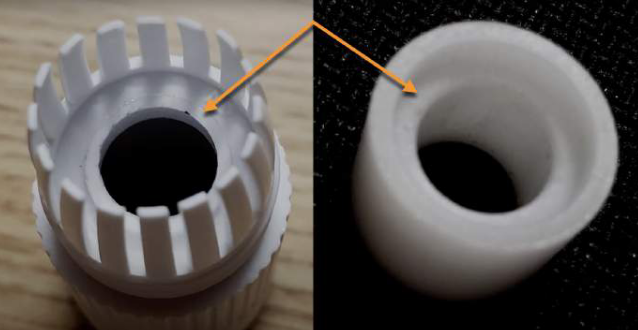
The order of assembly is as shown below:

There is a ridge on the inside of the main housing and the grommet. These should mate when
assembled.
Step 10
Assemble the grommet into the main housing.
Assemble the (1) screw cap then (2) the main housing with grommet insert onto the ethernet
cable.

Step 11
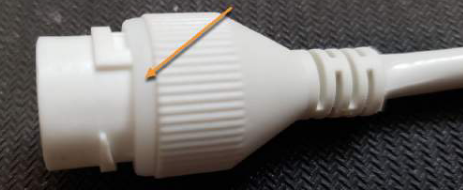
Assemble the gasket to the RJ45 receptacle pigtail from the camera side. Ensure that it is
properly seated for an appropriate seal.
Step 12
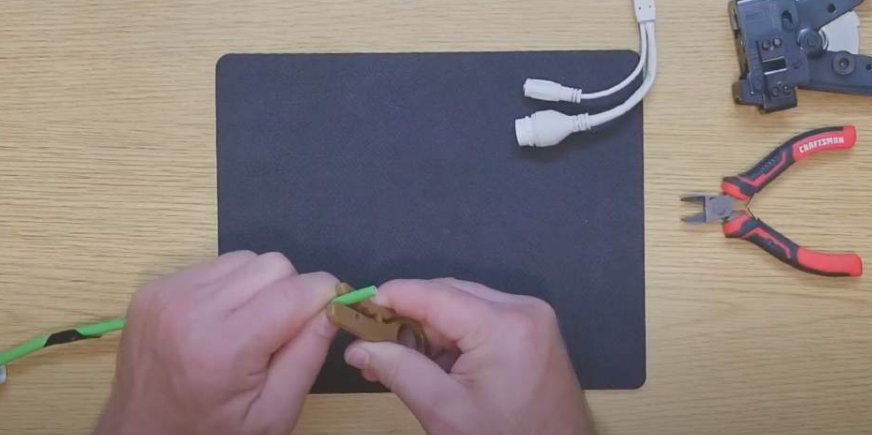
Using an insulation removal tool, strip the cable jacket of your ethernet cable.
Step 13
Orient your cable wires to be inserted into the RJ45 connector

Step 14
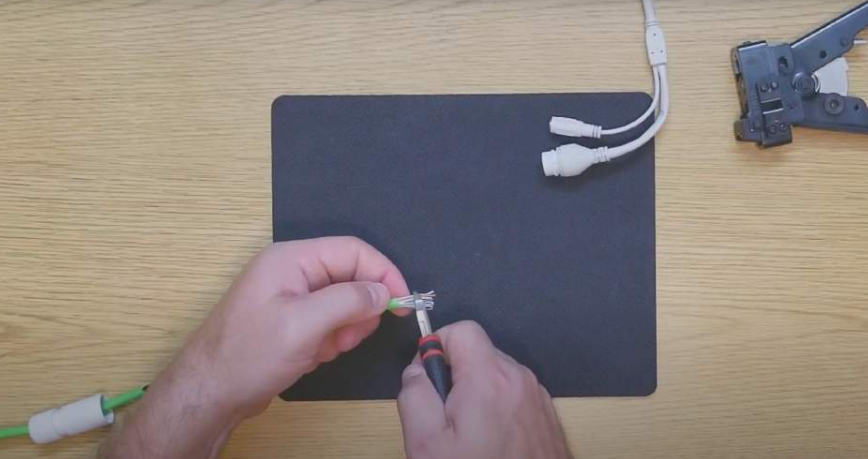
Prepare the wires for the RJ45 connection by trimming the wires to 1/2″ in length.
Step 15
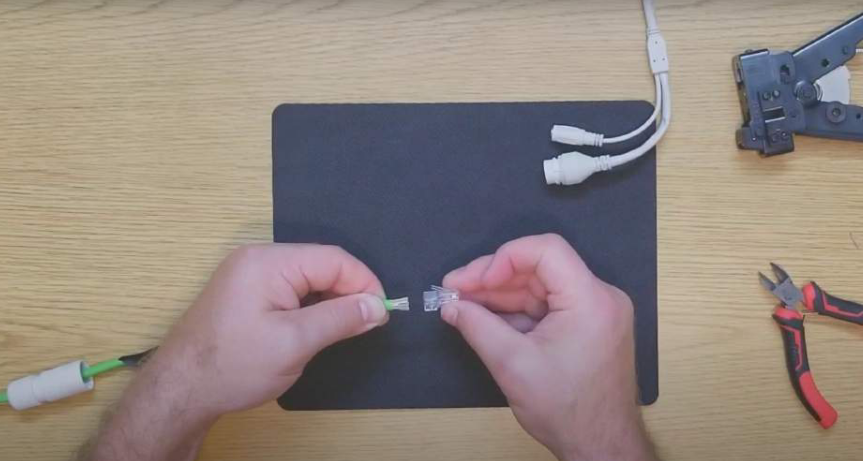
Check the wire order once more, then with clip side down, push the wires into the RJ45
connector. Ensure all wires slide smoothly into the appropriate wire grooves.
Double check all wires are seated in the correct position.
Step 16
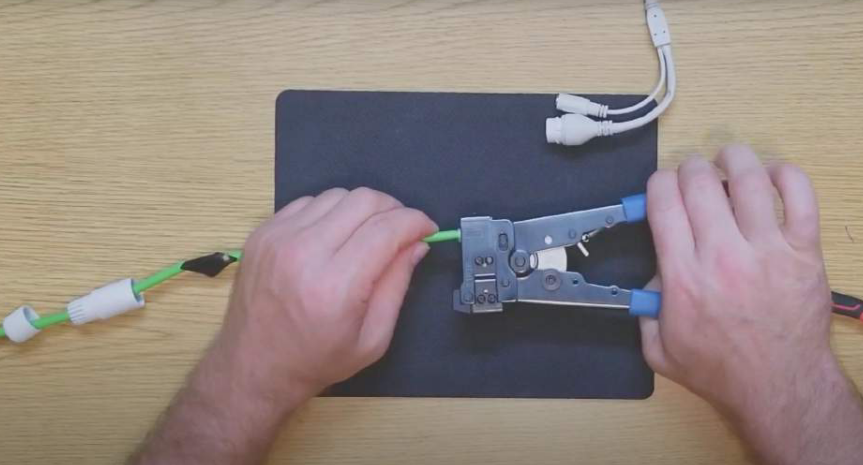
Then place the RJ45 connector into the crimping tool and crimp the wire.
Many RJ45 crimping tools are all-in-one, stripping and crimping at the same time.
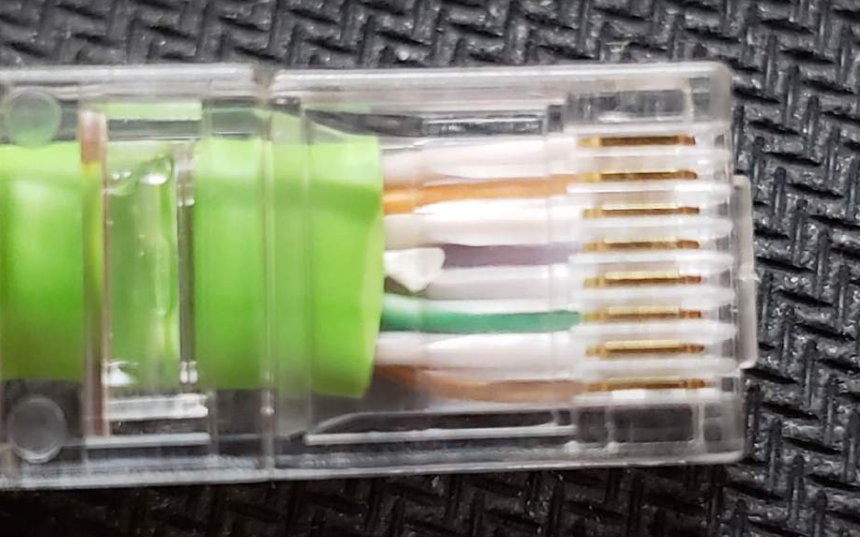
The completed connection should look like the image below. If you have an ethernet cable
tester, this is a good time to test the connections for continuity prior to use.
Step 17
Plug in the ethernet connection into the camera RJ45 receptacle pigtail.
Slide the waterproof housing over the connection and twist the bayonet lock.
Lastly, tighten the end cap to create a watertight seal of the grommet on the wire jacket.

We hope this article was useful to you, please leave us a comment or feedback as it will help us improve our customer support center.
How to do RTSP Directly from Ubiquiti IP Cameras in order to be use on Spot Dashboard
This guide will show you how simple and effective it is to add a camera to your SpotAI appliance using auto-discovery and quick activation. If you have cameras connected to an NVR that you need to add, check out this article.
In order to use Ubiquiti IP Cameras, you will first need to make sure you are running the latest firmware on the camera and then enable the “Standalone mode” on this unit.
1. Connect the camera to the network as outlined in the Quick Start Guide (QSG) that came with your camera. QSG’s current versions are also downloadable in the Downloads page, within each product’s Documentation section.
2. Update the camera’s firmware to the newest available (also found on the Downloads page).
3. Log in to the camera.
a. On a new install, the wizard will appear. Select Standalone mode.
b. If this camera is already in use, go to the Configure tab and ensure it is set to Standalone mode and click Save.
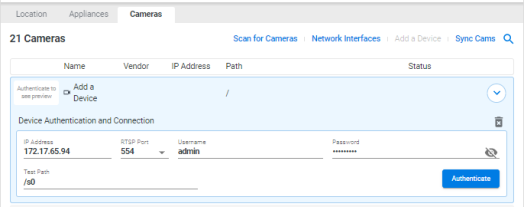
> Once you have saved the Standalone configuration settings simply head back to the Spot Dashboard and type ” /s0 ” where the Path field is located and click authenticate.
We hope this article was useful to you, please leave us a comment or feedback as it will help us improve our customer support center.
Adding an Existing 3rd Party NVR to the Spot Dashboard
This article will guide you through how to pull video streams from an existing 3rd party NVR. This is for the scenario where cameras are connected to the 3rd party NVR rather than to the network directly. If you have cameras connected to the network directly that you need to add, check out this article.
Spot AI Dashboard
Step 1: Click on Configure at the top of the page.
Step 2: Go to Locations, find the location of interest and click Edit.
Step 3: Go to Cameras if you’re not already there and the Spot AI dashboard will automatically search for your cameras and NVRs.
Step 4: Spot Genius will attempt to auto-authenticate and find how many streams the NVR has, but if that fails, please enter the following:
Step 5: Once you have entered the information. Please click Authenticate. If all inputs were valid, you will see a still image populate from the cameras with a few streaming options.
For the best viewing experience, choose the streaming option which has the specs closest to:
For Appliances starting with sn5a and up, and enterprise Appliances (snae, snea, snae2):
For Appliances starting with sn4e and up:
Step 6: Click Activate on each stream.
If you are stuck at any step, please reach out to Spot AI Support for assistance.
We hope this article was useful to you, please leave us a comment or feedback as it will help us improve our customer support center.
Adding a New Camera to the Spot Dashboard
This article will guide you through how to add a camera to your Spot AI Dashboard using auto-discovery and auto-activation. These steps will require a Spot IVR having already been added to the current location. If that still needs to be done please follow this article. If you have cameras connected to a 3rd party NVR that you need to add, check out this article.
Step 1: Click on the Configure tab located at the top of the page.
Step 2: Go to Locations in the left-side menu, find the location of interest, and click Edit.
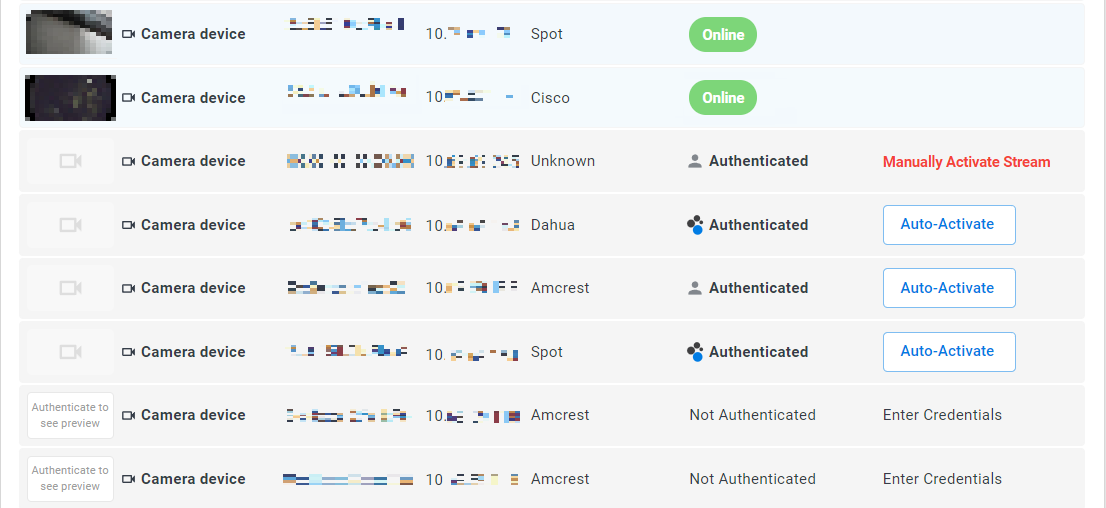
Step 3: Go to Cameras and the Spot AI dashboard will automatically search for your cameras and you’ll see a listing of all available cameras to choose from.
Step 4: Spot Genius will attempt to automatically authenticate all discovered cameras.
For the best viewing experience, choose the streaming option which has a resolution closest to:
For Appliances starting with sn5a and up, and enterprise Appliances (snae, snea, snae2):
For Appliances starting with sn4e and up:
This is the optimal resolution for low latency and seamless web viewing.
Troubleshooting cameras not showing in the list:
If you do not find your camera in the list of devices, here are some troubleshooting steps:
Troubleshooting cameras not authenticating or activating:
Changing the password of an already activated camera:
If you need to change the password of a camera, please see the Camera Password Guide. Once changed, access the camera on the Spot Dashboard (either through Maintain or Configure > Edit), click on the Connection and update the password entry there, then click Authenticate. If it’s correct you will see “Valid Connection” show up in green text.
Here is video showing how to add cameras on dashboard
https://youtu.be/-iUb3MhBamA
We hope this article was useful to you, please leave us a comment or feedback as it will help us improve our customer support center.
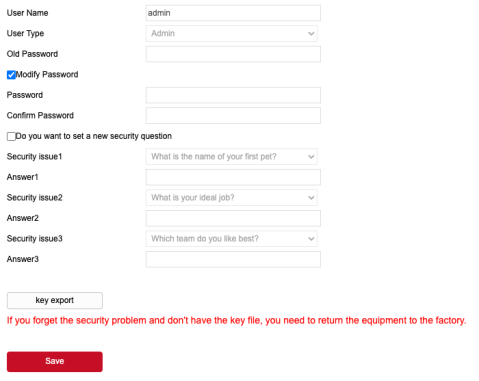
Camera Password Guide
As part of the initial camera installation process, Spot strongly recommends changing the camera password from the default credentials to something more secure. The supported characters, default credentials, and how to change the password for the Spot cameras are included below.
Default Credentials:
Username: admin
Password: spot2330 OR admin
For cameras with MAC addresses beginning with 0c:cc:47:
Passwords can be up to 32 characters in length, and can include upper and lowercase letters, numbers, and the following special symbols: ~!@#$%^&*-_+=|;:,./?`
Changing the Password:
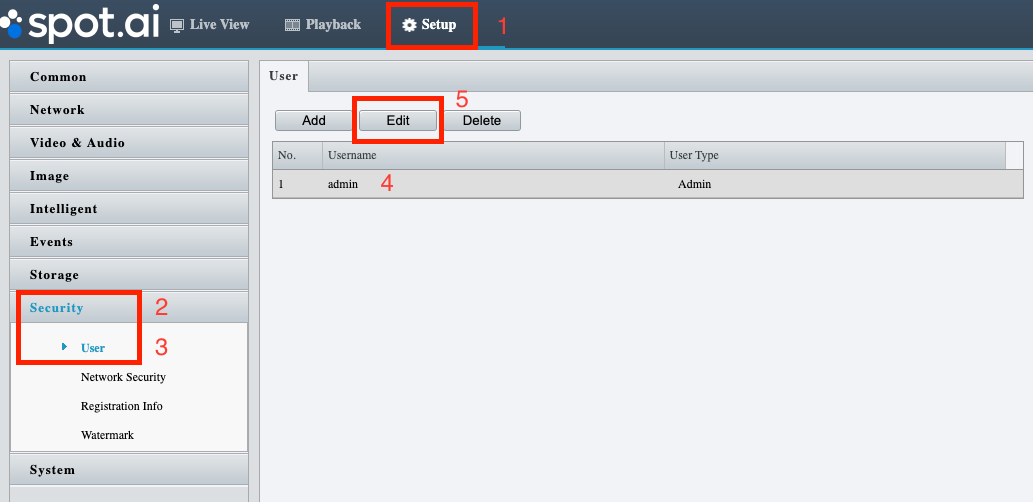
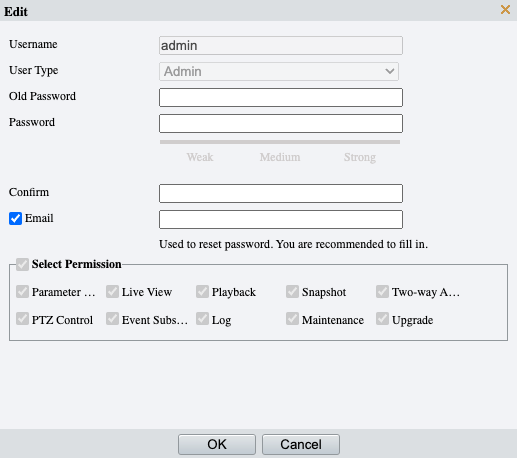
For cameras with MAC addresses beginning with 2c:6f:51:
Passwords can be up to 31 characters in length, and can include upper and lowercase letters, numbers, and the following special symbols: ~!@#$%^&*-_+=|;:,./?

We hope this article was useful to you, please leave us a comment or feedback as it will help us improve our customer support center.
