How to set up a Hikvision CCTV system, Hikvision is committed to serving various industries through its cutting-edge technologies of machine perception, artificial intelligence, and big data, leading the future of AIoT: through comprehensive machine perception technologies, we aim to help people better connect with the world around them; with a wealth of intelligent products, we strive to identify and satisfy diverse demands by delivering intelligence at your fingertips; through innovative AIoT applications, we are dedicated to empowering every individual to enjoy a better future by building an intelligent world that is more convenient, efficient and secure.
How to set up a Hikvision CCTV system
Setting up a Hikvision CCTV to ensure it’s working properly is relatively complex – making sure all parts are set-up correctly.
This is a guide as to how best set-up a CCTV system, including the most important parts:
If you follow these 3 main rules then your Hikvision CCTV system should be up and working well 😉
How to Add IP cameras to Hikvision CCTV system
There are x4 different ways to add a camera to a Hikvision NVR CCTV recorder:
How to add IP Cameras Manually
Before you can view live video or record video files, you must add the network cameras to the device’s connection list.
Before You Start
Ensure the network connection is valid and the IP camera has been activated.
Step 1 Click [CAMERA ICON] on the main menu bar to enter the Camera Management interface.
Step 2 Click the Custom Add tab on the title bar to enter the Add IP Camera interface.

Step 3 Input the IP address, protocol, management port, and other information.
Step 4 Enter the IP camera’s login user name and password.
Step 5 Click Add to finish adding the IP camera.
Step 6 (Optional) Click Continue to Add to add additional IP cameras.
How to Automatically add Searched Online IP Cameras
Step 1 On the Camera Management interface, click the Online Device panel to expand the Online Device interface.
Step 2 Select the automatically searched online devices.
Step 3 Click Add.
Note: If the IP camera you wish to add has not been activated, activate it from the IP camera list on the camera management interface.
How to add PoE Cameras to a CCTV system
The PoE interfaces enable the device system to pass electrical power safely, along with data, on Ethernet cabling to the connected PoE cameras. The number of PoE cameras supported varies by device model. If you disable the PoE interface, you can connect to online network cameras. Also, the PoE interface supports the Plug-and-Play function. For example, for DS-7608NI-I2/8P, to connect six network cameras via PoE interfaces and two online cameras, disable two PoE interfaces in the Edit IP Camera menu. Follow the steps to add network cameras for devices that support the PoE function.
How to add PoE Cameras to a CCTV system
Step 1 Connect PoE cameras to the device’s PoE ports with network cables.
Step 2 Go to Camera > Camera > IP Camera to view camera images and information.
How to add Non-PoE IP Cameras
You can disable the PoE interface by selecting manual while the current channel can be used as a normal channel and the parameters can also be edited.
Step 1 Go to Camera > Camera > IP Camera.
Step 2 Position the cursor on a window with no linked IP camera and click (……….)

Step 3 Set Adding Method to Manual. • Plug-and-Play: The camera is physically connected to the PoE interface. Its parameters cannot be edited. You can go to System > Network > TCP/IP to change the IP address of the PoE port. • Manual: Add IP camera without a physical connection, via the network.
Step 4 Enter the IP address, the user name, and password of administrator manually.
Step 5 Click OK.
How to configure PoE Interfaces
When long-distance PoE transmission (100 to 300 m) is required, enable long distance mode for the PoE channel.
Step 1 Go to Camera > Camera > PoE Settings.
Step 2 Enable or disable long network cable mode by selecting Long Distance or Short Distance radio.
• Long Distance: Long-distance (100 to 300 meters) network transmissions via PoE interface.
• Short Distance: Short-distance (<100 meters) network transmission via PoE interface.

Note: The PoE ports are enabled with the short distance mode by default. The bandwidth of an IP camera connected to the PoE via long network cable (100 to 300 meters) cannot exceed 6 MP. The allowed maximum long network cable may be less than 300 meters, depending on IP camera model and cable materials. When the transmission distance reaches 100 to 250 meters, you must use CAT-5E or CAT-6 network cable to connect with the PoE interface. When the transmission distance reaches 250 to 300 meters, you must use CAT-6 network cable to connect with the PoE interface. Refer to Appendix Error! Reference source not found.Error! Reference source not found. for the list of IP cameras.
Step 3 Click Apply.
How to configure cameras with a customised Protocols on a CCTV system
To connect the network cameras that are not configured with the standard protocols, you can configure customised protocols for them. The system provides 16 customised protocols.
Step 1 Click Protocol at the top taskbar to enter the protocol management interface.

Step 2 Select the protocol type of transmission and choose the transfer protocols.
Type: The network camera adopting custom protocols must support getting streams through standard RTSP.
Path: Contact the network camera manufacturer to consult the URL (uniform resource locator) for getting main stream and sub-stream. The format of the URL is: [Type]://[IP Address of the network camera]:[Port]/[Path]. Example: rtsp://192.168.1.55:554/ch1/main/av_stream.
Note: The protocol type and the transfer protocols must be supported by the connected IP camera. After adding the customised protocols, the protocol name will be listed in the drop-down list.
How to change camera settings on a Hikvision CCTV camera
How to configure OSD Settings
You can configure the OSD (On-screen Display) settings for the camera, including date/time, camera name, etc.
Step 1 Go to Camera > Display.
Step 2 Select the camera from the drop-down list.
Step 3 Edit the name in the Camera Name text field.
Step 4 Check the Display Name, Display Date, and Display Week checkbox(es) to show the information on the image.
Step 5 Set the date format, time format, and display mode.
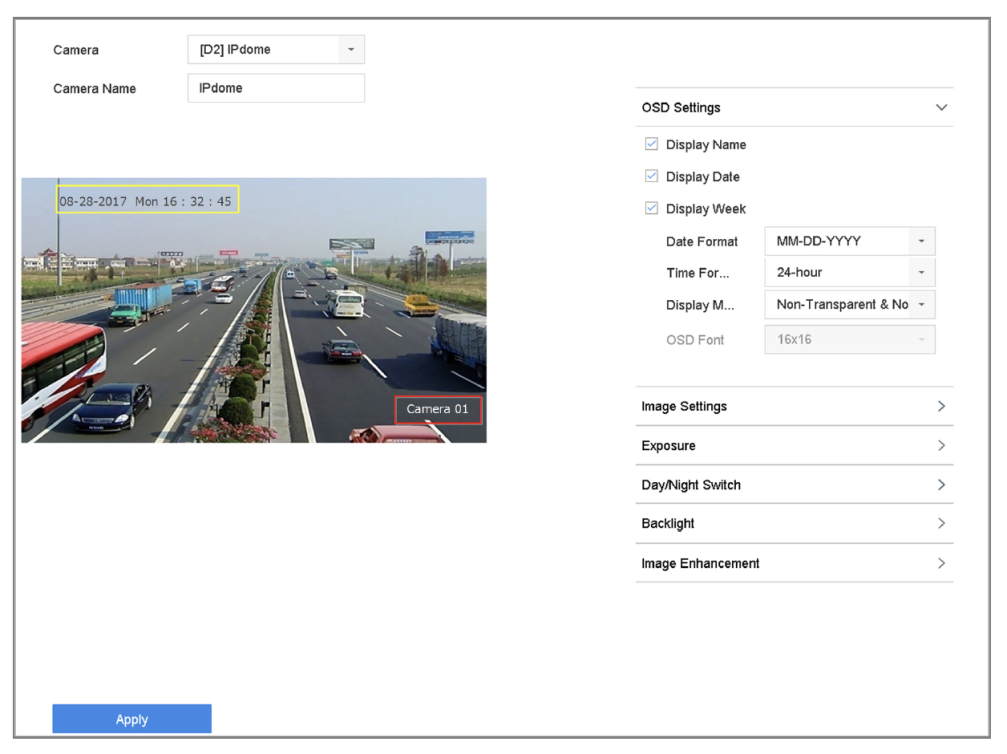
OSD Configuration Interface
Step 6 Use the mouse to click and drag the text frame on the preview window to adjust the OSD position.
Step 7 Click Apply to apply the settings.
How to configure the Privacy Mask
The privacy mask protects personal privacy by concealing parts of the image from view or recording with a masked area.
Step 1 Go to Camera > Privacy Mask
Step 2 Select the camera on which to set the privacy mask.
Step 3 Click the Enable checkbox to enable this feature.
Step 4 Use the mouse to draw a zone on the window. The zones will be marked by different frame colours.
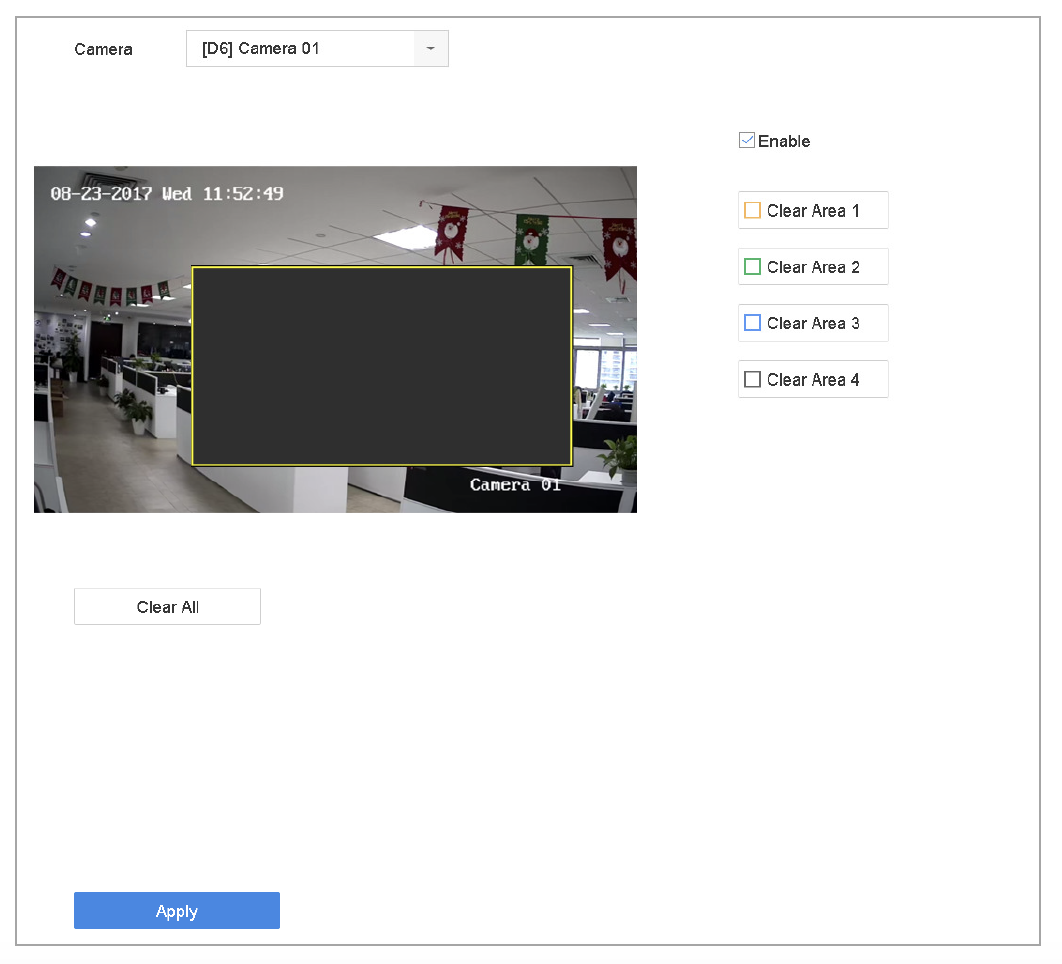
Privacy Mask Settings Interface
Note Up to four privacy masks zones can be configured and the size of each area can be adjusted. Clear the configured privacy mask zones on the window by clicking the corresponding Clear Zone 1-4 icons on the right of the window, or click Clear All to clear all zones.
Step 5 Click Apply to save the settings.
How to configure video Parameters
You can customise the image parameters including the brightness, contrast, and saturation for the Live View and recording effect.
Step 1 Go to Camera > Display.
Step 2 Select a camera from the drop-down list.
Step 3 Adjust the slider or click on the up/down arrow to set the value of the brightness, contrast, or saturation.
Step 4 Click Apply to save the settings.
How to configure the Day/Night Switch
Step 1 The camera can be set to day, night, or auto switch mode according to the surrounding illumination conditions.
Step 2 Go to Camera > Display.
Step 3 Select the camera from the drop-down list.
Step 4 Set the day/night switch mode to Day, Night, Auto, or Auto-Switch. Auto: The camera automatically switches between day mode and night mode according to the illumination. The sensitivity ranges from 0 to 7, and higher sensitivity more easily triggers the mode switch. The switch time refers to the interval between the day/night switch. You can set it from five sec to 120 sec. Auto-Switch: The camera switches the day mode and the night mode according to the start time and end time you set.
Step 5 Click Apply to save the settings.
How to configure other camera parameters
For a connected camera, you can configure the camera parameters including the exposure mode, backlight, and image enhancement.
Step 1 Go to Camera > Display.
Step 2 Select a camera from the drop-down list.
Step 3 Configure the camera parameters.
Step 4 Click Apply to save the settings.
How to view CCTV via Hikvision app – IVMS 4500
Step 1 Download App Download the free HikVison iVMS- 4500 lite app from Google play store OR the Apple app store. This app works well with Android and Apple phones and tablets. The app is available for windows phones but we have mixed success with windows phones. Note: If you are downloading it to a tablet like the iPad choose the iVMS-4500 HD option The HD version has slightly different screens to those shown. (This guide only refers to the iVMS 4500 lite version ONLY).
Step 2 Open Menu Open the app and tap the menu button which is the 3 small lines inside the circle on the top left.
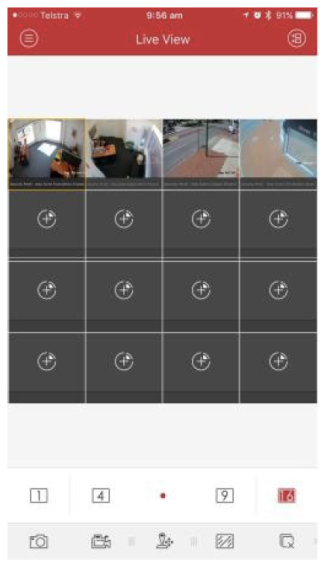
Step 3 Press devices A menu list will appear chose ‘Devices’.

Step 4 Add a new device A list of devices will appear. If this is the first time that you have used the app a preconfigured ‘demo’ device will appear. To add your own device by pressing the + sign at the top right.
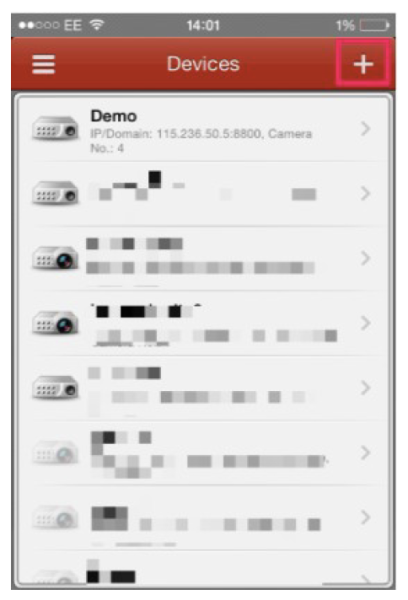
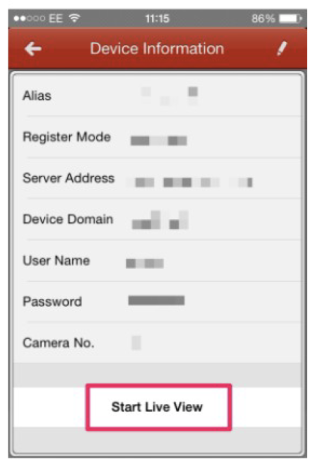
Step 5 Add device details Enter your devices remote details as below. Alias: Enter a name for your device. Register Mode: IP/Domain Address: amco”yourmonitoringnumber” .ddns.net (without the quote marks) For example:amco7865.ddns.net Username: admin Password: (Your PW) Then press the save button at the top right. Your device details will now be verified.
Step 6 Start Live view After a few seconds you see a start live view button appear at the bottom of the screen, press it to start viewing your cameras. If start live view does not appear, check your settings and make sure if you are at home that you are on 4G/another WIFI AP than your home WIFI. As this is a remote connection. It will not work when you’re at home unless you connect via 4G.
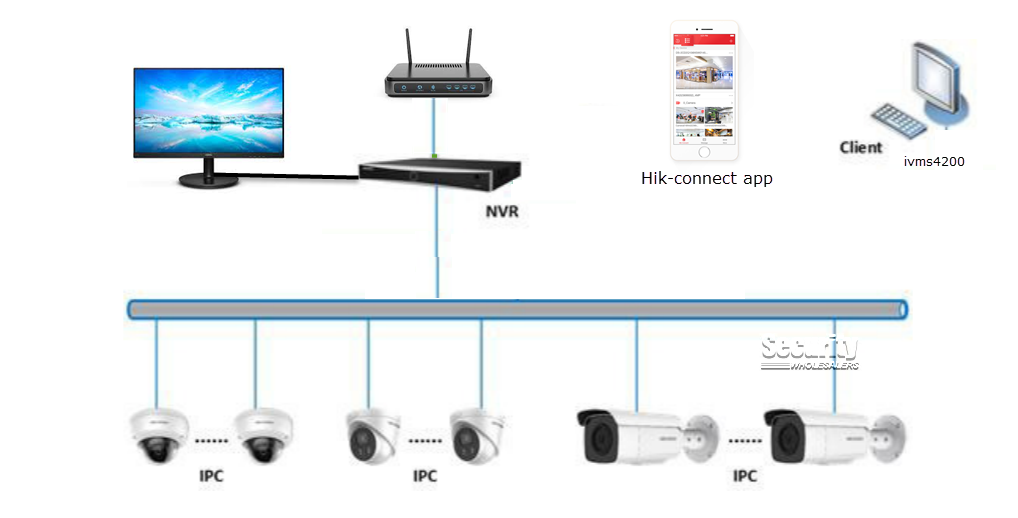 This FAQ deals with one of our most common questions.
“I’ve just bought a Hikvision IP kit from you – what do I do?”
What you need:
Steps:
