How to Add Device to Hik-ProConnect, After Hikvision shuts down iVMS-4500 and HiDDNS services, installers who previously used iVMS-4500 and HiDDNS services can add devices to Hik-ProConnect to provide remote operation, maintenance and management services for end users.
Devices can be added to Hik-ProConnect through P2P and IP/Domain. This document will introduce them in detail.
- How to Visit Hik-ProConnect
- Download Hik-ProConnect App
Installers can download and install the latest version of the Hik-ProConnect APP by visiting the Hikvision APP Store appstore. hikvision. com.
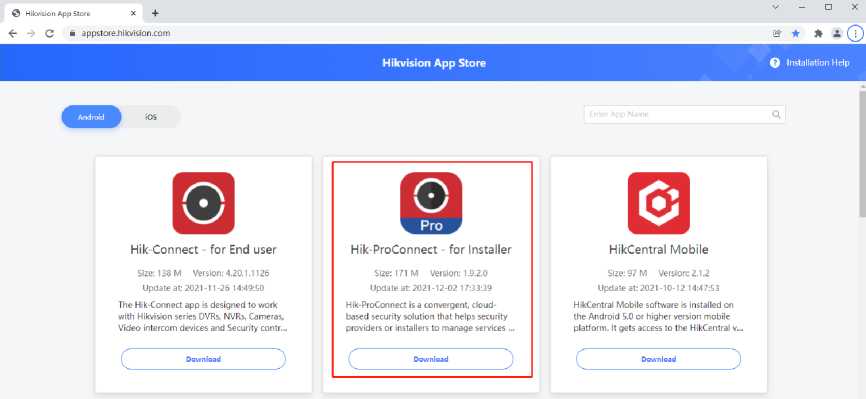
Installers can directly access the Hik-ProConnect portal on the PC side. The web page addresses of various countries are as follows:
Russia: https://hik-proconnectru.com
Others : https://hik-proconnect.com
Read Next :
Installers can register their Hik-ProConnect account through the Hik-ProConnect APP or portal according to the prompts, and then add devices.
- Upgrade your device to the latest version that supports Hik-Connect.
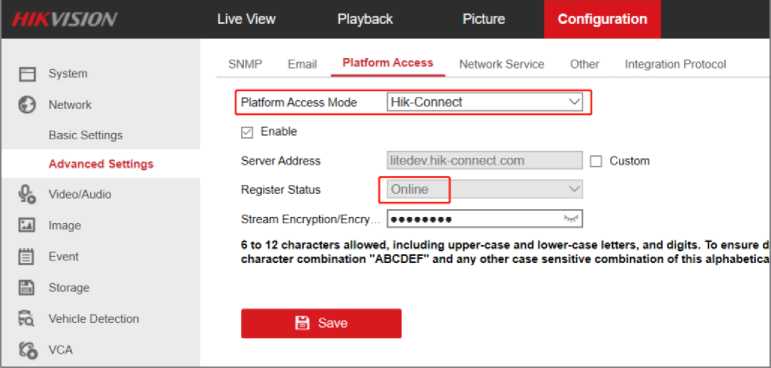
- Enable the Hik-Connect function on the device side and keep it online.
The path is Configuration-Network-Advanced Settings-Platform Access. For platform access mode, select Hik-Connect or Cloud P2P (the display of different devices may be different), and set the verification code for device addition.
Note: Some devices may not allow user-defined verification code. Users can view it in the device label. If there is no verification code in the label, the device verification code is ABCDEF. Since ABCDEF is not alowed as the verification code in the current service, please contact the technical support for processing before using this kind of device
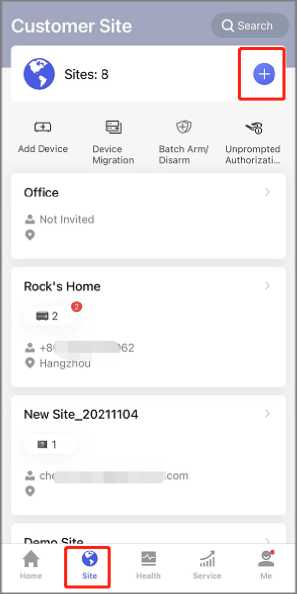
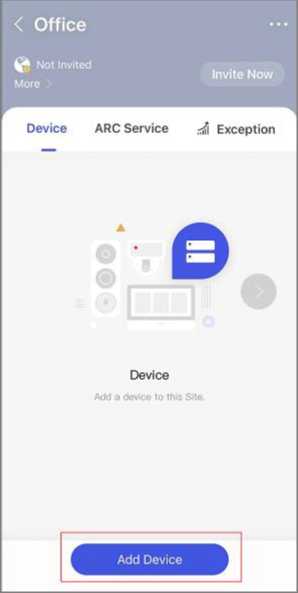
(a) Scan QR code.
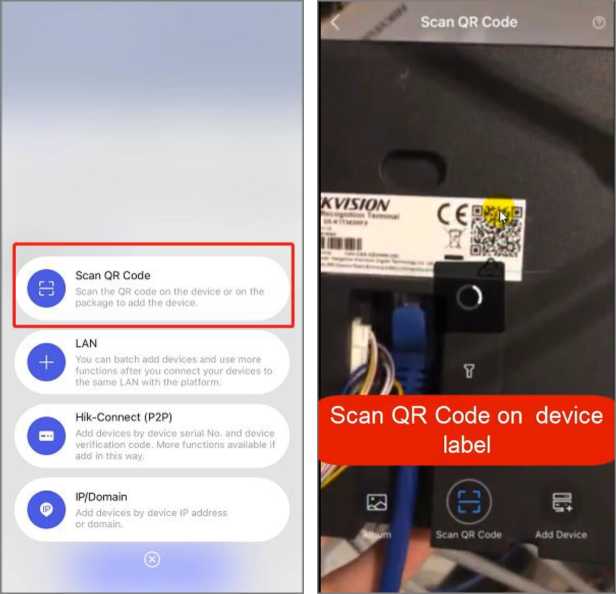
(b) Enter the device seriel number.
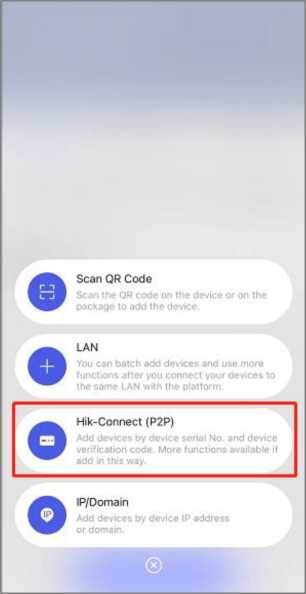
![]()
| Serial No. | Enter serial No. |
|---|---|
| Verification Code | Enter verification code. |
Hik-Connect (P2P)
How to get the device serial number and verification code? View
- Enter the verification code set in Preparation, and click Add.

< Hik-Connect (P2P) •••
Serial No.
Verification Code
How to get the device serial number and verification code? View
< Hik-Connect (P2P)
Serial No.
Verification Code
Add
How to get the device serial number and verification code? View
Firmware compatibility test completed.
Add
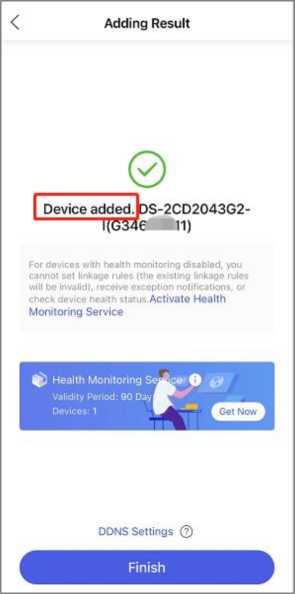
4. Complete adding.
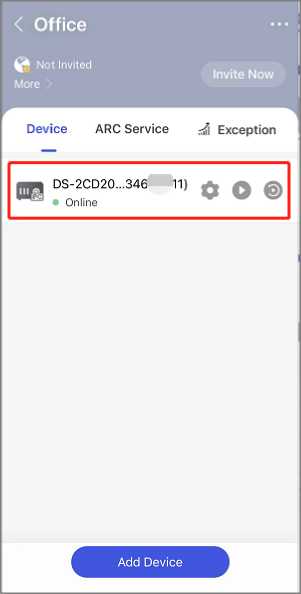
5. After adding the device to the site, deliver the site and device to the Hik-Connect account of the end user and apply permission from end user.
< Invite Site Owner
| < Office | … |
|---|---|
| Not Invited
More > |
Invite Now |
Device ARC Service Exception
DS-2CD20…34644411)
• Online
Email Phone Number
Enter Email Account of Hik-Connect
Enter email.
O Allow Me to Disable Hik-Connect Service (?)
Apply for Permission
Site Information Management
Configuration >
Playback >
Remarks
 Enter the remarks.
Add Device
If you add a device to Hik-ProConnect, you will be prompted that it is incompatible with Hik- ProConnect; Or if the remote configuration function cannot be used after adding the device, you can enable the Hik-Connect DDNS function in Hik-ProConnect.
- Port mapping of the device through the UPnP function of the router or the device itself.
- Select the device, click DDNS Settings.
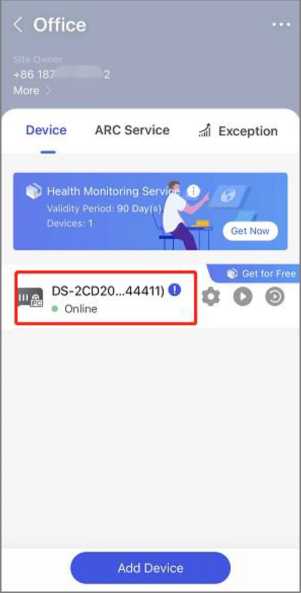
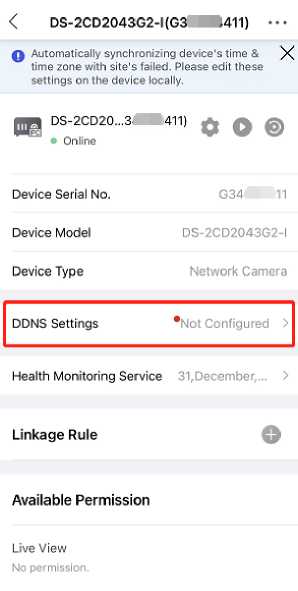
- Enter the external port mapped in the first step, and enter the user name and password of the device.
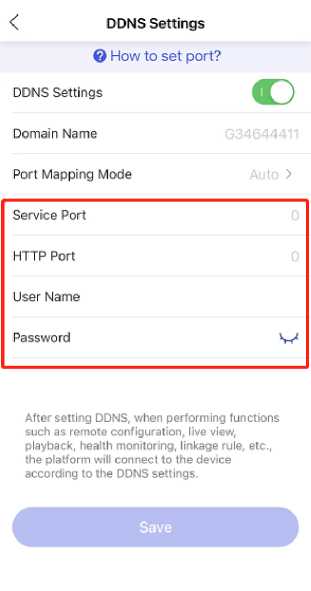
After DDNS is enabled, devices will be directly connected through DDNS when remote configuration, live view, playback, health monitoring, linkage rule and other functions are used in Hik-ProConnect.
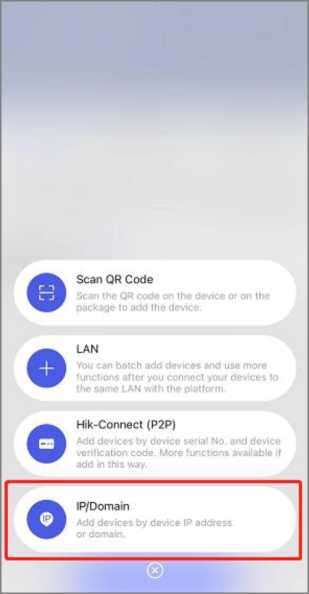
For devices that does not support the Hik-Connect service function, you can also add devices to Hik-ProConnect through IP/Domain.
- Site-> AddDevice->IP/Domain.
- Add a device by manually entering the IP address, port number, user name and password of the device.
![]()
| Q Only supports adding devices mapped in X | |
|---|---|
| WAN by IP address or domain name. | |
| Device Name | Enter device name. |
| IP Address | Enter address. |
| Port | Enter port number. |
| User Name | Enter user name. |
| Password | Enter your password. |
< IP/Domain
After adding, the installer can apply to the end user for remote configuration, preview and playback permissions as needed.
- If the mobile phone and the device are in the same LAN, you can use the LAN IP and port to add. If both the mobile phone and the device are in the public network, you need to map the device to the public network and add the device using the public IP and port in Hik-ProConnect.
- The devices added with IP are different from those added with Hik-Connect domain in function. Some functions that must rely on cloud services, such as device sharing, alarm/call reception, etc., are only supported in the Hik-Connect domain add mode.

