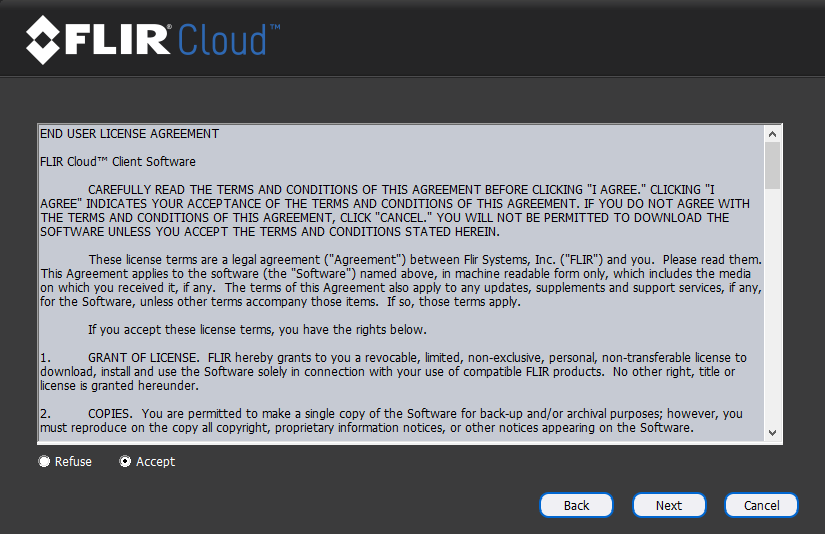
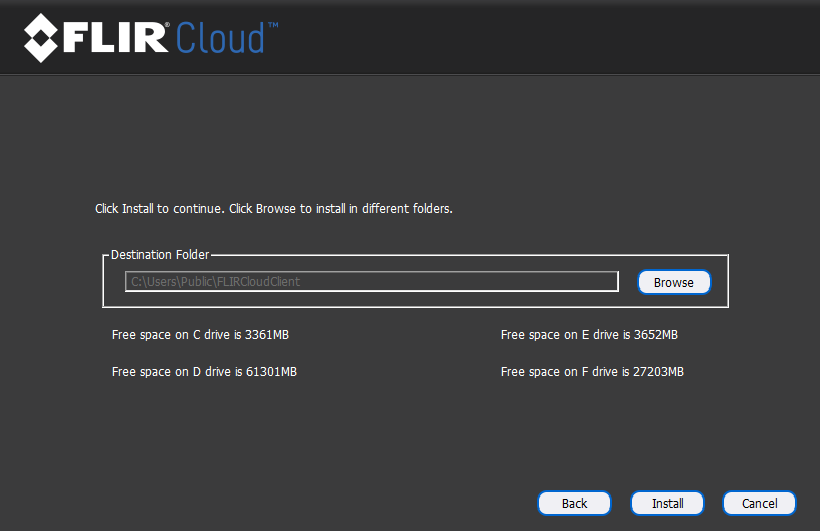
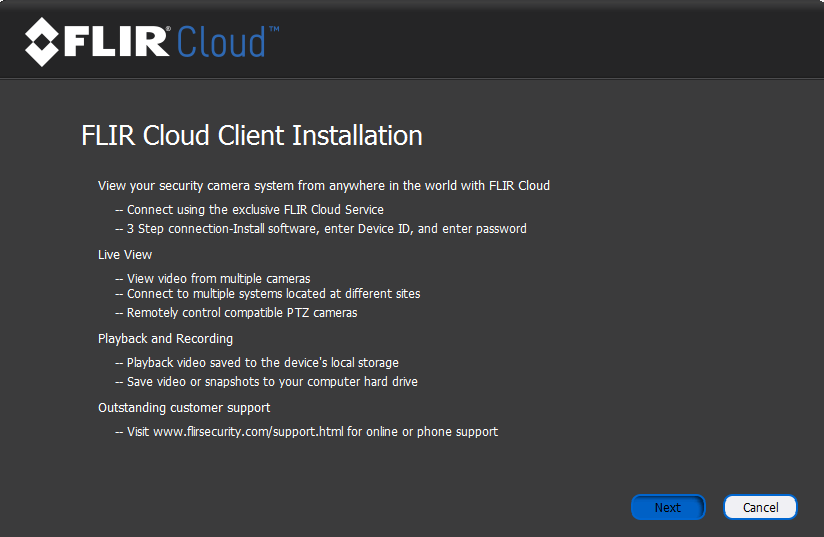
FLIR Cloud Client installation and user guide,Flir Cloud Client Software for PC. Here we are going to demonstrate how you can download and install the client software for you Flir Cloud DVR/NVR or IP camera. Here you can download Flir Cloud Client Software For PC free of cost. This software is also named lorex cloud for pc. We are also going to tell you how can use the software.
Before starting Flir cloud client software downloading, let know about this awesome tool. Flir Cloud Client Software for PC is a free utility powered by Lorextechnology and by using this tool you are able to monitor your DVR/NVR or IP camera at your personal computer.

Read Next :
FLIR Cloud Client Software: Adding your DVR / NVR using Device ID
Your DVR / NVR can be manually added to the FLIR Cloud Client software by entering the device ID. FLIR Cloud Client software is available for download on PC / Mac. Click here for more information on locating software downloads.
Prerequisite:
- The following instructions require you to access your system using the FLIR Cloud Client software and a PC / Mac. The instructions below are shown using a Windows 10 operating system.
To manually add the DVR / NVR using a device ID:
- Launch FLIR Cloud Client software on your computer.
- Enter your login information. Refer to your user manual for your default Username and Password if needed.
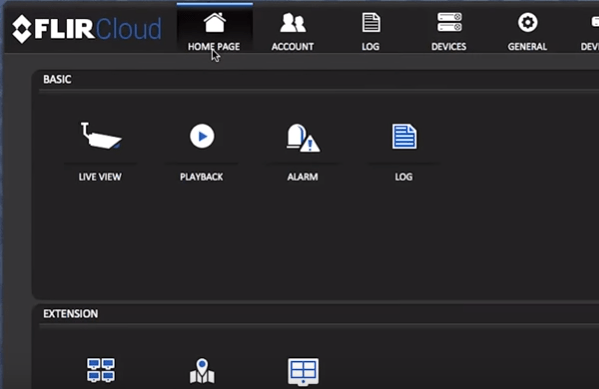
- Click Login to open the Home window.
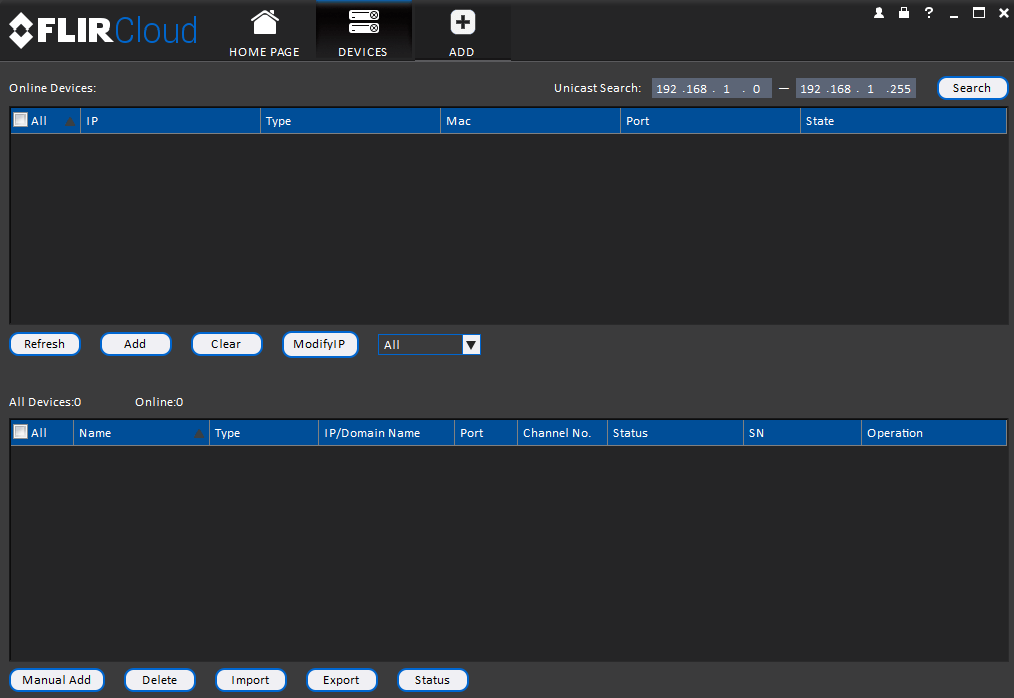
- Click the Devices icon () to open the Devices tab.
- Click Manual Add on the bottom-left corner to open the Manual Add window.
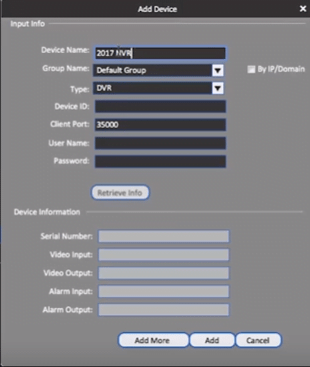
- In the Manual Add window, enter the following:
- Device Name: Enter the Device Name of your choice to identify the DVR / NVR.
- Device ID: Enter the device ID or scan the QR code located on the top of the DVR / NVR.
- Client Port: Enter the Client Port value (default: 35000).
- User Name: Enter the DVR / NVR User Name. Refer to your user manual for your default Username if needed.
- Password: Enter the DVR / NVR Password. Refer to your user manual for your default Password if needed.
- Click Add to connect your DVR / NVR. The connection may take a few minutes.
- Click Home, and then double-click Default Group to load your connected cameras.
If you are not able to connect to your DVR / NVR using the device ID on the same network, you may be experiencing a NAT Loopback issue. Routers recognize and connect to DVR / NVR via IP address. To connect your system from the same network, use the IP address of the DVR / NVR. Click here for details on using the IP address to manually connect your DVR / NVR.
FLIR Cloud Client Software: Adding your DVR / NVR using IP address
Your LHV / LNR Series DVR / NVR system can be manually added to the FLIR Cloud Client software by entering the system IP address.
Prerequisites:
- Download and install the FLIR Cloud Client software
- Ensure you have the IP address of your LHV / LNR Series DVR / NVR system.
- The following instructions require you to access your system using the FLIR Cloud Client software and a PC / Mac. The instructions below are shown using a Windows 10 operating system.
To manually add the LHV / LNR Series DVR / NVR using an IP address:
- Launch FLIR Cloud Client software on your computer to open the Login window.
- Enter your login information. Refer to your user manual for your default Username and Password.
- Click Login to open the Home window.
- Click the Devices icon () to open the Devices tab.
- Click Manual Add on the bottom-left corner to open the Manual Add window.
- In the Manual Add window, enter the following information:
- Device Name: Enter the Device Name of your choice to identify the DVR / NVR.
- IP/Domain Name: Ensure the IP/Domain checkbox is checked to enable connection using the IP address. Enter the IP address of the DVR / NVR.
- Client Port: Enter the Client Port value (default: 35000).
- User Name: Enter the DVR / NVR User Name.
- Password: Enter the DVR / NVR Password.
- Click Add to connect the DVR / NVR. The connection may take a few minutes.
FLIR Cloud Client Software: Backing up recorded video to a USB flash drive
You can back up selected recorded video files for storage on a USB flash drive (not included) during playback, or by searching for recorded video files. Ensure you have enough space on your USB flash drive to save the file.
The following instructions require you to access your system using the FLIR Cloud Client software and a PC / Mac.
To search for and back up recorded video using FLIR Cloud Client software:
- Insert USB flash drive into the DVR / NVR.
- Right-click on the Live View to access the Quick Menu and select Main Menu.
- Log in with your login information. Refer to your user manual for your default Username and Password.
- Click the Backup icon ().
- Configure search options using the parameters below to locate the files being stored on the USB drive.
- Device Name: Select the USB flash drive you inserted.
- Type: Select the recording type you are searching for (All, Normal, Motion, Alarm, or Alarm and Motion / A+M).
- Start Time / End Time: Set the start and end times for the search.
- Record CH: Select the channel the recording was made on or select All to include all channels in the search.
- File Format: Select the file format you want to save the recording as, .dav for compatibility with Lorex by FLIR video player software, .asf for compatibility with VLC Media Player.
REMINDER: Lorex by FLIR video player software is available for download online. Click here for more information on locating software downloads.
- Click Add. A list of files that match your search criteria will populate.
- If the files you would like to backup are present, select the files and click Backup.
- If the files you would like to backup are not included in the search results, reconfigure your search parameters and search again.
Wait for the backup to complete before removing the USB flash drive.
Video clip backup allows you to select a duration of video during Playback mode and save it to a USB device (not included).
To save a file using video clip backup:
- Insert USB flash drive into the DVR / NVR and begin playing back video.
- Click the Video clip icon () to mark the beginning of the video clip. Click the Video clip icon () again to mark the end.
- Click Save () to open the Backup Menu.
- Configure the following:
- Select the USB device you want to save to.
- Select the files you would like to backup.
- Click Backup > Start.
Wait for backup to complete before removing the USB flash drive.
FLIR Cloud Client Software: Creating a new user
FLIR Cloud Client software creates a default administrator account when the software is initially installed. To ensure your administrative access remains protected, it is recommended to create a new user account should another person require access to the system.
IMPORTANT: We recommend that you test the user accounts that you create by logging into them and testing their permissions. This allows you to check that the account is set up with the correct permissions. It is not recommended to share your administrator credentials with another person.
Prerequisite:
- Download and install the FLIR Cloud Client software on your PC / Mac. Click here for more information on locating software downloads.
The following instructions require you to access your system using the FLIR Cloud Client software and a PC / Mac.
To create a new user account:
- Launch the FLIR Cloud Client software on your computer.
- Click the Account tab () on the home page.
- Click Add to open the Add User window.
- Enter the new User Name and Password.
- Select the Role for the user account.
- Select the User Rights permissions for the user account.
- Click Save to save your settings.
FLIR Cloud Client Software: Downloading recorded video on PC / Mac
FLIR Cloud Client software allows you to download recorded video onto your PC / Mac.
Prerequisite:
- Download and install FLIR Cloud Client software on your PC / Mac. Click here for more information on locating software downloads.
- The following instructions require you to access your system using the FLIR Cloud Client software and a PC / Mac.
To download recorded video:
- Launch the FLIR Cloud Client software on your computer.
- On the Home window, click the PLAYBACK icon. () to open the PLAYBACK tab.
- On the right-side under the Device tab, select the Device Name and cameras that you would like to play back from.
- On the bottom-right under View, in the From drop-down and To drop-down, select a date range.
- Click Search to view recorded video for the selected date range.
- Click the Play icon () to start viewing your recorded video.
- Click a specific time on your timeline to select a starting time, then click the Time Clip icon (). A timeline market indicates a start time for your playback download.
- Click a specific time on your timeline to select an end time and click the Time Clip icon () to open the Export Setup window.
- Click Browse to select the where you want to save your recorded video.
- Select the Export Format for your recorded video. The available options for exporting video are:
- .asf
- .avi
- .mp4
- .dav
LIMITATION: Mac operating systems only support downloading recorded videos to .dav format.
- Click OK to open an Information window, then click OK again.
- Click the Export icon () on the bottom-right to open the Export window and view your status. Once the video is completed, you can find the video file in your selected folder.
FLIR Cloud Client Software: FLIR PC-NVR installation and setup
FLIR PC-NVR is software bundled with the FLIR Cloud Client software download. It is a completely separate software, and one does not require the other to function.
FLIR PC-NVR turns the computer into an NVR and will use your hard disk drive (HDD) on your PC to store recorded video.
IMPORTANT: If you install PC-NVR and want to remove it afterwards, you must uninstall FLIR Cloud Client software entirely and re-install it with the PC-NVR option not selected. Uninstalling FLIR Cloud Client will require the administrator password. If you do not have this password, you must contact technical support for assistance in recovering your password.
The following instructions require you to access your system using the FLIR Cloud Client software and a PC.
REMINDER: FLIR PC-NVR can be installed while installing FLIR Cloud Client. However, if it is not initially installed, FLIR Cloud will need to be uninstalled and re-installed to install FLIR PC-NVR at a later date.
Prerequisites:
- Ensure FLIR Cloud Client software and FLIR PC-NVR are downloaded on your PC.
- Record the device ID and IP address of the camera or DVR / NVR system you want to add to PC-NVR.
- Ensure your PC is connected to the same network as your DVR / NVR system.
- Manually add your camera or DVR / NVR system to FLIR Cloud Client software
To add a channel from the DVR / NVR in FLIR PC-NVR:
- Launch FLIR Cloud Client software on your computer, then click PC-NVR.
- Click the Plus icon () to open the Add Channel window.
- Enter the device ID or IP address of the system you want to add.
- Select the channel you want to add using the checkbox, then click Import.
Once you have added the channel, you can configure your hard disk drive (HDD) settings for your PC.
To configure your HDD settings:
- Click PC-NVR > Disk Management, then configure the following:
- When disk is full: Select Stop Recording or Overwrite.
CAUTION: Overwrite will save recorded video over the oldest saved files when your hard drive is full.
-
- Allocate: Enter hard drive space you would like FLIR PC-NVR to use.
TIP: FLIR PC-NVR is compatible with an external USB HDD.
You can set a recording schedule for each connected camera in FLIR PC-NVR.
To set a recording schedule for a camera:
- Click Record Plan.
- Select the channel you want to set a recording schedule for.
- Select Continuous, Motion, or Alarm, then click and drag in the timeline of each day to customize the recording schedule.
- Continuous: Your camera will record continuously.
- Motion: Your camera will record when it detects motion.
- Alarm: Your camera will alert you when it detects motion.
TIP: Setting a recording schedule in FLIR PC-NVR does not affect the recording schedule set on your DVR / NVR system.
Your PC-NVR will behave as a virtual NVR system and save your recorded video to your PC. FLIR PC-NVR shows in the Device list and behaves like any other DVR / NVR system in the FLIR Cloud Client software.
FLIR Cloud Client Software: Forgotten password
If you are unable to log in to your FLIR Cloud Client software due to a forgotten password, contact Technical Support for a password reset. For security, passwords cannot be reset using the online support system.
FLIR Cloud Client Software: Missing Next / Cancel buttons during installation
If you are installing FLIR Cloud Client software and you cannot locate and click Next / Cancel to complete / cancel the installation, the DPI resolution on your monitor may not be optimized for the software. This can be corrected by changing your screen resolution.
Prerequisite:
- The following instructions require you to access your system using the FLIR Cloud Client software and a PC / Mac. Instructions below are based on a Windows 7 operating system.
To change your screen resolution:
- Right-click on your desktop.
- Click Personalize.
- On the bottom-left of the Personalize window, click Display.
- To change the size of text and windows on your screen, select the Smaller – 100% (default) option.
- Click Apply.
Once you have completed these steps, you can restart your computer, or log off and then log on again. Launch the FLIR Cloud Client software installation wizard. After installation, you can change the monitor resolution again to your preferences in the Display window.
FLIR Cloud Client Software: Modifying administrator username and password
When you first install your FLIR Cloud Client software, the username and password are set to defaults. Refer to your user manual for the default user name and password for your system. Click here for downloads and documentation for your product. Upon setup using the default user name and password, you will have full access to all of the features of FLIR Cloud Client and your connected DVR / NVR systems as the Administrator. It is recommended that you change the administrator user name and password for security purposes.
Prerequisite:
- Download and install the FLIR Cloud Client software on your PC / Mac. Click here for more information on locating software downloads.
The following instructions require you to access your system using the FLIR Cloud Client software and a PC / Mac.
To change your administrator password:
- Launch the FLIR Cloud Client software on your computer. If prompted, enter your user name and password.
- Click the Account tab () on the home page.
- Select the user from the list that you want to change, then click the Pencil icon () to open the Modify User window.
- Enter your new password and confirm.
- Click Save. A prompt confirms that your user information has been successfully modified.
IMPORTANT: If you are unable to log in to your FLIR Cloud Client software due to a forgotten password, contact Technical Support for a password reset. For security, passwords cannot be reset using the online support system.
FLIR Cloud Client Software: Preventing software from filling up hard disk drive on PC / Mac
PC
FLIR PC-NVR bundled software is included with FLIR Cloud Client software, and is available to be installed when you install FLIR Cloud Client software. FLIR PC-NVR software turns your PC into an NVR by storing recorded video from your cameras onto your local hard disk drive (HDD). To disable this, go into your computer Control Panel and uninstall FLIR PC-NVR software.
Mac
If you are using a Mac and an older version of FLIR Cloud Client software, it could be storing .dmg files in the root of the FLIR Cloud Client folder. To resolve this issue, uninstall the older version of FLIR Cloud Client software, then download and install the latest version of FLIR Cloud Client software. Click here for more information on locating software downloads.
FLIR Cloud Client Software: System requirements
FLIR Cloud Client software enables you to remotely connect to a Cloud compatible DVR / NVR system over the Internet. The FLIR Cloud Client software is available for download online for PC and Mac. Click here for more information on locating software downloads.
REMINDER: For setup instructions, refer to the Quick Start Guide or user manual for your system. Click here for downloads and documentation for your product.
Minimum System Requirements:
- CPU: Core 2 Duo 3.0GHz
- Operating System: Windows™ 8 / 7 / Vista Mac OSX 10.7 and above
- Memory: 2GB
- Video: 512 MB of video memory and above
- Network (LAN): 10 / 100 BaseT Network
- Network (WAN): 1 Mbps upstream
- High-speed Internet service is required to remotely connect to your system.
FLIR Cloud Client Software: Windows XP
Windows XP is not supported by FLIR Cloud Client software. FLIR Cloud Client software is compatible with Windows Vista, Windows 7, Windows 8, and Windows 10.
