How to Upgrade Firmware and Reset Hardware Milesight Devices, Milesight offers multi-potential sensing products to capture meaningful data. It innovatively applies Al, 5G, loT to bring real impacts to diverse applications. Committed to making sensing matter, Milesight responsively addresses customer demands and works closely with a growing partner ecosystem to realize the value of data.
How to Upgrade Firmware and Reset Hardware Milesight Devices
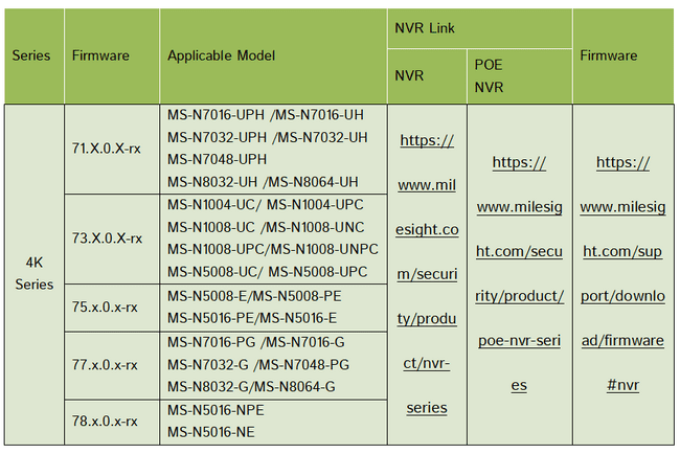
1. Choose Firmware
Note:
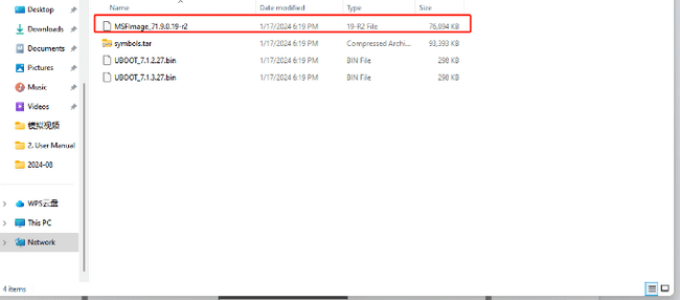
1) The second number of firmware stands for major version number, while the last two number means the minor version number. Take 71.9.0.19-r2 for example, it means that the NVR’s major version is 9 and it’s minor version is 19-r2 indicates an iterative update of some minor version.
2) You can use monitor to upgrade your NVR, or you can upgrade it via browser. The third way is to use Smart Tools.If click the link to get the upgrade firmware failed, please copy the link to browser and open again.Please note that the firmware downloaded from the official website should be unzipped before upgrading.
3) Firmware updates are also easy with NVR online upgrades.
4)Please note that if it is an older model or you cannot find the download link for the corresponding model, you can contact support@milesight.com for processing.
2. Upgrade Steps for Local Monitor
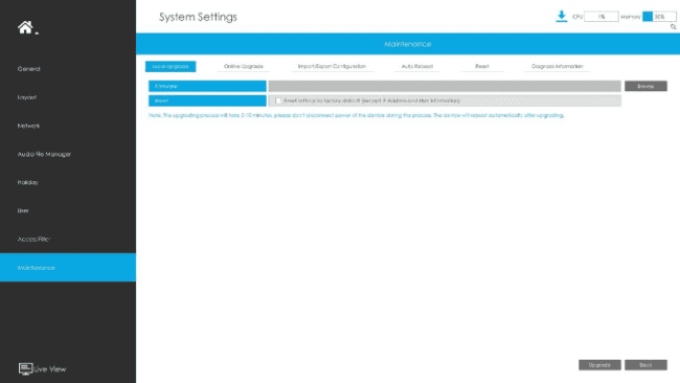
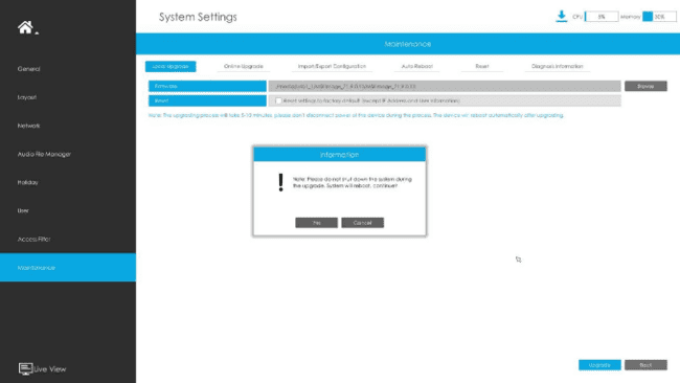
Step1: Enter upgrade menu by clicking “Main Menu”→“System Settings”→“Maintenance”→“Local Upgrade”.
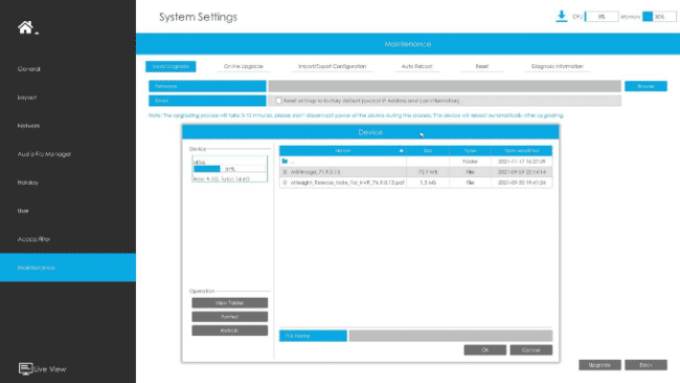
Step2: Click ”Browse” button to search for files on your USB device and select the corresponding firmware file.
Step3: Click “Upgrade” button to confirm the upgrade.
Note:
The upgrading process will take 5-10 minutes, please don’t disconnect power of the device during the process. The device will reboot automatically after upgrading.
3. Update Steps for WEB
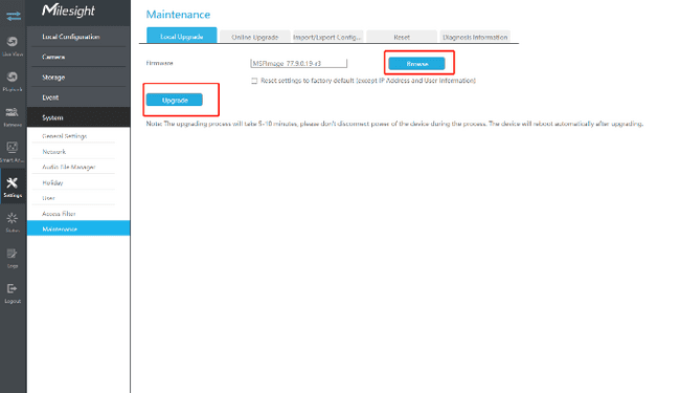
Step1: “Settings”→“System”→“Maintenance”→“Local Upgrade”.
Step2: Click “Browse” and find the position where you downloaded
Note:
Remember to check the model, use the corresponding firmware for your model
Step3: After choosing the corresponding firmware, click “Upgrade” button to confirm the upgrade.
.
Note:
The upgrading process will take 5-10 minutes, please don’t disconnect power of the device during the process. The device will reboot automatically after upgrading.
4. Update Steps for Smart Tools
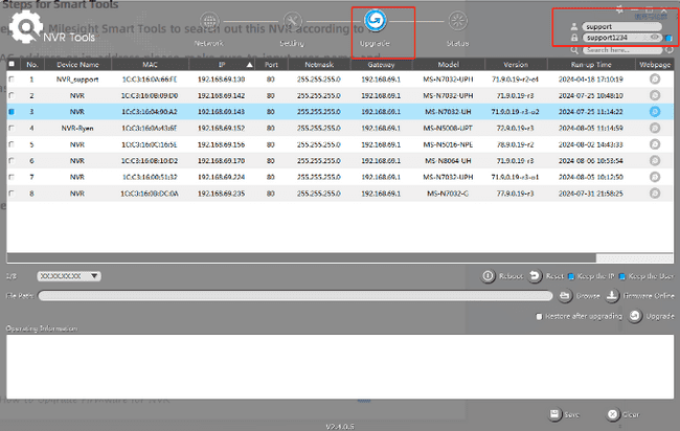
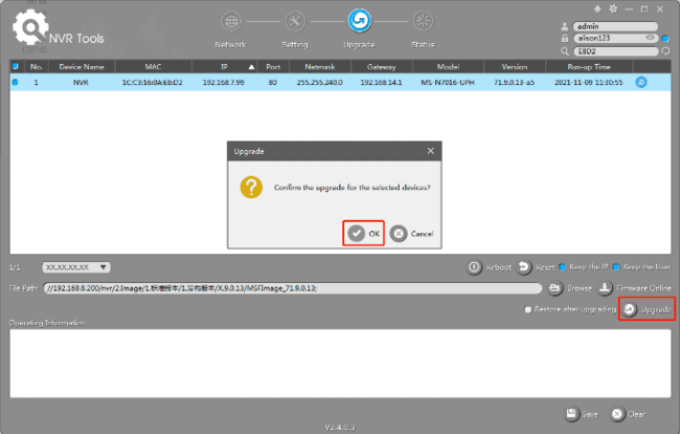
Step1:Use Milesight Smart Tools to search out this NVR according to its MAC address or IP address. Please make sure to input user name and password in top right corner.
Step2:Click “Browse” and find the position where you downloaded
Step3: After choosing the corresponding firmware, click “Upgrade” button to confirm the upgrade.
.
.
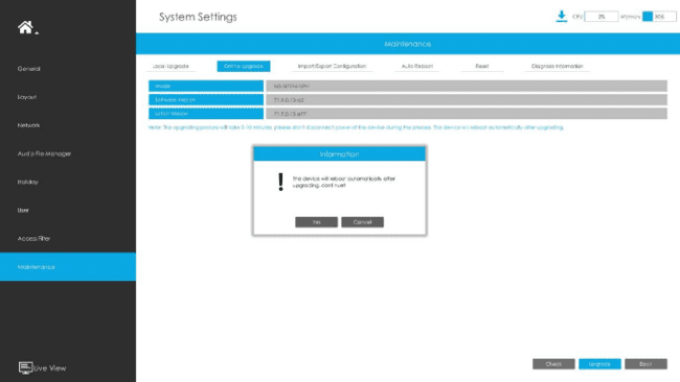
5. Update Steps for Online Upgrade
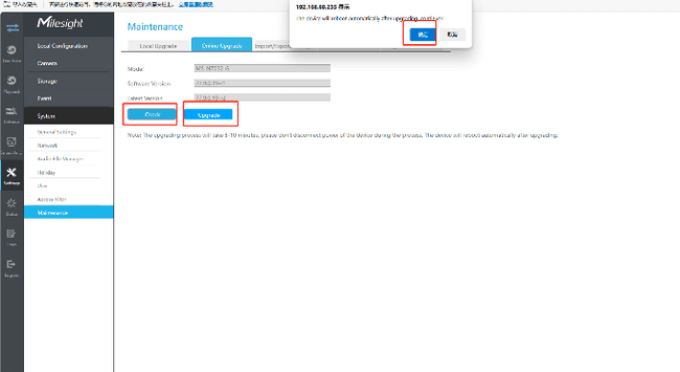
Option 1(On local monitor): You can click “Online Upgrade”, and click “Check” button to check the latest firmware version, then you can click “Upgrade” button to upgrade your NVR to the latest firmware version directly.
Option 2(On web): You can also click “Online Upgrade”, and click “Check” button to check the latest firmware version, then you can click “Upgrade” button to upgrade your NVR to the latest firmware version directly.
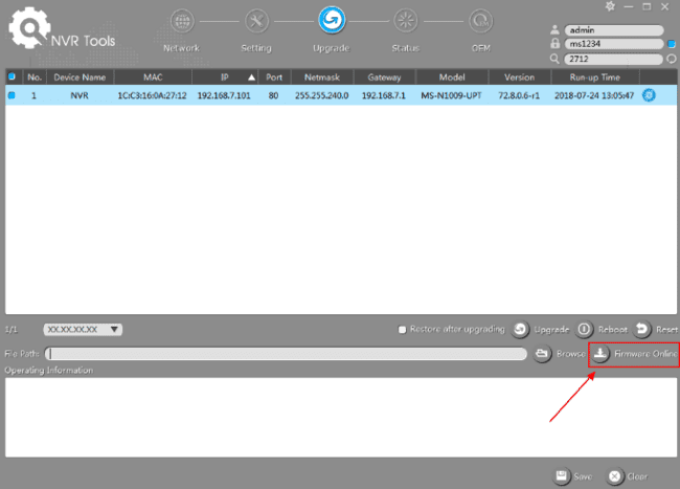
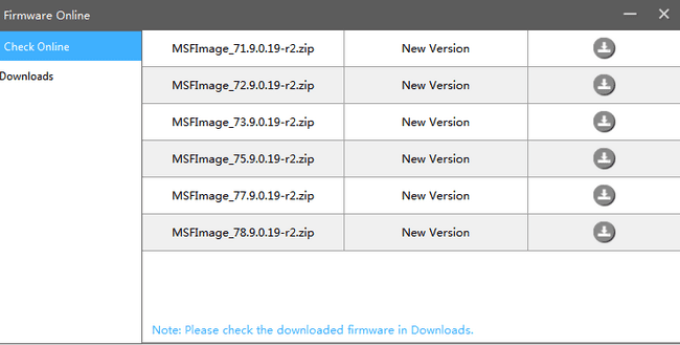
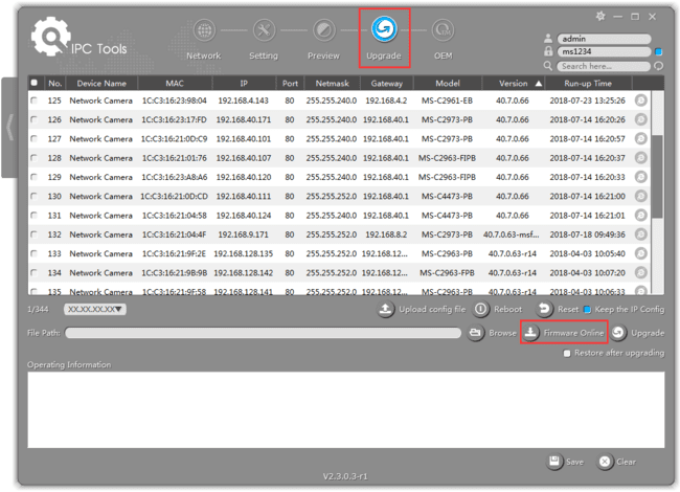
Option 3(On Smart Tools) You can also use Smart Tools to download the latest firmware.
“NVR Tools” – ”Upgrade” – ”Firmware Online”
Appendix
The link for Smart Tools:
https://www.milesight.com/support/download/software#auxiliary-software
How to Reset Hardware
The following will introduce how to reset NVR via hardware.
The first part is the reset steps, and the second part is reset button for each model .
Note:
1. Please note that the reset procedure is very important, please follow the operation one by one to avoid the reset is not successful).
2. If still have problem after hardware resetting or failing to perform the hardware reset, please contact with Support@milesight.com.
1. Reset Steps
For NVRs whose software version is before 7x.9.0.2-r3, or 61.x.x.xx/ 30.x.x.xx/ 1.x.x.xx/2.x.x.xx, please refer to the steps below:
Step1: Turn off the power;
Step2: Press the reset button;
Step3: Keep pressing the reset button and power on the NVR at the same time;
Step4: You will hear several short “beep” during this time;
Step5: Reset successfully when the short “beep” become an nonstop “beep”.
For NVRs whose software version is 7x.9.0.2-r3 or above, please refer to the steps below:
Step1: Turn off the power;
Step2: Press the reset button;
Step3: Keep pressing the reset button and power on the NVR, you will hear a short “beep” sound at the same time;
Step4: After 5 seconds you will hear a “beep” sound lasting about 3 seconds.
Step5: Reset successfully when the “beep” sound stops.
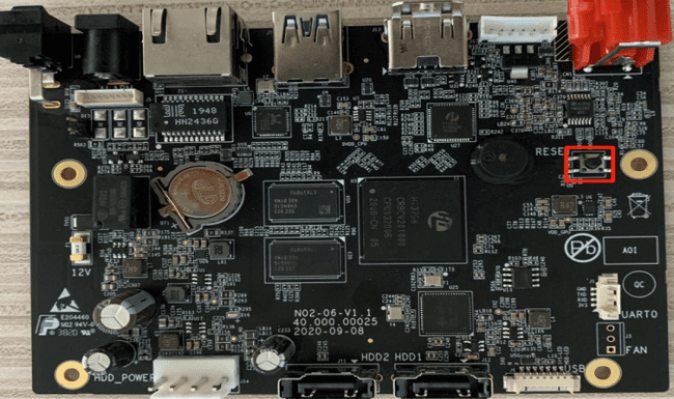
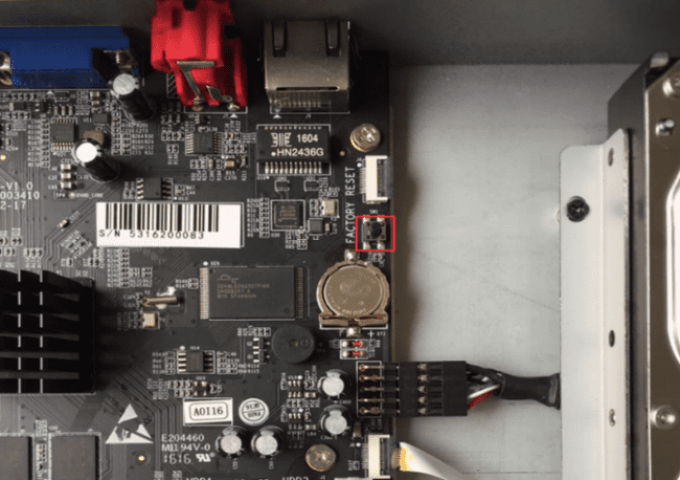
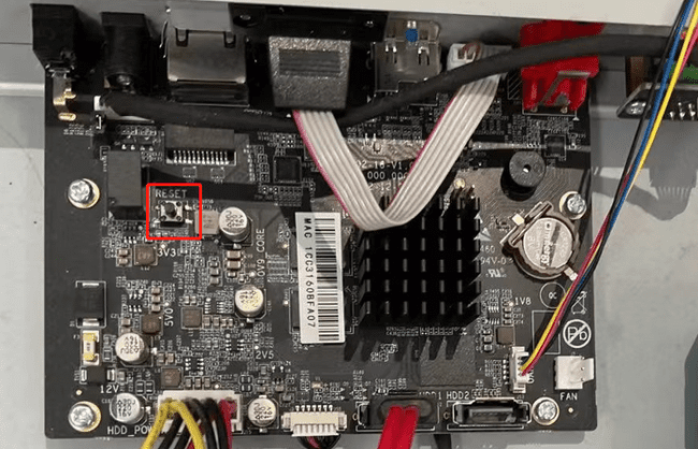
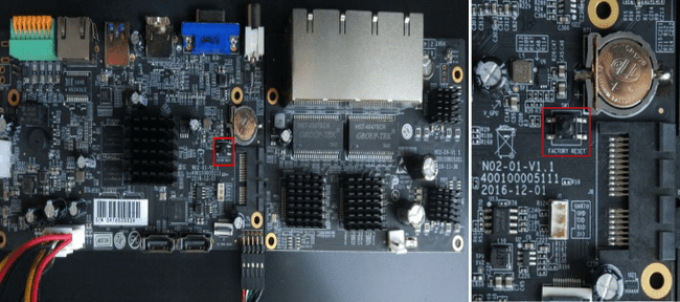
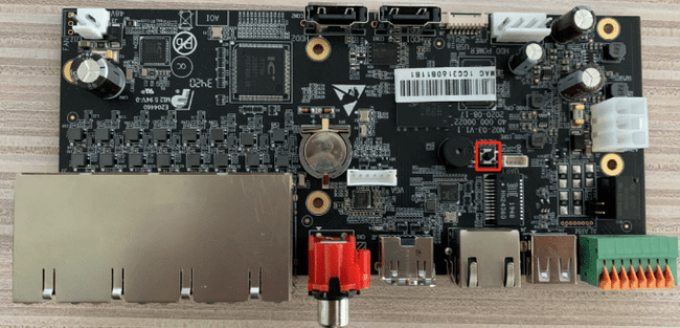
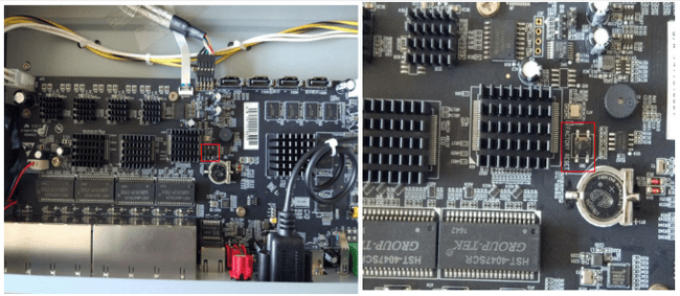
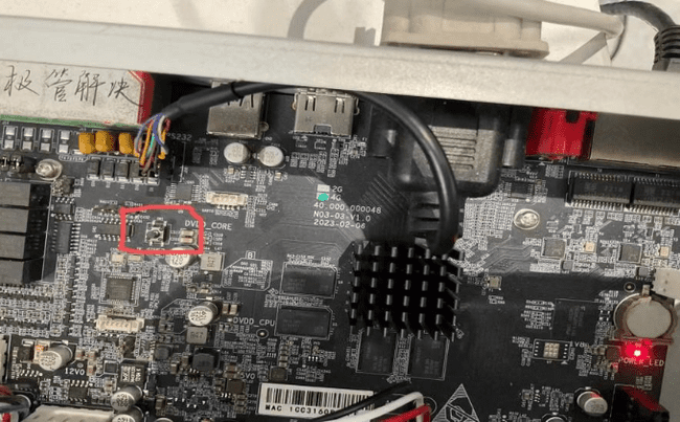
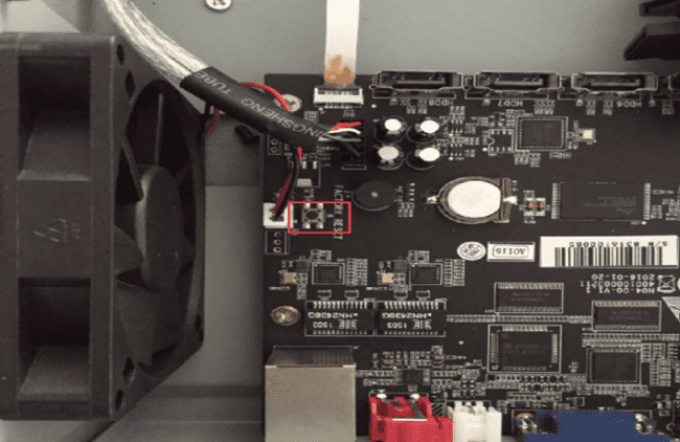
2.Position of Reset Button
· Series-1000:
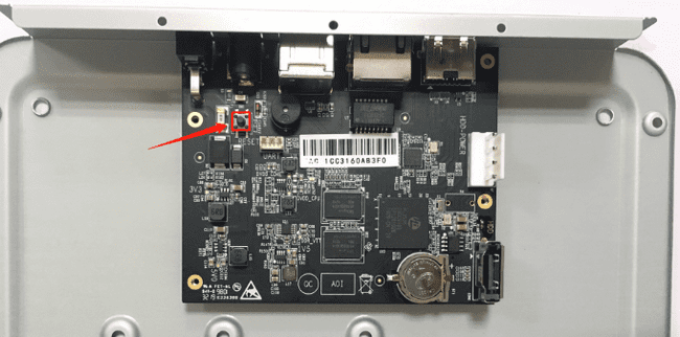
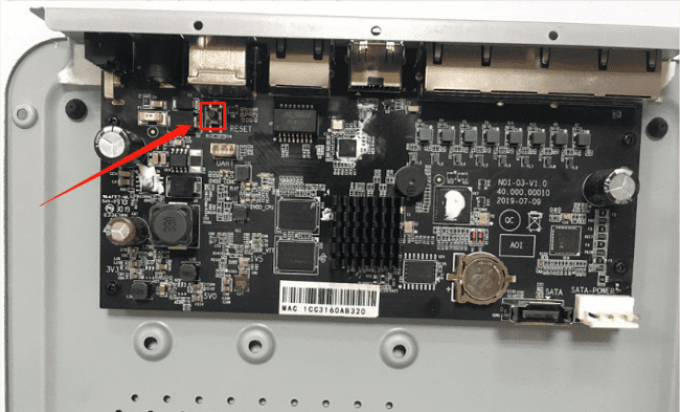
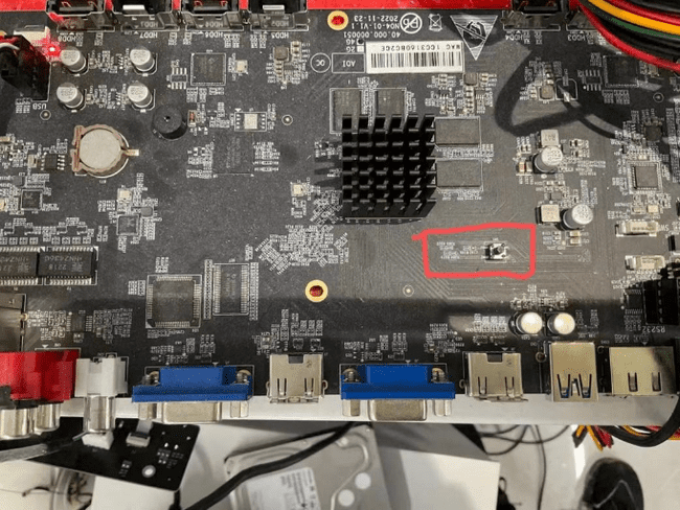
1004-UC/1008-UC: Loose the screws on the bottom and open the shell, an black button on the main board like the figure shown below
1004-UPC/1008-UPC: Loose the screws on the bottom and open the shell, an black button on the main board like the figure shown below.
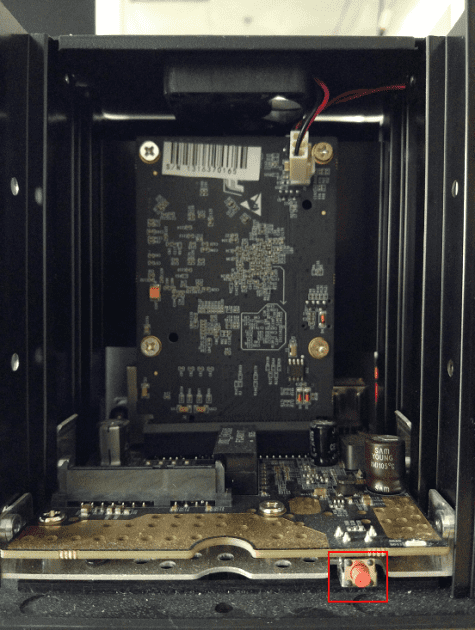
1008-UNPC: Slide and open the shell, an orange button on the inside like the figure shown below.
· Series-5000:
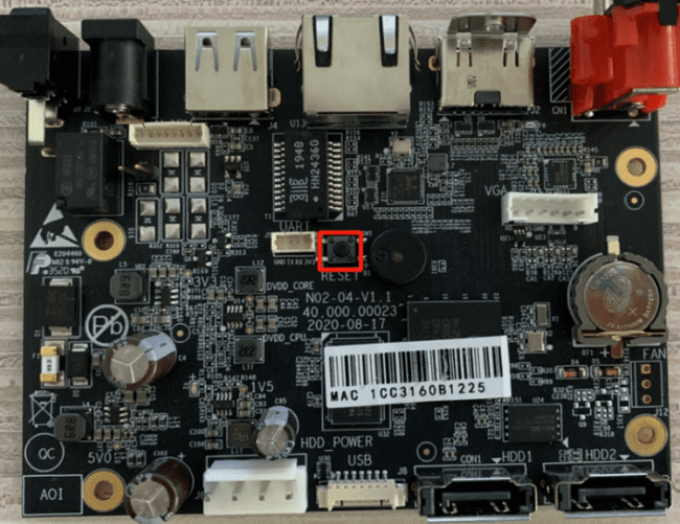
5008-UC: Slide and open the panel, a black button on the inside like the figure shown below.
5016-UT: Slide and open the panel, a black button on the inside like the figure shown below.
5016-UH/5032-UH: Slide and open the panel, a black button on the inside like the figure shown below.
5008/5016-E, 5008/5016-PE : Slide and open the panel, a black button on the inside like the figure shown below.
5008-UPT: Slide and open the panel, a black button on the inside like the figure shown below.
5008-UPC: Slide and open the panel, a black button on the inside like the figure shown below.
· Series-7000:
7016/7032-UH: Slide and open the panel, a black button on the inside like the figure shown below. 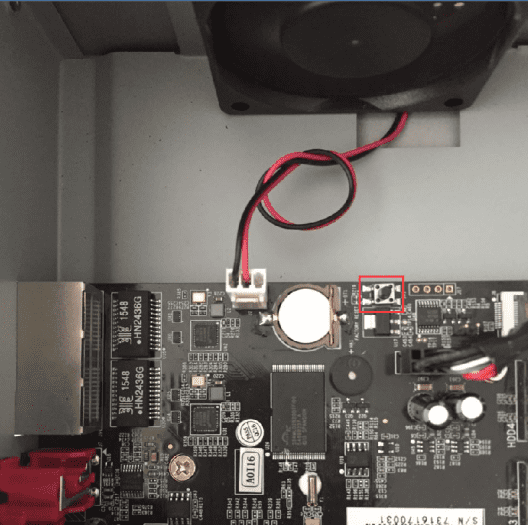
7016/7032-UPH/7048-UPH: Slide and open the panel, a black button on the inside like the figure shown below.
7016/7032-G/7048-PG:Slide and open the panel, a black button on the inside like the figure shown below.
· Series-8000:
8032/8064-UH: Slide and open the panel, a black button on the inside like the figure shown below.
8032/8064-G:Slide and open the panel, a black button on the inside like the figure shown below.
How to Reset Hardware
The following shows how to do a hardware reset on the network camera and where the reset button is located.
.
1) Reset Steps
For cameras whose model suffix has -A or -B or -C or -D or -E (e.g: MS-C8165-PA,MS-5373-PB, MS-C2866-X4RPC, MS-C5375-FPD, MS-C5367-X23PE) with the software version is after xx.7.0.1
(Including TraffiX Series :TS5510-GH,TS5511-GH)
Step1: Press the reset button and hold on, then power on the network camera and the IR LEDs will begin to twinkle ;
Step2: Keep pressing the reset button until the IR LEDs stay always on;
Step3: It will take 1~3 minutes to complete the reset and the IP will turn into 192.168.5.190 (If the IP does not be changed into 192.168.5.190, please try again from step 1);
Step4: Modify your local IP by SmartTools again.
For cameras whose model suffix has -A or -B (e.g: MS-C3377-PNA, MS-C4463-FIPB) with the software version is before xx.7.0.1
Step1: Power on the network camera and wait 2 minutes when it is totally up;
Step2: Press the reset button for over 5~10s,until hear the voice of IR-cut and see the IR LEDs are always on;
Step3: It will take 1~3 minutes to complete the reset and the IP will turn into 192.168.5.190 (If the IP does not be changed into 192.168.5.190, please try again from step 1);
Step4: Modify your local IP by SmartTools again.
For other cameras whose model suffix has no -A nor -B: (e.g: MS-C2182-P)
Step1: Press the reset button before powering on the network camera (do not loosen);
Step2: Power on the network camera and keep pressing the reset button for 10s;
Step3: It will take 1~3 minutes to complete the reset and the IP will turn into 192.168.5.190 (If the IP does not be changed into 192.168.5.190, please try again from step 1);
Step4: Modify your local IP by SmartTools again.
For Indoor Parking Guidance Camera (PM3322-E)
Step1: Power on the network camera and keep pressing the reset button for 5-10s;
Step2: Loosen the reset button,wait for about 25s until the indicator light starts to change colors alternately;
Step3: It will take 1~3 minutes to complete the reset and the IP will turn into 192.168.5.190 (If the IP does not be changed into 192.168.5.190, please try again from step 1);
Step4: Modify your local IP by SmartTools again.
For 4G Solar-powered Traffic Sensing Camera (SC211-NA/EU/AU)
Step1: Power on the network camera and press the reset button.
Step2: Keep pressing the reset button until the indicator light turns red and begins to twinkle(Do not let the red light twinkle for more than 10s).
Step3: It will take 1~3 minutes to complete the reset and the IP will turn into 192.168.5.190 (If the IP does not be changed into 192.168.5.190, please try again from step 1).
Step4: Modify your local IP by SmartTools again.
.
2) Position of the Reset Button
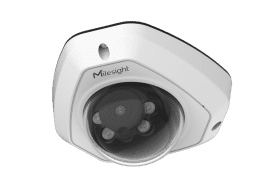
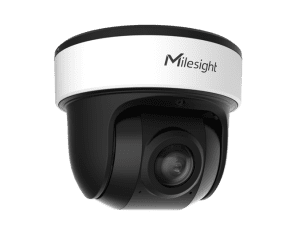
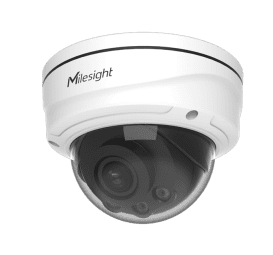
Mini Dome:
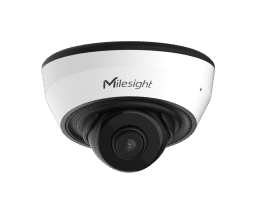
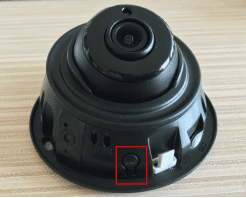
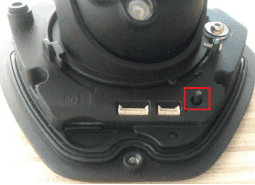
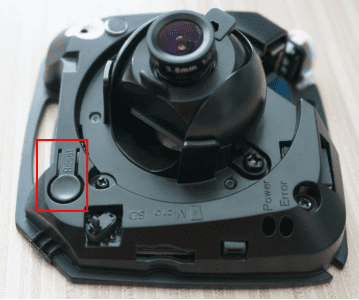
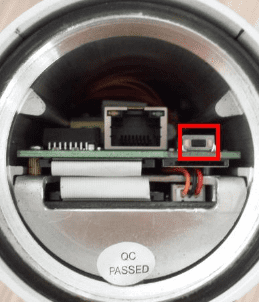
IR Mini Dome:Open the cover of the camera, a button like the figure shown below.
.
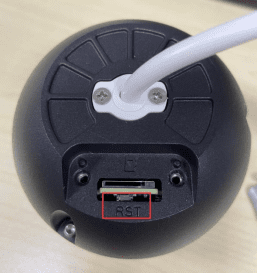
Weather-proof Mini Dome:Open the back cover on the camera ball, you can use tools to achieve reset button like the figure shown below.
.
.
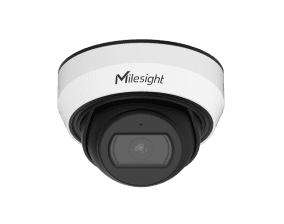
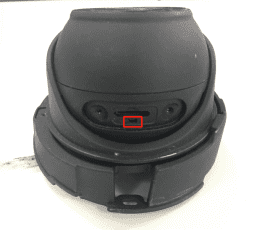
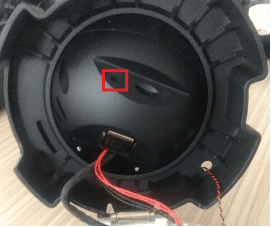
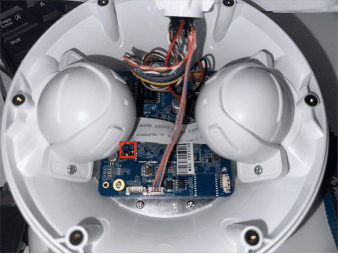
Vandal-proof Mini Dome: Open the cover of the camera, a button like the figure shown below.
.
.
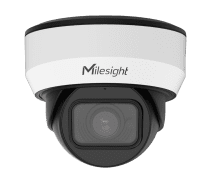
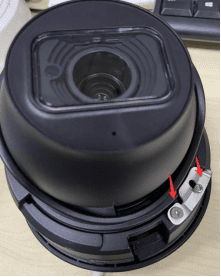
Motorized Mini Dome: Open the bottom lid cover of the camera, turn off the two screws as shown below,you can use tools to achieve reset button like the figure shown below.
.
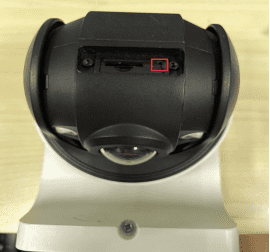
180° Panoramic Mini Dome: Rotate the dome,you can use tools to achieve reset button like the figure shown below.
.
Other: Open the cover of the camera, a button like the figure shown below.
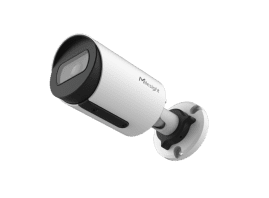
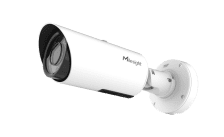
Mini Bullet:
Motorized Mini Bullet / Weather Proof Mini Bullet / Color Vandal Proof Mini Bullet/ Entrance & Exit AI LPR Bullet/Other: Open the cover of the camera base, a black button like the figure shown below.
.
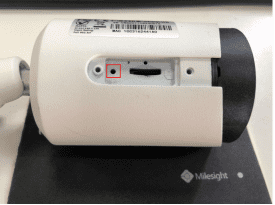
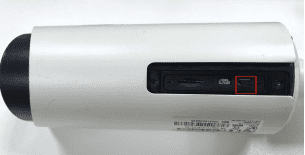
Vandal Proof Mini Bullet: Remove the back cover on the camera body, you can use tools to achieve reset button like the figure shown below.
.
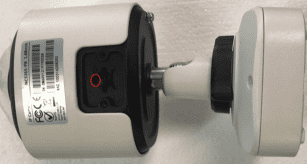
180° Panoramic Mini Bullet: Remove the back cover on the camera body, you can use tools to achieve reset button like the figure shown below.
.
.
Pro Dome:
Pro Dome / Entrance & Exit AI LPR Pro Dome : Open the top lid cover of the camera, you can use tools to achieve reset button like the figure shown below.
.
.
Pro Bullet:
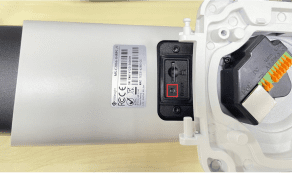
Remove the back cover on the camera body, a button like the figure shown below.
.
.
Pro Bullet Plus:
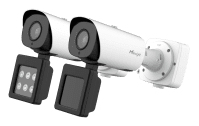
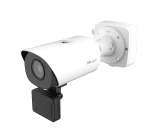
Pro Bullet Plus / Motorized Pro Bullet Plus / 5G AIoT Pro Bullet Plus / 5G Pro Bullet Plus/ 5G Motorized Pro Bullet Plus / Road Traffic Pro Bullet Plus / Road Traffic Parking Detection Pro Bullet Plus / Road Traffic Supplement Light Pro Bullet Plus / Road Traffic Radar Pro Bullet Plus / Road Traffic 5G Pro Bullet Plus / Entrance & Exit LPR Pro Bullet Plus / Entrance & Exit Supplement Light LPR Pro Bullet Plus / Outdoor Parking Management Pro Bullet Plus:Remove the back cover on the camera body, a button like the figure shown below.
.
.
.
.
.
.
.
.
.
.
Pro Box:
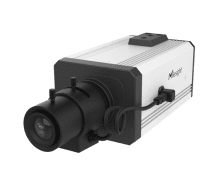
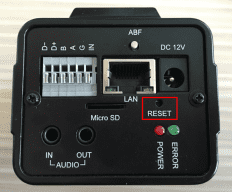
Pro Box / Pro Box Plus:a hole on the back of the camera, use pin or something like that to push the button deeper inside the hole.
.
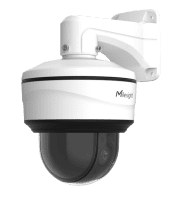
PTZ Dome:
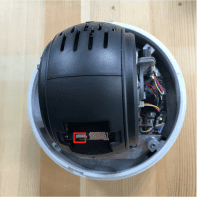
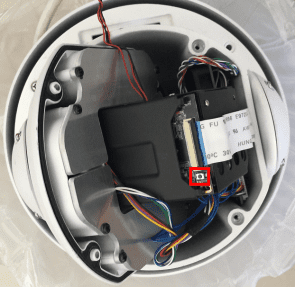
Open the dome cover and SD card cover, a black button next to SD card slot like the figure shown below.
.
PTZ Bullet:
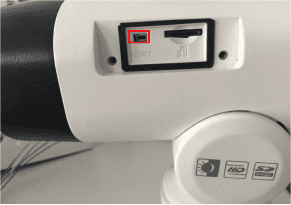
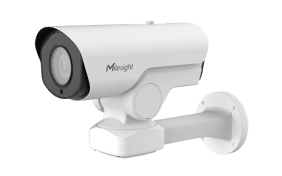
PTZ Bullet / Road Traffic PTZ Bullet: Remove the upper housing and the SD card cover which on the left side of the camera body, a button like the figure shown below.
.
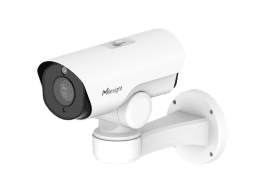
PTZ Bullet Plus:
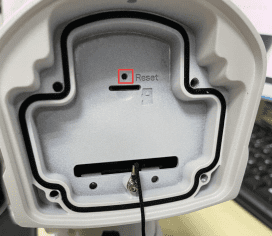
PTZ Bullet Plus / Road Traffic PTZ Bullet Plus: Open the back cover on the camera body, you can use tools to achieve reset button like the figure shown below.
.
Speed Dome:
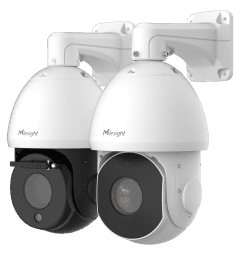
Speed Dome/ Road Traffic Speed Dome:Open the front cover of the camera, a black button like the figure shown below.
.
Fisheye:
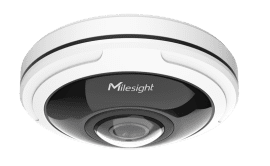
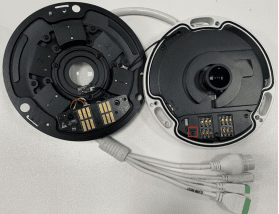
Open the front cover of the camera, a black button like the figure shown below.
.
.
Dual-sensor 180° Panoramic:
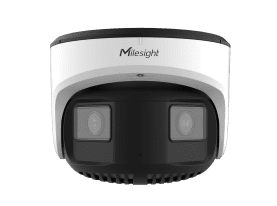
Remove the SD card cover on the back of the camera , use pin or something like that to push the button inside the hole.
.
4G Solar-powered Traffic Sensing:
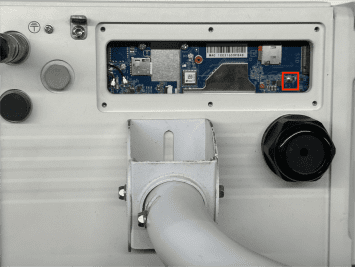
Remove the SIM card cover on the back of the camera , use pin or something like that to push the button inside.
.
.
Indoor Parking Guidance Camera:
Open the top cover of the camera, a black button like the figure shown below.
.
TrafficX:
TrafficX / TraficX Enforcement:
Open the back cover on the buttom of the camera ,the reset button like the figure shown below.
.
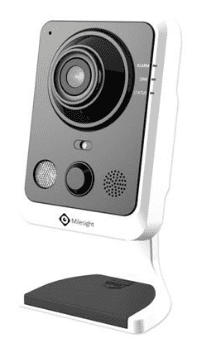
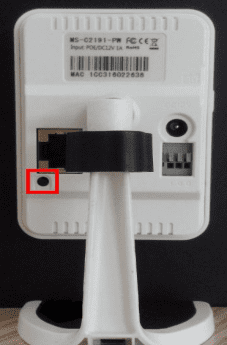
Wi-Fi Mini Cube (Discontinued):
A black button on the back of the camera.
.
How to Upgrade Firmware for IP Camera
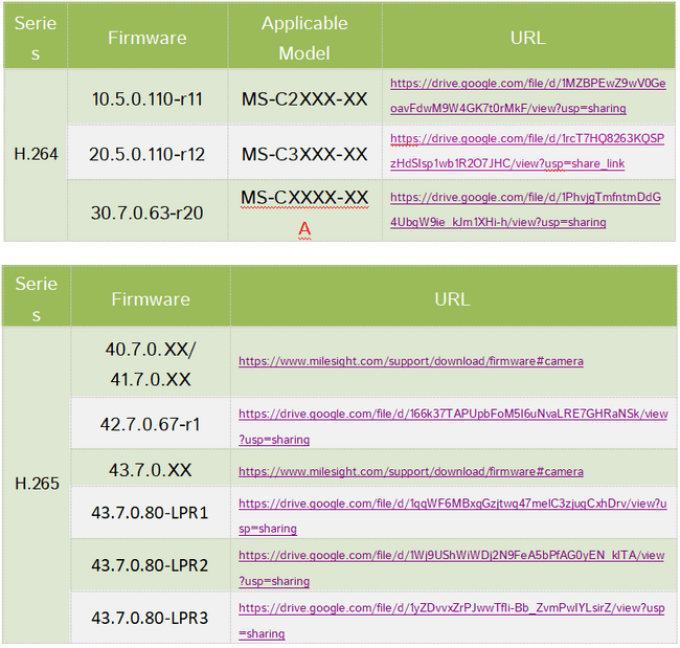
1. Choose Firmware
.
Note:
1) Firmwares 10.5.0.110-r11 and 20.5.0.110-r11 are separately used for cameras MS-C2XXX and MS-3XXX which are without -A or -B in the model names, such as MS-C2182-P and MS-C3366-FPN;
2) Firmware 30.7.0.63-r20 is used for cameras with -A in the model names including MS-C2XXX-A and MS-3XXX-A, such as MS-C2182-PA and MS-C3366-FPNA;
3) Firmware 40.7.0.XX is used for cameras which use the firmware that the prefix of version number is 40 or 41;
4) Firmware 42.7.0.XX is used for cameras which use the firmware that the prefix of version number is 42 (For earlier MS-C8262-F(I)PB and MS-C9674-PB);
5) Firmware 43.7.0.XX is used for cameras which use the firmware that the prefix of version number is 43 ;
6) Firmware 43.7.0.XX -LPRX is used for LPR cameras which use the firmware that the suffix of version number is LPRX, such as LPR1, LPR2,LPR3;
7) If failed to get the upgrade firmware by clicking the link directly , please copy the link to browser manually;
8) To ensure that the firmware is fully available, the downloaded file will be a compressed package. Please manually extract it before importing to the File Path.
2. Key Steps after Downloading the Firmware
If the firmware you downloaded is 30.7.0.XX or 4X.7.0.XX, you can skip this part and directly go to 3.Upgrade Steps, otherwise please read below steps carefully.
Step1: If the current firmware version of your camera is above XX.5.0.85, like 10.5.0.89 or 20.5.0.90, you can go to 3.Upgrade Steps and upgrade your camera directly;
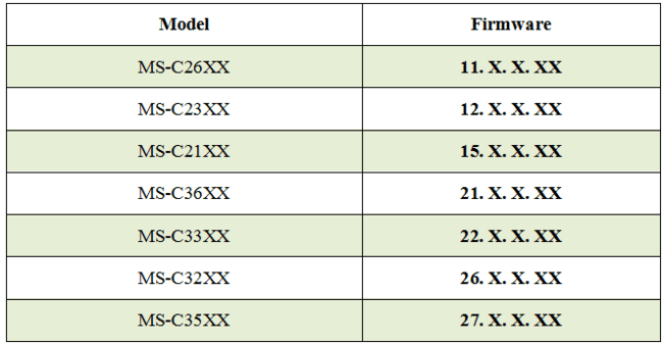
Step2: If the current firmware version of your camera is below XX.5.0.85, like 10.5.0.73 or 20.5.0.80, you should change the name of the firmware you downloaded according to the table below;
Take MS-C2651-PM for example:
Step1: According to the table above, it matches with MS-C2XXX, so we should download MSFImage_10.5.0.110_896a6b5b first.
Step2:
1) Suppose that the firmware version of this camera is XX.5.0.87 before upgrading, we can directly upgrade it according to 3.Upgrade Steps;
2) Suppose that the firmware version of this camera is XX.5.0.79, we should change the name of the firmware we downloaded. According to Table2, MS-C2651-PM belongs to model MS-C26XX and matches with 11.X.X.XX. So we need to change
MSFImage_10.5.0.110-r11_2e653e10 into MSFImage_11.5.0.110-r11_2e653e10
3. Upgrade Steps
Please check each model with right firmware version as mentioned above , then upgrade the firmware according to the following steps:
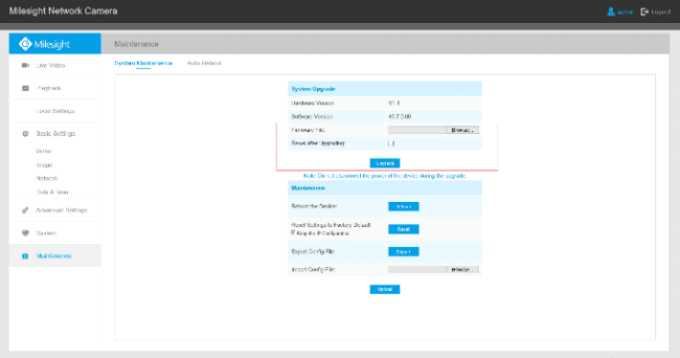
Step1: Go to the web of IP Camera, click “Configuration” -> “Maintenance” -> “Upgrade Firmware”
Step2: Browse and select files for the upgrade.
Step3: Click the “Upgrade” button and a progress bar will pop up, wait for about 1-3 minutes until it reaches 100%. After that, the system will reboot, and the firmware upgrade successfully.
Step4: Use Milesight Smart Tools to search out this camera according to its MAC address, and then change its IP into your local IP address. (The IP address will be kept after upgrading if the firmware versions are after XX.4.0.52).
You can also use Smart Tools to download the latest firmware.
“IPC Tools”-“Upgrade”-“Firmware Online”
The link for Smart Tools:
https://www.milesight.com/support/download/software#auxiliary-software
Note:
1) If the current firmware version of the camera is below 10.5.0.73 and 20.5.0.73, like 10.5.0.68 or 20.4.0.51, please reboot the camera and restore it into factory settings via web before upgrading.
2) For the new version, you may need to re-install the ActiveX. During the installation, please close the browser, otherwise the ActiveX may not be installed correctly.
3) Please clear the cookies first after re-installing the new ActiveX(Press Shift+Ctrl+Delete to quick call the clear cookies windows).
