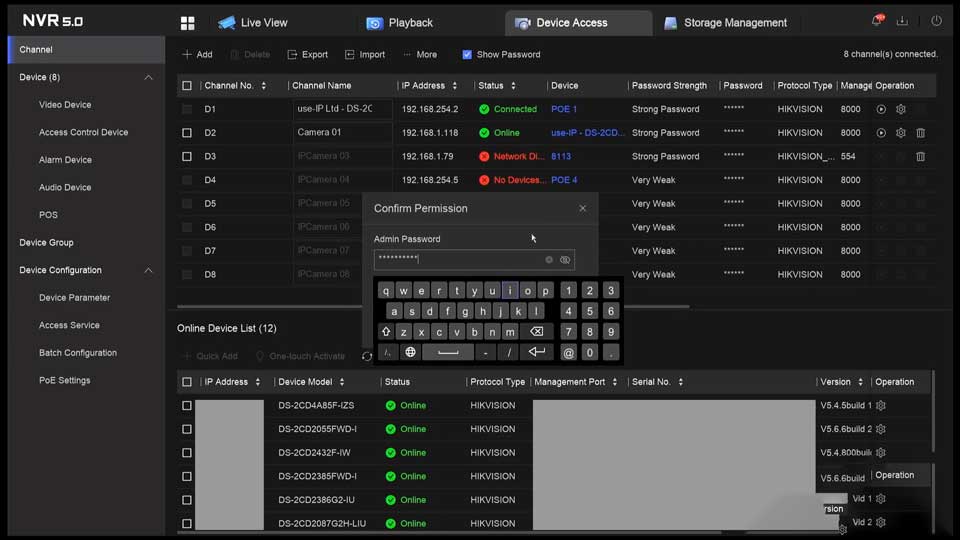
How to find your camera passwords on a Hikvision NVR, We all know how easy it is to forget passwords and it can be a real hassle resetting them on Hikvision cameras, especially if they are connected directly to an NVR.But, if you plan to move your cameras to another location, NVR, or if you just need to access them directly to carry out a firmware update, you will need to know what its password it. Luckily, there’s a little-known feature on the local GUIs of each NVR which allows you to view all of the connected cameras.
The below steps and videos will walk you through how to use this feature on the NVR 4 E-UI, NVR 4.0, and NVR 5.0 interfaces, which are the most commonly found on Hikvision NVRs now.
As this feature is only available on the local GUI, and not in a web browser, there are a few things you will need to do before starting:
How to find your camera passwords on a Hikvision NVR
Steps for the NVR 4 E-UI local GUI…
Steps for the NVR 4.0 local GUI…
Steps for the NVR 5.0 local GUI…
How do I activate my Hikvision device?
As a security measure, any device that is brand new or has been reset to its factory settings needs to be “activated” with a strong password before it can be used.
Devices running old firmware may still be using the default Hikvision password of “12345”. If this is the case for your device, you should set your own password on it and update its firmware to the latest available as soon as you can.
To activate your camera, you will need to make sure that it is connected to your LAN and being powered (by either a PoE switch or a separate PSU). Then, follow the steps below to activate your camera using Hikvision’s SADP tool on a PC.
Note – This section only really applies to cameras that you plan to add to your NVR across the network. If you’re using the Plug and Play feature to connect your device, you don’t need to worry about activating it. When you plug the device into your NVR, it will be automatically activated the given the Activation Password and Username set during the initial NVR setup.
Step 1:
Install Hikvision’s SADP Tool and run it on a PC that is on the same network as the inactive device.
Step 2:
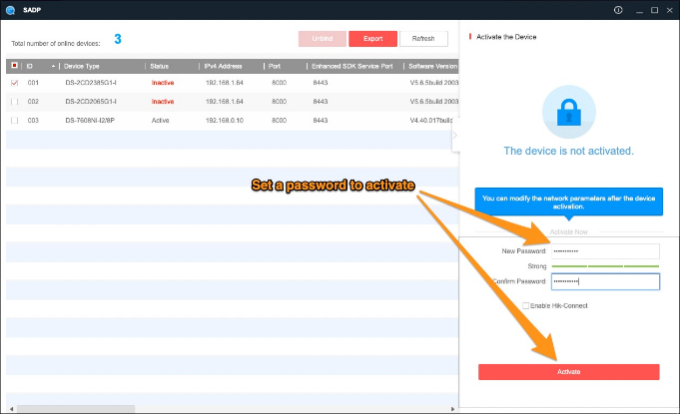
You should see a list of all the devices on the network, any that have not been activated are marked as “Inactive” in the “Status” column. Select the inactive device from the list by ticking the corresponding box on the left.
Step 3:
You should then be prompted to set a password for it in the right-hand flyout:
Set and confirm a password that SADP classifies as strong – you should use a combination of at least three of the following in your password for it to do so:
If you have existing devices in your system, then using the same password as these means you don’t need to keep a list of passwords for each device, as well as saving you time during future configuration.
Step 4:
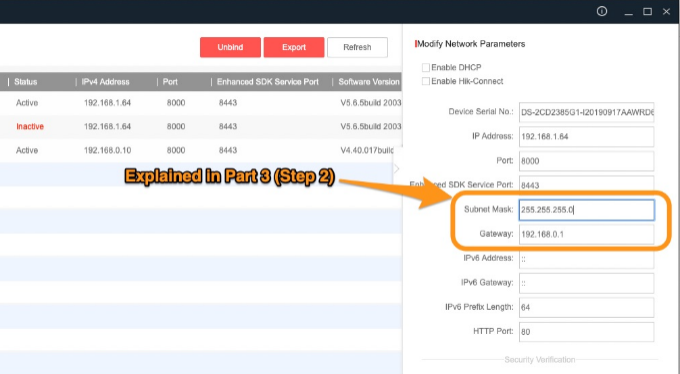
You now need to change a few of the “network parameters” in the right-hand side flyout so that the device can be accessed on your network.
Firstly, change the Gateway and Subnet Mask to the correct ones for your network.
Step 5:
.
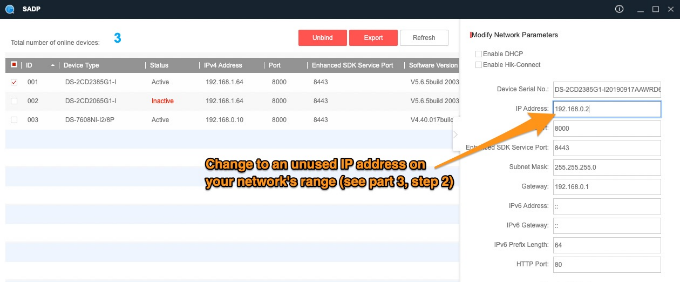
Now, you need to set a unique IP address for your new device, which also needs to be within your LAN range. This is explained in detail in the guides linked in step 3, but if your gateway address is “192.168.1.1”, then the device will need an address within the range of “192.168.1.x” where “x” is any unused address (including the gateway) between 1 and 254.
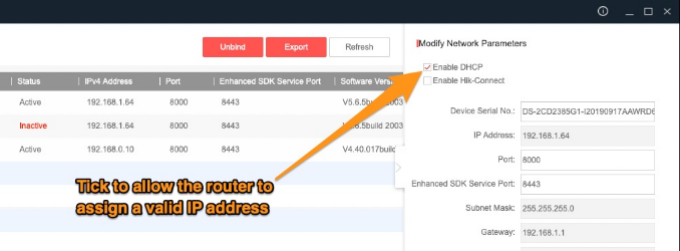
If you don’t need to set a specific IP address, or still aren’t sure which ones are available to use, then you can always tick the Enable DHCP box. This will get your router to automatically assign a working IP to the new device. Once the IP address changes (after you click modify), make a note of it and untick this box again to stop it from changing in the future.
Note – DHCP will only work if the Gateway field is correctly set for your network.
Step 6:
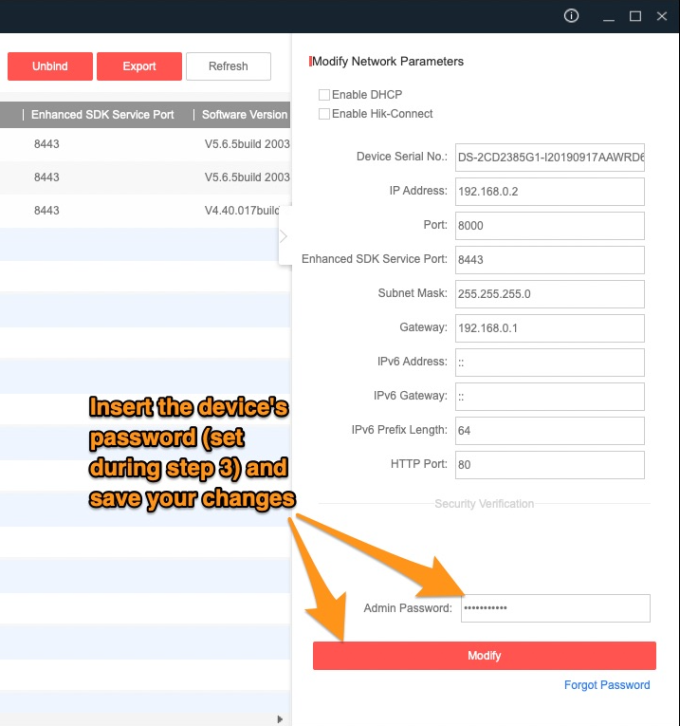
Finally, type in the password that you activated the device with during step 3, and then click “Modify” to save your changes.
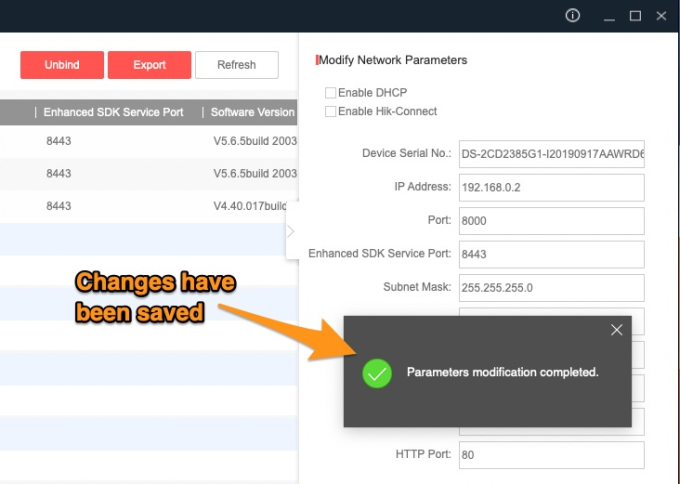
You’ll see a “Parameters modification completed” popup to confirm that the password is correct and your changes have been saved:
Now that the camera has been activated with the correct network settings, it can be added to one of your NVR’s channels. For the instructions on doing this, please see Part 4.
