Hikvision Devices Browser Configuration, Hello, in this article we have prepared a guide with the necessary settings and steps for Hikvision recorder, camera and all other devices to work in the browser from the computer. Common settings for all browsers such as Microsoft Edge, Google Chrome, Opera and Mozilla Firefox are in our article.
Exporting Playback file in IE11 does not save files
Issue: User is viewing Hikvision device on IE11 and wants to export clips or playback files. IE11 acknowledges that files have been saved, but file is non-existent.
Resolution: Run IE11 as Administrator.
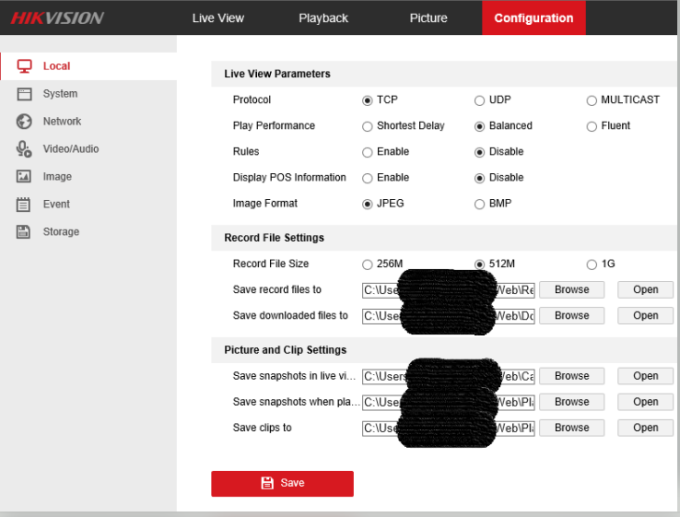
When logged into the Hikvision device, go to Configuration > Local > Record File Settings | Picture and Clip Settings >>> change file path as needed.
If there are still issues with IE11 not exporting files, recommend other fixes like adding the device URL in Tools > Compatibility View Settings or considering temporarily disabling Software AV/Firewall that may be blocking the USSCWebVideo plugin.
Hikvision Devices Browser Configuration
Edge- How to use Edge Browser with IE mode
*** UPDATE ***
Refer to attachement at the bottom of the page.
How to enable IE compatibility mode on Microsoft Edge
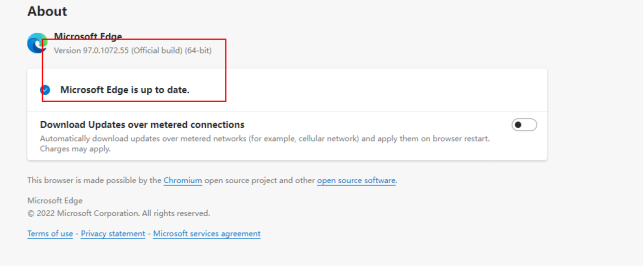
Step 1. Ensure that the Edge browser version is later than 89. Recommend to use the latest Edge browser version.
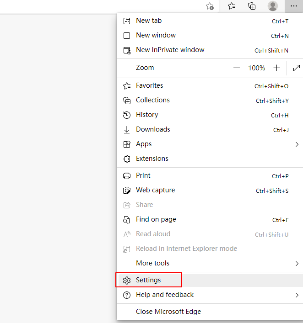
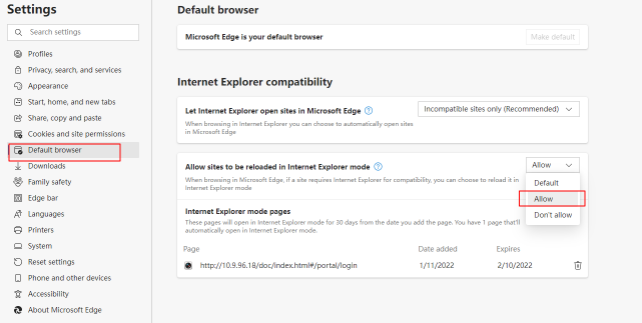
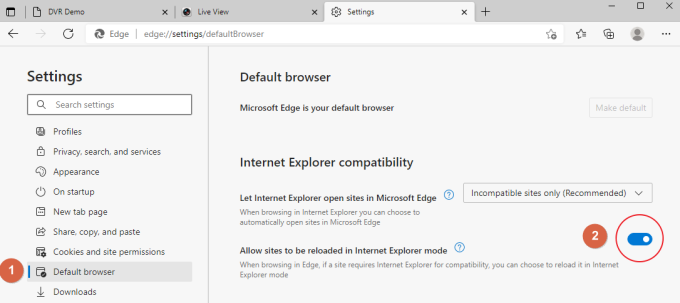
Step 2. Click the drop-down box on the right side of the Edge browser and select Settings to enter.
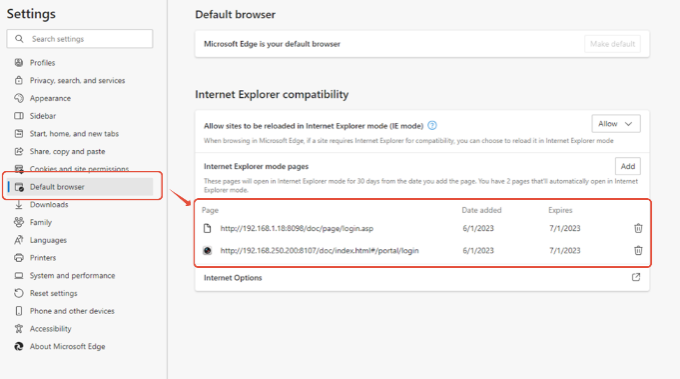
Step 3. Select the default browser, enable allowing the site to reload in IE mode, and restart the browser as prompted.
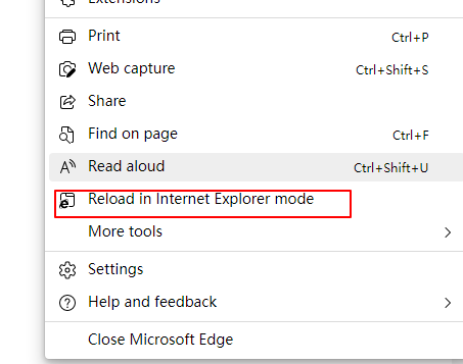
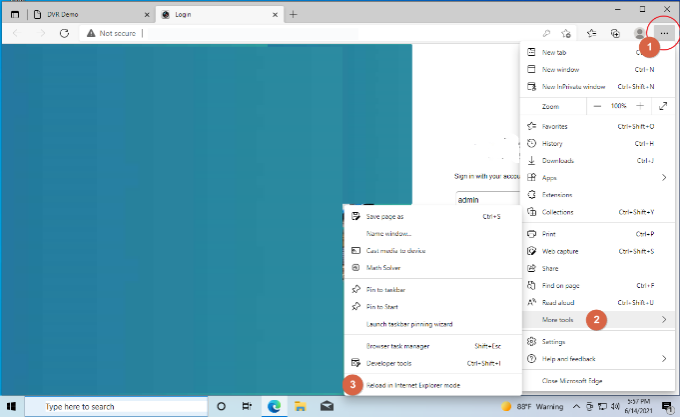
Step 4. Click the right drop-down box and select Reload in IE mode.
Step 5. It has been switched to running in IE mode.
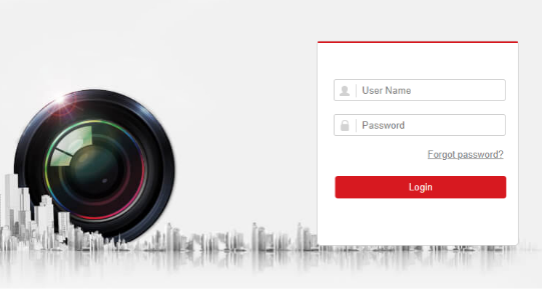
Step 6. Login camera ip.
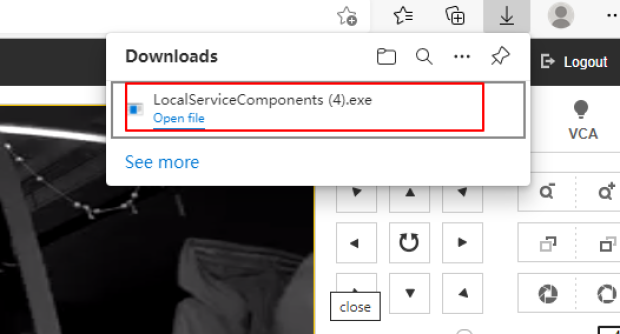
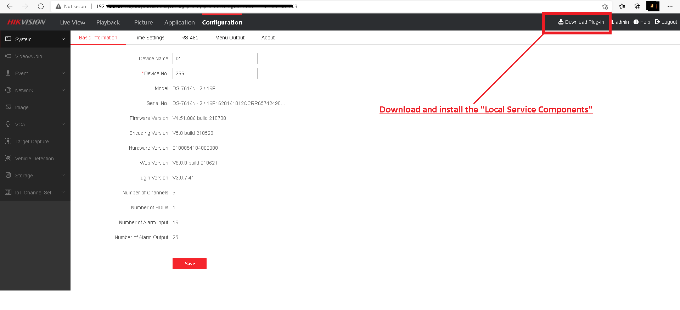
Step 7. Enter the camera web page and click on the upper right corner to download the Plug-in.
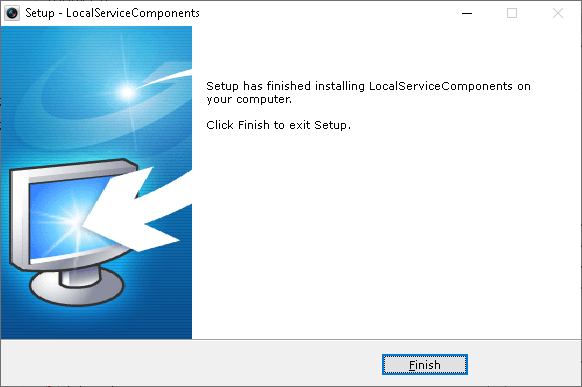
Step 8. Click to open the downloaded file and then can successfully preview the camera
***********************************************************************************************************
Internet Explorer has been serving the tech community for 25 years and Microsoft is finally ending its support. The end-of-support date will be June 15, 2022. After the Windows10 update 21H2, the Internet Explorer browser will be hidden/removed from the OS.
Requirement:
The minimal version is 91.0.86.
Otherwise, some functions will not be available.
.
After you restart the Edge browser and go to the DVR Login
page, nothing will appear different.
This is because you need to
Reload in Internet Explorer Mode from the Menu.
1. Go to …
2. More Tools
3. Reload in Internet Explorer mode
After the browser reloads again,
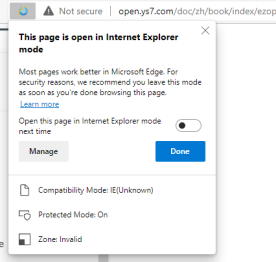
You’ve entered the Internet Explorer mode.
The most noticeable difference is a prompt
message on the top of the page.
Note: Do not click Leave.
Edge will revert back to regular Edge mode.
After you log in to the DVR/NVR,
you should see the please download plug-in
message on the center of the screen. Download the
plug-in and install.
After fully loading, Refresh the page, and click
Allow
Then, you should be able to see the video after clicking the Play All button.
Everything should be exactly the same as
Internet Explorer.
You should be able to view the camera
streams without any issue.
How do I download video files from the Edge Browser IE Mode?
The reason that you cannot download video files is because by default
the Edge:IE mode is running with the Protected Mode: ON for Zone: Internet
Even if you try adding the system to the trusted site list will be no use.
This is because the Zone is locked down to the Internet. (refer to the Zone listed under the yellow highlighted area in the picture above)
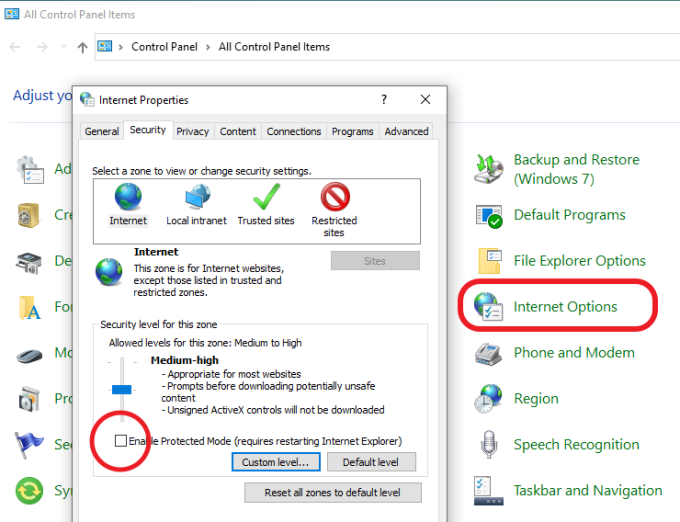
To Disable this: You need to open the Control Panel > Internet Options.
Uncheck the Enable Protected Mode option, and then restart the Edge browser.
(Important Note) Disabling Protected Mode may not be a safe action. Hikvision has no liability with any issues that may arise with this use. If this method is not preferred, we recommend using the IVMS Client software to View/Download video files.
(951 KB)
.
Browser and Plugin Support of Hikvision Products
Most current Hikvision recorders and IP cameras can be accessed via web browsers over TCP/IP.
Originally Internet Explorer was the only support browser and required installation of ActiveX controls.
Non-plugin support for newer browsers such as Chrome (PC) and Edge were introduced recently which no longer required plugin installation.
The table below shows products that support non-plugin browsers as well as the initial firmware versions of such support.
*Devices not covered below support only IE with plug-in
** Characters in BOLD below are key identifiers of the series of applicable products.
| Product Series | Product Type/Description | Non-Plugin Support Version |
| DS-7XXXNI-IX DS-96XXNI-IX |
I-Series NVR | v4.1.50 and above |
| DS-96XXXNI-IXXX | Super NVR | v4.1.61 and above |
| DS-7XXXNI-QX | Q-Series NVR | v4.30.000 and above |
| DS-7XXXHXI-KX | K-Series DVR | v4.20.000 and above |
| DS-2CD2XX3 DS-2CD2XX5 |
IP Camera | v5.5.61 and above |
| DS-2CD5XXX DS-2CD7XXX |
IP Camera | v5.5.50 and above |
| DS-2DFXXXXX | DF-Series IP PTZ Camera | v5.5.8 and above |
.
Notes:
.
Updated 10/21/21
Plug-in free:
| Supported Max. Resolution | <=3MP (I7 processor is required)
NOTE:For the camera that the resolution is higher than 3MP, it may appear the phenomenon of previewing failed or black image. |
| Supported Browser | Firefox52+,Chrome45+,Safari 11+ |
| Supported Encoding Format | H.264, H.264+, H.265, H.265+ |
Comparison Chart for Plug-in free and Plugin live view:
| Model | Function | Non-Plugin | With Plugin |
| Preview | Preview | Resolution<=3MP ((IE7 processor is required) Bitrate<=2M |
√ |
| Audio | √ | √ | |
| Capture | √ | √ | |
| Digital Zoom | √ | √ | |
| Window Division | √ | √ | |
| Full-Screen | √ | √ | |
| Record | √, Only Chrome | √ | |
| Audio On | × | √ | |
| Playback | Playback | × | √ |
| Download Video | × | √ | |
| Picture | Picture | × | √ |
| Application | Application | √ | √ |
| Configuration | Export Device Parameters | √ | √ |
| Import Device Parameters | √ | √ | |
| Upgrade | √(Only dav format file supported) | √ | |
| Draw Area | √ | √ | |
| Counting | Only support draw detection line. OSD display isn’t supported. | √ | |
| Export Log | Support.txt format | √ | |
| Local | × | √ | |
| File Path Setting | Only file name can be displayed.
It cannot show complete path. |
√ |
Involved Models:
IP camera
All G1 platform cameras: DS-2CD2XX5, DS-2CD2XX3 V5.5.61_180718 and above
All G1+M platform cameras: DS-2CD2XX6G1 V5.5.61_180717 and above
All H3/H3+M platform cameras: DS-2CD5XXX, DS-2CD7XXX V5.5.50_180309 and above
NVR
All I series NVR with V4.1.50_180227 and above:
DS-76xxNI-I2, DS-76xxNI-I2/xP, DS-77xxNI-I4, DS-77xxNI-I4/xP, DS-96xxNI-I8, DS-96xxNI-I16
All Super I series with V4.1.61_180818 and above:
DS-96000NI-I16, DS-96000NI-I16/H, DS-96000NI-I24, DS-96000NI-I24/H
Chrome or Edge Browser missing “Local” menu option
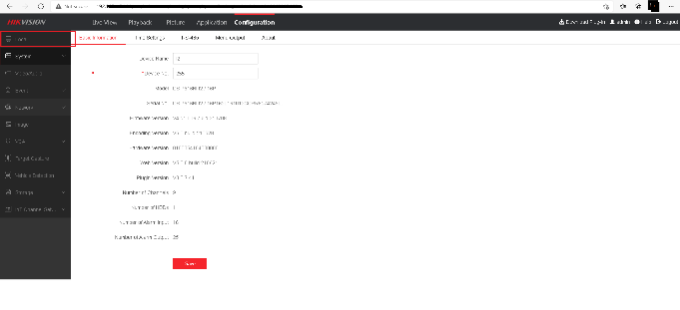
Download and Install the “Local Service Components” , close and restart the browser then log back in again to see that the Local menu option well then available.
.
*Note: Once the Local Service Component is installed, connections to the system with this service will not work with Internet Explorer until it is removed again.
.
.
Chrome – Live view failure
How to fix “not supported” error on IE mode, Microsoft Edge
Occasionally when using IE mode on Microsoft Edge you will run into the “not supported” error on the web interface. This is typically due to enabling IE mode after you are already on the “not supported” URL.
To fix this, you will need to go into the Microsoft Edge settings, and head to the “default browser” page.
On this page, there is an option to add URLs under the “Internet Explorer mode page” section. This will likely already have the “not supported” URL. You will need to delete this URL, and add the normal URL with just the IP address. Be sure to add a “http:// before the IP, or sometimes it will not work”
Browser Not Supported
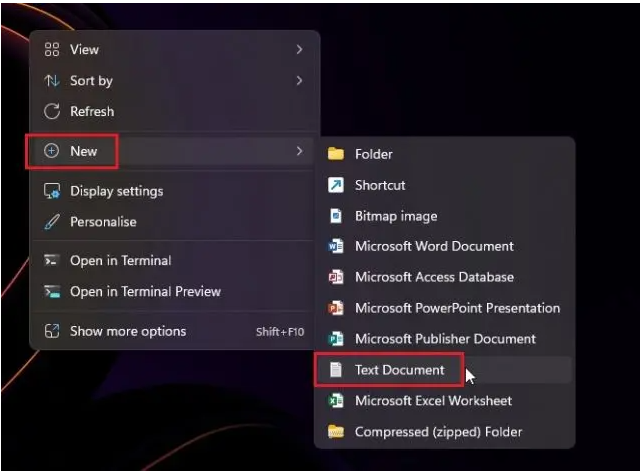
1. First, right-click on the Desktop or any location you prefer and choose New -> Text document.
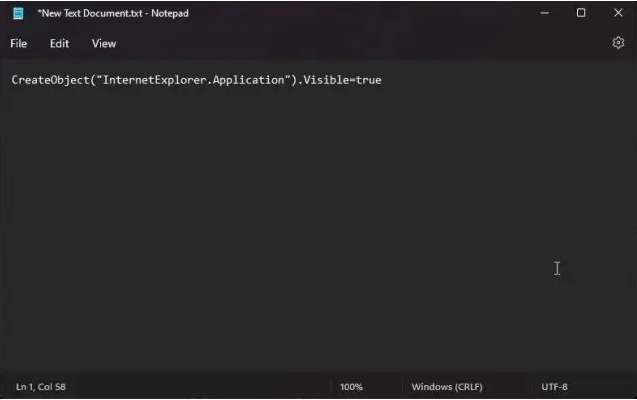
2. Once the text file opens up, copy and paste the below code into the Notepad file.
CreateObject(“InternetExplorer.Application”).Visible=true
.
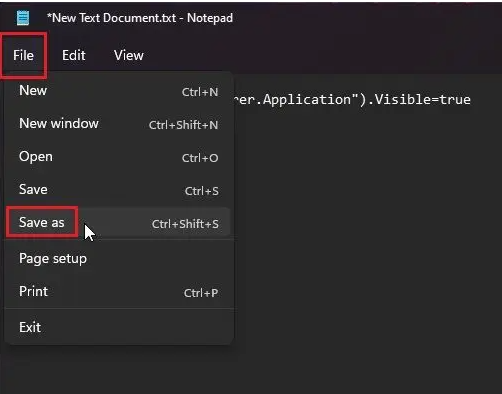
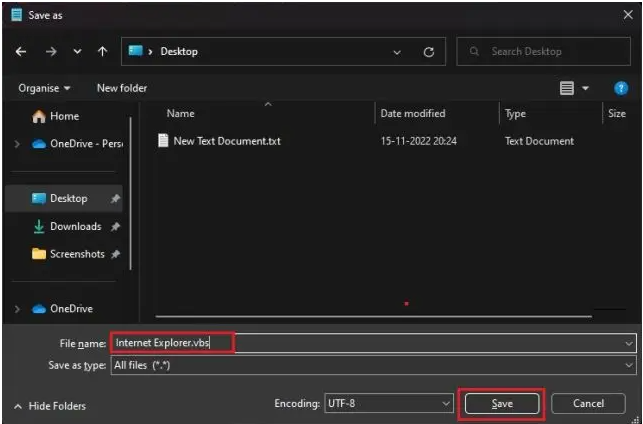
3. After that, click on File -> Save as.
.
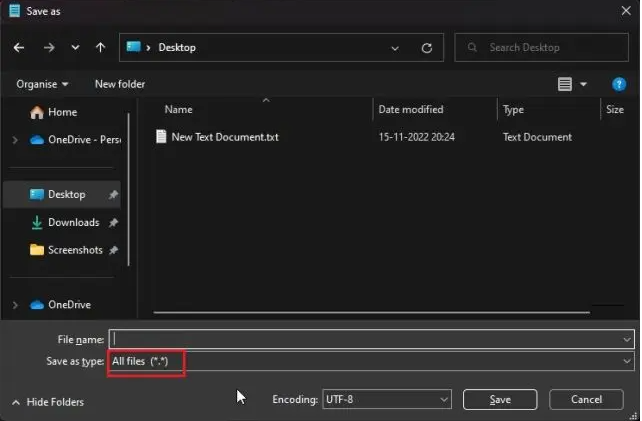
4. Here, click on the drop-down menu next to “Save as type” and change it to “All files (*.*)“.
5. After that, set a name for the shortcut with .vbs extension at the end. For example, I have named the file Internet Explorer.vbs . Now, save the file to a preferred location like your Desktop.
6. Now, double-click on the VBS file, and there you have it. Internet Explorer 11 will open up on your Windows 11 PC, and it works flawlessly without any issues. From now onwards, you only need to double-click on the VBS file to use IE 11.
Motion Icon would not Trigger Motion List on Web
Motion Icon would not Trigger Motion List on Web
Enable IE Mode in Edge
To turn on Internet Explorer mode, use the following steps.
Self-signed certificates period
Q: How long can the validity period of self-signed certificates for channel cameras be set?
A: Generally, it can only be set until 2037.
Browsers Configuration
Browsers Configuration
refer to attachment
