The Surveillance Station is professional network surveillance Video Management System (VMS). Being one of the Turbo NAS standard applications, the Surveillance Station can be activated on the QTS App Center to turn the Turbo NAS into a professional Network Video Recorder (NVR) system for real-time monitoring, recording, playback, alarm notifications, Intelligent Video Analytics’s (IVA), and management to safeguard your assets and property when used with supported IP cameras.
In order to integrate your INSTAR IP camera in the QNAP Surveillance Station we recommend you to download the latest version from QNAP app store.
QNAP Surveillance Station Setup Guide
Add a HD Camera
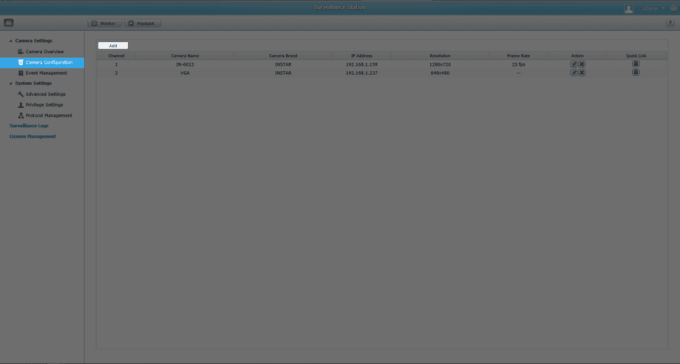
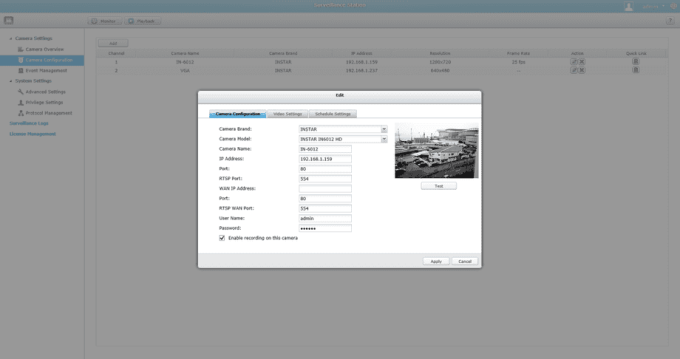
Start the Surveillance App from the QNAP web interface and click on the Add button. Now choose type in the address for your local HD camera, the HTTP & RTSP port and your login credentials.
Fig1. Start the Surveillance App from the QNAP web interface and click on the Add button.
Fig2. Type in the camera´s local IP address and your login credentials.
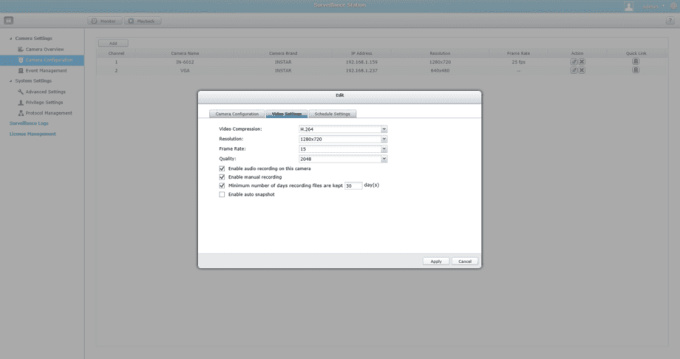
Fig3. Adjust the video quality of the camera´s live stream to fit your needs.
What to do in case of a model mismatch?
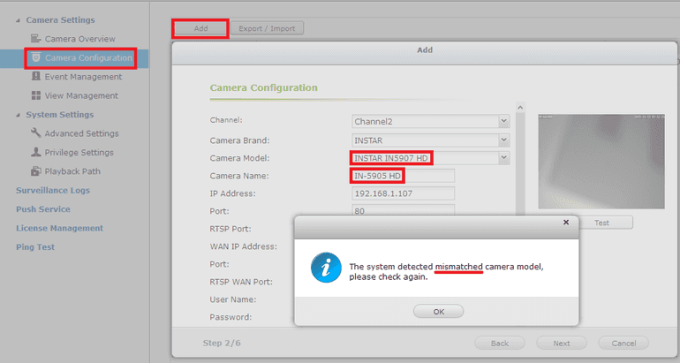
Fig4. If you want to integrate a model that is not supported by the Surveillance Station yet, you will be faced with a Model Mismatch error.
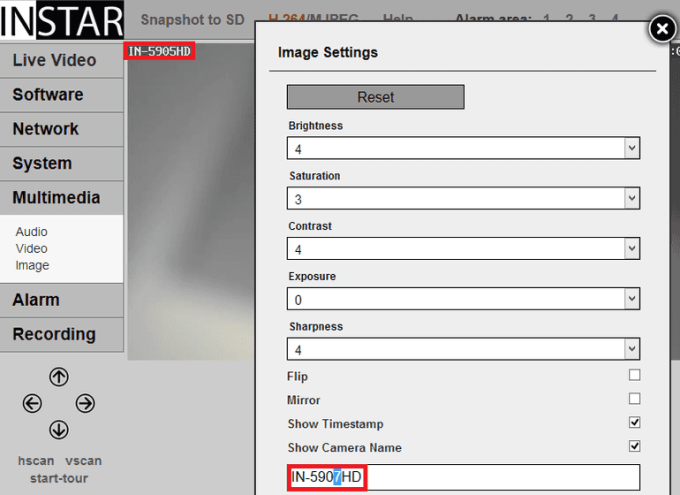
Fig5. Simply change the camera name under Multimedia/Image to a supported camera model and retry.
Add a VGA Camera
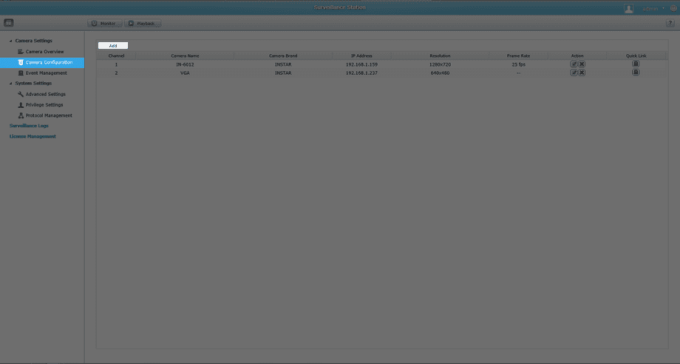
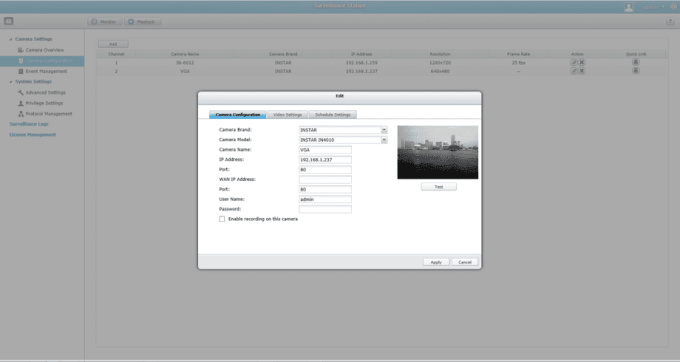
Start the Surveillance App from the QNAP web interface and click on the Add button. Now choose type in the address for your local VGA camera, the HTTP port and your login credentials.
Fig6. Start the Surveillance App from the QNAP web interface and click on the Add button.
Fig7. Type in the camera´s local IP address and your login credentials.
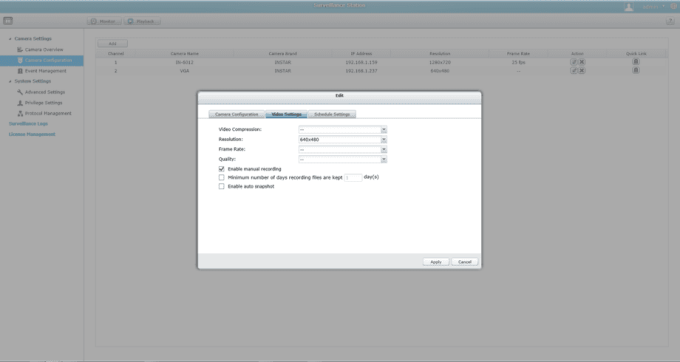
Fig8. Adjust the video quality of the camera´s live stream to fit your needs.
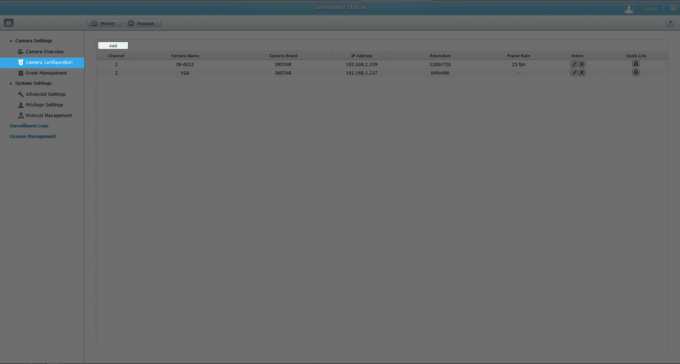
Fig9. Both cameras are now available after confirming your settings.
Event Management
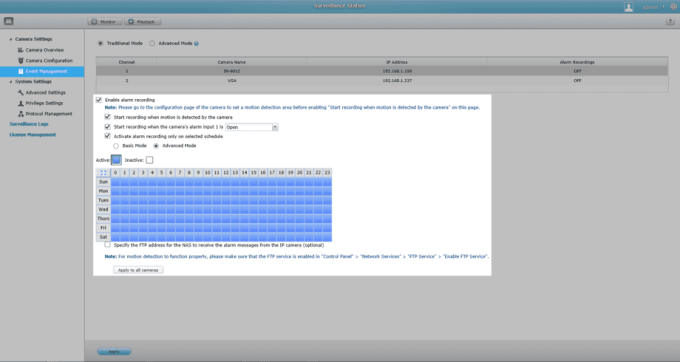
Open the event manager to activate the alarm recording in case of a motion detection event or bind the recording function to the external alarm input – so that an external sensor (e.g. a PIR motion detector) can trigger an alarm recording. Go to Advanced settings to adjust the length of the alarm recording and for a simple storage management.
Fig10. Set your camera to record a video in case of an alarm trigger event.
Monitor and Playback
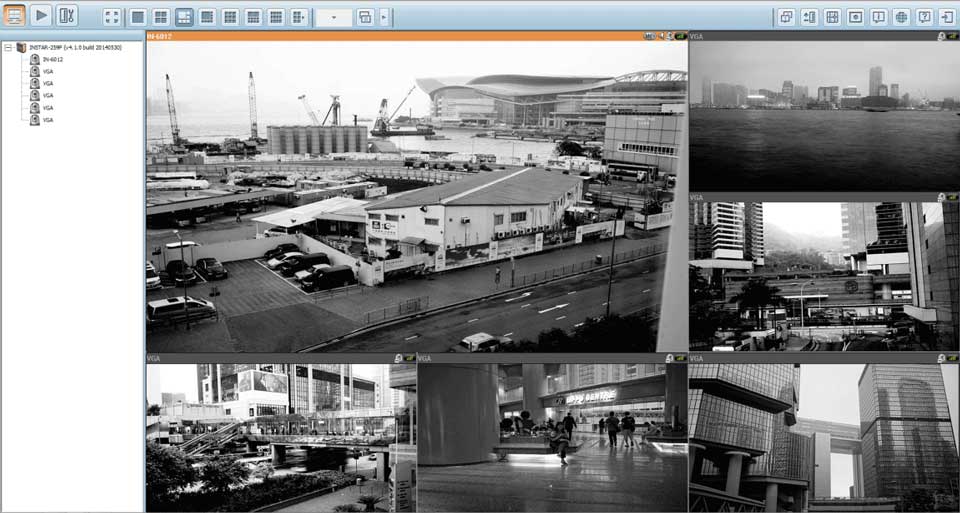
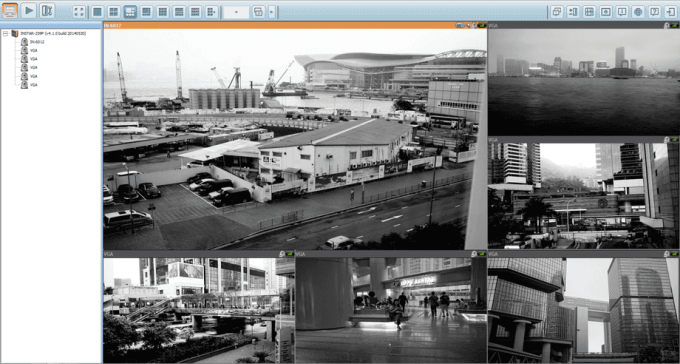
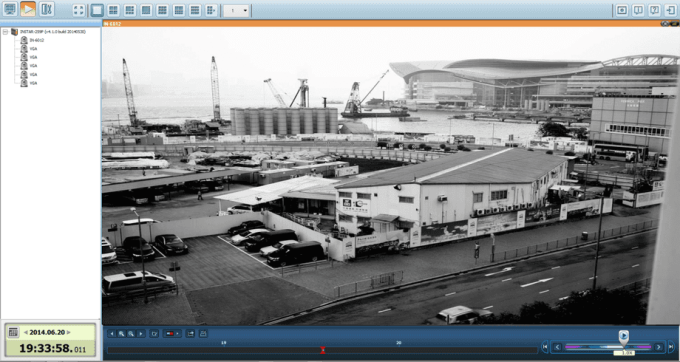
Use the Monitor window to keep an eye on your cameras real-time feeds from your INSTAR cameras. Whenever a suspicious event is found, take a snapshot to keep a record and take immediate actions accordingly. The Playback window allows you to quickly find videos of suspicious incidents on the Surveillance Station with the support of an intuitive timeline, image preview, Intelligent Video Analytics’s (IVA), and more.
Fig11. Use live-view to watch real-time feeds from the IP cameras.
Fig12. Quickly find videos of suspicious incidents on the Surveillance Station with the support of an intuitive timeline.
QVR Pro 2.1
Adding a Camera
QVR Pro is built-in in the QVR Pro appliance provides embedded monitoring channels, allowing you to quickly build a home surveillance environment.
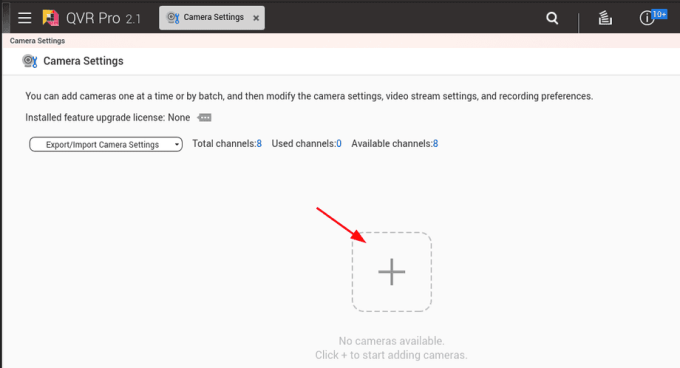
Open the QVR Pro application from your QNAP dashboard, select Camera Settings and click on the Plus icon to add a new camera:
You now have 3 choices:
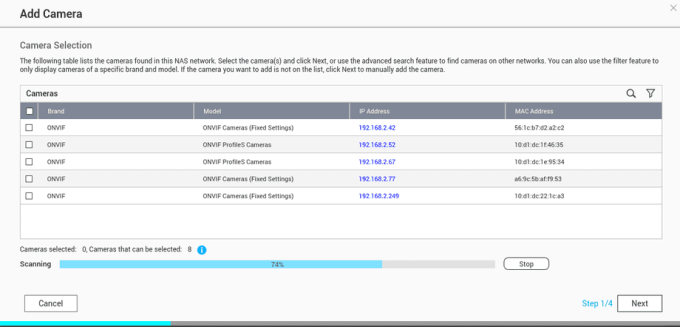
ONVIF
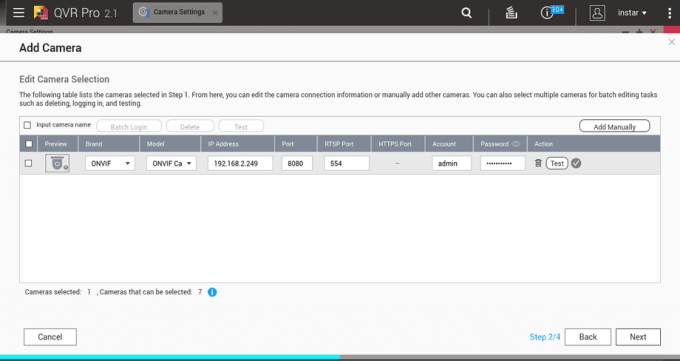
If you choose to add your camera via it’s ONVIF service you don´t have to change anything. Just click on Test to verify that everything is set up correctly. And click Next to continue:
Note that all INSTAR HD and Full HD camera models support the ONVIF S Profile. Only the 2k+ WQHD models provide support for the newer T Profile. The main difference here is, that the latter allows you to use the camera’s PIR sensor as an alarm trigger for the QVR Motion Detection.
INSTAR Preset
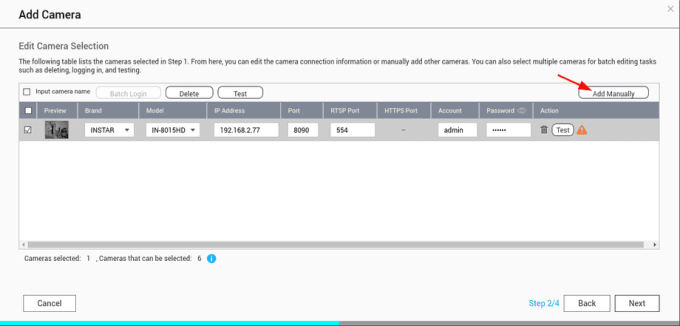
By stopping the ONVIF network and clicking on Next you now have the option to add your camera manually:
Select INSTAR as Brand and your camera Model. In addition you now have to specify your camera’s IP Address, HTTP Port and RTSP Port. Test your settings and click next.
Note that the INSTAR profile allows you to use the (HD, Full HD and WQHD) camera’s PIR sensor as an alarm trigger for the QVR Motion Detection.
Generic RTSP
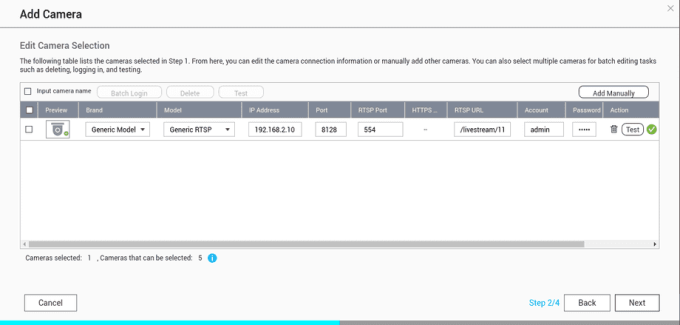
By stopping the ONVIF network and clicking on Next you now have the option to add your camera manually:
Select Generic as Brand and RTSP Model as Model. Add your camera’s IP Address, HTTP Port and RTSP Port. In addition you now have to specify your camera’s RTSP Streaming URL. Test your settings and click next.
Default Streaming URLs (high, middle and low resolution):
Activating the Video Recordings
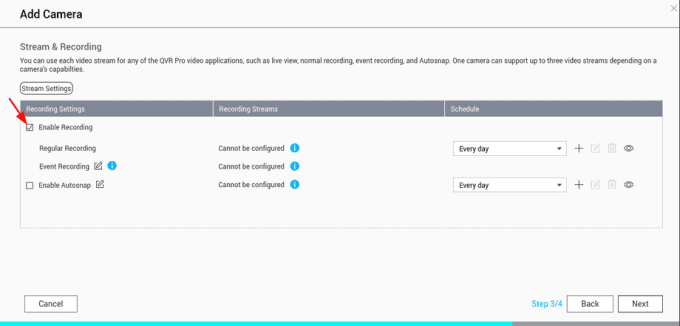
You will now be asked to set the video streaming and recording settings. Make sure to add the tick to Enable Recording or you won´t be able to see your camera’s video stream:
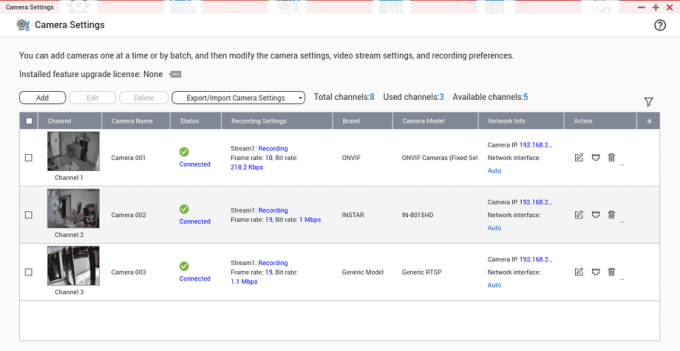
Click next and you will see an overview over all connected cameras:
Motion Detection
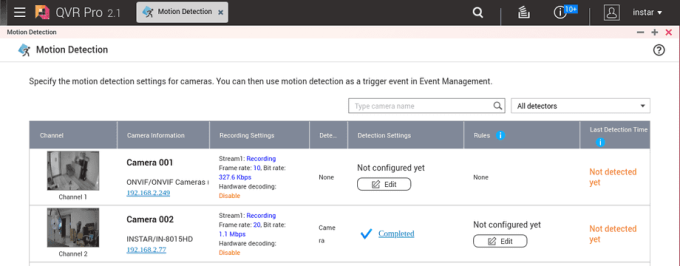
Close the Camera Settings menu and open the Motion Detektion menu:
Here you can now configure the motion detection and select action rules that should be triggered when motion was detected.
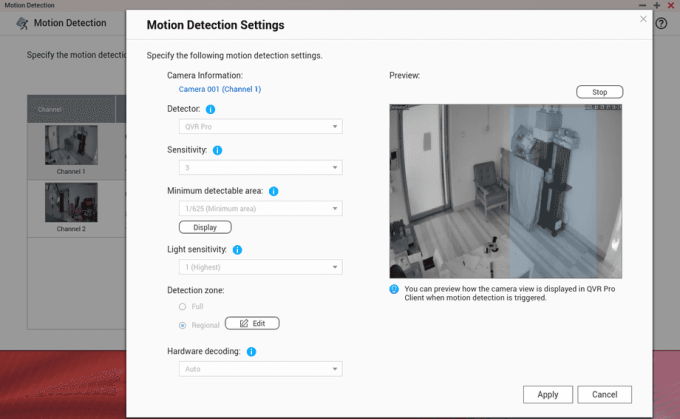
Detection Settings
Select if you want the QVR Pro Software to use it’s internal, software-based, motion detection, or if you want your camera to use it’s own motion detection (including the PIR motion sensor – only available if you added your camera via the preset or the ONVIF T Profile).
If you use the QVR Pro motion detection you can set sensitivity levels and motion detection areas.
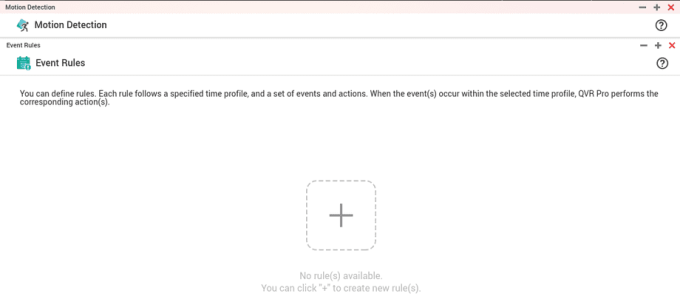
Rules
With the motion detection configured we can now add an If/Then rule set to specify what we want to happen when motion is detected:
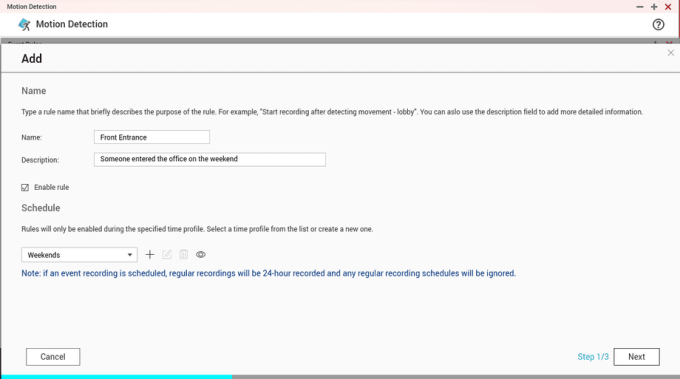
The first step is to name your rule, activate it and set a time schedule when it should be applied:
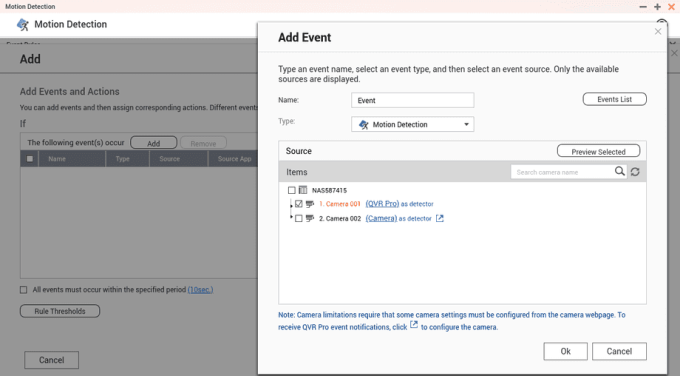
The event we want to react to is of type “Motion Detection” from a specific camera:
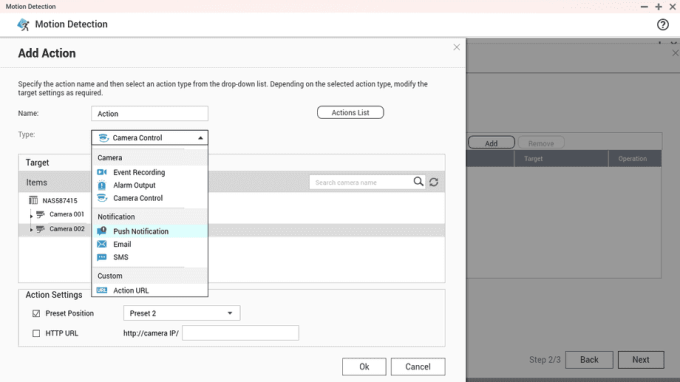
When this event occurs we want to trigger an action – e.g. an Email or Push Notification or sending a command to another camera to move to one of it’s preset positions:
Once everything is set up click on Next to save the configuration:
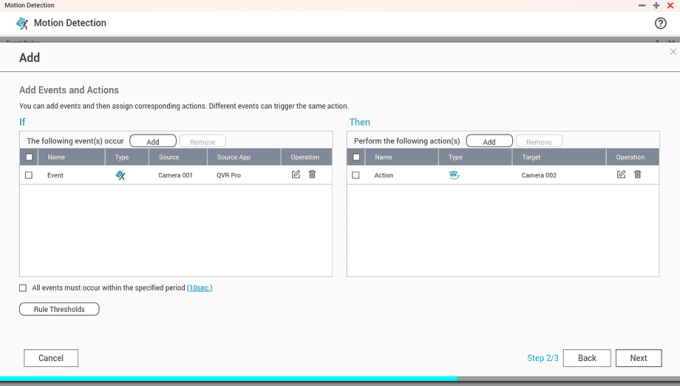
The Rule specified above waits for a motion detection event from camera 1. When this event occurs it will send a command to camera 2 to move to a specified preset position.
QNAP Surveillance Station setup, QNAP Surveillance Station guide, QNAP NAS surveillance, IP camera setup, QNAP NAS tutorial, network video recorder setup, surveillance system installation, home security system setup, QNAP NAS guide
QNAP Surveillance Station user manual, QNAP Surveillance Station configuration, QNAP Surveillance Station tutorial video, QNAP Surveillance Station troubleshooting, QNAP NAS surveillance setup step by step, QNAP NAS surveillance best practices, QNAP Surveillance Station FAQ, QNAP Surveillance Station compatibility
how to set up QNAP Surveillance Station, QNAP Surveillance Station for beginners, QNAP Surveillance Station for home use, QNAP Surveillance Station for small business, QNAP Surveillance Station for large business, QNAP Surveillance Station on a budget
QNAP Surveillance Station IP camera setup, QNAP Surveillance Station motion detection, QNAP Surveillance Station recording, QNAP Surveillance Station playback, QNAP Surveillance Station remote access, QNAP Surveillance Station mobile app, QNAP Surveillance Station cloud storage
QNAP Surveillance Station not working, QNAP Surveillance Station no video, QNAP Surveillance Station connection problems, QNAP Surveillance Station error messages, QNAP Surveillance Station slow performance
QNAP Surveillance Station, IP camera setup, network video recorder, surveillance system, home security
how to add IP cameras to QNAP Surveillance Station, how to configure motion detection on QNAP Surveillance Station, how to access QNAP Surveillance Station remotely, QNAP Surveillance Station best practices for small businesses, troubleshooting common QNAP Surveillance Station issues
QNAP Surveillance Station AI, QNAP Surveillance Station cloud integration, QNAP Surveillance Station cybersecurity, QNAP Surveillance Station smart home integration
