Contera VMS Setup and User Guide, The Contera VMS offers Standard (16 cameras), Premium (64 cameras), and Professional (128 cameras) licence choices with a range of advanced features. Arecont Vision systems integrators can download a Contera 30 day free trial licence. End users can obtain a trial license through their systems integrator.
ConteraVMS: Thick client installation
The ConteraVMS thick client needs to be installed on a customer’s workstation.
Resolution:
Download the ConteraVMS Thick Client here: https://sales.arecontvision.com/software.php
Note: The thick client requires a Windows x64 bit OS.
- Right click on the installer and select Run as Admin. Click Yes if prompted by UAC.
- Accept the license agreement and click Next.
- Click Install.
- If this is an upgrade you can choose to wipe out all settings by putting a check mark next to Perform a clean installation.
- If this is an upgrade you can choose to wipe out all settings by putting a check mark next to Perform a clean installation.
- Click Close.
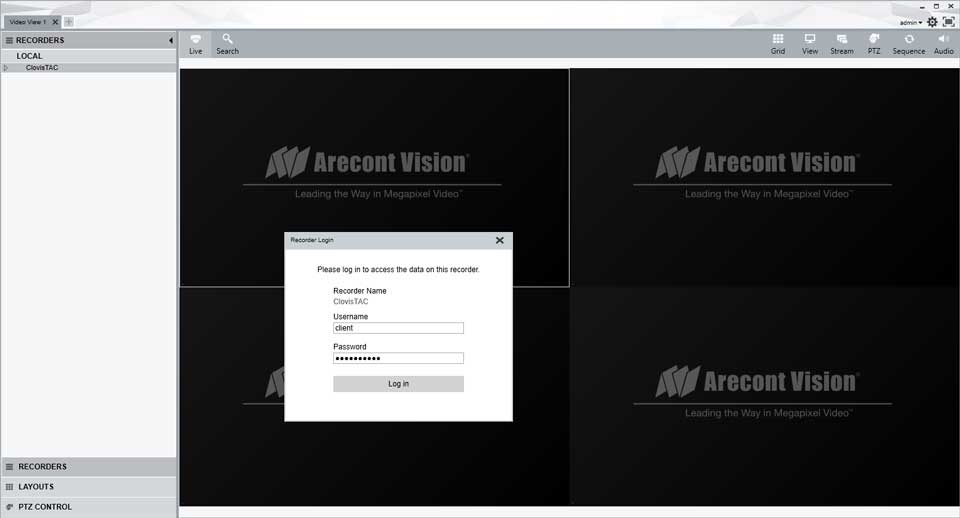
- Login with [Username: admin Password: 1234]
- Note: This is a local account on the workstation used to initially configure the client. This is not the login you will use for viewing the video.
- Note: If you log in with your conteraWS account, your site will load automatically.
- Enter a new password and click Save.
- Click Setup.
- Provide a name for the server and the IP address. Click Save then click Close.
- If you want the system to automatically connect you can supply the username and password provided by your ConteraWS Administrator under Authentication.
- If no ConteraWS is used, Enter the “Client” IP address from the ConteraCMR.
- Port 80 and 443 must be open.
- Double click the server and enter the username and password provided by your ConteraWS Administrator. Click Login.
- Click on a camera to populate the view.
Contera VMS: Feenics Integration WS Alert Configuration
Issue:
Contera VMS and Feenics Integration WS Alert Configuration
Procedure:
*Note: You will need an AV-CWSP#Y License applied in order for integration functions to start.
1. Create a New Intrusion Alert Rule
2. Select a Door Access or Access Control Alert Rule Type when creating a new rule.
3. When creating an Alert Rule, Event Types further define when an event notification will be sent. More than one type can be added when creating a rule.
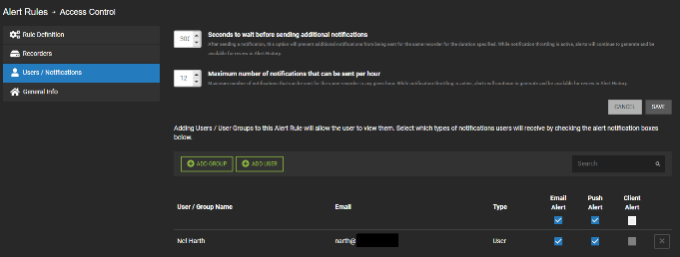
4. Add Users to an Alert Rule – Click Users / Notifications on the navigation sidebar.
5. Click Add User or Add Group.
6. Check the box next to each User or User Group who will receive emails and/or push notifications when the alert is triggered.
7. Click Add when finished.
NOTE: To receive email alerts, push alerts or client alerts, the Email Alert, Push Alert or Client Alert boxes must be checked. Simply adding a user only gives them access to see this alert’s history.
8. Updating, Disabling, or Deleting an Alert Rule – Click General Info on the navigation sidebar.
9. Edit the Name and Description as desired.
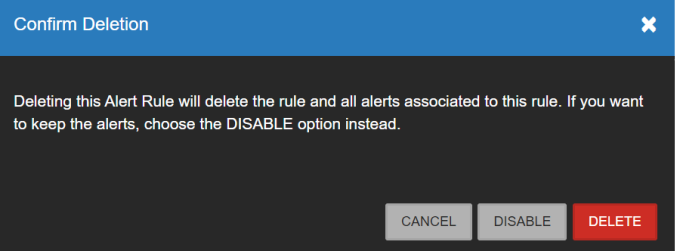
10. Click Disable to turn the Alert Rule off without deleting it.
11. Click Delete to permanently remove the Alert Rule and delete all history associated with it.
12. Click Save when finished.
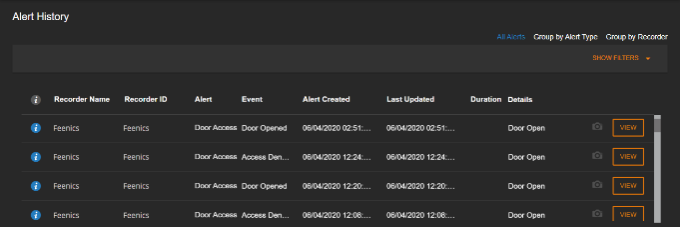
13. Alert History – In WS – Select Alerts > Alert History. Here you will find all Alert events created by associated recorders that have rules assigned.
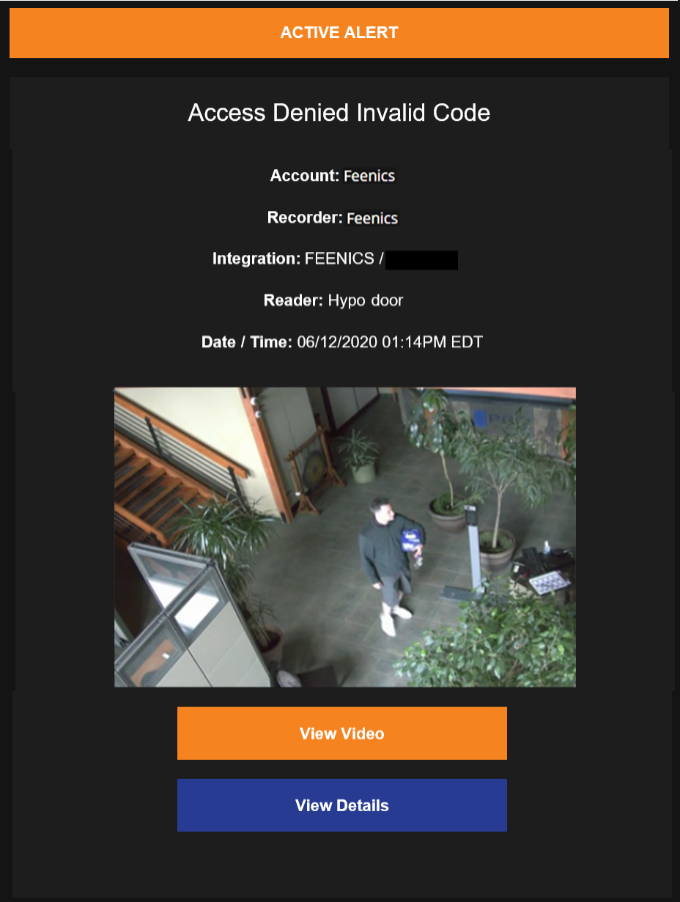
14. Email Alerts – Any User or User Group checked to receive email alerts for an event, are notified with Account, Recorder, Camera, Zone, Date and Time information as well as a thumbnail image and links that allow additional Event monitoring.
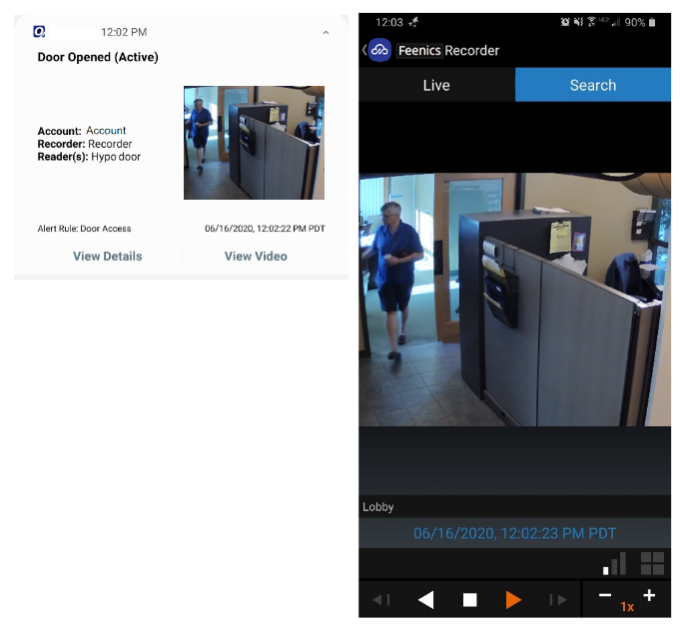
15. Push Notifications – A User or User Group that has Push Notifications enabled in an Alert Rule and has the Contera mobile app installed will receive notifications on their mobile device with information, a screenshot, and associated video whenever an alarm condition is detected.
Contera VMS : How to Activate Camera Recording Licenses
Issue:
Environment:
Contera NVR Server
AV-CST1 – ConteraVMS Standard 1 Channel Recording License
AV-CPM1 – ConteraVMS Premium 1 Channel Recording License
AV-CPR1 – ConteraVMS Professional 1 Channel Recording License
Note: Pre-loaded Channel Recording license:
If the Contera recorder and Channel recording license were on the same purchase order. The label will have printed on it “Upgrade with the License part #(AV-CxxXx)and the ConteraWS Part# (AV-CWxY)
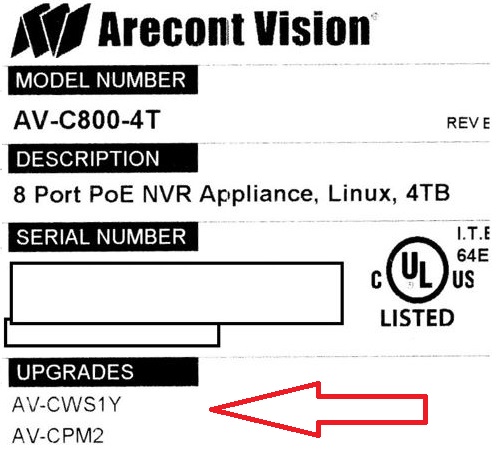
To activate:
Contera VMS: How to Convert a Multisensor Device from a Single Channel to a Native Multi-Sensor/Encoder Integration
NOTE: If any multi-sensor devices were added as a single channel ONVIF device before updating to OWS Server Software version 2.6, the device may display the same video on all sensors.
To change a multi-sensor device from a single channel to a native multi-sensor/encoder integration:
Adding the Multi-Sensor Device via Discovery
NOTE: Discovery will only work on a newly installed device. For disabled devices, see Manually Add the Multi-Sensor Device.
How to completely uninstall ConteraVMS (missing modules).
Issue:
The clients install of ConteraVMS is not operating correctly or has missing modules (i.e. Maps).
Resolution:
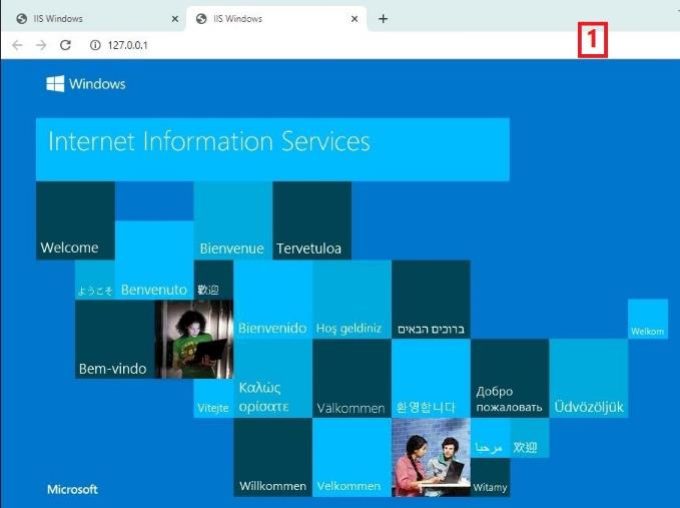
ConteraVMS: Contera Server application opens to IIS windows
Issue:
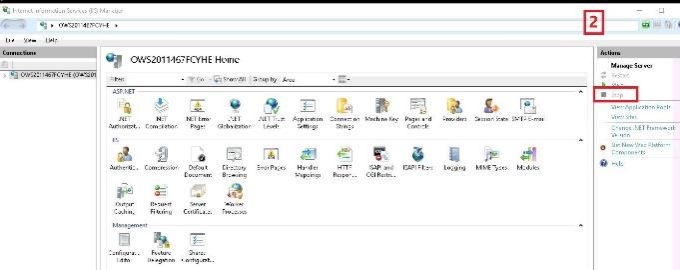
Contera Server application opens to IIS windows
Environment:
Contera VMS on windows (OS)
Procedure:
ConteraVMS: How to Enable/Disable Channel Partner Support Remote Support
Issue:
For security reasons, a Contera administrator can enable and disable the Channel Partner Support Service if/when needed.
With newer firmware, this cannot be enabled indefinitely. There is a 6-month maximum duration before it needs to be re-enabled.
Resolution:
1. Log into your Contera VMS Account. https://www.arecontvision-ws.com
2. Click on the gear icon in the upper right-hand corner.
![]()
3. Go to Remote Support Options.
4. Click Save.
.
ConteraVMS: Feenics Access Control Integration Configuration
Issue:
Contera VMS and Feenics Integration
Note: The current integration supports a max of 1000 cards.
Procedure:
*Note: You will need an AV-CWSP#Y License applied in order for integration functions to start.
*Note: All equipment must have the proper timezone / time set or else there will be sync issues.
1. From the Cloud Portal, select the Management tab.
2. Choose Integrations from the drop-down menu.
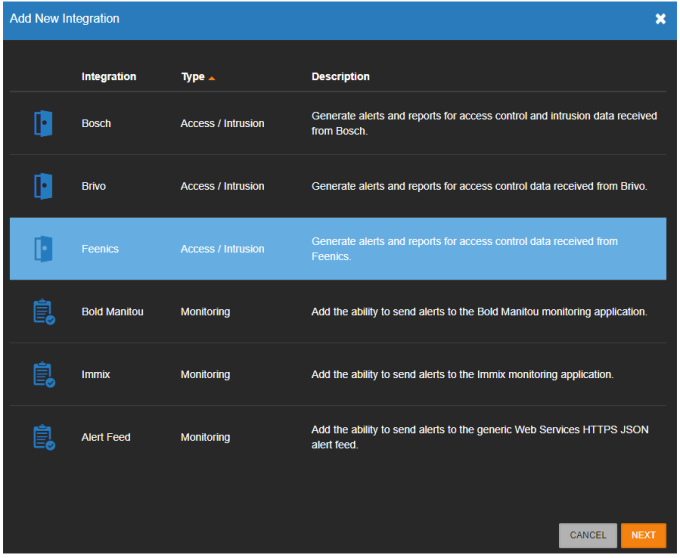
3. Click on Add New Integration.
4. Choose Feenics and click Next.
5. The Feenics Integration will be added to the Manage Integration list.
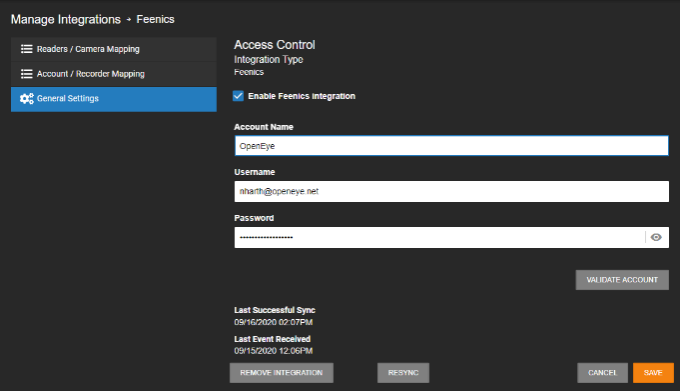
6. Click Edit to enable or disable the Feenics Integration in General Settings.
7. In General Settings, enter the Access Control Account Name and Access Control Username from your Feenics Keep account
8. Click Save. Once you click Save, OWS will sync with Keep by Feenics and download available readers.
NOTE: Last Successful Sync shows the last time and date OWS successfully synced with the linked account.
NOTE: Last Event Received shows the last time and date OWS received an event from the account.
NOTE: Validate Account manually resends the account credentials to confirm the linking is still valid.
NOTE: To access all cardholders, accounts, and readers, enter an Access Control Account Name, Username and Password associated with a Feenics user associated with the Enterprise Layer. Otherwise, only the cardholders, accounts and readers associated with a user below the Enterprise Layer will be accessible.
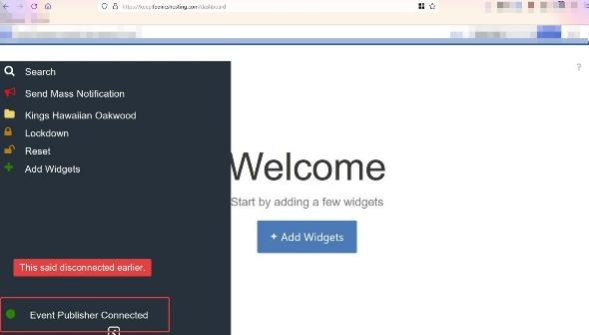
NOTE: If there is a sync issue check the Feenics portal: https://keep.feenicshosting.com. Use the information in Step 7. Check for disconnects/reconnects as shown below. If it shows this, Feenics support will need to be involved.
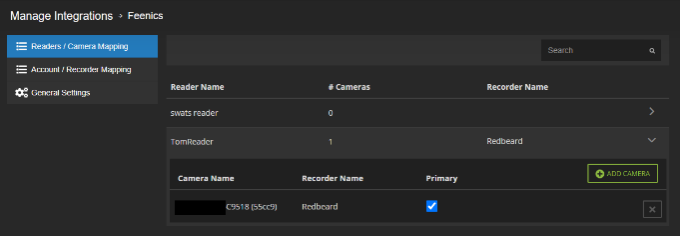
9. Press Readers / Camera Mapping.
10. Select Reader.
11. Press Add Camera and select the desired camera to link to the reader.
12. Press Account / Recorder Mapping.
13. Select desired Feenics account.
14. Press Add Recorder and select the recorder to link to the Feenics account.
ConteraVMS: Feenics WS Alert Configuration Procedure
.
ConteraVMS: “Unable to record” error is displayed on Contera cameras
Issue:
Camera(s) are displaying the error “Unable to record”. The below is displayed in the recording log for that camera:
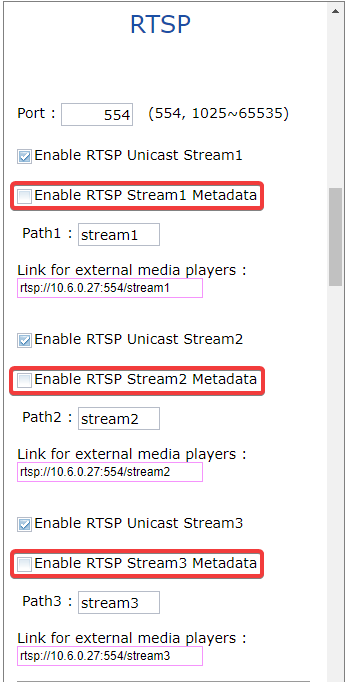
2019-09-19 15:52:00.259 NOTICE [rtspreceiver] rtsp://10.6.0.27:554/stream1: Describe failed with code BadSdpFormat
Resolution:
Synchronize Rate Types and Values with a VMS / NVR
Objective
Synchronize bit rate controls between a camera and VMS.
Procedure
To ensure stable rate controls, you want to synchronize the following settings across both your VMS/NVR and the camera’s interface:
To synchronize rate controls across your VMS/NVR and camera:
For more information about camera bitrates, see:
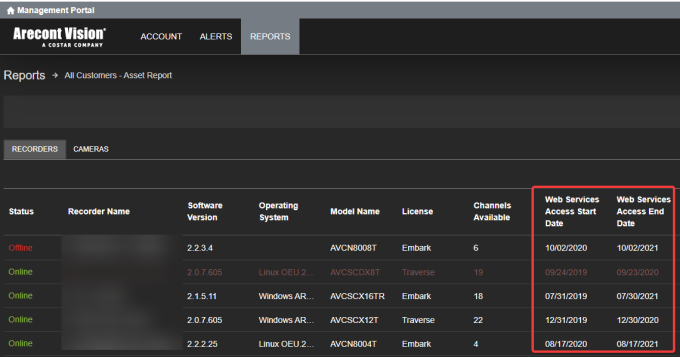
ConteraVMS: How to view when a ConteraWS subscription will end or has Expired
Issue:
Resolution:
6.If the Contera WS has expired follow the Article to renew the license. ConteraVMS: How to renew your ConteraWS subscription
ConteraVMS: Documentation
The official ConteraVMS documents are now located at: https://sales.arecontvision.com/manuals.php
3 MB Download
200 KB Download
10 MB Download
8 MB Download
Troubleshooting VMS integrations with ONVIF Device Manager
Issue:
A problem is seen in a particular model connected to the Video Management System.
Resolution:
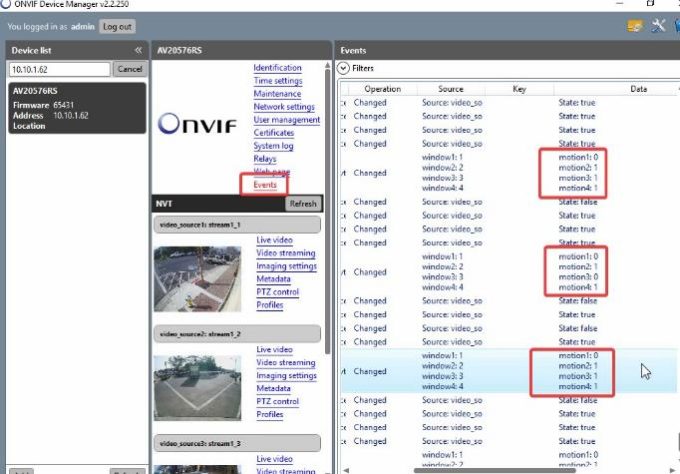
6.Monitor the live video from here to see if the symptoms experienced in the VMS can be replicated. For example, if there’s an issue with motion events not being recorded/picked up in the VMS, click on the camera in ODM, then click Events. If you see motion events populate as shown below, the camera is passing motion events properly. The VMS manufacturer must be consulted next.
.
