Amcrest Orion review and installation guide 2024, This software the most stable and recommended method of accessing your devices from your computer. It is free software provided by Amcrest that can provide a means of accessing all your devices in one central location without the use of a plugin or web browser.
To download the latest version of Amcrest Orion Surveillance software to your Windows device please click on the link provided below.
Amcrest Orion Download for Windows PC
To download the user manual for the Amcrest Orion software, click here.
For additional information, such as useful articles or other information related to the Amcrest Orion surveillance software, click here.
Amcrest Orion Surveillance Software Download
To download the latest version of Amcrest Orion Surveillance software to your Windows device please click on the link provided below.
Amcrest_Orion_Surveillance_Software.exe
Amcrest Orion Surveillance Software User Manual
To download the Amcrest Orion Surveillance Software user manual, please click on the link provided below.
Amcrest_Orion_Software_User_Manual.pdf
Amcrest Orion Datasheet
To access the datasheet for the Amcrest Orion software, please click on the link provided below.
How To Install The Amcrest Orion Surveillance Software
Amcrest Orion is a video surveillance software application that provides an all-in-one, full-featured solution to manage and monitor Amcrest network cameras, NVRs, and DVRs, etc. The software supports up to 64 devices for free with a maximum of 256 channels. It is currently a Windows based only software, however, to download the latest version of this software click here.
For more information on how to install the software, please refer to the information provided below.
Step 1: Download the Amcrest Orion software and open the .exe file. Select the software license agreement and click Next.
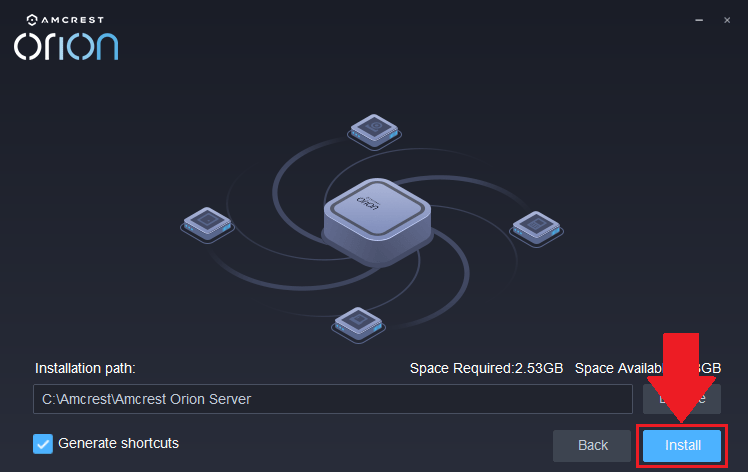
Step 2: Select an Installation Path if needed using the Browse option. Click Install.
Note: Allow the components to install on your computer.
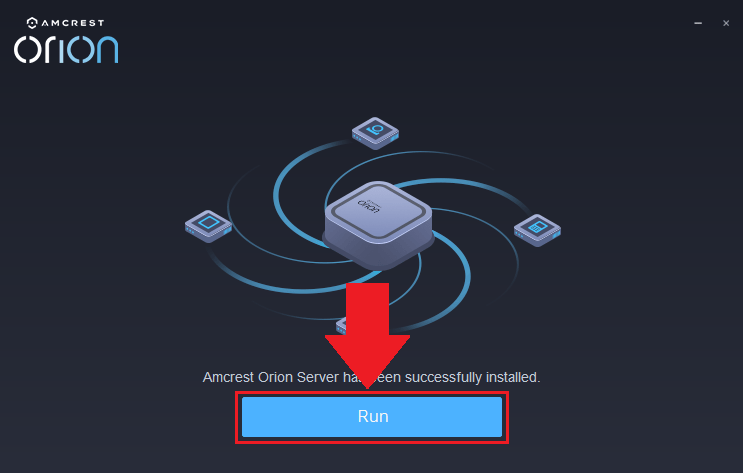
Step 3: Click Run.
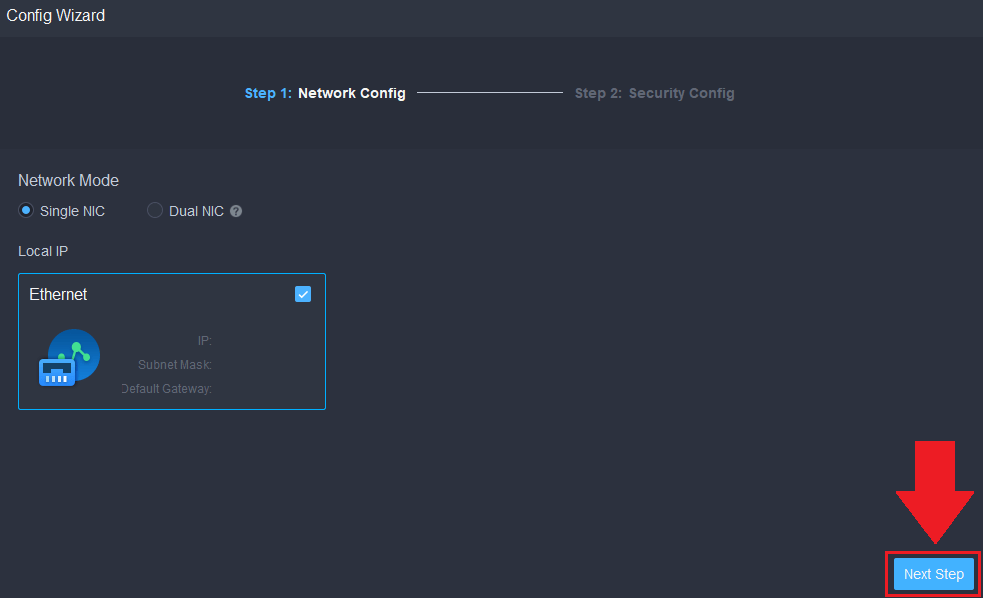
Step 4: Select a network mode and the network card and click Next Step.
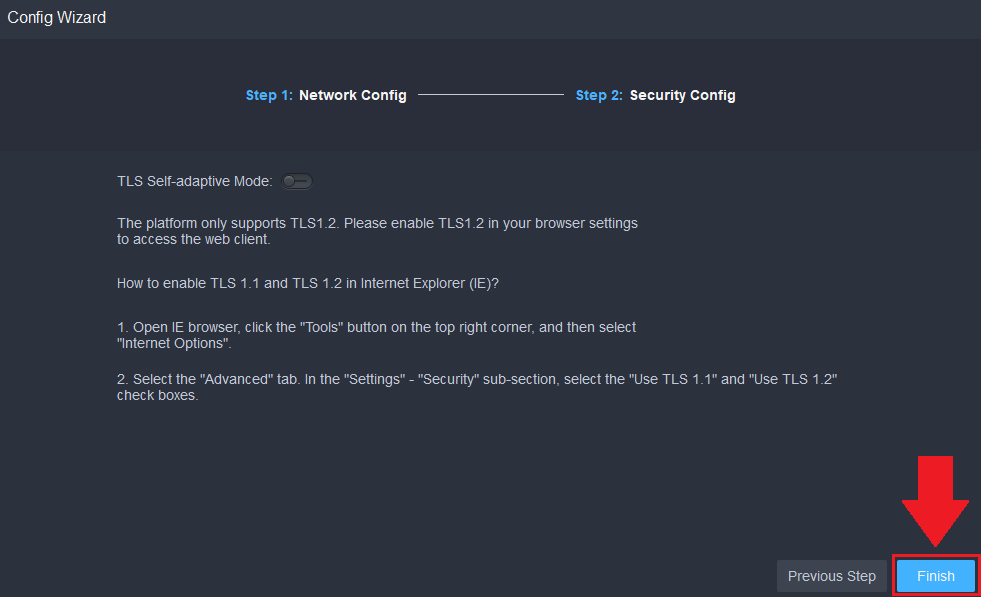
Step 5: Set the TLS self adaptive mode if necessary. Please note, this is disabled by default but can be enabled if needed. Click Finish.
Note: TLS self adaptive mode is a security feature that allows Amcrest devices to automatically switch between Transport Layer Security (TLS) versions 1.2 and 1.3 depending on the capabilities of the connected device. This ensures that the highest level of security is always used, while also avoiding compatibility issues with older devices.
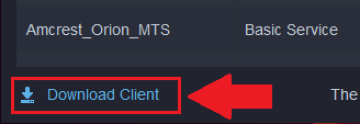
Step 6: Download the Client software to your computer.
Note: Click proceed anyway in the browser if needed to download the client software.
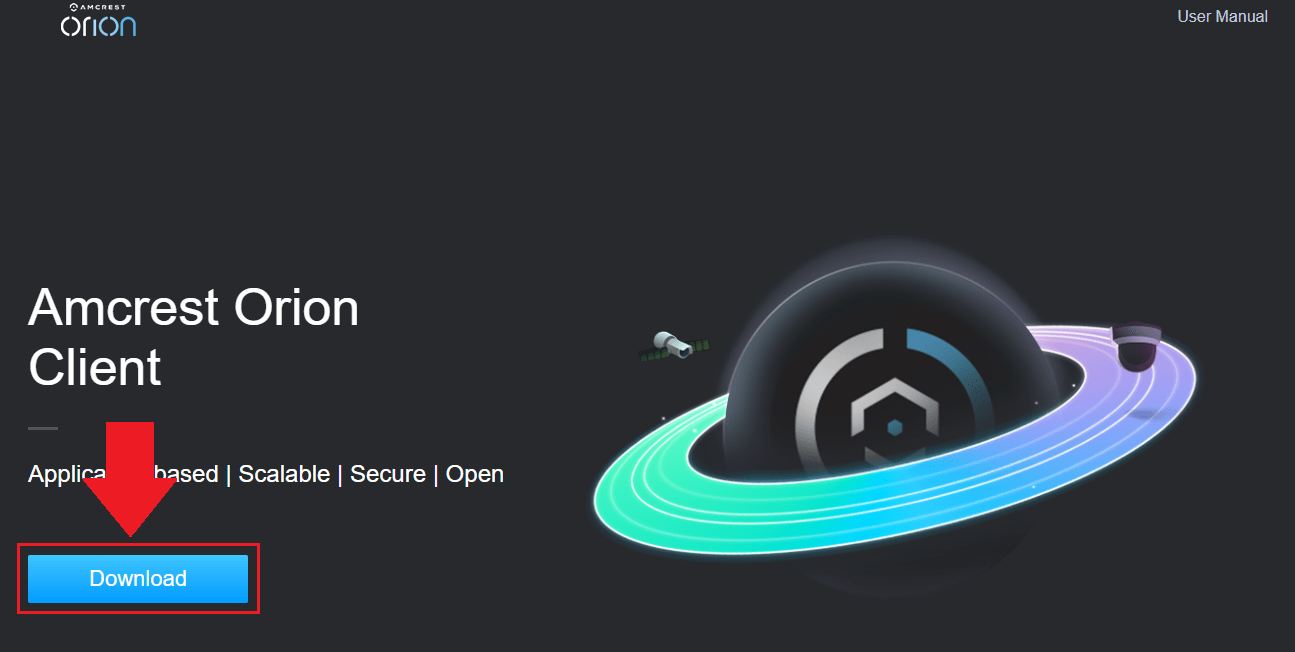
Step 7: Click Download and follow the steps to install the client software to your computer and run the client software.
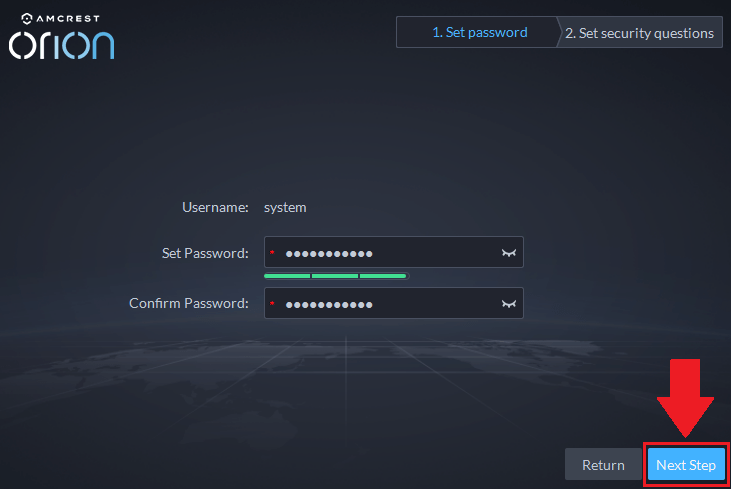
Step 8: Enter the IP address found on the server client into the Server Address field. The default username will be system. Enter a password for the client account into the interface, click Next Step.
Note: Set security questions, this information will be used to access your client software if you forgot the password. Click OK. This will load the client software.
How To Add An Amcrest Camera To Amcrest Orion Surveillance Software
Before connecting your device to the Amcrest Orion software, please make sure the device is initialized and on the same network as the computer. You will need the username and password for the device before you are able to add it to the camera. For more information, please refer to the information provided below.
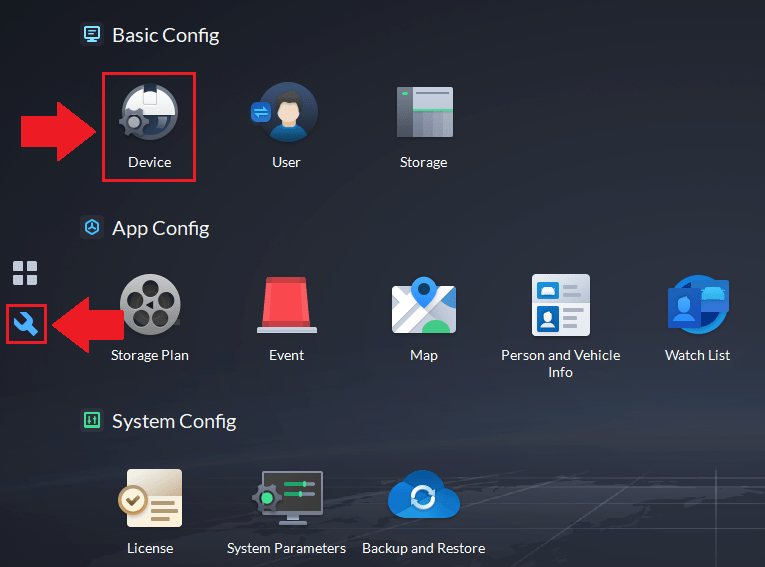
Step 1: Access the client software and select the configuration icon. Select Device.
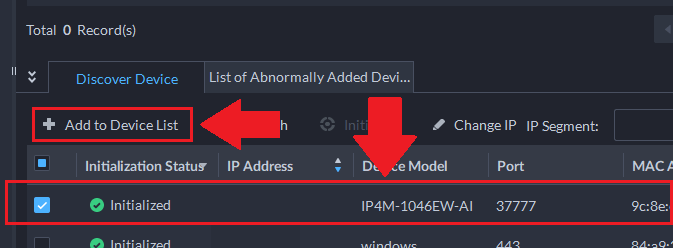
Step 2: All connected devices should be displayed in the Discover Device menu, however, click the Refresh button to refresh the interface if needed. Select the device and click Add to Device List.
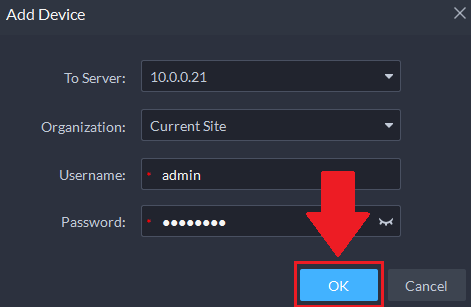
Step 3: Enter the password for the device and click OK.
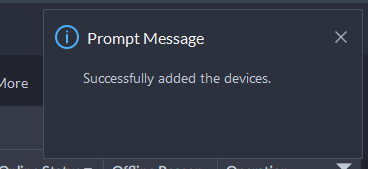
The device will be added successfully.
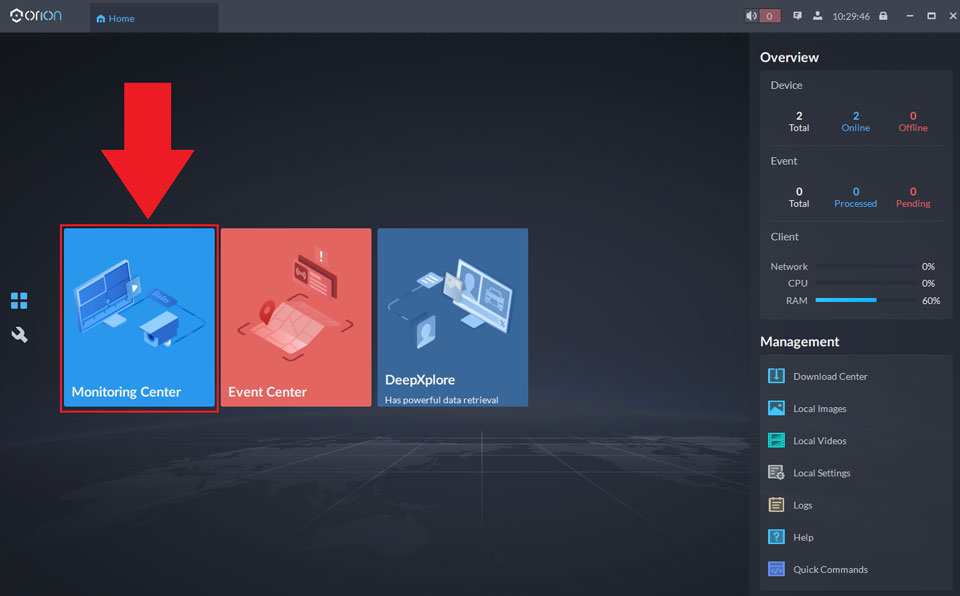
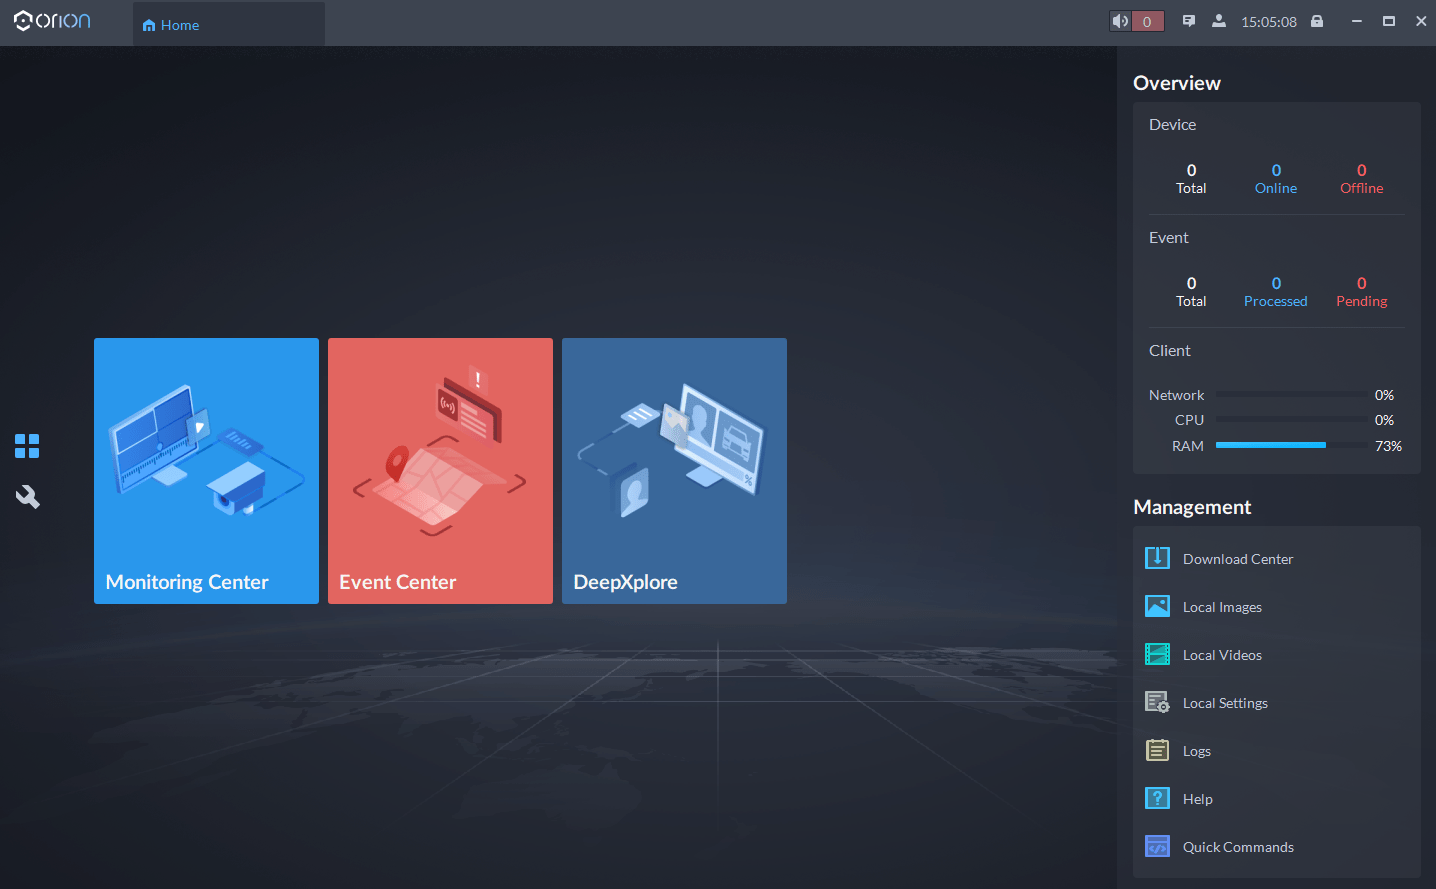
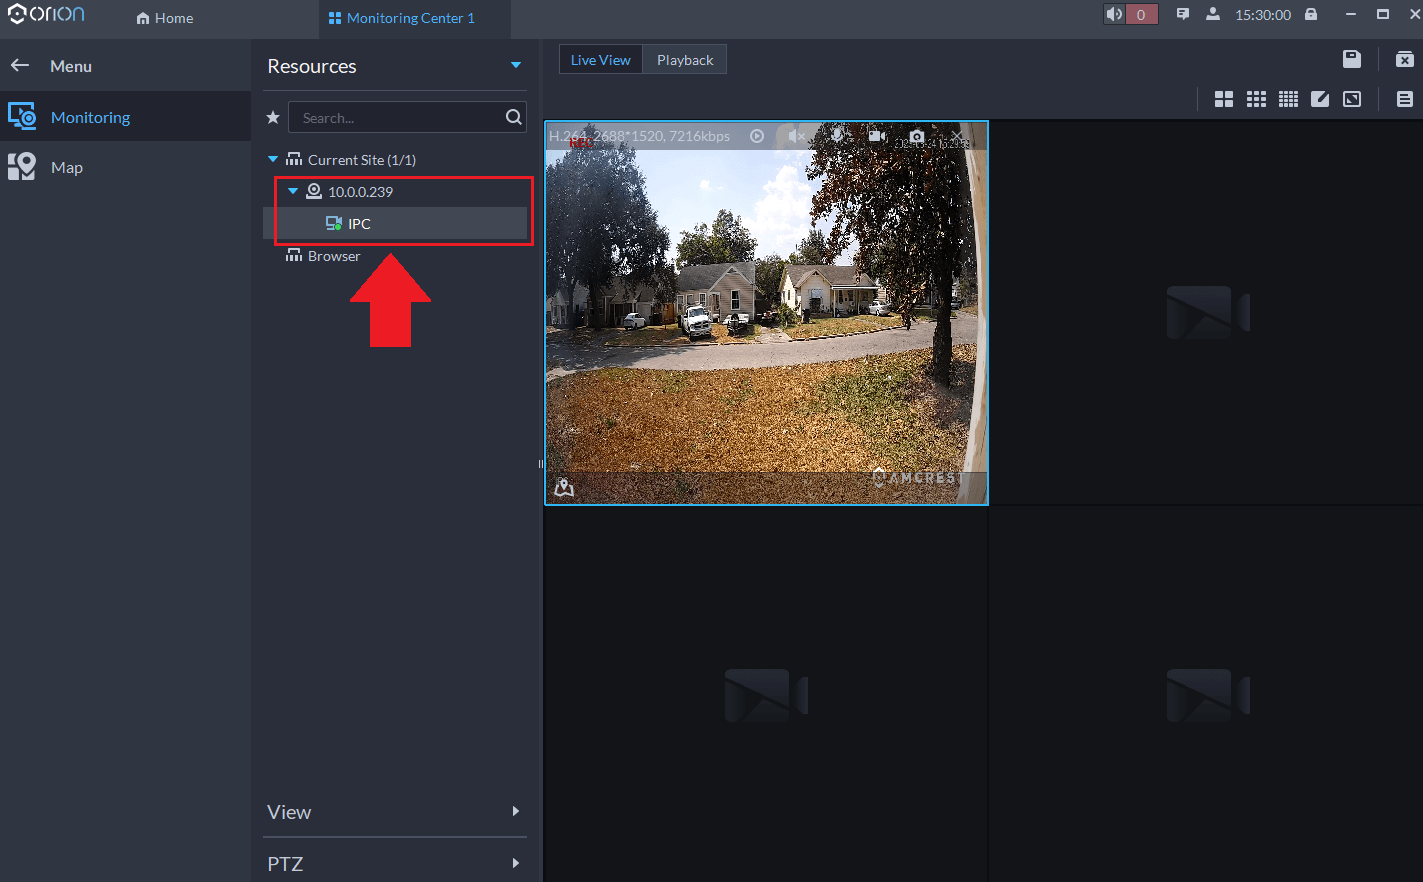
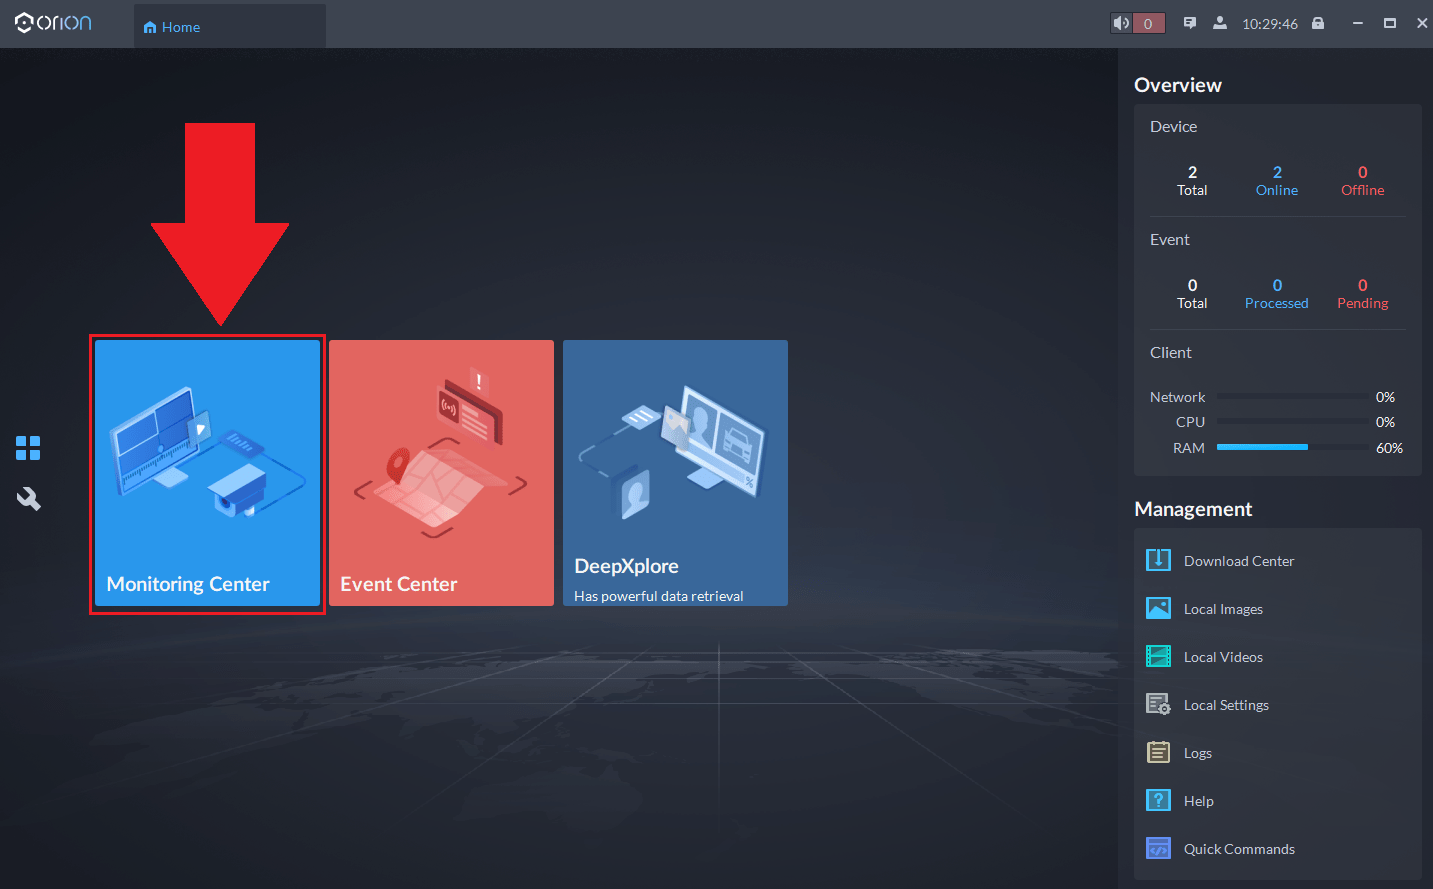
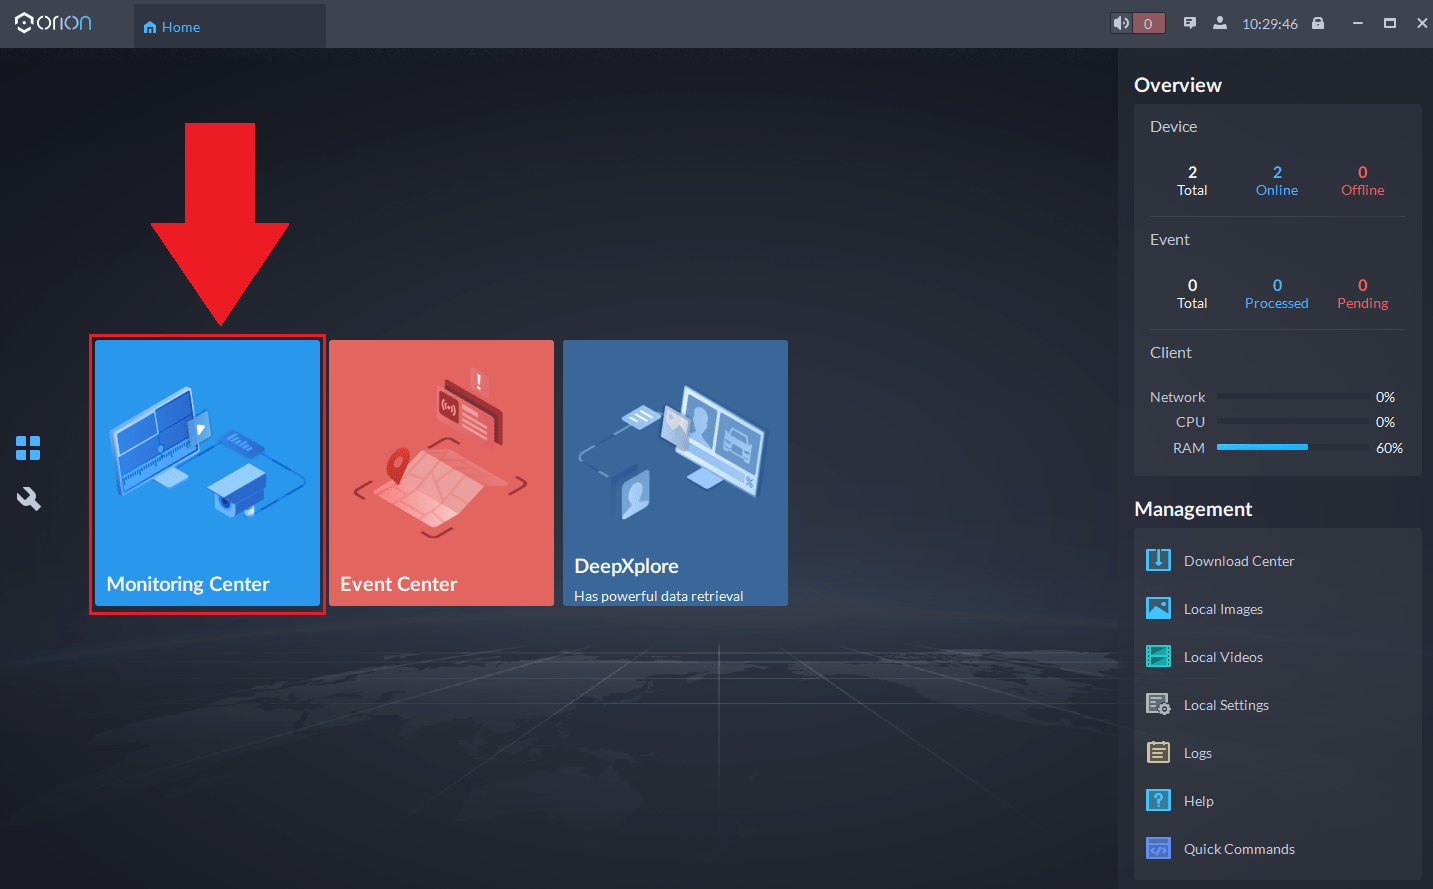
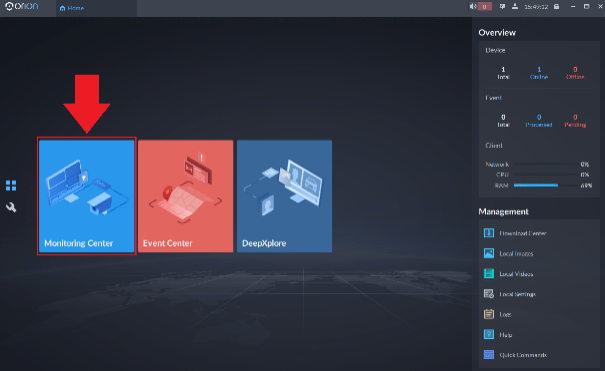
Step 4: To view the device, access the main menu and click on Monitoring Center. Double click the device from the device list to view the live feed.
How to Use the Dewarping Features on a Fisheye Camera Using Amcrest Orion Surveillance Software
Fisheye dewarping (Fisheye unwrapping) provides a correction in the distortion of images obtained from a camera equipped with a fisheye lens. This allows the user to view different aspects and views of the 360° image provided by the fisheye lens of the camera. For more information on how to use the fisheye dewarping functions in the Amcrest Surveillance Pro software, please refer to the information provided below.
Step 1: Log into the Amcrest Orion Software and select Monitoring Center.
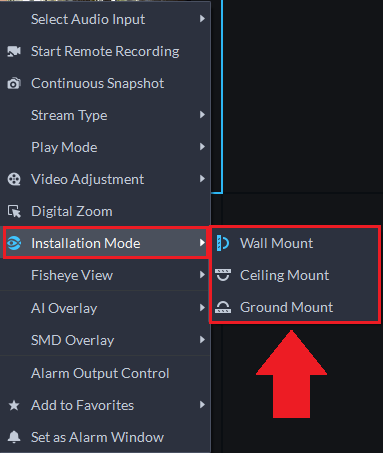
Step 2: Select your fisheye camera from the device list to view the live feed. Right-click on the live feed to access the live view options menu. Hover your mouse pointer over Installation Mode and select an installation mode.
Installation Modes Explained
Note: Different installation modes will provide different dewarping functions. For more information on the dewarping functions provided with each installation mode, please refer to Dewarping Features Explained.
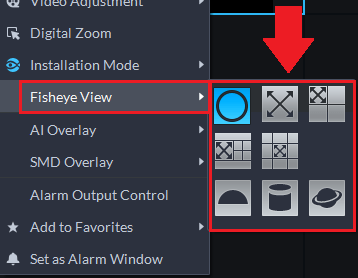
Step 3: Hover your mouse over Fisheye View and select a dewarping option from the provided list of icons.
Dewarping Features Explained
Wall Mount
Ceiling Mount
Ground Mount
.
How To Download Recordings Using Amcrest Orion Surveillance Software
Recordings in the playback menu can be downloaded (exported) using the Amcrest Orion Surveillance software. To download the free software click here.
For more information on how to add a device into Amcrest Orion Surveillance software click here.
Downloading a Recording
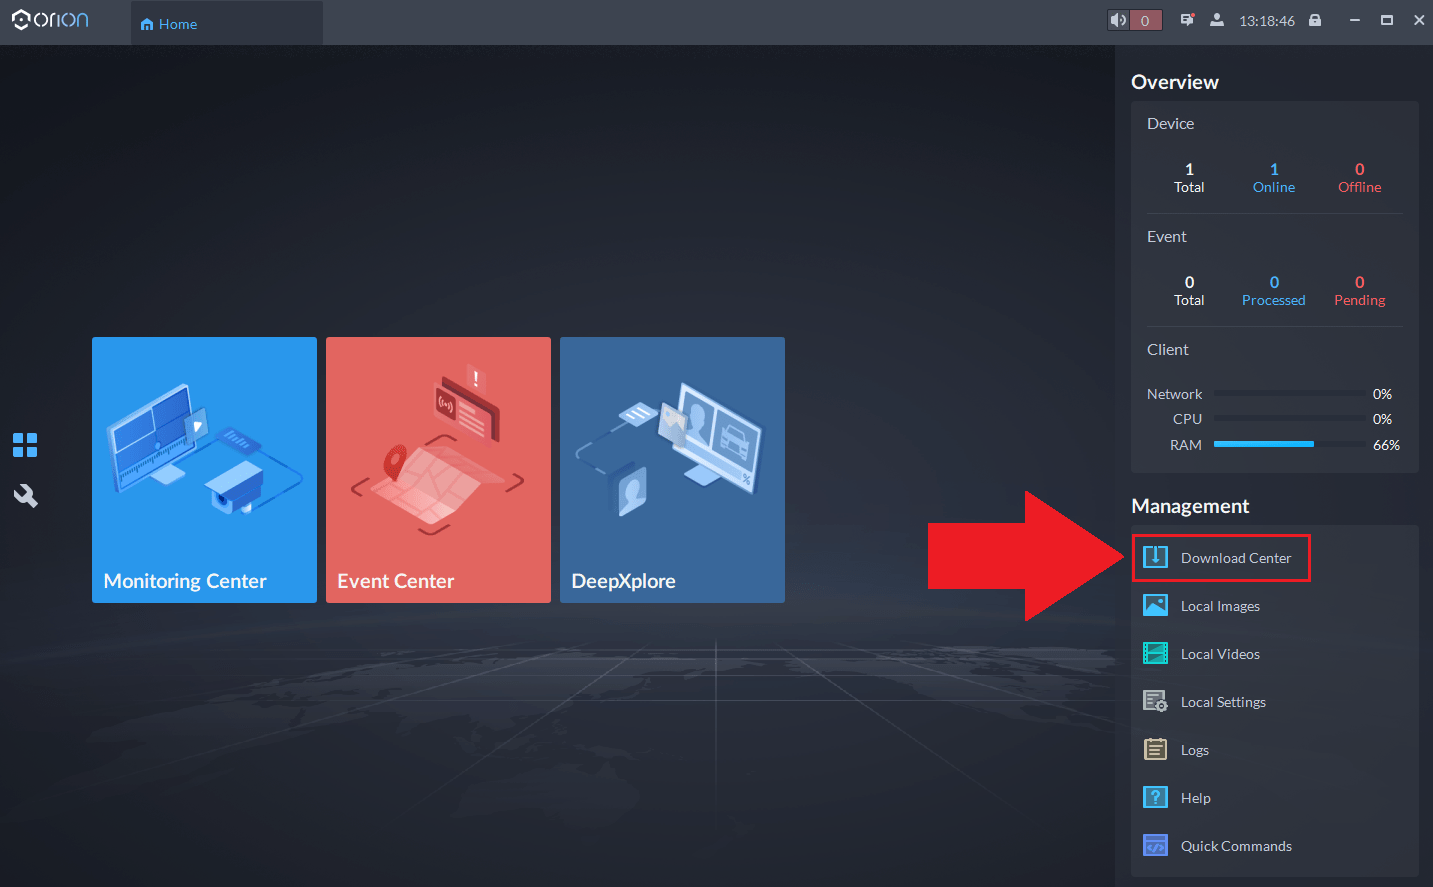
Step 1: Open the Amcrest Orion surveillance software and select Download Center.
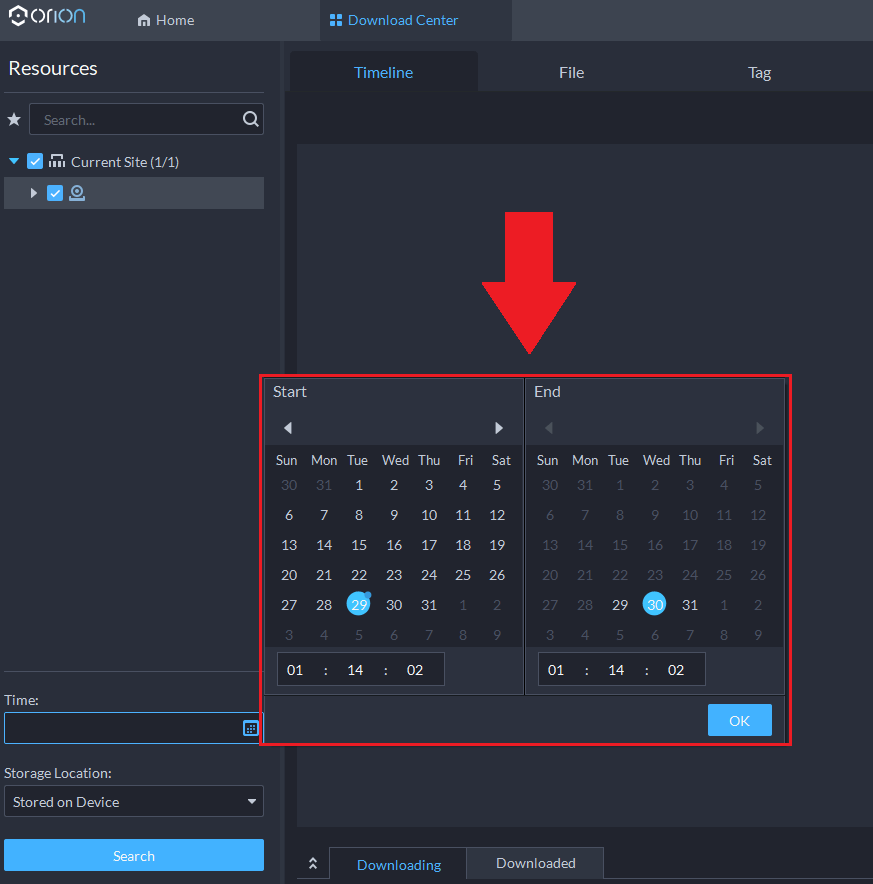
Step 2: Select the device in the Resources menu and click the calendar option in the Time menu. Select a date and time range of the recordings. Click OK.
Step 3: Click Search. Recordings can be accessed in a timeline or file format. If downloading from a timeline range, select a start and end time in the timeline, enter the software user password and click OK. Verify the start and end time of the recording and click OK. The recording will begin to download.
Step 4: Click the Downloaded tab to view and locate the storage path of the recording. Click the  icon to locate the downloaded recording on your computer.
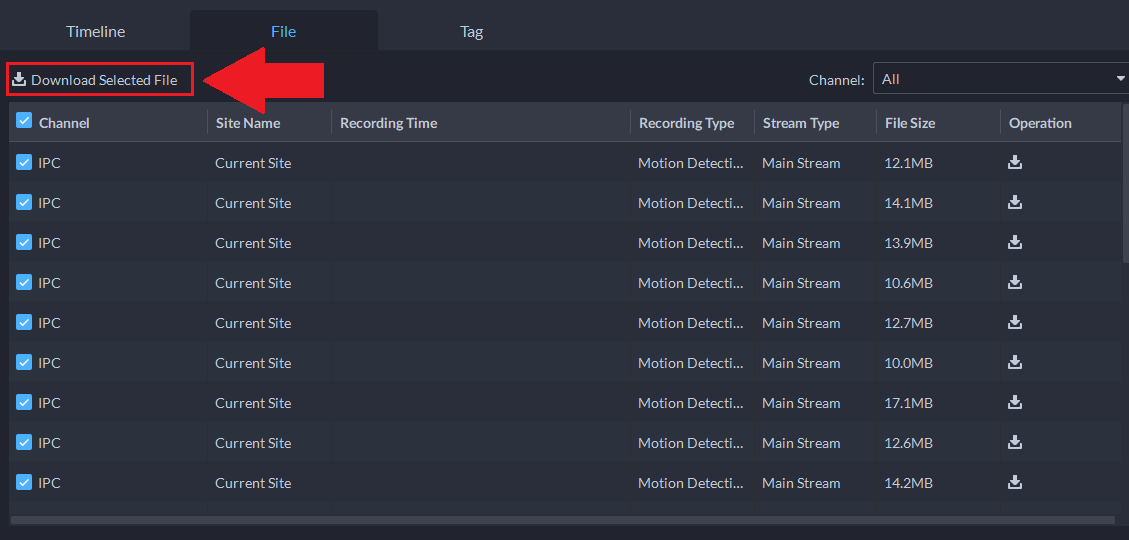
Note: If downloading multiple recordings, it is recommended to use the File menu. Select all recordings you want to download and select Download Selected File. To download a single file, click the Operation icon.
How to Customize Video Settings Using Amcrest Orion Surveillance Software
If you are having issues customizing the video settings for your device in the app then you can use Amcrest Orion Surveillance software to adjust these settings. This is free software provided by Amcrest and can be used as a one-stop surveillance source for all your Amcrest devices. To download the free software, click here.
For more information on how to customize the video settings, please refer to the information provided below.
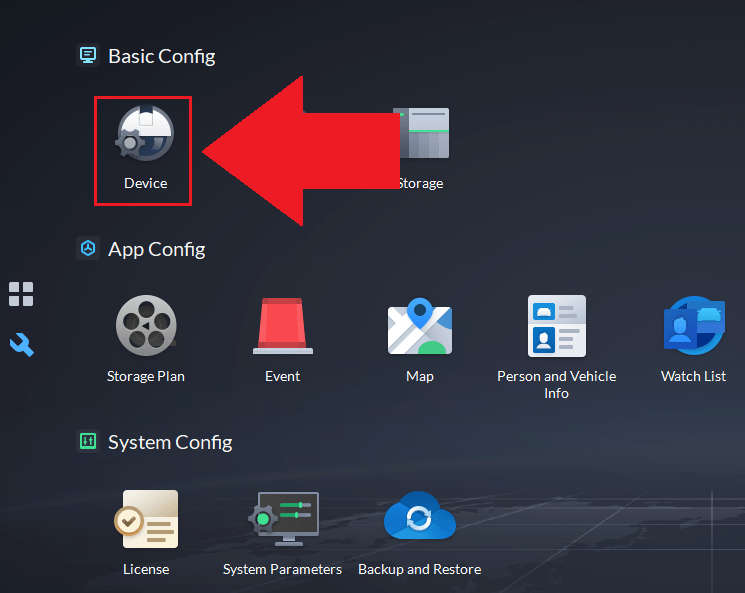
Step 1: Open the Amcrest Orion software and select the settings  icon. Select Device.
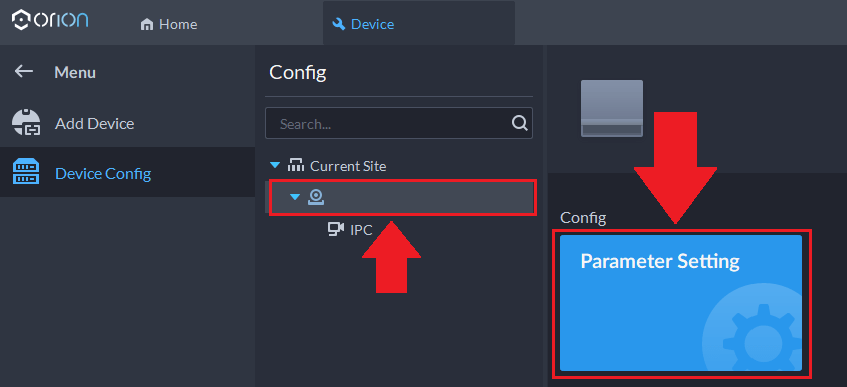
Step 2: Select Device Config, select the device, and click Parameter Setting.
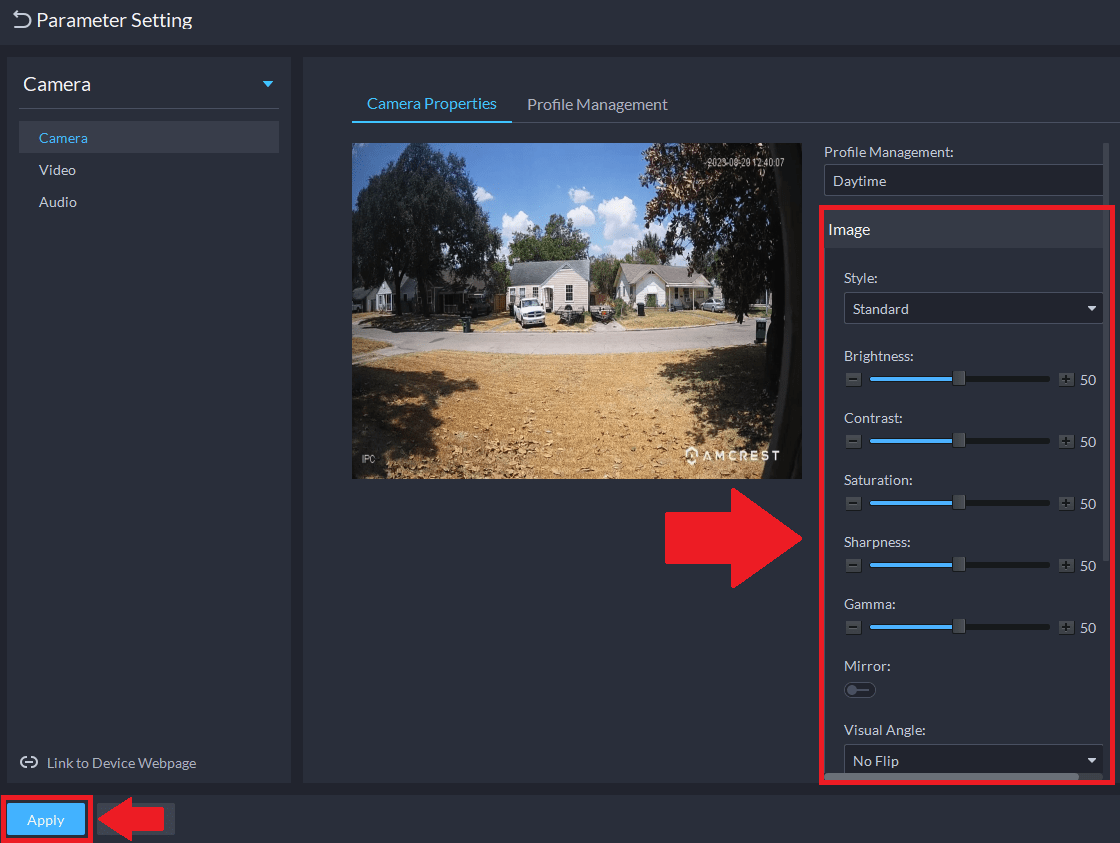
Step 3: Use the video settings options provided in the camera properties menu to customize the video settings. Click Apply.
Note: If you would like the video settings to apply to the device’s web UI, click Link to Device Webpage
How To Setup Recording Schedules In The Amcrest Orion Surveillance Software
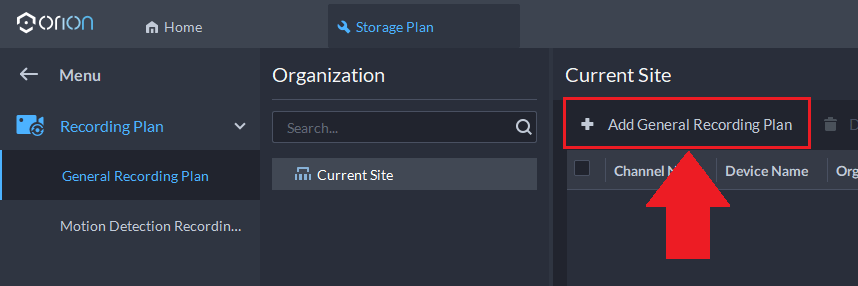
The Amcrest Orion Surveillance software allows you the opportunity to set your added device to record on motion or on the continuous (general) recording schedules. The software uses a recording plan template to set recording schedules. For more information on how to set up recording schedules, please refer to the information provided below.
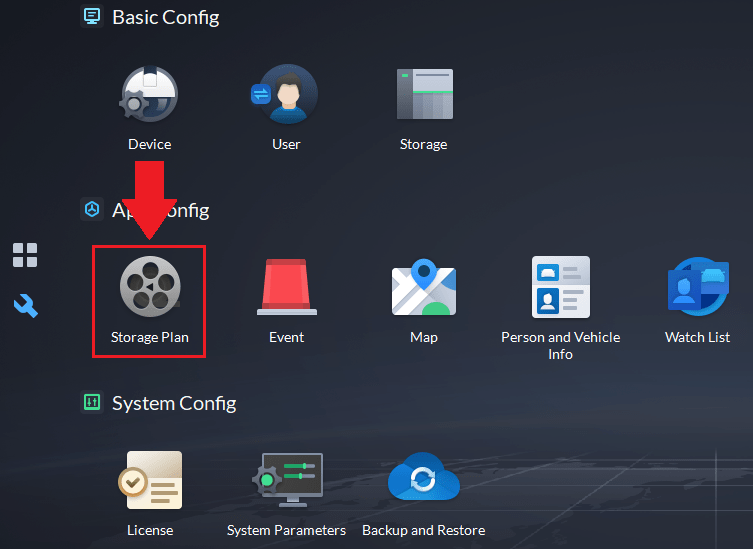
Click on the  icon located in the Home menu and select Storage Plan.
Setting a Recording Plan
A general recording plan will allow the software and selected devices to record 24/7.
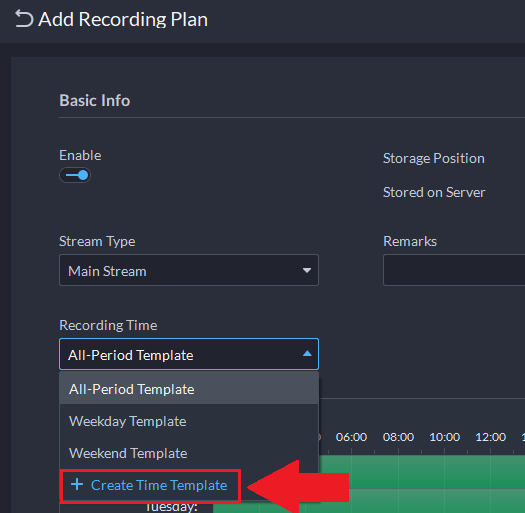
Ensure the option is enabled and click the Recording Time dropdown menu. The schedule will be set to record 24/7, all days of the week, however, can be set to recording during the week or only on the weekends. However, a custom Time Template can be used if needed.
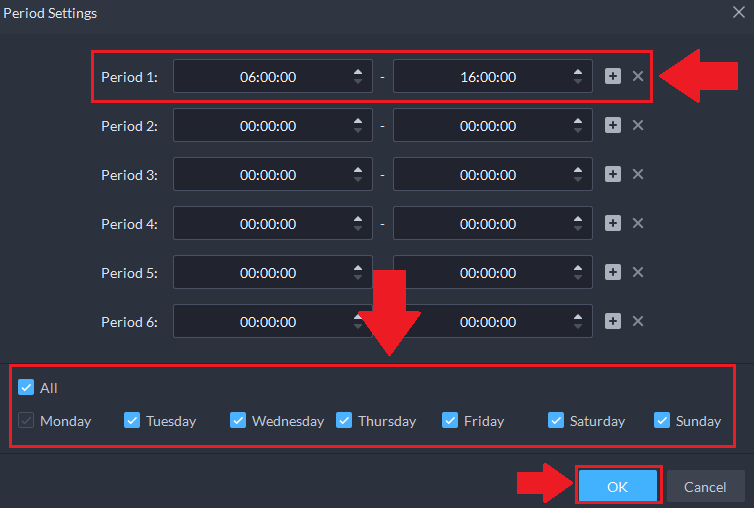
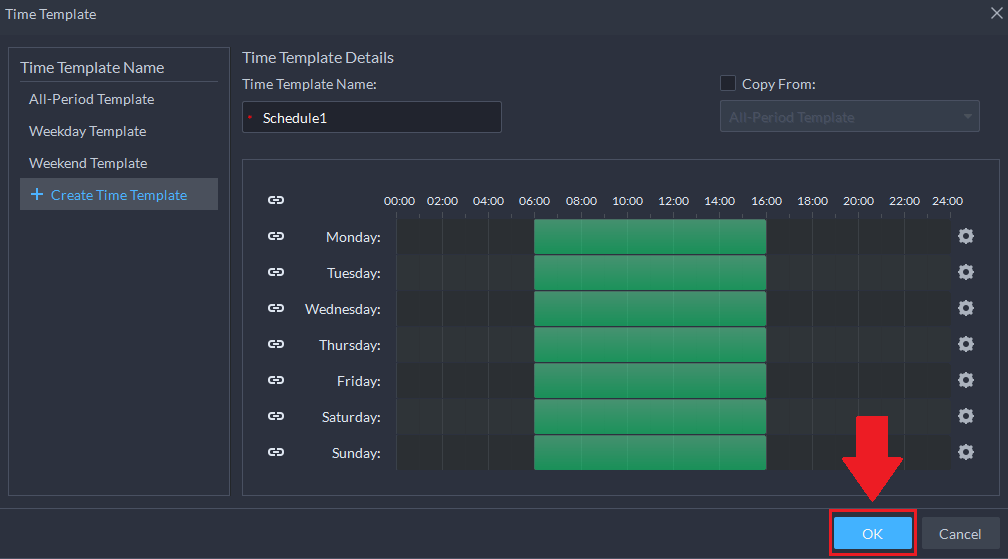
Enter a name for the custom time template and click the period settings (  )option. A total of 6 periods can be set if needed by clicking the “+” icon. Enter a start and end time for the schedule. For instance, in this example we will set it to only recording from 6am (0600) – 4pm (1600). Select which days the schedule will apply and click OK.
The schedule will now be set in the software. Click OK.
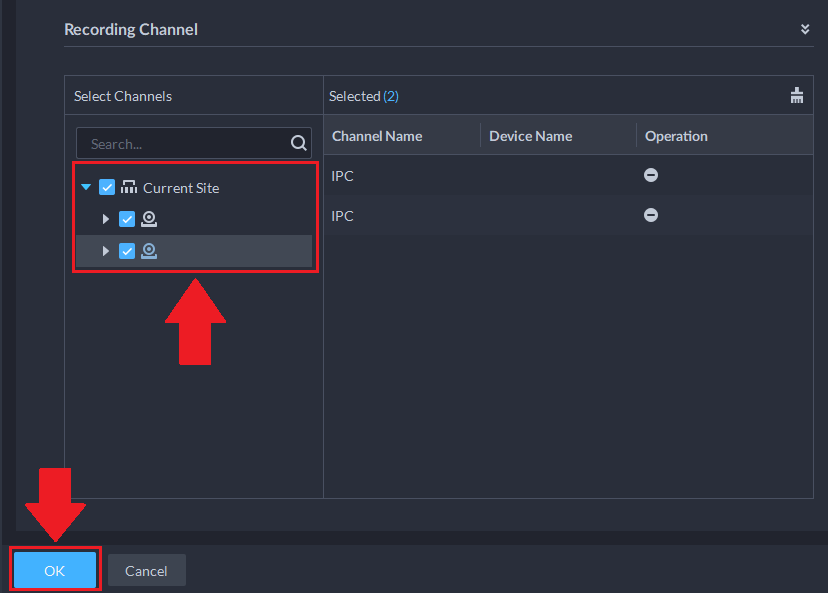
Select the newly created recording schedule template from the Recording Time menu. In the Recording Channel, select the devices you would like the schedules to apply. Click OK.
The storage plan will be will now be applied to the selected devices.
The same concept can be applied to motion detection recording plans as well if needed.
How To Set an Email Server In Amcrest Orion Surveillance Software
Email Setup will be dependent on your specific email provider. In this example, we will be using Gmail. A email server can be used to send email notifications or during password recovery. For more information on how to setup an email server, please refer to the information provided below.
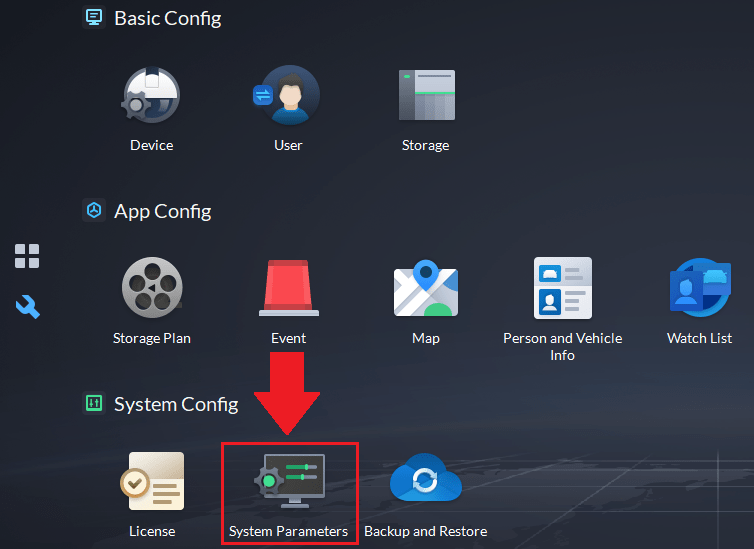
Step 1: Open the Amcrest Orion Surveillance software, select the  option, and select System Parameters.
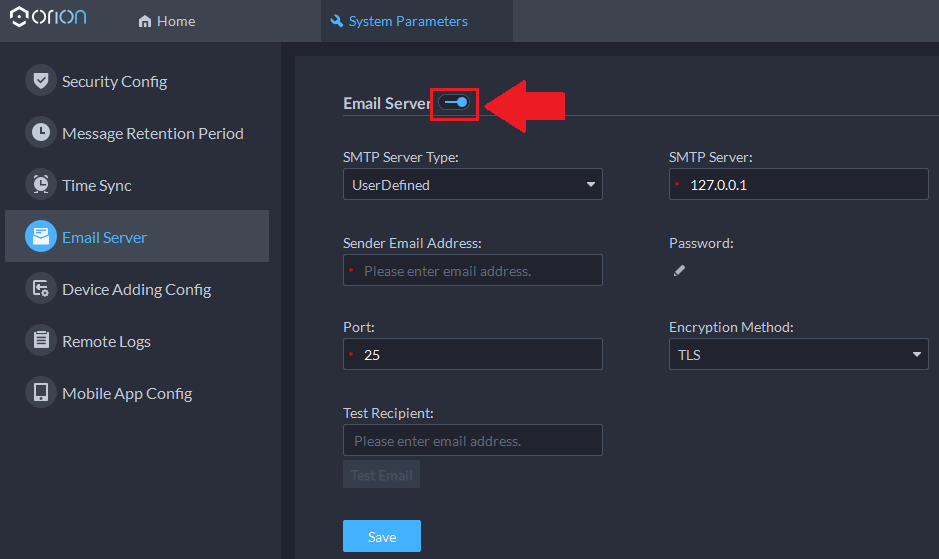
Step 2: Select Email Server and enable the option.
Step 3: Select the email provider from the SMTP Server Type dropdown menu and enter all requested information into the interface. Please note, the password should be your Gmail generated app password. **Please refer to Allow Less Secure Apps (Updated) section for more details.
Allowing Less Secure Apps (Updated)
As of May 30th, 2022, Google will be removing the allow less secure apps option, this means a generated password will need to be entered that will allow email alerts to come through on your account. Before proceeding, please ensure 2 factor authentication is enabled in your account settings. For more information on how to do this, please refer to the information provided below.
1.) In Gmail, click the account avatar/icon picture located in the upper right of the window.
2.) Now click the blue button that says “Manage Your Google Account”
Once on the account setting page please click “Security”
3) Click onApp passwords
4) Enter your email password, and click Next.
5) Select an option from the provided drop down menus and select Custom. Enter a name for the authentication and click Generate.
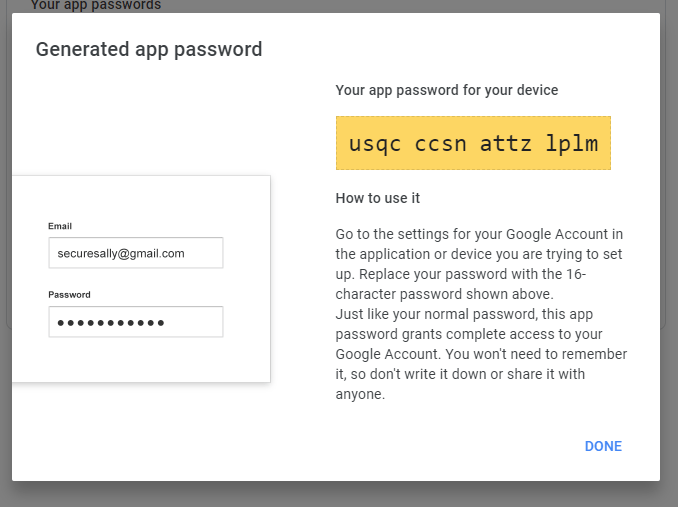
6) Google will provide a security password which must be entered into the device’s Email Setup interface in the device’s web UI.
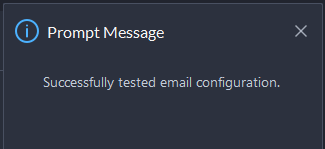
Step 4: Click Test Email. Once confirmed, click Save.
How To Setup Views and Tours Using Amcrest Orion Surveillance Software
How To Create a View
When creating a tour it is highly recommended to create a view first before creating the tour. A view is a collection of cameras/channels shown in a window. This can be a collection of devices from the same DVR/NVR or a collection from different devices in a single view. For efficiency purposes, it is recommended to keep cameras from the same NVR in the same view. Conversely, this is not mandatory and each view can be customized based on your needs.
Step 1: Log into the Amcrest Orion Software and select Monitoring Center.
Note: Views can be customized to a range of a single camera to 64 cameras simultaneously. Please keep in mind the more cameras that are opened the more network resources are being used. Our recommendation is to set a max of 9 camera views or less but in our example, we will use a wide variety to show the flexibility of the feature.
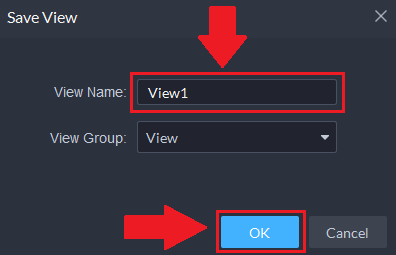
Step 2: Select each device from the device list and click the save icon (  ). Enter a name for the View and click OK.
Note: If you are using a DVR/NVR with multiple channels, it is necessary to expand the device to show the individual channels associated with your device.
If you are performing this procedure on multiple computers, the process will need to be performed on each desktop/laptop. For this reason, we recommend renaming the cameras in a way to know which cameras/channels go together.
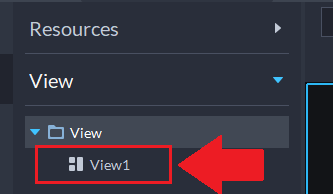
Step 3: Select View. Select the dropdown option next to the View folder. Select the newly created view to load the live feed of the cameras in the interface.
Tour Setup
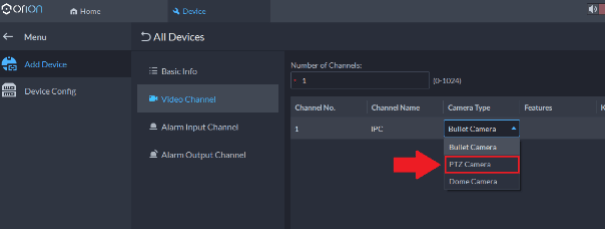
When you have finished creating the view you can now start configuring a tour. A tour will allow the software to shift between multiple PTZ presets set by the user in the software. If using a PTZ camera, please navigate to Add Device menu and select the edit icon (  ) for the device. Select Video Channel and ensure the Camera Type is set to PTZ Camera. Click OK.
Note: At least 2 presets must be set to configure a tour.
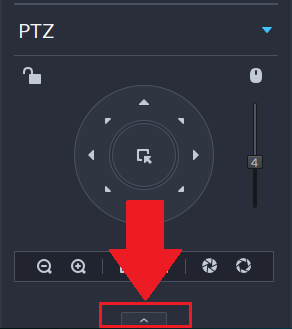
Step 1: Access the Monitoring Center, select the device, access the PTZ menu, and select the down arrow.
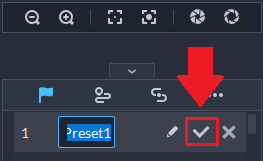
Step 2: Use the PTZ option to rotate the camera to a specific point. Click the Edit (  ) icon and name the tour. Click the checkmark (
  ) when finished.
Note: Click the Go icon (  ) to call a preset. The camera will rotate to a related position.
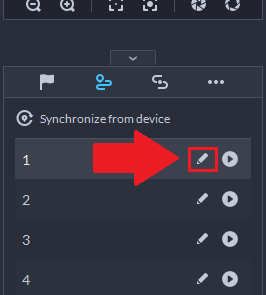
Step 3: Once the presets are created, click the  icon and select the Edit (
  )icon.
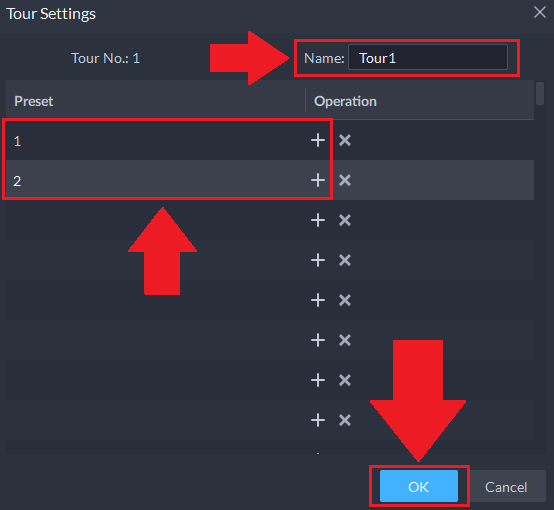
Step 4: Enter a name for the tour and click the add (  ) icon. Select all applicable presets related to the tour and click OK.
Note: Click the play (  ) icon to run the tour.
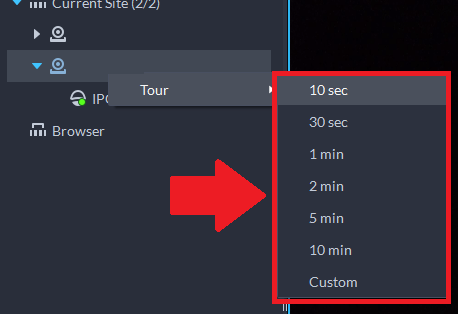
Step 5: Navigate to the Resources menu, right click on the device to set a tour duration.
Note: To stop the tour, click on the stop (  ) icon in the Tour (
  )menu.
How to Recover a Forgotten Admin Password on Amcrest Orion Surveillance Software
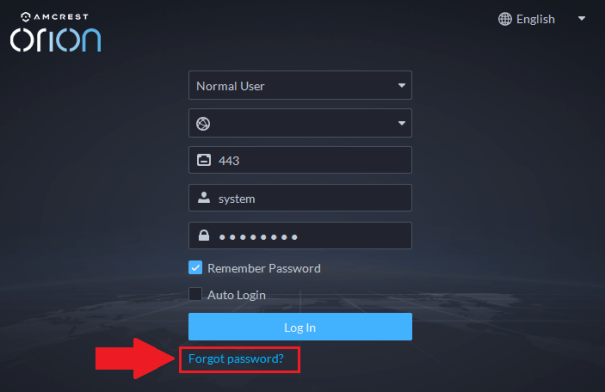
If you have forgotten the admin password to log into the Amcrest Orion Surveillance software, the password can be recovered using the Forgotten Password option. This option can be found on the login screen once the software has been opened. For more information on how to retrieve your forgotten password, please refer to the information provided below.
Step 1: Open the Amcrest Orion Surveillance software and click Forgotten Password.
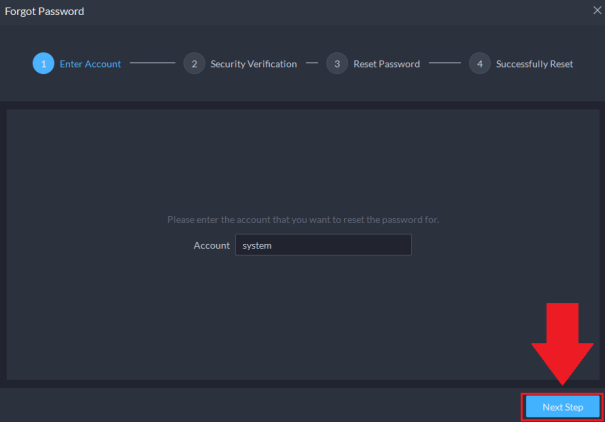
Step 2: Verify the account’s username and click Next Step.
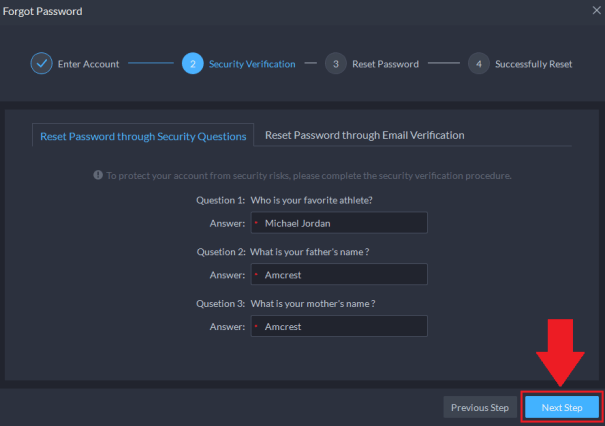
Step 3: The password can be reset using security questions or through email verification. Please note, the password cannot be reset if there is no email server established. Once the security questions or answered, click Next Step.
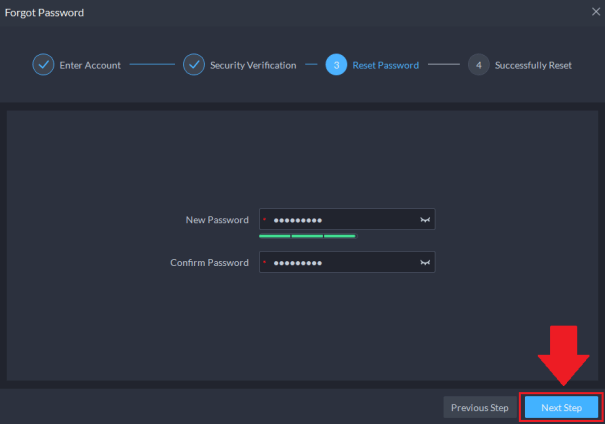
Step 4: Enter the new password into the provided fields, click Next Step.
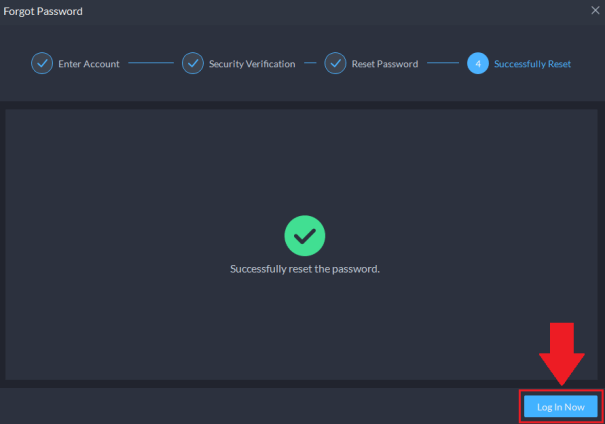
Step 5: Click Log In Now.
Note: Enter the new password and click Log In to open the software. Select Remember Password or Auto Login to allow the software to open on your machine without having to reenter it.
How To View Events Using The Playback Feature In Amcrest Orion
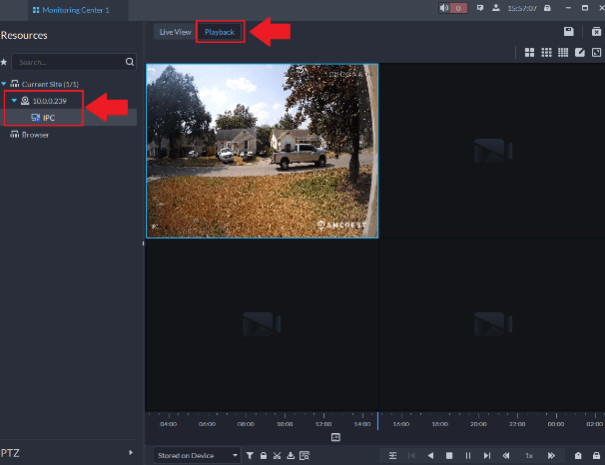
The monitoring center allows the user to view both the live view and playback of a connected device. The monitoring center can be found on the Home menu of the software. The playback option allows the user to view motion, human, or vehicle detection events retained on the device.
Step 1: Click on the Playback option and select your device. Double click to load the initial recording in the timeline.
Note: Use the timeline to manually scroll through the events of the day. The calendar option can be used to choose different dates and times of the events.
To view filter and view specific record types, such as human/vehicle events, click the filter icon (  )
)
.
