QMeye User Manual 2024, QmEye is intended to monitor various types of remote video devices, such as IP cameras, DVRs, and NVRs. The program requires using an account; and, if you do not have one, you can create right from the program’s interface. Setting a new account also needs providing your email address, which is used to recover your password in case you forget it.
The tool allows adding and monitoring a large number of cameras simultaneously. The cameras in your network can be automatically found and installed. The program supports IP and P2P connection modes as well as UMSP, HZXM, and HZZN protocols. It could also be necessary to provide the camera‘s password to access it. After this step, the devices can be organized by grouping them into different folders. For monitoring purposes, it is possible to divide the workspace into up to 64 regions. Moreover, on the left, there is a panel, from which you can control the selected camera.
In addition to allowing the users to view live video streams, the program also lets you schedule recording sessions and play them later. Likewise, it can take snapshots of specific video frames. Moreover, you can implement alarms to send notifications to a given SMS number.
All in all, QmEye is an excellent solution in terms of the number of cameras and connection protocols allowed. Unfortunately, the tool is not as easy to use as other similar tools and its graphical user interface probably needs a redesign.
This manual has mainly instructions on the installation and usage in Android, iPhone mobile phone.
1.Android
This cloud service platform is the best mobile phone video during the internet era. It consists of front-end acquisition devices, platform servers, and remote view of three parts.
Open the software into the login interface, inputting the username and password and click button “login”, then it will be login the application.
Icon description:
|
Iicon |
Function description |
|
|
After select, it will go directly to the main menu when you log in again. |
Notice: Please click “LoginFree”, directly into the system, without verifying user name and password. And you can get help information without login.
1.1 User register
User register
Click the button “register” on the login menu, then will jump to the register interface.
Enter the register information, click “register” then will be registered.
Note:1 please enter the valid E-mail address in order to retrieve your password when you lost it.
2 No account login version, no such function!
On the register clicking the button “login” and jump to “retrieve password” interface.
Input the username, click button “retrieve password”.
If you have entered your name and email address when registering and the username has been occupied, then “retrieve password” information will be sent to the email address.
QMeye User Manual 2024
1.2 Real-time preview
In the main menu, clicking “real-time preview
Click “Favorites” button, go to “collection management” interface
Click on the icon, favorites list change into editing state, click icon, you can delete your favorites.
Select one of the devices on “Live list” enters the video preview interface.
Button instruction:
|
icons |
function instruction |
|
|
return to main menu |
|
|
move to the left |
|
|
move to the right |
|
|
move down |
|
|
move up |
|
|
enlarge |
|
|
narrow |
|
|
zoom out |
|
|
zoom in |
|
|
aperture enlarge |
|
|
aperture narrow |
|
|
start/ close intercom |
|
|
start/ close speakers |
|
|
stop/ start |
|
|
snapshot |
|
|
start / close the local video |
|
|
favorites |
|
|
channel switcher |
1.3 device management
Click the button” device management” on the main menu and enter “device management” interface.
Icon instruction:
|
Icon |
Function instruction |
|
|
return to the main menu |
|
|
click on the pop-up menu, such as modifying parameters, name options |
|
|
shot |
|
|
catalogue |
|
|
device |
|
|
after pop-up, add the catalogue,, device and shot menu |
|
|
search the local shot |
Modify the connection parameter
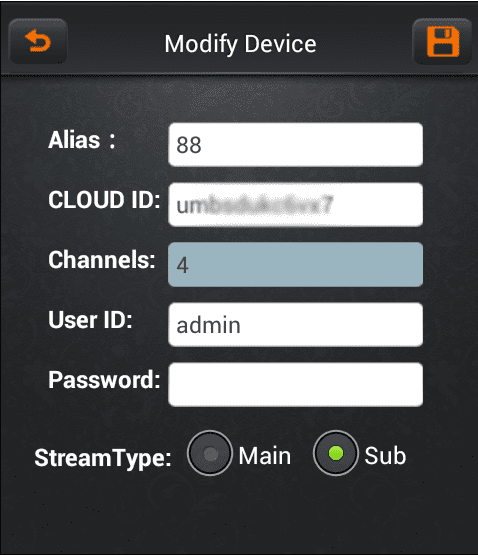
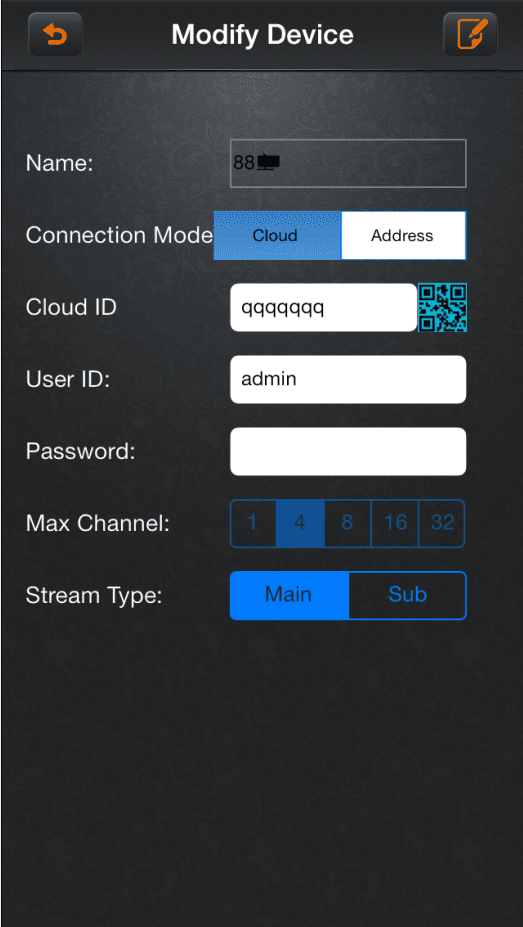
Click on the icon, select “modify connect parameter”, then into “modify device” dialog box:
A)Click on the icon, return to the device management lists.
B)Click on the icon, save the current configuration.
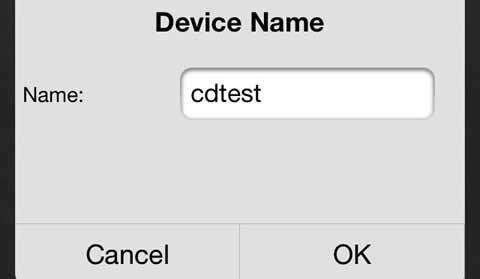
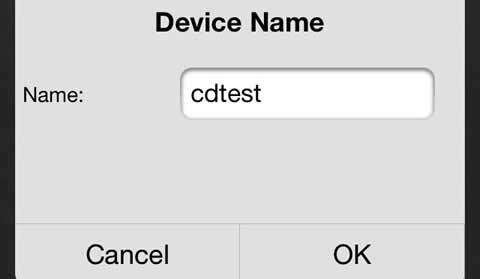
Click on the icon, select the option “modify the name”, then pops up “modify name” or “modify the catalogue” dialog box.
A)Click “OK” button to save the current configuration.
B)Click “cancel” button to cancel the modifying.
Delete
Click on icon, select “delete’ button to delete the current device directly
Add the catalogue
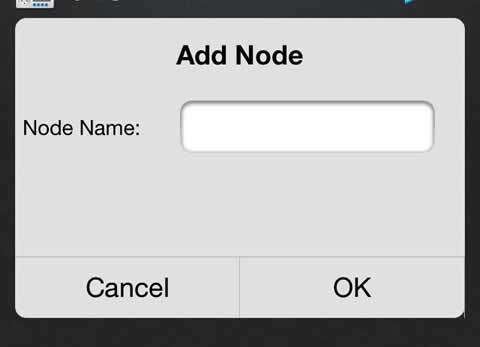
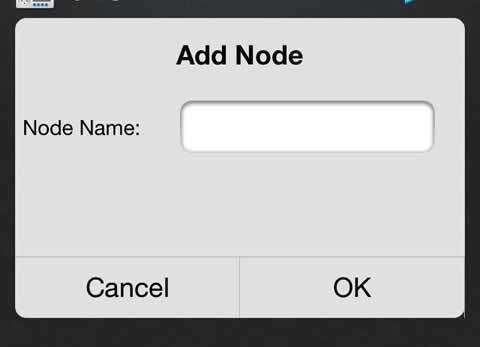
Click on icon, select “add the catalogue” option, then pops up “add the catalogue” dialog box
A)Click “OK” button, it will be saved the current configuration. Then will be showed in the device management list.
B)Click button “Cancel” to cancel to add the catalogue.
Add the device
Click on the icon to select “add the device” option.
Icon instruction
|
Icon |
Function instruction |
|
|
Open the camera and shoot the QR code to obtain the data. |
|
|
Save the device data |
|
|
Cancel to add the device. |
Please see the operation introduction of “add devices”.
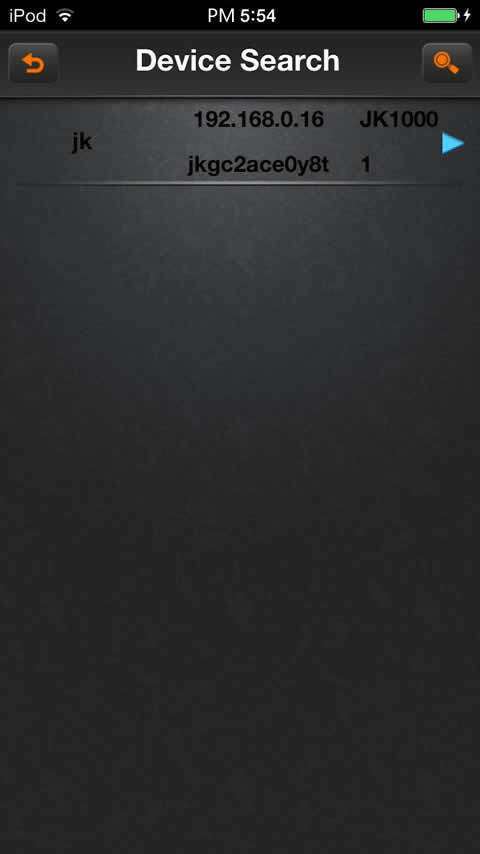
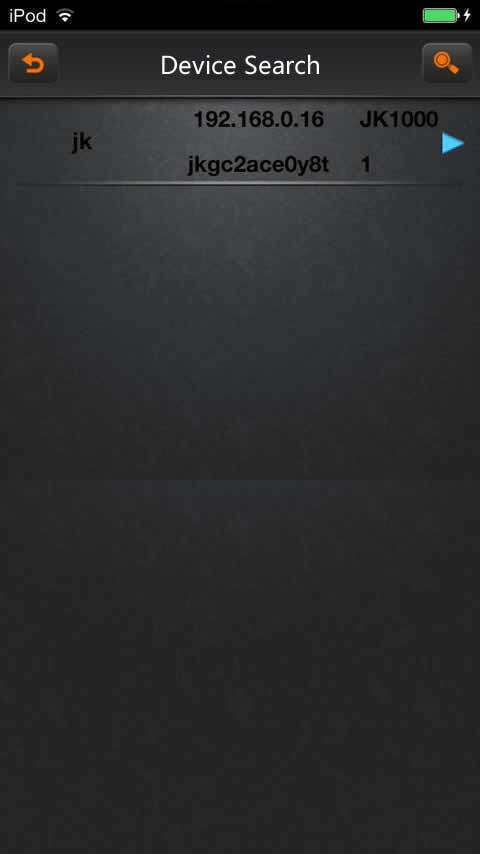
Click on the icon to enter “search” dialog box. If there are some devices in local place, you would search out the corresponding device.
Icon instruction
|
Icon |
Function instruction |
|
|
return to device management |
|
|
pop up the option of “add menu” |
|
|
search the device again |
Click on the icon, then pop up the menu as follows:
A)Add a device: add DVR (multi- channel)
B)Add a shot: add a single camera (single channel)
C)Modify the name: modify the name of the device or shot
D)Modify IP: Modify the IP address, subnet mask, gateway information
E)Modify the device password
1.4 Playback
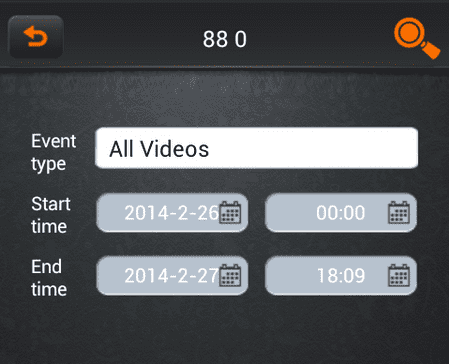
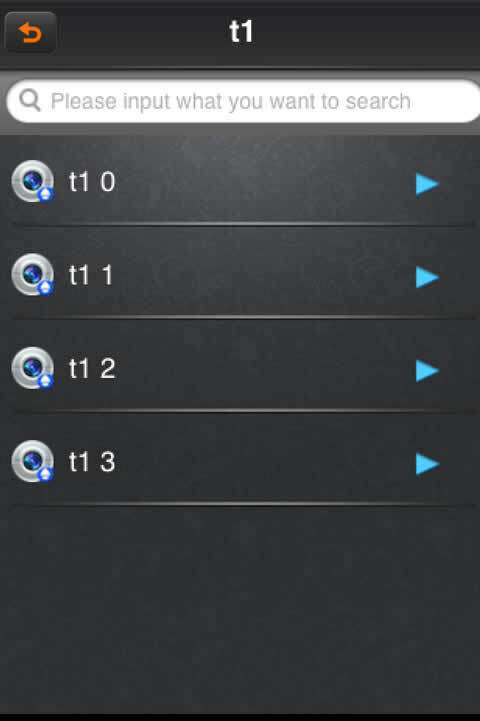
Click button “playback” option in the main menu, and then select to playback the video.
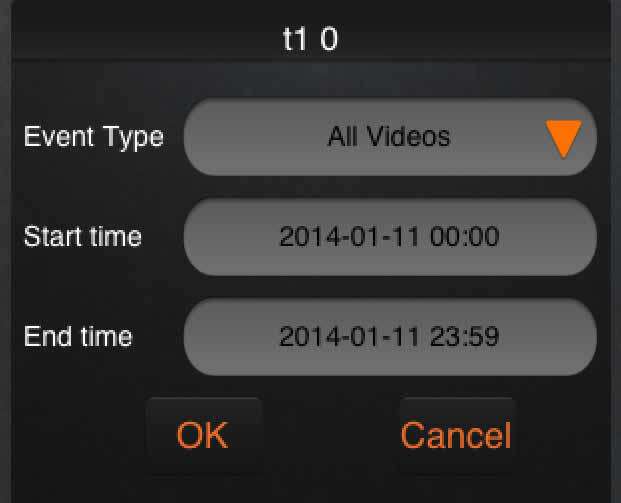
After select an event type, start time and end time, clicking on the icon will list out the remote video lists, and then click on the item will be selected to play or download videos.
1.5 Alarm management
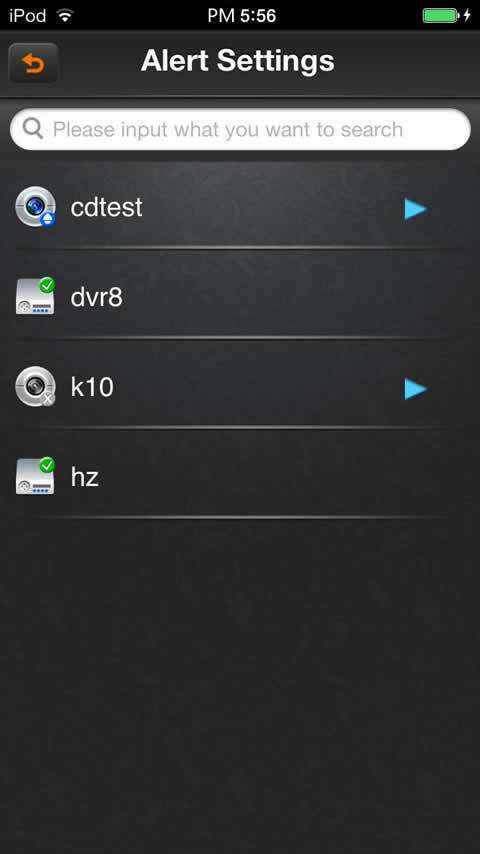
Click the option of “alarm management” in the main menu
Icon instruction:
|
Icon |
Function instruction |
|
|
No guard |
|
|
Guarded |
|
|
Click the pop-up menu options |
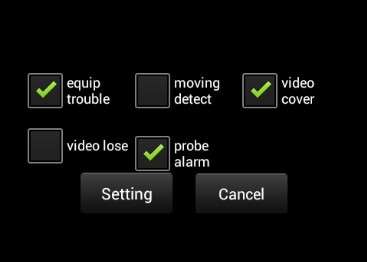
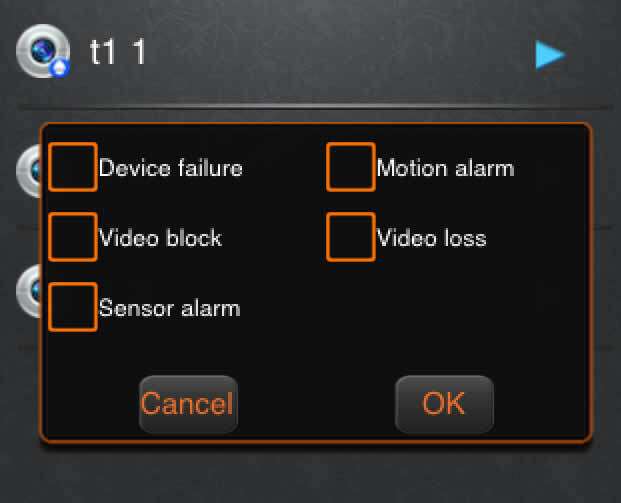
Click on the icon to select “guard” option, pop up the dialog box as follows:
Select the option those need to alarm and click the button “setup” to save the current settings; Click the button “cancel” to cancel the current settings.
Click on the icon to select the button “unguard”, cancel the current camera setting.
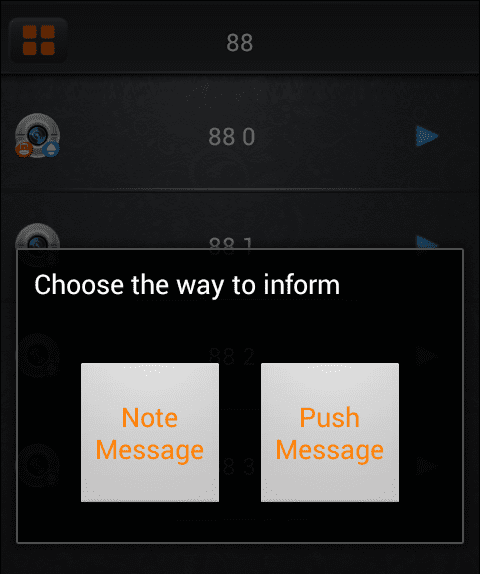
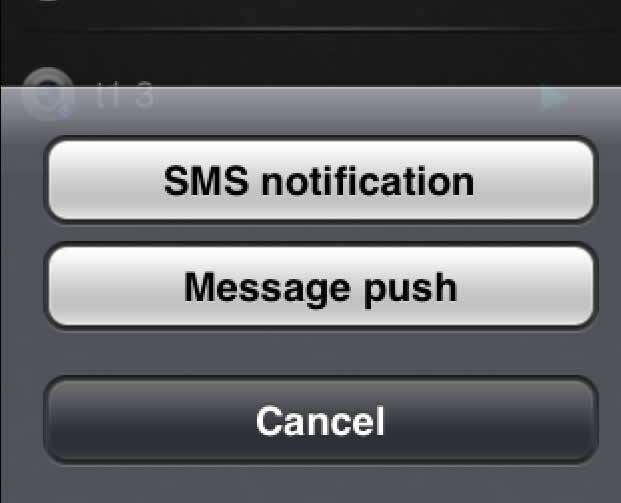
Click on the icon to select “note” option, and then pop up the dialog as follows:
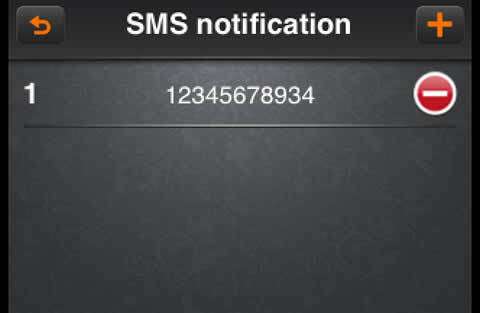
A)SMS notification: set the cell phone number of alarm notification
B)News push: open/ close the news push setting
In the notification interface, and then into “SMS notification” interface
Icon instruction
|
Icon |
Function instruction |
|
|
return to the alarm management |
|
|
Add the number of SMS |
|
|
Delete the current number |
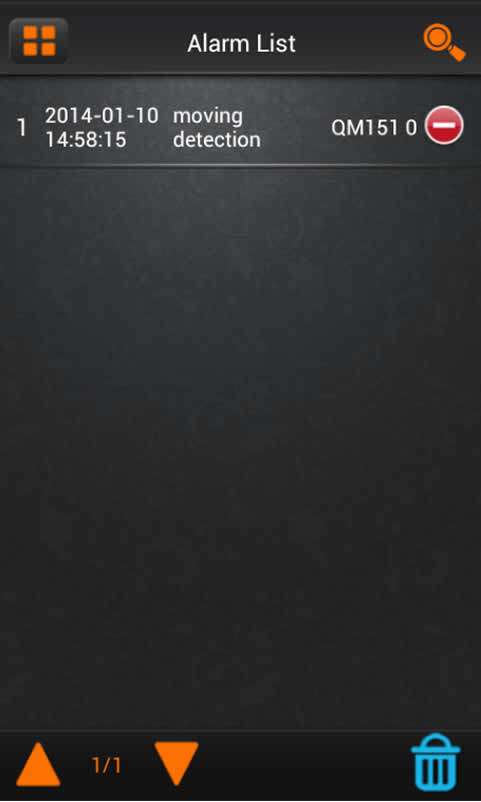
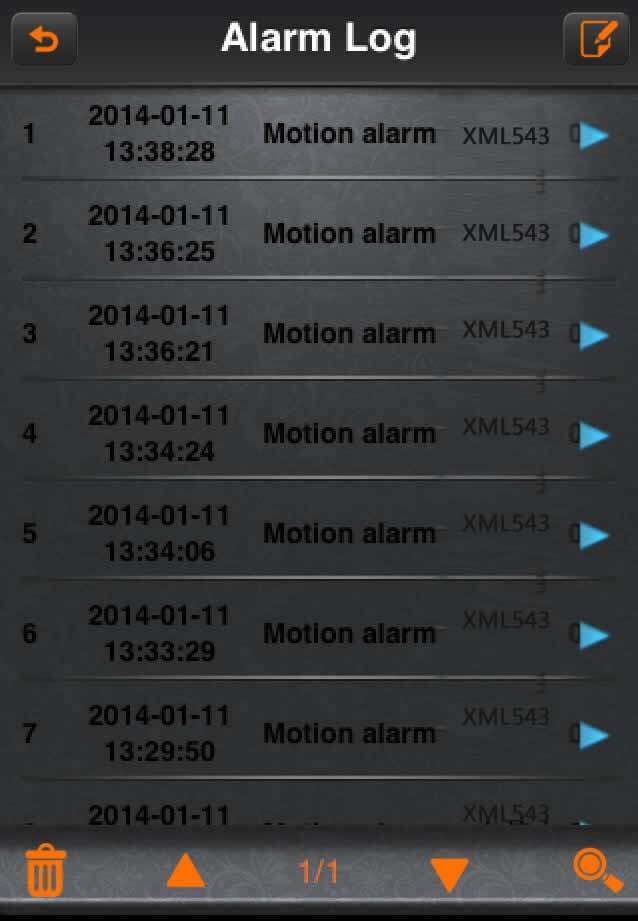
Click on the icon to select “record” option, and then pop up the dialog of “alarm record”
The icons instruction
|
Icon |
Function instruction |
|
|
return to the alarm management |
|
|
search the alarm record |
|
|
page up |
|
|
page down |
|
|
Delete all alarm information |
1.6 Local playback
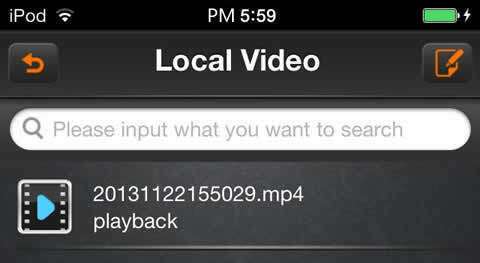
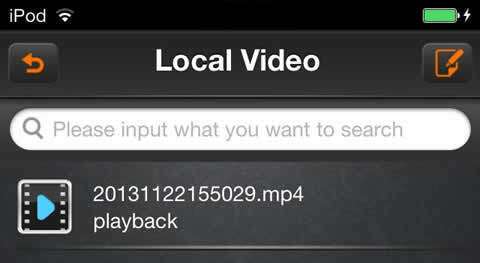
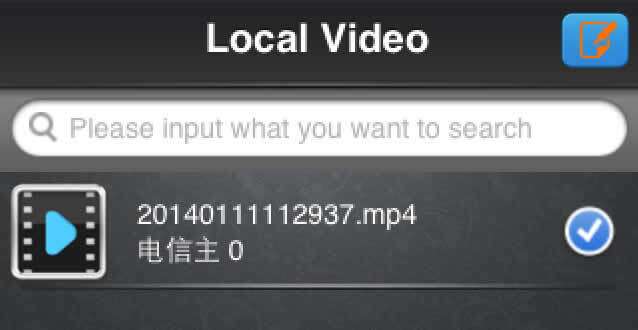
Click on “local playback” option in the main menu, and then into the interface as follows
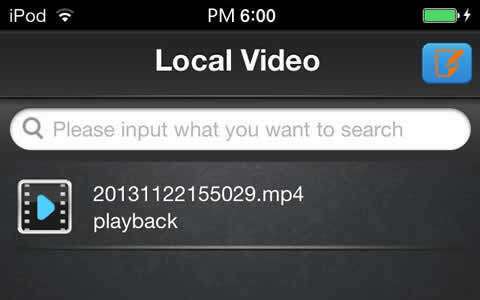
Click on the icon, the local playback video list change to editing states.
Select the video options that you want to delete, and then click the icon; you can delete the selected local video.
1.7 Image view
Click on “images browsing” option
Click on the icon, the local playback video list change to editing states.
Select the image options that you want to delete, and then click on the icon to delete the selected local images.
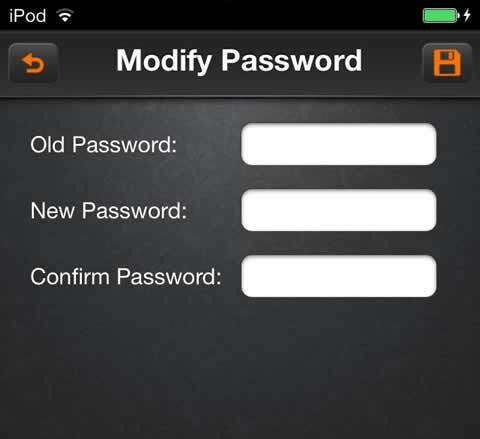
1.8 Modify password
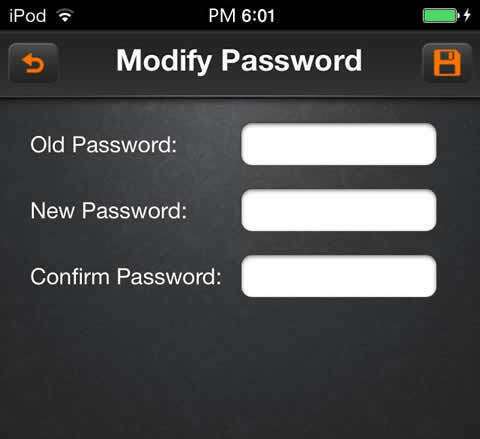
Click on” modify password” option in the main menu, and then into the interface as follows:
Click on the icon to save the current modified password.
1.9 Local configuration
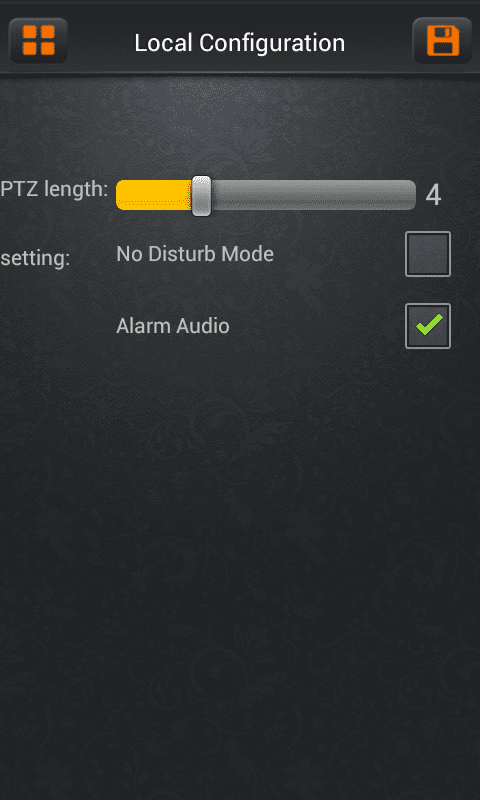
Click on “local configuration” option in the main menu, and then into the interface as follows
Function instruction:
|
Function |
Instruction |
|
PTZ length |
The camera rotation rate setting |
|
Do not disturb |
Alarm Info Tips switch |
|
Alarm voice |
Close the alarm voice |
Click on the icon to save the current configuration.
2、iphone
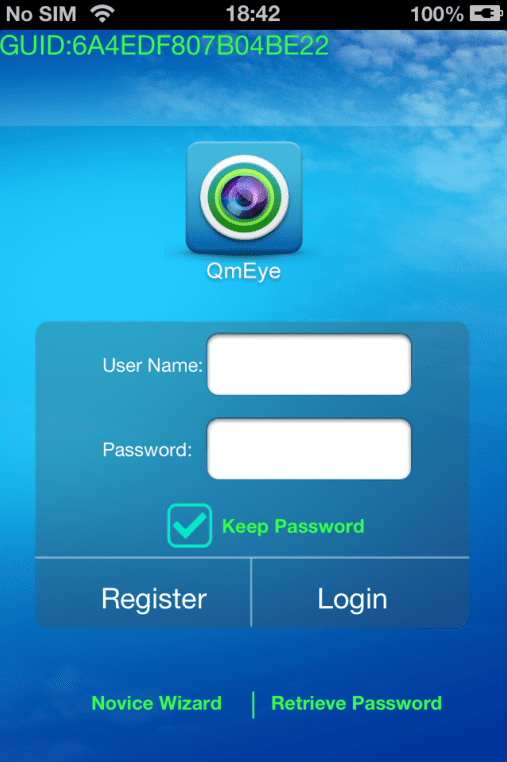
Open the software into the login interface, inputting the username and password and click button “login”, then it will be login the application.
Icon description:
|
Iicon |
Function description |
|
|
After select, it will go directly to the main menu when you log in again. |
Notice: Please click “LoginFree”, directly into the system, without verifying user name and password. And you can get help information without login.
User register
Click the button “register” on the login menu, then will jump to the register interface.
Enter the register information, click “register” then will be registered.
Note: 1 please enter the valid E-mail address in order to retrieve your password when you lost it.
2 No account login version, no such function!
retrieve the password
On the register clicking the button “login” and jump to “Retrieve password” interface.
Input the username, click button “retrieve password”.
If you have entered your name and email address when registering and the username has been occupied, then “retrieve password” information will be sent to the email address.
2.2 Real-time preview
In the main menu, clicking “real-time preview
Click “Favorites” button, go to “collection management” interface
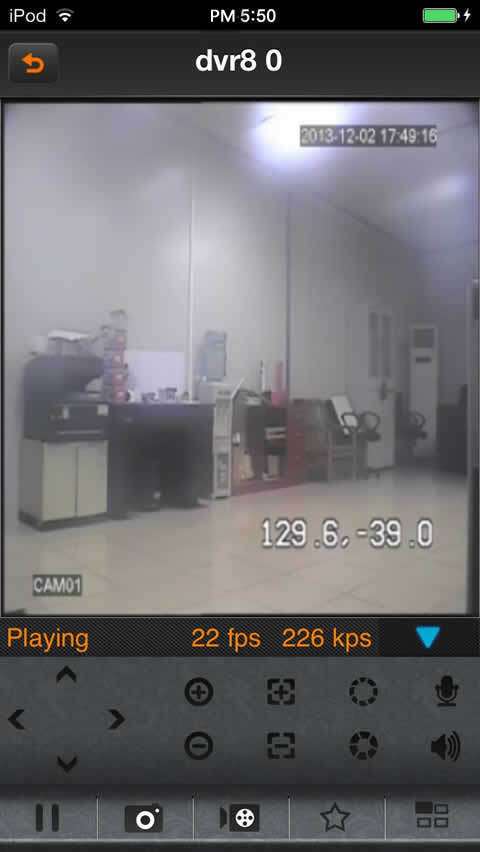
Select one of the devices on “Live list” enters the video preview interface.
Button instruction:
|
icons |
function instruction |
|
|
return to main menu |
|
|
move to the left |
|
|
move to the right |
|
|
move down |
|
|
move up |
|
|
enlarge |
|
|
narrow |
|
|
zoom out |
|
|
zoom in |
|
|
aperture enlarge |
|
|
aperture narrow |
|
|
start/ close intercom |
|
|
start/ close speakers |
|
|
stop/ start |
|
|
snapshot |
|
|
start / close the local video |
|
|
favorites |
|
|
channel switcher |
2.3 device management
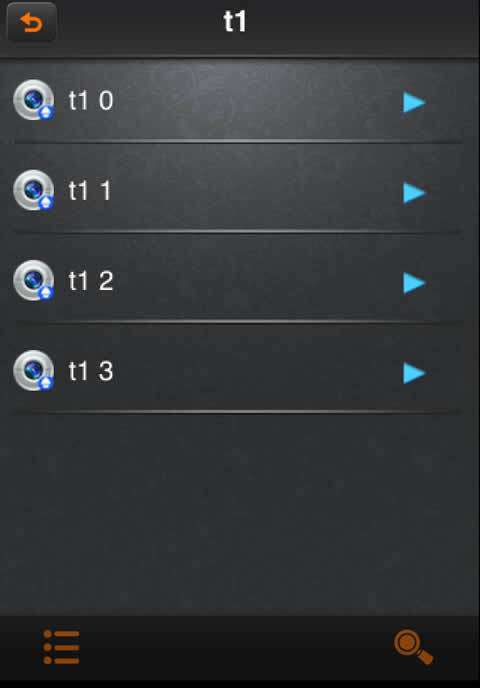
Click the button” device management” on the main menu and enter “device management” interface.
Icon instruction:
|
Icon |
Function instruction |
|
|
return to the main menu |
|
|
click on the pop-up menu, such as modifying parameters, name options |
|
|
shot |
|
|
catalogue |
|
|
device |
|
|
after pop-up, add the catalogue,, device and shot menu |
|
|
search the local shot |
Modify the connection parameter
Click on the icon, select “modify connect parameter”, then into “modify device” dialog box:
A)Click on the icon, return to the device management lists.
B)Click on the icon, save the current configuration.
Modify the name
Click on the icon, select the option “modify the name”, then pops up “modify name” or “modify the catalogue” dialog box.
A)Click “OK” button to save the current configuration.
B)Click “cancel” button to cancel the modifying.
Delete
Click on icon, select “delete’ button to delete the current device directly
Add the catalogue
Click on icon, select “add the catalogue” option, then pops up “add the catalogue” dialog box
A)Click “OK” button, it will be saved the current configuration. Then will be showed in the device management list.
B)Click button “Cancel” to cancel to add the catalogue.
Add the device
Click on the icon to select “add the device” option.
Icon instruction
|
Icon |
Function instruction |
|
|
Open the camera and shoot the QR code to obtain the data. |
|
|
Save the device data |
|
|
Return the main menu |
Add the shot
Please see the operation introduction of “add devices”.
Search the local device
Click on the icon to enter “Device search” dialog box. If there are some devices in local place, you would search out the corresponding device.
Icon instruction
|
Icon |
Function instruction |
|
|
return to device management |
|
|
pop up the option of “add menu” |
|
|
search the device again |
Click on the icon, then pop up the menu as follows:
A)Add a device: add DVR (multi- channel)
B)Add a shot: add a single camera (single channel)
C)Modify the name: modify the name of the device or shot
D)Modify IP: Modify the IP address, subnet mask, gateway information
E)Modify the device password
2.4 Playback
Click button “playback” option in the main menu, and then select to playback the video.
After select an event type, start time and end time, click the button OK will list out the remote video lists, and then click on the item will be selected to play or download videos.
2.5 Alarm management
Click the option of “alarm management” in the main menu
Icon instruction:
|
Icon |
Function instruction |
|
|
No guard |
|
|
Guarded |
|
|
Click the pop-up menu options |
Guard
Click on the icon to select “guard” option, pop up the dialog box as follows:
Select the option those need to alarm and click the button “OK” to save the current settings; Click the button “Cancel” to cancel the current settings.
Unguard
Click on the icon to select the button “unguard”, cancel the current camera setting.
Note
Click on the icon to select “note” option, and then pop up the dialog as follows:
A)SMS notification: set the cell phone number of alarm notification
B)Message push: open/ close the news push setting
In the notification interface, and then into “SMS notification” interface
Icon instruction
|
Icon |
Function instruction |
|
|
return to the alarm management |
|
|
Add the number of SMS |
|
|
Delete the current number |
Record
Click on the icon to select “record” option, and then pop up the dialog of “alarm record”
The icons instruction
|
Icon |
Function instruction |
|
|
return to the alarm management |
|
|
search the alarm record |
|
|
page up |
|
|
page down |
|
|
delete all alarm information |
2.6 Local playback
Click on “local playback” option in the main menu, and then into the interface as follows
Click on the icon, the local playback video list change to editing states.
Select the video options that you want to delete, and then click the button “delete”; you can delete the selected local video.
2.7 Image view
Click on “images browsing” option
Click on the icon, the local playback video list change to editing states.
Select the image options that you want to delete, and then click on the button delete to delete the selected local images.
2.8 Modify password
Click on” modify password” option in the main menu, and then into the interface as follows:
Click on the icon to save the current modified password.
2.9 Local configuration
Click on “local configuration” option in the main menu, and then into the interface as follows
Function instruction:
|
Function |
Instruction |
|
PTZ length |
The camera rotation rate setting |
|
Do not disturb |
Alarm Info Tips switch |
|
Alarm voice |
Close the alarm voice |
|
Alarm languagece |
Alarm push language |
Click on the icon to save the current configuration.
QmEye_PC_Client_
1、Install
Double-click to open QmEye installation file, pop up following the installation wizard(The version number may be different, but not influence use)
Click “next” until the following interface, click the “install”
After the installation of software, pop-up window as follows:
Click “finish”
2.1 Login
Start the application, the program into the landing interface, as shown in P2-1
P2-1 Login
Enter account and password to log in. If the user does not have the account , you can apply for to register. And local login is permitted.
2.2 Register
Clicks the “register” on the login interface, enter the registration screen, as shown in P2-2.
P2-2 Register
With * is required, fill in and then click the “register”.
2.3 Password lost
If users have account, but forget the login password.You can through the e-mail to retrieve password. Click “Password lost”, Enter the following interface
图2-3 Password lost
Mail QueryL: Check the reserved E-mail information when registering.
Retrieve Password: System will send an email to the email, according to the prompt to reset the login password
2.4 Main Interface
After the success of the user login, enter the main interface, as shown in P2-4.
P2-4 main interface
Main interface is divided into four parts, including at the top of the navigation bar(P2-5), he left menu bar – device list and function(P2-6), in the middle of the play rect(P2-7), And at the bottom of the play controls(P2-8)
P2-5 Navigation bar
P2-6 Device list and function
P2-7 The play rect
P2-8 Play controls
The description of each icon function as the following:
|
icon |
function description |
icon |
function description |
|
|
Directory: For equipment management, classification of grouping and operation |
|
The local video, select a live preview screen to start the video. Video files saved on your PC. |
|
|
equipment:Multi-channel DVR, NVR, etc. If the corresponding equipment don’t online icon as grey |
|
Local snap, select a live preview screen starts to capture. The snap images stored on your local PC. |
|
|
Camera:The IPC or a channel, etc,If the corresponding camera don’t online icon as grey |
|
Talkback, real-time two –way intercom |
|
|
Single picture full-screen playback, can also double-click on the play form in full-screen playback |
|
Monitoring, one-way receive the playback audio |
|
|
Turn off the live preview |
|
64 split-screens, support 1、4、9、16、25、36、49 and 64 split-screens. |
|
|
full screen, picture full screen playback. |
|
sign out |
|
|
64 split-screens, support 1、4、9、16、25、36、49 and 64 split-screens. |
|
help, click to open help page |
|
|
Page up |
|
Page down |
2.5 Control panel
Picture 2-9 control panel
Screen locking: Lock the screen, in the lock case is not able to do any operation in current interface apart from unlocking.(PS: It is not permitted, on local login mode.)
Log off: logout the client
Playback: to playback the remote video and local video
Photos: view local images save by capture
Password Correcting: modify the user logon password(PS: It is not permitted, on local login mode.)
Alarm Settings: set the front-end device booted and alarm monitoring types(PS: It is not permitted, on local login mode.)
Device Searching: search all device which in LAN
DeviceAdministration: for operation such as rename, add, delete a device.
2.6 Add the Device
2.6.1 Quick Add
“Control Panel” ->” Device Searching”, then pop up the device searching interface, as shown in P2-10
P2-10 search the device
Select out a device is searched, and then click “add to the list” filling device login ID and password, as showed in P2-11
P2-11 add a device to lists
Parent directory: add the camera to specific catalogue
Scene name: add to the display name of the user to the device lists.
Username: login username of the device
Password: the login password of the device
Channel NO: view what channel number, start from 1. Completed IPC as 1
Streaming: request to a front- end device stream format while live preview, default is sub stream. Fulfill the above information: after finished, click “add” button
图2-12
2.6.2Add the device manually
“Control the panel” ->”Device management”, then pop up the device management interface, as shown in figure 2-13
Picture 2-13 device management
Firstly, select a directory from the device list box, then click “add the cameras” enter the added interface like the following figure:
Picture 2-14 add cameras
Device name: the display name that you add to the user device list, more convenient to people identify (such as living room)
Device type: lens (the channel of the IPC, DVR\NVR), device (such as DVR\NVR)
Connection modes: (IP address and port access mode), P2P (cloud- penetration mode)
Protocol: select the front-end device protocol
Cloud ID: front-end device ID to identify the device, P2P mode exclusive.
Username: the login username of device
Password: device login password
Channel NO: view what channel number, start from 1. Completed IPC as 1 (if it is the device type, it is the channel number mean: complete 8 if is 8Channel DVR)
Stream: request to a front- end device stream format while live preview, 0 is main stream,1 is sub stream, default is sub stream.
2.7 Alarm setting
“Control the panel” ->”alarm configuration”, then pop up the alarm setting interface, as shown in figure 2-15
Picture 2-15 alarm setting
Guard: start 4 alarm types monitoring which you tick
Unguard: cancel all alarm types monitoring
PC Push: after booting and the related equipment alarm is triggered, the server will push the information to the PC client and prompt the user
Add number: add SMS notice number
Delete number: delete SMS notice number
Turn off the alarm: turn off the alarm, which the PC client is no longer to prompt the push information of device trigger alarm
Open the alarm: turn on the alarm, which the Pc client will prompt the push information of device trigger alarm.
View the alarm information: after starting current PC to view all alarms push messages.
2.8Video playback
2.8.1 Remote video playback
“Control the panel” ->”video playback”, then pop up the video select operation interface, (as shown in figure 2-16), select “remote video” then into remote video playback interface, as shoun in figure 2-17
Picture 2-16 video types select
Picture 2-17 remote video playback
Select a device and set up the query time then click it to acquire the relevant video information. as shown in figure 2-18
Picture 2-18 remote video lists
Double click a video to play in the video lists (as follows), double click the playing interface can be full screen.
Picture 2-19 remote video playback
2.8.2 Local video
“Control the panel” ->”video playback” -> “local video”, then pop up the local video interface, (as following:
Select the local video date that need to view. Query the related video and double click to play.
IE Browser User Manual
Preface
Thank you for using our IP camera products. This series of products are all-in-one IP cameras designed for network video surveillance, including box IP camera, infrared box IP camera, dome IP camera, speed dome IP camera, etc. The products adopt high performance and powerful single SOC chip media processor to integrate audio and video capture, compression and transmission. Standard H.264 Baseline and Main Profile coding algorithm ensures clearer and smoother video transmission effect. Built-in Web Server allows users to easily perform real-time monitoring and remote control over front-end cameras via IE browser.
This series of IP cameras is suitable for small and medium-sized enterprises, families, and other environments that require remote network video transmission and monitoring. It is easy to install and operate.
Statement:
Readership:
This manual is suitable for engineers as follow:
Notes:


