Senstar Thin Client User Guide 2024, The Senstar Thin Client is a simple and cost-effective device designed to display 1080p video from 30+ network video camera manufacturers via ONVIF Profile S, as well as from the Senstar Symphony VMS or any RTSP-compatible video source.
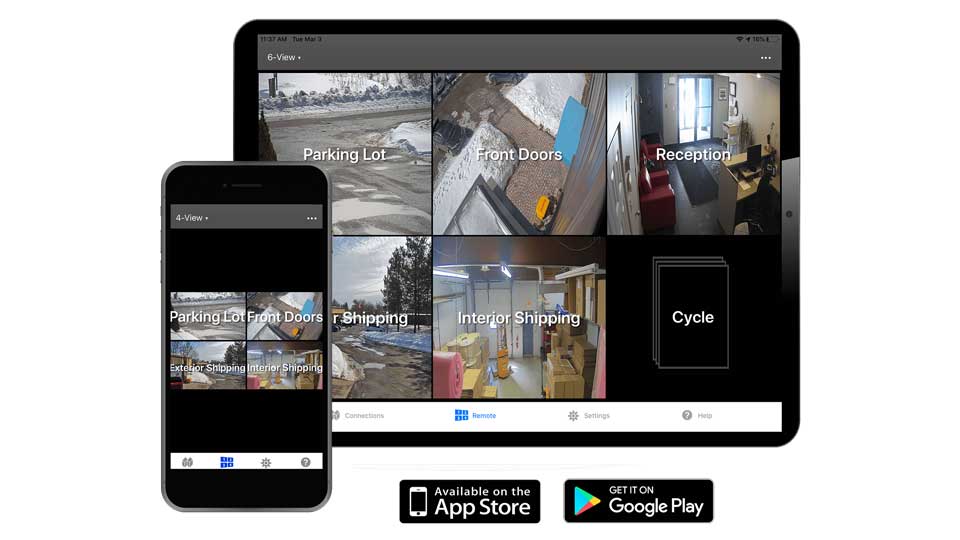
The device is ideal for space-constrained environments due to its compact design while its web-based interface makes it easy to configure and manage. The Senstar A10D Thin Client™ is a secure, reliable, and cost-effective PC alternative designed to display 720p or 1080p video from network video quickly and easily. The device can be controlled via the web, or through the convenience of your smartphone.
Supported Touch Screen Monitors for Thin Client 2.0.1
AG Neovo – http://ca.agneovo.com/
iiyama ProLite – http://www.iiyama.com/us_en/products/prolite-t1731sr-1/
For more information, see the Release Notes in the downloads page: https://xnet.senstar.com/Xnet/Downloads/ThinClientUpdate.aspx
Senstar A10D Thin Client Firmware Upgrade
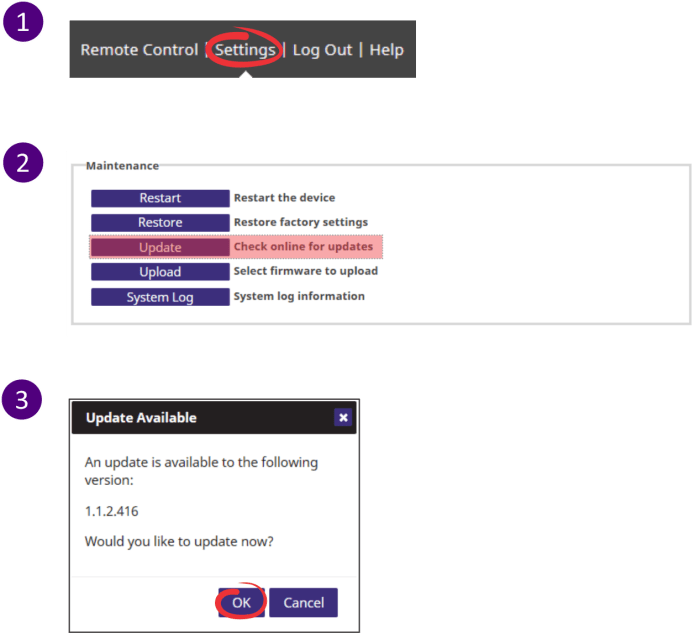
The following article outlines how to check for firmware updates through Thin Client.
Optionally, you can manually download the firmware upgrade from here and then click Upgrade from the Maintenance section, as shown in step 2.
onnect to Thin Client using SSH
Enable SSH in Thin Client
SSH is disabled by default and any time a factory restore is performed.
1. Open a web browser and enter http://thinclientIP/EnableSSH. Recommended browsers include: Mirosoft® Internet Explorer, Mozilla®, Firefox®, and Google Chrome™.
2. The message “SSH Successfully enabled” appears.
3. If you are using Linux go to command–line and enter ssh <username>@<IP address>. For example, ssh root@10.234.1.10. When prompted enter the password.
4. If you are using Windows® ensure a version of PuTTY is downloaded.
When you are done, you should consider disabling SSH. The link to disable SSH is http://thinclientIP/DisableSSH.
Cannot connect to ONVIF-compliant camera because no ONVIF stream available
Issue
Network cameras/encoders supporting ONVIF do not offer a way to set up an ONVIF stream/profile necessary for making an ONVIF connection from the Thin Client to the ONVIF-compliant device.
Solution
If the camera manufacturer does not provide a method for setting up ONVIF streaming profiles, use a third-party tool to do so. One such open source tool is the ONVIF Device Manager: http://sourceforge.net/projects/onvifdm/
Senstar Thin Client User Guide 2024
Read Also : Verkada Viewing Station setup and user guide
Device cannot connect to Video Source
Issue
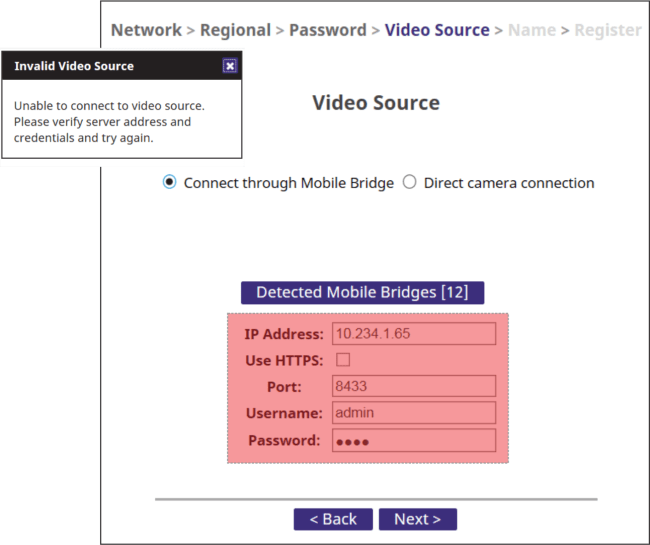
The Thin Client cannot connect to Mobile Bridge, and you see an Invalid Video Source error when setting up or re-configuring the device as follows: “Unable to connect to video source. Please verify server address and credentials and try again.”
Solutions
All Thin Client Articles
|
Device does not power on |
|
|
HDMI output is not working or is cut off |
|
|
Device cannot connect to Video Source |
|
|
Camera views contain blank camera panels |
|
|
Cannot connect to ONVIF-compliant camera because no ONVIF stream available |
|
|
Connect to Thin Client using SSH |
|
|
Edges of the Displayed Image are Cropped |
|
|
Senstar A10D Thin Client Firmware Upgrade |
|
|
Cannot Log into Thin Client Using Chinese Characters |
|
|
Supported Touch Screen Monitors for Thin Client 2.0.1 |
|
|
Connection Fails, Unable to Retrieve Live Video: Thin Client 2.1.0 – Mobile Bridge |
|
|
Thin Client 2.1.0 – Wrong time displayed in video decoration when connecting to cameras via Mobile Bridge |
|
|
2.2.0 Keyboard and Remote Control Functions |
|
|
Touch Screen Monitor Not Working with Thin Client |
Camera views contain blank camera panels
Issue
Thin Client camera views contain one or more blank camera panels on the web interface and/or the HDMI output monitor.
Solution
The Thin Client can decode up to 1920×1080 at 30 FPS in H.264, MJPEG, or MPEG4. Ensure you have at least one (1) camera stream configured at this resolution or lower.
Note: Camera streams above 1920×1080 resolution cannot be decoded to the camera.
The Thin Client device automatically selects an appropriate video stream based on the resolution of the panel the video is being rendered in. Thin Client will select the stream with a resolution that most closely matches the panel’s resolution without exceeding it.
Therefore, it is recommended to have one (1) stream at 1920×1080 and another stream at 800×450 as the Thin Client will select the best stream automatically based on the camera view layout selected.
Cisco 2960-X and Catalyst SG300 switch with Thin Client
Issue
Thin Client is not connecting to cameras, not displaying cameras, not working properly on the network.
Reason
The network port is ‘flapping’ that is, going up and down constantly and so the Thin Client cannot connect.
Source of Problem: Cisco Switches
The EEE (Energy-Efficient Ethernet) feature on the switch is the source of the issue. See Cisco bug report here:
https://quickview.cloudapps.cisco.com/quickview/bug/CSCus35889
Resolution
Disable the EEE feature on the switch. This resolves the issue with the Thin Client.
Edges of the Displayed Image are Cropped
Symptoms:
The edges of the displayed video images are cropped.
Probable Cause:
It is likely that overscan is enabled on the displays being used. Overscan is the term used to describe the situation when not all of an image is present on a viewing screen. By default most TVs and monitors are set to use overscan to compensate for potential artifacts at the edge of the screen from the incoming signal.
Solution:
Turn off overscan on all the displays being used. The procedure for this varies depending on the product; therefore, consult the documentation for your particular model for complete instructions.
|
|
|
|
|
Device does not power on
Issue
When you attempt to power on the Thin Client by plugging it in to a PoE switch, and one or more of the following occurs:
Solutions
HDMI output is not working or is cut off
Issue
The Thin Client is not displaying HDMI output on the monitor.
– or –
HDMI television output is partially cut off.
Solutions
Upgrading from a version older than 1.2.1.515
If you have a Thin Client version older than 1.2.1.515 do NOT update directly to Thin Client 2.01.
You MUST update to 1.2.1.515 first and then to 2.0.1.
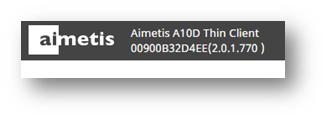
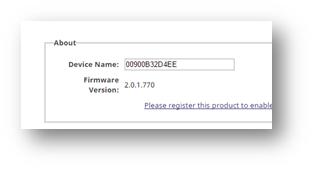
The version number is displayed in the top left of the Web interface and in the About section at the top of the Settings page.
Connection Fails, Unable to Retrieve Live Video: Thin Client 2.1.0 – Mobile Bridge
Example Scenario:
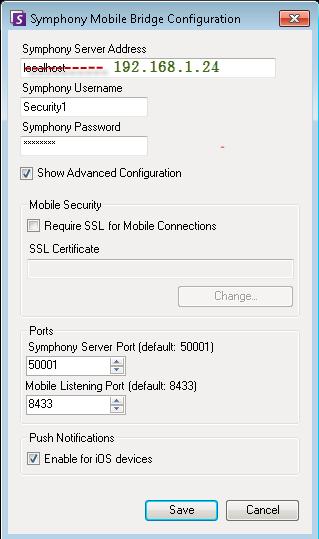
When you connect a Thin Client to a PSA, the Mobile Bridge is installed with default values. The entered IP address is localhost or 127.0.0.1.
Issue:
Thin Client tries to retrieve live video and the connection fails.
Solution:
During Mobile Bridge setup, you must enter a unique IP address when Mobile Bridge is installed on the same machine as the Symphony Server. Do NOT enter 127.0.01 or localhost during the Mobile Bridge setup because the Thin Client will NOT be able to retrieve video via that Mobile Bridge.
Example:
Cannot Log into Thin Client Using Chinese Characters
Applies to Thin Client v2.0.0 and 2.0.1
Issue:
User tries but fails to log into Thin Client using Chinese characters in username or password.
Solution:
To set up your Thin Client so that users can log into the Thin Client using Chinese characters, you must modify Thin Client settings using the settings.sh script.
Note: To ensure settings are updated, it should print to screen, MBCodepage|936 or MBCodepage|950
If you run Mobile Bridge version 2.1.6 or newer, the code page is printed on start. Search for “Current encoding” in Mobile Bridge log:
Current encoding: xxxxx codepage: yyyyy
Thin Client 2.1.0 – Wrong time displayed in video decoration when connecting to cameras via Mobile Bridge
Issue:
When you connect to cameras via Mobile Bridge and you manually change the time in the Thin Client web interface, the time does NOT change on the video decoration. The time decoration in the video is always the time of the server to which the camera is connected.
Cause:
Thin Client converts the Symphony Server’s Coordinated Universal Time (UTC) to local time and displays it in the video decoration. The time decoration therefore is not affected by local system time.
Reason:
This is necessary because of historical video, which must show the converted time from the server.
Important: If the time is changed when connecting directly to the camera, the updated time is displayed in the video decoration.
2.2.0 Keyboard and Remote Control (CEC) Functions
|
Function |
Remote Control Device |
Keyboard |
|
Select (from list) |
Select |
Enter |
|
Cancel (list selection) |
Exit Return |
Esc |
|
Escape Full Screen Mode |
Exit Return |
Return Esc |
|
Clear Camera |
|
Delete |
|
Camera List |
C (Yellow) |
C |
|
View Menu |
D (Blue) |
D |
|
Play |
Play |
P |
|
Pause |
Pause |
P |
|
Live |
Exit |
Escape |
|
Speed |
12345 |
12345 |
|
Forward 1 second |
9 |
] |
|
Forward 10 seconds |
>> |
>. |
|
Backward 1 second |
7 |
[ |
|
Backward 10 seconds |
<< |
<, |
|
Zoom Timeline In |
-Volume |
– |
|
Zoom Timeline Out |
+Volume |
+= |
|
Timeline Left |
Left Arrow |
Left Arrow |
|
Timeline Right |
Right Arrow |
Right Arrow |
|
Channel Up |
+Channel |
Page-Up |
|
Channel Down |
-Channel |
Page-Down |
|
*Date Picker |
|
|
|
*Export |
|
|
|
Live PTZ: Zoom In |
Red |
+ |
|
Live PTZ: Zoom Out |
Green |
– |
|
Live PTZ: Pan Right |
Right Arrow |
Right Arrow |
|
Live PTZ: Pan Left |
Left Arrow |
Left Arrow |
|
Live PTZ: Tilt Up |
Up Arrow |
Up Arrow |
|
Live PTZ: Tilt Down |
Down Arrow |
Down Arrow |
|
Live PTZ: Home |
Stop |
Home |
|
Live PTZ: Preset Menu |
0 |
0 |
|
Live PTZ: Preset Number |
123456789 |
123456789 |
* Mouse and touch control only.
Note: Consumer Electronics Control (CEC) has different trade names depending on the manufacturer. For example:
Touch Screen Monitor Not Working with Thin Client
Problem:
Touch screen monitor does not work with the Thin Client.
Issue:
The touch screen monitor must be on before powering on the Thin Client.
Resolution:
Ensure your monitor is on and restart the Thin Client.
Add Axis cameras with dewarped panoramic view to Thin Client devices
To see the video from an Axis fisheye camera in a dewarped panoramic view, you must manually add the camera using a direct connection with an RTSP URL.
Where ip_address is the IP address of the camera, profile_id is the stream profile setting for the camera, and resolution is the resolution of the camera.
Stream profile settings:
Thin Clients do not display video when connecting through Mobile Bridge
Symptoms
Thin Clients do not display video when connecting to Symphony using Mobile Bridge.
Probable cause
The Thin Clients are using TLS 1.0 and the Mobile Bridge is using TLS 1.2.
Solution
Configure the Thin Clients to use TLS 1.0.
SNMP settings for Thin Client devices
To connect to a Thin Client device using an SNMP browser, you must use the following settings in addition to the IP address of the Thin Client device.
|
Setting |
Value |
|---|---|
|
Address |
The IP address of the Thin Client device. |
|
Port |
The port that the Thin Client uses for SNMP connections. |
|
Read Community string |
l2 |
|
SNMP version |
2 |


When you’re diving into the Thin Client experience, don’t forget to fine-tune those display settings for a top-notch viewing ride and turbocharge your system’s performance. And hey, setting up those scheduled backups isn’t just a chore – it’s your trusty sidekick in keeping your data safe and your maintenance hassle-free. It’s all about maximizing your tech game for smooth sailing!
Isn’t it a blast troubleshooting for hours? Watch those video edges disappear with overscan! And who needs stable networks? Keep EEE on and enjoy the ‘flapping’ fun with Senstar Thin Client!
Ever explored the Senstar Thin Client User Guide 2024? It’s packed with cool troubleshooting hacks for fixing any connection glitches during setup. Plus, if you’re more of a visual learner, check out the online tutorial videos – they’ve got your back for configuring your Thin Client like a pro! It’s a handy resource for smooth sailing with your system.
I gotta say, while the guide covers basics like server connections, it might not be equipped for complex network setups, leaving users hanging in tricky situations. Also, updating firmware isn’t stressed, which could cause compatibility woes with Senstar Thin Client. A more detailed troubleshooting approach could save some headaches.
Feeling a bit stressed about those connection problems? Don’t fret! If you’re still running into trouble despite following the guide, reaching out to Senstar’s customer support for extra help could be a lifesaver. It may also be worth updating the firmware on both the Senstar Thin Client and your ONVIF camera for smoother operation. Remember, help is just a call away!