Configuration Instructions For SVStation, Look no further for your next security camera system. Order the best from the leaders in CCTV security. Whether you need a camera system for your business or your home, we are here to customize the perfect solution for you. We offer NVR IP security camera systems as well as HD over coax security camera systems, all suitable for both indoor and outdoor use. You can conveniently place your order online or allow us to prepare a free customized quote for you.
Setting Up SVStation
After installing SVStation you will want to add your SureVision NVR or Camera to the software so you can view it. This only needs to be configured one time.
Please follow the guide below to help you add your new device.
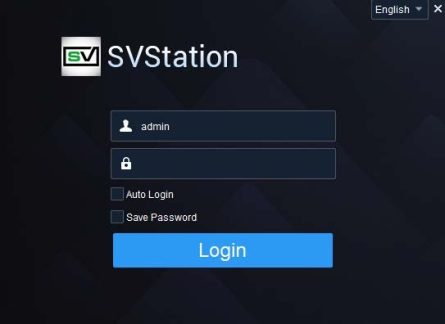
Start by launching SVStation. You will be greeted with a login prompt. Use admin for the username and 123456 as the password. This can be changed later!
You can select the Auto Login feature if you do not wish to see the login prompt each time you launch the program.
You can also Save Password so you do not have to type in a password each time you login.
Click Login.
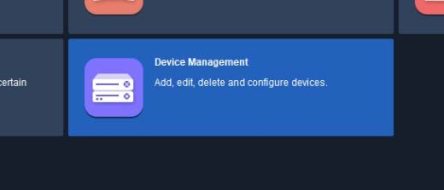
Once you have logged into SVStation please select Device Management to add your device.
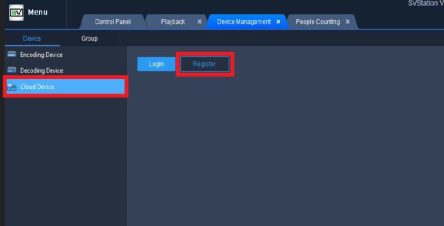
Inside of the Device Management menu click on Cloud Device on the left column.
If you have registered your NVR already please skip to page X.
If this is the first time configuration click Register. Leave this page open as we will be coming back to it later in this guide
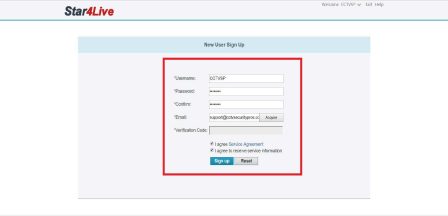
You will be redirected to the registration URL to register your device for the first time.
Please enter a Username, Password, Confirm Password and a valid Email Address.
Click Acquire to send the Verification Code to your email entered. Check email and enter the Verification Code once you receive it.
Agree to the terms and conditions and click Sign Up.
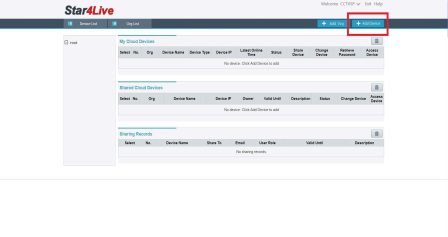
This next menu will allow you to add your NVR to the Cloud Devices. This will enable the NVR from remote viewing.
Click Add Device on the top right corner.
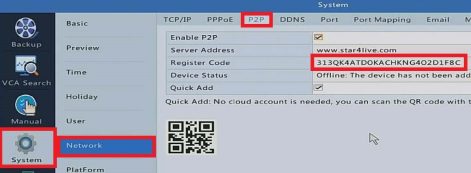
In order to add your device you will need to locate your Register Code of your NVR unit. This can be found inside of the following menus.
Menu -> System -> Network -> P2P. You will need this code for the next section of the guide.
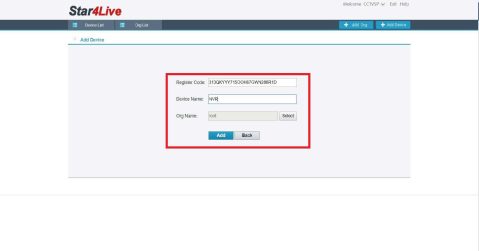
Enter in your Register Code exactly how it is shown on your network P2P menu. Next you need to give your NVR a Device Name. You may name the device anything you would like. Leave your Org Name as root. Click Add when complete.
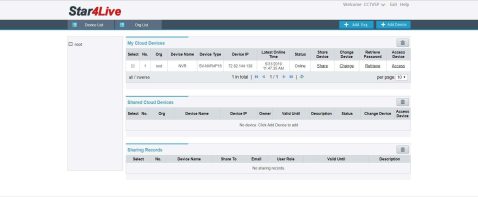
Your device has now been registered and can be remotely accessed from anywhere. You may close this page out once the NVR has been successfully added.
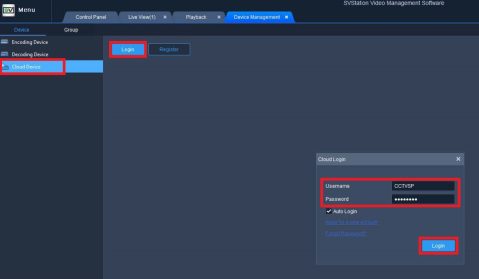
We will want to head back to the Device Management section of SVStation where we last left off and choose Login. We will use the Username and Password we just created
If you highlight Auto Login you will not need to login each time your open the software to view your cameras.
Click Login once your credentials have been entered.
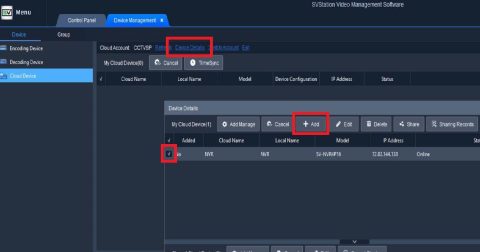
Once you are logged into your account on SVStation click on Device Details towards the top of the screen. Highlight the check box next to your device and click Add.
If your device does not show up in the Device Details you may need to refresh the devices associated to your account. Click the Refresh button to do that.
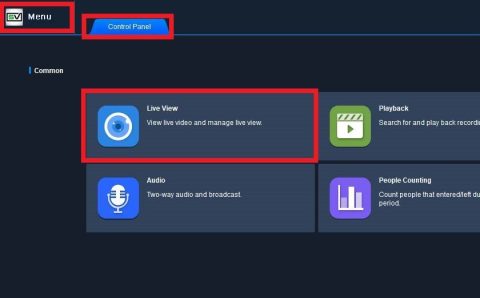
Once your device has been added and you are showing an Online status in your device list you may now watch Liveview video.
To get to this menu click on the SV Menu or Control Panel tabs towards the top left of the screen.
Select Live View.
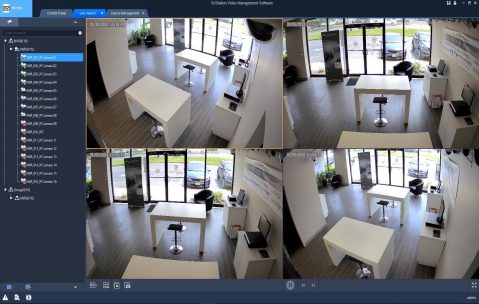
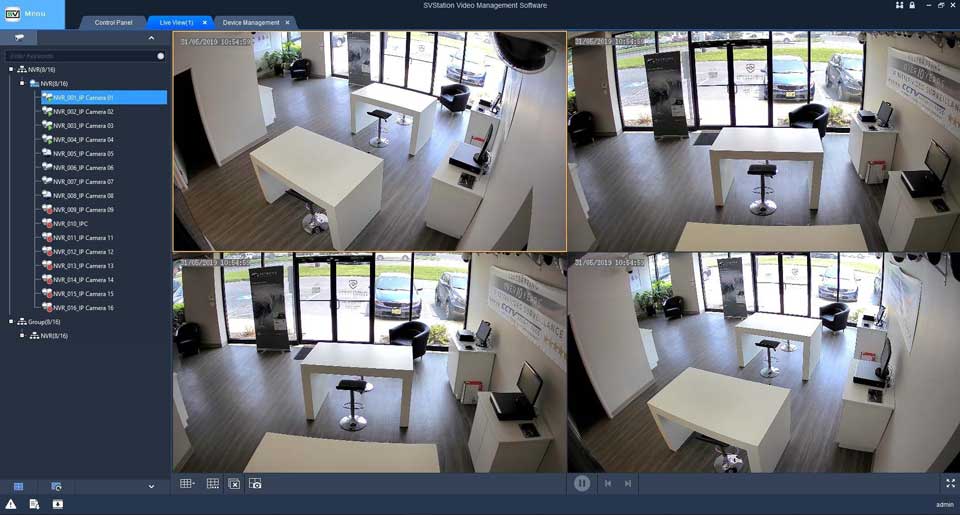
Inside of Liveview you can double click on your newly added Device to open every camera connected at once. Or you may double click on one camera at a time to open only one.
You can change window views towards the bottom of the page and rearrange camera views by dragging and dropping cameras to the appropriate window.
This completes the Remote Viewing P2P guide.
If you would like to add your cameras only on a local network you can follow the guide below. Please note the following guide will not allow you to remotely view cameras over the Internet. This is for local viewing only. Please see the
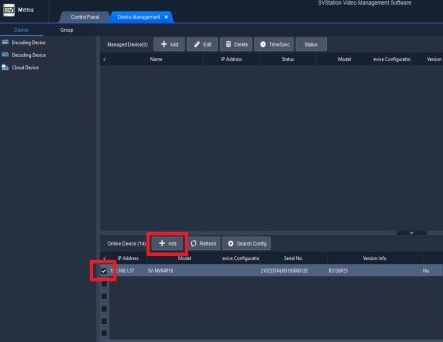
Inside of the Device Management you will see This menu is split into two sections. Managed Devices and Online Devices.
You will first need to find your device in the Online Device section towards the bottom half of the screen. Click on the Checkbox next to the device you would like to add. Once checked click the Add button above.

Once the device has been added it will move to the top of the screen under the Managed Devices section.
After a few seconds you will see the device status change to Online.
Configuration Instructions For SVStation
Read More : Hikvision iVMS-4200 Tutorial Videos
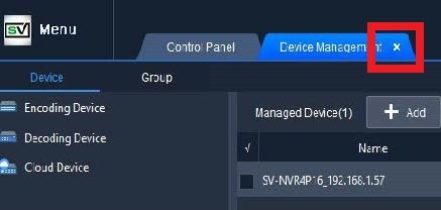
Now that our device has been added into SVStation we can now exit the Device Management section. This workstation is now ready to view the your cameras!
How to Find / Configure IP Camera using
SVTools
Using the SVTools Program, you can find IP Cameras on your network. This may be required for cameras that are not showing up on your network or for easy setup for an individual camera. You can download the tool from our website here.
https://www.cctvsecuritypros.com/surevision-downloads
To utilize the tool, you first must plug your cameras into a POE Switch that is on the Network or if the cameras on the NVR plug your computer into a POE port on the NVR with the cameras.
Once installed you can find cameras by hitting the Refresh button next to the Search Settings button at the top of the application.
In the camera list you should be able to identify the camera via the MAC Address if the camera has not been mounted. The Mac Address can be found on the sticker of the camera. A mac Address is identified by its 6 segmented Letters and Numbers. It will usually look something like this “a1:b2:c3:d4:e5:f6”.
Please note that the IP Address of the camera may be different than the one in the IPC Manual depending on if it is connected to a network with DHCP.
If you cannot connect to the camera you may need to set your adapter settings on your computer to match the IP of the camera. i.e. if the camera is 192.168.1.15 set the IP of the computer to 192.168.1.2 with a subnet of 255.255.255.0
For more information on how to change your adapter settings on your computer refer to the Microsoft Support page linked below.
https://support.microsoft.com/en-us/windows/change-tcp-ip-settings-bd0a07af-15f5-cd6a-363f- ca2b6f391ace#WindowsVersion=Windows_11
Once the camera shows up on the list you can select the camera and click Login, the default password for a camera is 123456. Alternatively, you can select the e icon under Configuration to log into the IP address of the camera via the web.
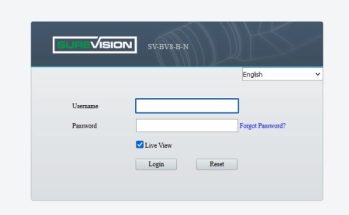
If you want to make advanced configurations to the camera such as Auto Tracking or IVS, you will need to login over the web interface and download the plugins if prompted.
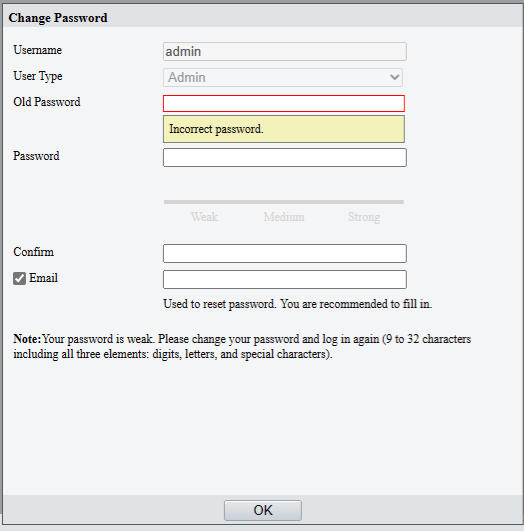

Once you log in with the default information on the
Web it will prompt you to change the password. If you have a system we recommend using the same password as the NVR. You will also be prompted to put in your email. Please put in an email that will always be accessible to you.
Once done you can setup your cameras by navigating
to the Setup page located at the top of the page and you can adjust any settings internally for the camera.
Recommended Settings to Check
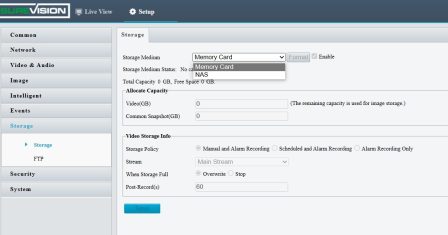
If using the camera independently check your Setup > Storage Page and make sure you have your Memory Card is detected and enabled.
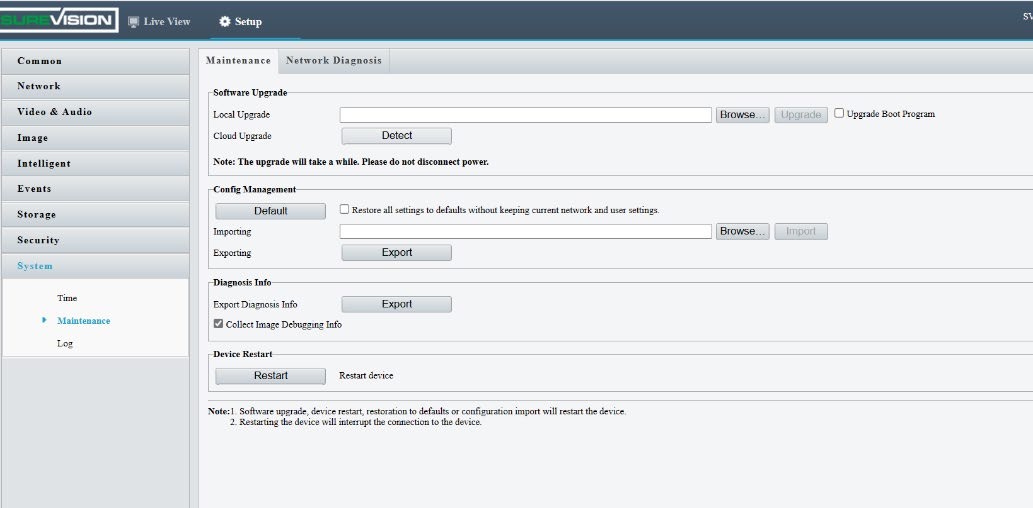
Check your camera for Updates under System > Maintenance > Cloud Upgrade. Click on Detect, then Cloud Upgrade. This will ensure that the most recent features are available for your camera. The camera will need to be on a network with internet access for this function to work.
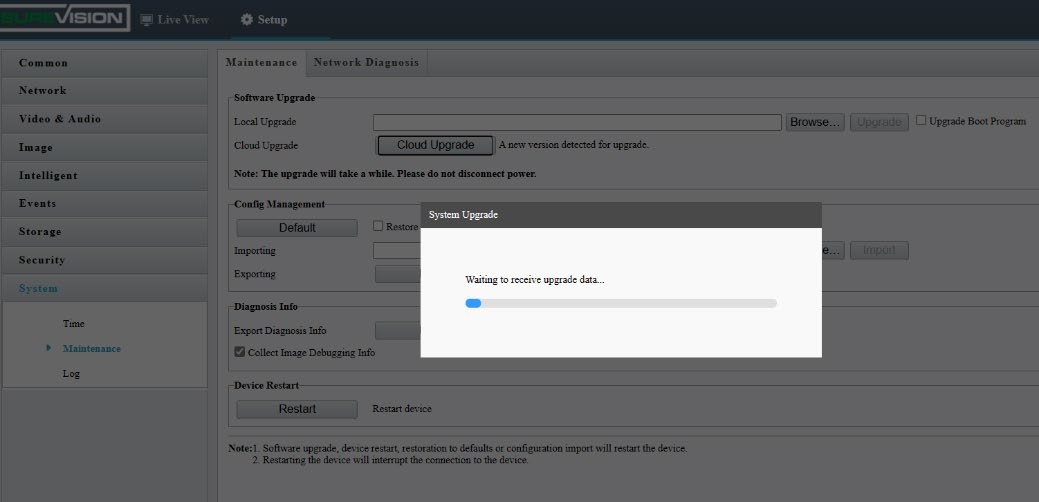
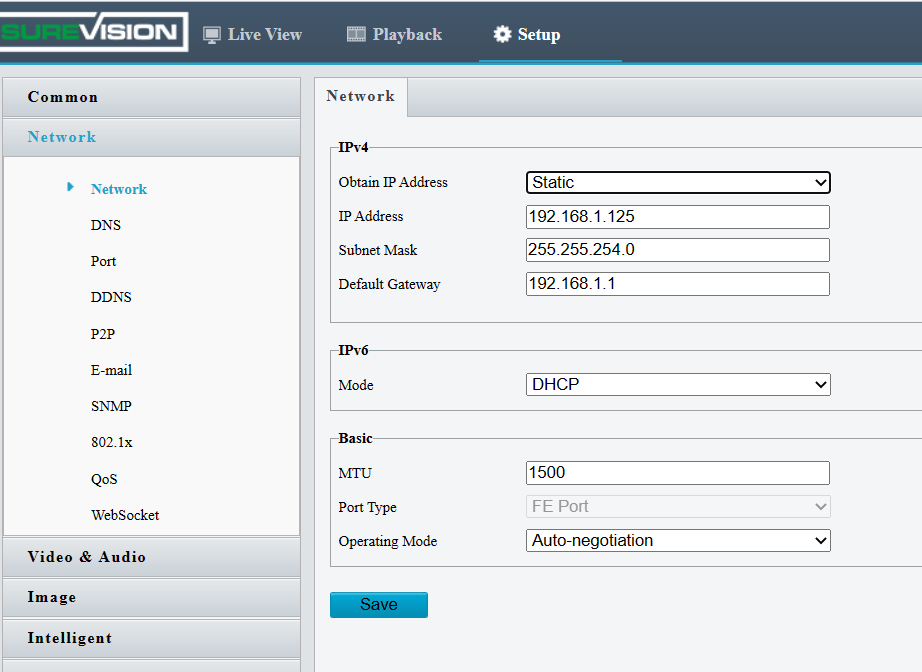
You can make changes to your Network Settings on the Setup > Network > Network page. DHCP is the default setting. If set to Static, you can customize the camera IP address, subnet, and Gateway.
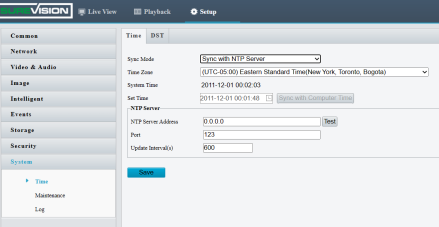
If not using an NVR, Under System > Time > Time set your camera to Sync with NTP server and select your Time Zone. This will allow you to enter a time server to automatically sync to the camera. We usually recommend using one of the following servers.
time.windows.com or time.google.com
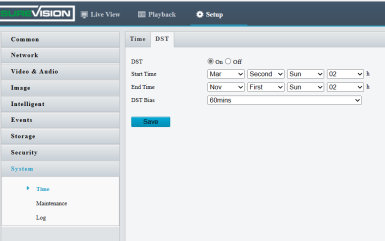
Under System > Time > DST Make sure you set DST to enabled if using NTP and set the Start time to Monday Second Sunday 02 and Nov First Sunday 02. This will enable Daylight Savings Time.
Cloud Account / Star4live Account Creation
To setup a Cloud Account for your Surevision System you will need to create an account on https://www.star4live.com/login.
To create an account go to Sign Up on their Login Box.
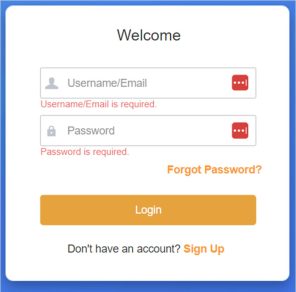
Once on the signup page you will need to fill out the forum listed on the page below.
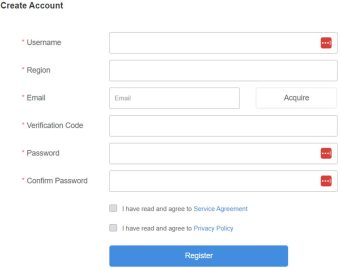
The username will be the same name you use on the apps such as Surevision, SVStation, or Guardstation.
Make sure you select the correct Region as if your region varies it will not allow you to share your system to accounts in different regions.
Make sure your email is easily accessible as you may need to reset your password.
The Verification code will be sent to the email after you hit Acquire.
The password must be 6-20 characters, including letters (a-z, A-Z), digits (0-9) and symbols and cannot only be letters, digits, or symbols.
Once you agree to the Service Agreement and Privacy Policy your account will be made. Once you have the account made. Login and you will see a page that will say My cloud Devices at the top.
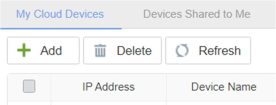
On this page you will need to click the ADD button to add your system and you can take the Register Code from the Menu > Network > P2P page of the system and input it into the Cloud Devices page.
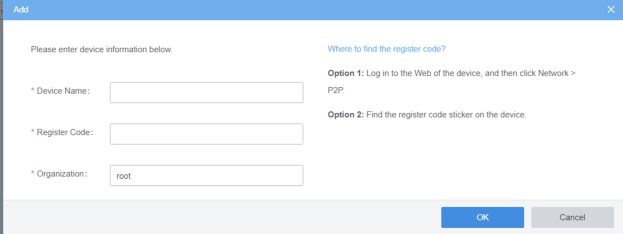
Once added you can view the system on any remote devices that you login using the Username and password you created earlier.
